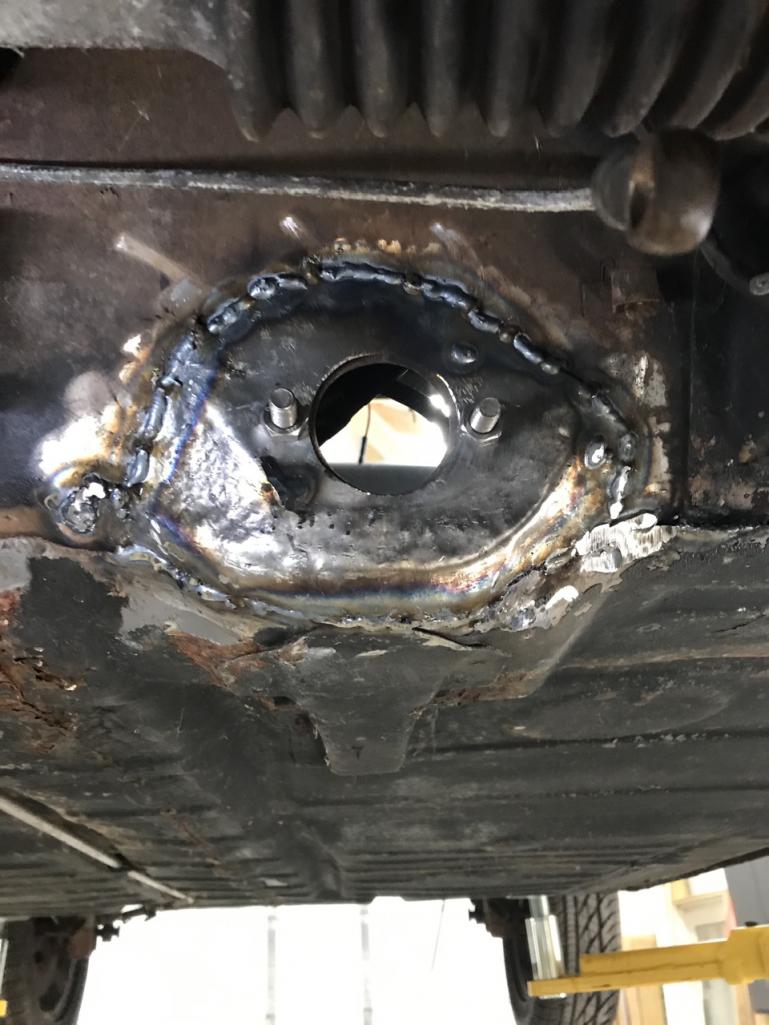
|
|

|
Porsche, and the Porsche crest are registered trademarks of Dr. Ing. h.c. F. Porsche AG.
This site is not affiliated with Porsche in any way. Its only purpose is to provide an online forum for car enthusiasts. All other trademarks are property of their respective owners. |
|
|
  |
| friethmiller |
 Jul 28 2024, 07:11 PM Jul 28 2024, 07:11 PM
Post
#221
|
|
Senior Member    Group: Members Posts: 846 Joined: 10-February 19 From: Austin, TX Member No.: 22,863 Region Association: Southwest Region 
|
Gas Tank Area (Bulkhead) Repair - Part 2 (7/27/2024):
Continuing with the last two patches to the bulkhead, you'll see the difficulty with welding up against the wheel well and around of the E-brake handle tube. You may also noticed that I over-cut the side of the main wire harness hole. I fixed this by cutting the edge off the original piece and welding it in to complete the job (IMG:style_emoticons/default/biggrin.gif) . I also spent a lot time grinding both side of the repairs and welding close any pin holes that were encountered. There were some areas that I couldn't even get the finger sander into. Toward the end of the day I pulled out the sandblaster and took a few more passes to try and clean up more of the bulkhead. I plan to completely remove all the old paint/rust throughout the week in order to hit it with some epoxy primer before moving back to the front floor repairs. 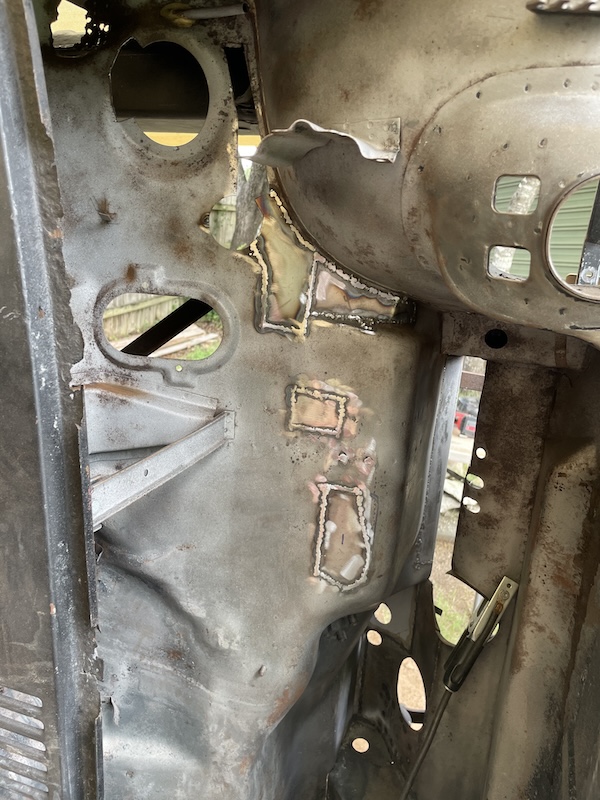 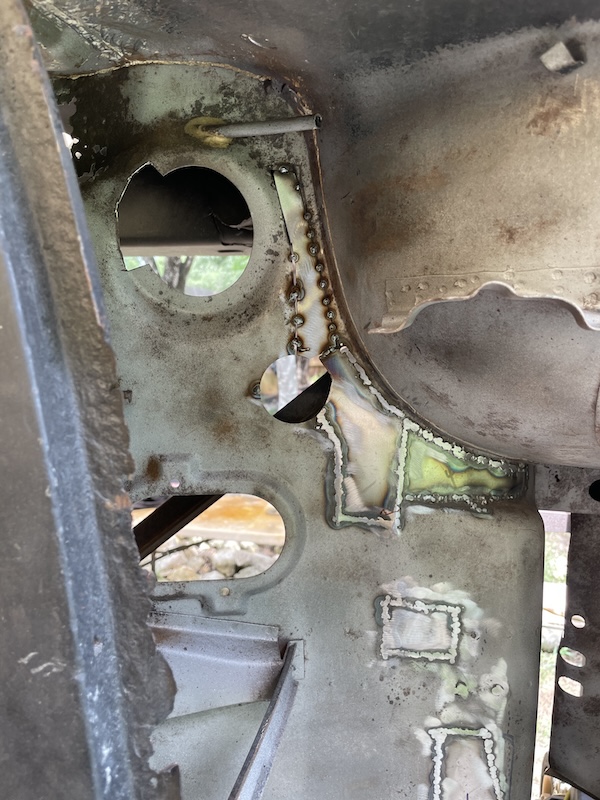 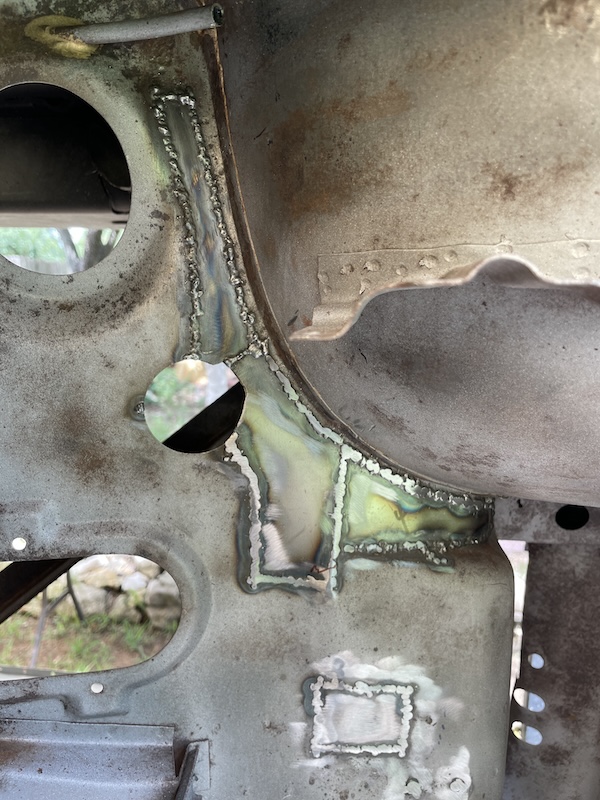 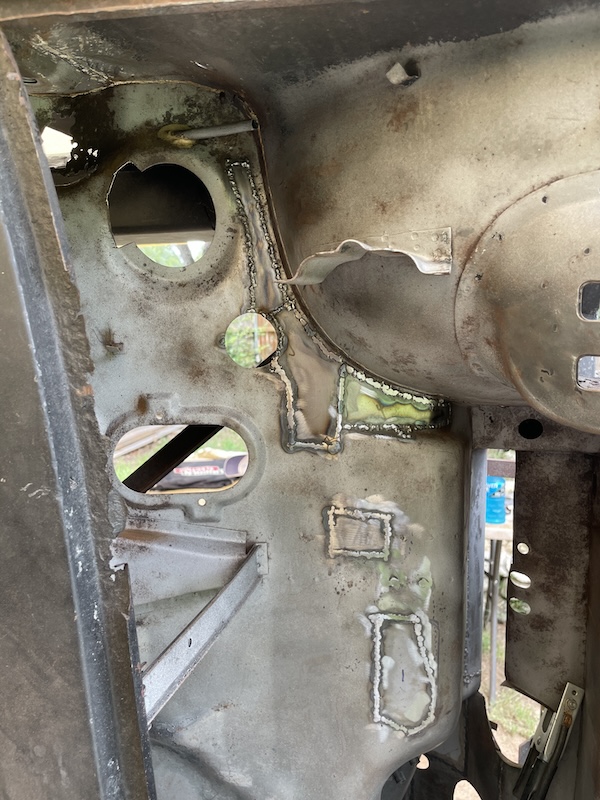 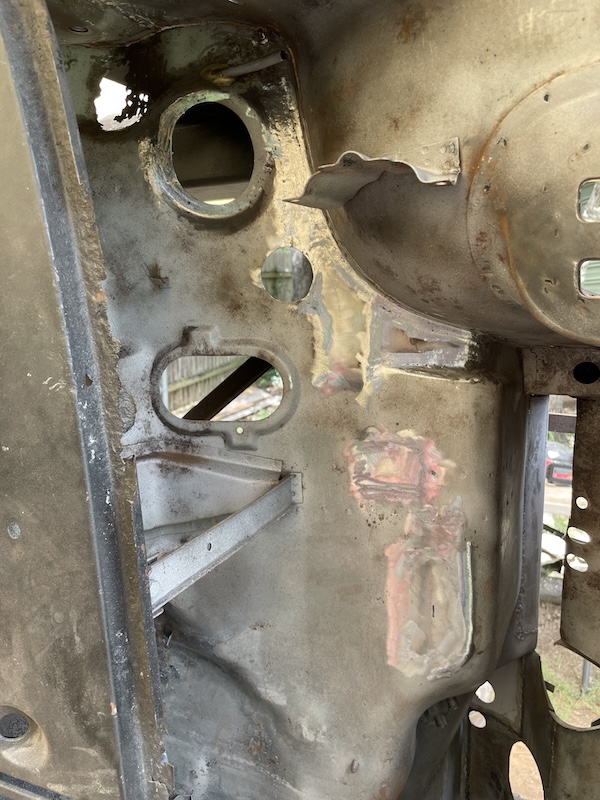 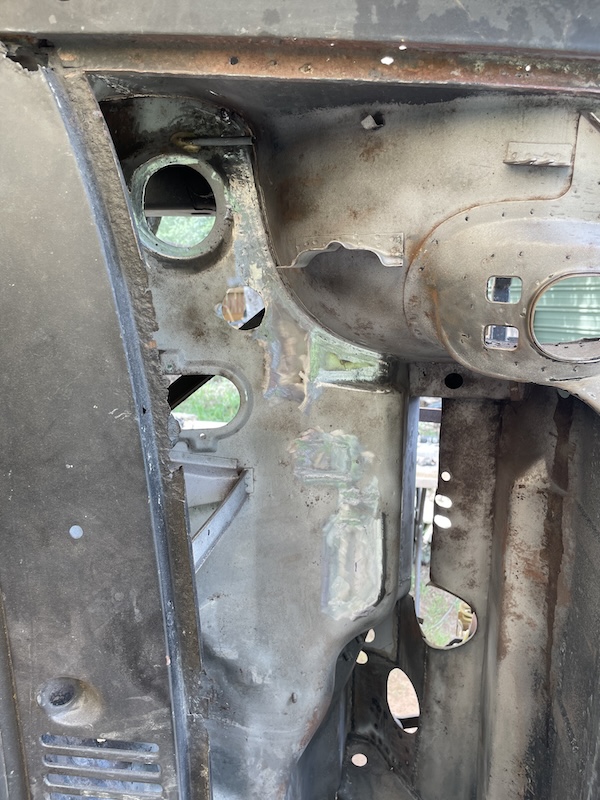 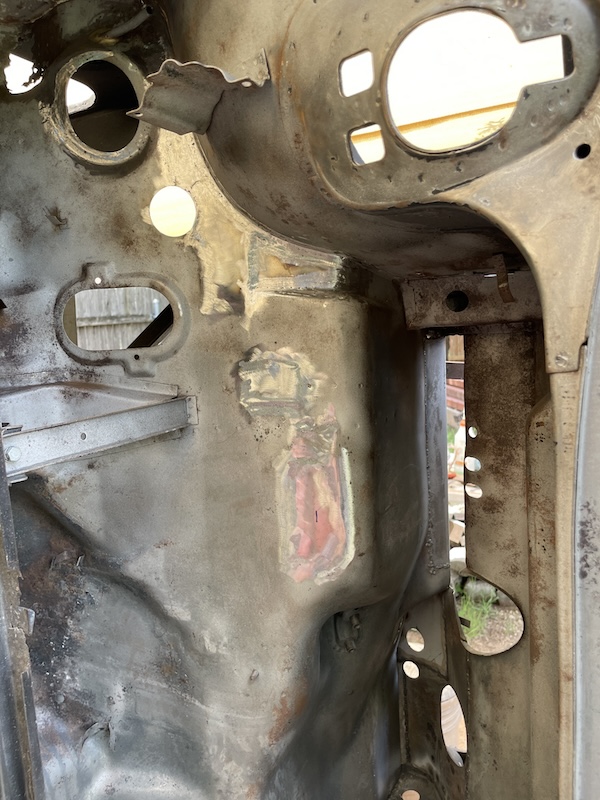 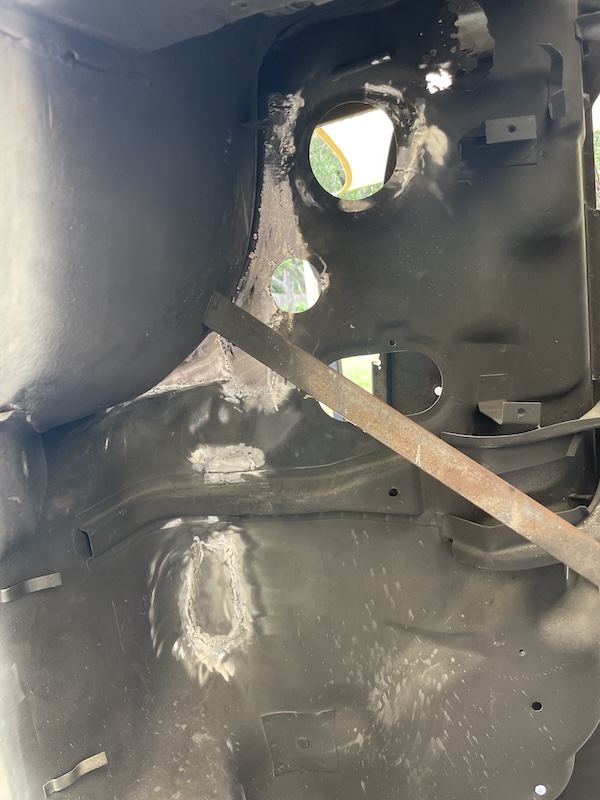 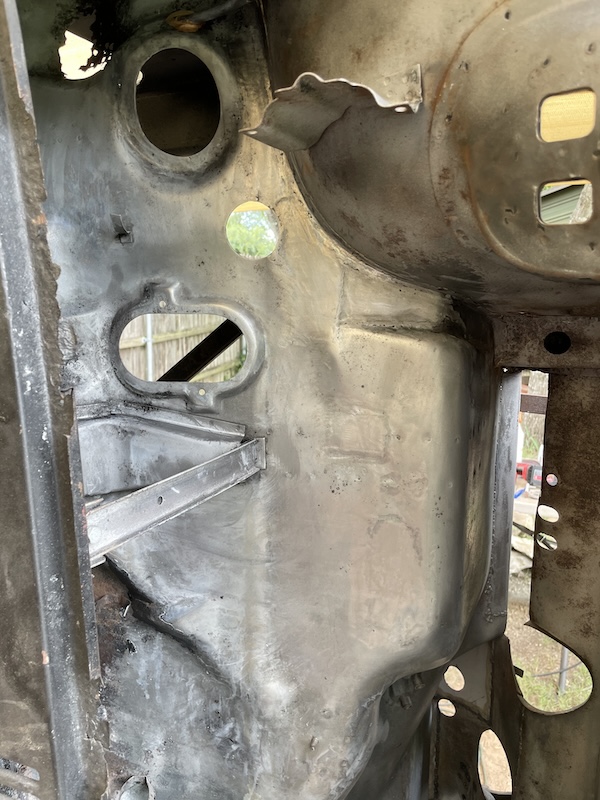 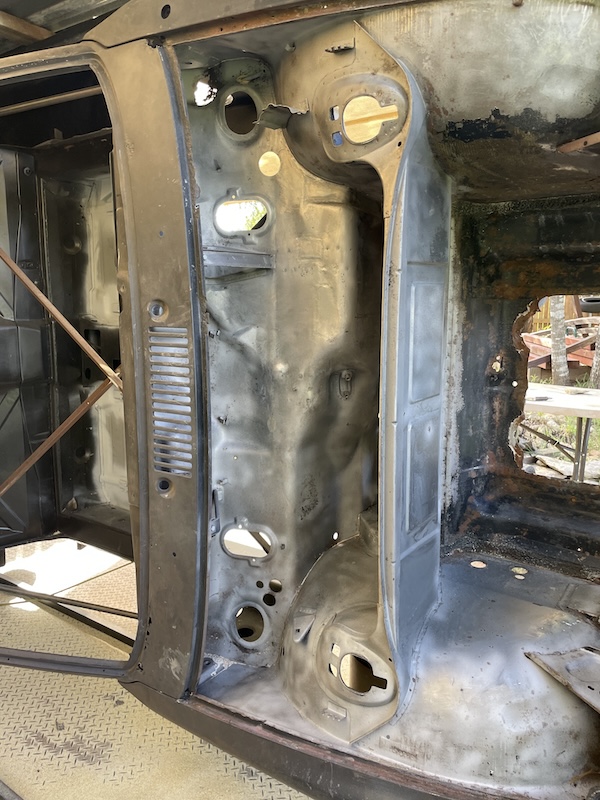 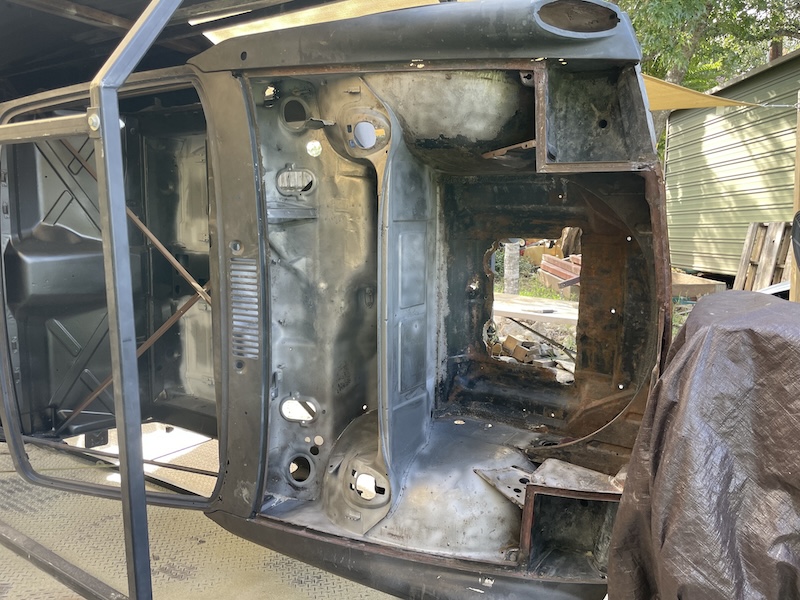 |
| bkrantz |
 Jul 28 2024, 07:27 PM Jul 28 2024, 07:27 PM
Post
#222
|
|
914 Guru      Group: Members Posts: 8,342 Joined: 3-August 19 From: SW Colorado Member No.: 23,343 Region Association: Rocky Mountains 
|
OK, Fred, now you're just showing off. (IMG:style_emoticons/default/pray.gif)
|
| friethmiller |
 Jul 28 2024, 07:45 PM Jul 28 2024, 07:45 PM
Post
#223
|
|
Senior Member    Group: Members Posts: 846 Joined: 10-February 19 From: Austin, TX Member No.: 22,863 Region Association: Southwest Region 
|
E-Brake Handle Area Repair (7/28/2024):
Honestly, I was kind of dreading this repair. There was a bit of metal missing and access was very limited from the top side. Things looked better from below but it was still difficult to get my body/head into the area without being too close to the repair. To make matters worse, the dashboard bracket and wiring harness hold down tabs prevented getting a cutting tool in there to remove old metal. I did manage to make a few cuts but it wasn't easy. In order to make the repair, I decided to create a large patch going from front to back over the hole. This would leave a small patch on the side that I would weld in at the end. I used a piece of construction paper to figure out the basic dimensions/shape of what was needed. Transferring this template to metal, I cut a rectangular patch that I then bent [with my metal brake] to give the basic shape. This was further tuned up with a hammer and dolly. After about an hour of shaping and cutting/sanding the patch metal, I was finally ready to tack it in. Again, I struggled to get access with the welder but in the end I was able to get everything done. I left the top-side alone and finished the day grinding-down my welds from below before priming the repair and calling it a day. I plan to grind/clean-up the top side of this area later this week - prior to painting the entire bulkhead area. Furthermore, I plan to eventually drill out the bolt holes using the e-brake handle as a template. 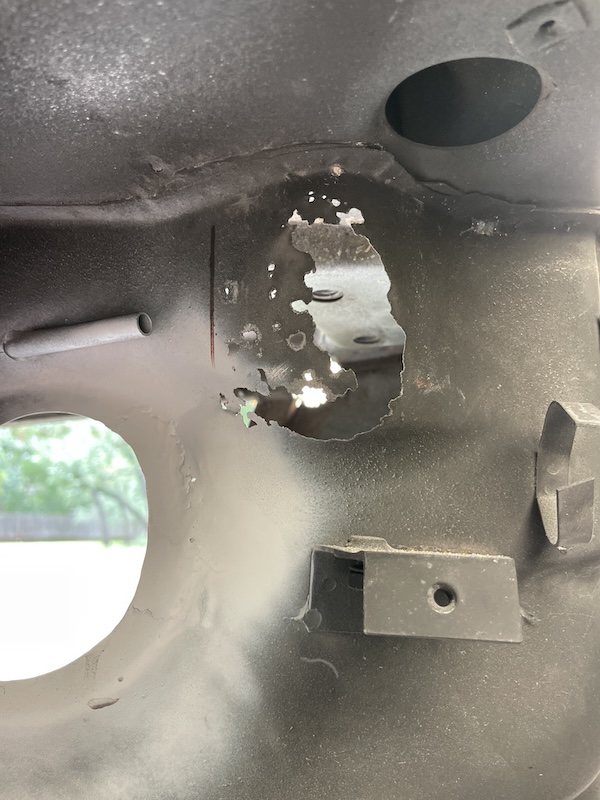 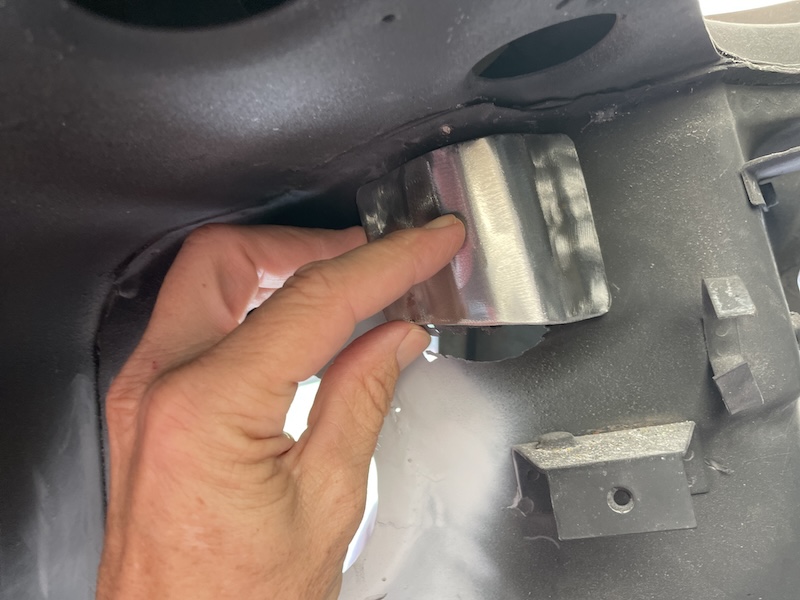 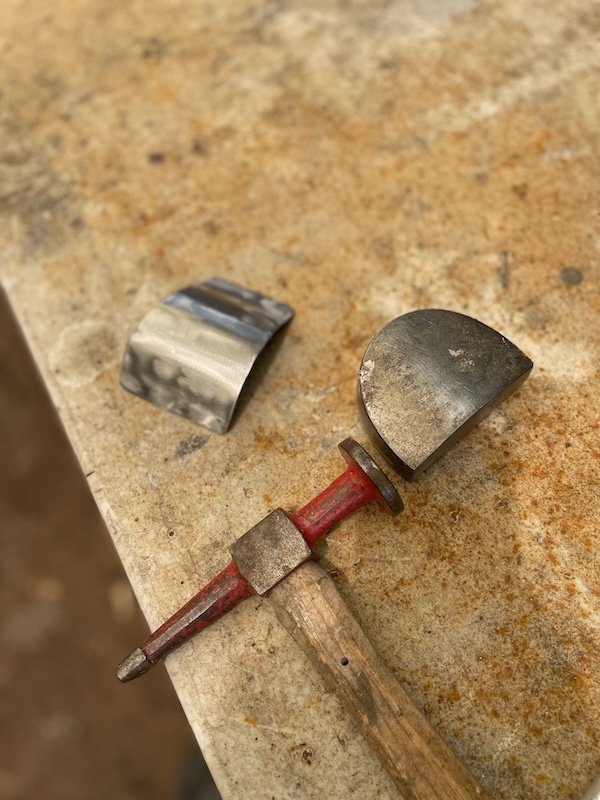 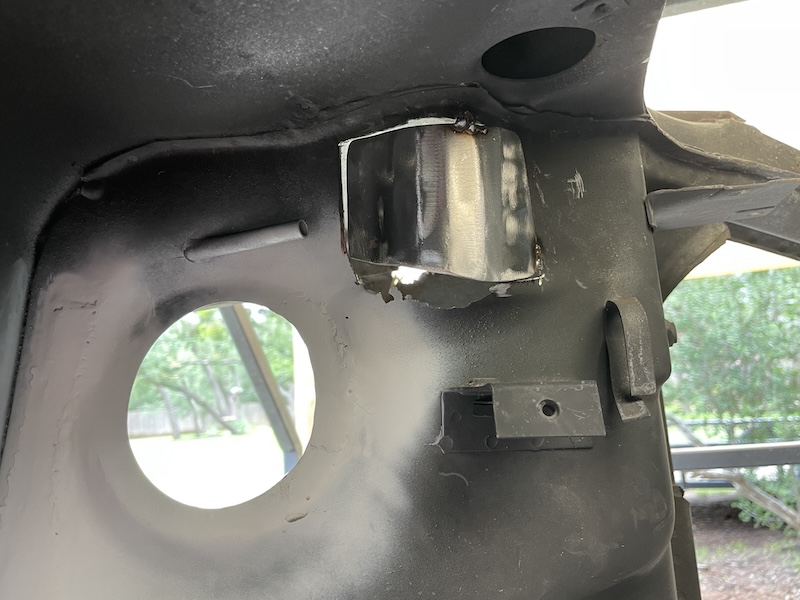 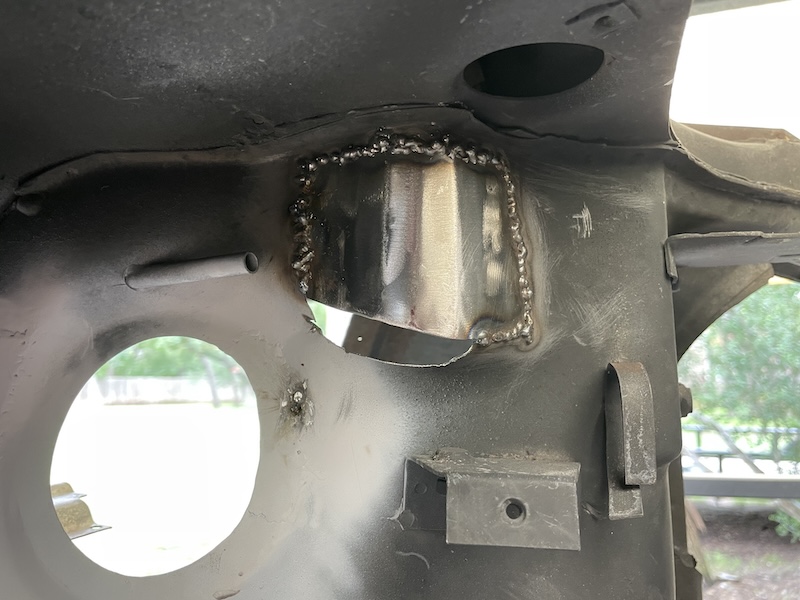 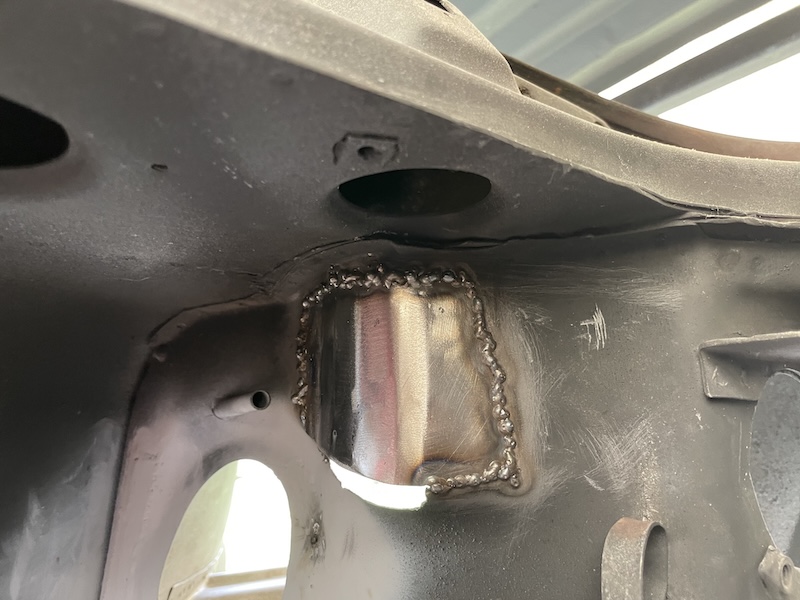 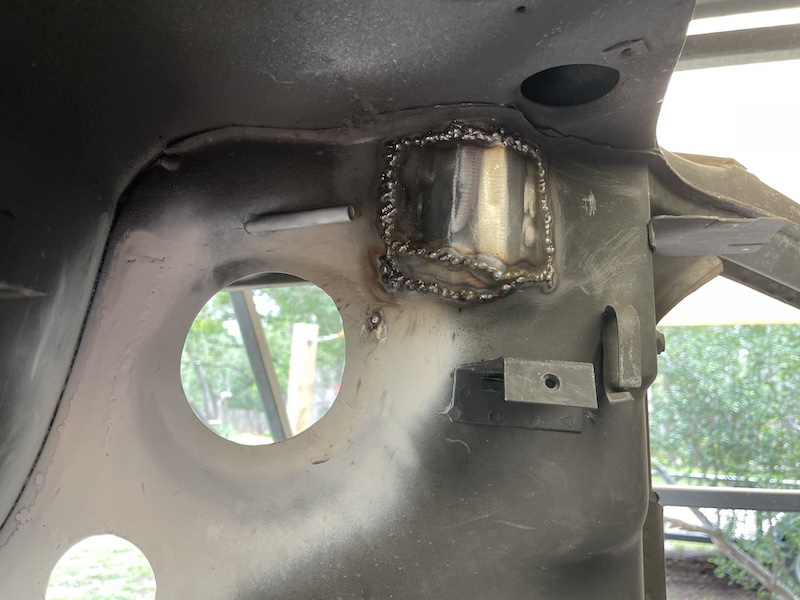 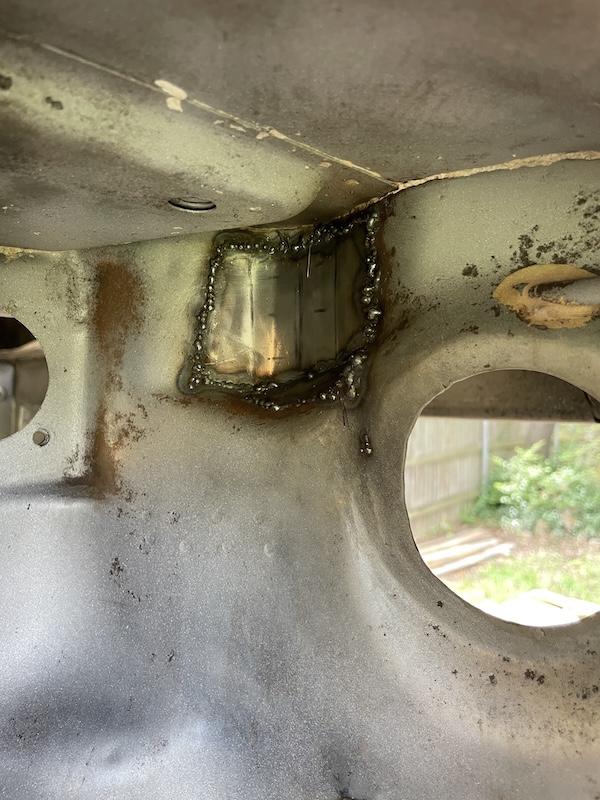 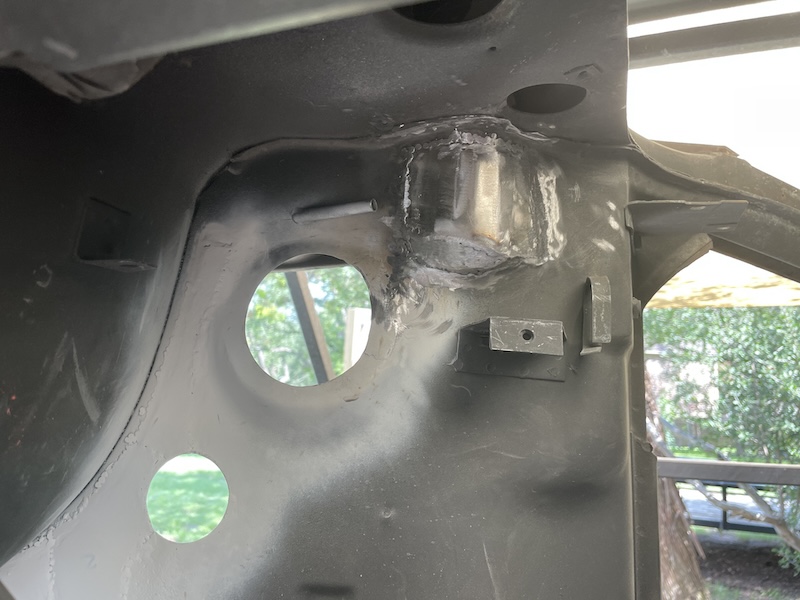 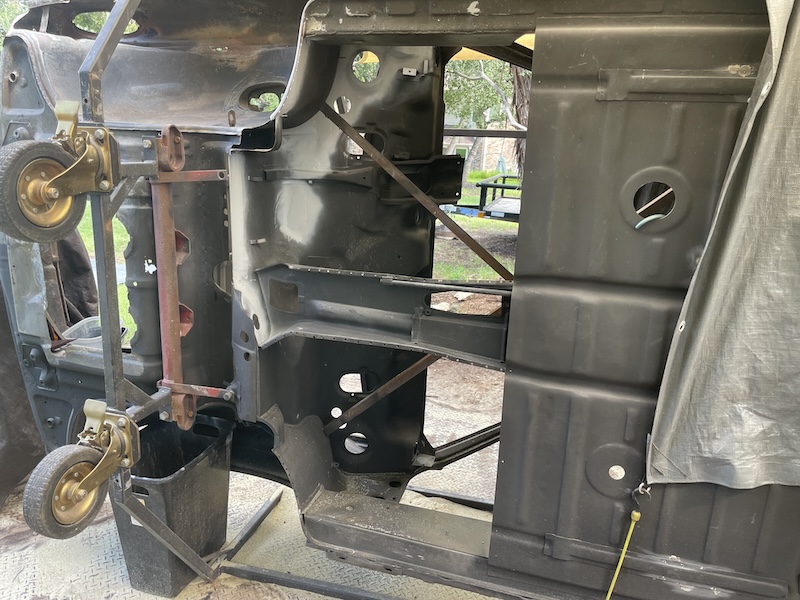 |
| friethmiller |
 Jul 28 2024, 08:09 PM Jul 28 2024, 08:09 PM
Post
#224
|
|
Senior Member    Group: Members Posts: 846 Joined: 10-February 19 From: Austin, TX Member No.: 22,863 Region Association: Southwest Region 
|
@technicalninja , @bkrantz
Thanks guys! (IMG:style_emoticons/default/beerchug.gif) Just grinding through these fiddly repairs. I would really like to just weld in the front floors but I know it'll be twice as hard to fix these things with the bottom all buttoned-up. |
| 930cabman |
 Jul 30 2024, 04:51 AM Jul 30 2024, 04:51 AM
Post
#225
|
|
Advanced Member     Group: Members Posts: 4,044 Joined: 12-November 20 From: Buffalo Member No.: 24,877 Region Association: North East States 
|
Once again, Fred knocks it out of the park. (IMG:style_emoticons/default/beerchug.gif)
|
| friethmiller |
 Jul 30 2024, 07:30 AM Jul 30 2024, 07:30 AM
Post
#226
|
|
Senior Member    Group: Members Posts: 846 Joined: 10-February 19 From: Austin, TX Member No.: 22,863 Region Association: Southwest Region 
|
Ha! Thanks. Fred now has his hands full with a bunch of exposed metal. I can't prep and paint this stuff fast enough out here in the humidity. (IMG:style_emoticons/default/sad.gif) |
| friethmiller |
 Jul 30 2024, 09:56 PM Jul 30 2024, 09:56 PM
Post
#227
|
|
Senior Member    Group: Members Posts: 846 Joined: 10-February 19 From: Austin, TX Member No.: 22,863 Region Association: Southwest Region 
|
Applying Epoxy Primer to the Bulkhead (7/30/2024):
Spent a few hours today/this evening preparing the gas tank area for epoxy primer. With only one can of 2K Epoxy left, I figured I didn't have enough for the entire area. My main focus was getting the bulkhead area with one coat. Just a few pics of the process. I think I used every grinder and sanding tool I own (IMG:style_emoticons/default/blink.gif) . Also, I went through several red 3M Scotch pads in order to final everything out by hand before paint. 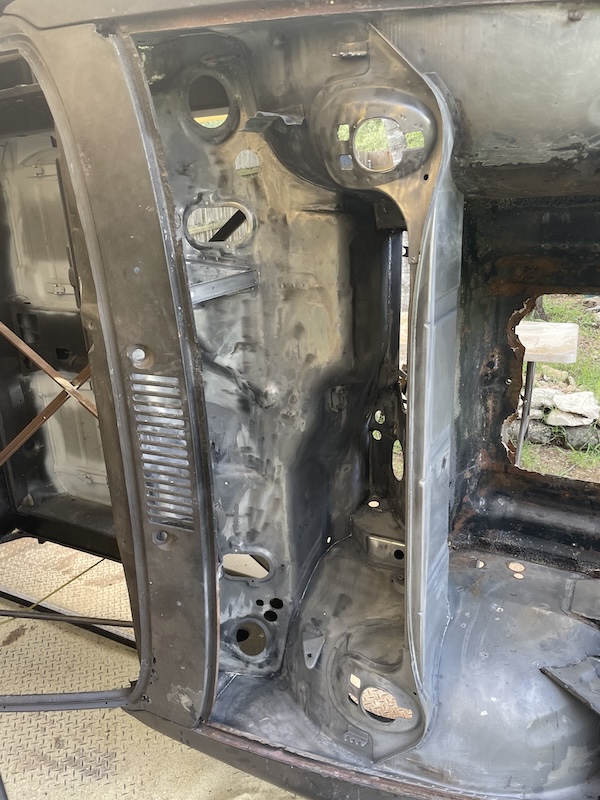 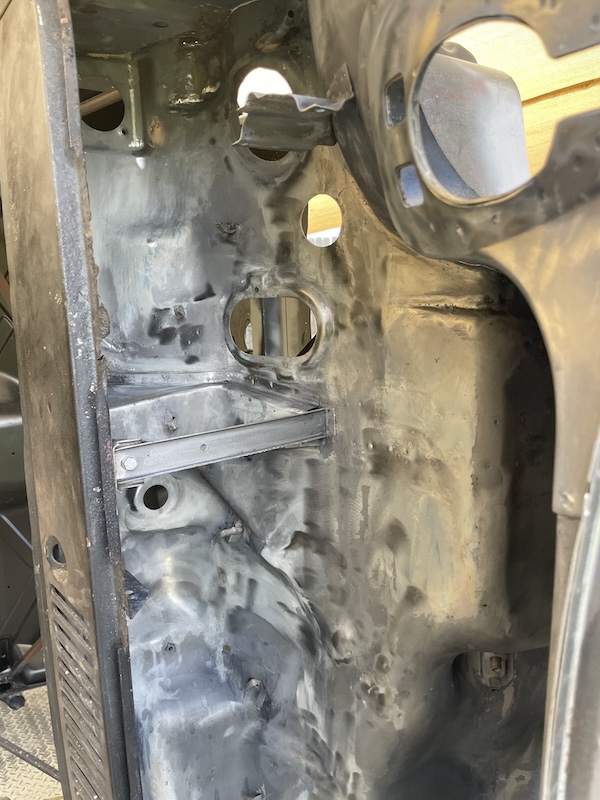 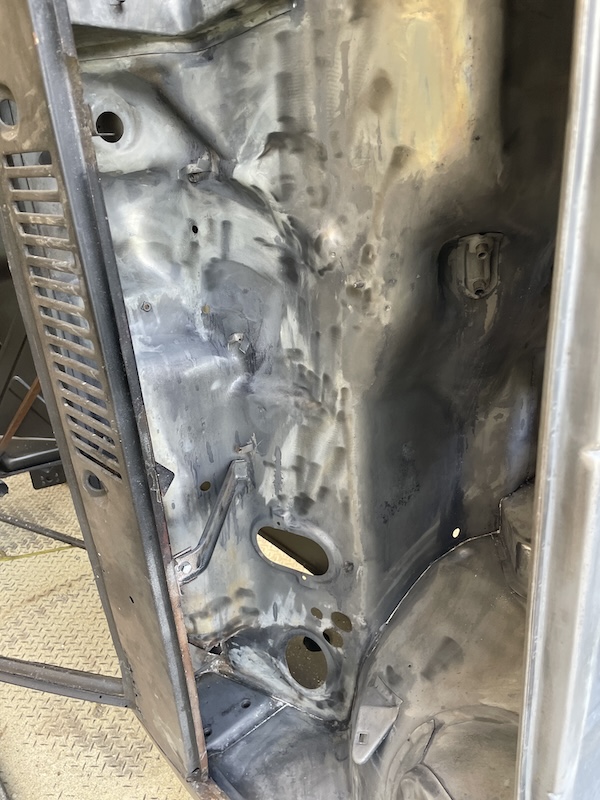 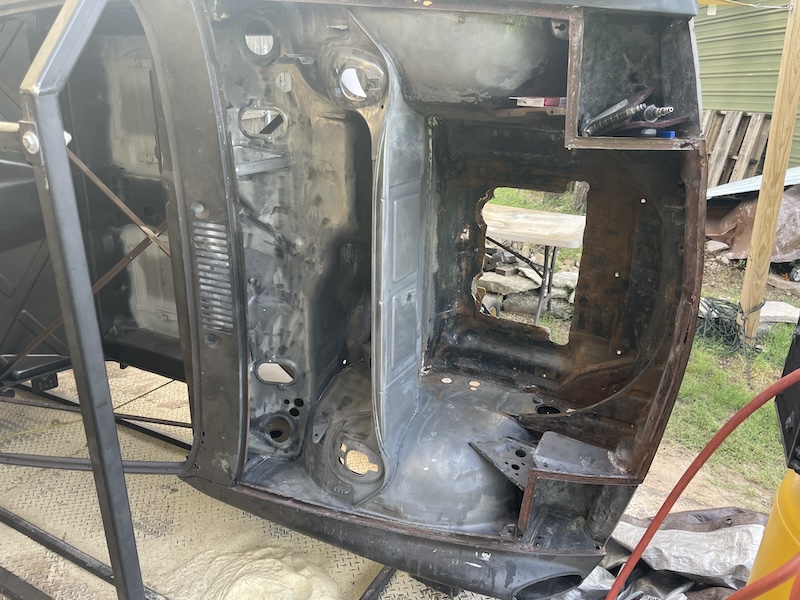 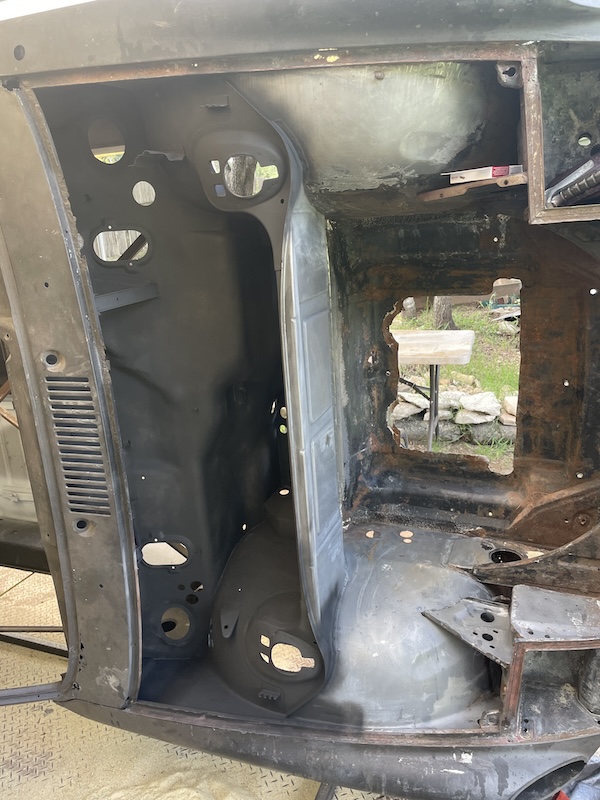 |
| friethmiller |
 Aug 5 2024, 08:37 AM Aug 5 2024, 08:37 AM
Post
#228
|
|
Senior Member    Group: Members Posts: 846 Joined: 10-February 19 From: Austin, TX Member No.: 22,863 Region Association: Southwest Region 
|
Repairing the Driver Side Front Floor/Supports (8/3 -8/4/2024):
Moving into the area that supports the metal foward of the front floor pan, I started with the small boxed area that the left side of the pedal board attaches. It wasn't as bad as the other side so I fabricated two small pieces to complete the repair. I employed the Shrinker/Stretcher to make the 90 degree bend in the second piece. I ended up having to add a third piece of metal to complete the inside against the wheel well. This repair was a little rough for my liking so I may come back later and blend everything in a bit better. 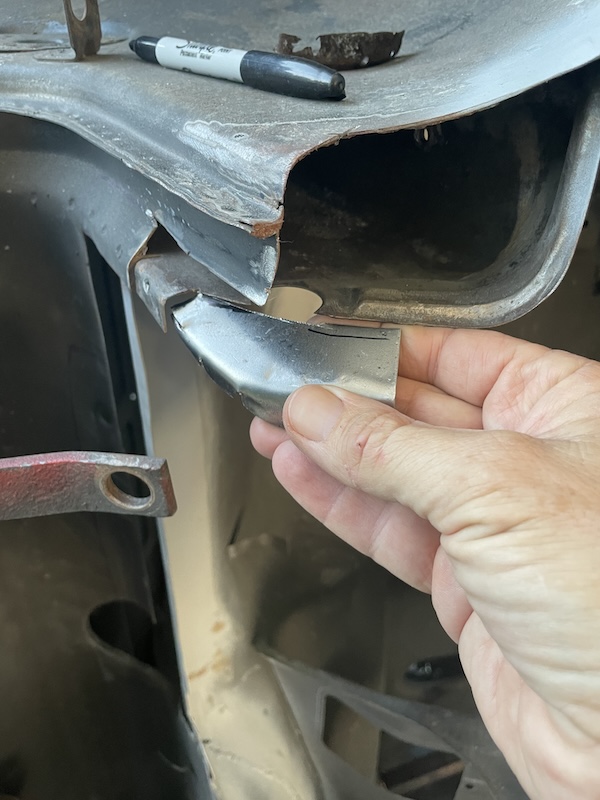 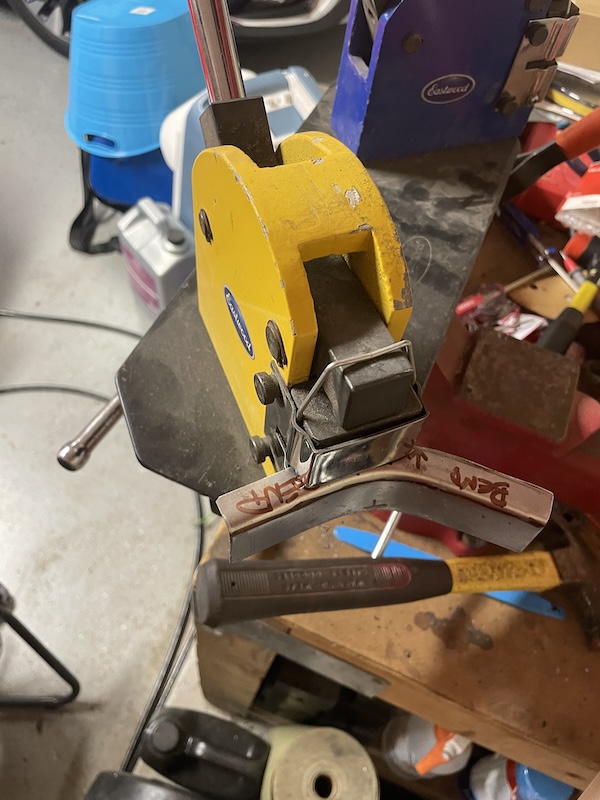 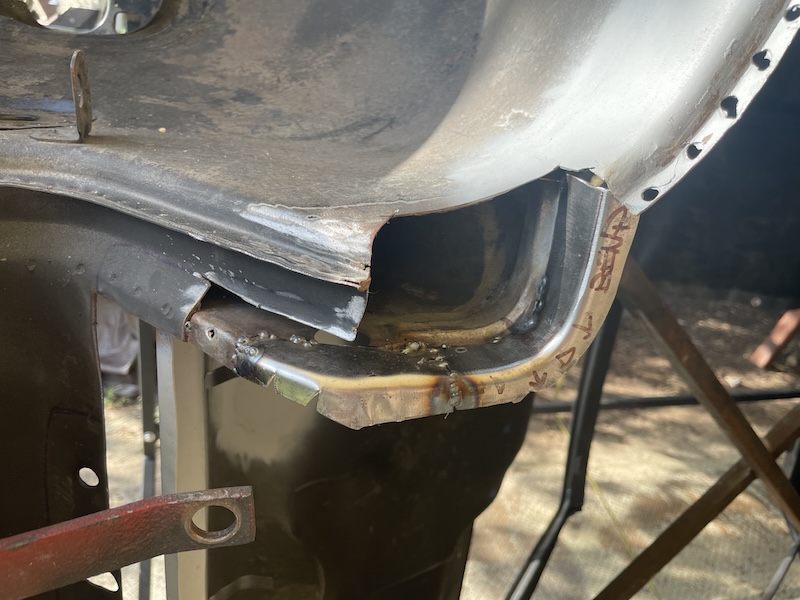 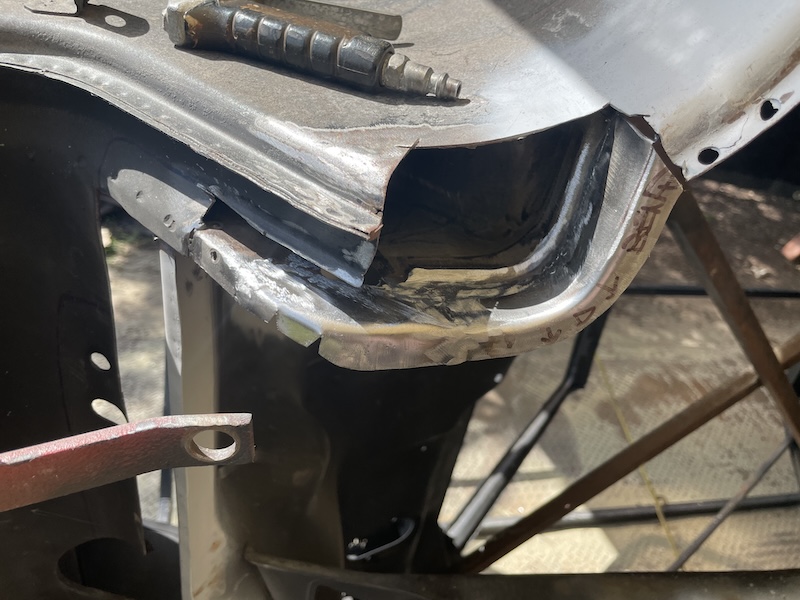 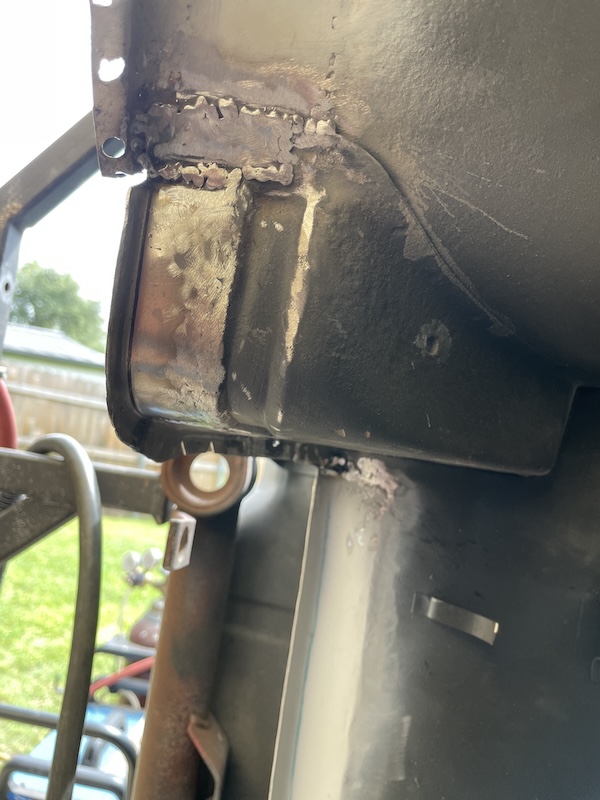 Finally getting back to this ugly, chewed up piece of metal. My plan was the replace the top section, weld it back into the car ,and then cut & replace section by section to rebuild the area around the bottom of the pedal cluster. The following photos show the progress. Everything, however, got cut short when a huge storm moved into the area on Sunday afternoon. Tools got put away and the car had to be covered up before the rain and lightning hit. That's how it goes "outside" sometimes. Hope to continue the rebuild of this critical area next weekend. 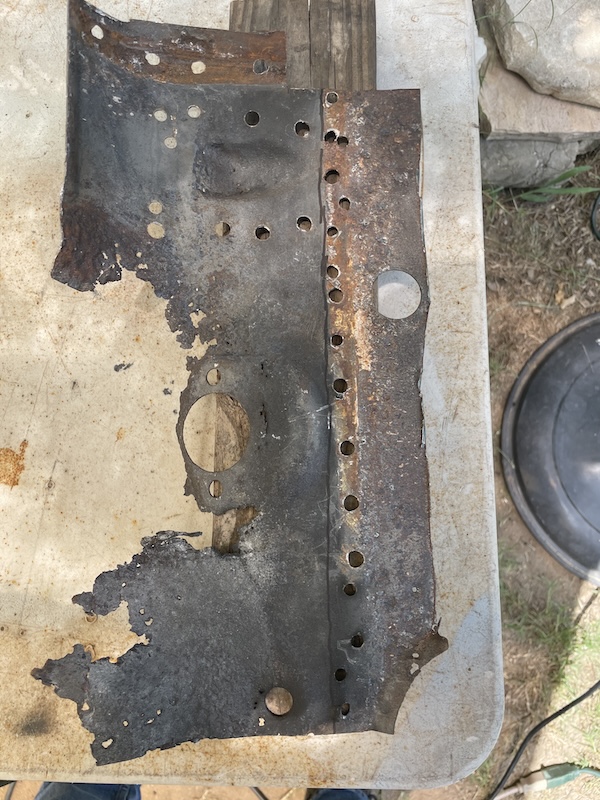 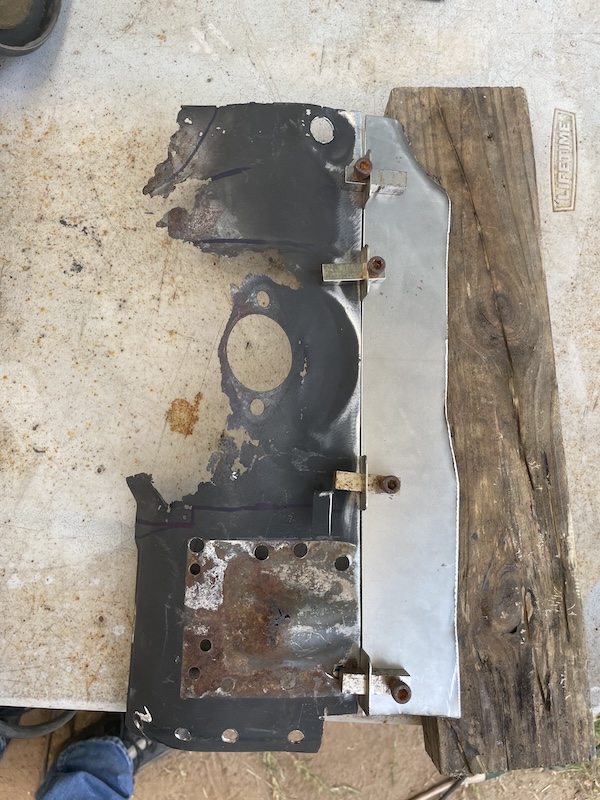 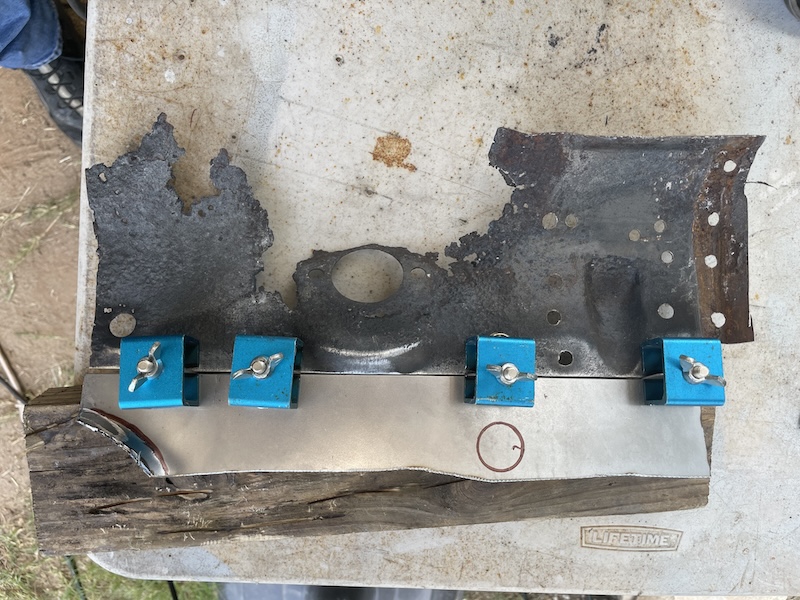 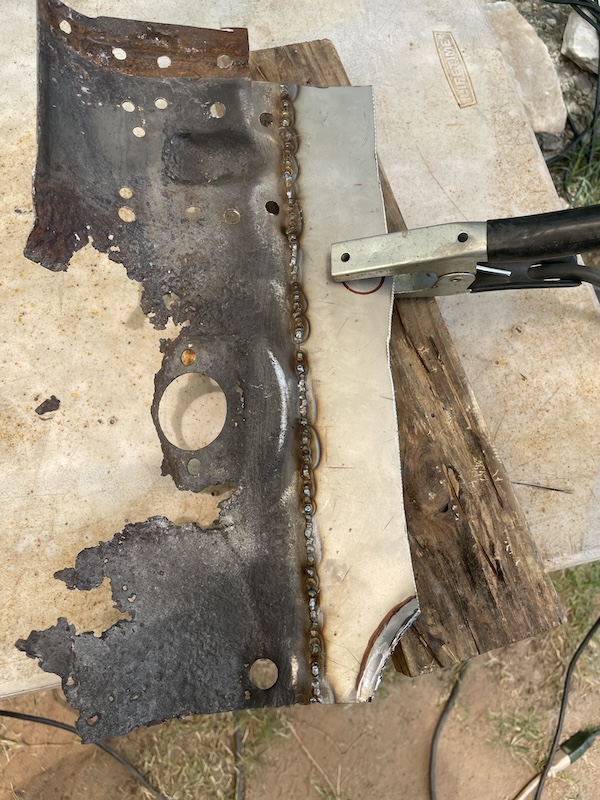 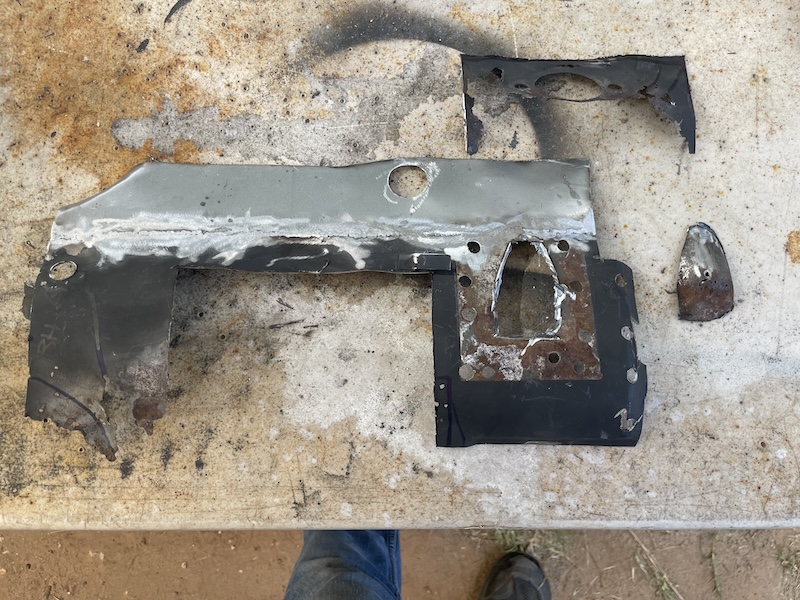 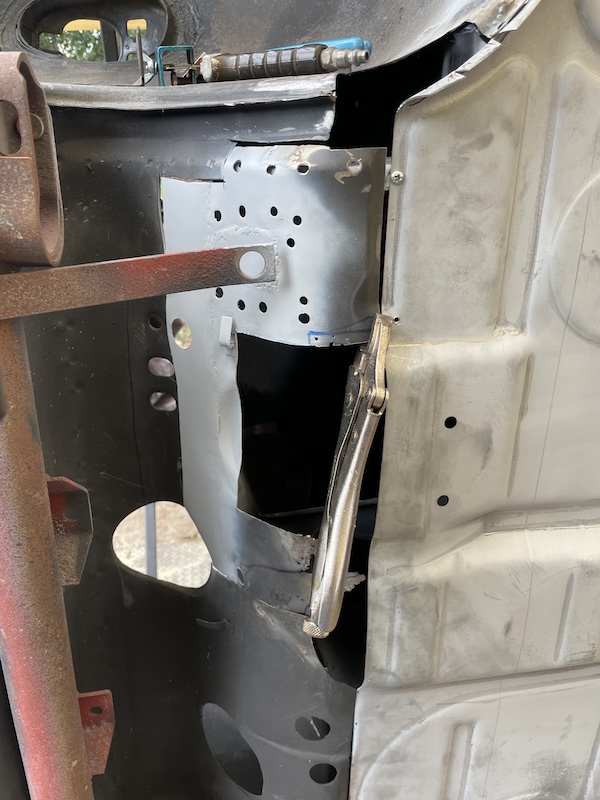 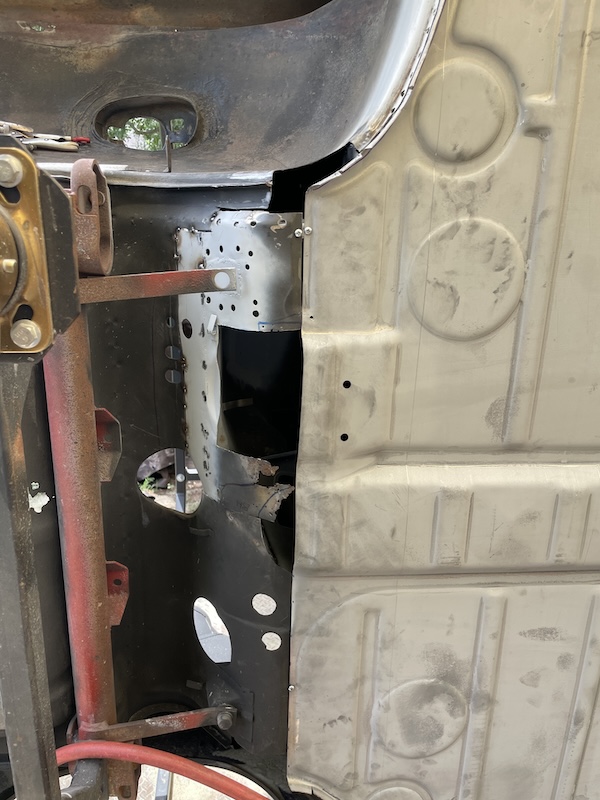 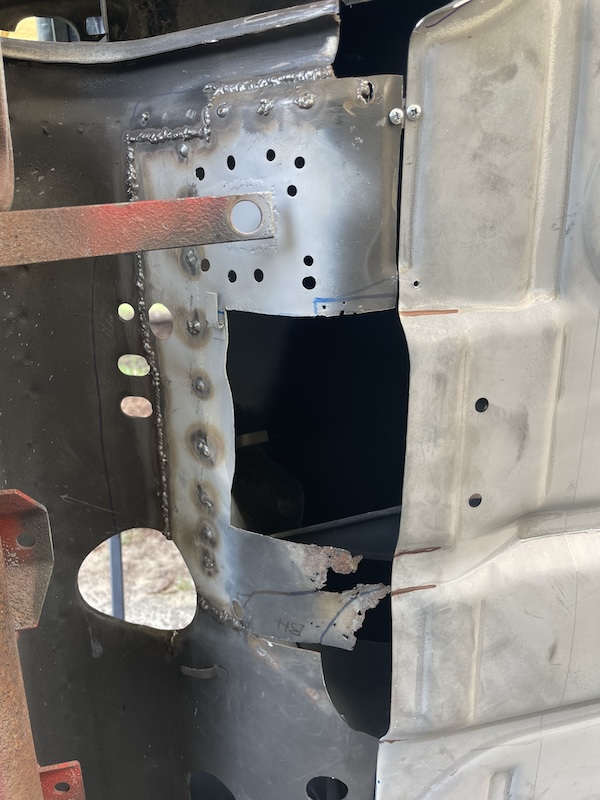 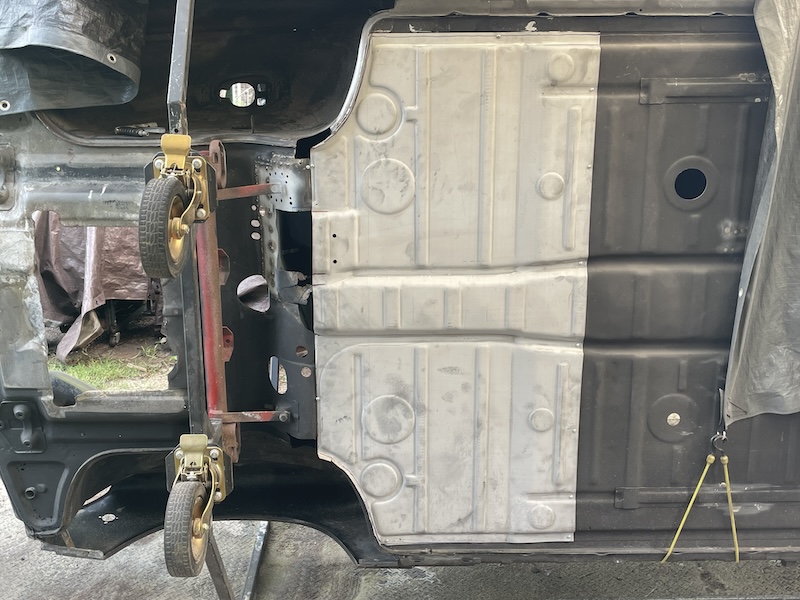 |
| East coaster |
 Aug 5 2024, 10:35 AM Aug 5 2024, 10:35 AM
Post
#229
|
|
Senior Member    Group: Members Posts: 1,834 Joined: 28-March 03 From: Millville, NJ Member No.: 487 Region Association: None 
|
|
| friethmiller |
 Aug 5 2024, 11:11 AM Aug 5 2024, 11:11 AM
Post
#230
|
|
Senior Member    Group: Members Posts: 846 Joined: 10-February 19 From: Austin, TX Member No.: 22,863 Region Association: Southwest Region 
|
Nice work! The pedal cluster area was one f the more challenging spots on my latest build…..lots of compound curves where the master cylinder goes through. It was a bitchy little piece to fabricate, but seeing your other work it shouldn’t be too bad. Thanks for the photo, @East coaster. At some point I'll weld the front pan in place and start fabricating the section(s) around the MC. Still need to grind my work from Sunday and weld-in the suspension mount. It's coming along - albeit slower than I'd like. (IMG:style_emoticons/default/unsure.gif) |
| 930cabman |
 Aug 5 2024, 12:29 PM Aug 5 2024, 12:29 PM
Post
#231
|
|
Advanced Member     Group: Members Posts: 4,044 Joined: 12-November 20 From: Buffalo Member No.: 24,877 Region Association: North East States 
|
POLL:
Does anyone wish they had the skills, time, patience and nohow to keep up with Fred? (IMG:style_emoticons/default/beerchug.gif) (IMG:style_emoticons/default/beerchug.gif) (IMG:style_emoticons/default/beerchug.gif) |
| friethmiller |
 Aug 5 2024, 04:11 PM Aug 5 2024, 04:11 PM
Post
#232
|
|
Senior Member    Group: Members Posts: 846 Joined: 10-February 19 From: Austin, TX Member No.: 22,863 Region Association: Southwest Region 
|
POLL: Does anyone wish they had the skills, time, patience and nohow to keep up with Fred? (IMG:style_emoticons/default/beerchug.gif) (IMG:style_emoticons/default/beerchug.gif) (IMG:style_emoticons/default/beerchug.gif) Thanks but to be honest with you, I struggled a bit welding the seam in the steering rack tunnel area. I had to look through/stand behind the steering rack bar and the entire hoop/wheel assembly on the rotisserie. Humbled again by this little car. Hope I can get in there, grind everything down, and getting it looking good before moving on. (IMG:style_emoticons/default/biggrin.gif) |
| bkrantz |
 Aug 5 2024, 07:43 PM Aug 5 2024, 07:43 PM
Post
#233
|
|
914 Guru      Group: Members Posts: 8,342 Joined: 3-August 19 From: SW Colorado Member No.: 23,343 Region Association: Rocky Mountains 
|
Nice work! The pedal cluster area was one f the more challenging spots on my latest build…..lots of compound curves where the master cylinder goes through. It was a bitchy little piece to fabricate, but seeing your other work it shouldn’t be too bad. Thanks for the photo, @East coaster. At some point I'll weld the front pan in place and start fabricating the section(s) around the MC. Still need to grind my work from Sunday and weld-in the suspension mount. It's coming along - albeit slower than I'd like. (IMG:style_emoticons/default/unsure.gif) Remember, the MC mounting needs to be STIFF, if you want to get a firm brake pedal and good stopping. |
| Dion |
 Aug 6 2024, 07:04 AM Aug 6 2024, 07:04 AM
Post
#234
|
|
RN     Group: Members Posts: 2,839 Joined: 16-September 04 From: Audubon,PA Member No.: 2,766 Region Association: MidAtlantic Region 

|
I’m just catching up again. Unreal how much you’ve accomplished.
True metal craftsmanship. Thanks for taking us into your work. To more (IMG:style_emoticons/default/beerchug.gif) |
| friethmiller |
 Aug 6 2024, 07:20 AM Aug 6 2024, 07:20 AM
Post
#235
|
|
Senior Member    Group: Members Posts: 846 Joined: 10-February 19 From: Austin, TX Member No.: 22,863 Region Association: Southwest Region 
|
Nice work! The pedal cluster area was one f the more challenging spots on my latest build…..lots of compound curves where the master cylinder goes through. It was a bitchy little piece to fabricate, but seeing your other work it shouldn’t be too bad. Thanks for the photo, @East coaster. At some point I'll weld the front pan in place and start fabricating the section(s) around the MC. Still need to grind my work from Sunday and weld-in the suspension mount. It's coming along - albeit slower than I'd like. (IMG:style_emoticons/default/unsure.gif) Remember, the MC mounting needs to be STIFF, if you want to get a firm brake pedal and good stopping. Thanks for reminding me, @bkrantz! From what I've seen with the passenger side, the brand new 18 gauge sheet metal is rock solid. It certainly helps to have all new metal where it connects to the body as well. I will keep this in mind as I move forward. |
| friethmiller |
 Aug 6 2024, 07:54 AM Aug 6 2024, 07:54 AM
Post
#236
|
|
Senior Member    Group: Members Posts: 846 Joined: 10-February 19 From: Austin, TX Member No.: 22,863 Region Association: Southwest Region 
|
I’m just catching up again. Unreal how much you’ve accomplished. True metal craftsmanship. Thanks for taking us into your work. To more (IMG:style_emoticons/default/beerchug.gif) Thanks Dion! It's coming along. Started to grind down the welds yesterday evening. Not complete but it should turn out alright. Found a few holes I need to weld along the seam. Trying to get this done today before leaving for a short trip out of town. 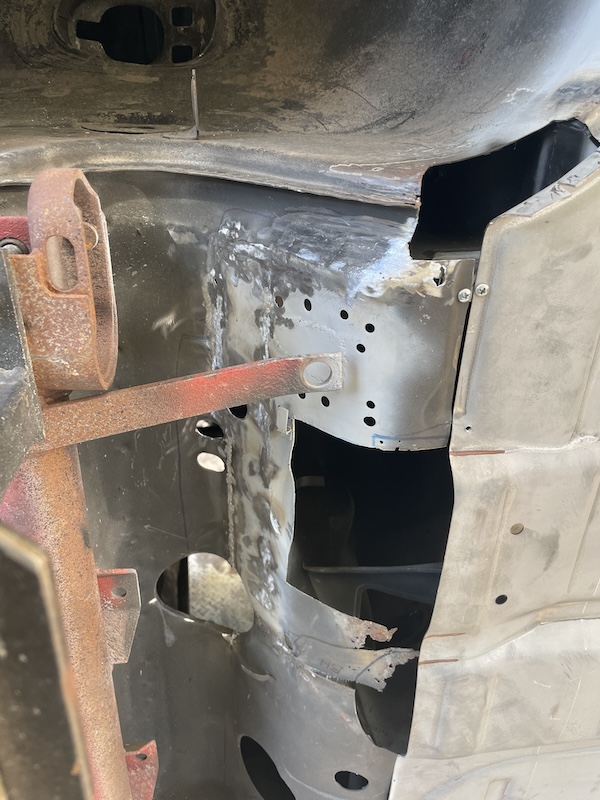 |
| friethmiller |
 Aug 12 2024, 06:29 AM Aug 12 2024, 06:29 AM
Post
#237
|
|
Senior Member    Group: Members Posts: 846 Joined: 10-February 19 From: Austin, TX Member No.: 22,863 Region Association: Southwest Region 
|
Rear Support Bar Attachment (8/11/2024):
I was out of town the latter part of this week and didn't get back to the car until Sunday. Plan was to weld the rear support bar attachment and possibly get the front floorpan started. The following photos show this suspension attachment going back on the car. You may notice the drill holes don't exactly match up. This is because I positioned the piece using the steering support bar. The underlying sheetmetal had been removed and re-welded so I figured it might be a little off. In order to weld this back on with holes through both metal pieces, I first clamped and tacked the attachment down and then used a copper backing plate to provide something to weld against for each rosette (see photo #3). The last photo is right before I went back in to finish the last weld and clean-up any holes. So, I guess, the "final" photo will be coming later when everything in this area is finished (IMG:style_emoticons/default/biggrin.gif) 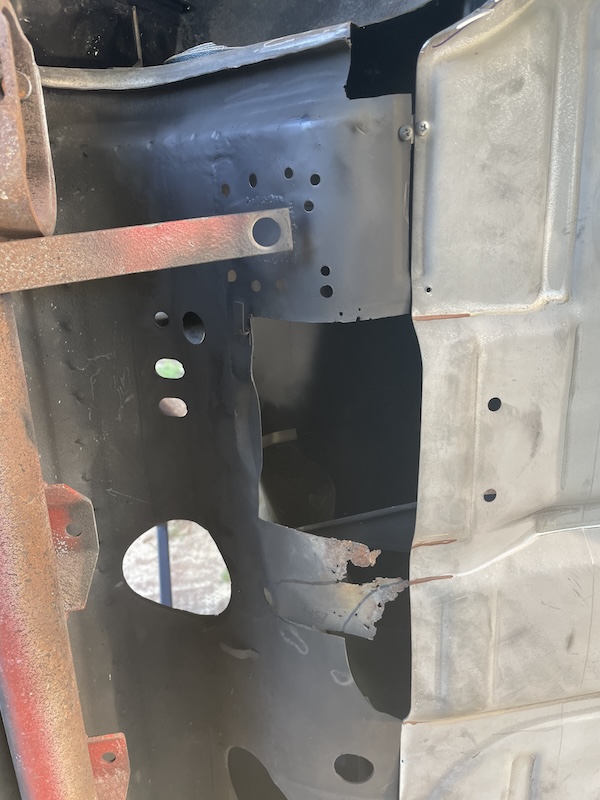 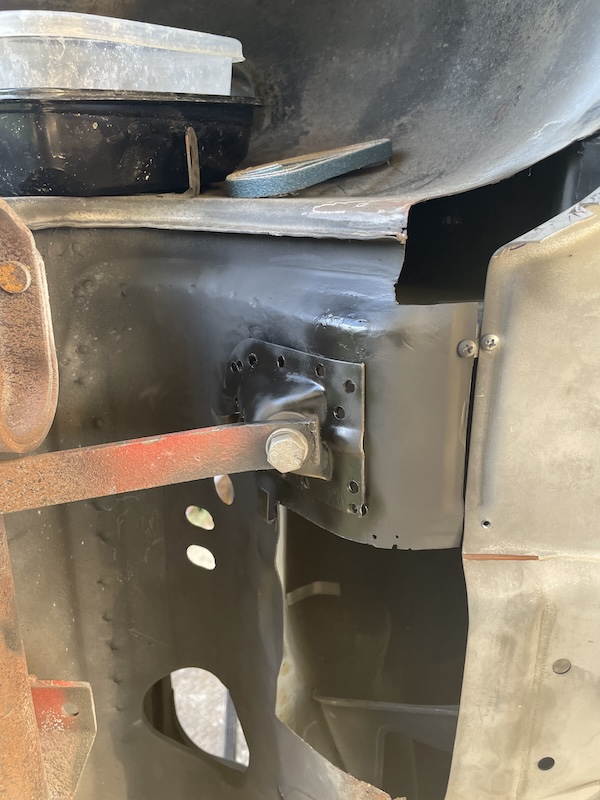 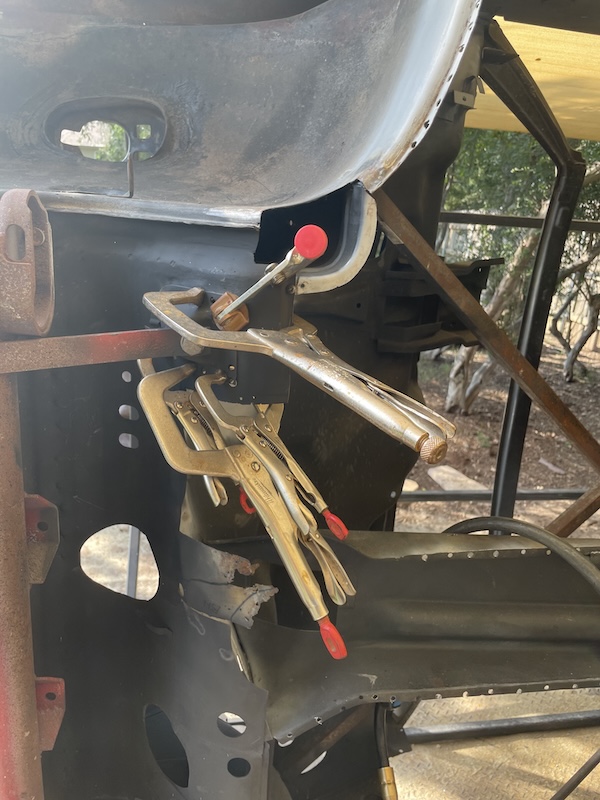 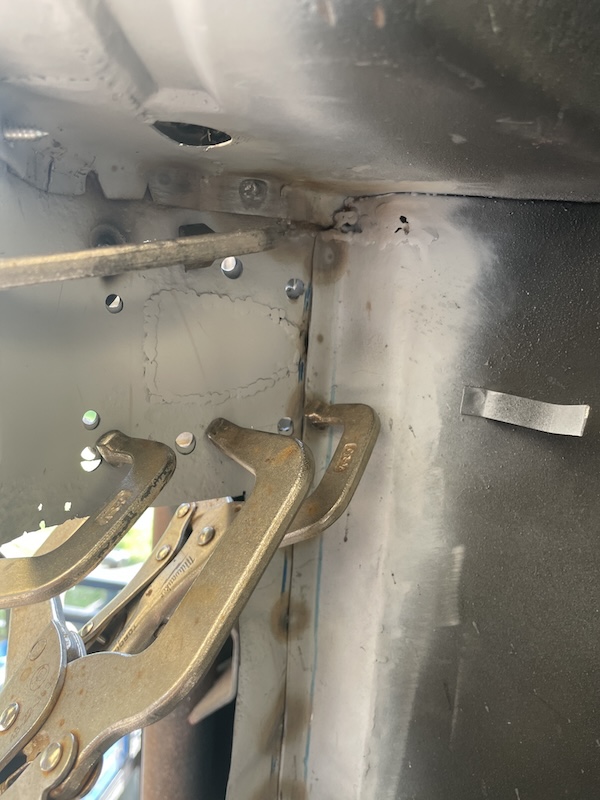 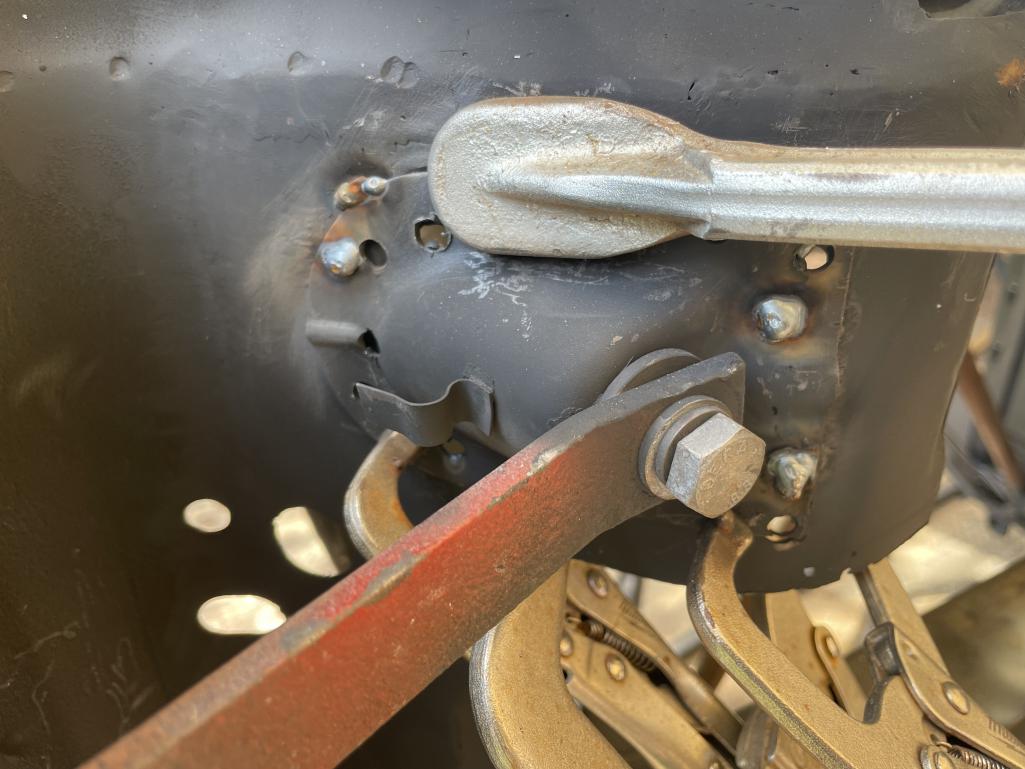 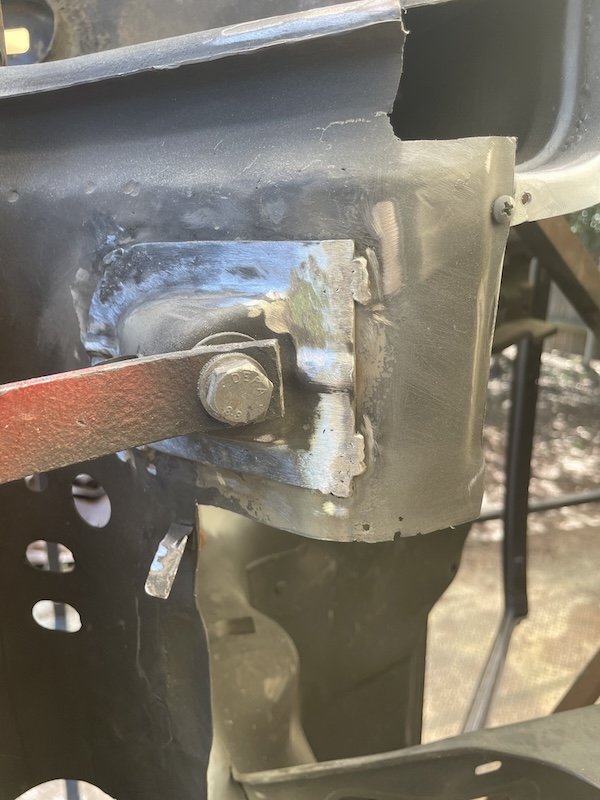 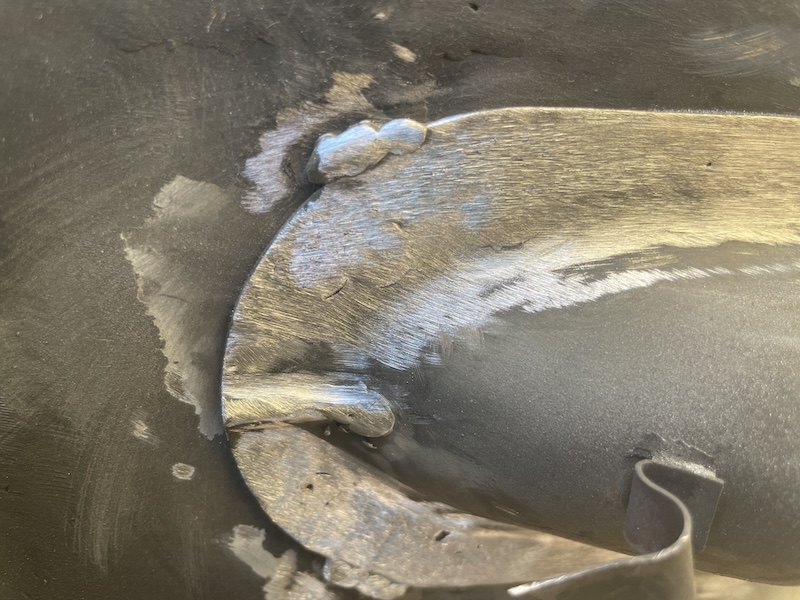 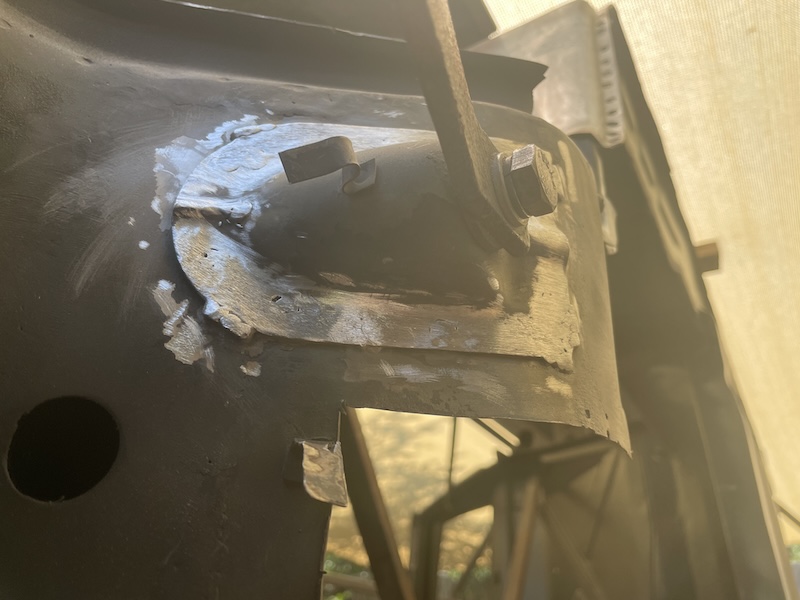 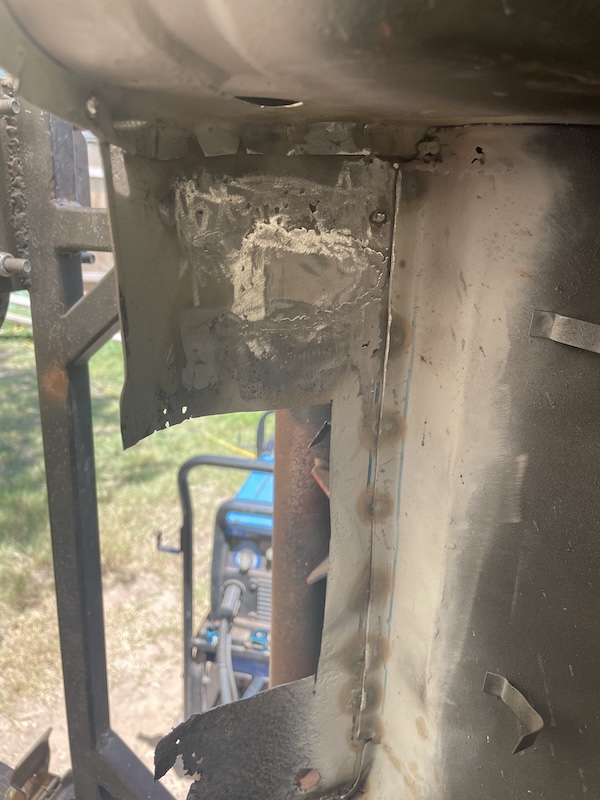 |
| friethmiller |
 Aug 12 2024, 06:59 AM Aug 12 2024, 06:59 AM
Post
#238
|
|
Senior Member    Group: Members Posts: 846 Joined: 10-February 19 From: Austin, TX Member No.: 22,863 Region Association: Southwest Region 
|
Front Floorpan Install - Part 1 (8/11/2024):
With the suspension attachment installed, I then moved to cutting and fitting the front floorpan for install. This process took more time than I'd like to admit (IMG:style_emoticons/default/blink.gif) but I wanted to make sure my alignment was straight and my panel gaps were good. Part of the job was also cleaning up the bottom of the rear pan where I had previously welded in the seat hinges. This is easy work but the welder was employed to close up a few holes left behind from the screws. 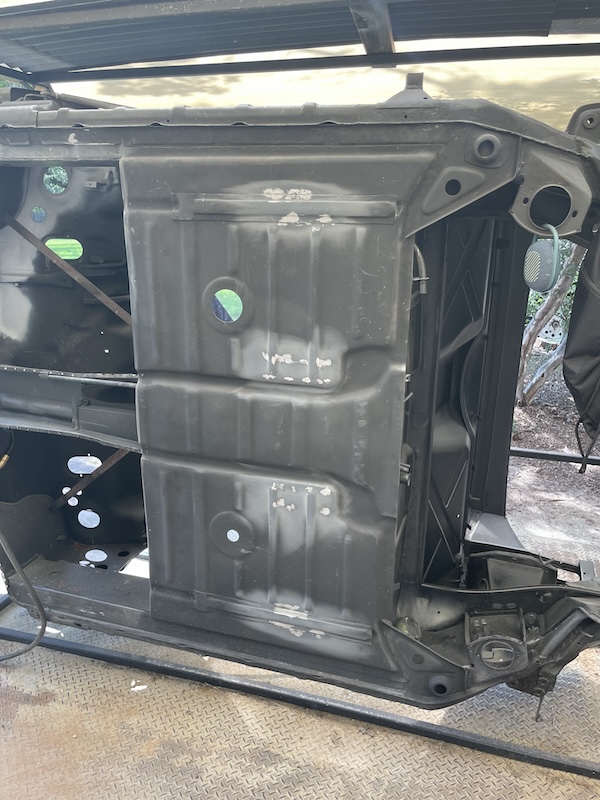 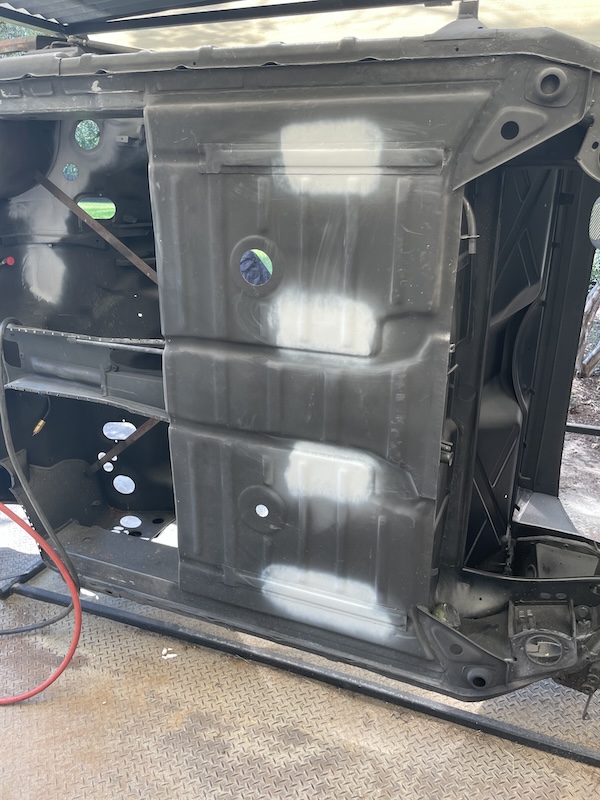 Next, I prep'd the area where the pan makes contact by grinding back the black epoxy and hitting it with weld-thru primer. 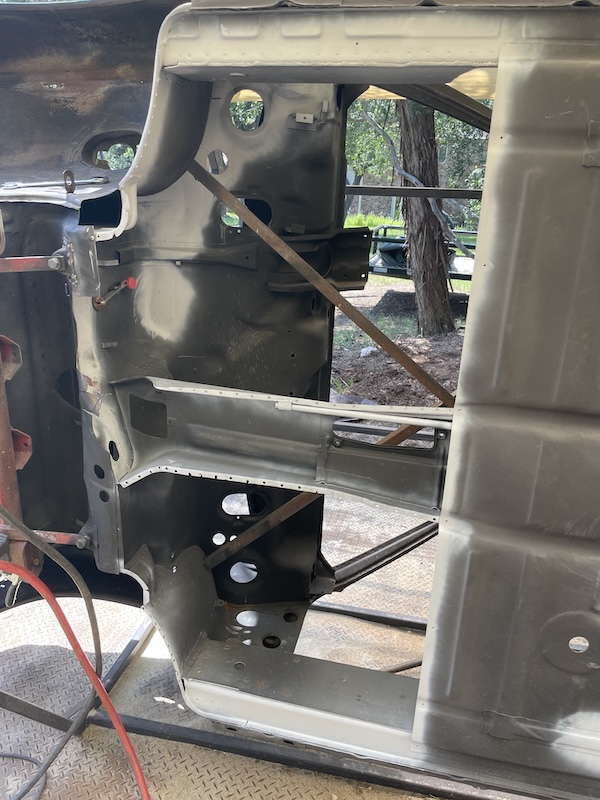 Fitting the pan took a bit of time. After trimming, I had to drill holes out along the sides for the rosette welds and mount, remove, grind, and remount the panel until I as was satisfied with the gaps. 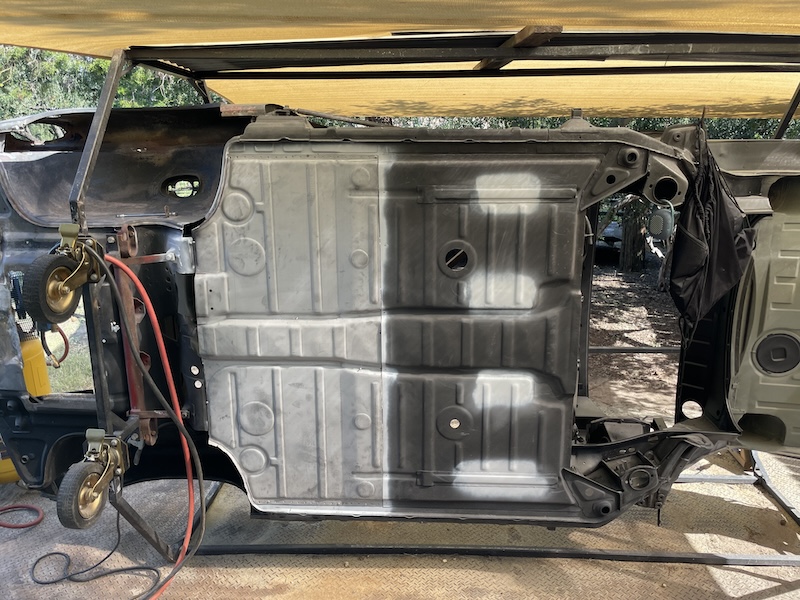 The remaining photos show the process of welding in the panel. Note: I still have to weld the panel to the tunnel from the inside. I have a few screws in place but this will be for another day. Also, the welds up in the front will be completed later as I finish with the pedal cluster/ master cylinder area. 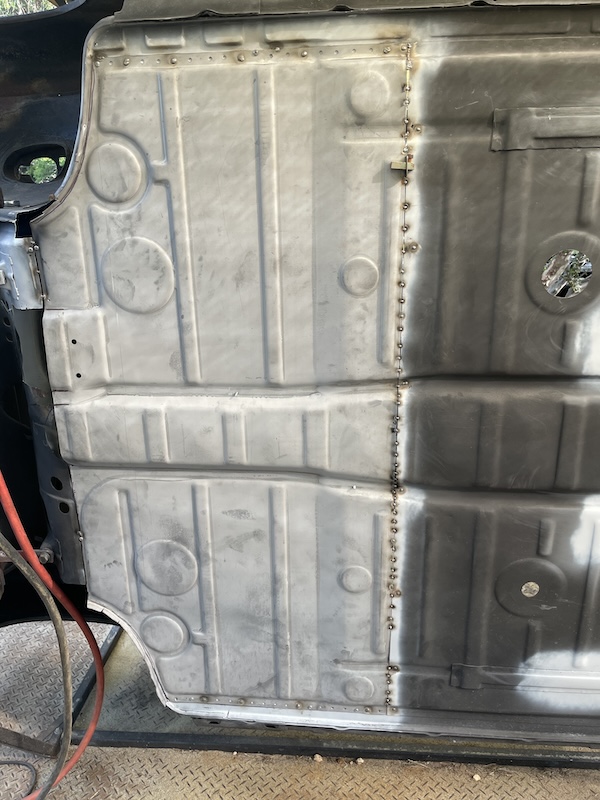 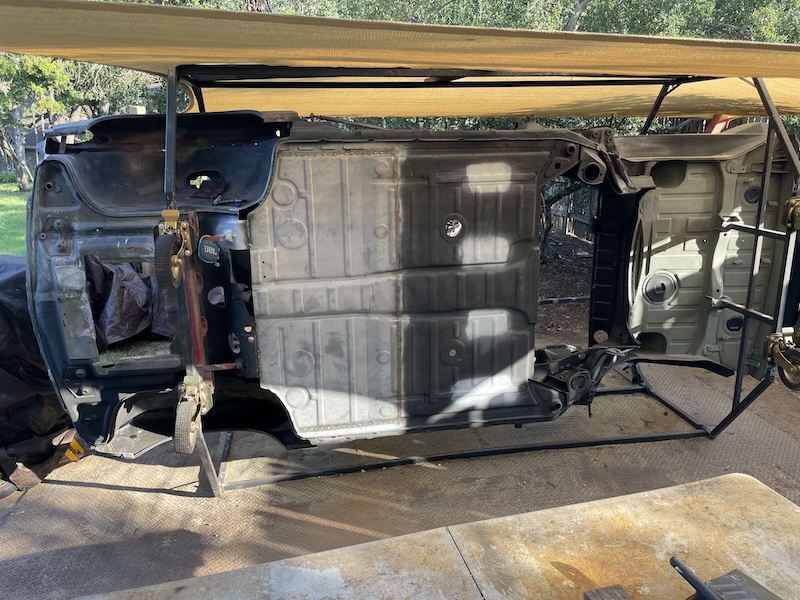 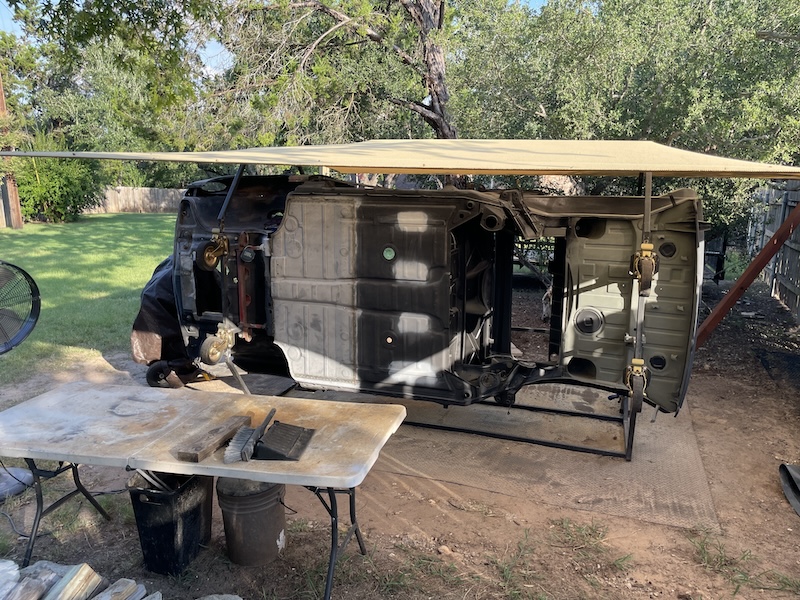 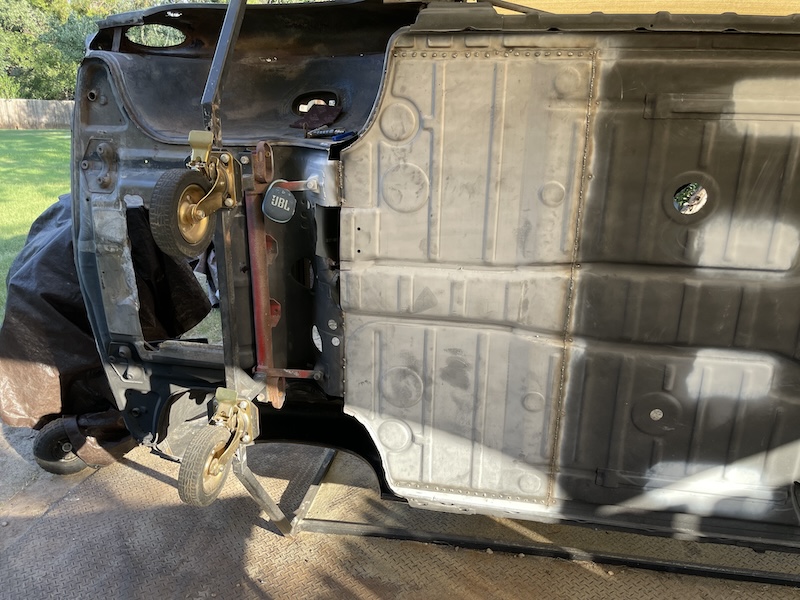 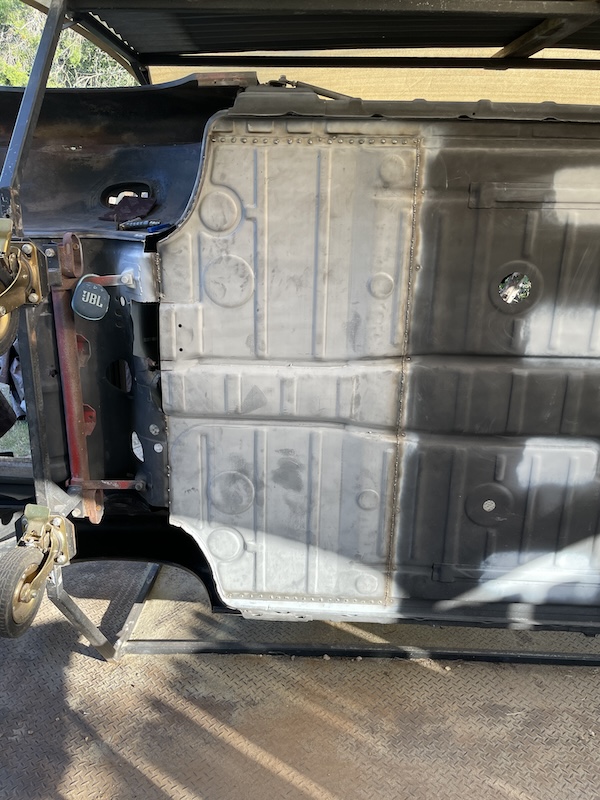 |
| bkrantz |
 Aug 12 2024, 07:25 PM Aug 12 2024, 07:25 PM
Post
#239
|
|
914 Guru      Group: Members Posts: 8,342 Joined: 3-August 19 From: SW Colorado Member No.: 23,343 Region Association: Rocky Mountains 
|
Nice--no more Fintstone car look.
|
| Literati914 |
 Aug 12 2024, 08:45 PM Aug 12 2024, 08:45 PM
Post
#240
|
|
Senior Member    Group: Members Posts: 1,910 Joined: 16-November 06 From: Dallas, TX Member No.: 7,222 Region Association: Southwest Region |
(IMG:style_emoticons/default/devil.gif) Hey Fred, just smear a little filled over it, it'll be fine. (whispered while balancing on your shoulder)
(IMG:style_emoticons/default/happy11.gif) |
  |
1 User(s) are reading this topic (1 Guests and 0 Anonymous Users)
0 Members:

|
Lo-Fi Version | Time is now: 20th April 2025 - 02:37 AM |
Invision Power Board
v9.1.4 © 2025 IPS, Inc.


