|
|

|
Porsche, and the Porsche crest are registered trademarks of Dr. Ing. h.c. F. Porsche AG.
This site is not affiliated with Porsche in any way. Its only purpose is to provide an online forum for car enthusiasts. All other trademarks are property of their respective owners. |
|
|
  |
| friethmiller |
 Aug 13 2024, 07:53 AM Aug 13 2024, 07:53 AM
Post
#241
|
|
Senior Member    Group: Members Posts: 846 Joined: 10-February 19 From: Austin, TX Member No.: 22,863 Region Association: Southwest Region 
|
(IMG:style_emoticons/default/devil.gif) Hey Fred, just smear a little filled over it, it'll be fine. (whispered while balancing on your shoulder) (IMG:style_emoticons/default/happy11.gif) @Literati914 - Ha! That little red-horned guy makes me want to get back out there with the welder and fill in ALL the pinholes! (IMG:style_emoticons/default/welder.gif) |
| Literati914 |
 Aug 13 2024, 08:56 AM Aug 13 2024, 08:56 AM
Post
#242
|
|
Senior Member    Group: Members Posts: 1,910 Joined: 16-November 06 From: Dallas, TX Member No.: 7,222 Region Association: Southwest Region |
You're kicking ass on this rust repair stuff, and in August.. in Texas !! (IMG:style_emoticons/default/pray.gif)
I bet you're pretty familiar with the 'tarp everything up at night in case it rains' situation too, I know that one well myself. Anyway - I like your "Not holier than thou" approach !! (IMG:style_emoticons/default/lol-2.gif) Keep it up. |
| friethmiller |
 Aug 13 2024, 12:45 PM Aug 13 2024, 12:45 PM
Post
#243
|
|
Senior Member    Group: Members Posts: 846 Joined: 10-February 19 From: Austin, TX Member No.: 22,863 Region Association: Southwest Region 
|
Nice--no more Fintstone car look. @bkrantz - Call me crazy but I'm partial to the look of a "complete floor". Especially when I'm driving. It helps to have pedals! (IMG:style_emoticons/default/lol-2.gif) |
| 930cabman |
 Aug 13 2024, 12:55 PM Aug 13 2024, 12:55 PM
Post
#244
|
|
Advanced Member     Group: Members Posts: 4,044 Joined: 12-November 20 From: Buffalo Member No.: 24,877 Region Association: North East States 
|
Nice--no more Fintstone car look. @bkrantz - Call me crazy but I'm partial to the look of a "complete floor". Especially when I'm driving. It helps to have pedals! (IMG:style_emoticons/default/lol-2.gif) There is little doubt regarding the crazy, goes without saying. the floor will keep your trousers dry in the rain, possibly other benefits also Pedals are a nice luxury Keep rockin it out Fred, soon you will be behind the wheel and thanks for the updates |
| friethmiller |
 Aug 13 2024, 02:38 PM Aug 13 2024, 02:38 PM
Post
#245
|
|
Senior Member    Group: Members Posts: 846 Joined: 10-February 19 From: Austin, TX Member No.: 22,863 Region Association: Southwest Region 
|
Keep rockin it out Fred, soon you will be behind the wheel and thanks for the updates Will do! Thanks @930cabman . I'm glad y'all find my "sheetmetal minutia" non-boring! Here's to steady progress on our restoration projects! Cheers (IMG:style_emoticons/default/beerchug.gif) |
| friethmiller |
 Aug 25 2024, 04:22 PM Aug 25 2024, 04:22 PM
Post
#246
|
|
Senior Member    Group: Members Posts: 846 Joined: 10-February 19 From: Austin, TX Member No.: 22,863 Region Association: Southwest Region 
|
Front Floor Pan Welds/ Front Jack Point (8/21 - 8/23/2024):
Back from dropping off my son to college and ready to get going on finishing the front floor pan welds. Maybe I'm getting a little old but about halfway through this process I decided I didn't want to be grinding on my knees. Thought it would be smart just to finish the driver side and get the passenger side later once I rotate the car around. 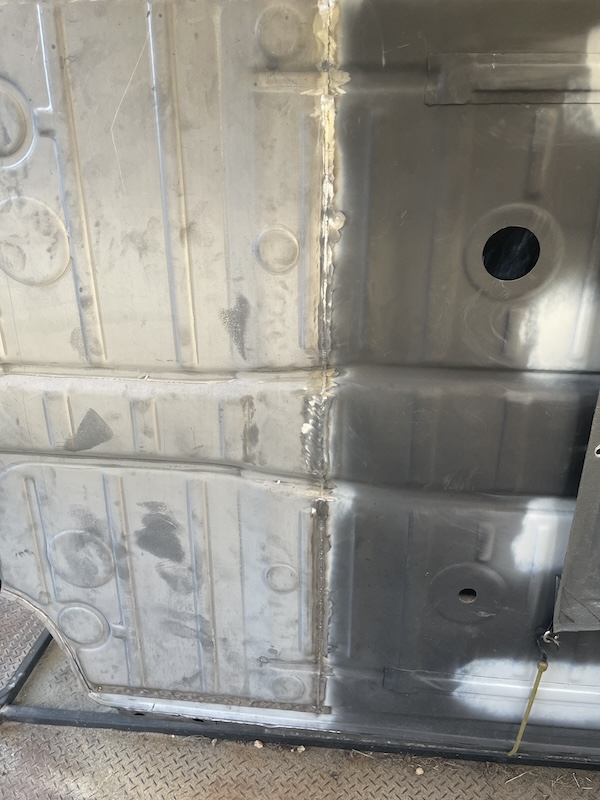 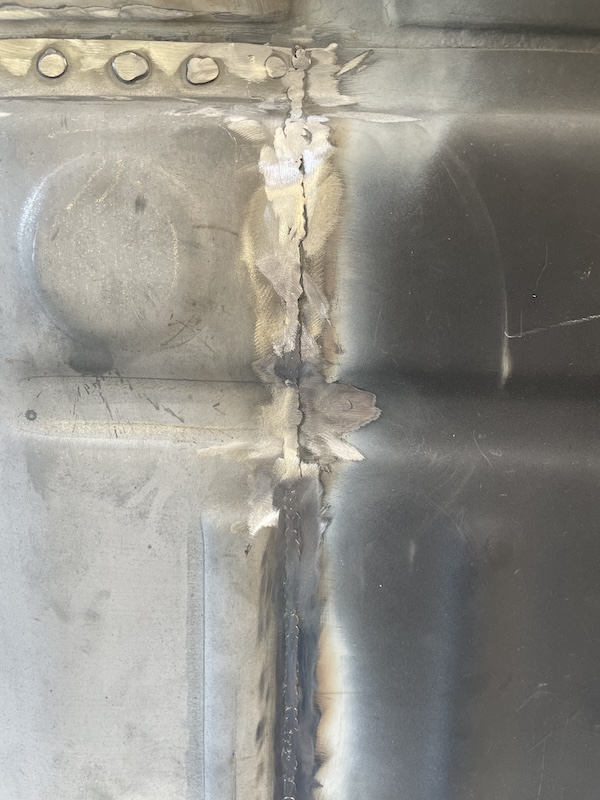 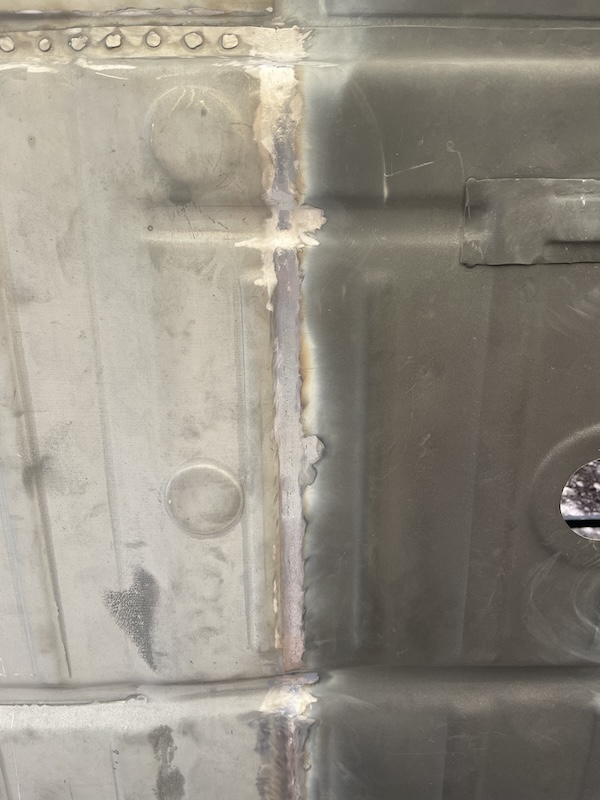 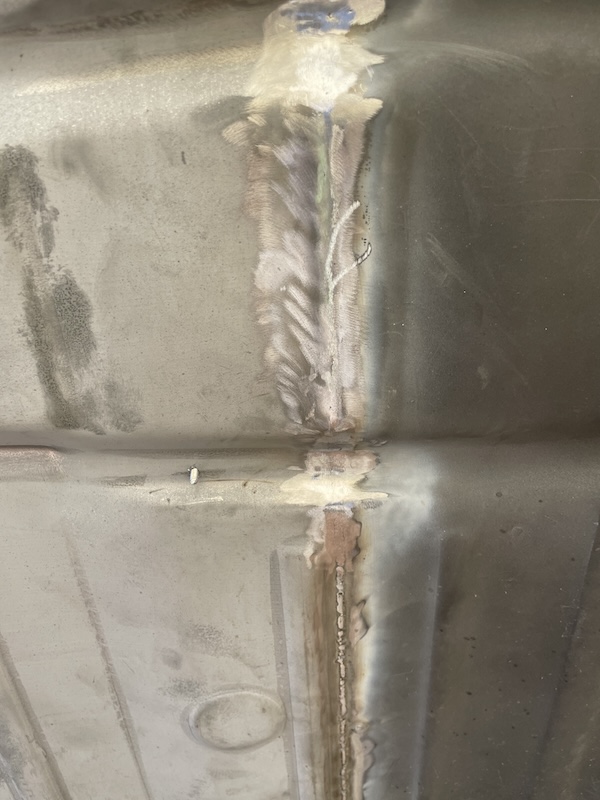 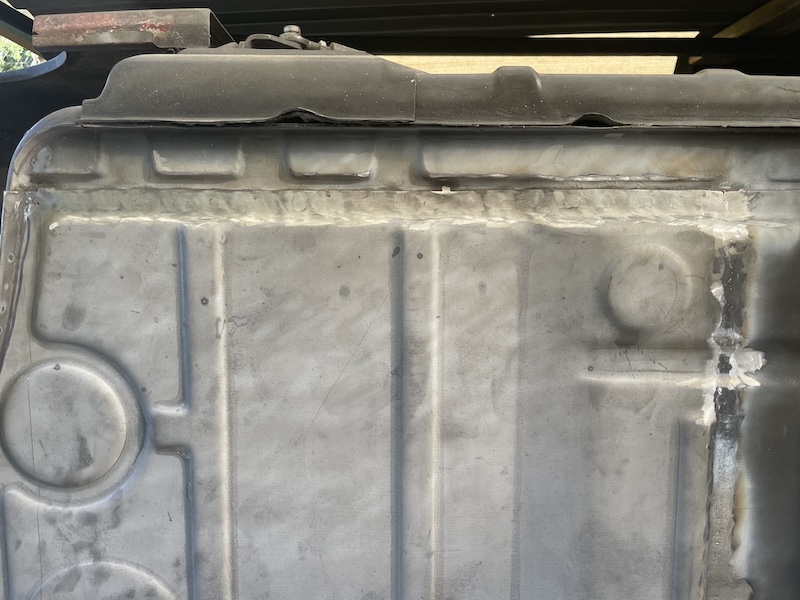 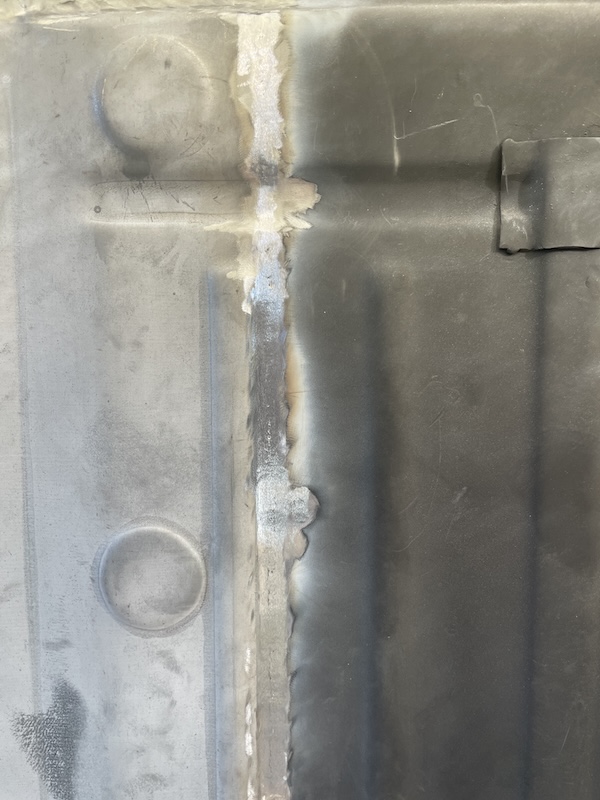 Here you can see that despite my best efforts, I left a few pin holes in the main seam. While I do plan on welding the seam from the other side just to make sure I have a complete weld, I came back and hit these spots. 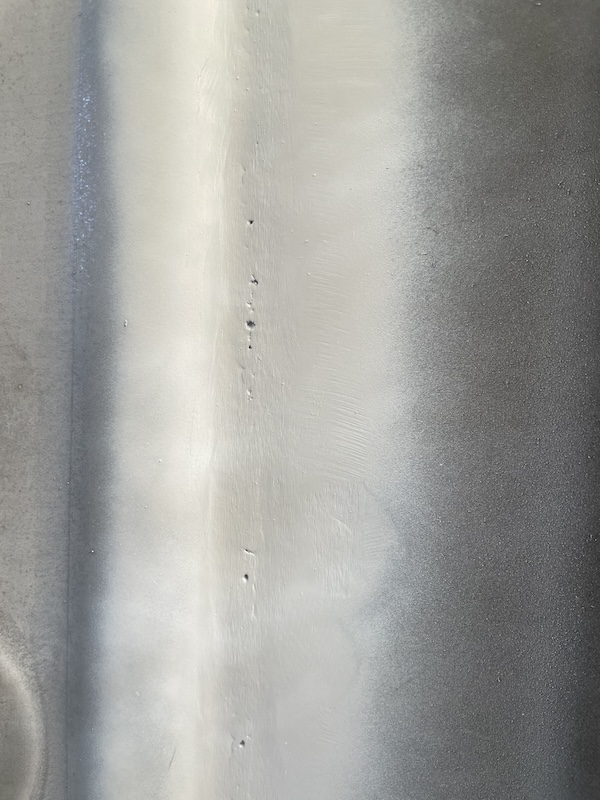 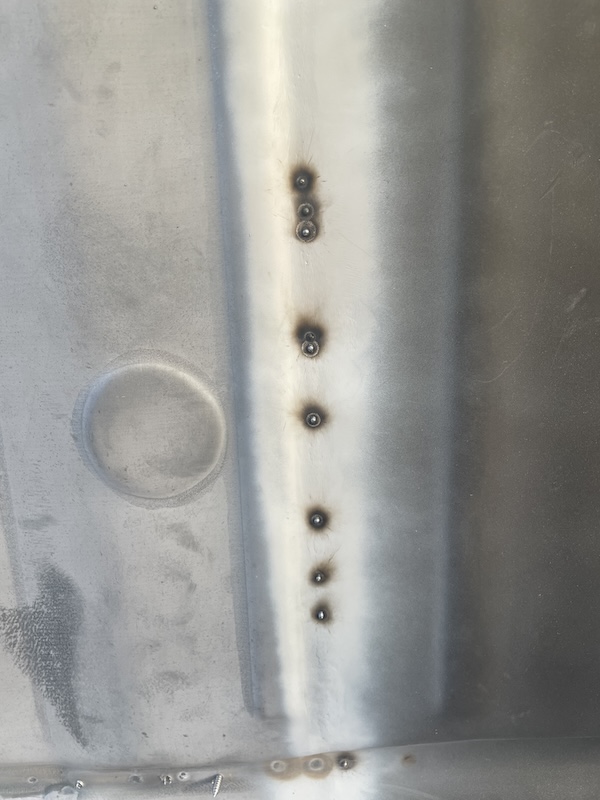 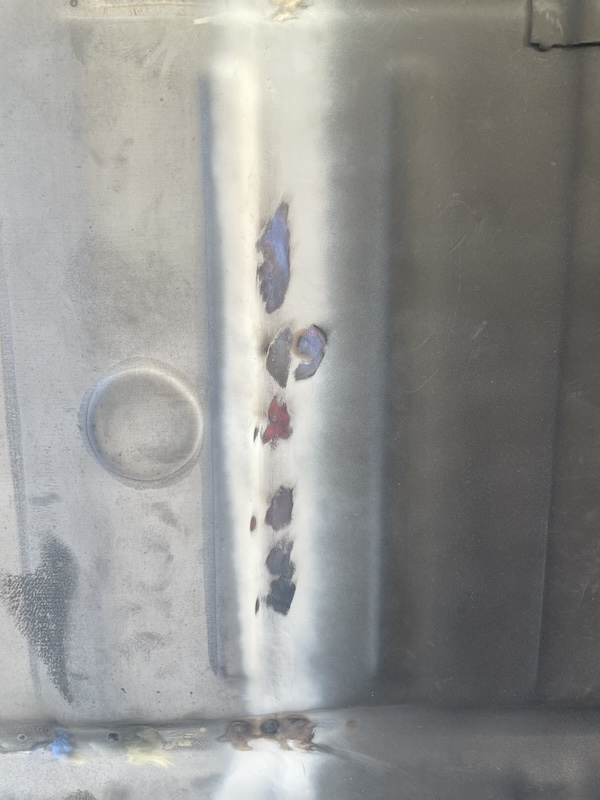 The next two images show what it looks from the other side. While it needs some touch up here and there, I'm very happy with the penetration of the welds. You can also see my initial (bit ugly) rosettes along the tunnel. Again, I decided to get the passenger side tunnel welds later when the car if flipped around. The second photo is with just a light grinding. Yeah, I definitely will need to weld this seam a little more. 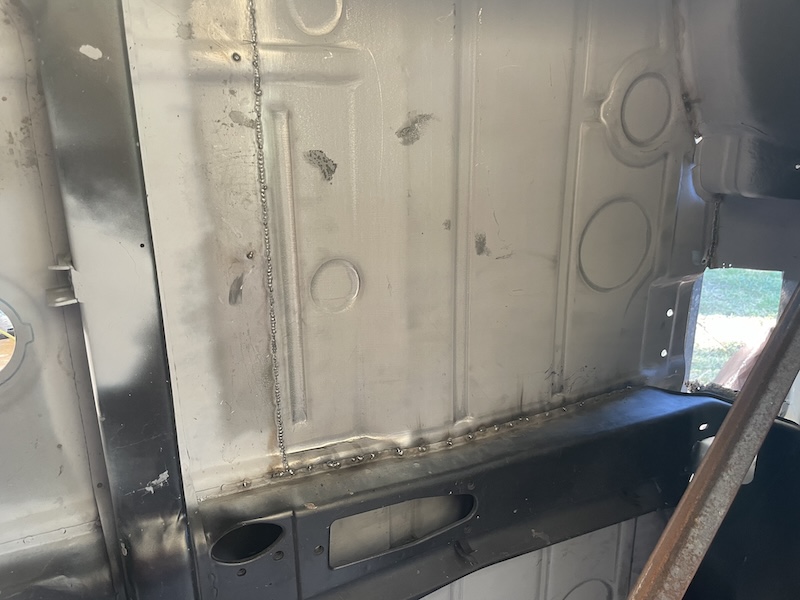 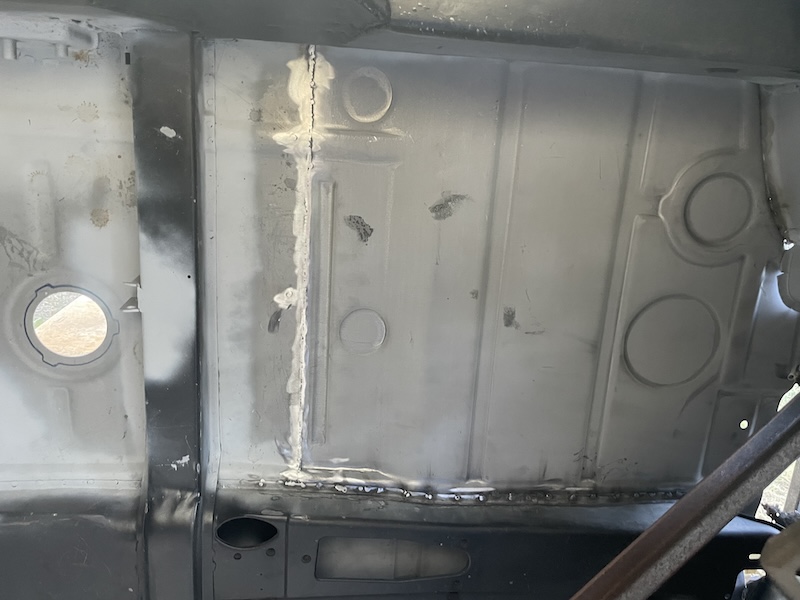 Another item on the To-do list was the front jack point. This came off the old, rusted out floorboard and was rust treated and primed with weld-thru primer. After bumping up the welder heat/wire speed, I zapped this in place and ground the welds down. Yes, I did get the small pin hole later (IMG:style_emoticons/default/biggrin.gif) 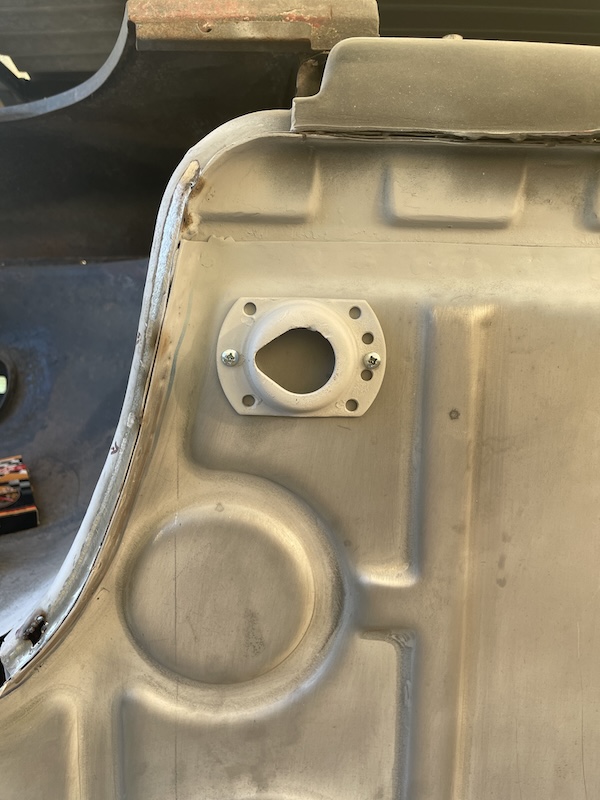 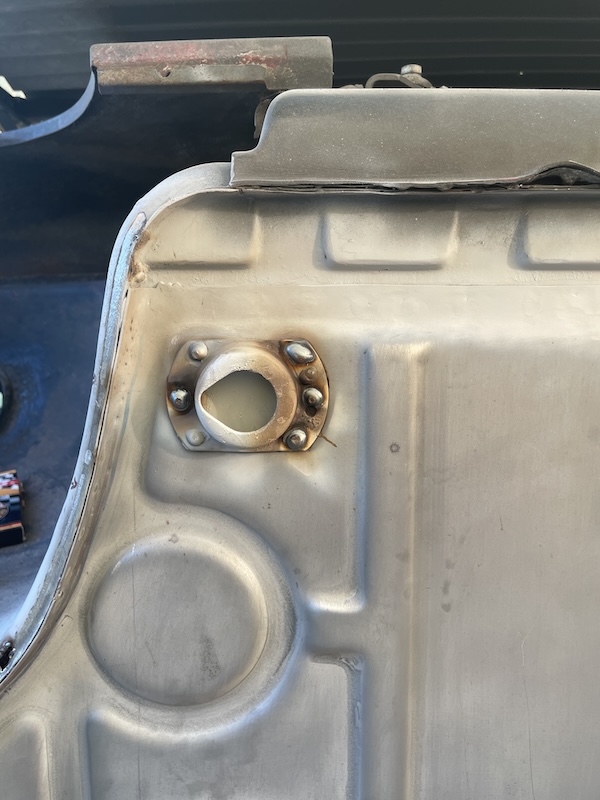 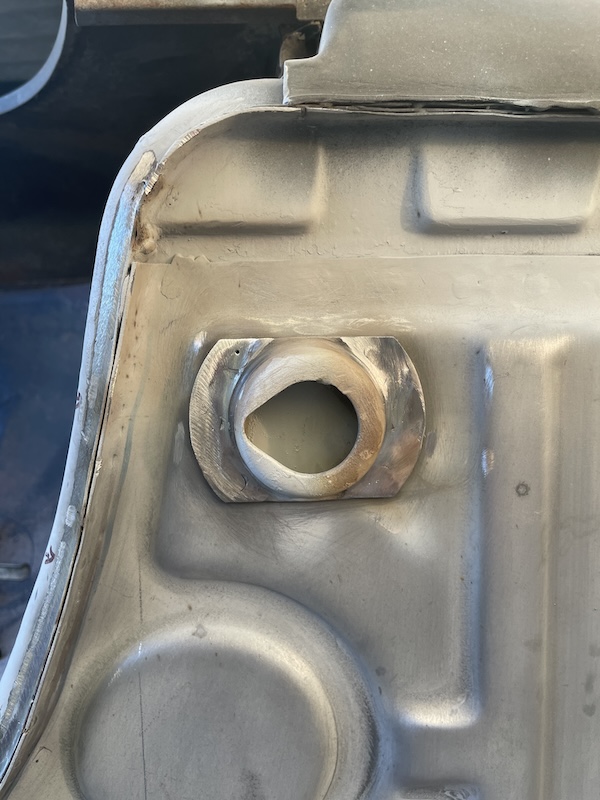 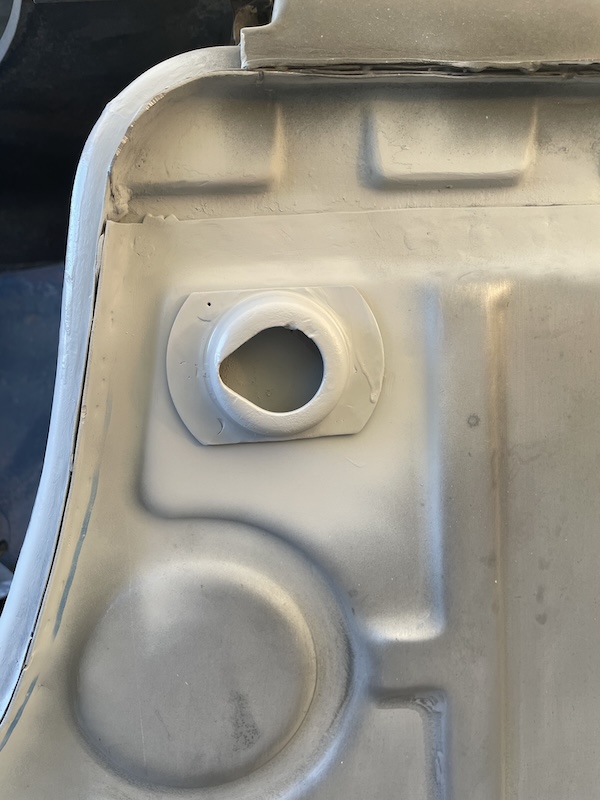 Stay tuned! Saturday was a big fabrication day. Will post these picture shortly. |
| 930cabman |
 Aug 25 2024, 04:54 PM Aug 25 2024, 04:54 PM
Post
#247
|
|
Advanced Member     Group: Members Posts: 4,044 Joined: 12-November 20 From: Buffalo Member No.: 24,877 Region Association: North East States 
|
Workmanship as usual, outstanding (IMG:style_emoticons/default/beerchug.gif) (IMG:style_emoticons/default/beerchug.gif)
I am warming up for restoration #3 and have been taking notes of your sequence and setups. Thank you for the great documentation Do you have an ETA? status of the PP |
| friethmiller |
 Aug 25 2024, 04:57 PM Aug 25 2024, 04:57 PM
Post
#248
|
|
Senior Member    Group: Members Posts: 846 Joined: 10-February 19 From: Austin, TX Member No.: 22,863 Region Association: Southwest Region 
|
Fabrication of the Forward Floor Area - Part 1 (8/24/2024):
HERE WE GO! It was a big day of fabrication. I've been waiting a while to finally get to this area of the car and try my hand and mimicking the factory floor around the pedal cluster bracket. I looked at several photos online and ones from my previous 914 to get a general idea on what the floor should look like. I decided to start my work by replacing two pieces around where the brake line enters the car to travel through the tunnel. The first piece starts level with the front floor pan and curves to the meet the floor in the arch above the steering rack. This low area is directly beneath the accelerator pedal. The second piece,which has the inlet for the brake line [at the top], moves down at a steeper angle and meets the round portion of the center floor structure. The two pieces join along the one side to create a "crease". 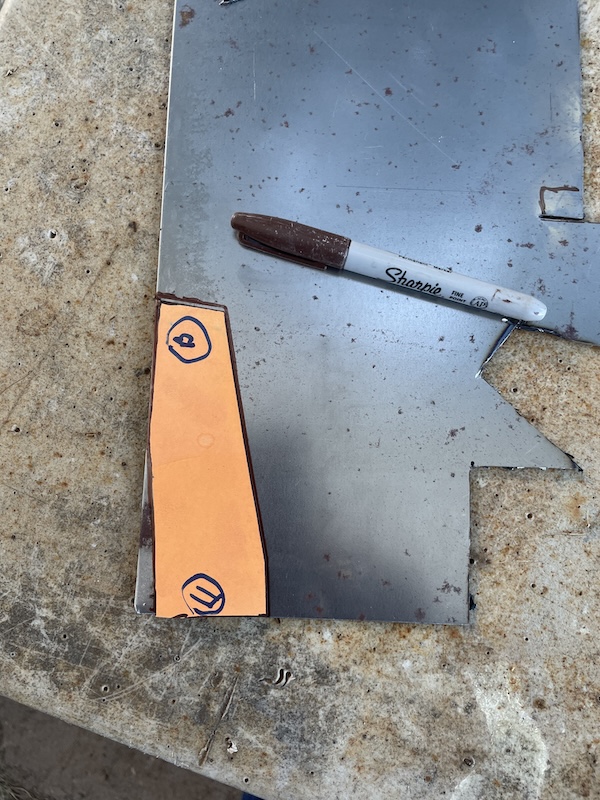 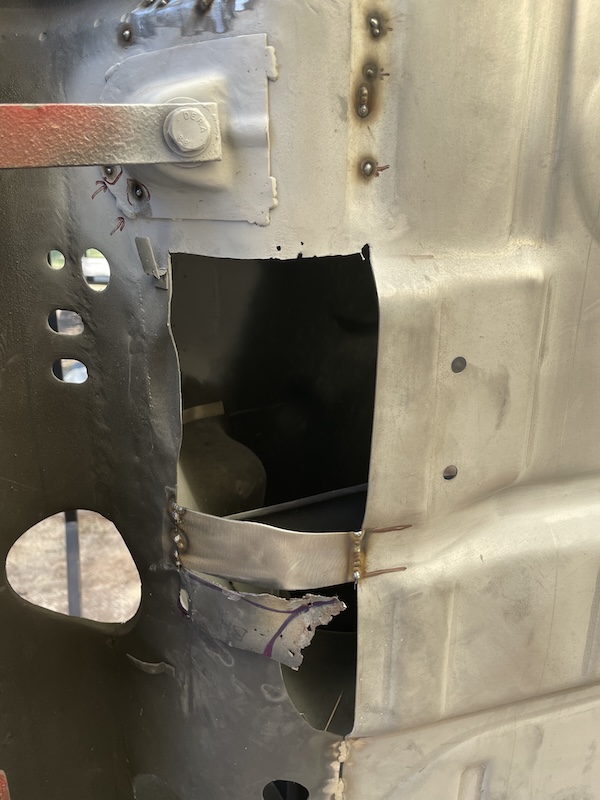 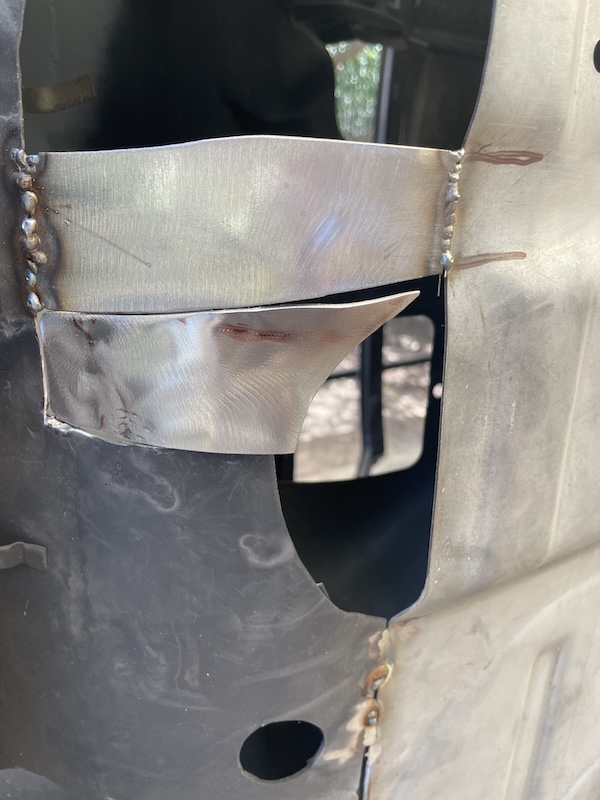 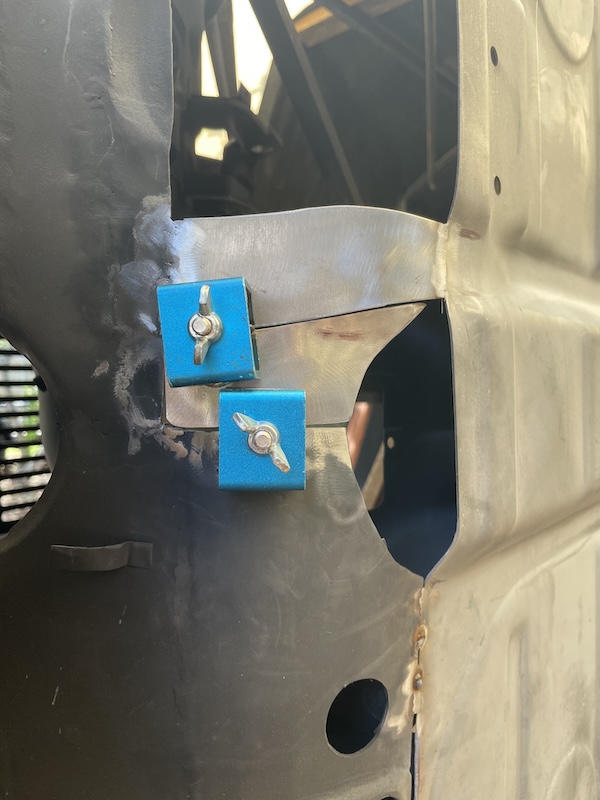 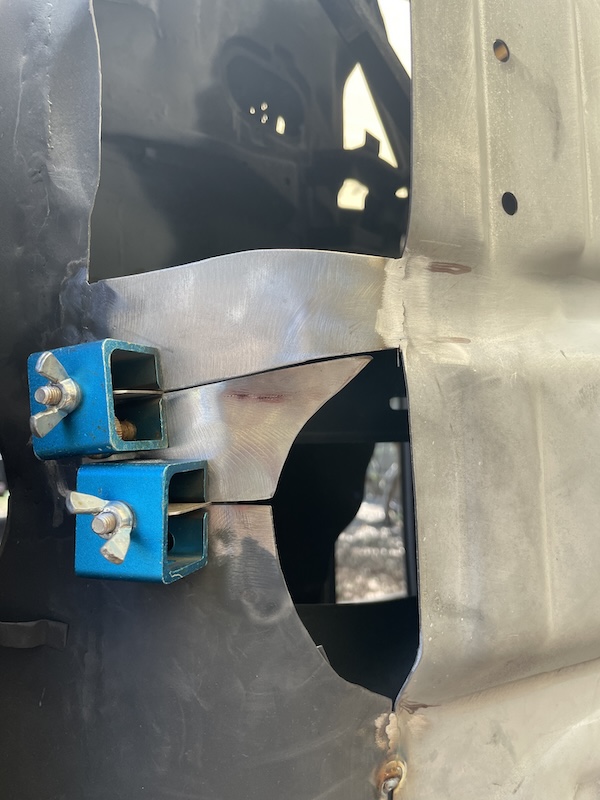 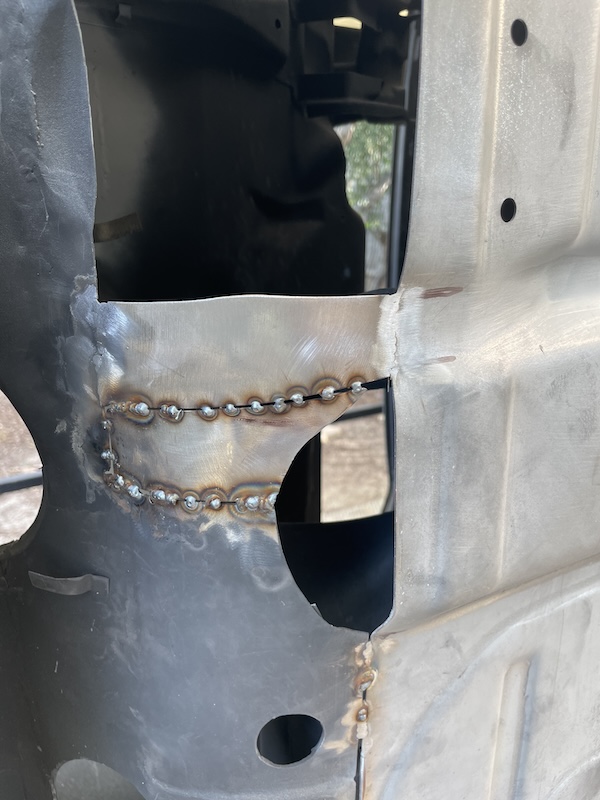 Next, I created the curved top to the center floor structure. Again, I have no measurements here. I'm just going off of photos and what looks correct to me. This piece was simply tacked in place for the time being so I could start fabricating the curved part that connects to the floor. I struggled a bit here. However, once I decided to cut the curved patch into two separate pieces, I was finally able to form/shape the metal to fit correctly. Again, just tacking things together at this point. Final photo is a "step back" to see how things look. That area under the pedal cluster support bracket is next! Stay tuned for the next set of pictures. (IMG:style_emoticons/default/welder.gif) 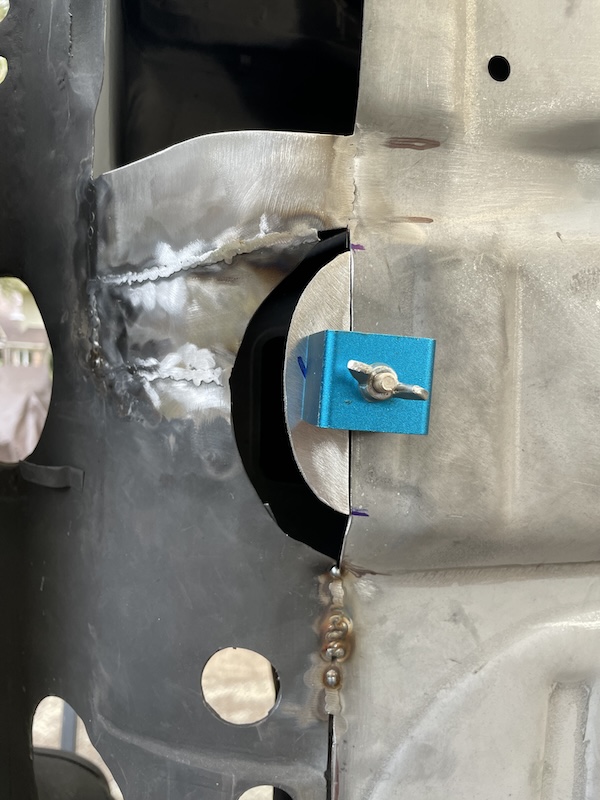 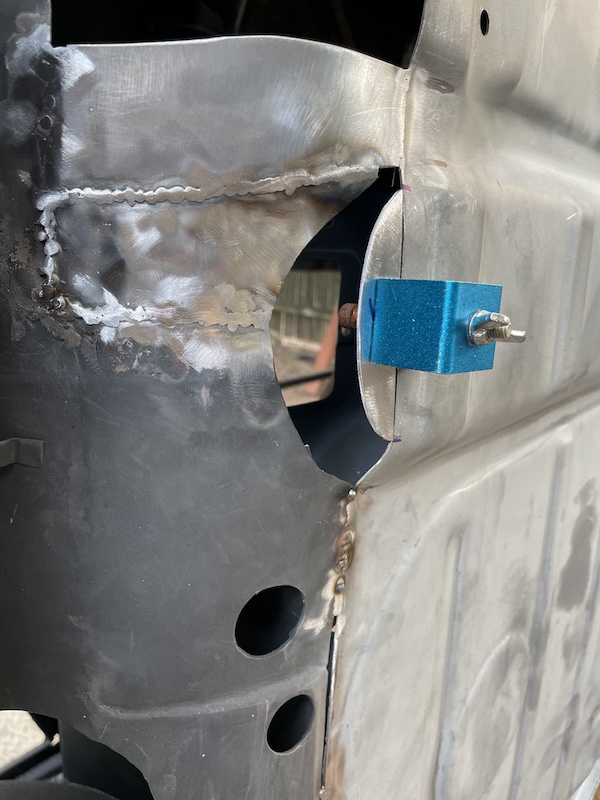 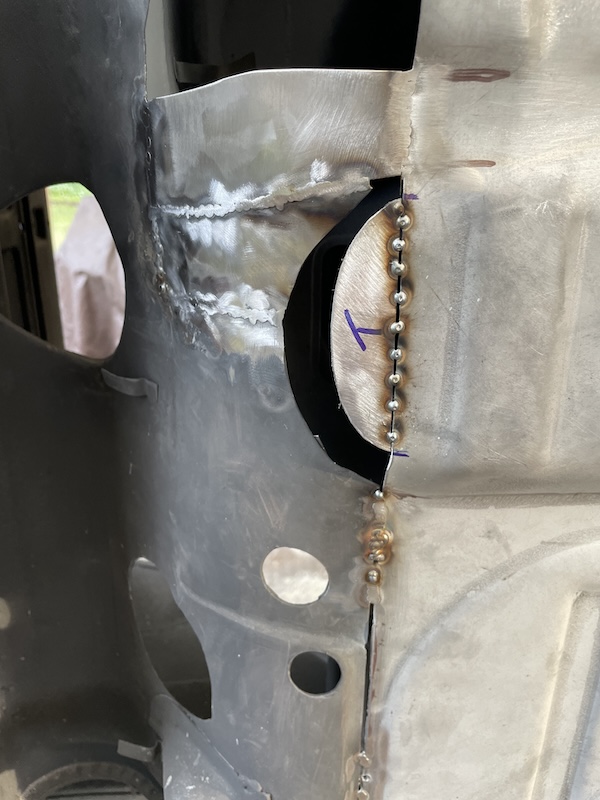 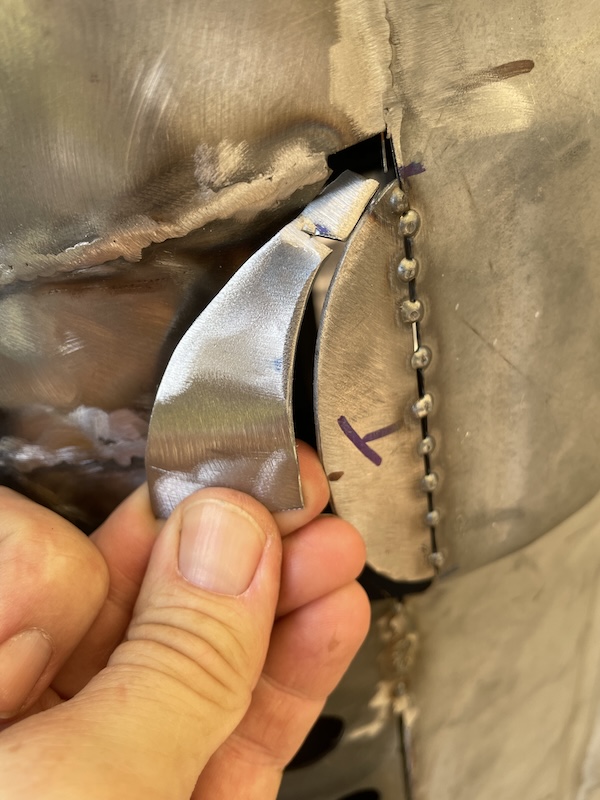 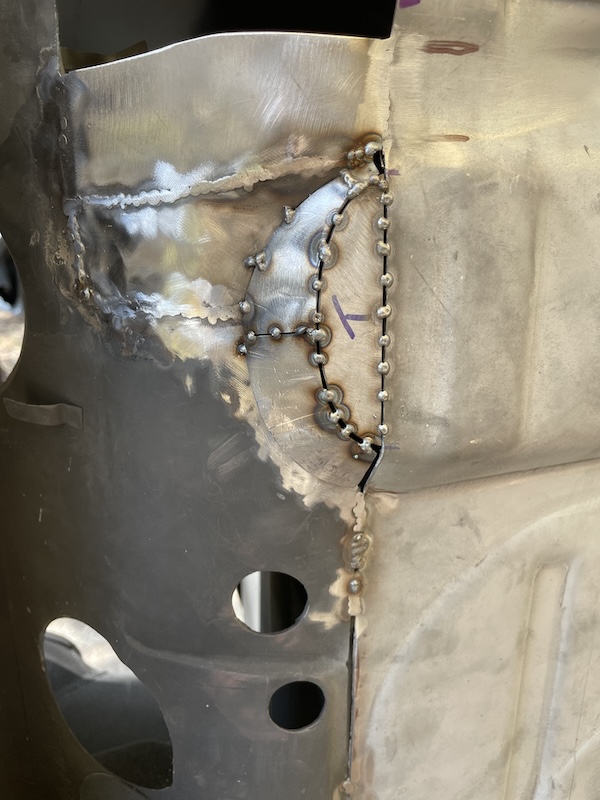 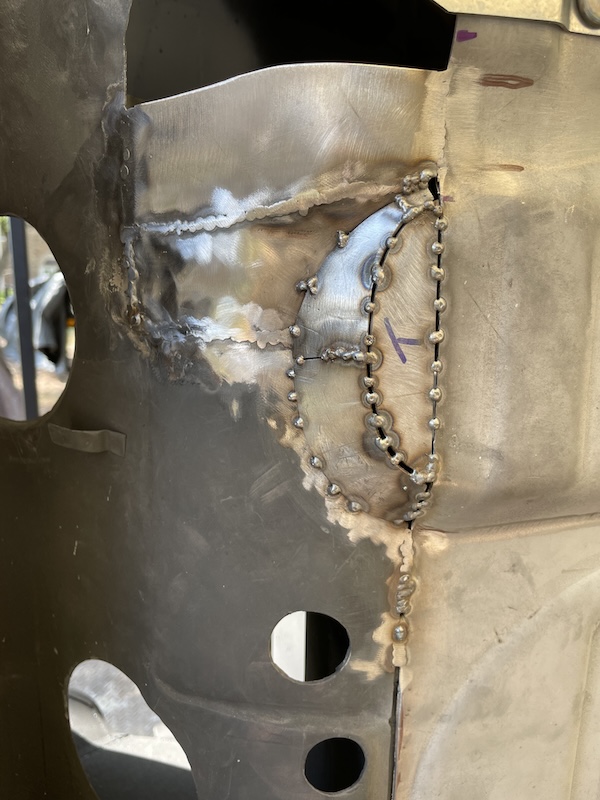 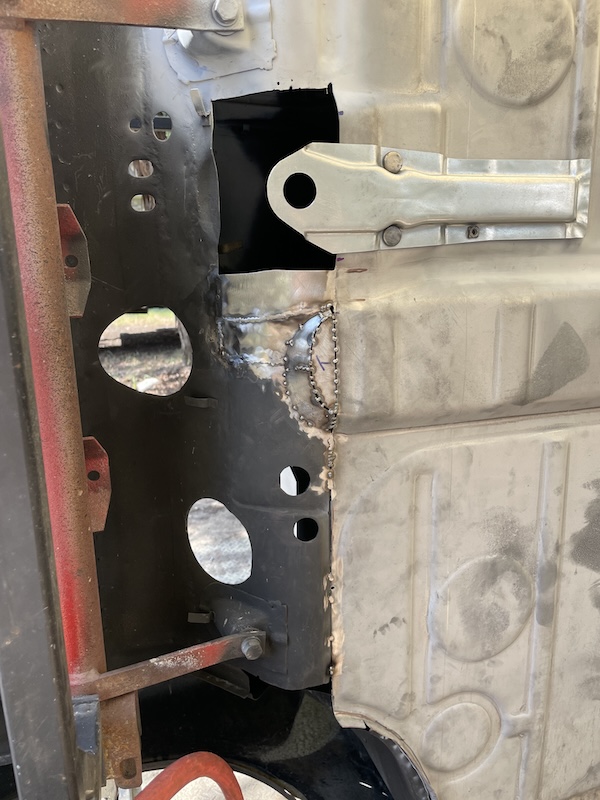 |
| friethmiller |
 Aug 25 2024, 05:42 PM Aug 25 2024, 05:42 PM
Post
#249
|
|
Senior Member    Group: Members Posts: 846 Joined: 10-February 19 From: Austin, TX Member No.: 22,863 Region Association: Southwest Region 
|
Fabrication of the Forward Floor Area - Part 2 (8/24/2024):
Next up is the craziness involved with fabricating the pedal cluster area. I had very little to go on here but I did do a little of this on my previous 914. So, I started with the bottom area that I was familiar with. This has a certain shape that is pretty easy to duplicate using the front floorpan and photos. I used construction paper to sketch out this shape that I used to cut the part from 18 gauge sheet metal. I purposely oversized my pattern a bit here to help with the "curved" look that I was going for (this will be seen later). This bottom piece has a protrusion that is directly below the opening at the end of the pedal cluster support bracket. This is actually not that hard to recreate. I first screwed the part down to a wooded pattern and, with a ball pean hammer, made a bowl in the metal. After removing the piece off the wood, I used my garage floor and the largest socket I owned to "steepen" the sides and pound the bottom flat. 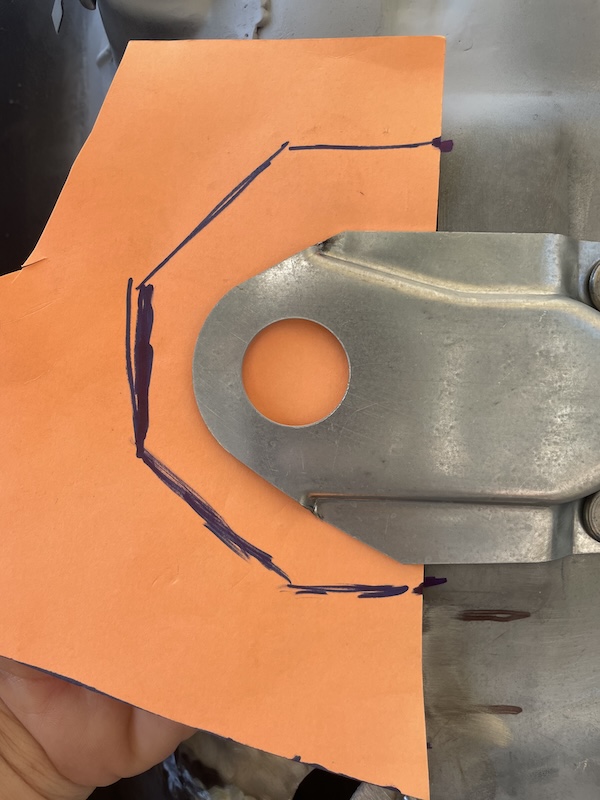 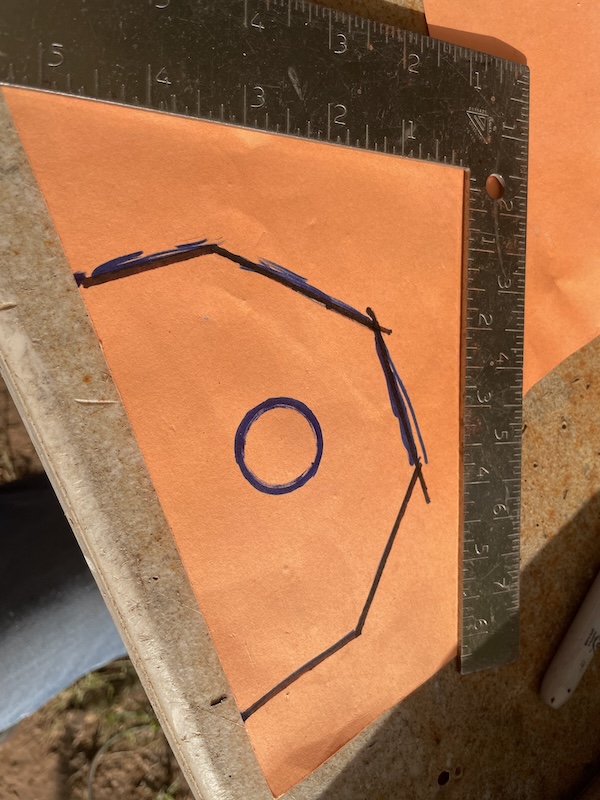 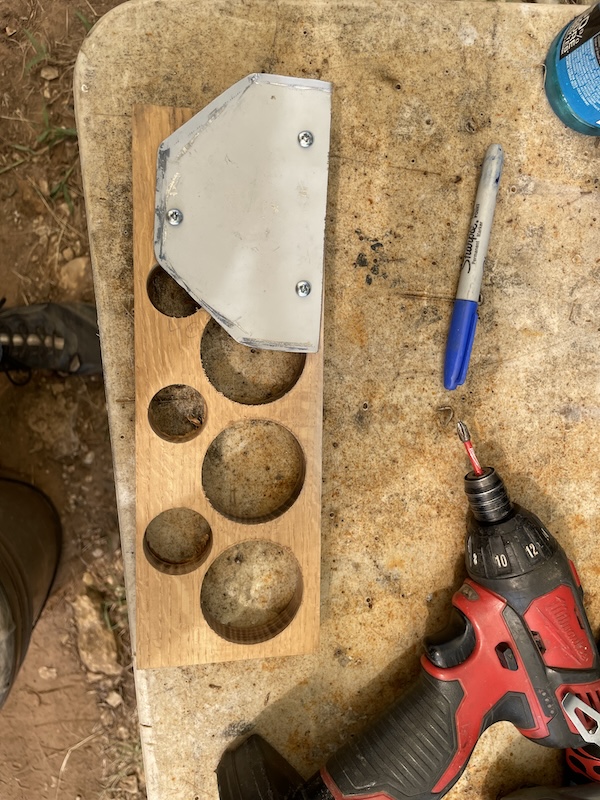 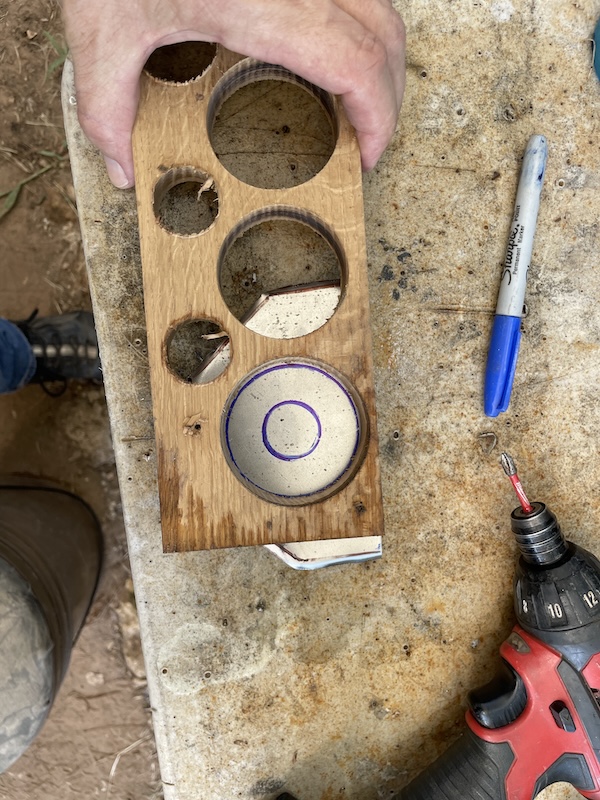 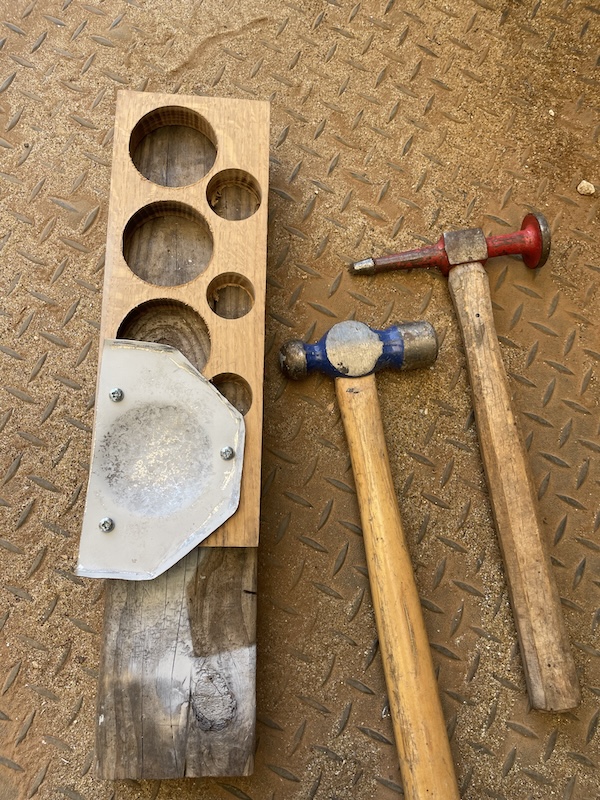 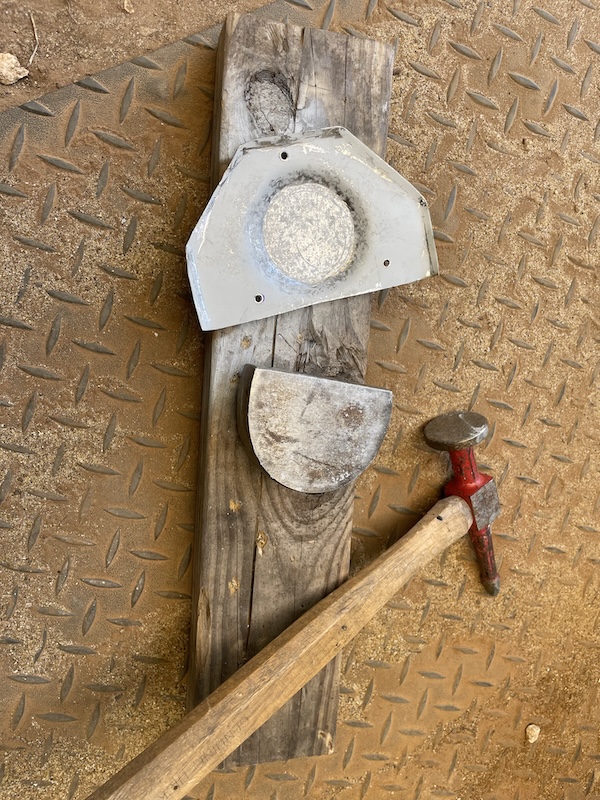 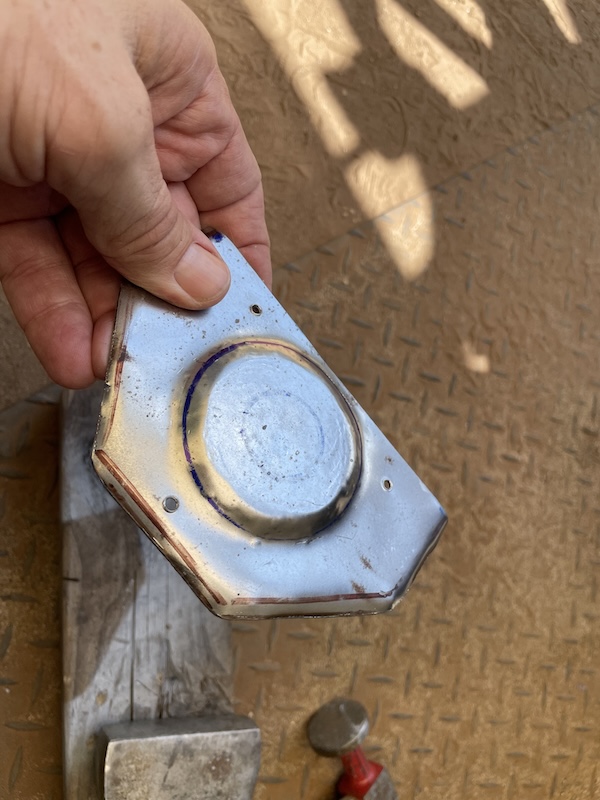 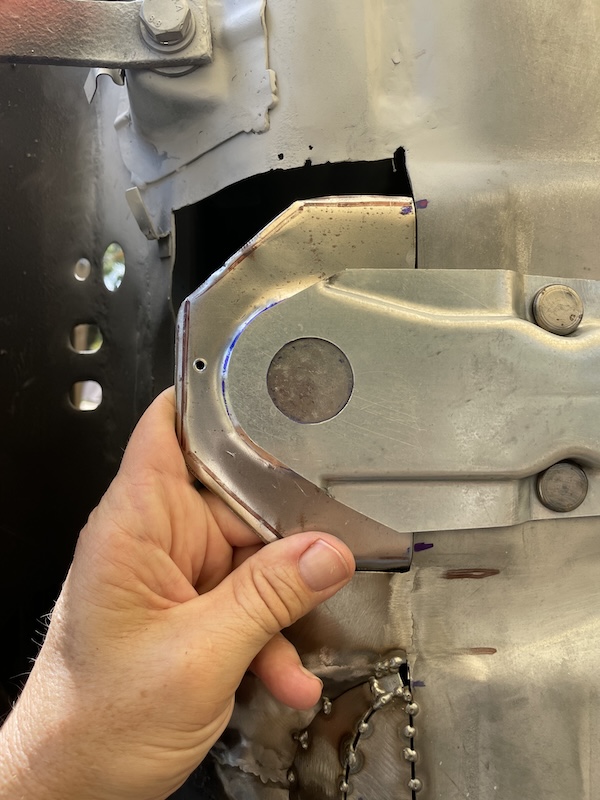 I tacked this bottom part in place and then started to template the vertical piece that secures the master brake cylinder. I used what remained of the original piece to help me form this part. Shaping the metal here was extremely difficult with the way the floor is "pressed" into shape. 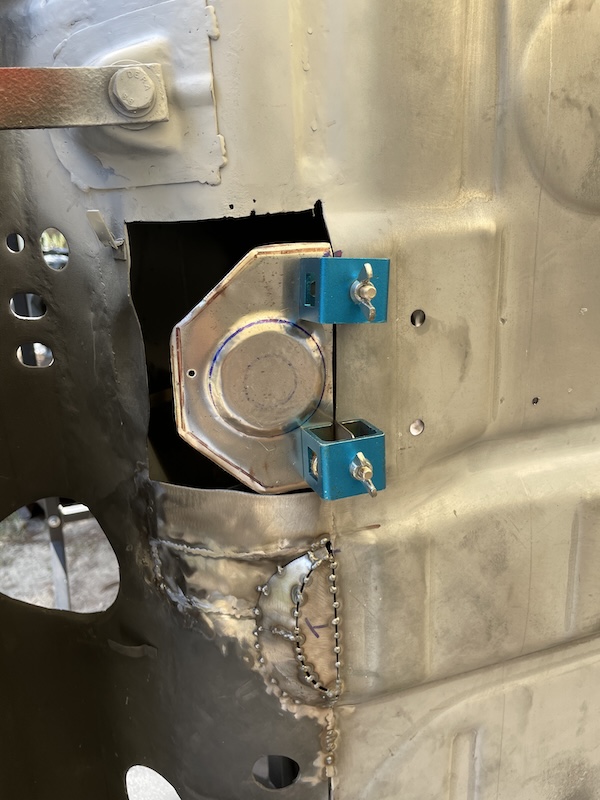 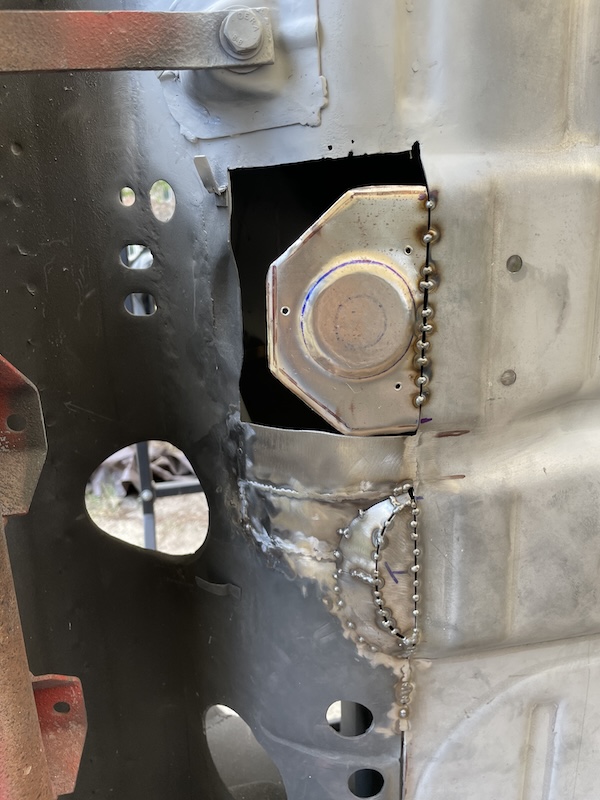 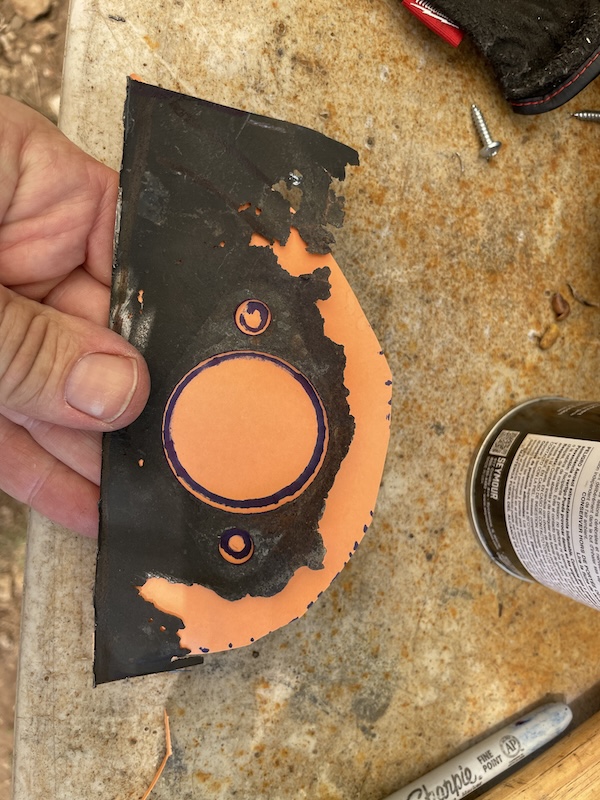 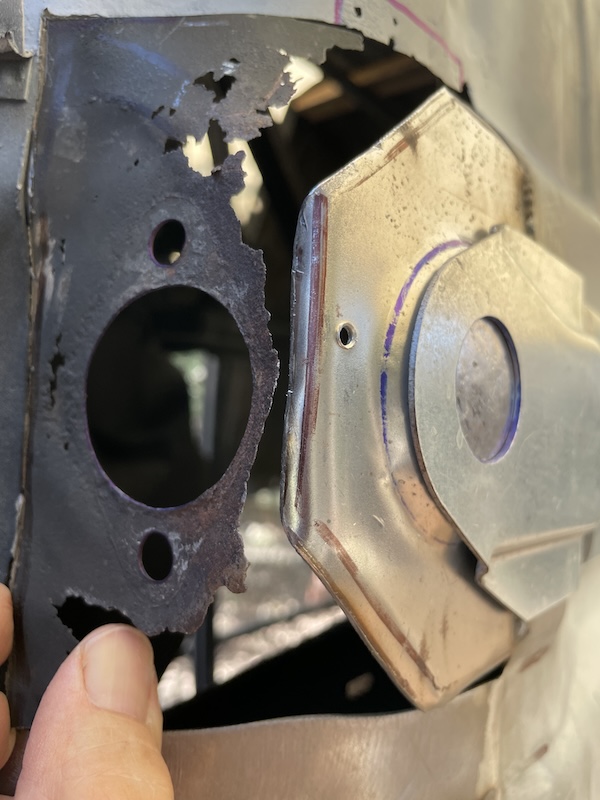 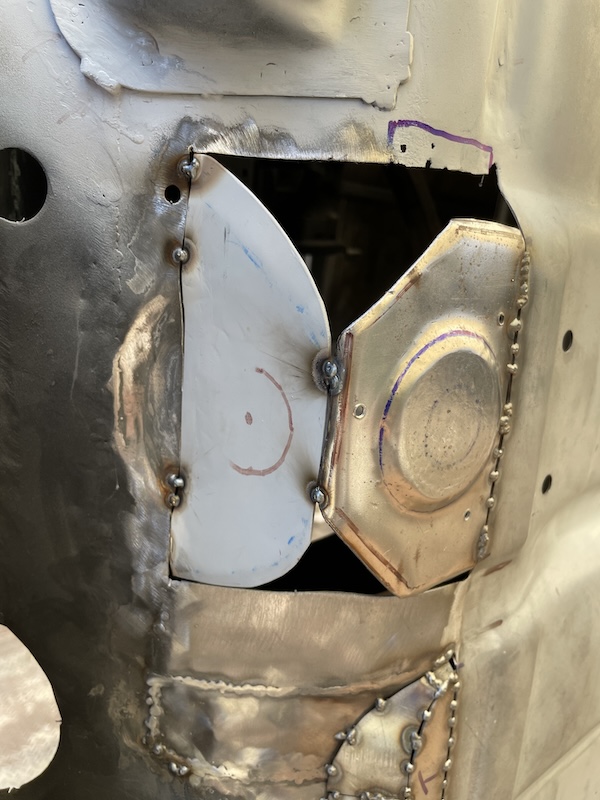 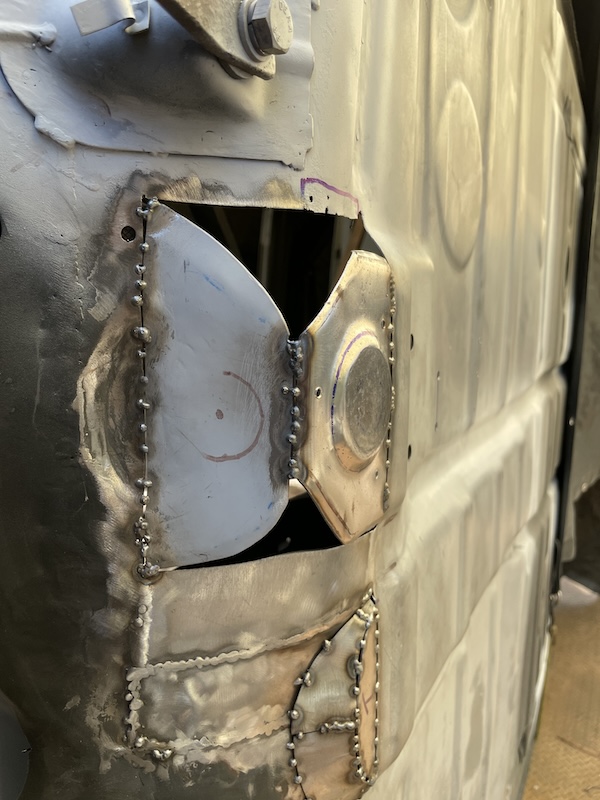 Moving on! After welding in a support [side] piece, I worked the construction paper again to form two really weird shape pieces that form flat sections. This took a bit of time to get right as you can see in the following photos. 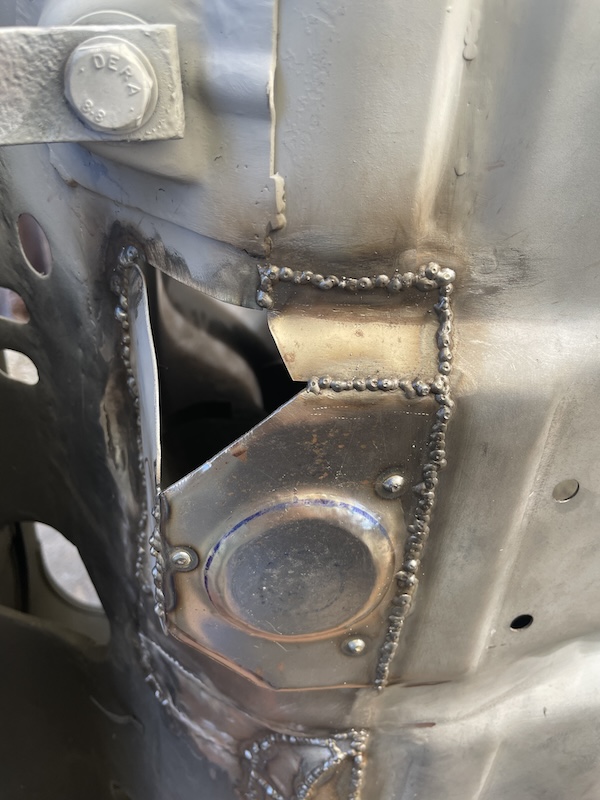 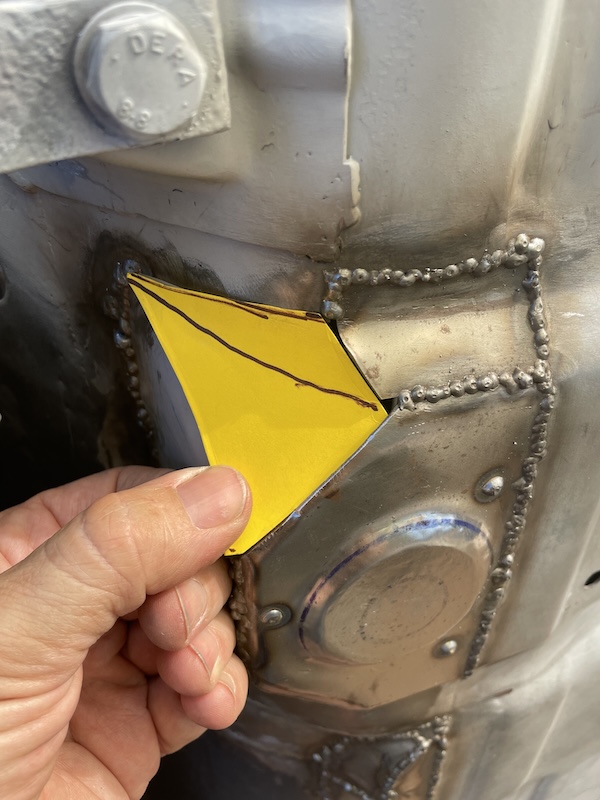 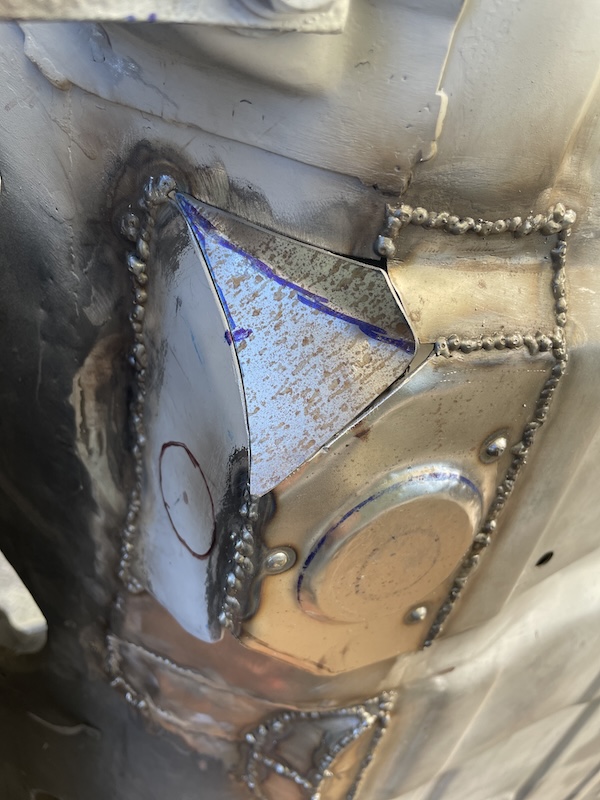 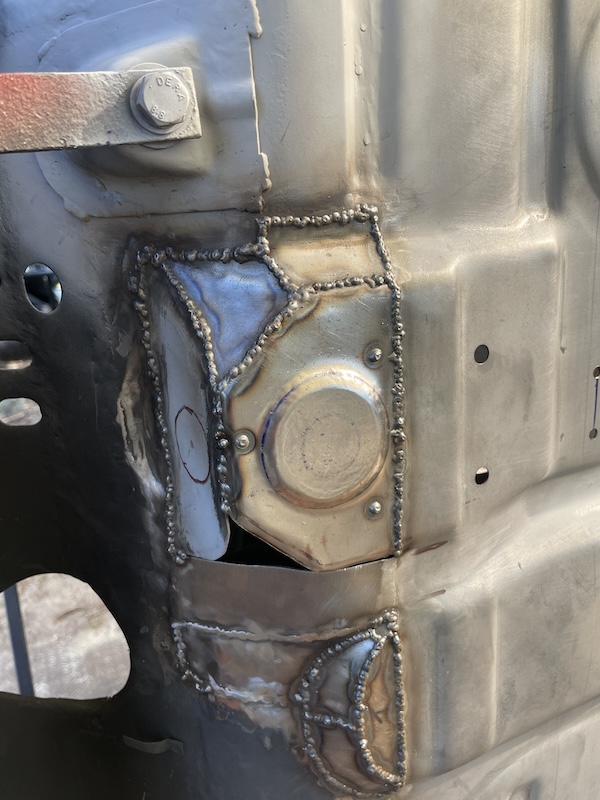 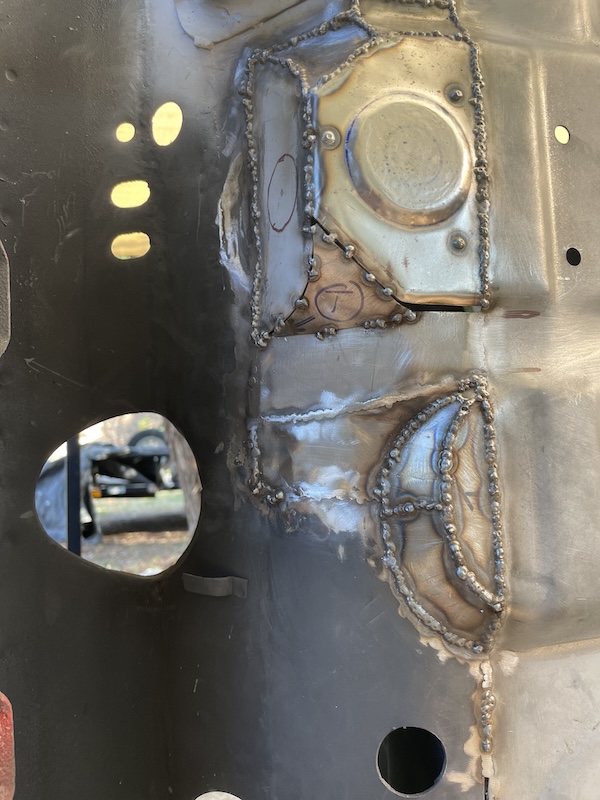 The final two photos show the completed work with the last photo showing just a light grinding of the welds. The next post will complete the work in this area. Stay tuned! 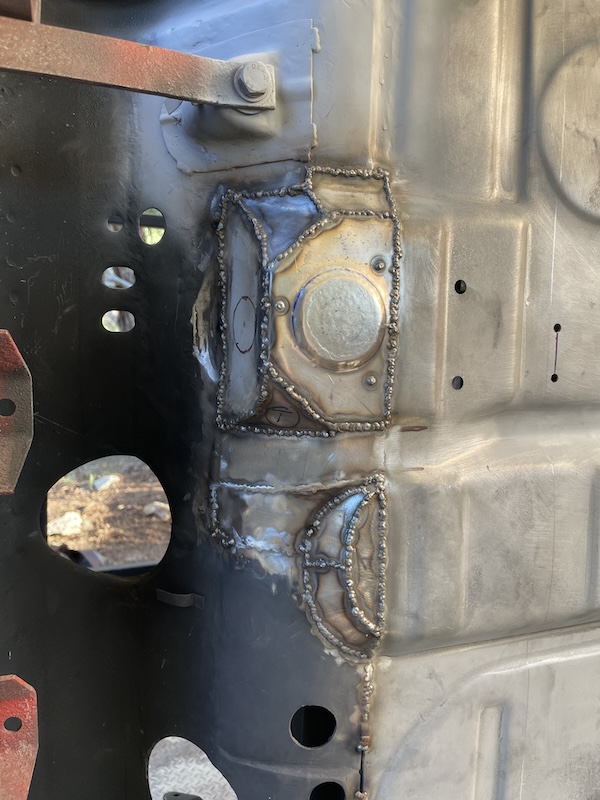 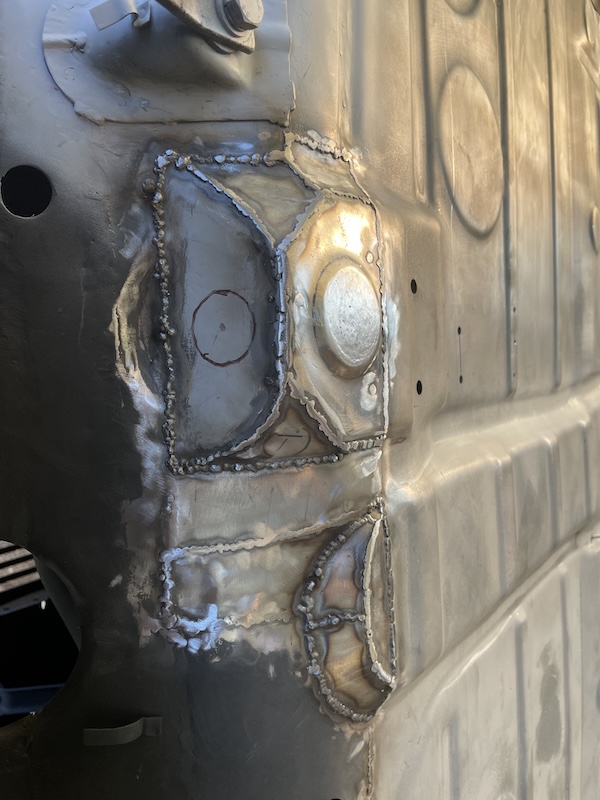 |
| friethmiller |
 Aug 25 2024, 06:00 PM Aug 25 2024, 06:00 PM
Post
#250
|
|
Senior Member    Group: Members Posts: 846 Joined: 10-February 19 From: Austin, TX Member No.: 22,863 Region Association: Southwest Region 
|
Fabrication of the Forward Floor Area - Part 3 (8/25/2024):
After Saturday's "blow-out", I had some other house-related tasks that I needed to get done. However, later in the afternoon I was able to get back out to the car. So, here are the final photos from this weekend's fabrication. While it's not perfect by any means, and I still have work / welding to be done inside, I'm pretty happy with results. Next weekend I will be welding-in the pedal cluster support bracket along with some other important tasks that must be done before flipping the car around to finish the other side. Cheers! (IMG:style_emoticons/default/beerchug.gif) 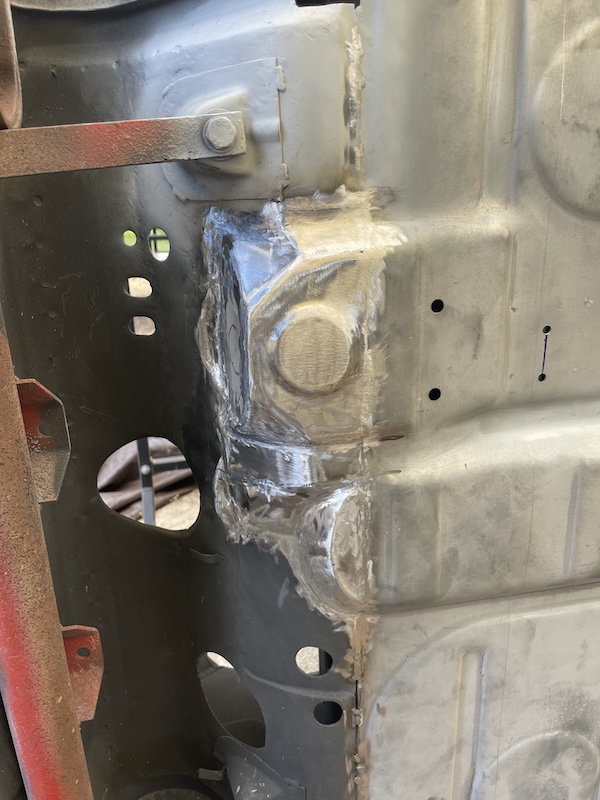 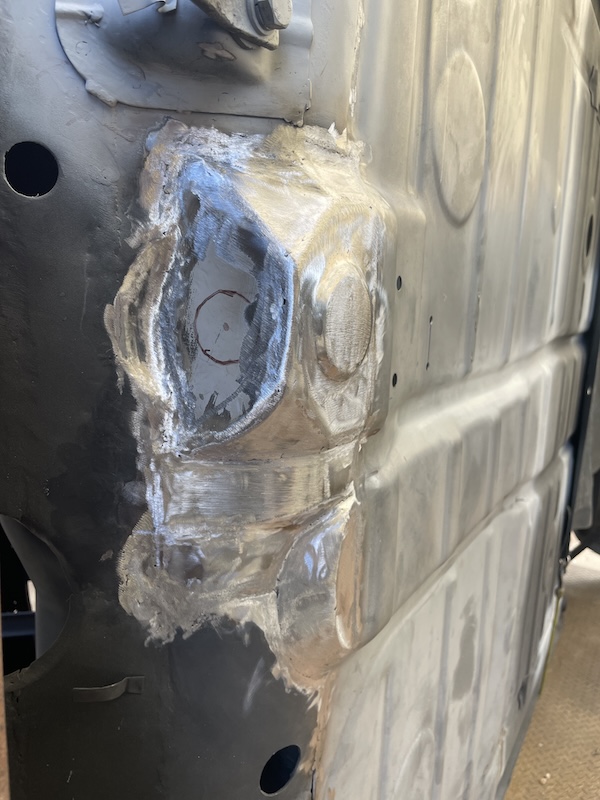 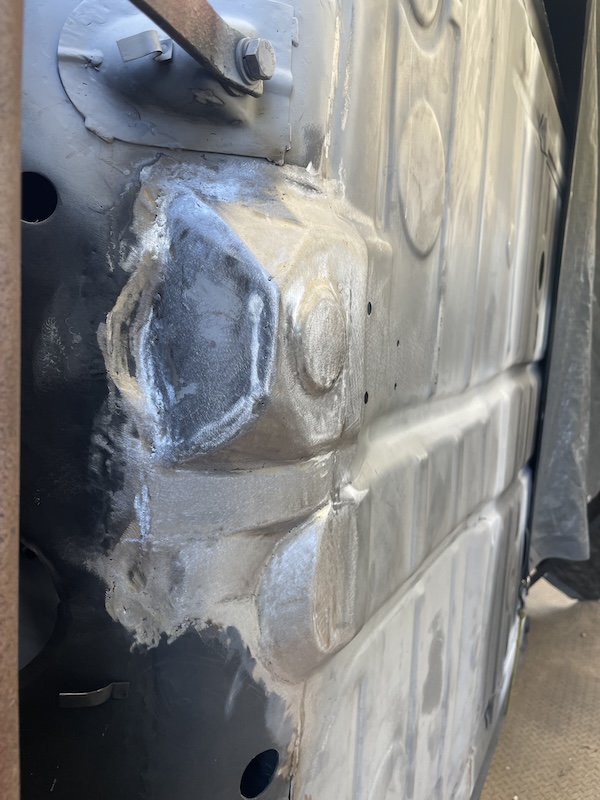 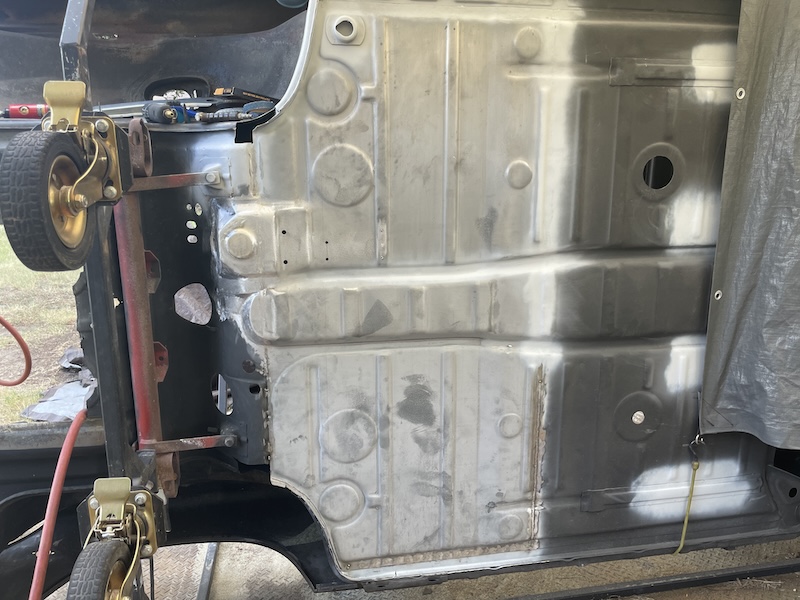 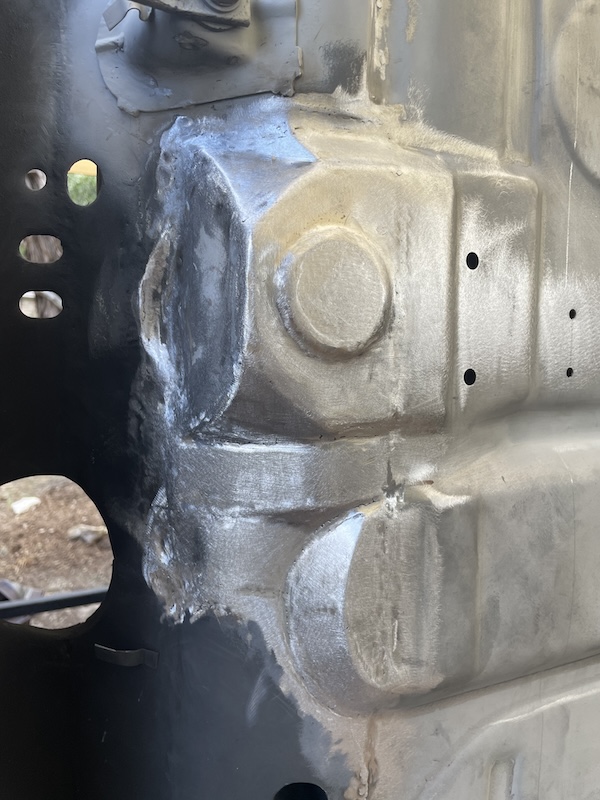 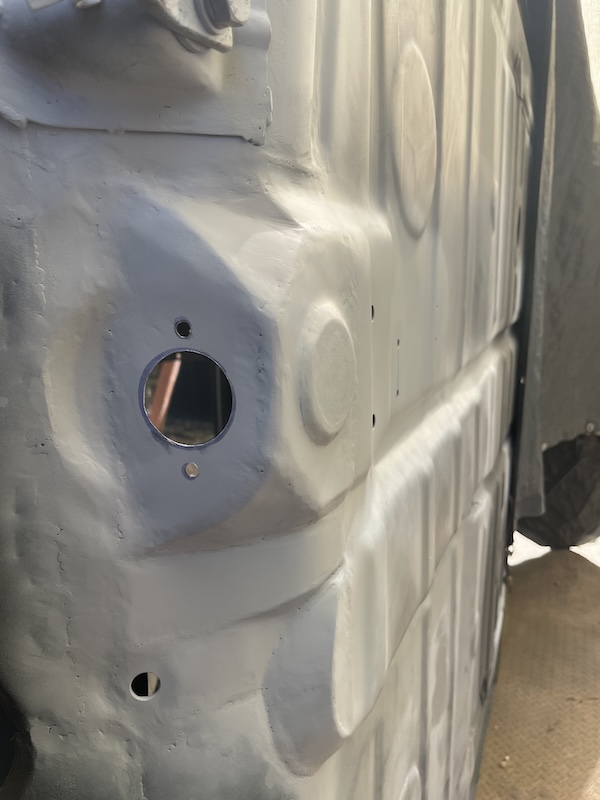 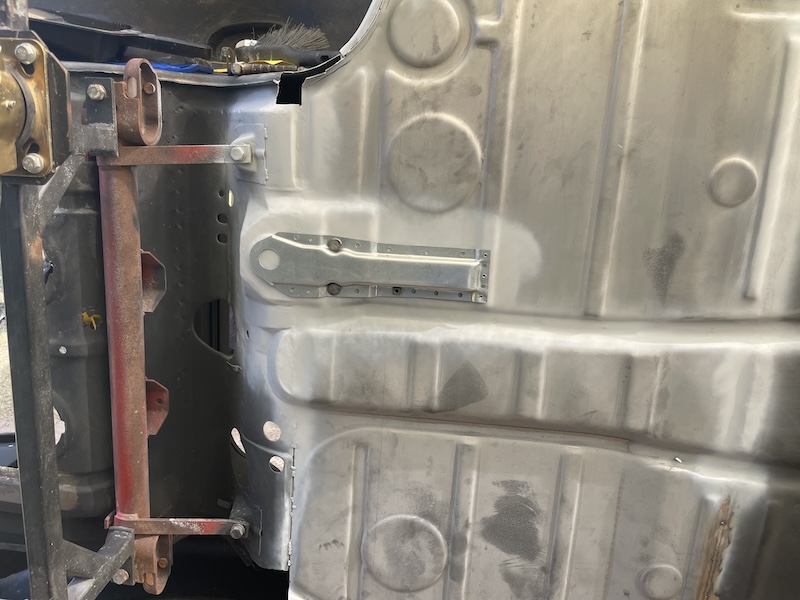 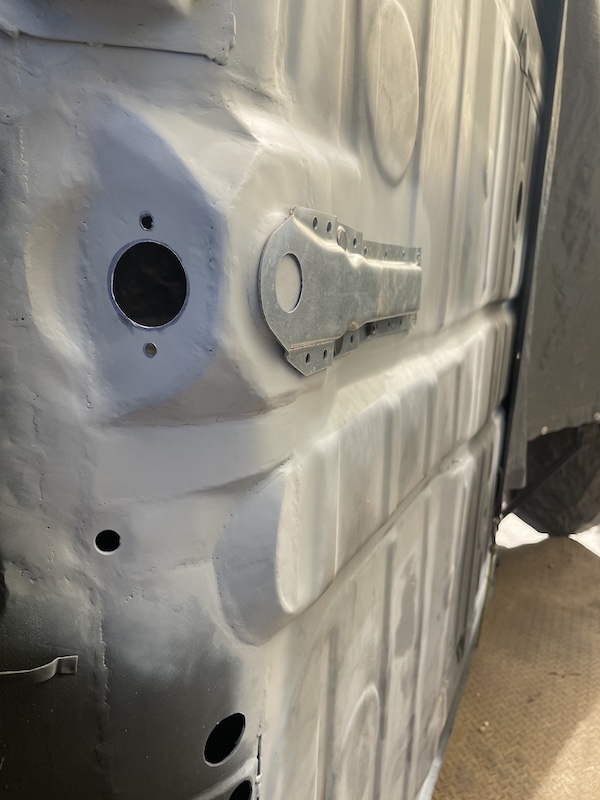 |
| bkrantz |
 Aug 25 2024, 07:34 PM Aug 25 2024, 07:34 PM
Post
#251
|
|
914 Guru      Group: Members Posts: 8,342 Joined: 3-August 19 From: SW Colorado Member No.: 23,343 Region Association: Rocky Mountains 
|
Save your knees. Get one of these.
Attached thumbnail(s) 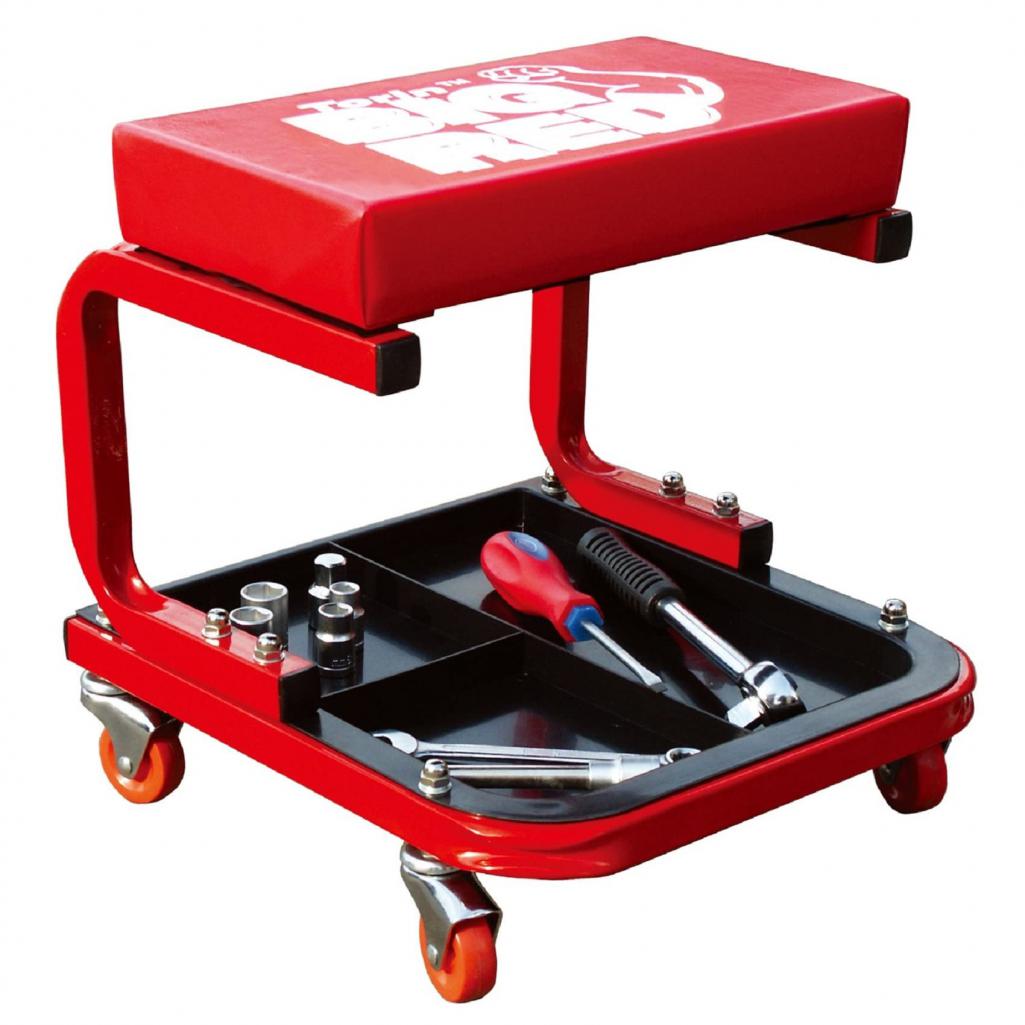
|
| friethmiller |
 Aug 26 2024, 08:10 AM Aug 26 2024, 08:10 AM
Post
#252
|
|
Senior Member    Group: Members Posts: 846 Joined: 10-February 19 From: Austin, TX Member No.: 22,863 Region Association: Southwest Region 
|
Workmanship as usual, outstanding (IMG:style_emoticons/default/beerchug.gif) (IMG:style_emoticons/default/beerchug.gif) I am warming up for restoration #3 and have been taking notes of your sequence and setups. Thank you for the great documentation Do you have an ETA? status of the PP @930cabman - 3rd restoration?! Wow! I can't even imagine. I have no "real" ETA for completion of this body. I can tell you that once the floor is finished, I plan to install the rear fenders with the doors "on" and then weld in the new door sills. After that, doors come back off as I tackle the front of the car. There's a bit of work up front, for sure. Especially around fabricating an improved intake for a larger A/C condenser. Oh, and I'm not sure what "PP" stands for, sorry. |
| Montreal914 |
 Aug 26 2024, 02:24 PM Aug 26 2024, 02:24 PM
Post
#253
|
|
Senior Member    Group: Members Posts: 1,809 Joined: 8-August 10 From: Claremont, CA Member No.: 12,023 Region Association: Southern California 
|
…was rust treated and primed with weld-thru primer. After bumping up the welder heat/wire speed, I zapped this in place and ground the welds down. So cranking up the welder is the trick to eliminate the splatter with the weld through primer? Damn I was struggling with that yesterday. Your project is coming along well! Getting that floor in is quite a milestone! (IMG:style_emoticons/default/smilie_pokal.gif) |
| friethmiller |
 Aug 26 2024, 03:12 PM Aug 26 2024, 03:12 PM
Post
#254
|
|
Senior Member    Group: Members Posts: 846 Joined: 10-February 19 From: Austin, TX Member No.: 22,863 Region Association: Southwest Region 
|
…was rust treated and primed with weld-thru primer. After bumping up the welder heat/wire speed, I zapped this in place and ground the welds down. So cranking up the welder is the trick to eliminate the splatter with the weld through primer? Damn I was struggling with that yesterday. Your project is coming along well! Getting that floor in is quite a milestone! (IMG:style_emoticons/default/smilie_pokal.gif) @Montreal914 - First off, I am a novice, untrained welder. I represent hours of OJT on my 914s and some YouTube videos... that's it (IMG:style_emoticons/default/biggrin.gif) I cranked up the welder based on the thickness of the jack point metal. In your case, [assuming you're using a shielding gas] you might try turning down the gas just a bit. I'd definitely do some trial and error, adjusting things one at a time till you're satisfied with the welds. My main issue, being outside, is air movement and it forces me to turn up the gas a bit to compensate. Sometimes I'll get a gust of wind at just the wrong moment and my rosette looks like $hit! I've even had to set up wind screens at times. (IMG:style_emoticons/default/welder.gif) |
| friethmiller |
 Aug 26 2024, 04:39 PM Aug 26 2024, 04:39 PM
Post
#255
|
|
Senior Member    Group: Members Posts: 846 Joined: 10-February 19 From: Austin, TX Member No.: 22,863 Region Association: Southwest Region 
|
Save your knees. Get one of these. @bkrantz - I like your thinking. Though, I might need one with better “off-road” characteristics (IMG:style_emoticons/default/biggrin.gif) 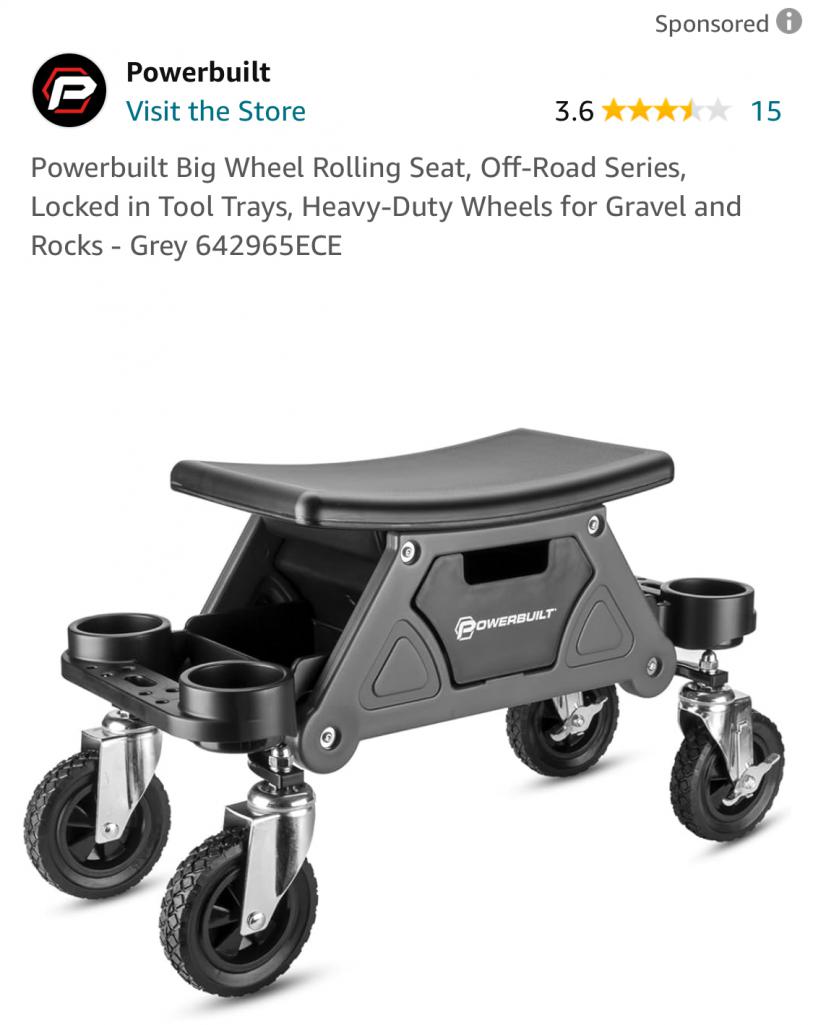 |
| bkrantz |
 Aug 26 2024, 07:20 PM Aug 26 2024, 07:20 PM
Post
#256
|
|
914 Guru      Group: Members Posts: 8,342 Joined: 3-August 19 From: SW Colorado Member No.: 23,343 Region Association: Rocky Mountains 
|
Seriously, I used my knees and scooted around on my butt for many years before my son got one for his garage. I tried it once and ordered my own the next day.
Plus the one you found has 4 cup holders! |
| friethmiller |
 Sep 2 2024, 02:26 PM Sep 2 2024, 02:26 PM
Post
#257
|
|
Senior Member    Group: Members Posts: 846 Joined: 10-February 19 From: Austin, TX Member No.: 22,863 Region Association: Southwest Region 
|
Final Floor Work - Part 1 of 4 (8/29 - 8/30/2024):
I have been working all summer on the LE's floors and this Labor Day weekend was shaping up to be my last, big push to get it done. With that said, I had a lot to do. In preparation of the holiday weekend, here's what I was able to get accomplished (Thursday and Friday evenings). 1) Prep and Weld the Pedal Cluster Support Bracket The support bracket had been on and off the car but now it was time to install it for good. I first painted the floor and the inside of the support with frame rail paint. I didn't want to rely on just primer for a part attached to the bottom of the car. I next drilled holes for rosette welds down the length of the part and bolted it in tight to the floor. I also added extra screws to help hold the part flush to the floor. After welding everything in (not my best work), I moved on to the lid holes. I left grinding the welds for Saturday. 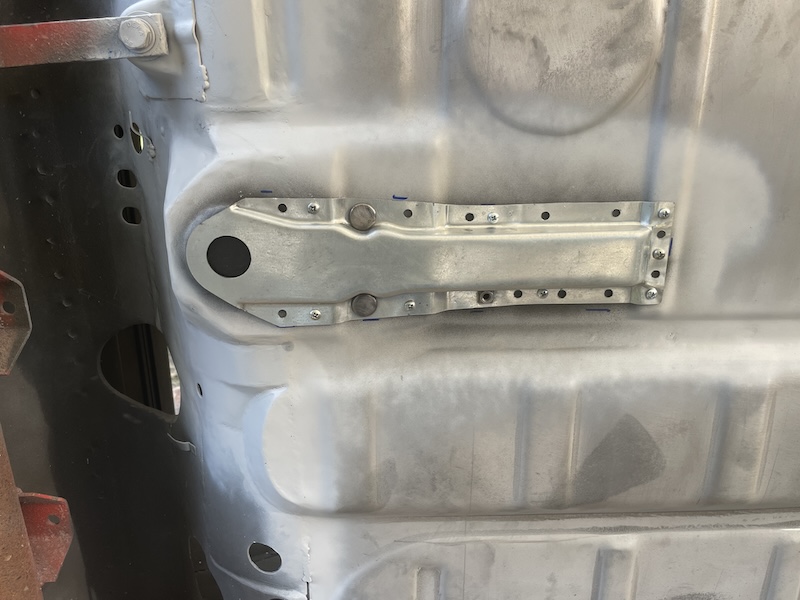 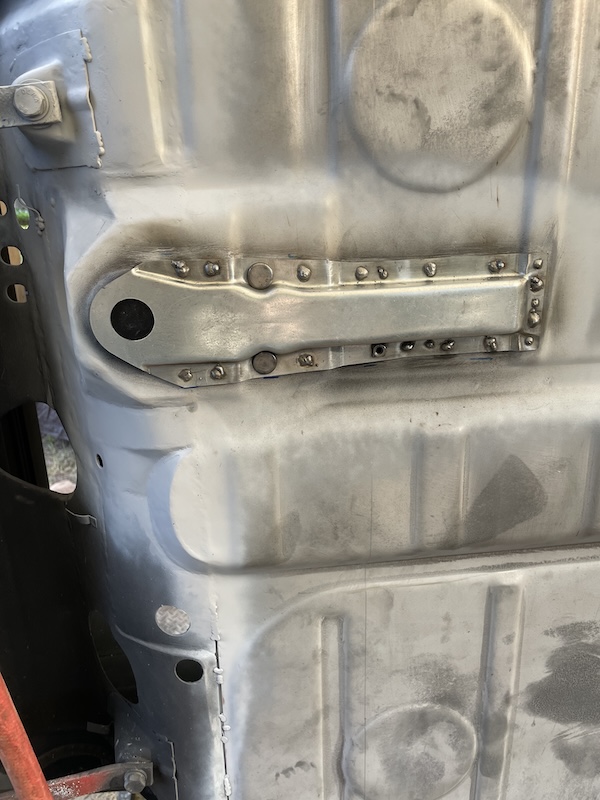 2) Cut and Finish all the Floorpan Lid Holes Marking and cutting holes for the floor lid holes is a tedious job. I use a lid hole I cut from a rusty floorpan to align and mark the outlines. Next, I used the biggest hole cutter I could find that could still cut metal to get things started. I then used my air nibbler and other cutting tools to get me close enough to finish everything off with my 2" grinder. 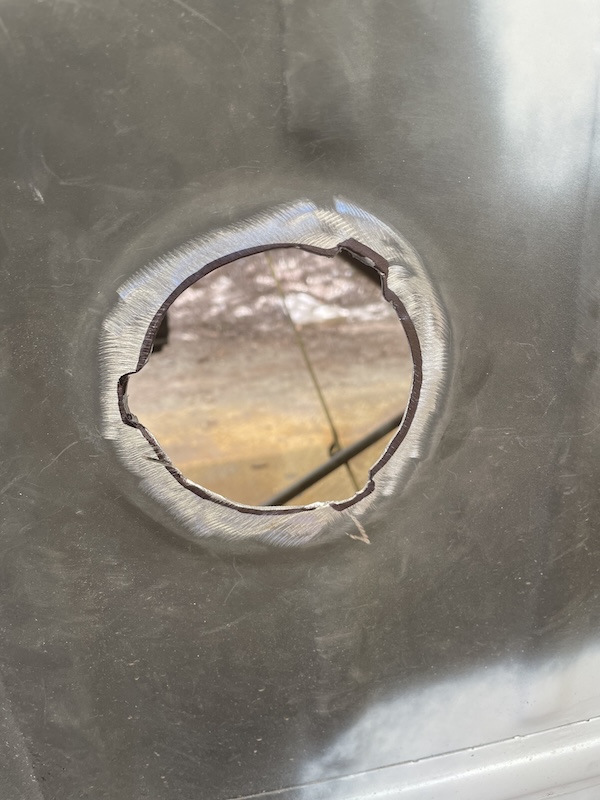 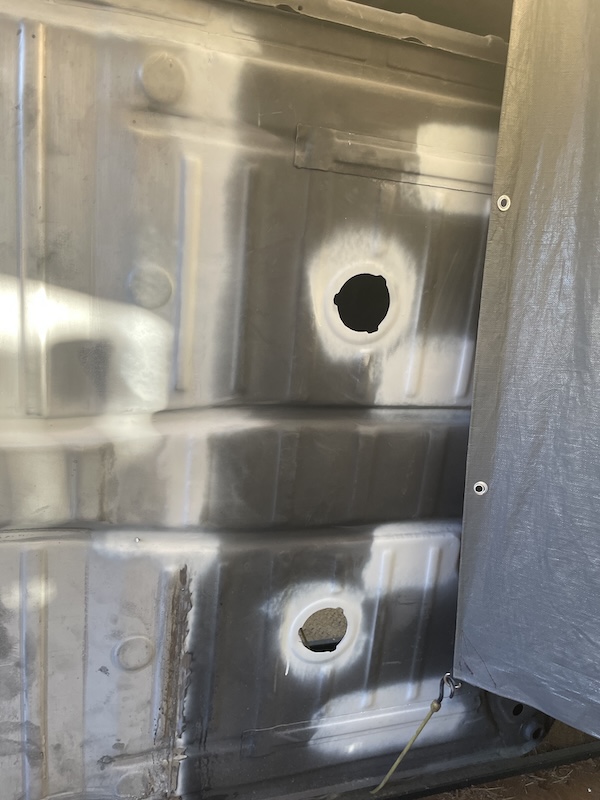 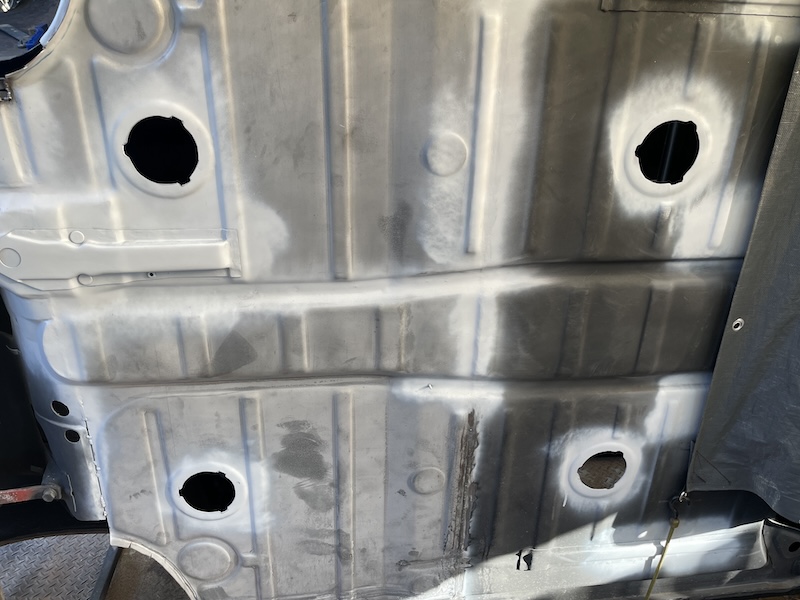 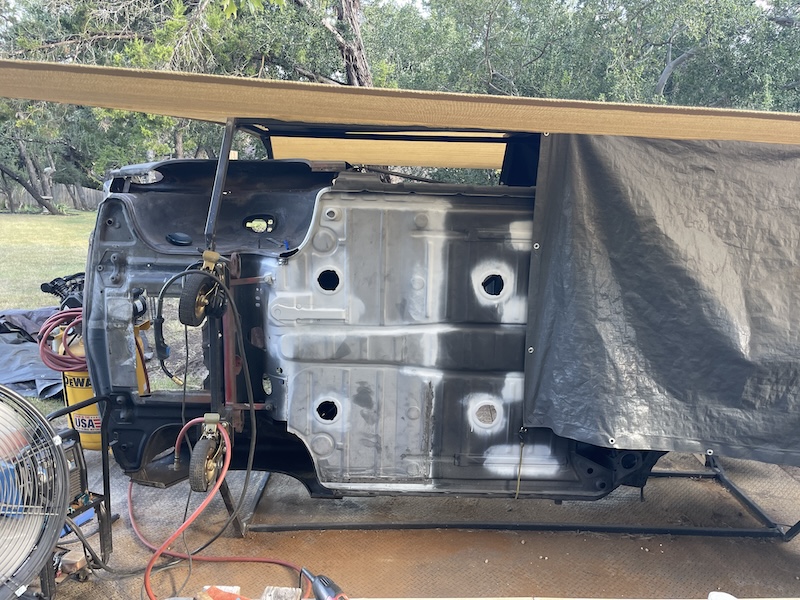 3) Find and Fix 4 Small Lids I was able to source 5 small lids from my shed. Two of them came from the floorpan I cut from my other 914 frunk for the A/C condenser. Once the lids were removed, the floor was then shipped to @seanpaulmc in Florida. Hopefully he can make good use of it on his little outdoor project. (IMG:style_emoticons/default/first.gif) Of the 5 lids I found, all of them needed some kind of repair. The worst one was pushed aside and I went to work carefully welding these guys up for a 2nd life. I left the grinding for later and moved on to started my final driver side floor patch. 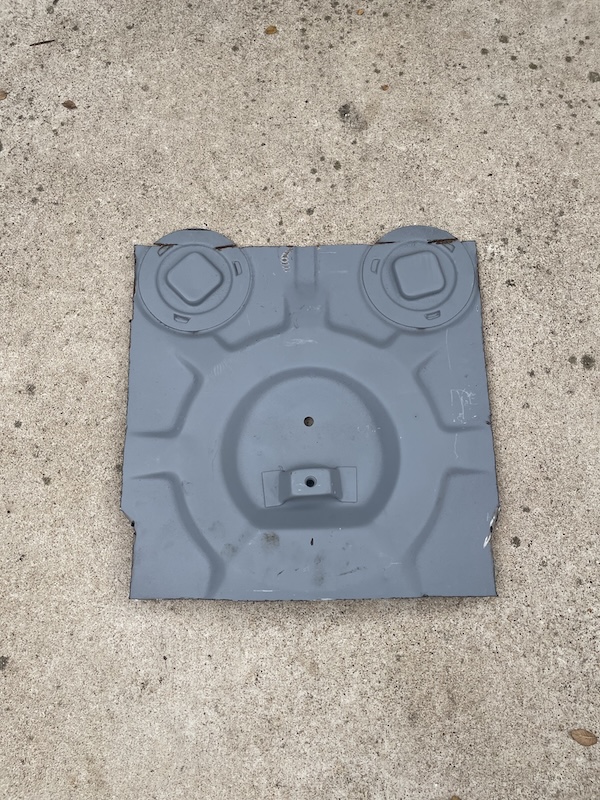 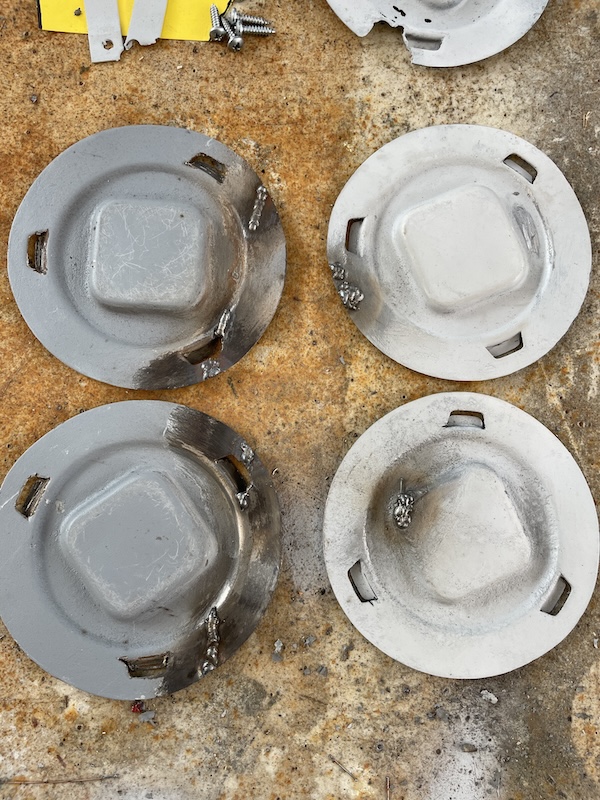 4) Get Started on the Fnal Driver Side Floor After forming a small patch for the floor section of this repair, I soon realized that I had cut the part too small. Instead of starting over, I cheated and cut the part right down the middle. I then proceeded to weld these two pieces into the floor. I did this based on experience. I know that I can trust the new metal to allow me to perform a wide stitch down the middle. I left the grinding for Saturday. 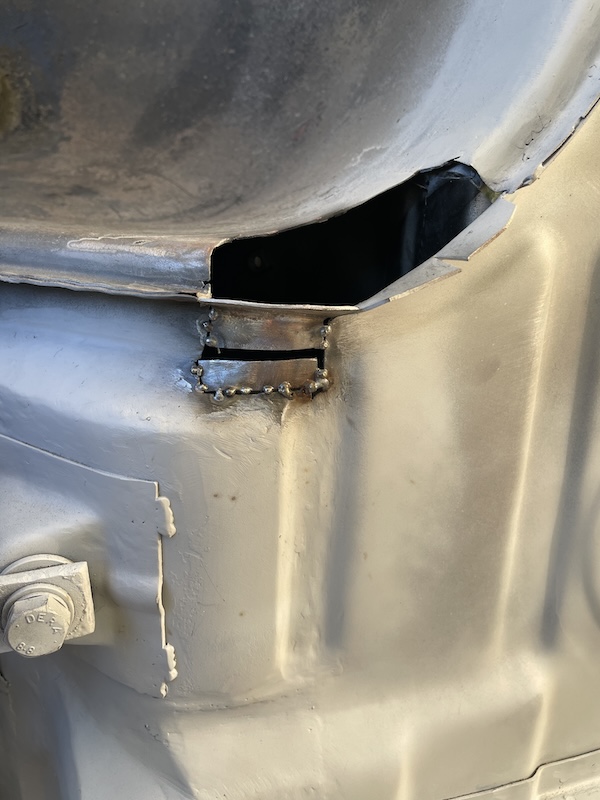 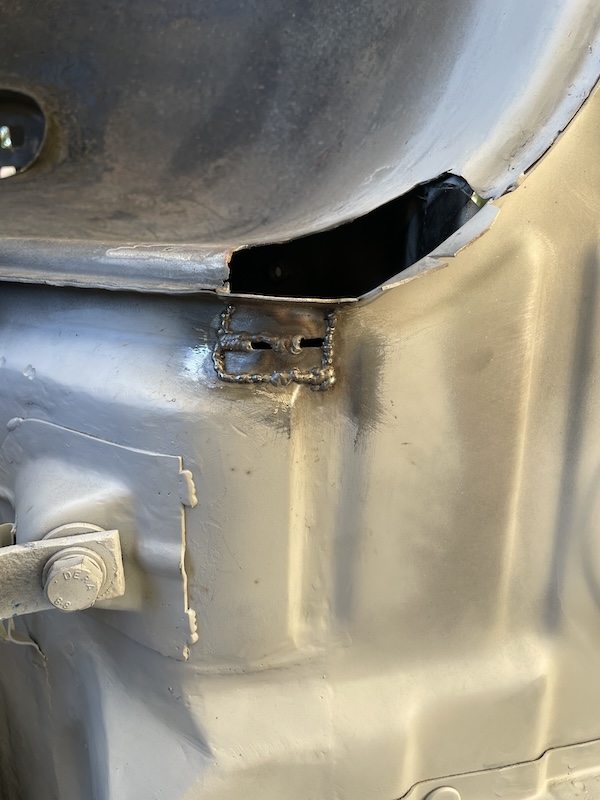 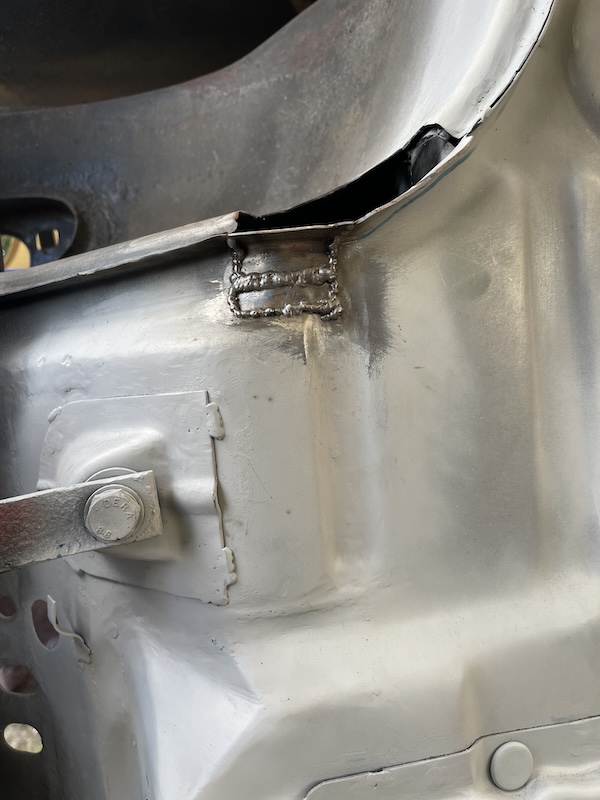 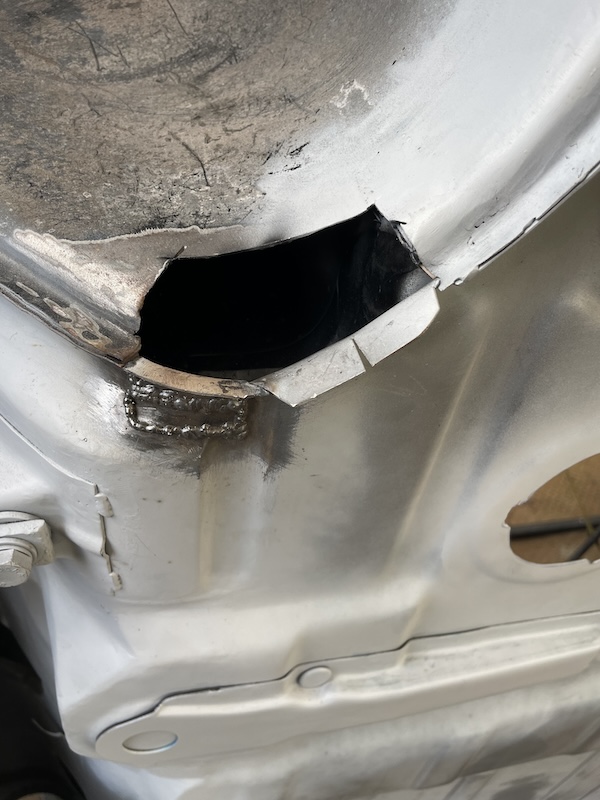 |
| friethmiller |
 Sep 2 2024, 02:59 PM Sep 2 2024, 02:59 PM
Post
#258
|
|
Senior Member    Group: Members Posts: 846 Joined: 10-February 19 From: Austin, TX Member No.: 22,863 Region Association: Southwest Region 
|
Final Floor Work - Part 2 of 4 (8/31/2024):
My goal for Saturday was to finish the patch I had started Friday and complete all remaining welding/grinding on the driver side so I could flip the car around to finish the remaining work on the passenger side. 1) Completing the Wheel Well Patch Ok, I've struggled on these weird shaped panel patches in the past. However, I've found they are actually easy to make and it only takes two pair of channel lock pliers. It starts with the paper form that replicates the shape of the part. Here you can see my dashed line represents the soft curve and the solid line is the 90 bend. I begin by forming the soft curve using the pliers facing each other along the the dashed line. I work this back and forth, making small bends at a time. Once I think I'm close, I move on to the 90 degree bend using one of the pliers to bend the metal right at the solid bend line. For this patch, I actually used clamps to hold it in place in the hole and made the final adjustments using a hand grinder to get the piece to fit. After prep'ing the backside of the patch with primer, I welded the metal into place. I was then finally able to grind both patches and complete the repair. 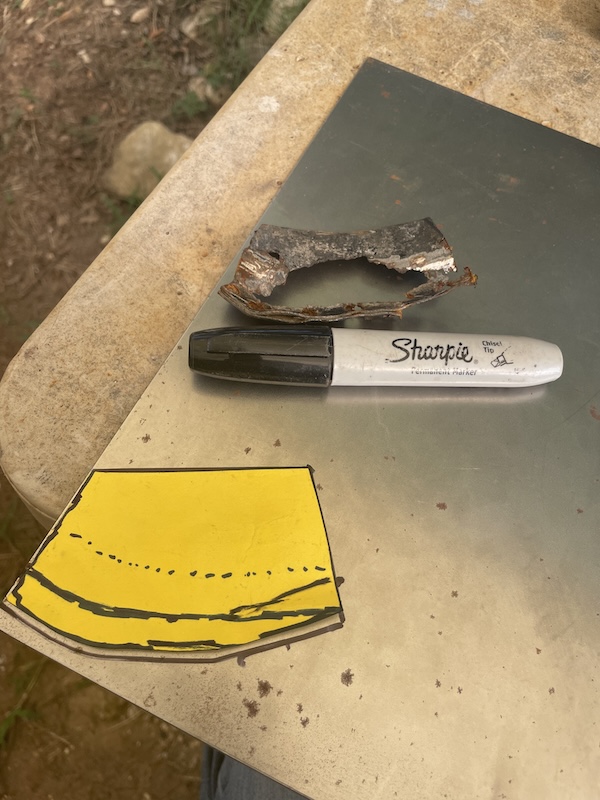 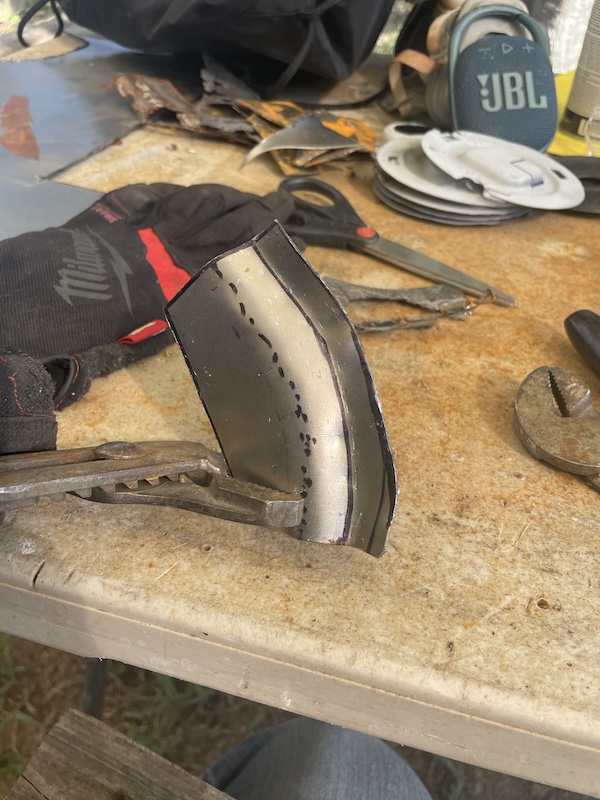 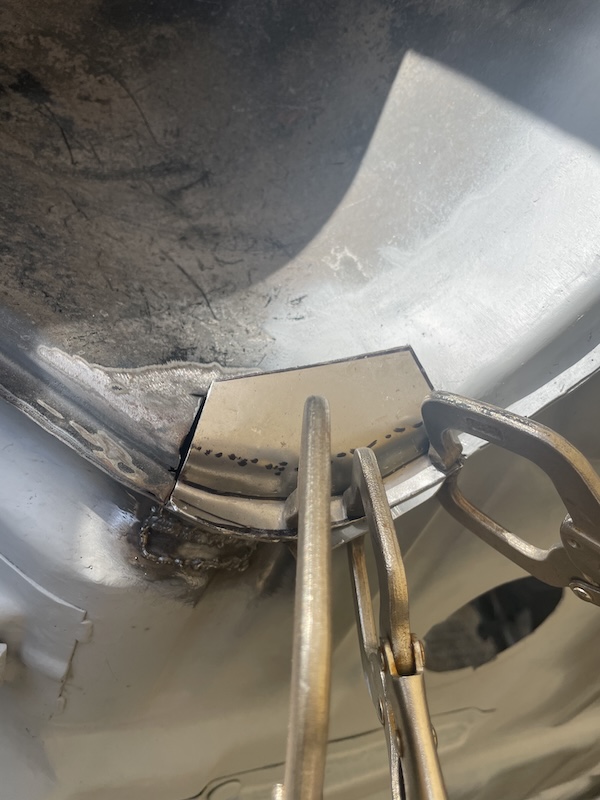 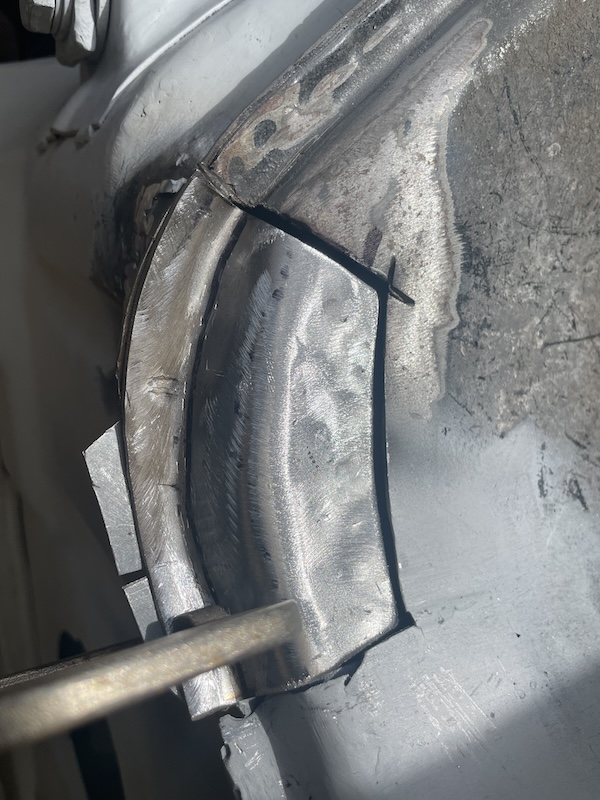 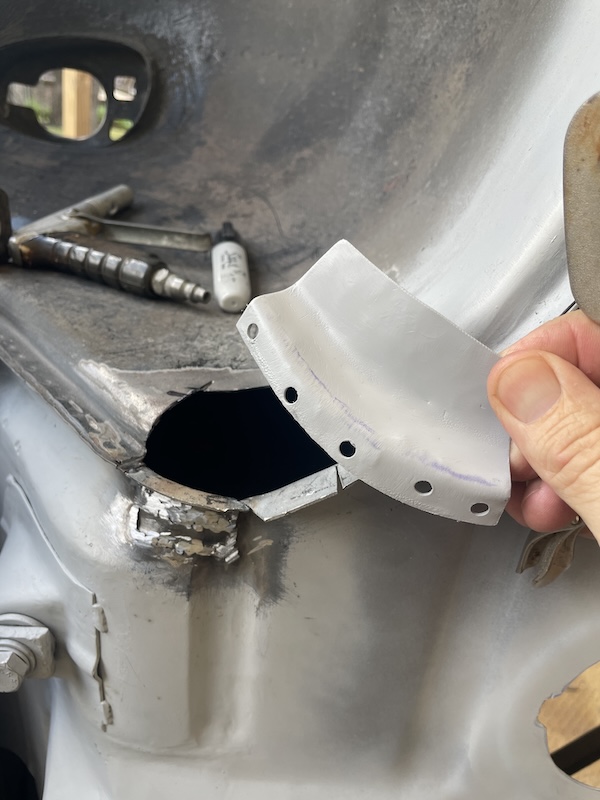 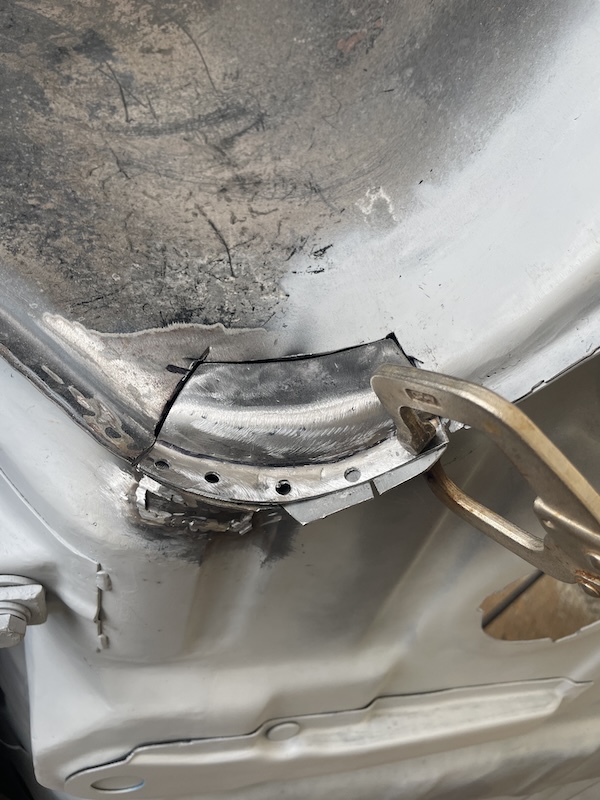 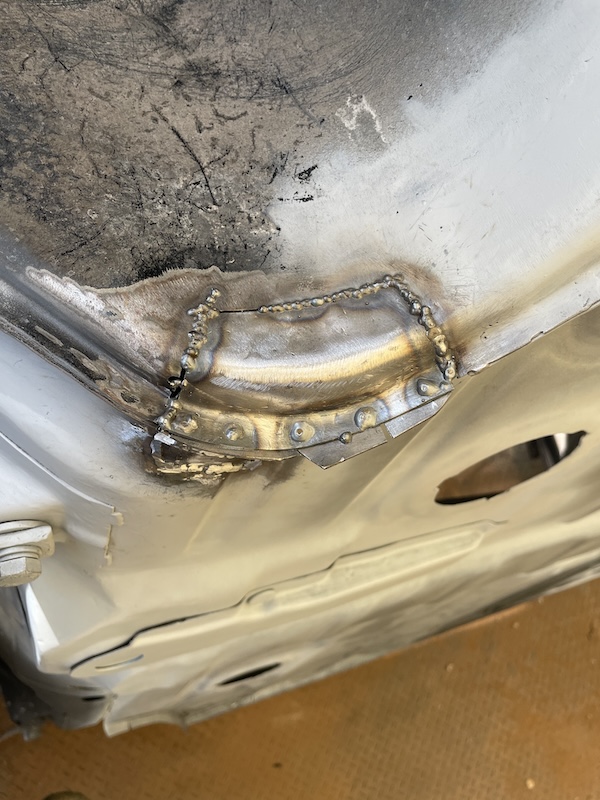 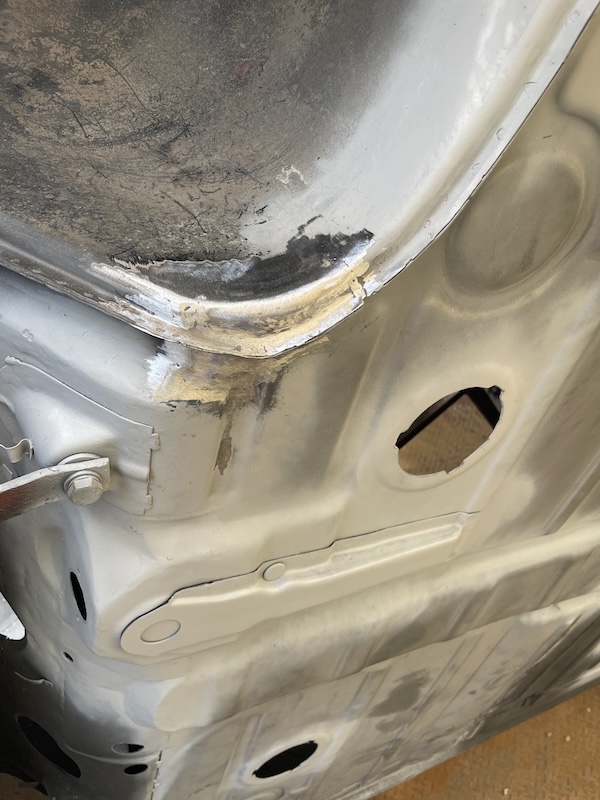 2) Final Work on the Passenger Side The remaining photos show the welding and grinding that I had to do on the passenger side of the floor. This work included welding the forward jack point, the passenger side tunnel welds, and the bottom of front wheel well. Note: I left the final hole on this side of the floor for Sunday. 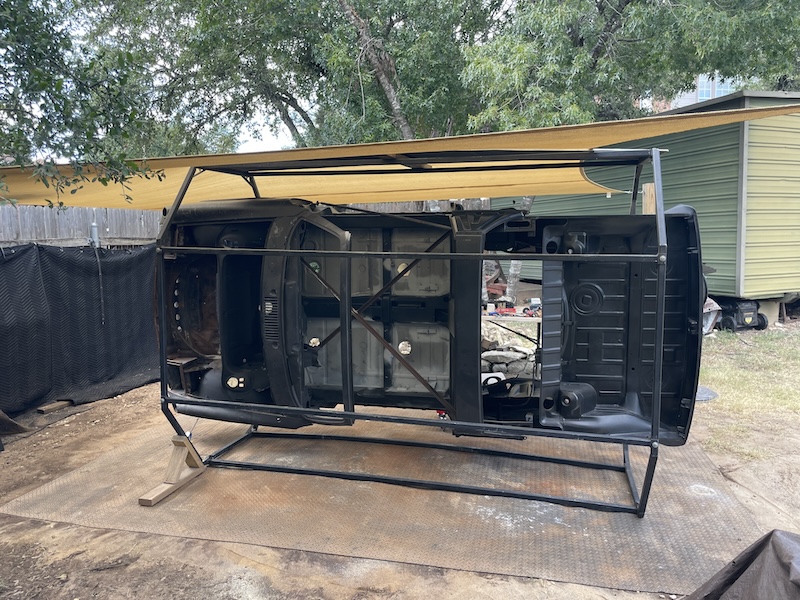 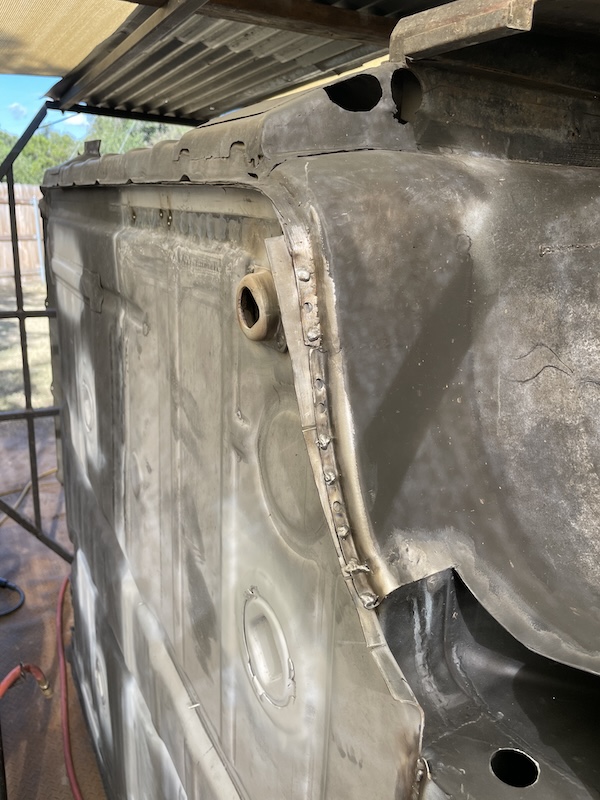 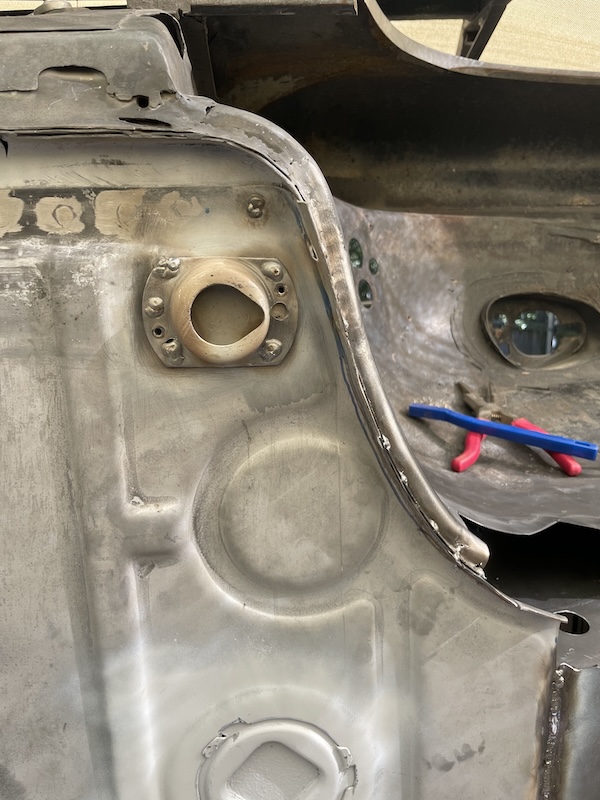 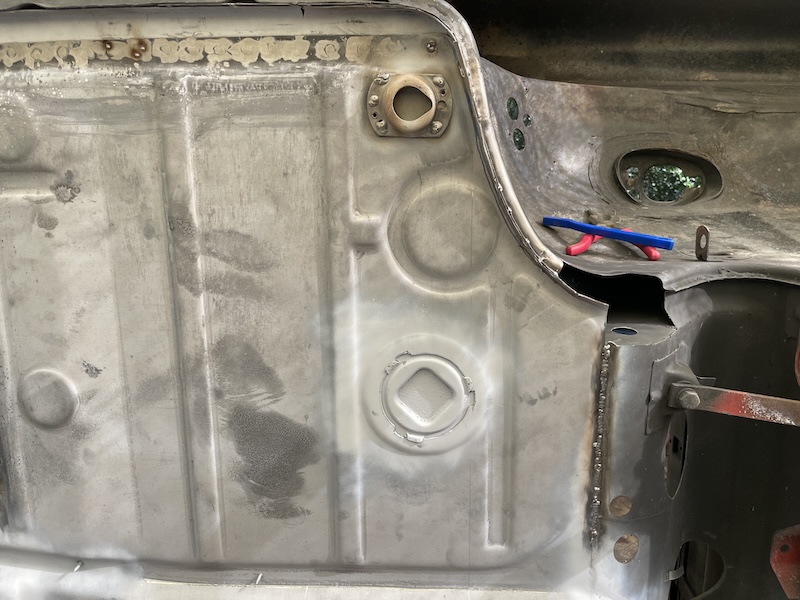 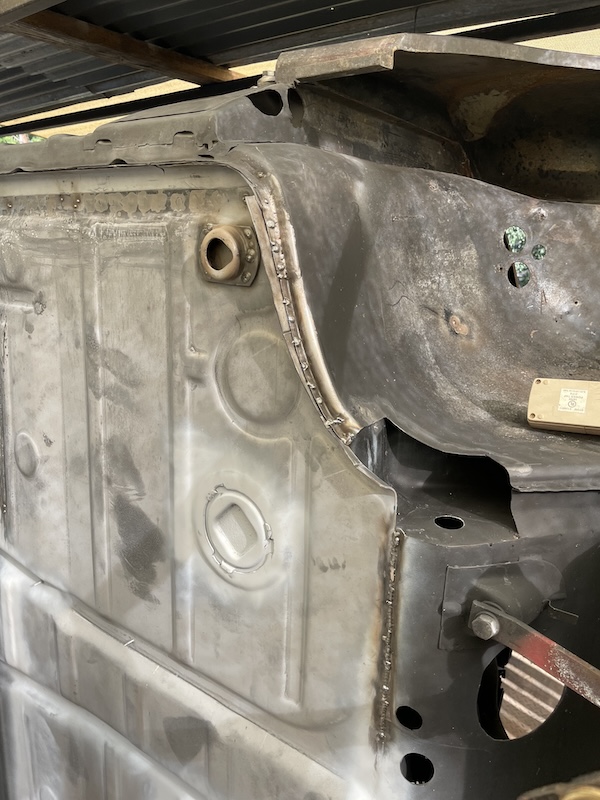 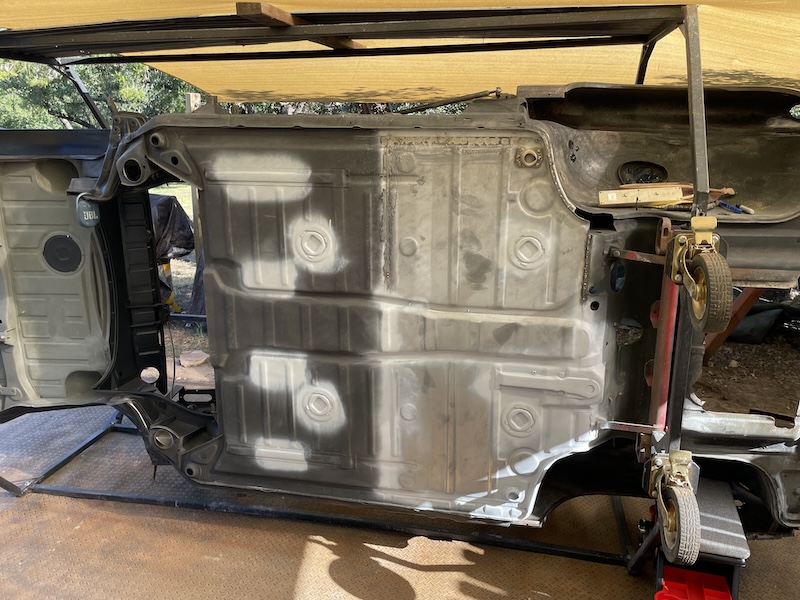 |
| 930cabman |
 Sep 2 2024, 03:06 PM Sep 2 2024, 03:06 PM
Post
#259
|
|
Advanced Member     Group: Members Posts: 4,044 Joined: 12-November 20 From: Buffalo Member No.: 24,877 Region Association: North East States 
|
From one of your earlier posts Fred: "I'm glad y'all find my "sheetmetal minutia" non-boring!"
Not really, your metal work is the real meat of the story. One of the best documented restoration's on this forum. While working outdoors in Texas (IMG:style_emoticons/default/beer.gif) |
| friethmiller |
 Sep 2 2024, 03:16 PM Sep 2 2024, 03:16 PM
Post
#260
|
|
Senior Member    Group: Members Posts: 846 Joined: 10-February 19 From: Austin, TX Member No.: 22,863 Region Association: Southwest Region 
|
Final Floor Work - Part 3 of 4 (9/1/2024):
1) Repairing the Floor Here we go! After a final grinding around the floorpan, I started the final hole on the passenger side. This will be the last repair before calling the floor DONE! Like before, I started with the floor section. The following photos show how I replicated the floor using a few pieces of metal. 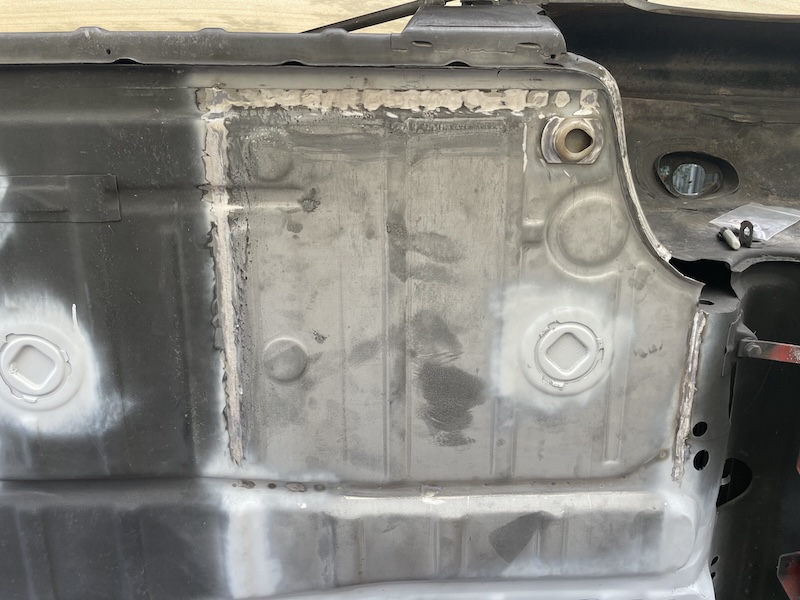 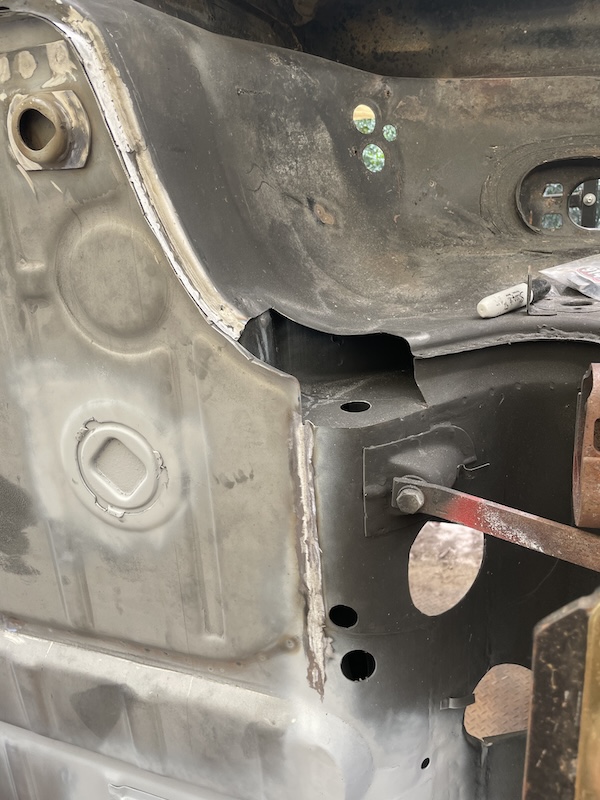 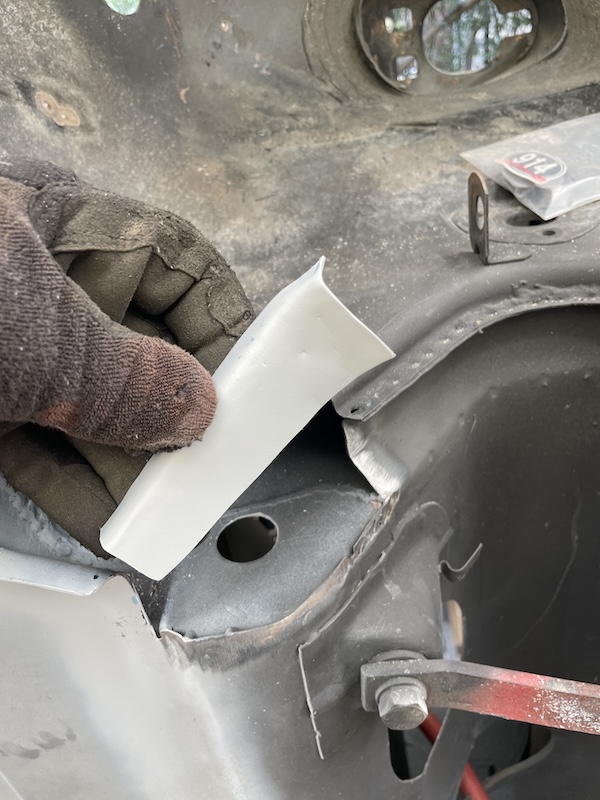 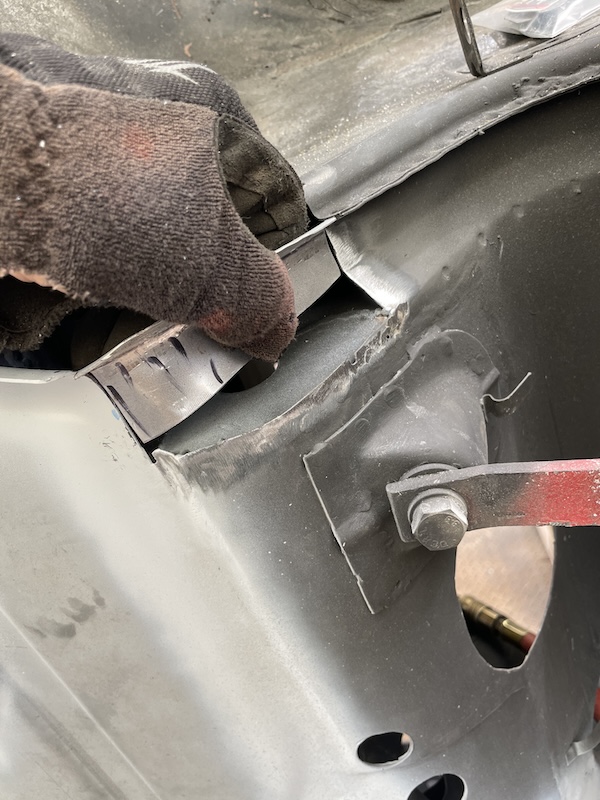 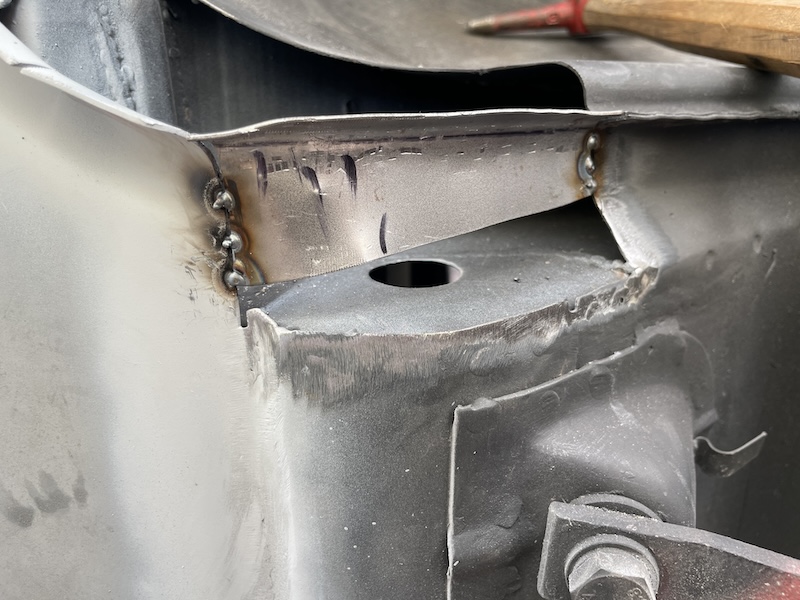 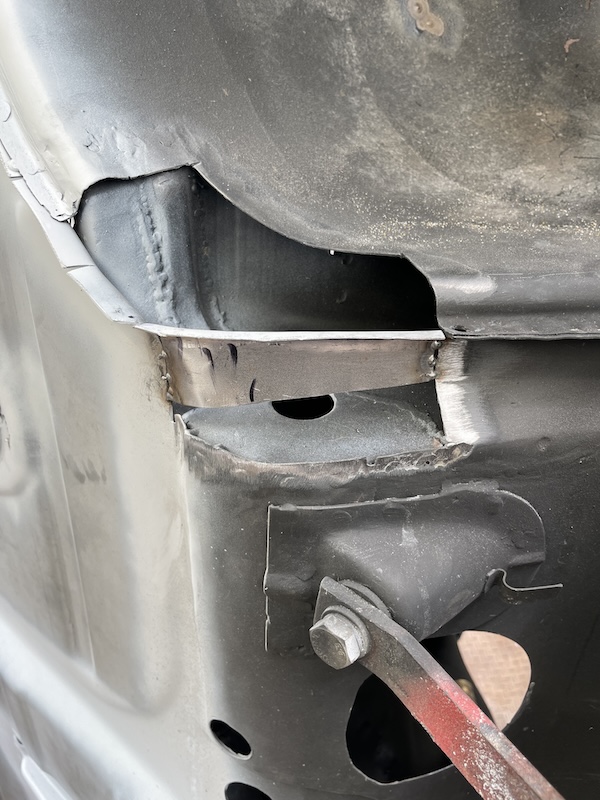 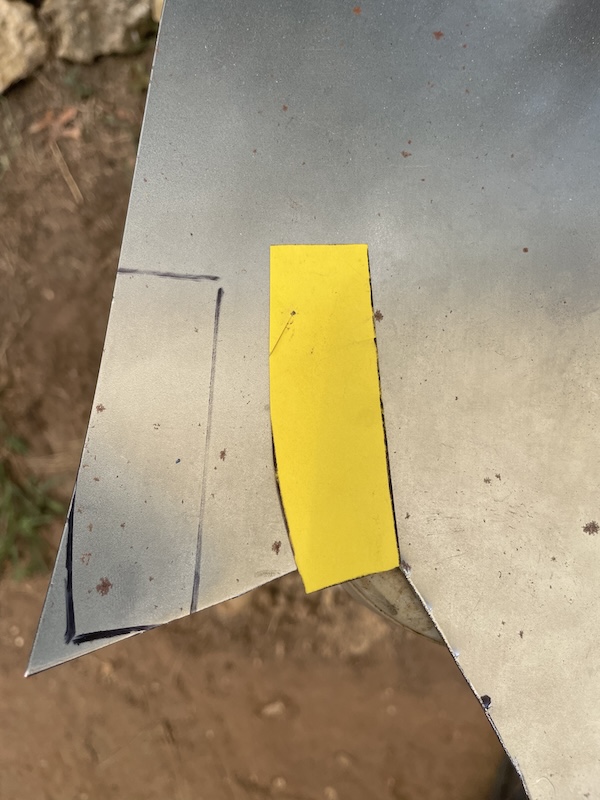 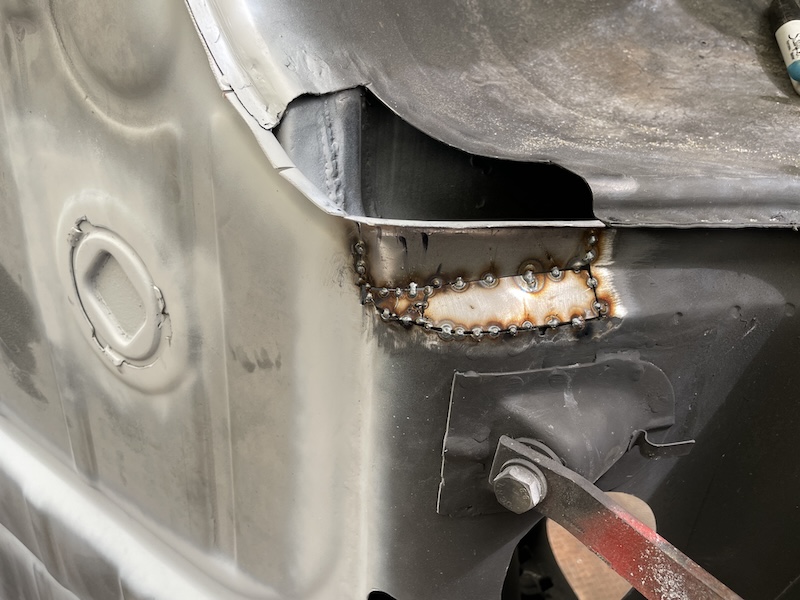 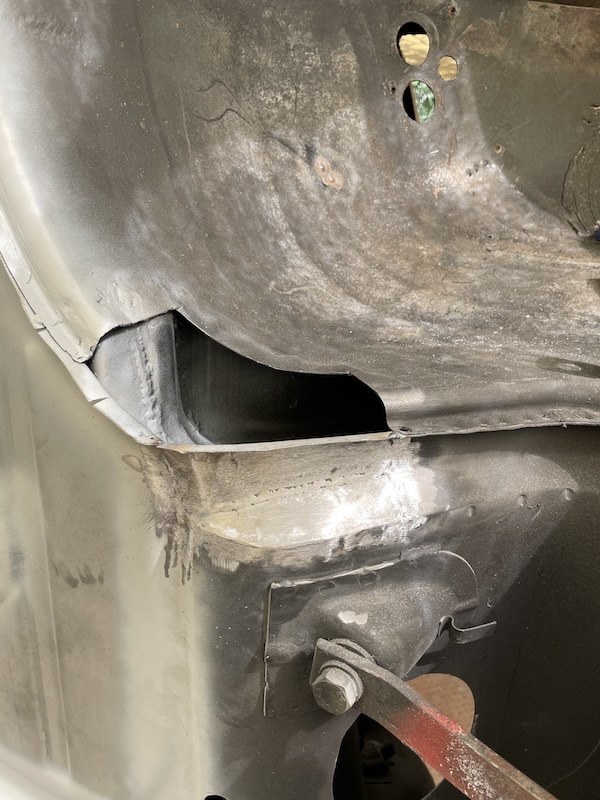 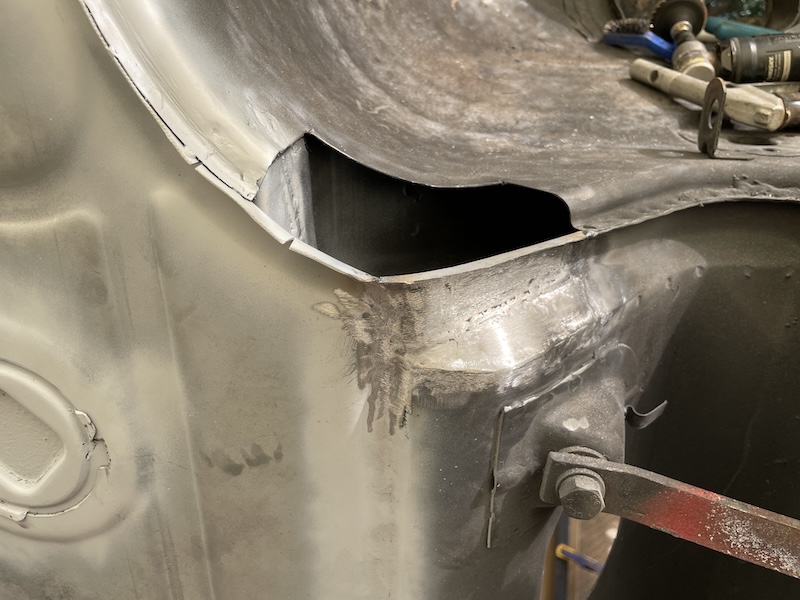 2) Repairing the Wheel Well Again, using my two plier technique, I formed the large patch. This area is tricky and I ended up cutting the patch into three pieces to get it to fit correctly. The following photos show the process. I left the grinding for Monday. Thank goodness for the extra day. 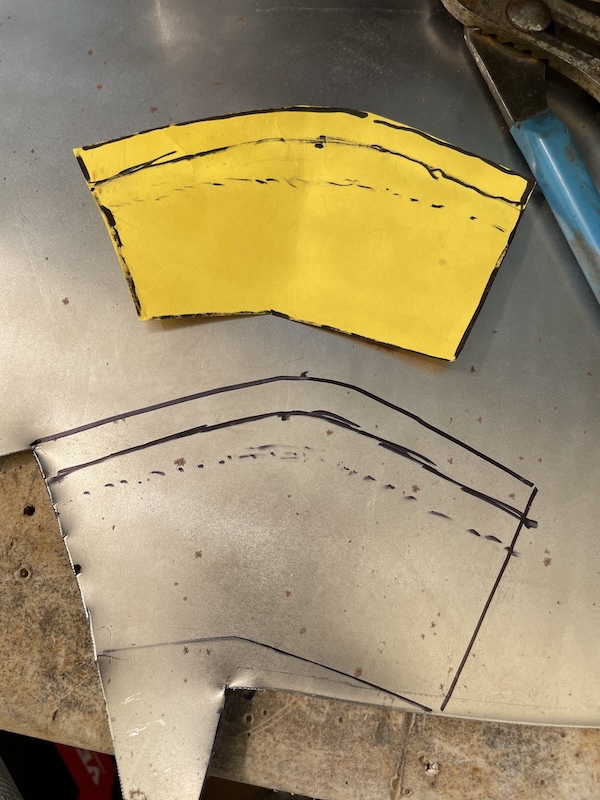 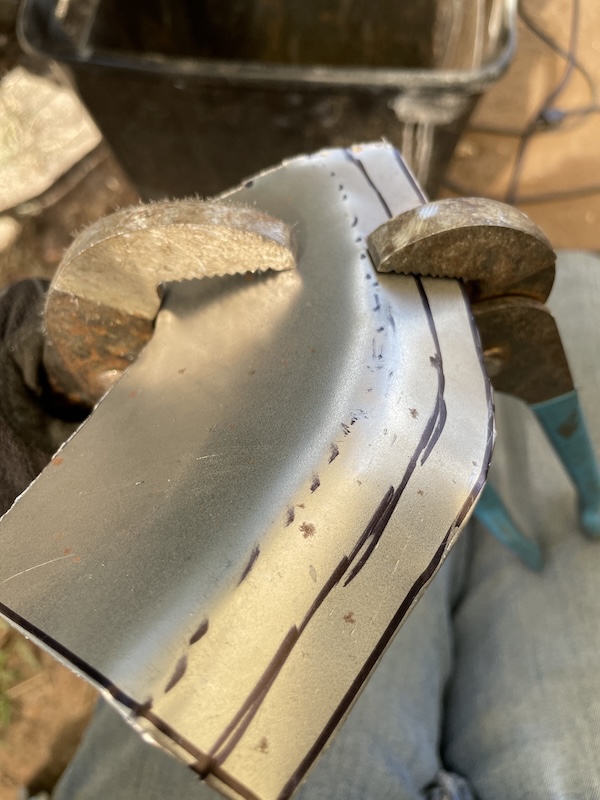 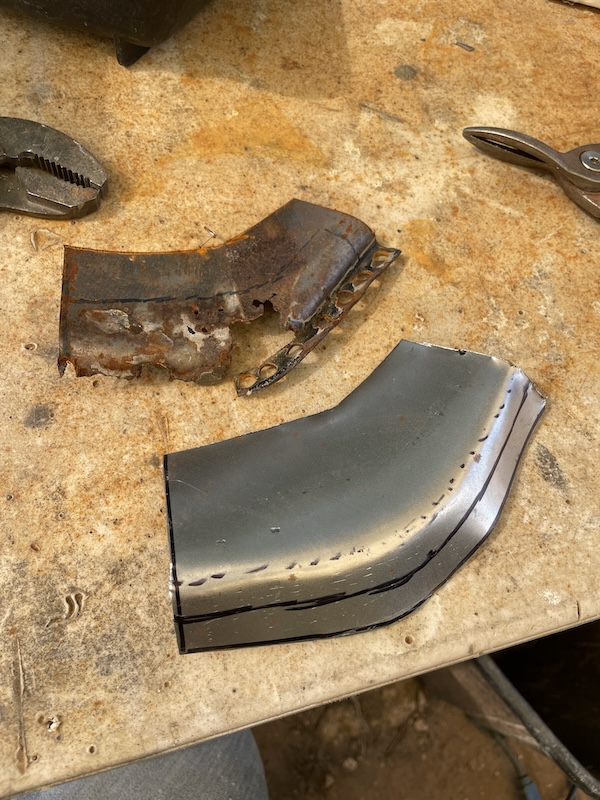 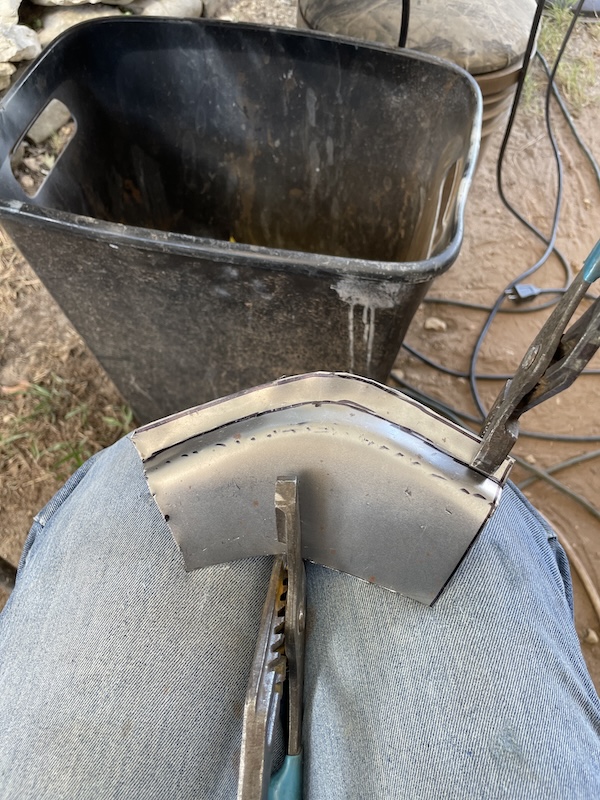 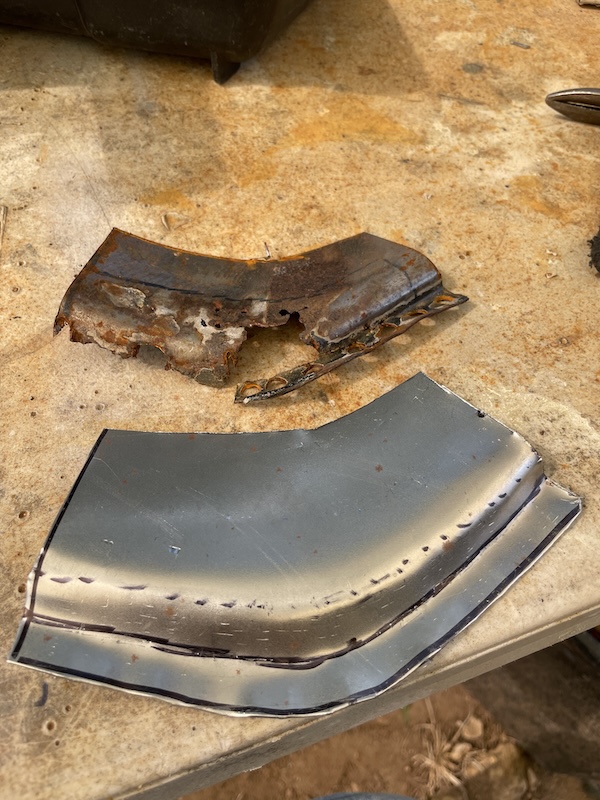 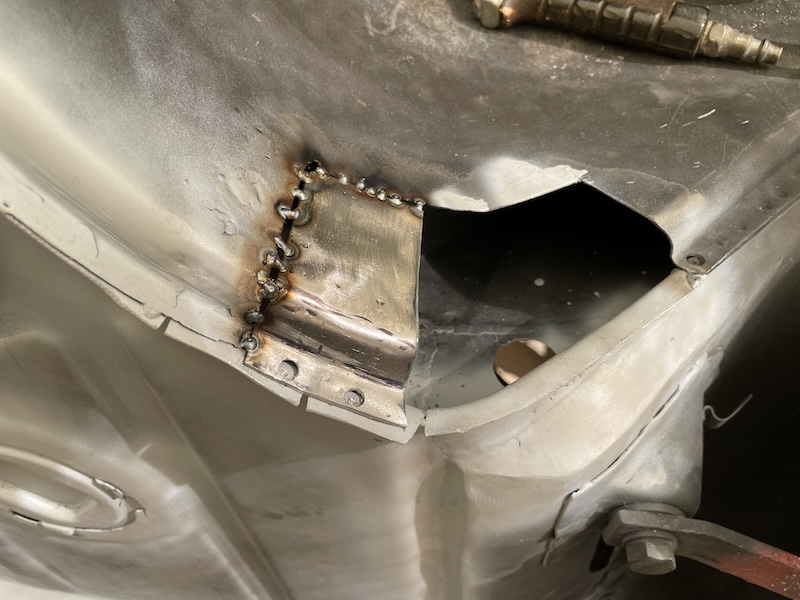 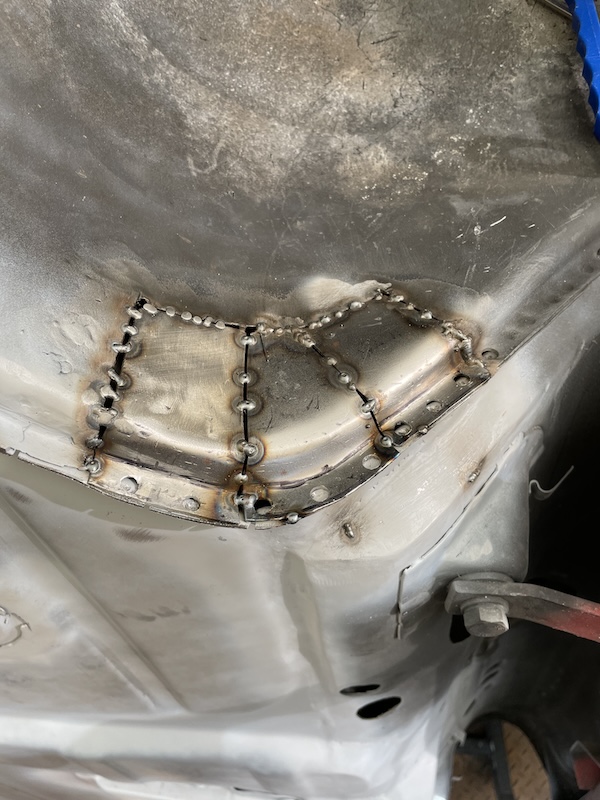 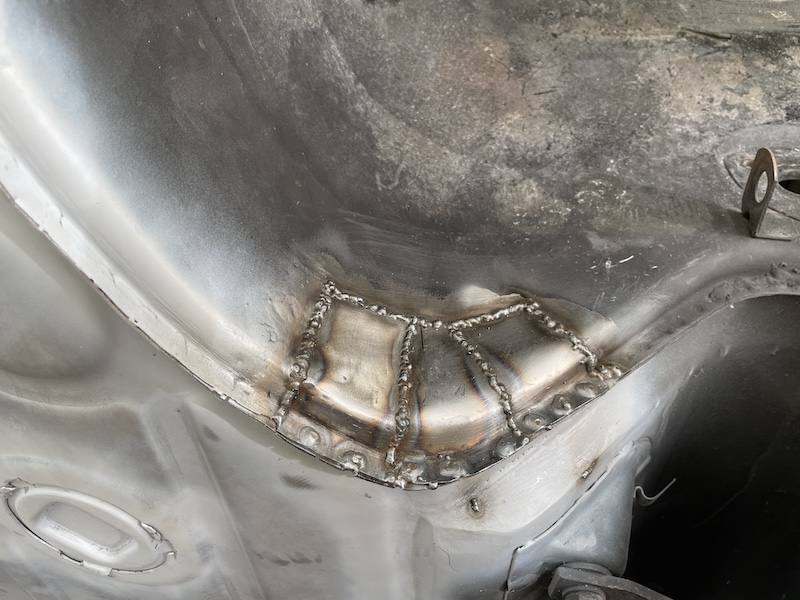 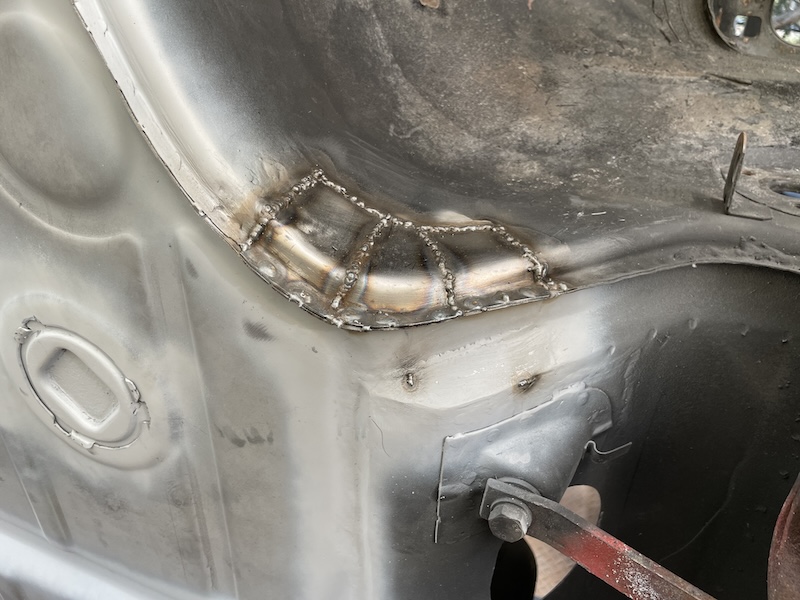 |
  |
3 User(s) are reading this topic (1 Guests and 0 Anonymous Users)
2 Members: friethmiller, East coaster

|
Lo-Fi Version | Time is now: 20th April 2025 - 05:40 AM |
Invision Power Board
v9.1.4 © 2025 IPS, Inc.


