|
|

|
Porsche, and the Porsche crest are registered trademarks of Dr. Ing. h.c. F. Porsche AG.
This site is not affiliated with Porsche in any way. Its only purpose is to provide an online forum for car enthusiasts. All other trademarks are property of their respective owners. |
|
|
  |
| bkrantz |
 Sep 9 2024, 08:11 PM Sep 9 2024, 08:11 PM
Post
#281
|
|
914 Guru      Group: Members Posts: 8,342 Joined: 3-August 19 From: SW Colorado Member No.: 23,343 Region Association: Rocky Mountains 
|
Hey, that looks like a 914!
|
| friethmiller |
 Sep 10 2024, 04:23 AM Sep 10 2024, 04:23 AM
Post
#282
|
|
Senior Member    Group: Members Posts: 846 Joined: 10-February 19 From: Austin, TX Member No.: 22,863 Region Association: Southwest Region 
|
Getting 20 clecos out does not qualify... More like 100 is "getting them out" Should look like a freaking porcupine! There he is! I see. (IMG:style_emoticons/default/idea.gif) I’m going to need more clecos. BTW, How’s that amazing ‘75 coming along? |
| friethmiller |
 Sep 10 2024, 08:21 AM Sep 10 2024, 08:21 AM
Post
#283
|
|
Senior Member    Group: Members Posts: 846 Joined: 10-February 19 From: Austin, TX Member No.: 22,863 Region Association: Southwest Region 
|
Hey, that looks like a 914! Yeah! Hey... what do you know?! You get so used to looking at the substructure for such a long time, you forget what it used to look like. (IMG:style_emoticons/default/bumblebee914.jpg) |
| technicalninja |
 Sep 10 2024, 08:53 AM Sep 10 2024, 08:53 AM
Post
#284
|
|
Advanced Member     Group: Members Posts: 2,523 Joined: 31-January 23 From: Granbury Texas Member No.: 27,135 Region Association: Southwest Region 
|
Getting 20 clecos out does not qualify... More like 100 is "getting them out" Should look like a freaking porcupine! There he is! I see. (IMG:style_emoticons/default/idea.gif) I’m going to need more clecos. BTW, How’s that amazing ‘75 coming along? Not at all... It got HOT here (finally!!!) and when it's over 100 I don't have a life. It's sleep or work on OPCs (other people's cars). 7 days a week, minimum of 12 hours a day (sometimes more like 16). Now, I make 90% of my yearly money in 4 months. It's usually 4 months, this year it will be 2.5 months... The last 5 days have been "California weather" and the phone hasn't rung. Luckily the heat is coming back and I'm usually busy till deep in October... I want to put a GM V6 in it, but that Boxster is just sitting there... Might be worth figuring out how to put a water-cooled Porsche 6 into a 914... I believe all of the M96 motors share the same outer dimensions. |
| friethmiller |
 Sep 15 2024, 08:34 PM Sep 15 2024, 08:34 PM
Post
#285
|
|
Senior Member    Group: Members Posts: 846 Joined: 10-February 19 From: Austin, TX Member No.: 22,863 Region Association: Southwest Region 
|
Rear Fenders - Passenger Side Jam, Prep, and Weld: Part 1 of 2 (9/13 - 9/15/2024):
[Warning: Lots of photos] Started off the weekend by applying seam sealer to the inner fenders on both sides. This sealant takes a good 24 hours to tack-up so I wanted to get this done as soon as possible. Doing this now is the way to go. I won't be able to get access to a lot of these areas once the fenders are reattached. 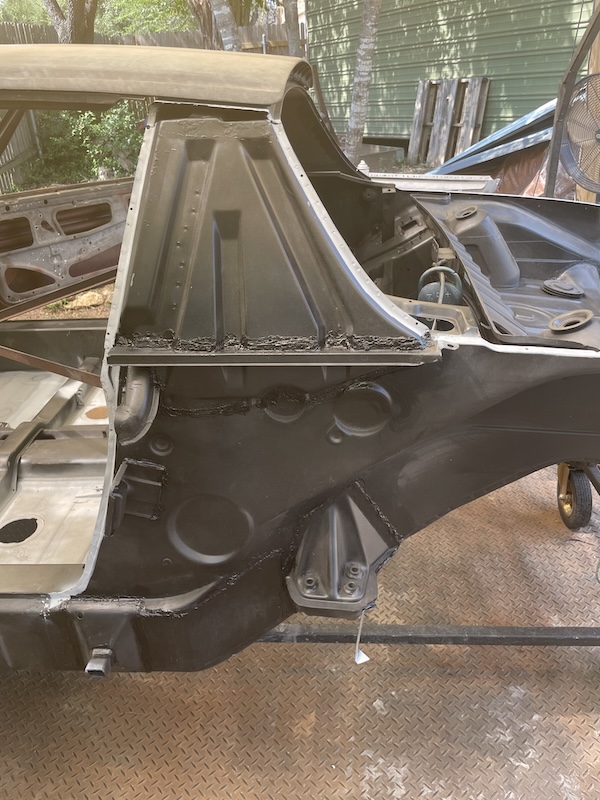 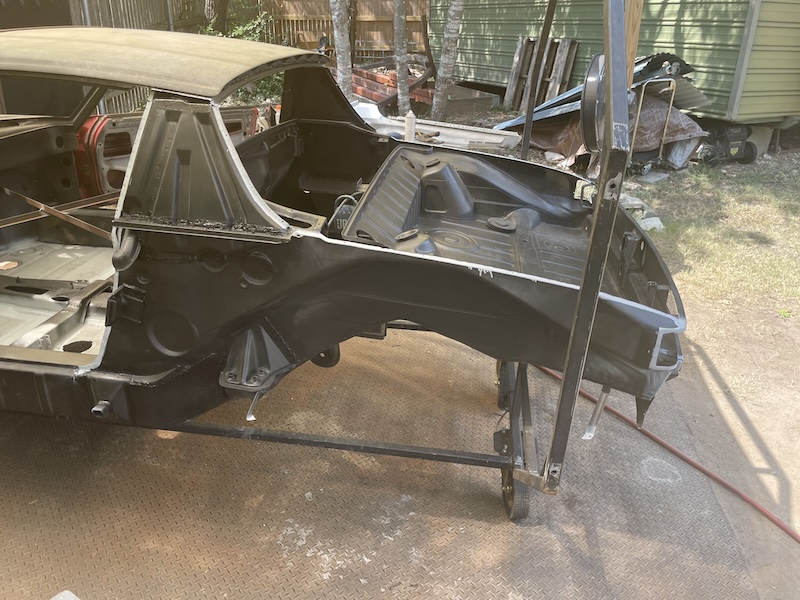 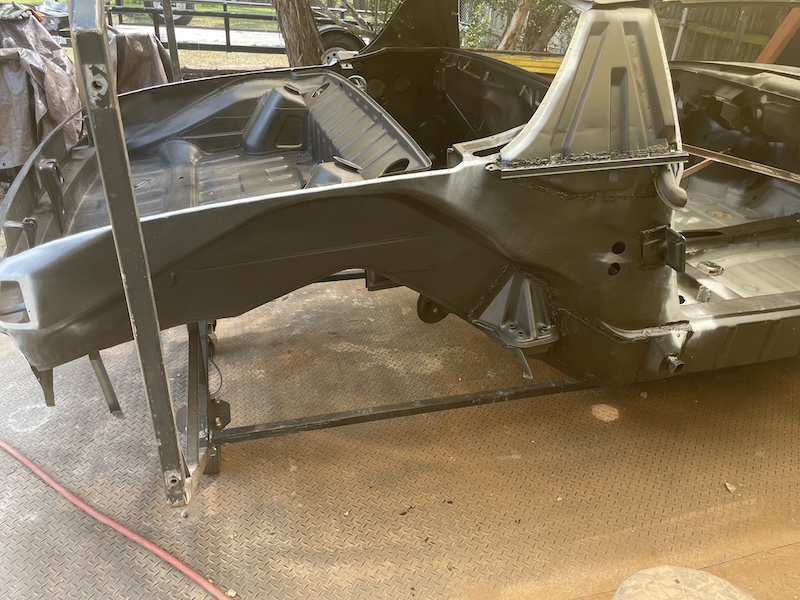 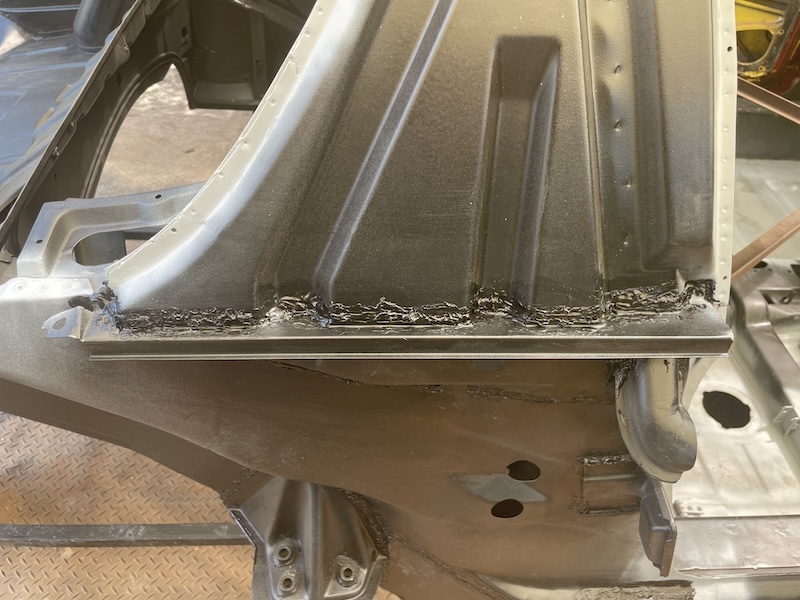 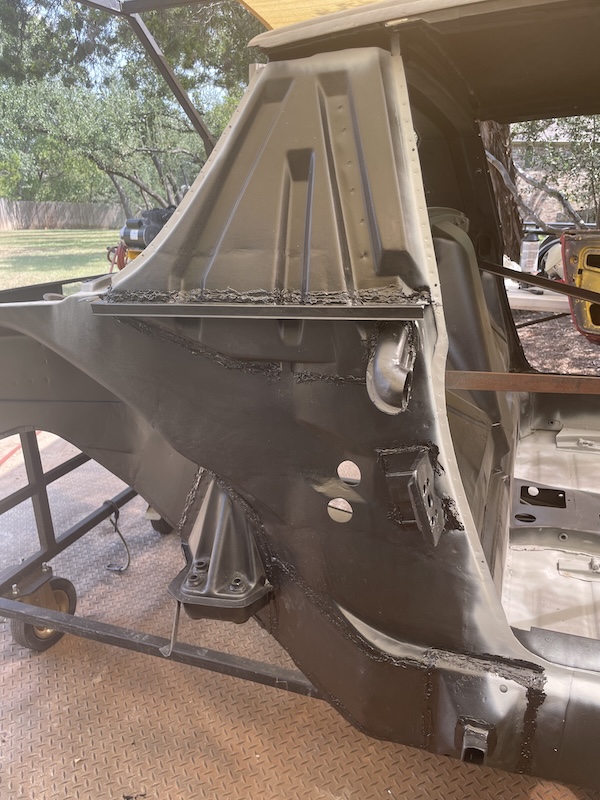 After getting the door jam fitted in the fender and with the car, I noticed that the latch plate holes weren't lining up at all. I didn't want to shorten the top of the piece to bring the holes up since that would have exposed a gap at the bottom. Decided to use the old door jam to solve the problem. Used the portion around the holes as a template, cut the pattern out of the new sill, and then welded in the patch. This moved the holes up and over where I needed them. This was good practice for welding on the exterior of the car. I think it turned out pretty good. I ground down the back of the patch a bit to make sure it would lay flat against the door catch bracket. 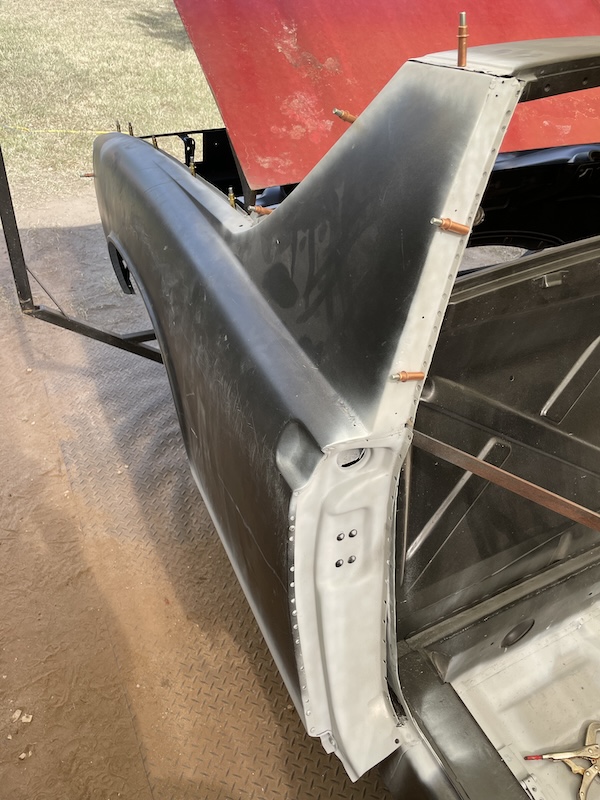 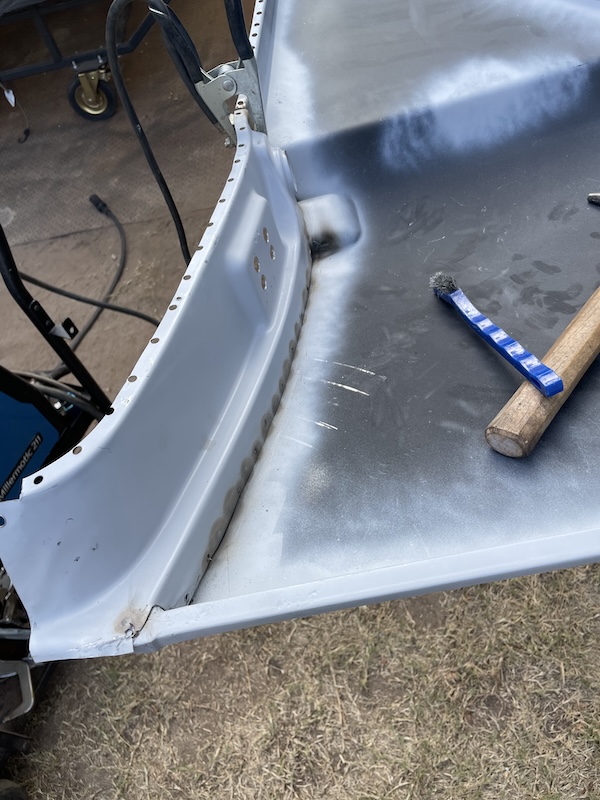 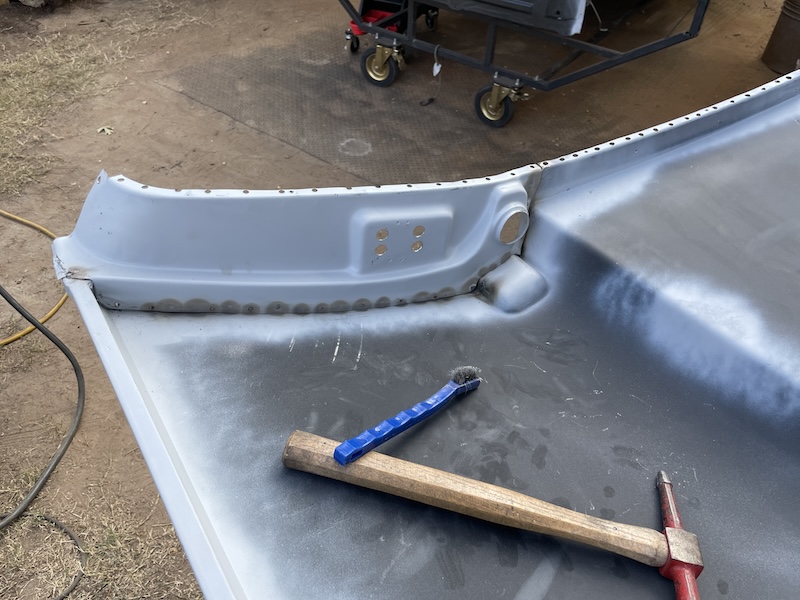 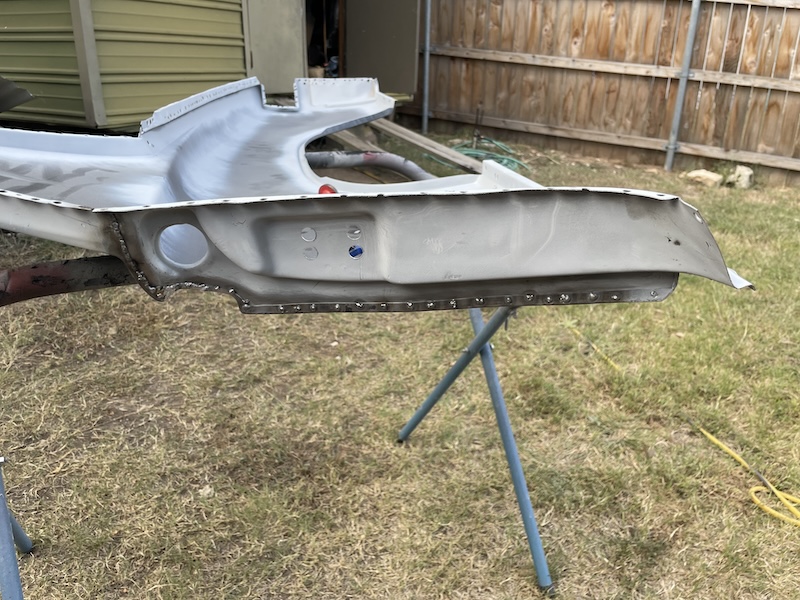 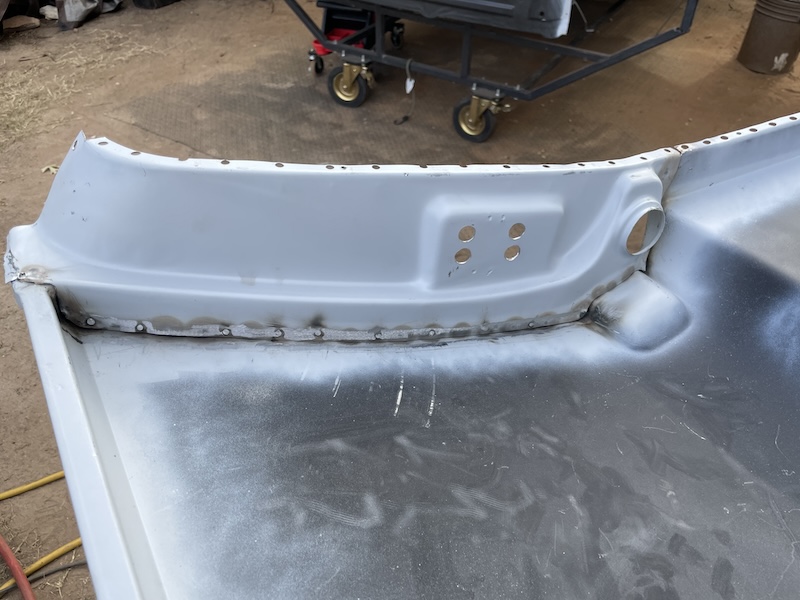 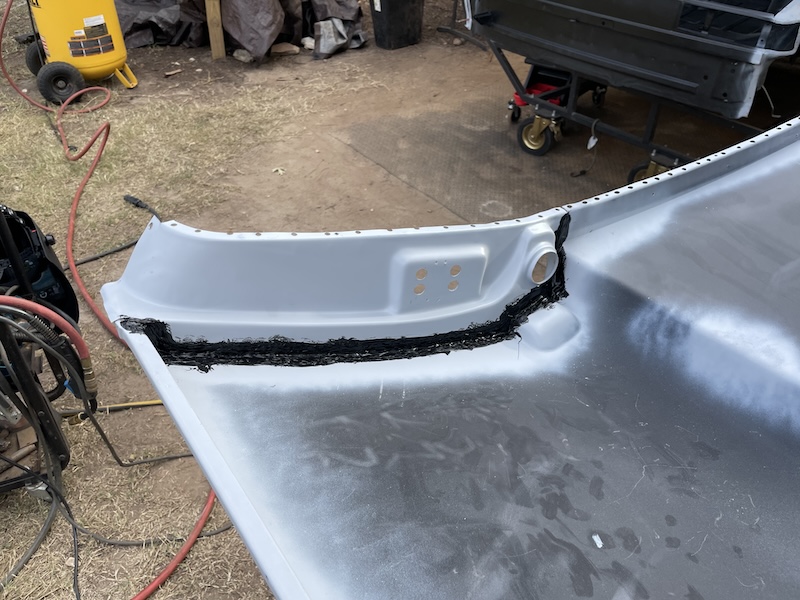 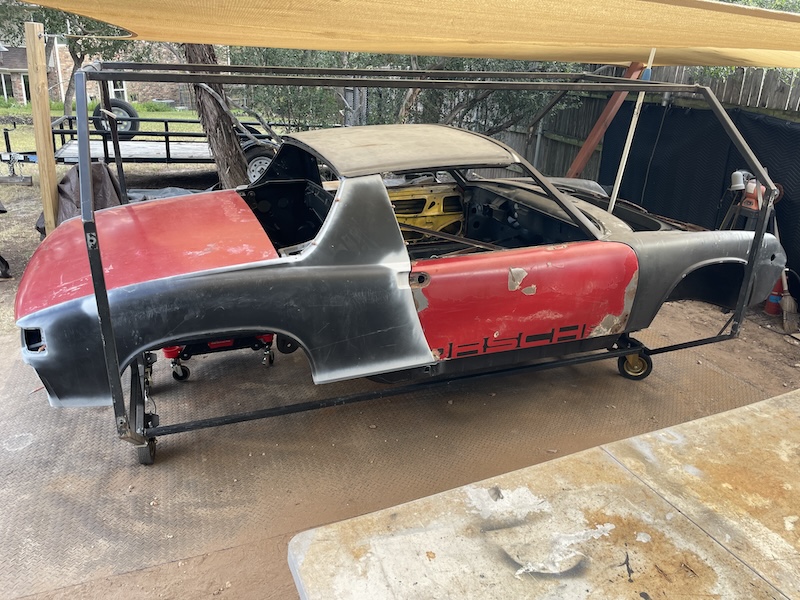 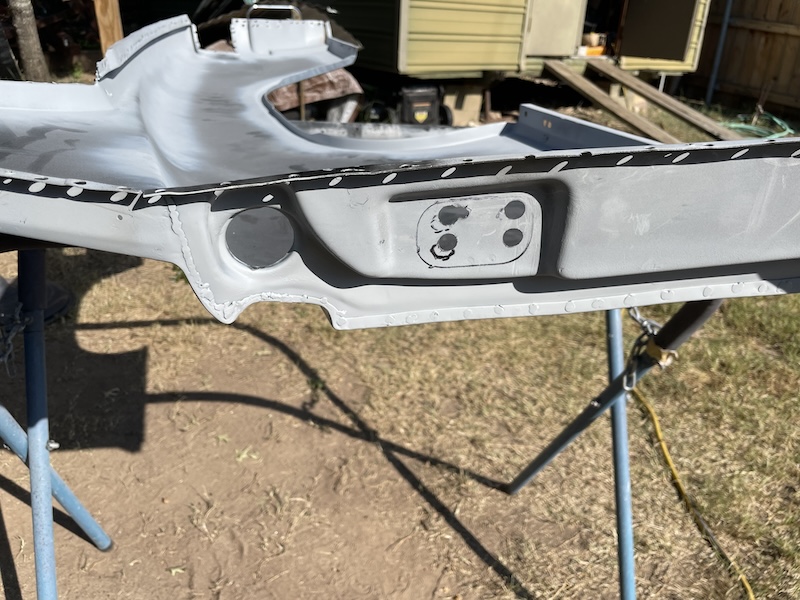 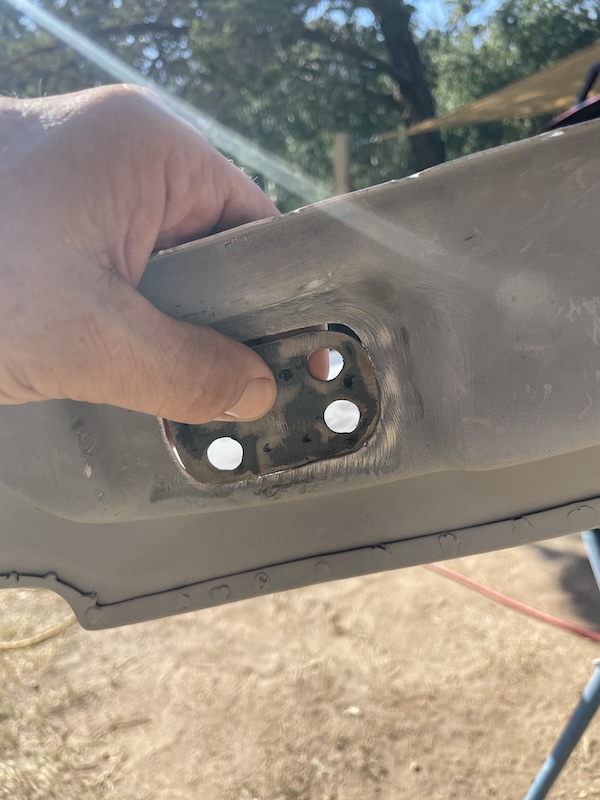 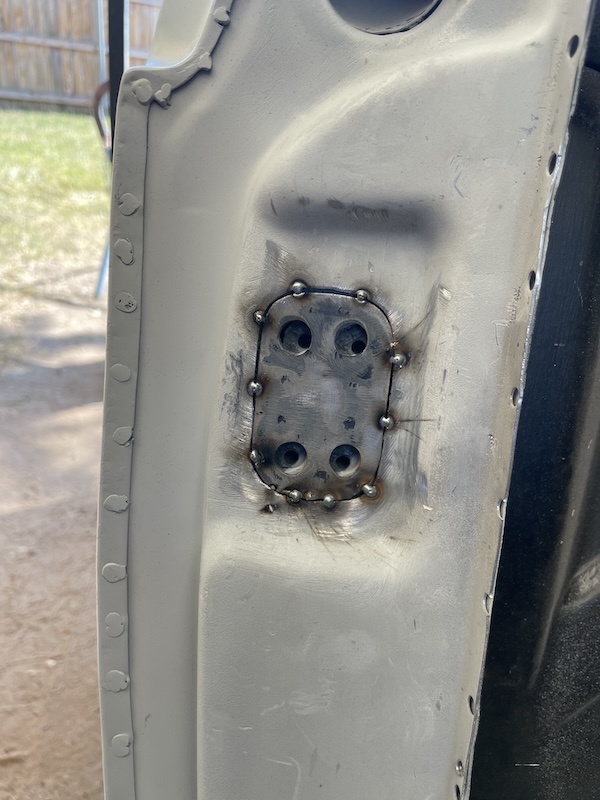 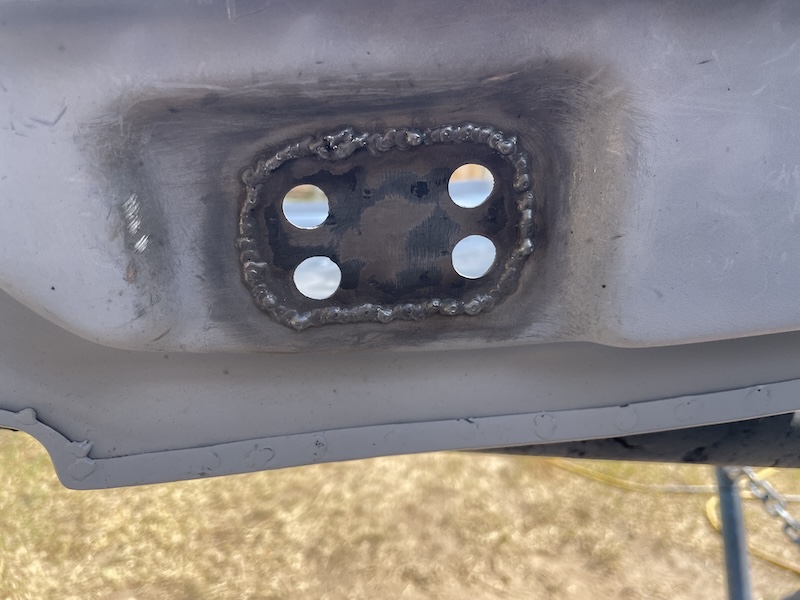 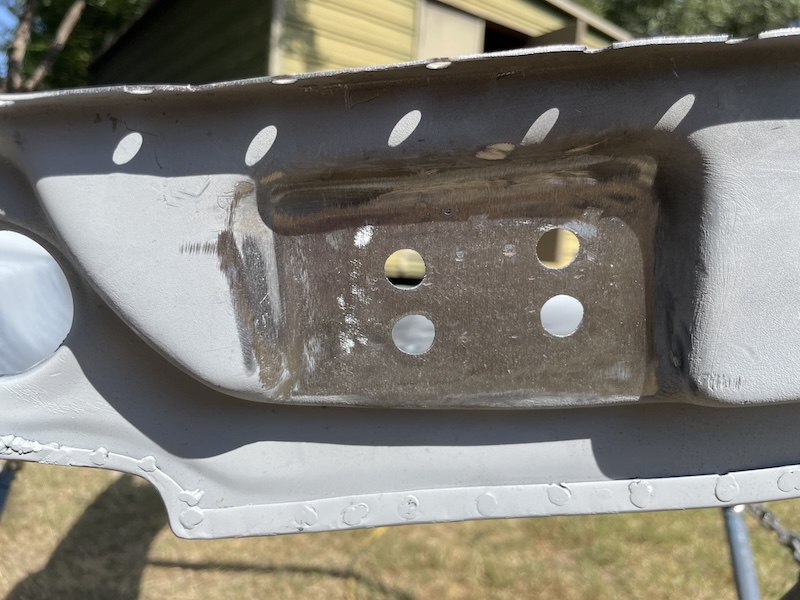 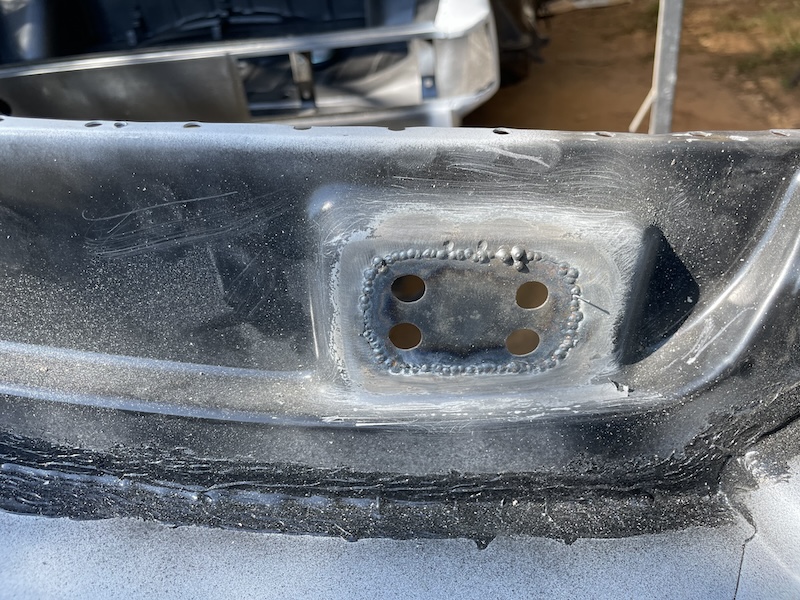 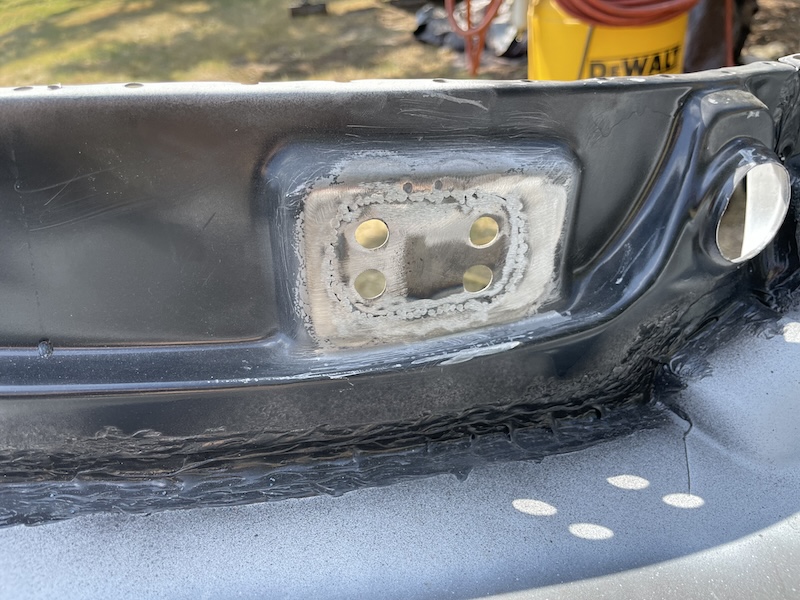 |
| friethmiller |
 Sep 15 2024, 09:00 PM Sep 15 2024, 09:00 PM
Post
#286
|
|
Senior Member    Group: Members Posts: 846 Joined: 10-February 19 From: Austin, TX Member No.: 22,863 Region Association: Southwest Region 
|
Rear Fenders - Passenger Side Jam, Prep, and Weld: Part 2 of 2 (9/13 - 9/15/2024):
I had some leftover rubber seals with 3M adhesive backing that I thought might help to prevent any squeaking with the fender. Not 100% sure but I think the factory put something here as well. 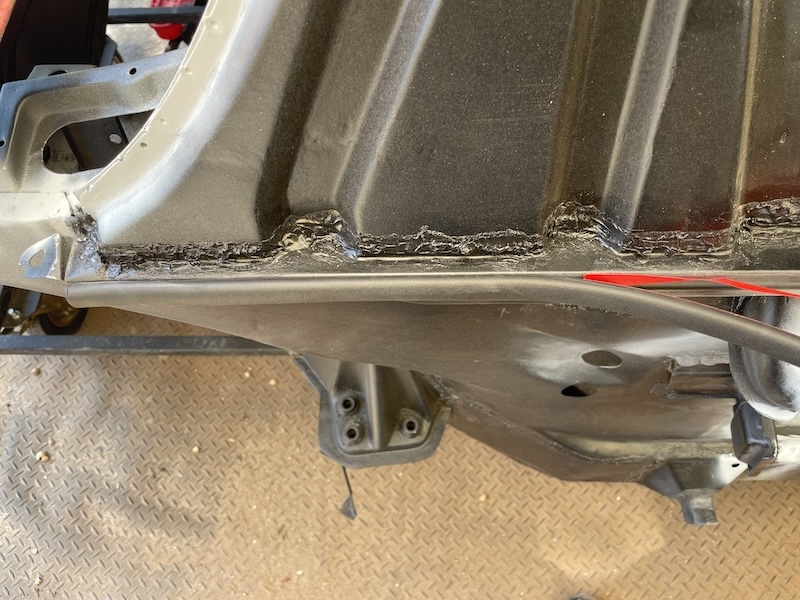 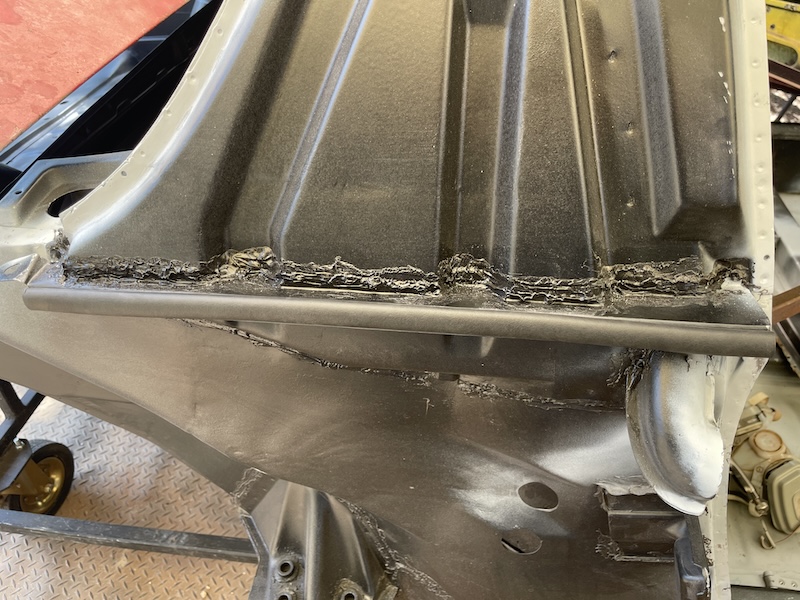 Next, I verified/checked alignment at the trunk/latch one final time. Made sure I had a fender to fender gap of 53 1/2" and then screwed down both fenders flush with the inner fender edge. 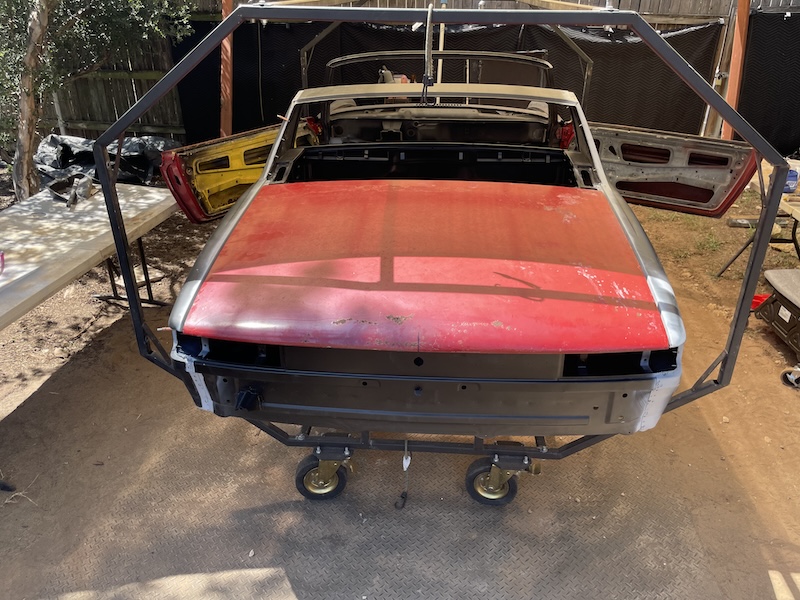 I was finally able, at this point, to slowly make my way around the fender with the rosette welds. With it being 100 degrees today, I had to take several breaks to get it all done. The welds look pretty bad here, I know, but I promise it will all look good in the end. (IMG:style_emoticons/default/rolleyes.gif) 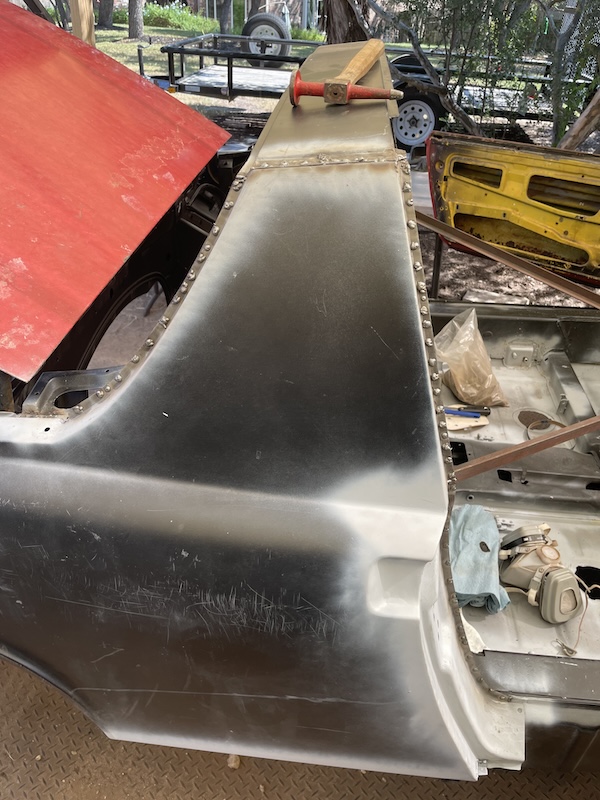 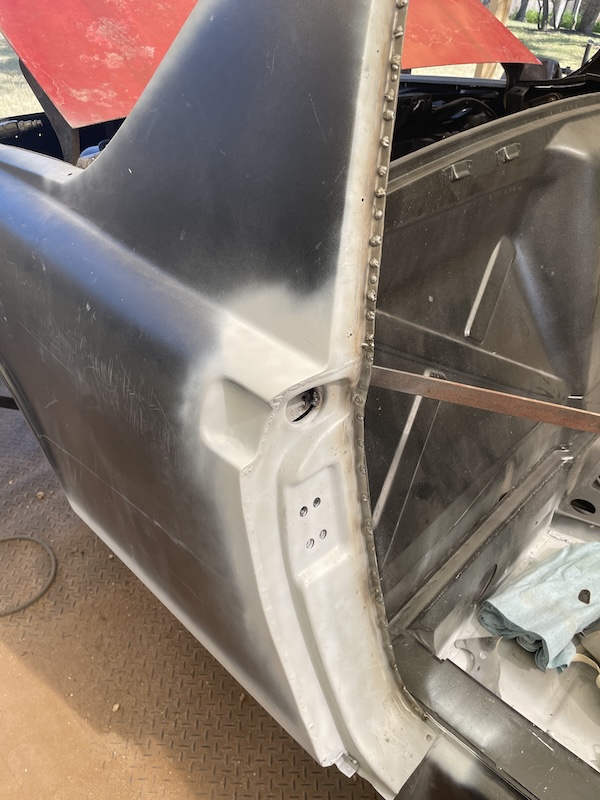 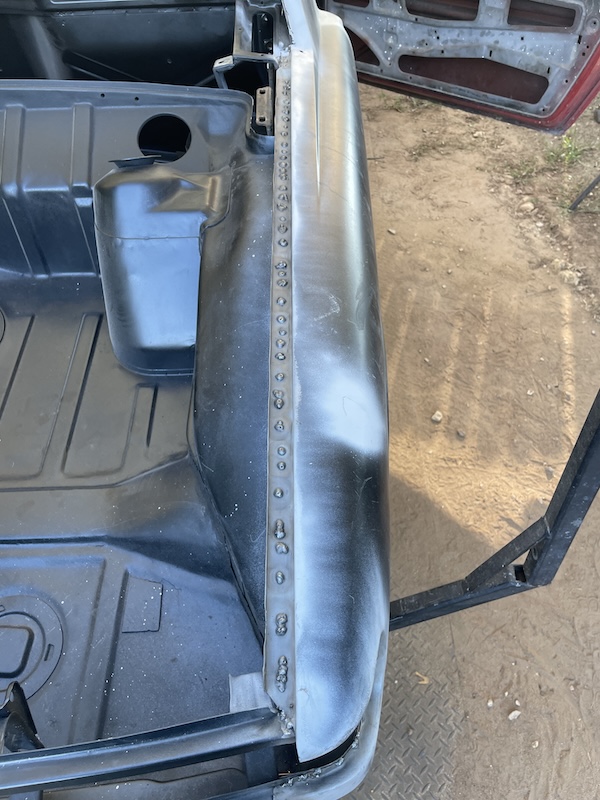 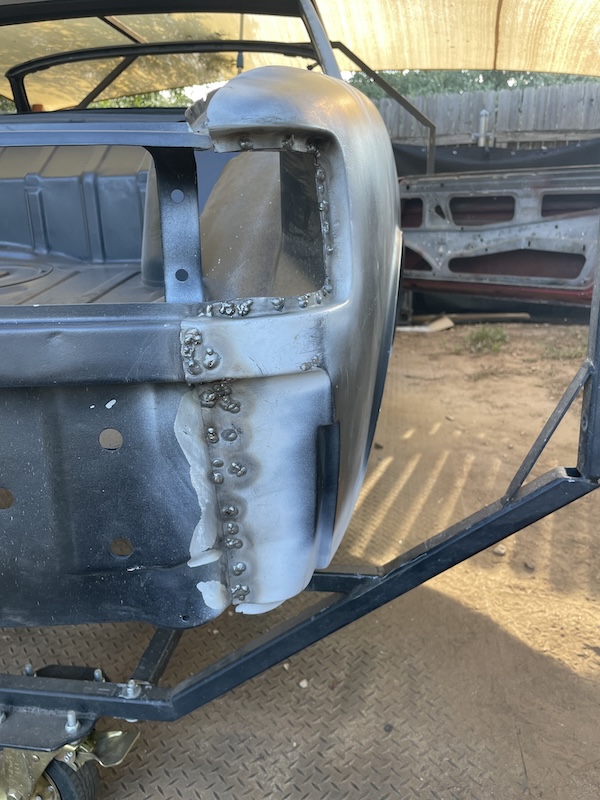 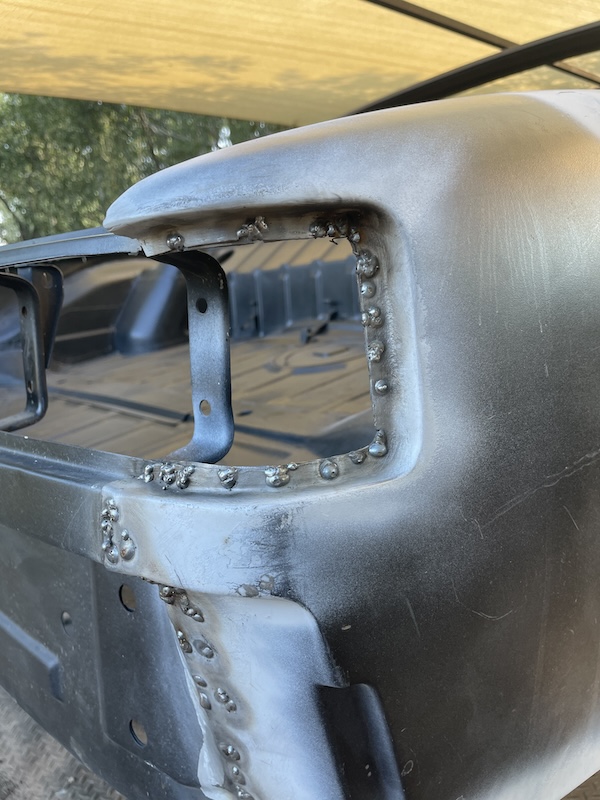 Final shots of the Driver Side. These welds will be done next weekend, hopefully (IMG:style_emoticons/default/welder.gif) 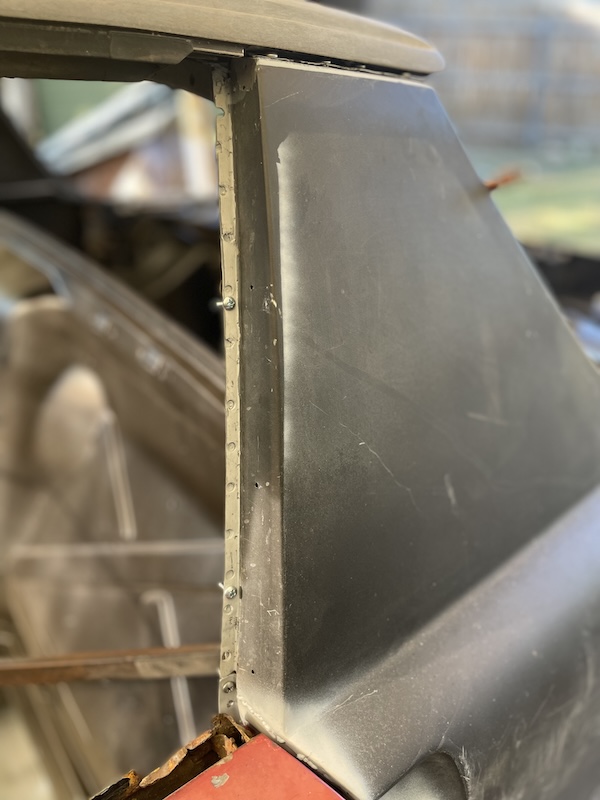 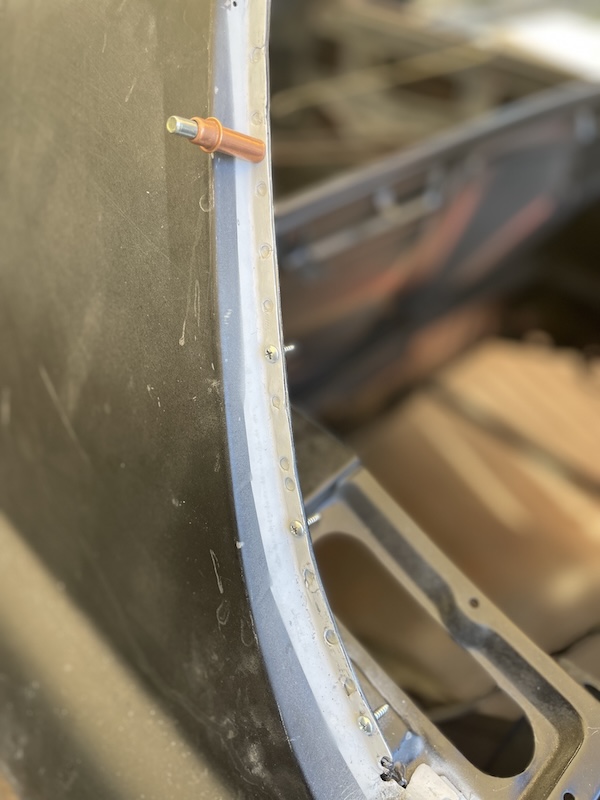 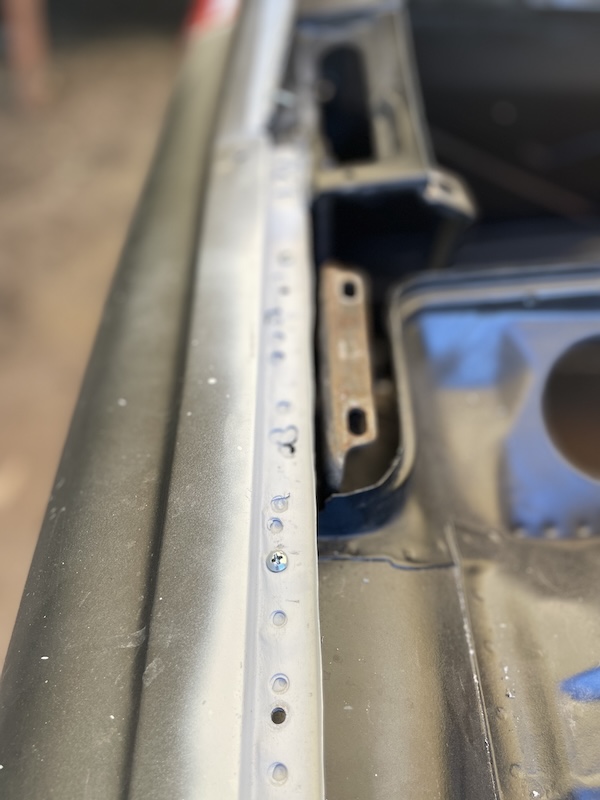 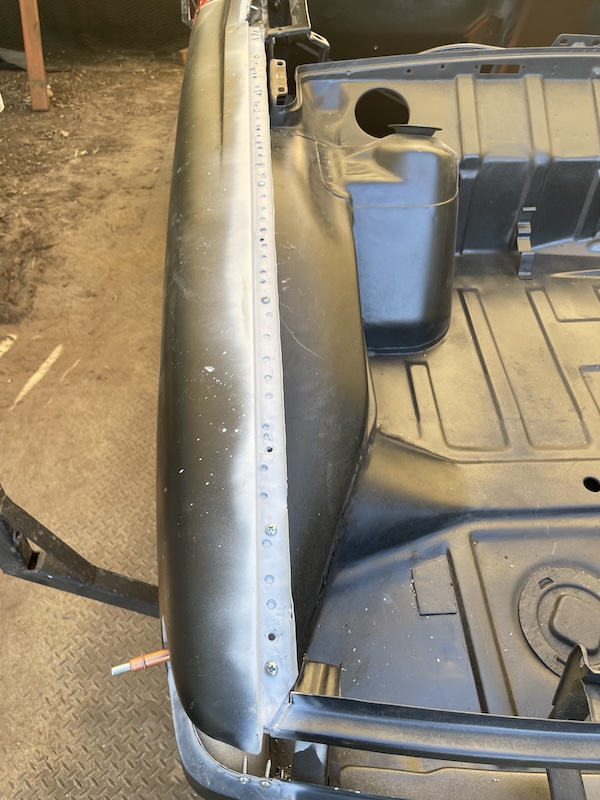 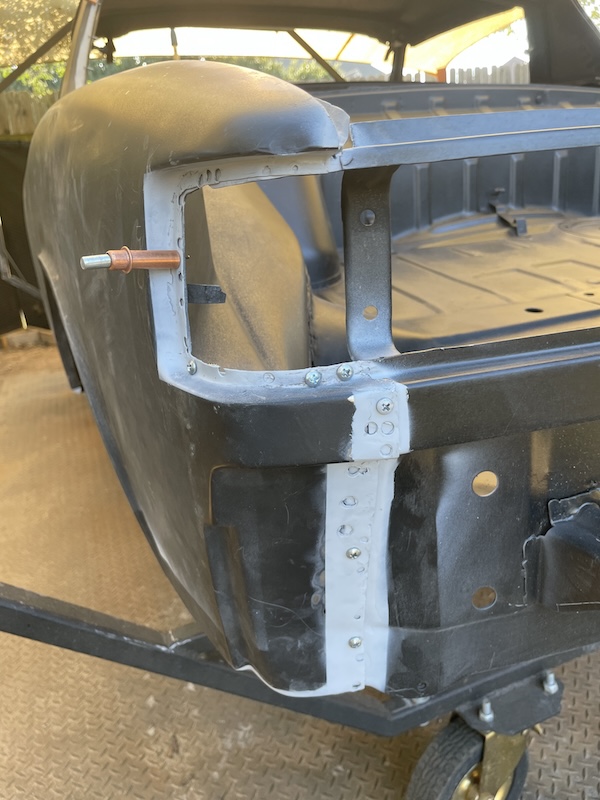 |
| friethmiller |
 Sep 17 2024, 01:27 PM Sep 17 2024, 01:27 PM
Post
#287
|
|
Senior Member    Group: Members Posts: 846 Joined: 10-February 19 From: Austin, TX Member No.: 22,863 Region Association: Southwest Region 
|
A Little Lunch Grind (9/17/2024):
Just a few photos of my "start" at grinding down the welds on the rear quarter. Doing a little bit each day so I can be ready to weld in the driver side this weekend. I'm working my way from the back to the front here. Of course, I'll need to touch up a few spots but it's looking good so far. The little pieces of metal that tie the corner of each fender to the rear cross panel will need to be reinstalled as well (see last photo). That looks like I'll need to cut the rear panel and curve it to meet the fender. Might need to add a little metal to make it all work. Not sure. (IMG:style_emoticons/default/confused24.gif) The rear panel is a new RD part. 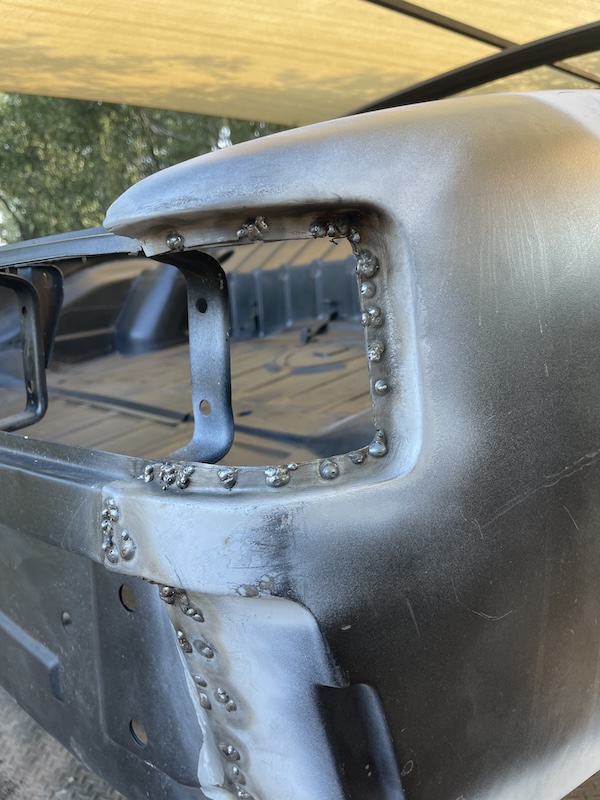 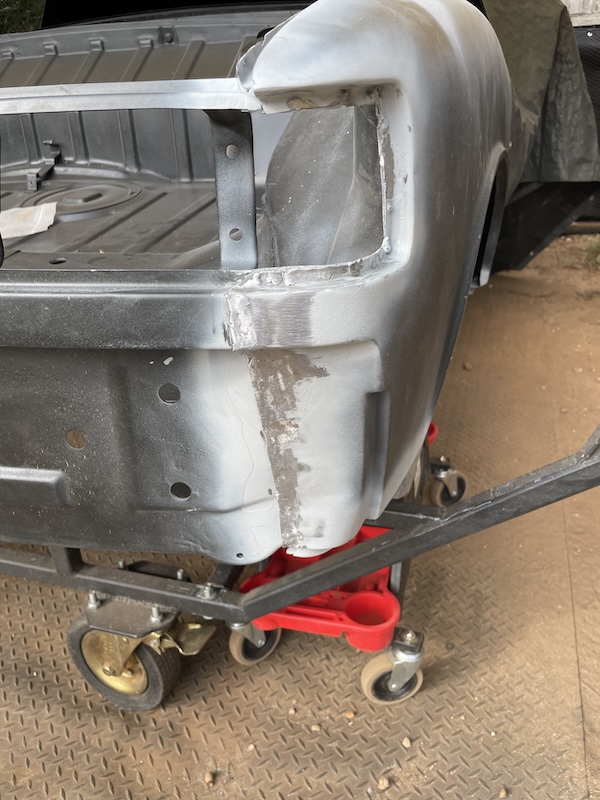 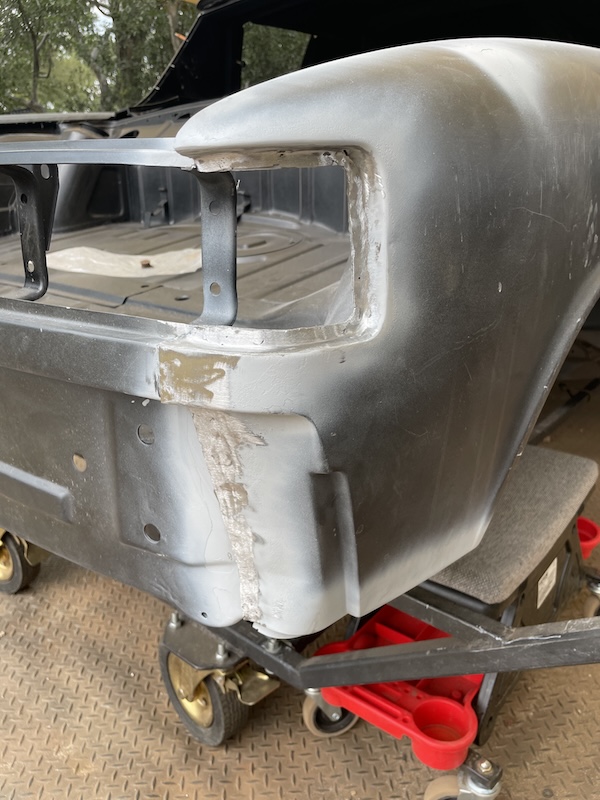 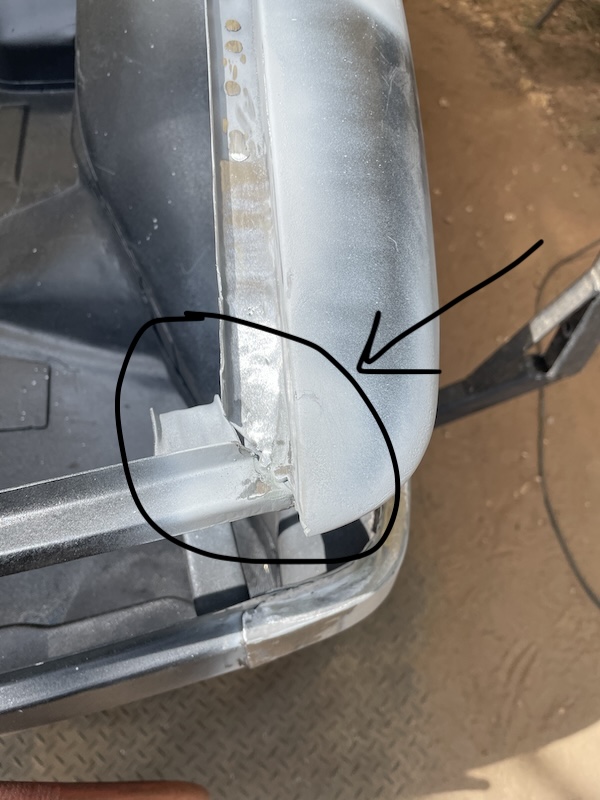 |
| seanpaulmc |
 Sep 17 2024, 05:42 PM Sep 17 2024, 05:42 PM
Post
#288
|
|
Member   Group: Members Posts: 381 Joined: 6-December 16 From: Orlando, FL Member No.: 20,649 Region Association: South East States 
|
|
| 930cabman |
 Sep 17 2024, 05:45 PM Sep 17 2024, 05:45 PM
Post
#289
|
|
Advanced Member     Group: Members Posts: 4,044 Joined: 12-November 20 From: Buffalo Member No.: 24,877 Region Association: North East States 
|
Excellent work with the grinders
(IMG:style_emoticons/default/piratenanner.gif) (IMG:style_emoticons/default/piratenanner.gif) |
| friethmiller |
 Sep 18 2024, 02:56 PM Sep 18 2024, 02:56 PM
Post
#290
|
|
Senior Member    Group: Members Posts: 846 Joined: 10-February 19 From: Austin, TX Member No.: 22,863 Region Association: Southwest Region 
|
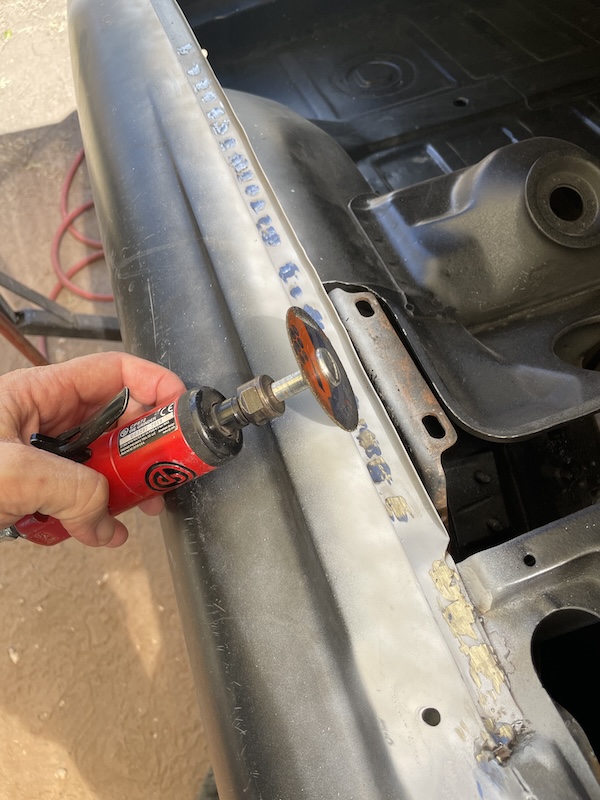
Thanks! Well... after trying several different options, I finally found the right tool to do 90% of the grinding in the channel (see photo). It gets right in there. I'll use the finger sander next to finish it out.
 |
| 930cabman |
 Sep 18 2024, 03:41 PM Sep 18 2024, 03:41 PM
Post
#291
|
|
Advanced Member     Group: Members Posts: 4,044 Joined: 12-November 20 From: Buffalo Member No.: 24,877 Region Association: North East States 
|
Will be better than stock.
3" thin wheel with a smooth touch gets the job done. |
| mbseto |
 Sep 25 2024, 08:13 AM Sep 25 2024, 08:13 AM
Post
#292
|
|
Senior Member    Group: Members Posts: 1,257 Joined: 6-August 14 From: Cincy Member No.: 17,743 Region Association: North East States |
Just skimmed through this whole thread, man this is some great work. A true labor of love.
|
| friethmiller |
 Sep 25 2024, 08:43 PM Sep 25 2024, 08:43 PM
Post
#293
|
|
Senior Member    Group: Members Posts: 846 Joined: 10-February 19 From: Austin, TX Member No.: 22,863 Region Association: Southwest Region 
|
Just skimmed through this whole thread, man this is some great work. A true labor of love. @mbseto - Thanks man! Good luck with your build. We're here if you need any help. |
| friethmiller |
 Sep 25 2024, 09:26 PM Sep 25 2024, 09:26 PM
Post
#294
|
|
Senior Member    Group: Members Posts: 846 Joined: 10-February 19 From: Austin, TX Member No.: 22,863 Region Association: Southwest Region 
|
Rear Fenders - Completing the job (9/20/2024):
With the fender welded in, I quickly realized that couldn't cut the bottom of the rear panel to curve-it-in to meet the inside of the seal track on the fender. Plan B! I had to cut the metal and tap it down. I then cut a small relief in order to fit the small piece of metal that goes in the corner here. This piece allows the trunk's corner bumper to rest here when the trunk is closed. With the part welded in place, I then cut a small patch piece to fill the gap at the curve. I decided to go with 18 gauge here. I thought I could always grind it thinner to match the surrounding metal at the end. After a bit of grinding with the 3" cutting wheel and the finger sander, I was able to get the area pretty much done. I will come back later with the welder to fill in the small holes here and there. 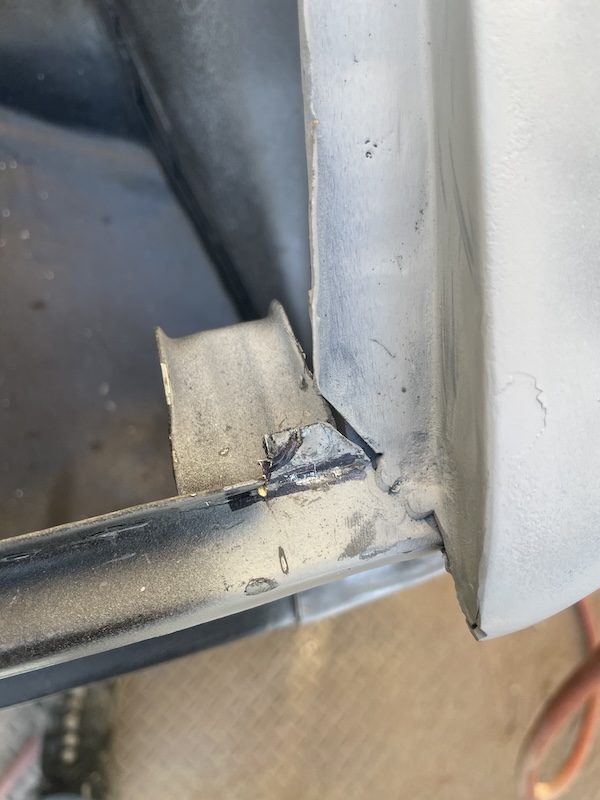 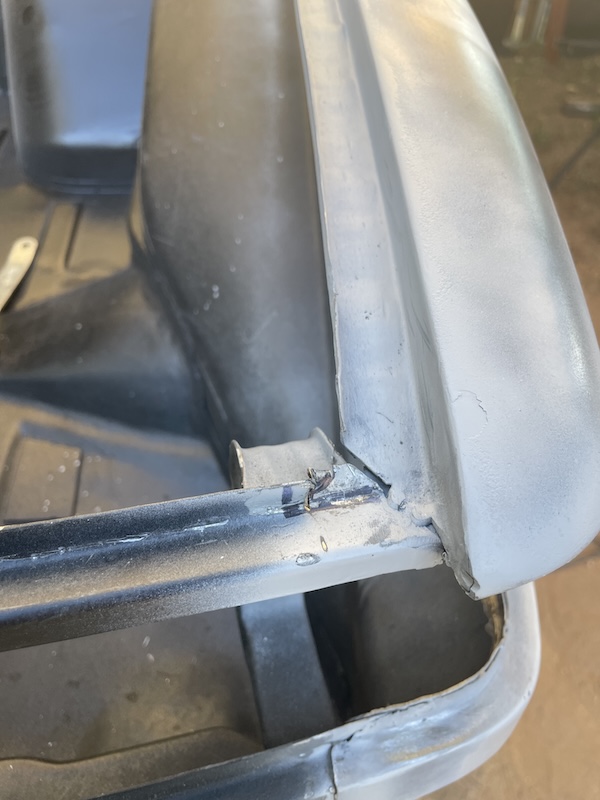 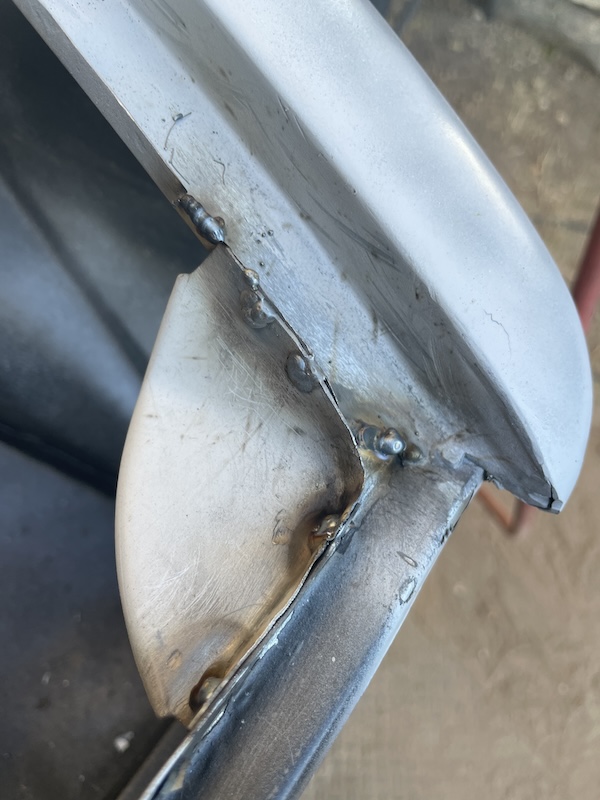 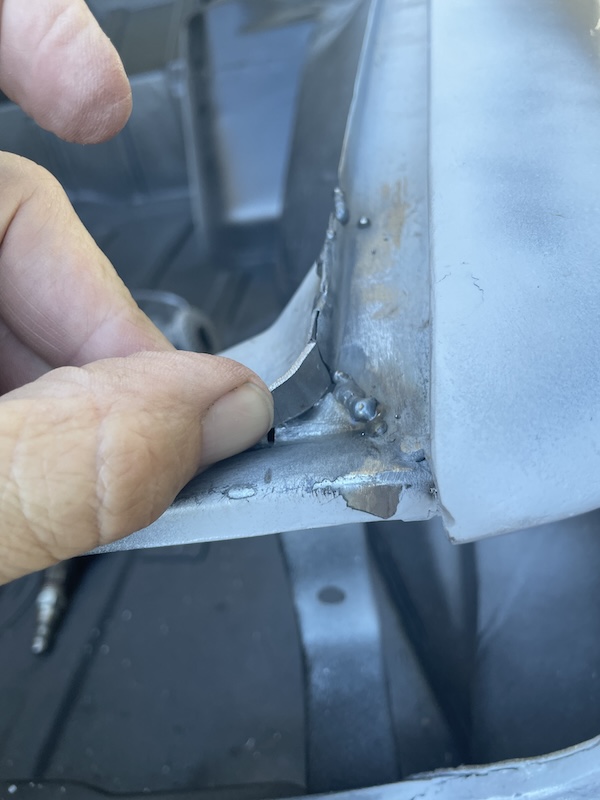 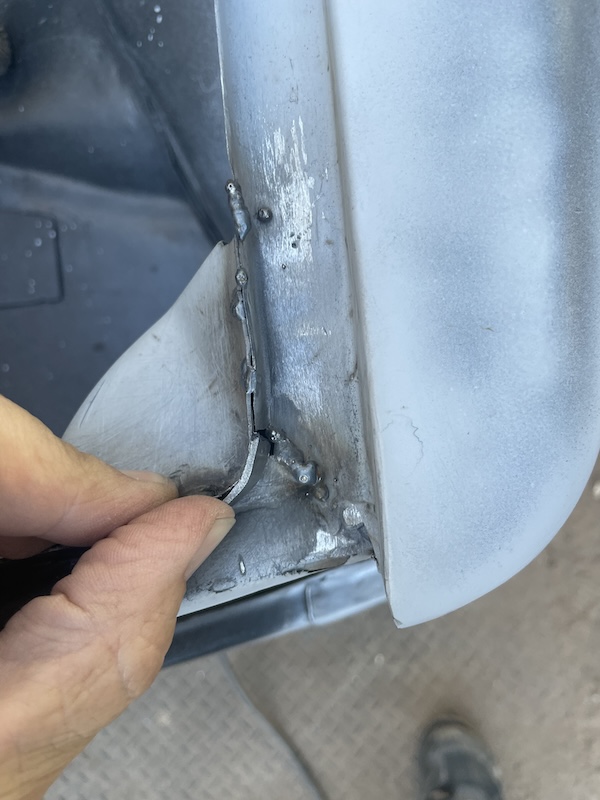 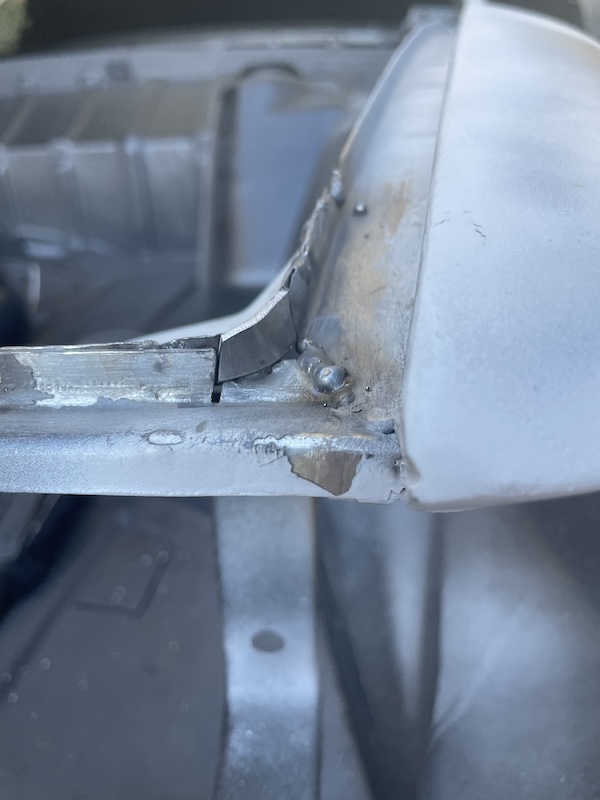 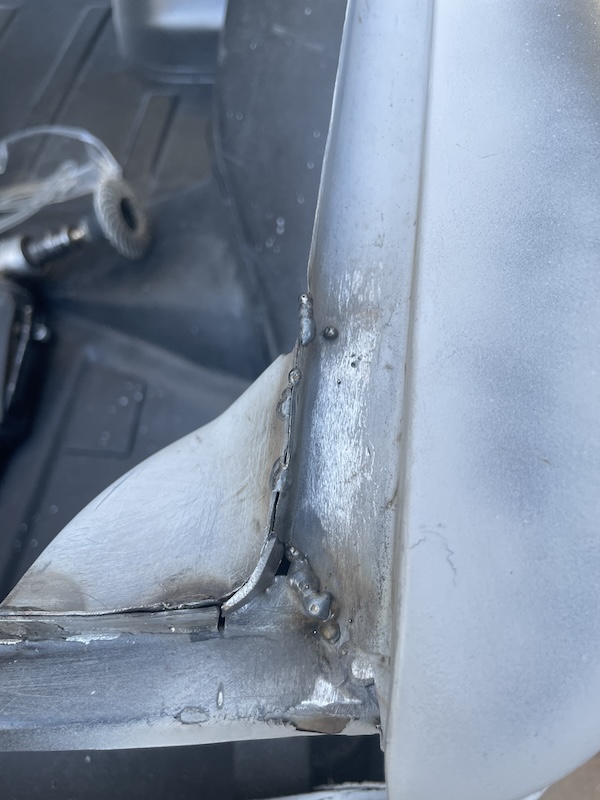 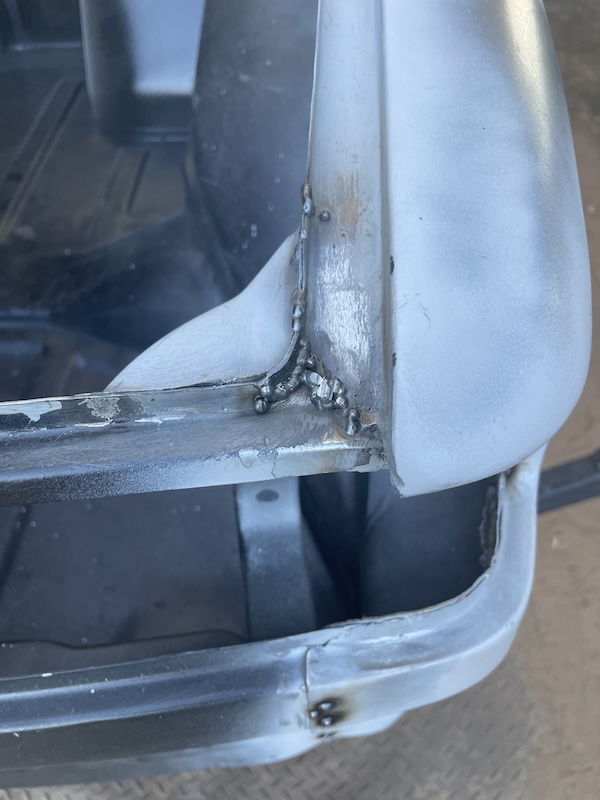 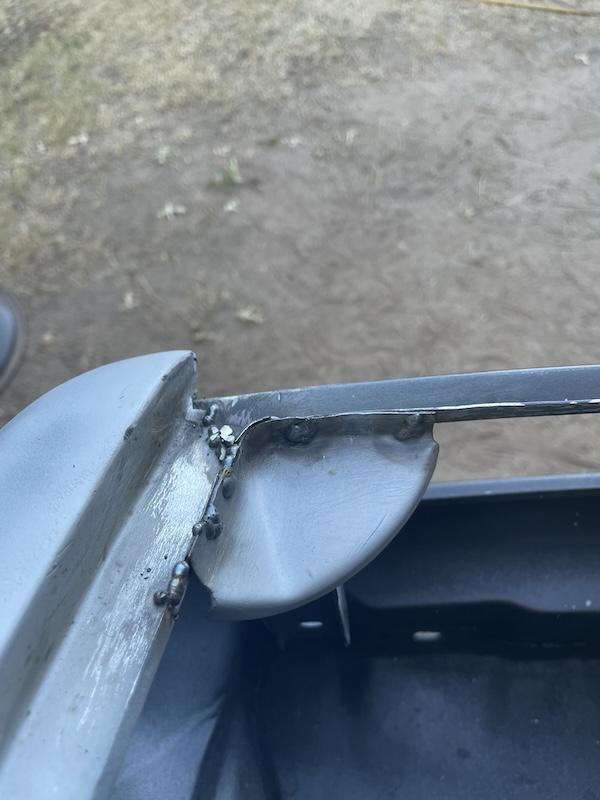 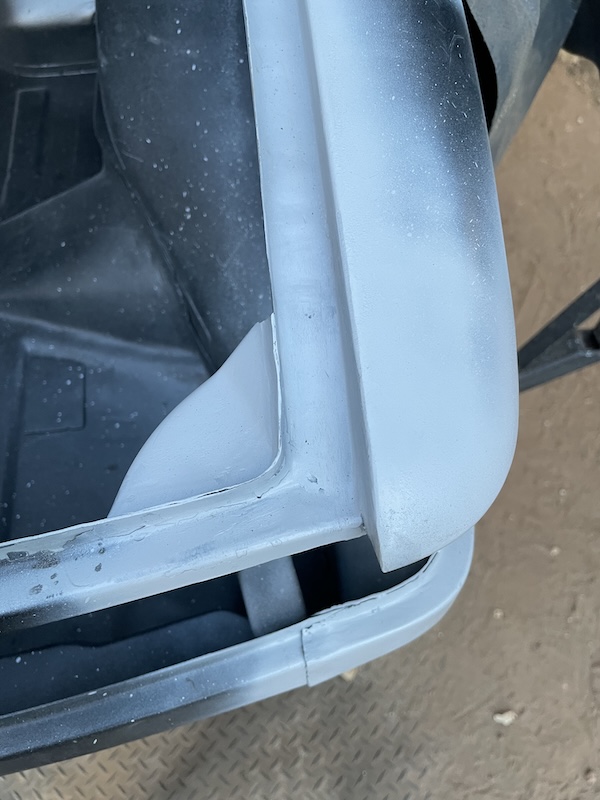 |
| Cairo94507 |
 Sep 26 2024, 07:29 AM Sep 26 2024, 07:29 AM
Post
#295
|
|
Michael           Group: Members Posts: 10,297 Joined: 1-November 08 From: Auburn, CA Member No.: 9,712 Region Association: Northern California 
|
Really coming along nicely. (IMG:style_emoticons/default/beerchug.gif)
|
| technicalninja |
 Sep 26 2024, 09:56 AM Sep 26 2024, 09:56 AM
Post
#296
|
|
Advanced Member     Group: Members Posts: 2,523 Joined: 31-January 23 From: Granbury Texas Member No.: 27,135 Region Association: Southwest Region 
|
Rear Fenders - Completing the job (9/20/2024): With the fender welded in, I quickly realized that couldn't cut the bottom of the rear panel to curve-it-in to meet the inside of the seal track on the fender. Plan B! I had to cut the metal and tap it down. I then cut a small relief in order to fit the small piece of metal that goes in the corner here. This piece allows the trunk's corner bumper to rest here when the trunk is closed. With the part welded in place, I then cut a small patch piece to fill the gap at the curve. I decided to go with 18 gauge here. I thought I could always grind it thinner to match the surrounding metal at the end. After a bit of grinding with the 3" cutting wheel and the finger sander, I was able to get the area pretty much done. I will come back later with the welder to fill in the small holes here and there. Concours WEENIE!!!! Nicely done! Hard to tell "worked". Transparent! (IMG:style_emoticons/default/ninja.gif) |
| friethmiller |
 Sep 26 2024, 10:43 AM Sep 26 2024, 10:43 AM
Post
#297
|
|
Senior Member    Group: Members Posts: 846 Joined: 10-February 19 From: Austin, TX Member No.: 22,863 Region Association: Southwest Region 
|
|
| Root_Werks |
 Sep 26 2024, 12:34 PM Sep 26 2024, 12:34 PM
Post
#298
|
|
Village Idiot      Group: Members Posts: 8,649 Joined: 25-May 04 From: About 5NM from Canada Member No.: 2,105 Region Association: Pacific Northwest 
|
Getting closer to paint!
|
| friethmiller |
 Sep 26 2024, 04:00 PM Sep 26 2024, 04:00 PM
Post
#299
|
|
Senior Member    Group: Members Posts: 846 Joined: 10-February 19 From: Austin, TX Member No.: 22,863 Region Association: Southwest Region 
|
Getting closer to paint! Yes! Only 2 years out for that! LOL. I plan to weld in the door threshold sills this weekend. Then she'll get a well deserved bath before I start in on the final front section of the car. (IMG:style_emoticons/default/mueba.gif) |
| friethmiller |
 Sep 26 2024, 04:19 PM Sep 26 2024, 04:19 PM
Post
#300
|
|
Senior Member    Group: Members Posts: 846 Joined: 10-February 19 From: Austin, TX Member No.: 22,863 Region Association: Southwest Region 
|
Driver Side Rear Quarter Weld-in (9/22/2024):
Photos from Sunday. Welding in the rear fender is fun! (IMG:style_emoticons/default/drunk.gif) You'll notice that I had to patch a small section of the seal track along the trunk side of the fender. Pretty easy stuff. I typically go "heavy" with the welds on the fenders 'cause I don't want to make 5 or 6 passes to get all the spots I missed. My eyes aren't what they used to be so a lot of times I have come in a hit a half moon shape because I didn't hit the rosette hole exactly. Another difficult thing is the size and location of the rosette hole. By the time you've drilled out the spot weld, the hole is larger and typically too close to the edge of the fender. That makes for tricky welding. You can see how much nicer the welds are along the inside of the new door jams where I drilled new holes. Big difference, IMO. A lot of grinding is next!! 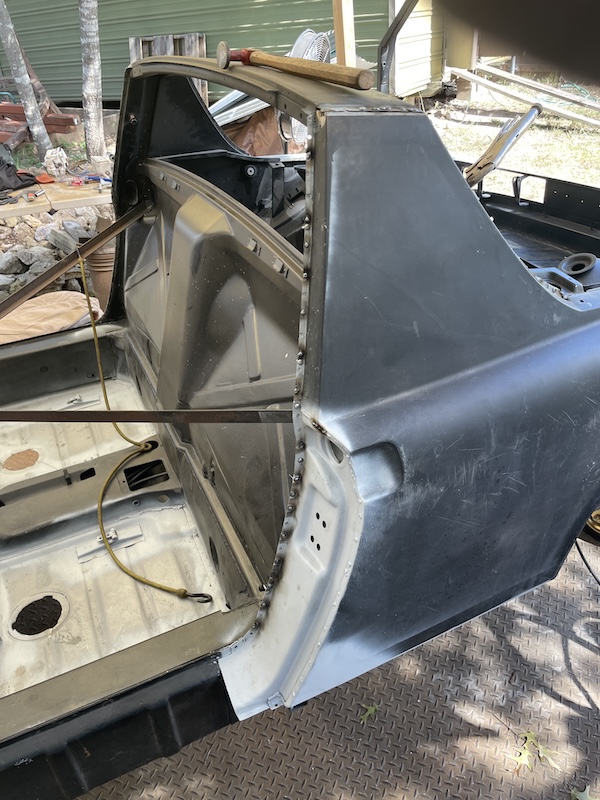 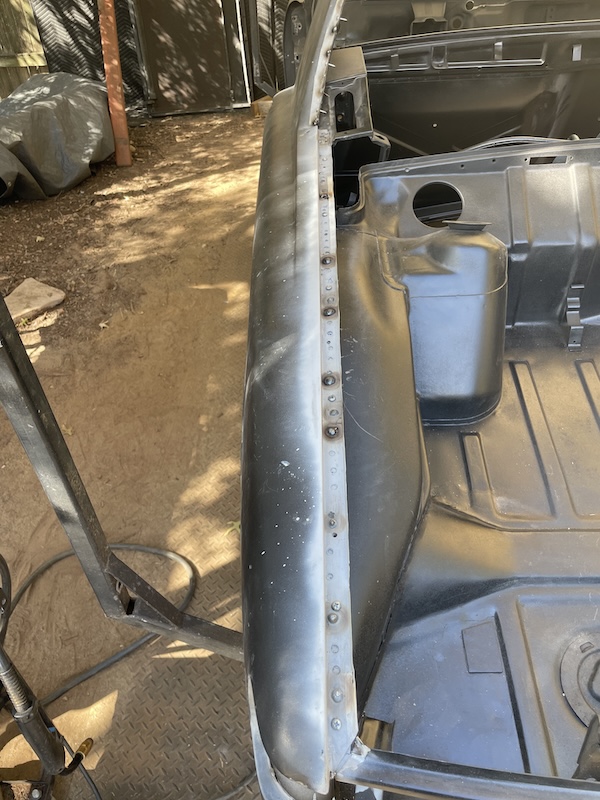 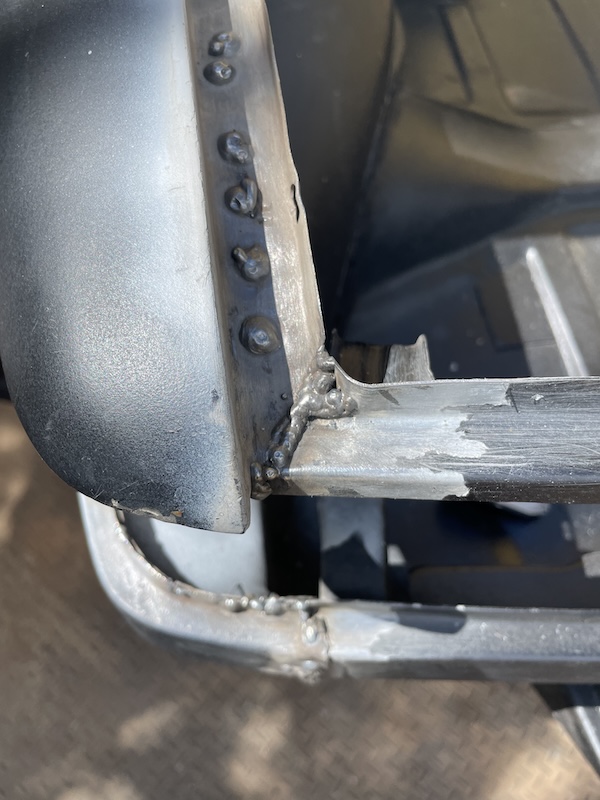 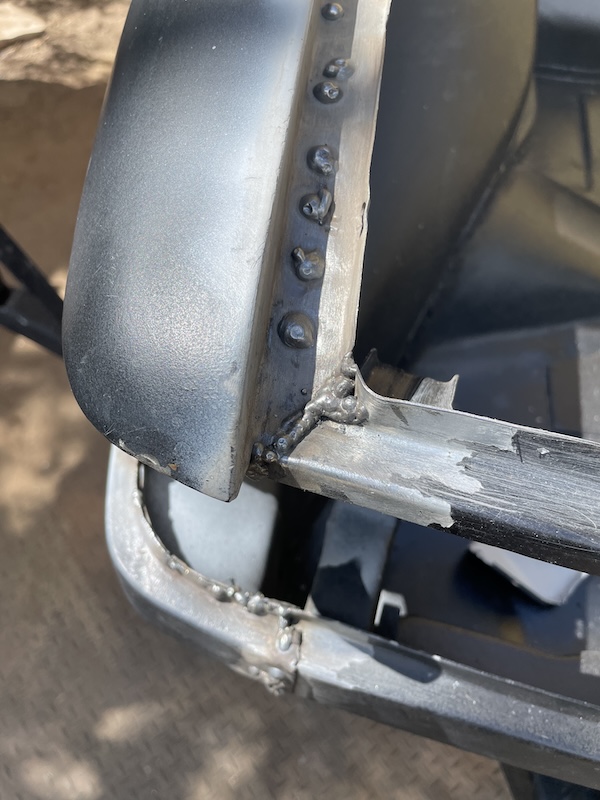 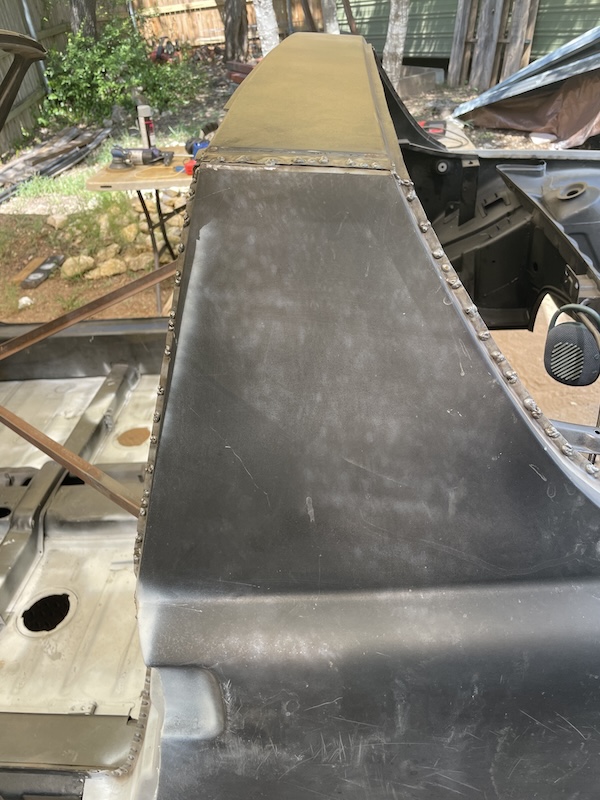 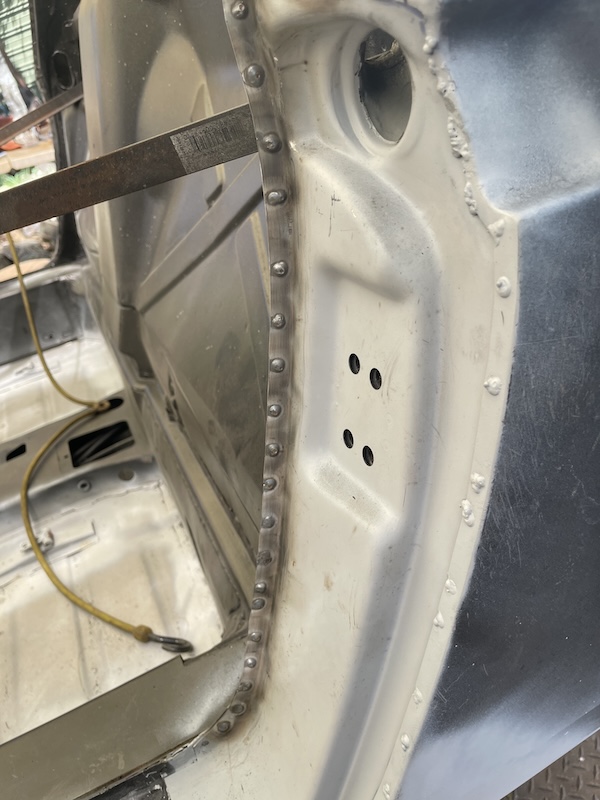 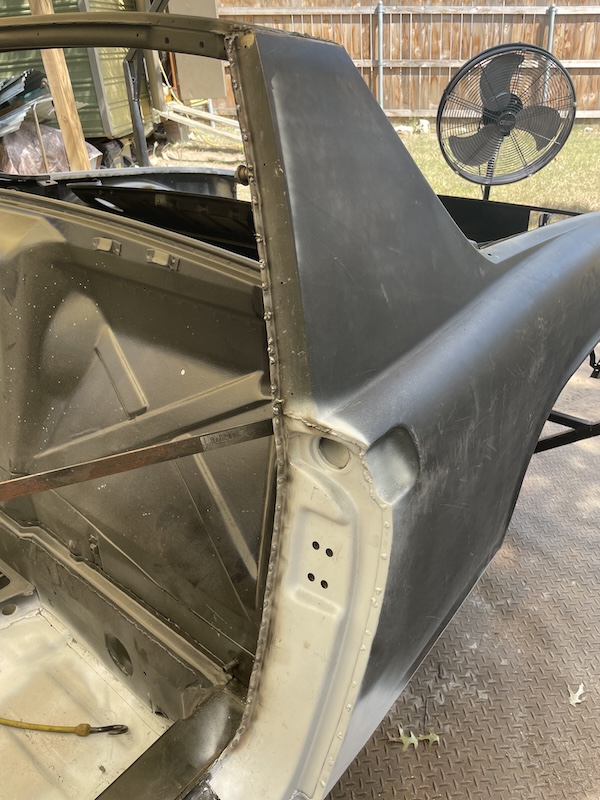 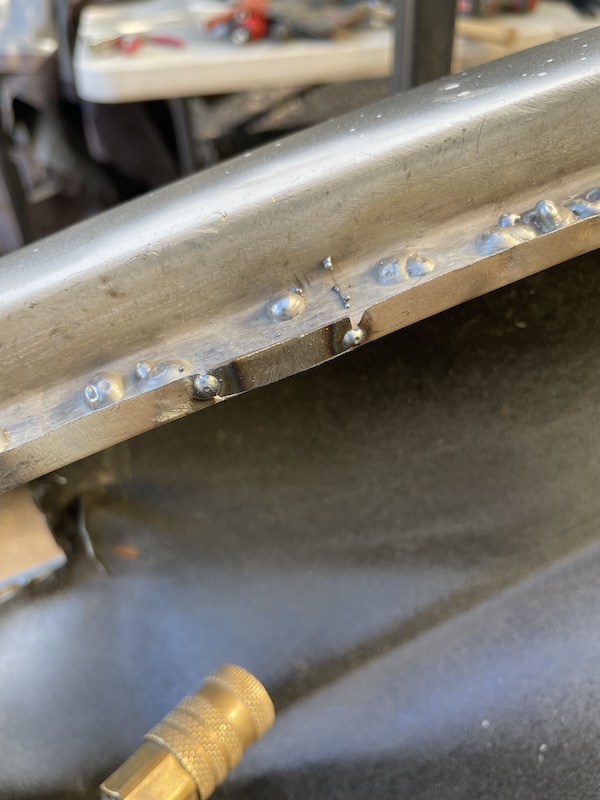 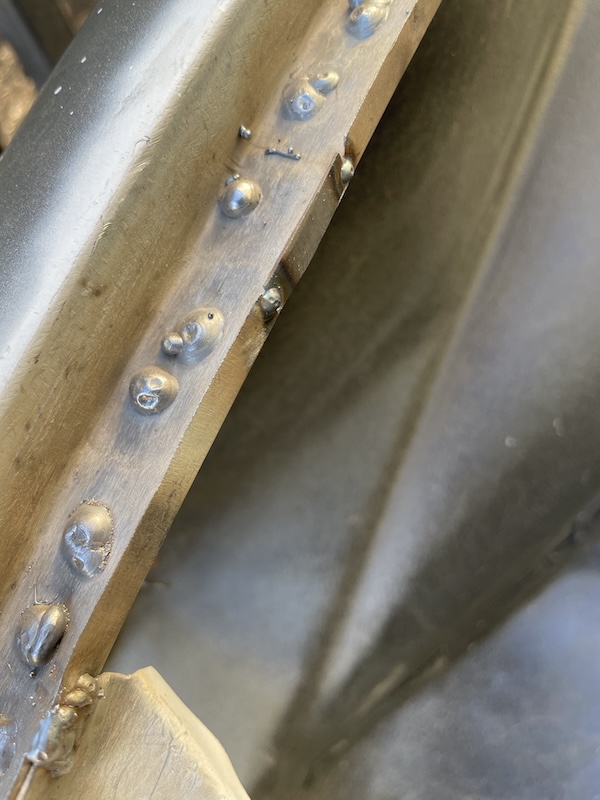 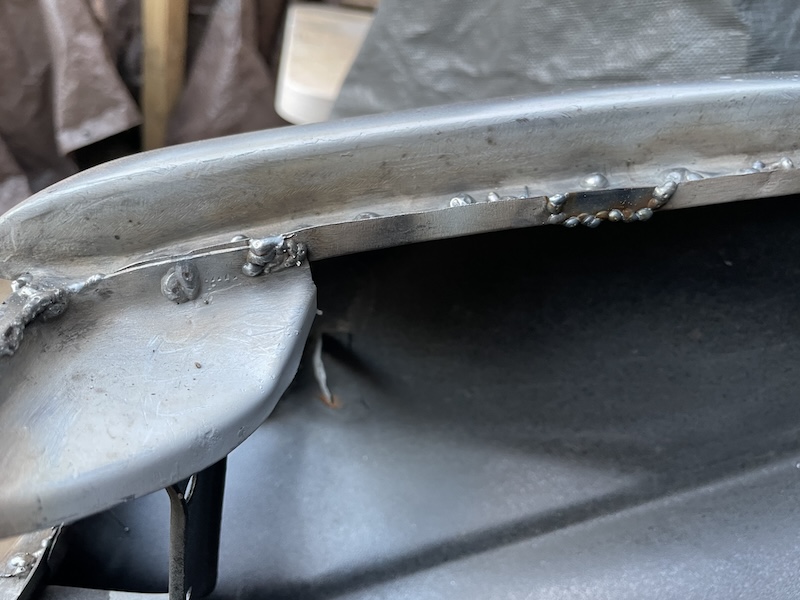 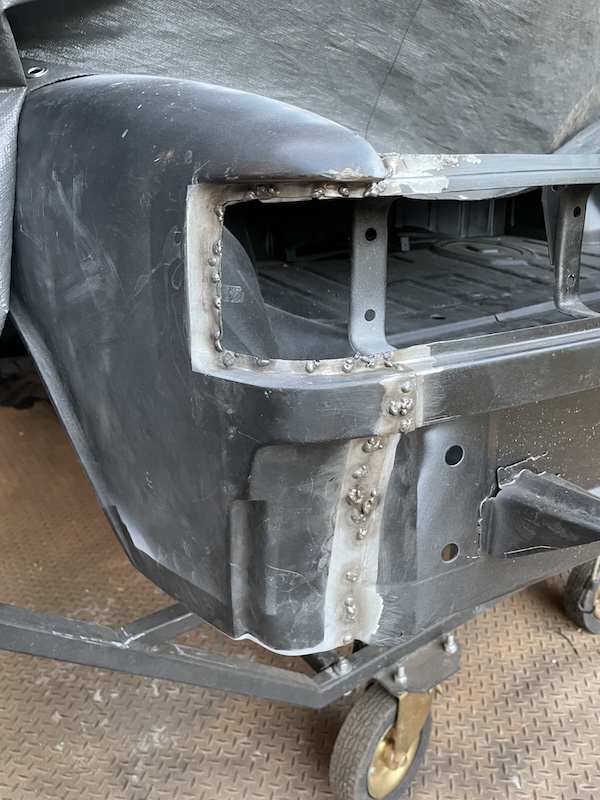 |
  |
1 User(s) are reading this topic (1 Guests and 0 Anonymous Users)
0 Members:

|
Lo-Fi Version | Time is now: 20th April 2025 - 02:37 AM |
Invision Power Board
v9.1.4 © 2025 IPS, Inc.


