|
|

|
Porsche, and the Porsche crest are registered trademarks of Dr. Ing. h.c. F. Porsche AG.
This site is not affiliated with Porsche in any way. Its only purpose is to provide an online forum for car enthusiasts. All other trademarks are property of their respective owners. |
|
|
  |
| friethmiller |
 Sep 26 2024, 04:40 PM Sep 26 2024, 04:40 PM
Post
#301
|
|
Senior Member    Group: Members Posts: 846 Joined: 10-February 19 From: Austin, TX Member No.: 22,863 Region Association: Southwest Region 
|
More Lunch Grinding (9/25/2024):
Not 100% complete but I was able to knock out a lot of the grinding work here. Quick shot of primer to keep things from rusting. More coming this weekend as I try and wrap up the fenders and door sills. 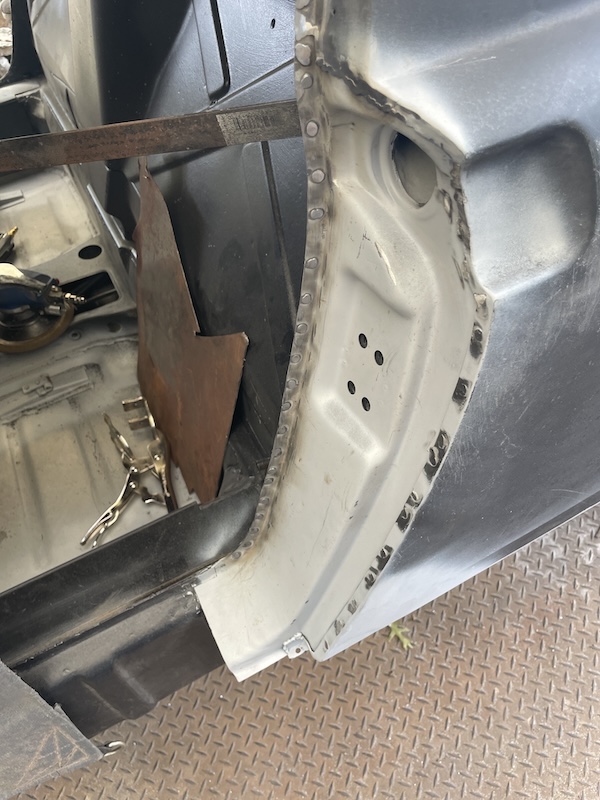 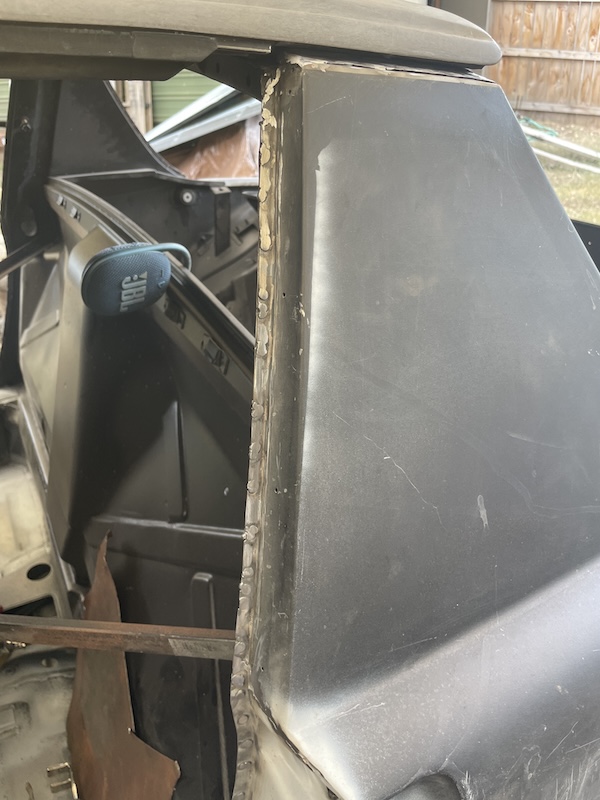 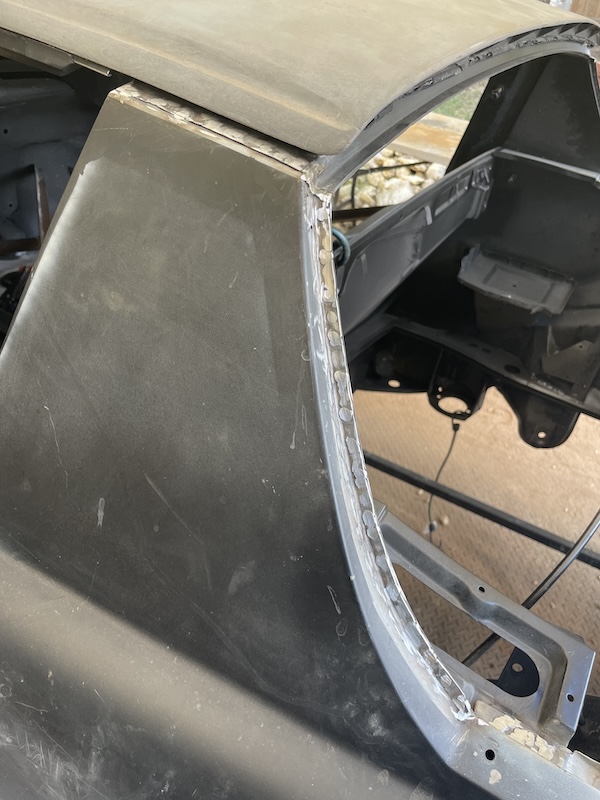 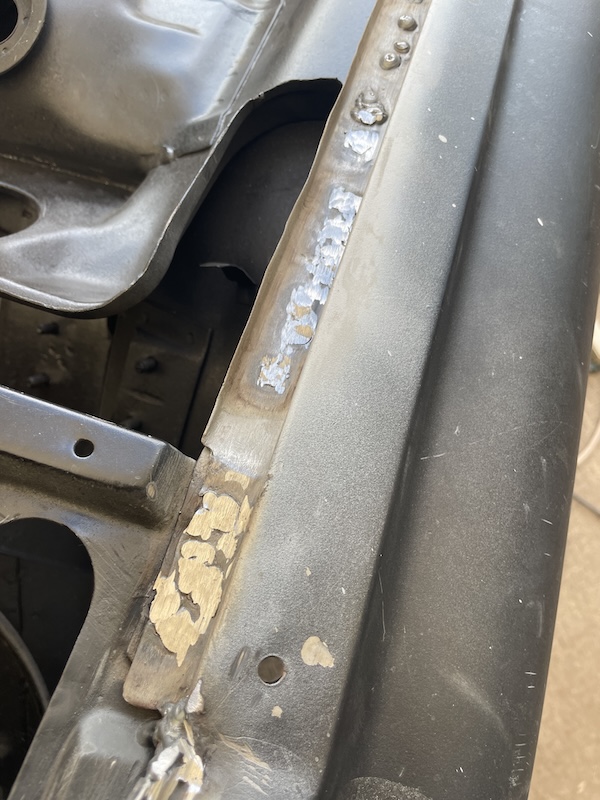 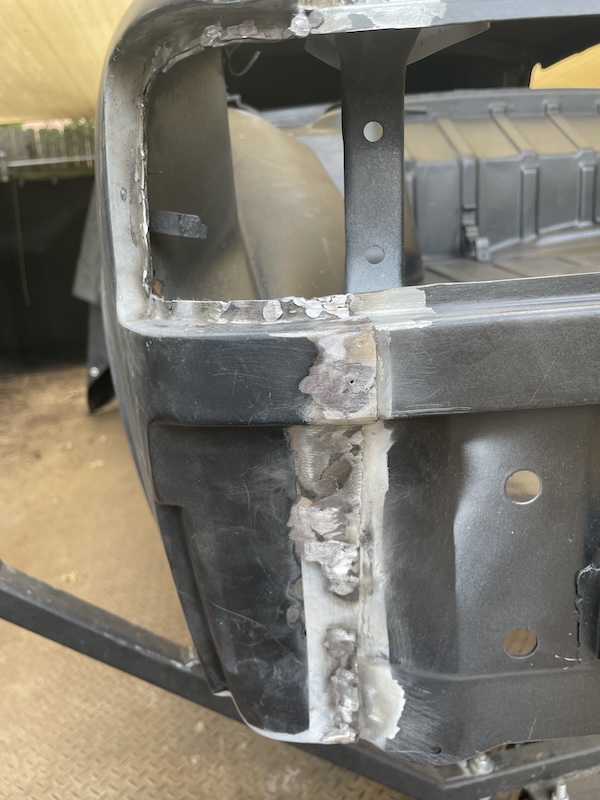 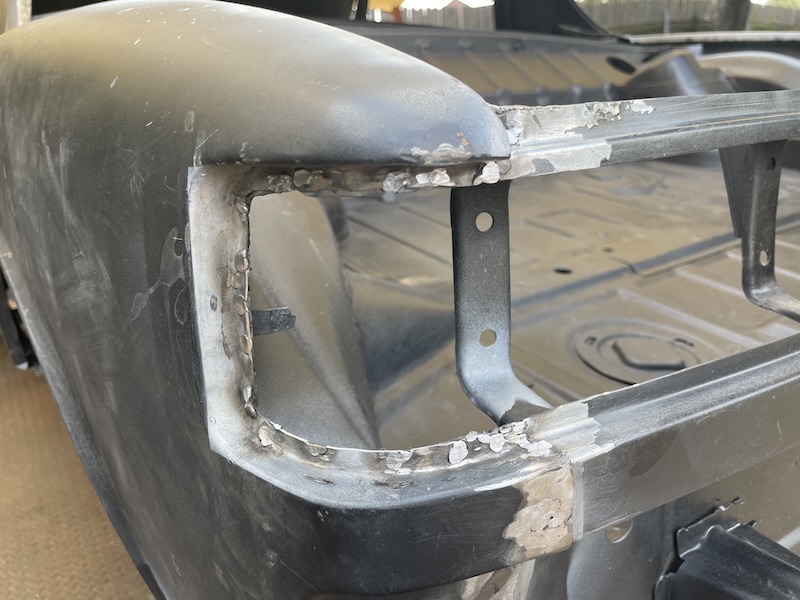 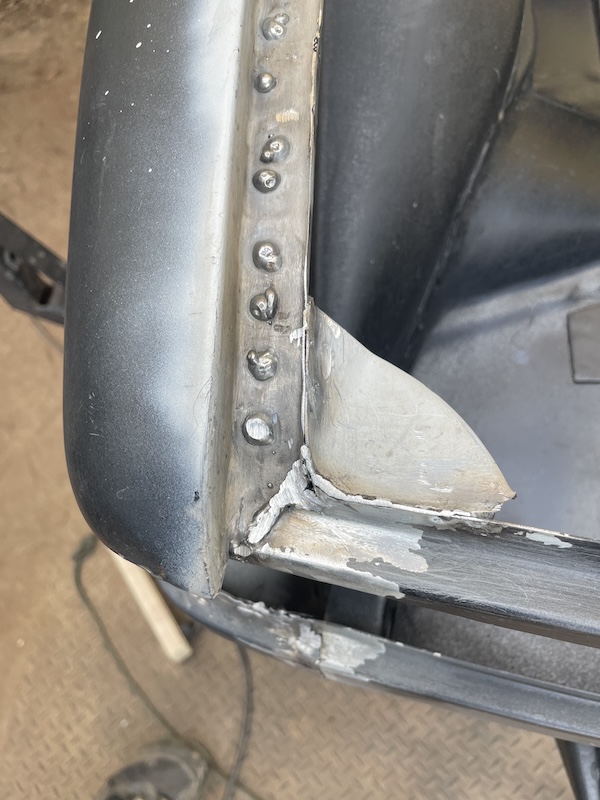 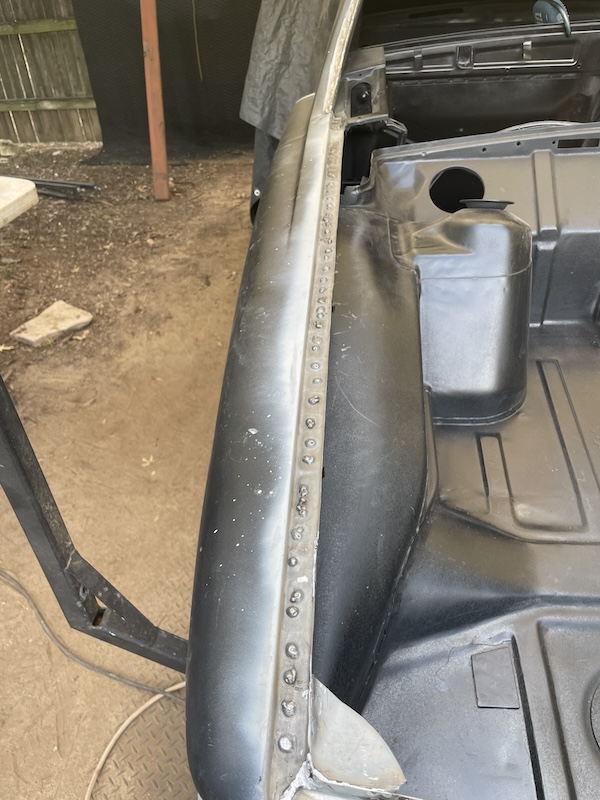 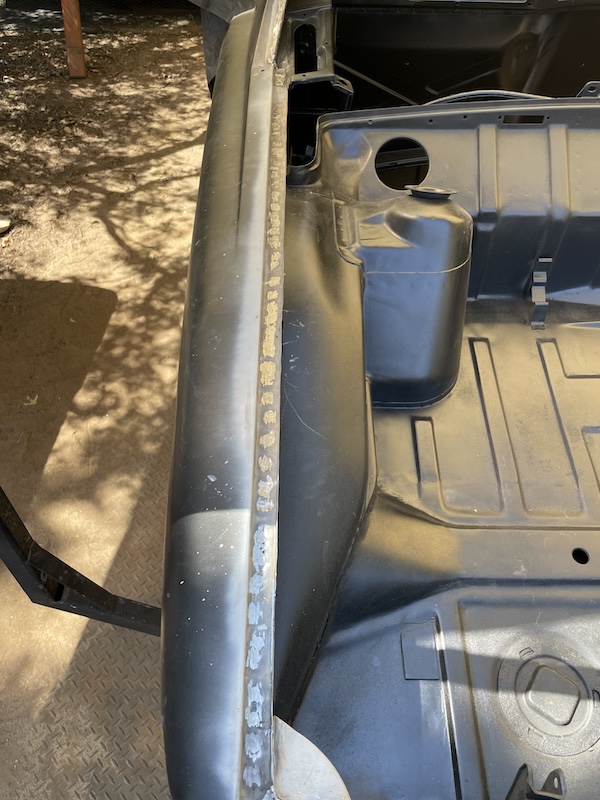 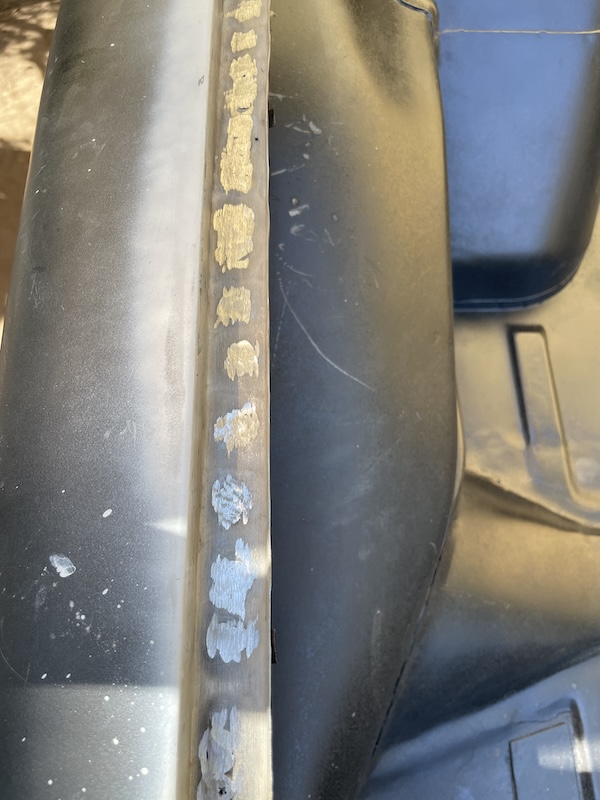 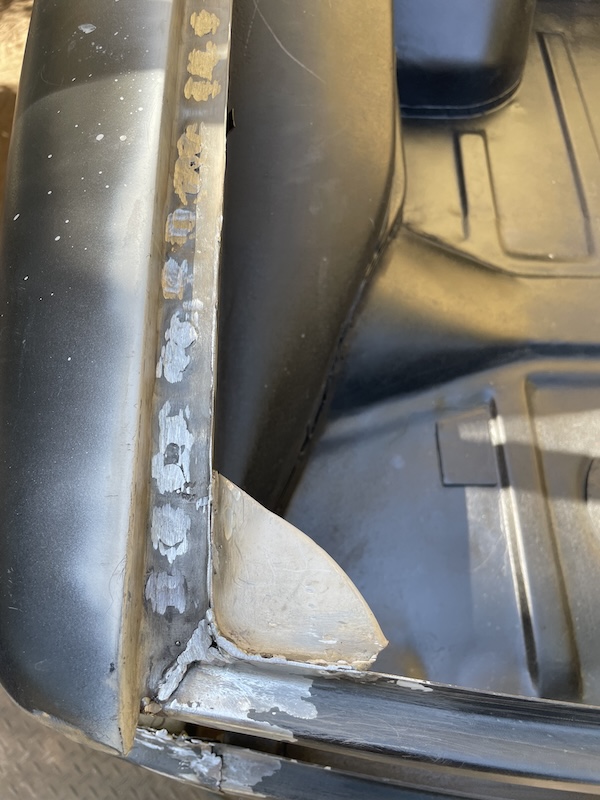 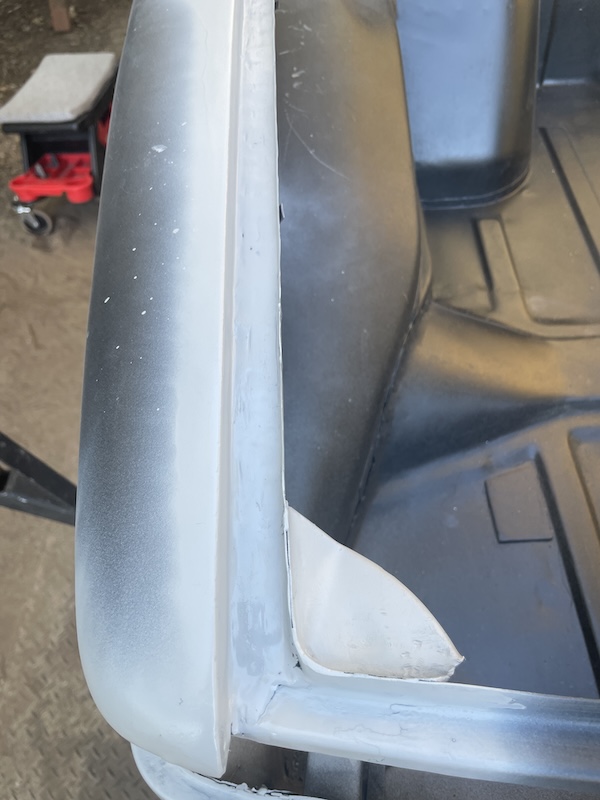 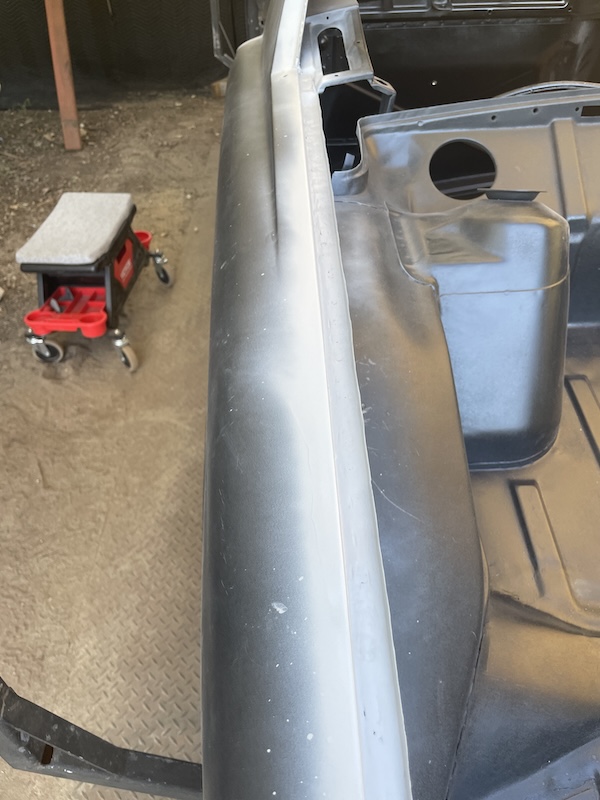 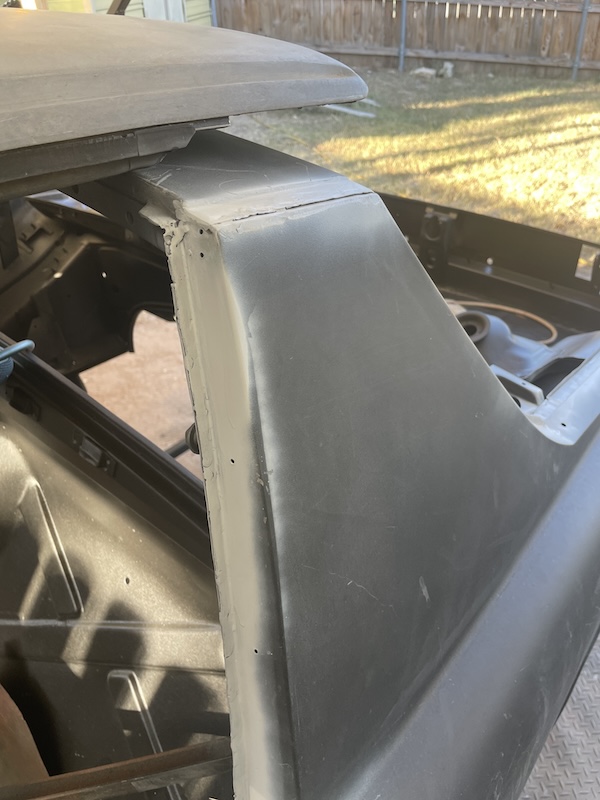 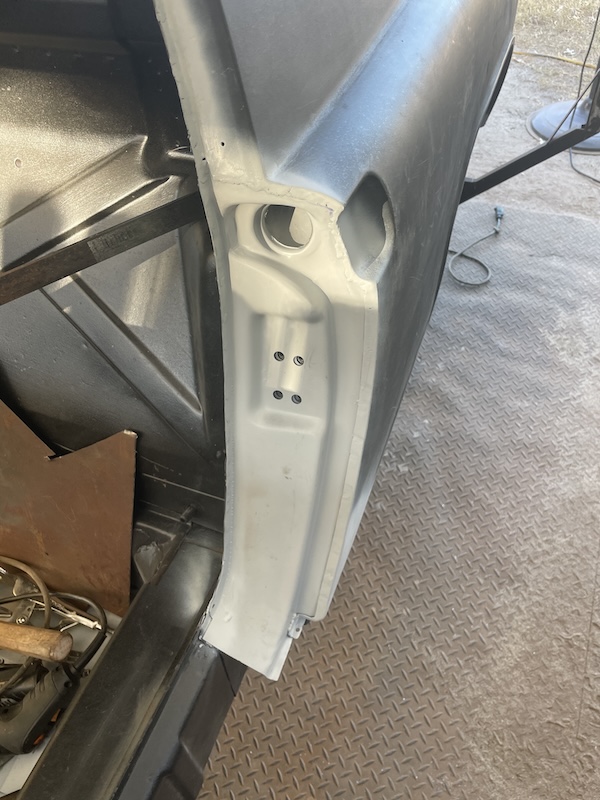 |
| slowrodent |
 Sep 27 2024, 08:51 AM Sep 27 2024, 08:51 AM
Post
#302
|
|
Member   Group: Members Posts: 177 Joined: 29-February 20 From: Tucson/Oro Valley Member No.: 23,981 Region Association: Southwest Region 
|
Such very very nice work (IMG:style_emoticons/default/pray.gif) Kinda like building a new car from scratch...
|
| technicalninja |
 Sep 27 2024, 10:45 AM Sep 27 2024, 10:45 AM
Post
#303
|
|
Advanced Member     Group: Members Posts: 2,523 Joined: 31-January 23 From: Granbury Texas Member No.: 27,135 Region Association: Southwest Region 
|
Such very very nice work (IMG:style_emoticons/default/pray.gif) Kinda like building a new car from scratch... Naw, that would have been easier!!!! Fred's OBVIOUSLY a masochist! (IMG:style_emoticons/default/av-943.gif) (IMG:style_emoticons/default/av-943.gif) (IMG:style_emoticons/default/av-943.gif) |
| friethmiller |
 Sep 27 2024, 11:57 AM Sep 27 2024, 11:57 AM
Post
#304
|
|
Senior Member    Group: Members Posts: 846 Joined: 10-February 19 From: Austin, TX Member No.: 22,863 Region Association: Southwest Region 
|
Such very very nice work (IMG:style_emoticons/default/pray.gif) Kinda like building a new car from scratch... Naw, that would have been easier!!!! Fred's OBVIOUSLY a masochist! (IMG:style_emoticons/default/av-943.gif) (IMG:style_emoticons/default/av-943.gif) (IMG:style_emoticons/default/av-943.gif) @slowrodent - Thanks man! @technicalninja - I operate in the "pain cave"! (IMG:style_emoticons/default/screwy.gif) |
| bkrantz |
 Sep 27 2024, 07:38 PM Sep 27 2024, 07:38 PM
Post
#305
|
|
914 Guru      Group: Members Posts: 8,342 Joined: 3-August 19 From: SW Colorado Member No.: 23,343 Region Association: Rocky Mountains 
|
Nice. I remember all the quality hours I spent grinding. I think I still have grit in my hair.
|
| technicalninja |
 Sep 27 2024, 07:54 PM Sep 27 2024, 07:54 PM
Post
#306
|
|
Advanced Member     Group: Members Posts: 2,523 Joined: 31-January 23 From: Granbury Texas Member No.: 27,135 Region Association: Southwest Region 
|
Just had a thought,
Fred doesn't have to clean up nearly as often as he would in the garage! Probably keeps the house cleaner as well. There is at least one positive to working outside... |
| friethmiller |
 Sep 28 2024, 06:44 PM Sep 28 2024, 06:44 PM
Post
#307
|
|
Senior Member    Group: Members Posts: 846 Joined: 10-February 19 From: Austin, TX Member No.: 22,863 Region Association: Southwest Region 
|
Driver Side Door Threshold (9/27 - 9/28/2024):
[Friday Evening] I decided to get a jump on things and started prep'n the driver side threshold on Friday evening. Aligning this part isn't that difficult but you have to pay attention to the inside edge. It actually sits just a bit short of the rocker to longitudinal pinch weld seam. Once in place and secured with some sheet metal screws, the two support pieces can be positioned below along the inner rocker. I used a marker to note the locations to drill out for plug welds. It's almost impossible to weld this from below so I prefer to do it from the top. With all the holes drilled out and the part primed, I mounted it one final time. Note: the black arrow shows an area that I will work on in the morning. I don't like the gap here. 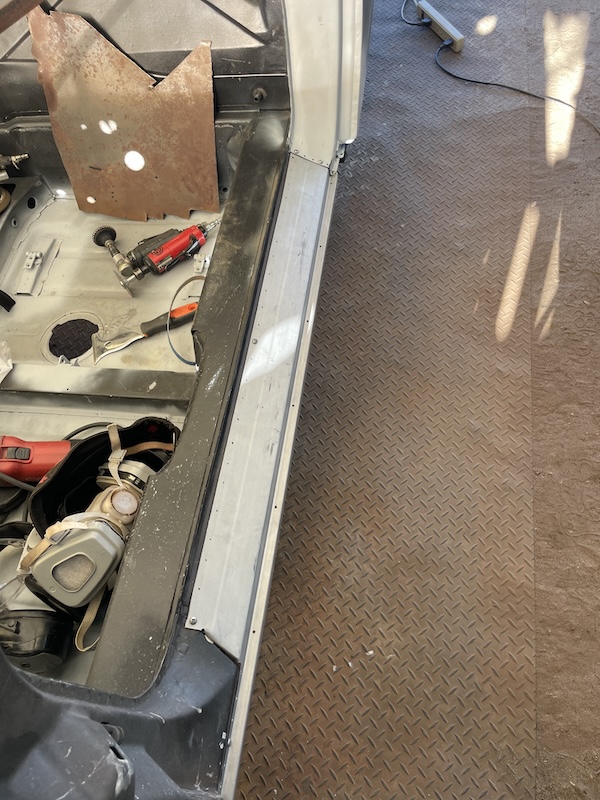 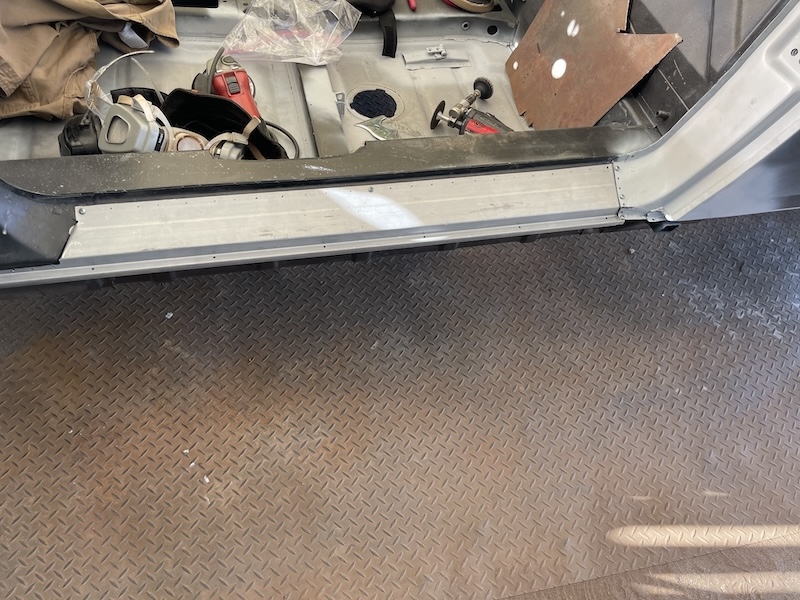 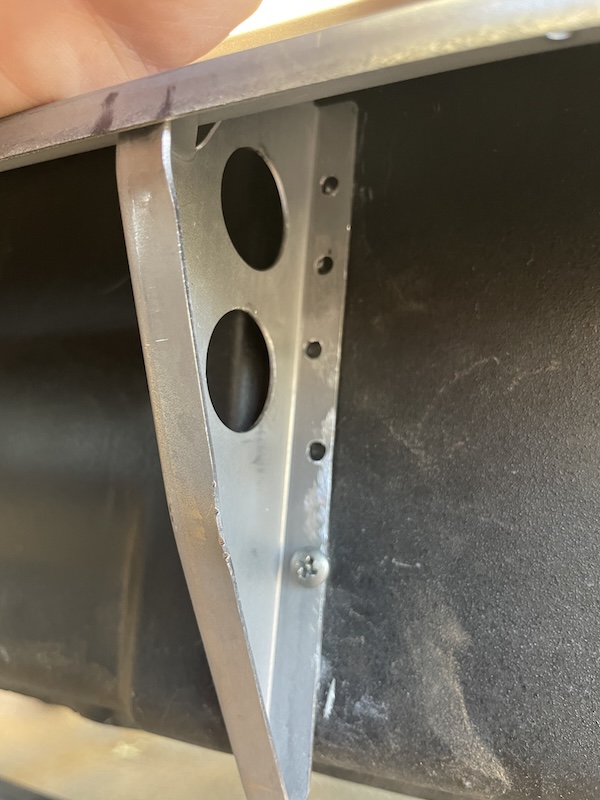 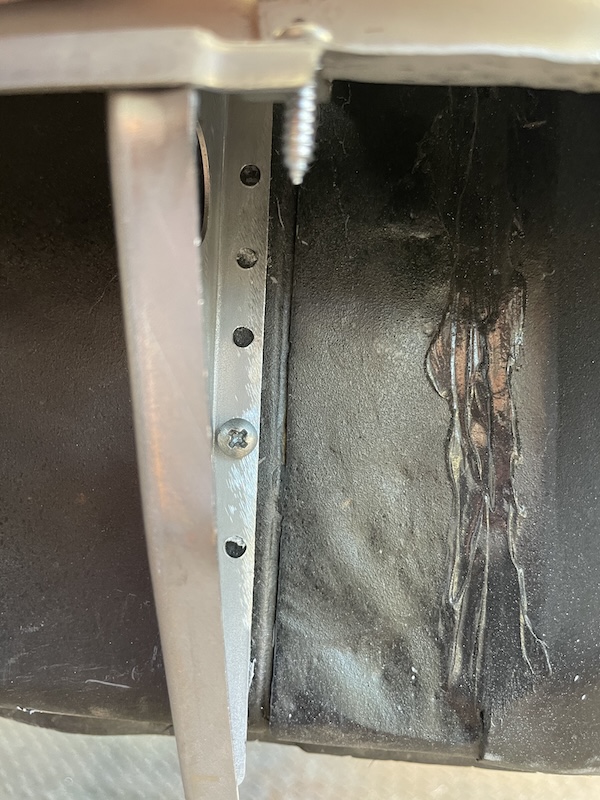 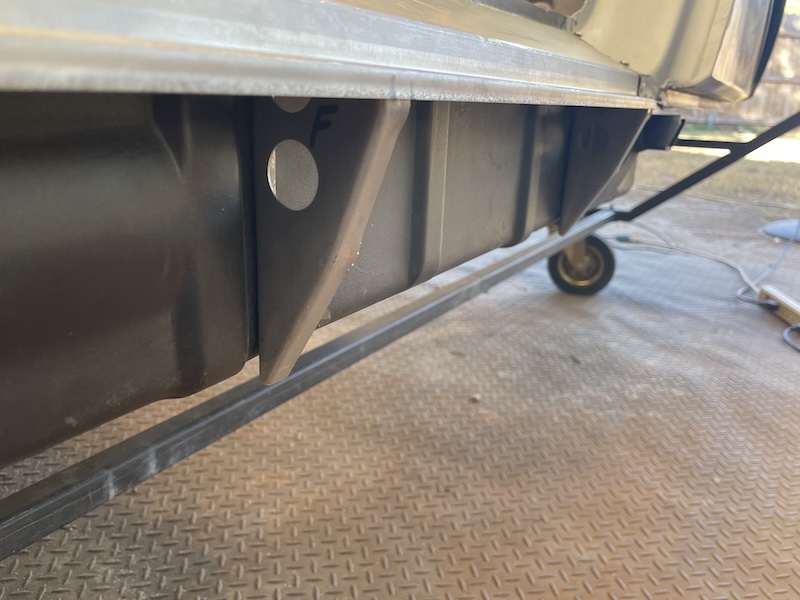 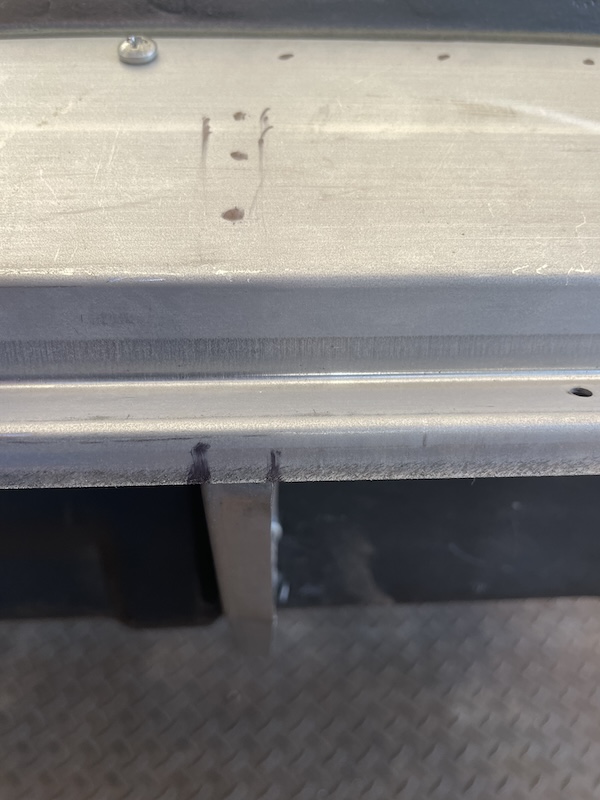 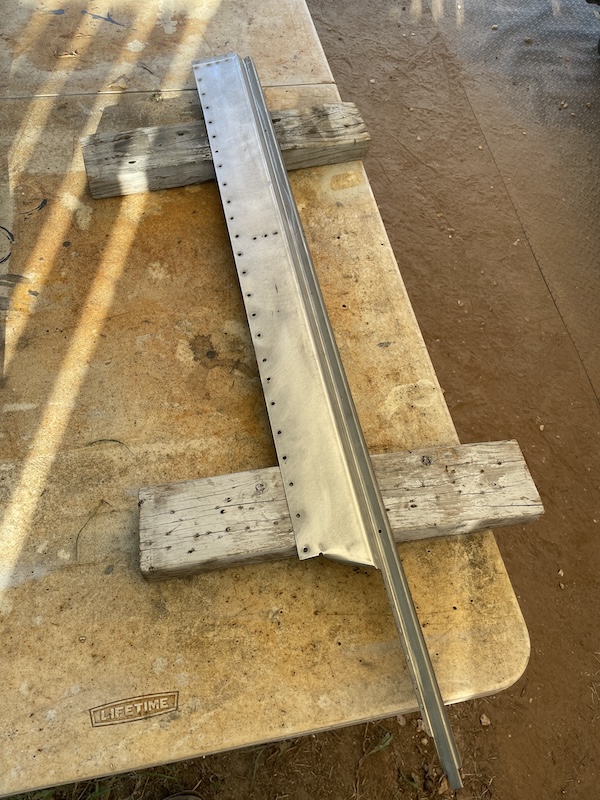 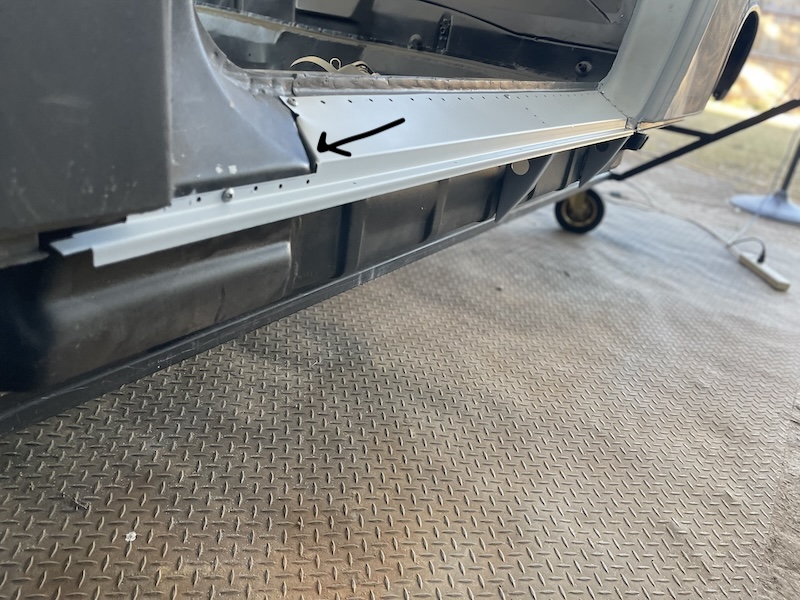 [Saturday] With the parts ready to go, I disassembled everything to start with the brackets. I decided to try and mimic the factory bend that is at the bottom of each bracket. This small curve tucks up nicely against the bottom of the rocker. It looks a lot better than just having the bracket stick out below the rocket, IMO. This was really easy to do with snips, a pair of vise grips, and a small hammer. I plan to weld-up these ends later once the car is rotated. 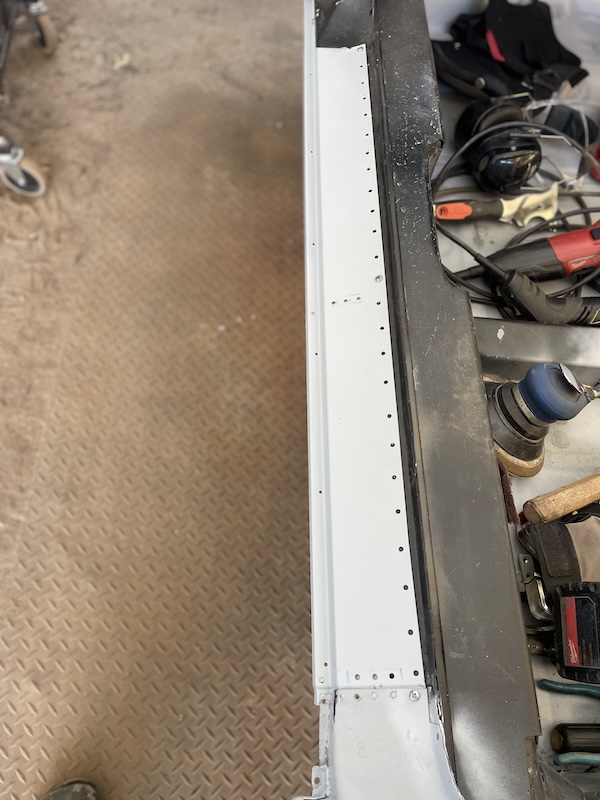 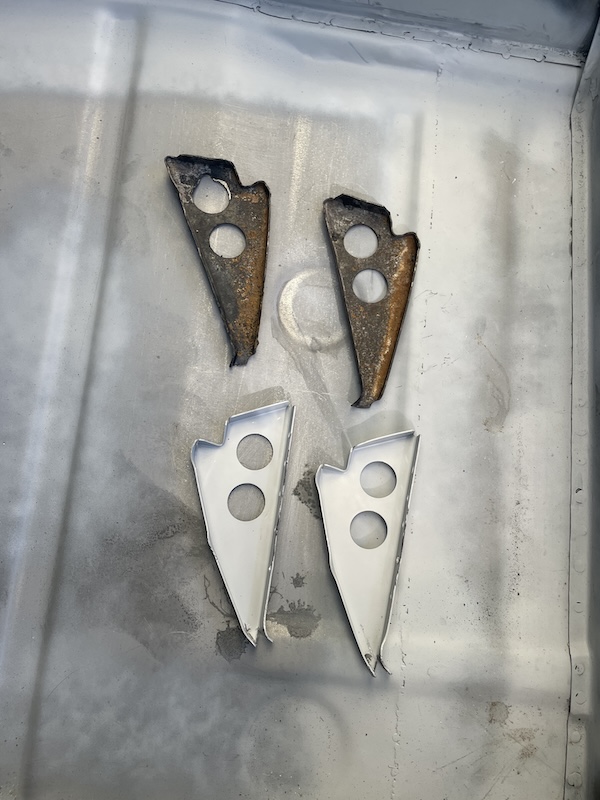 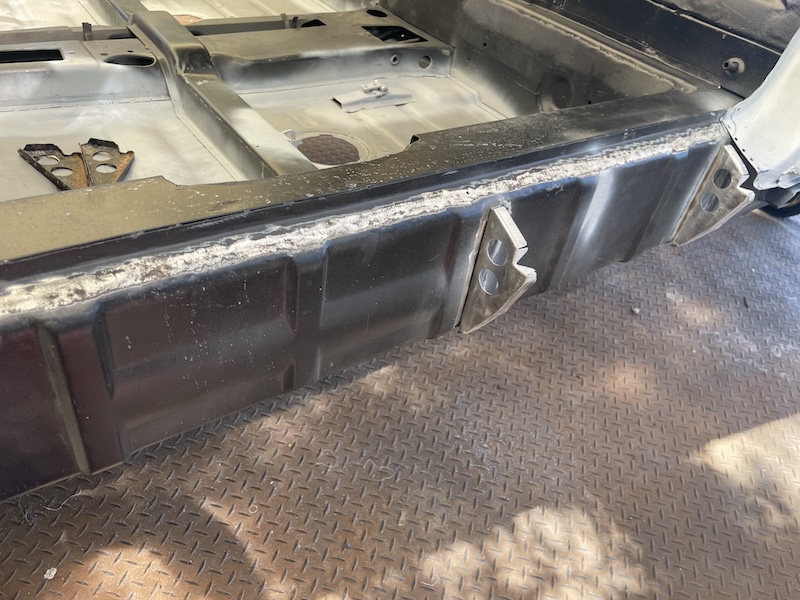 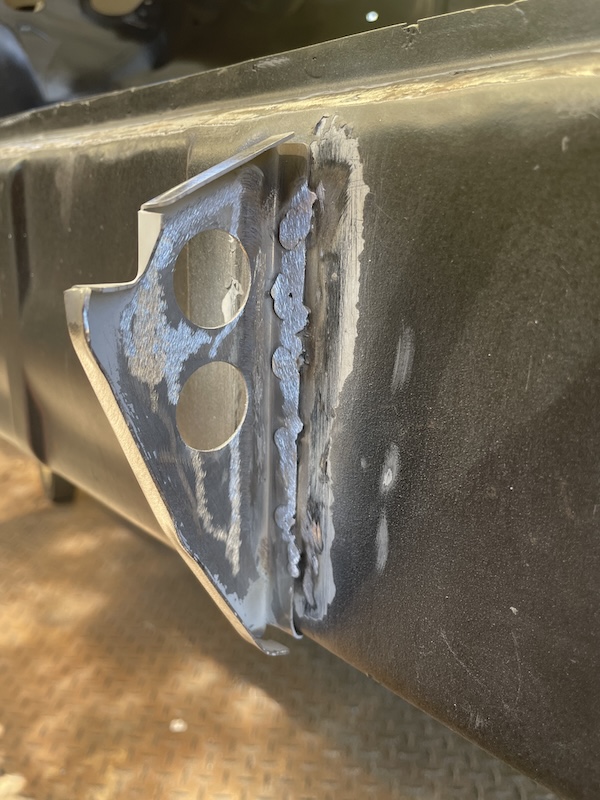 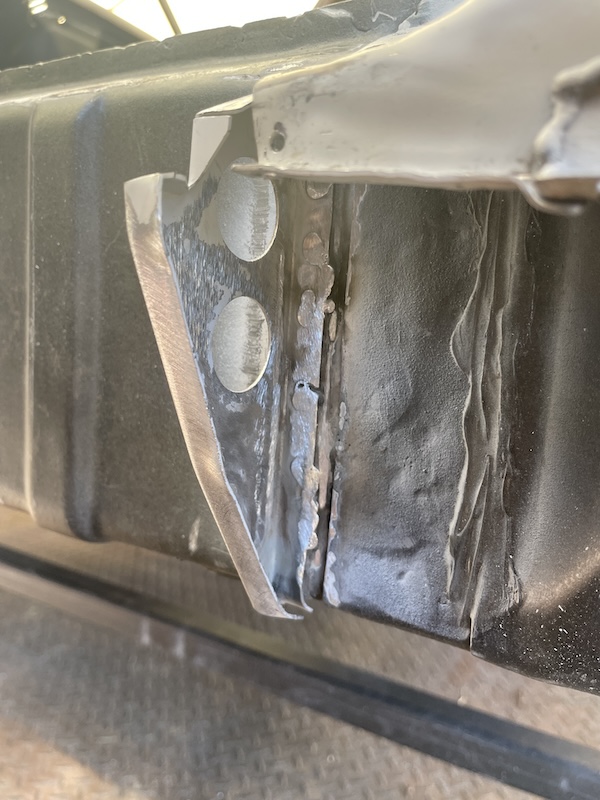 Got to use my magic green hammer to straighten the edges a bit. There's a lot of photos here of the process. Used a 4 1/2" grinder to get a majority of the excess weld, a 2 inch pneumatical grinder to flatten, followed up with my finger sander. Finally, I used 80-grit and then 120-grit on the D/A to blend everything in and prep it for paint. This side is pretty much done (IMG:style_emoticons/default/biggrin.gif) 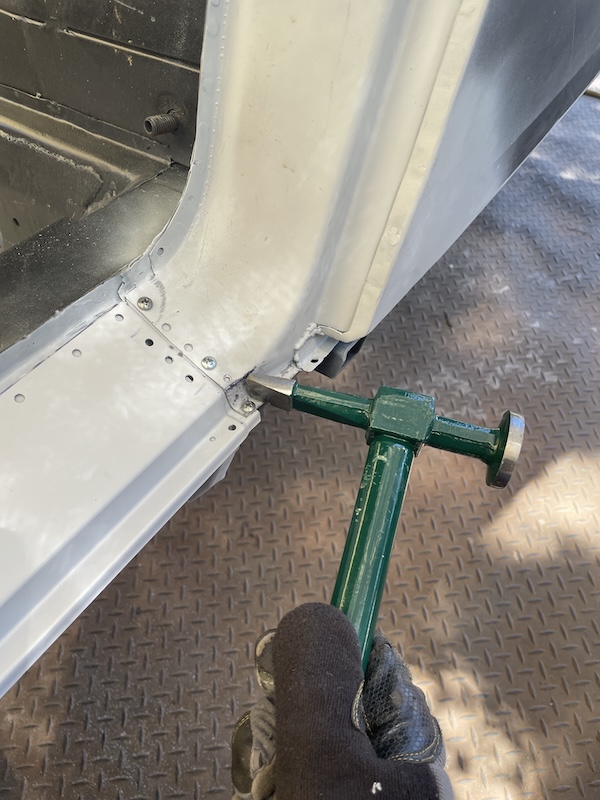 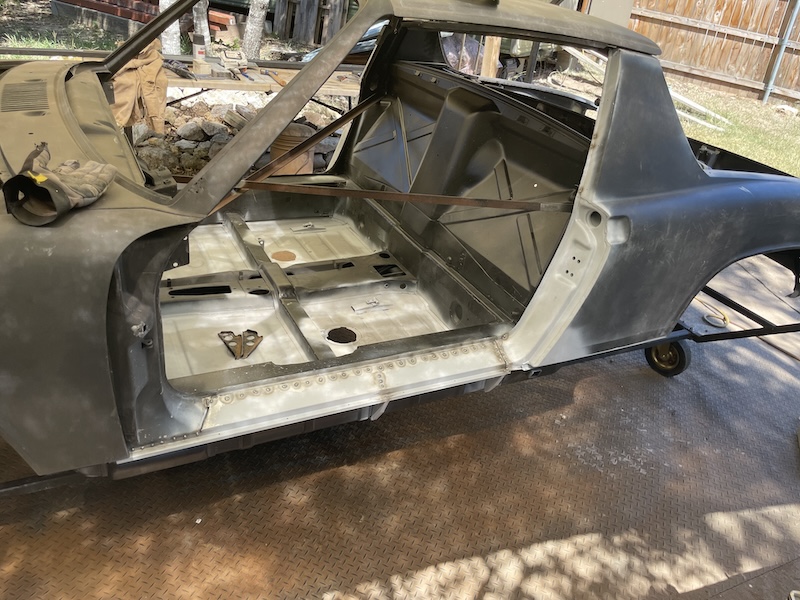 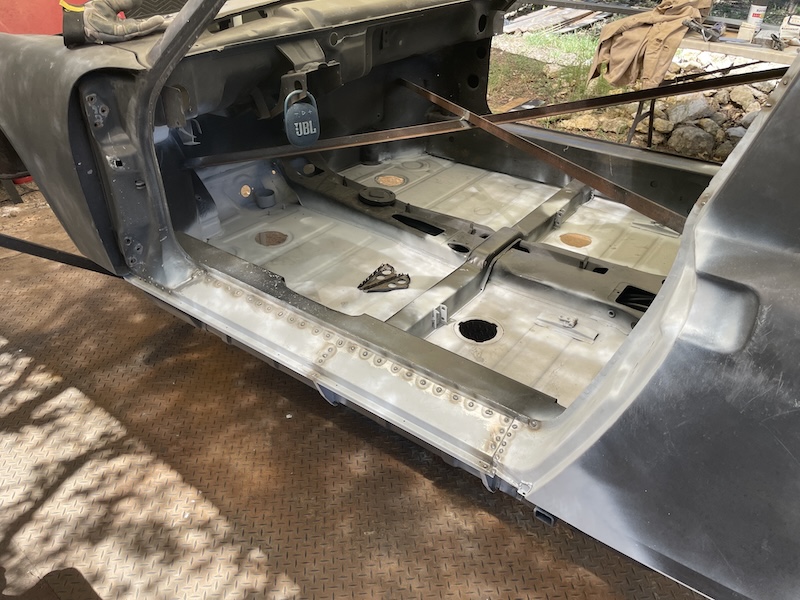 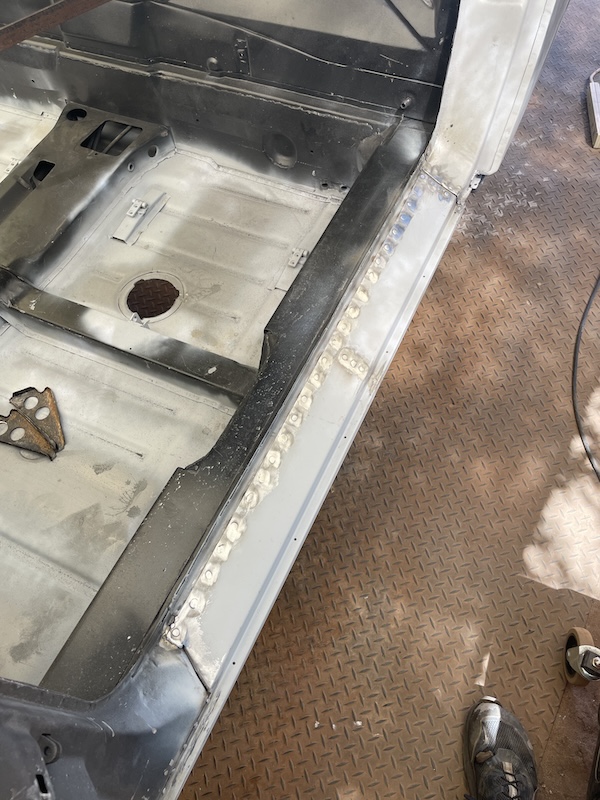 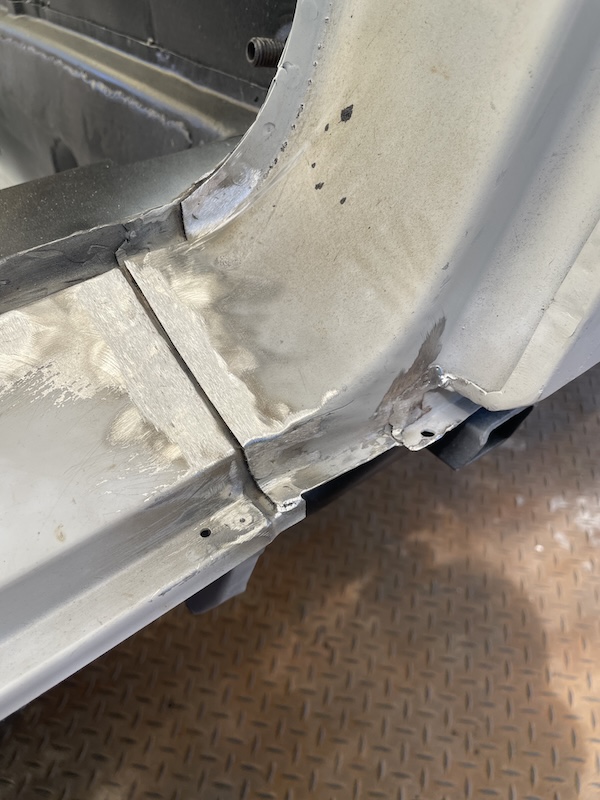 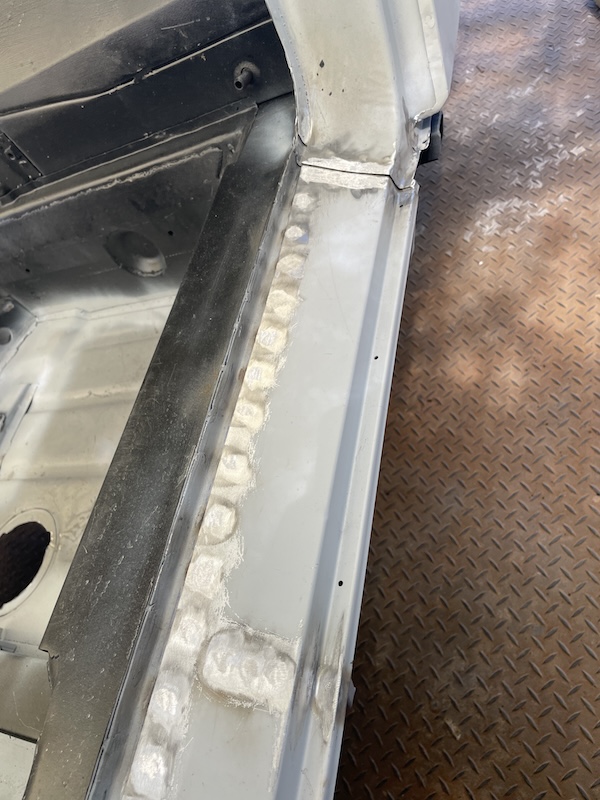 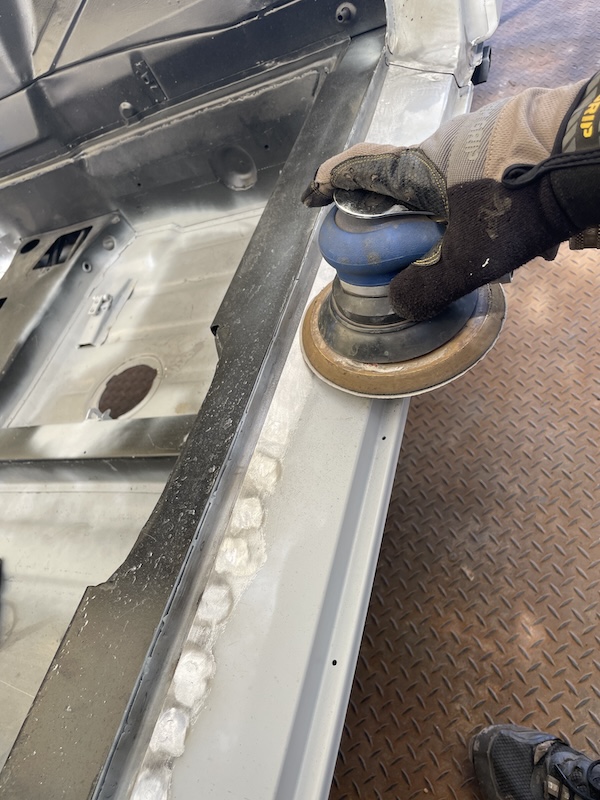 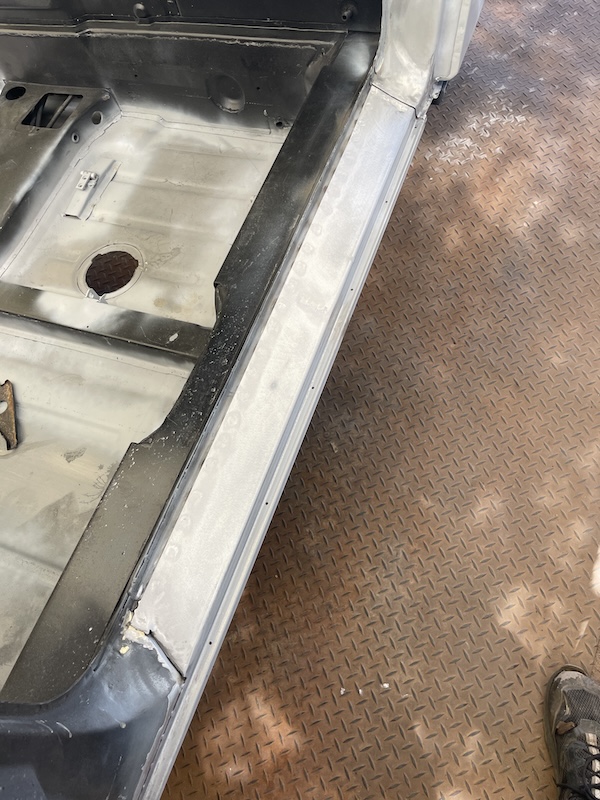 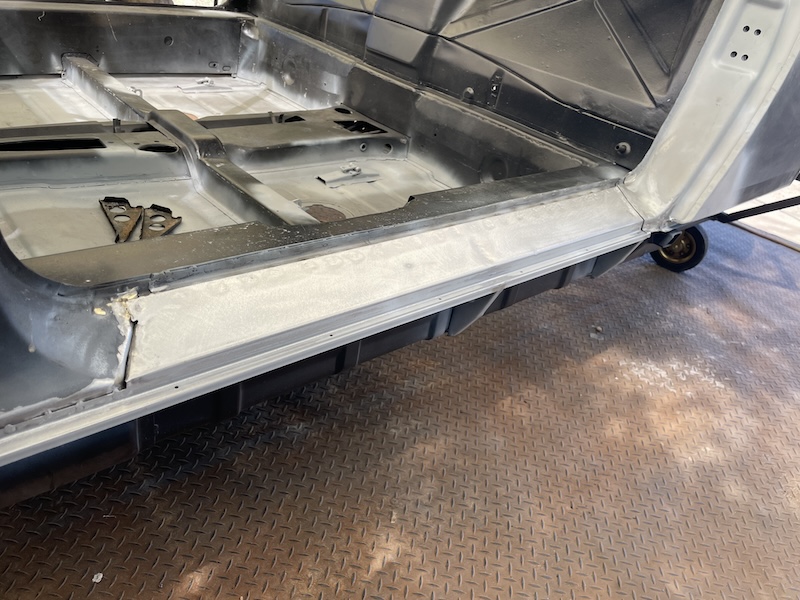 |
| friethmiller |
 Sep 28 2024, 06:45 PM Sep 28 2024, 06:45 PM
Post
#308
|
|
Senior Member    Group: Members Posts: 846 Joined: 10-February 19 From: Austin, TX Member No.: 22,863 Region Association: Southwest Region 
|
Just had a thought, Fred doesn't have to clean up nearly as often as he would in the garage! Probably keeps the house cleaner as well. There is at least one positive to working outside... My wife begs to differ! (IMG:style_emoticons/default/chair.gif) |
| friethmiller |
 Sep 29 2024, 02:37 PM Sep 29 2024, 02:37 PM
Post
#309
|
|
Senior Member    Group: Members Posts: 846 Joined: 10-February 19 From: Austin, TX Member No.: 22,863 Region Association: Southwest Region 
|
Passenger Side Door Threshold (9/29/2024):
First off on completing the passenger side threshold is the necessary holes for the A/C lines. I hadn't done these yet so this was my last chance to do it while I had good access. Used a hole saw and a stepper tool to get two 1-3/8" holes. I also prep'd the angle brackets to allow these hoses to pass. Kind of a PITA but didn't take too long. Next I prepared the threshold and welded it into place. Same treatment as the other side. 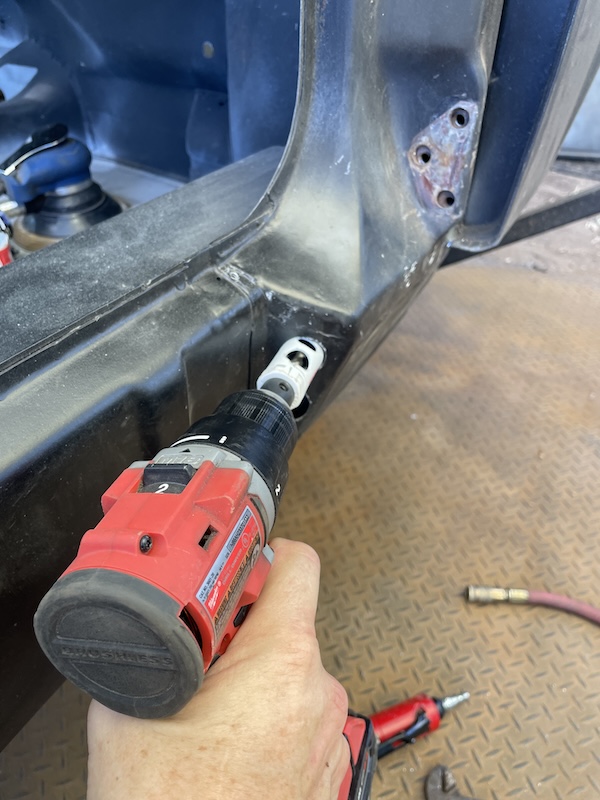 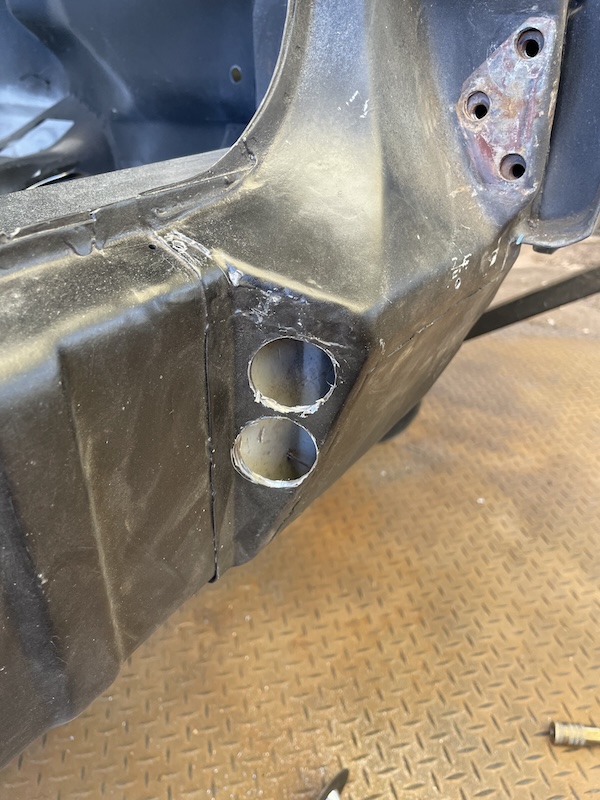 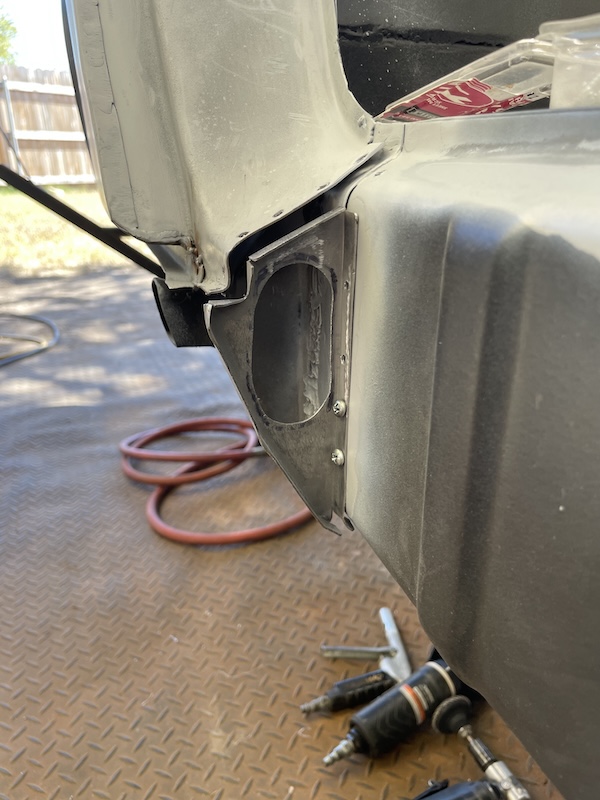 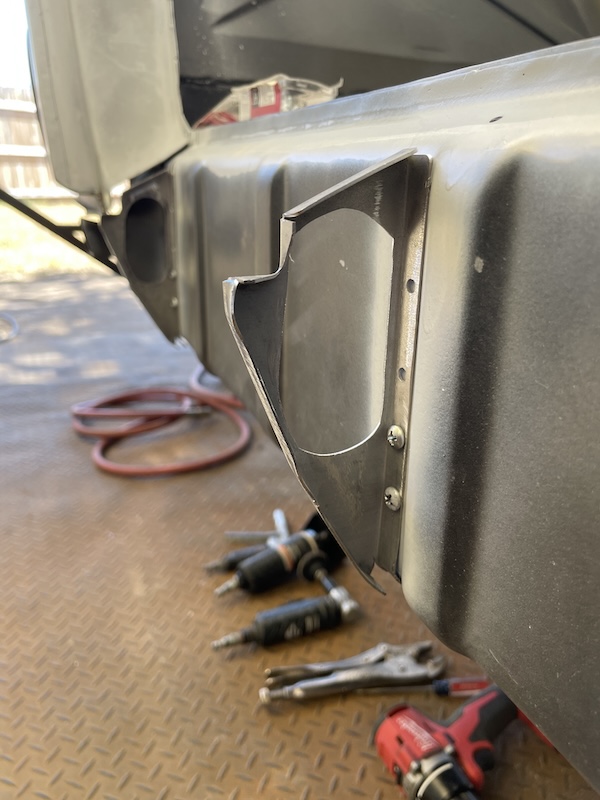 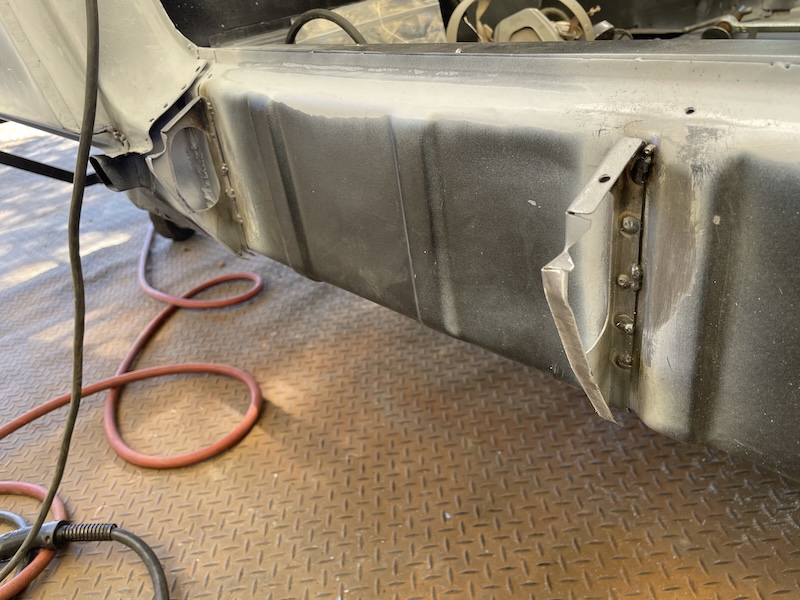 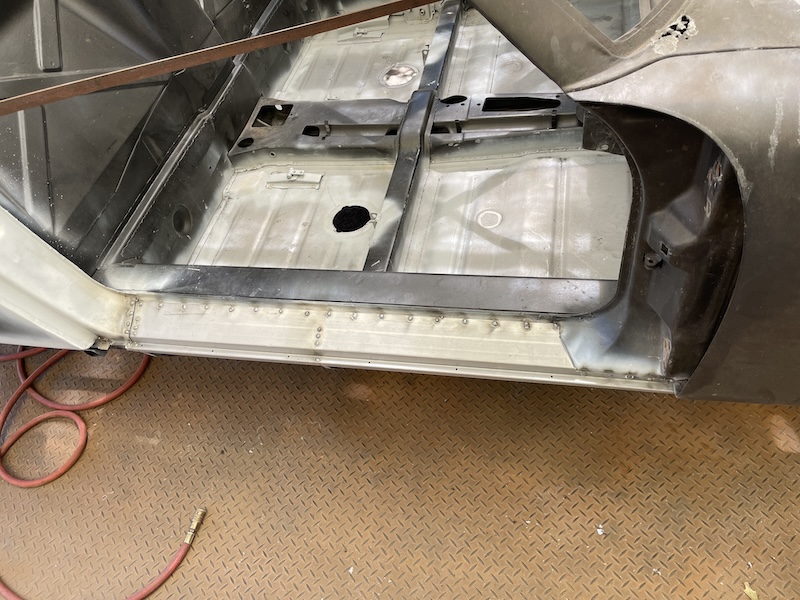 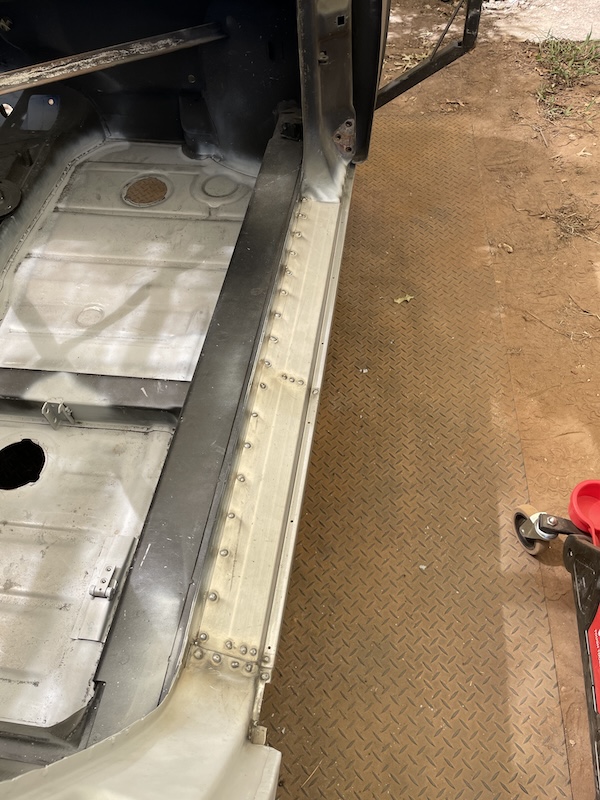 Next, I welded in two retaining plates - each having a welded nut on the back. These fit nicely in the body holes in the kick panel area and will remain in the car permanently. I probably should have done this from the get go but decided to use the prefab'd angle brackets on the door posts. This set up will allow me to mount the doors and leave everything in place. 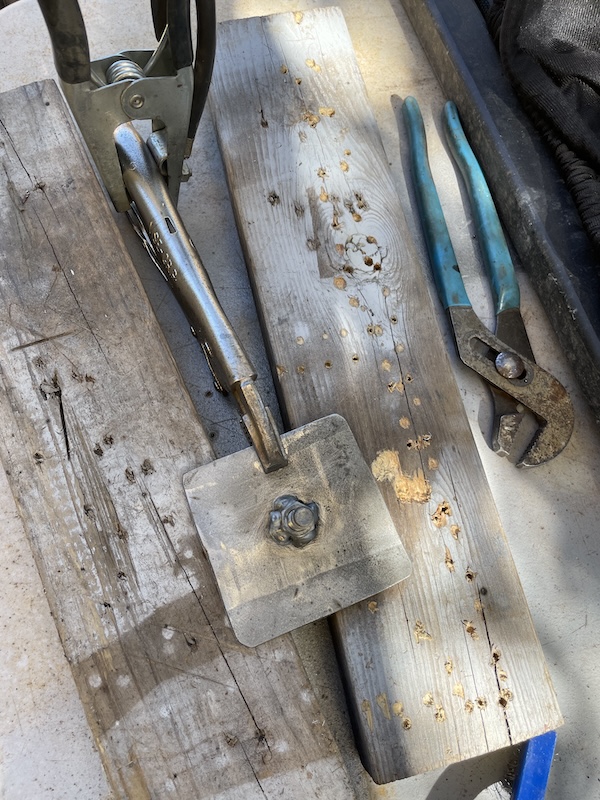 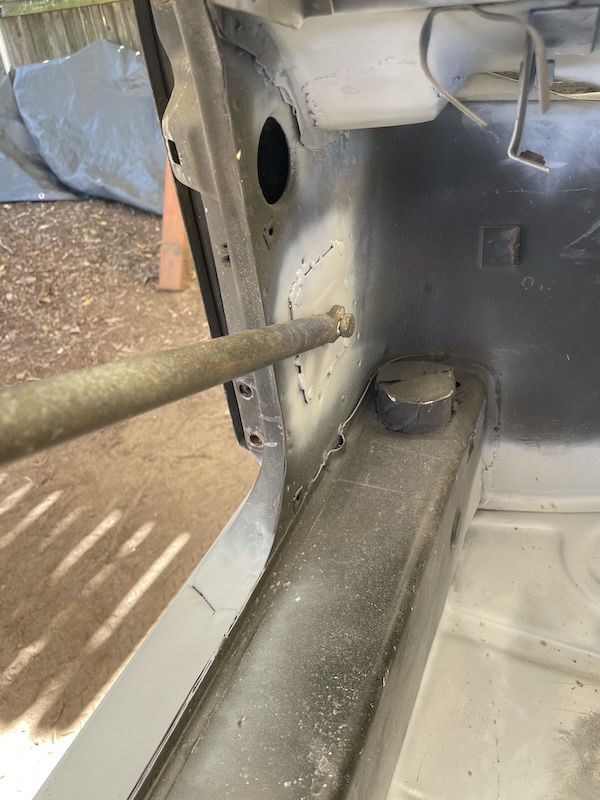 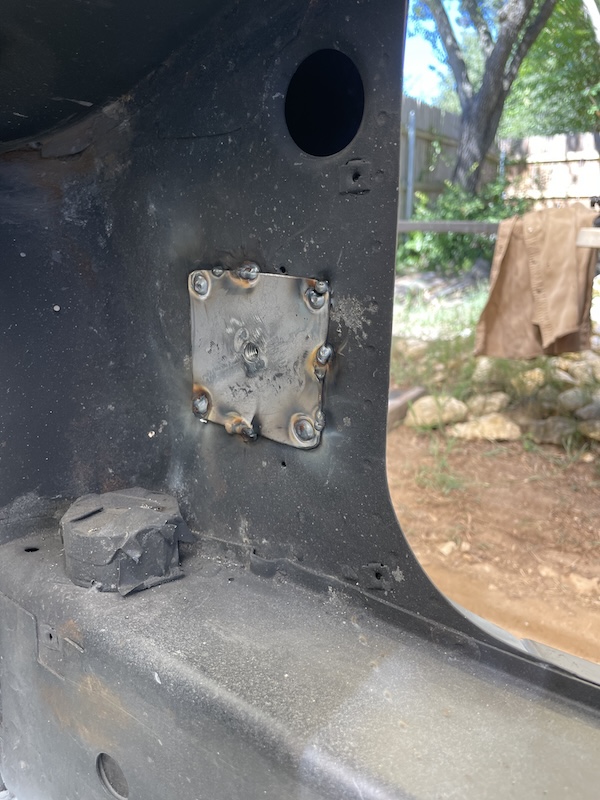 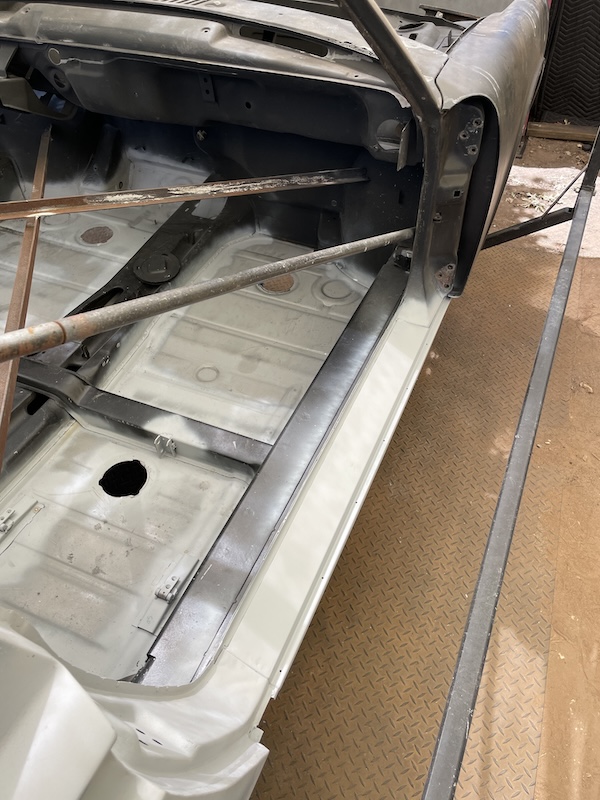 Final shots of the car being covered for the day/weekend. I'll likely be gone next weekend so it'll be mid-October before I get back out to continue the work. Cheers! (IMG:style_emoticons/default/beerchug.gif) 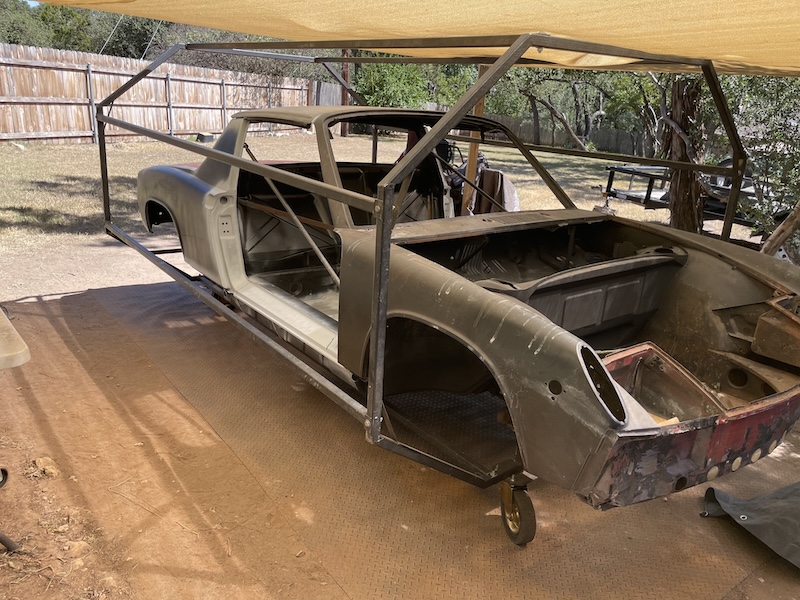 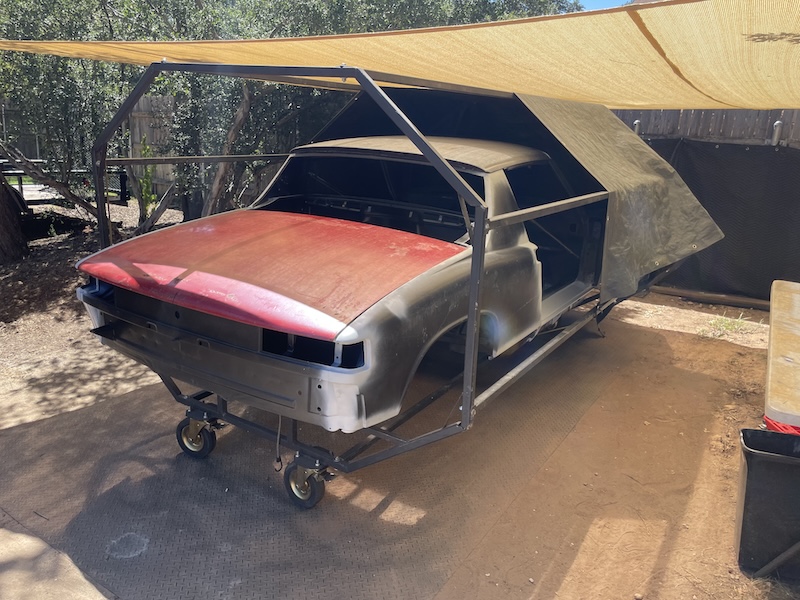 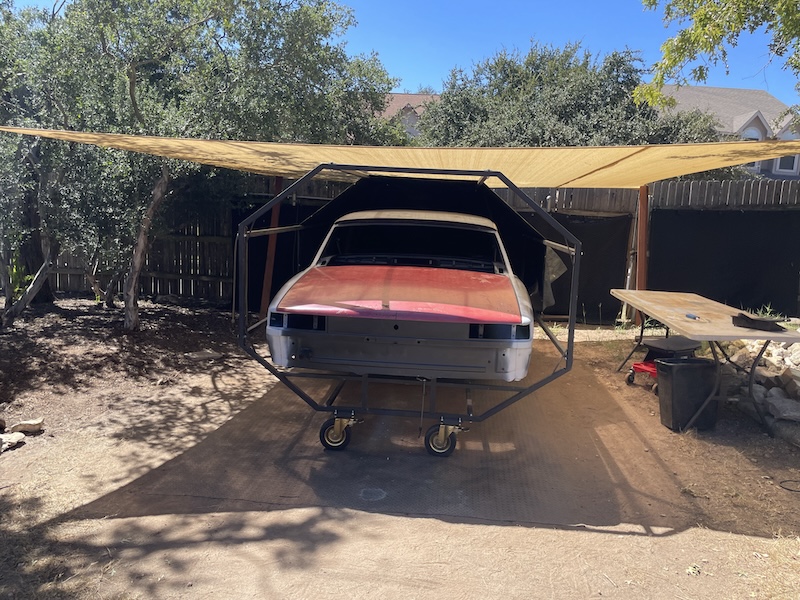 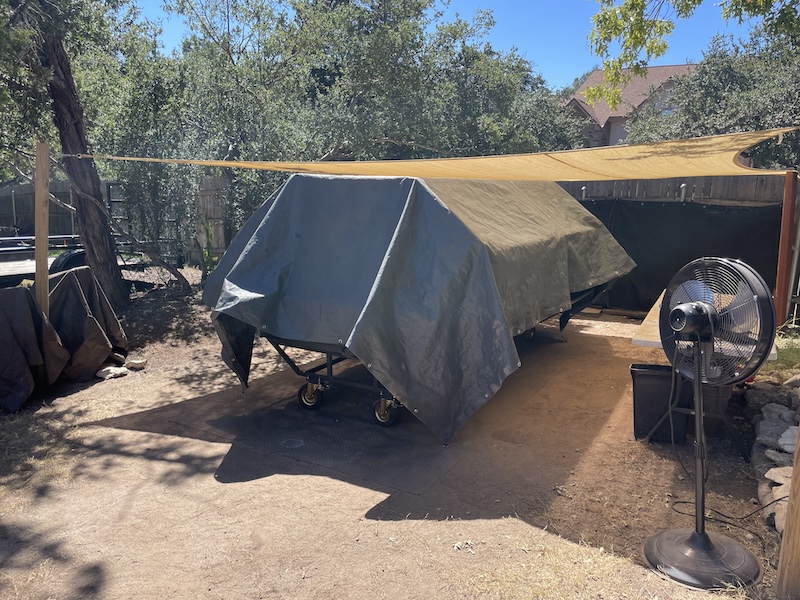 |
| technicalninja |
 Sep 29 2024, 04:49 PM Sep 29 2024, 04:49 PM
Post
#310
|
|
Advanced Member     Group: Members Posts: 2,523 Joined: 31-January 23 From: Granbury Texas Member No.: 27,135 Region Association: Southwest Region 
|
I like the camo cover!
Hide what you are doing from drone surveillance... The cage rotisserie makes a pretty good base for tarped rain protection! Paint by Xmas? |
| friethmiller |
 Sep 29 2024, 05:26 PM Sep 29 2024, 05:26 PM
Post
#311
|
|
Senior Member    Group: Members Posts: 846 Joined: 10-February 19 From: Austin, TX Member No.: 22,863 Region Association: Southwest Region 
|
I like the camo cover! Hide what you are doing from drone surveillance... The cage rotisserie makes a pretty good base for tarped rain protection! Paint by Xmas? That's right. (IMG:style_emoticons/default/flag.gif) I've got sound deadening blankets along the fence, a 6ft. low-profile sun blind, and dark waterproof tarps over the rotisserie - secured with bungee cords. I have a collapsible pole I use to "raise the tent" before I start working. The setup works pretty well. Paint by Christmas? (IMG:style_emoticons/default/blink.gif) I wish! The front fenders are coming off next and the entire rusted-out front end needs repaired. BTW, I'm going to engineer a custom front intake for my "large" condenser at the bumper/front valance area. |
| friethmiller |
 Oct 20 2024, 08:24 PM Oct 20 2024, 08:24 PM
Post
#312
|
|
Senior Member    Group: Members Posts: 846 Joined: 10-February 19 From: Austin, TX Member No.: 22,863 Region Association: Southwest Region 
|
Muffler Heat Baffle (10/19/2024):
First of two post for this weekend's work. I wanted to finish priming the car with the all the areas I have completed thus far before moving to the front of the vehicle. So, I decided to go ahead and prep and install the muffler heat baffle on the car before I painted anything. After pulling the baffle out of the shed, I took a look at its condition. The backside was rusted but the muffler side looked pretty good. So, I started by removing the obligatory globs of sealant that the factory mistakenly slung on the part - used heat and a scraper. I next used a wire-wheel and paint removing disk on the 4 1/2 inch grinder to get a majority of the rust and scale off. 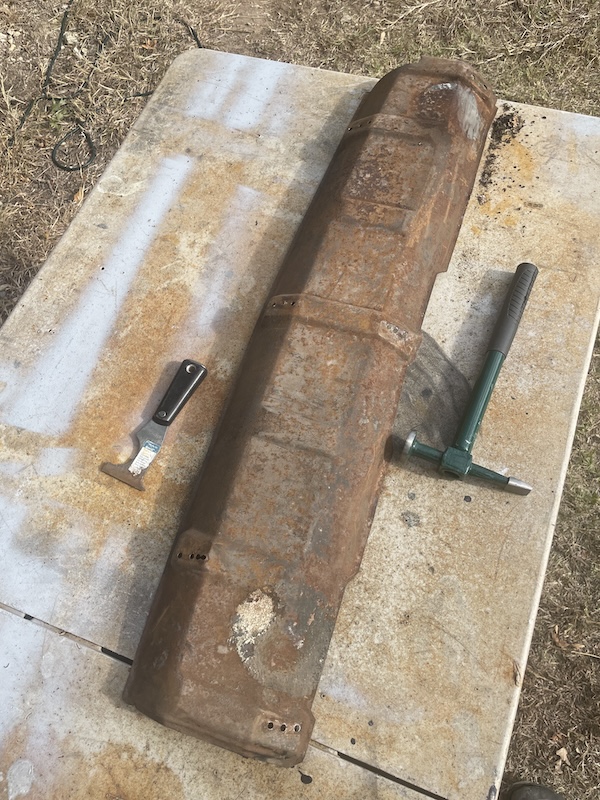 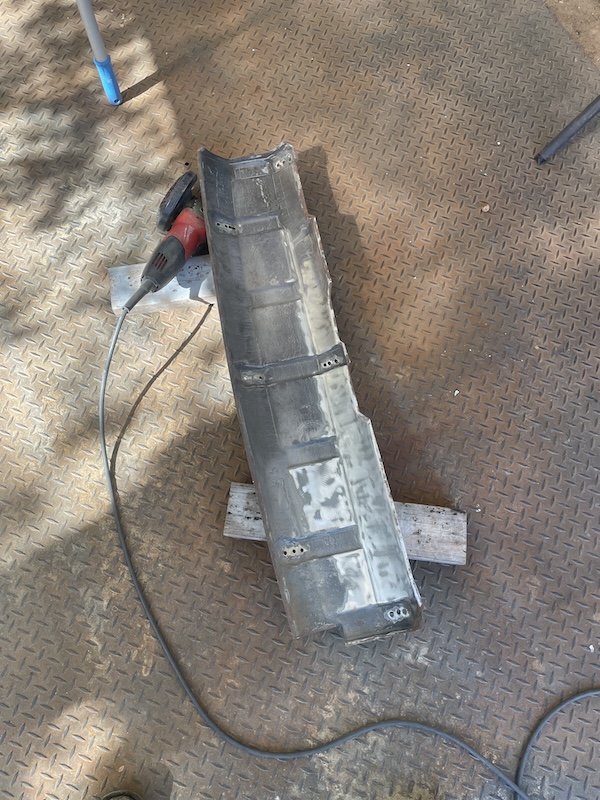 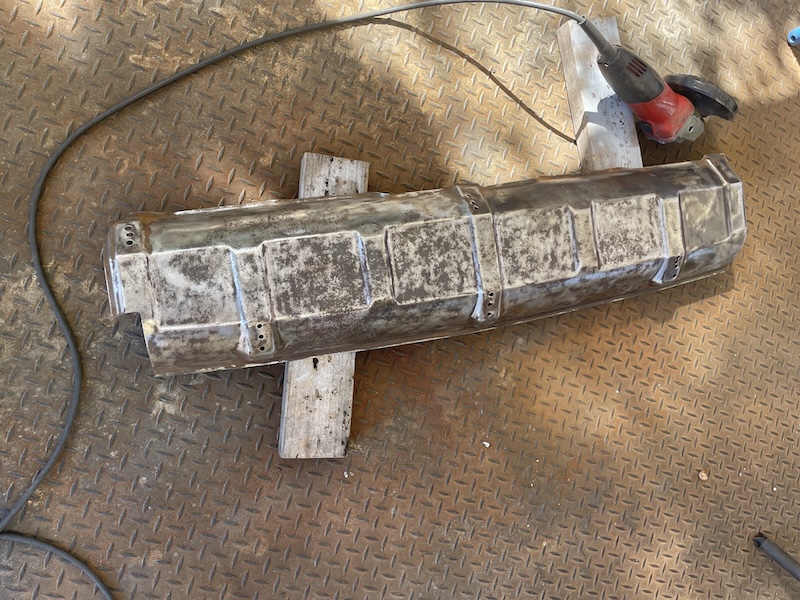 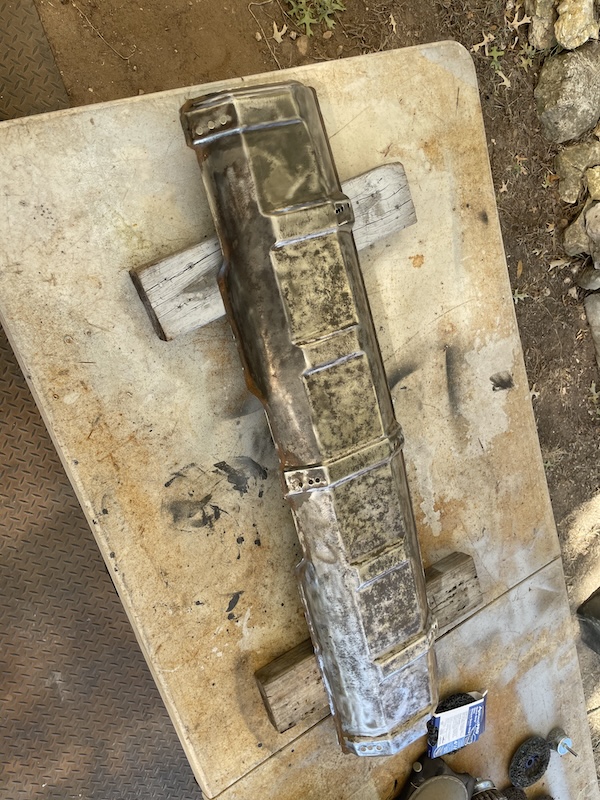 As you can see, you can only get so far with this so I pulled out the sand blaster and finished the job pretty quick - thanks to all the previous work. 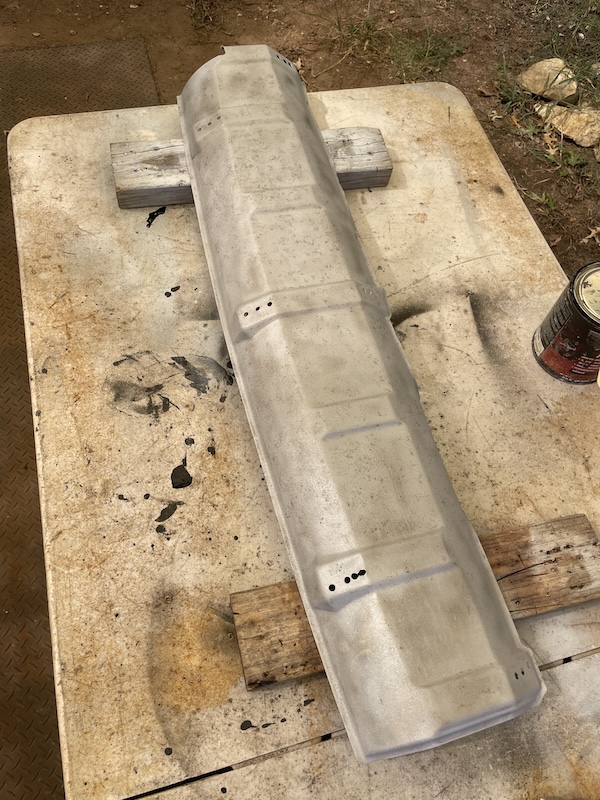 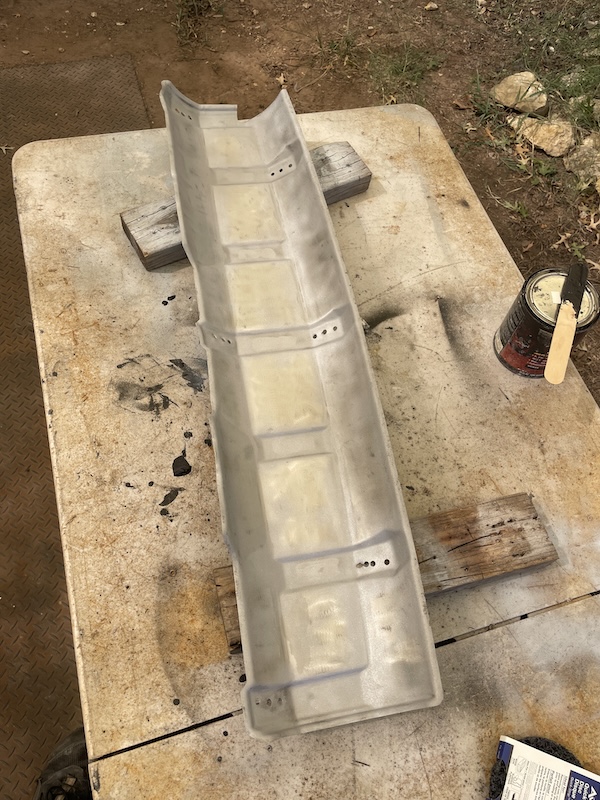 I then used the only POR-15 product I like, their high-temp epoxy. Unlike the normal POR-15, this stuff works great and is designed for parts like this. After painting the backside, I decided that it would be smart to weld the part onto the car, grind the welds, and THEN paint the muffler side. The following photos show this process. I'll probably hit it with a second coat later. 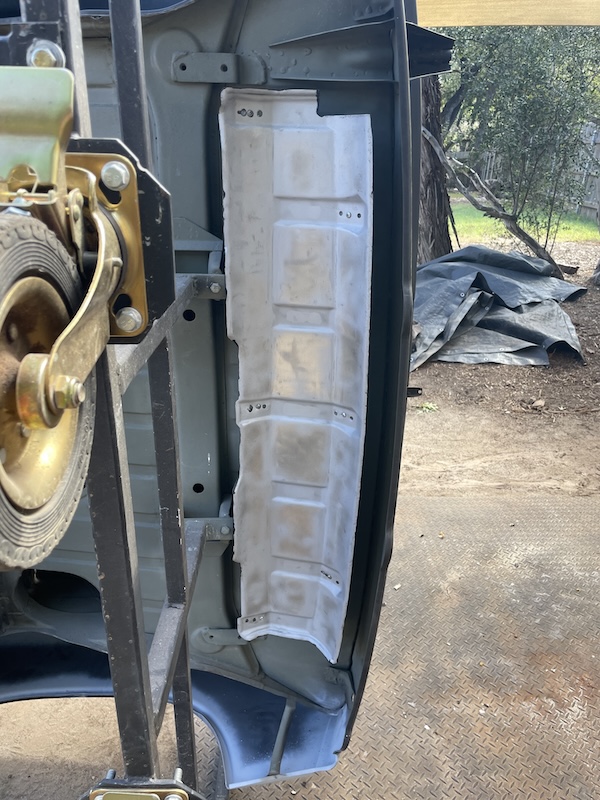 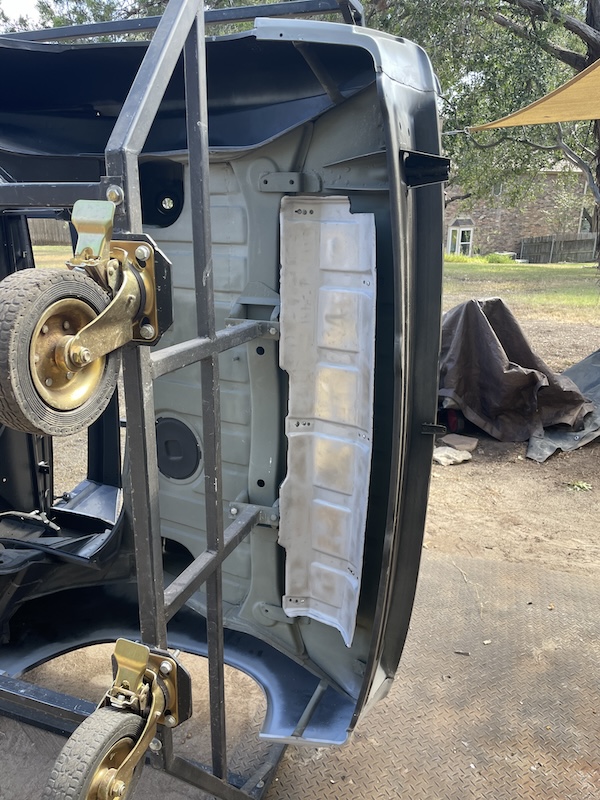 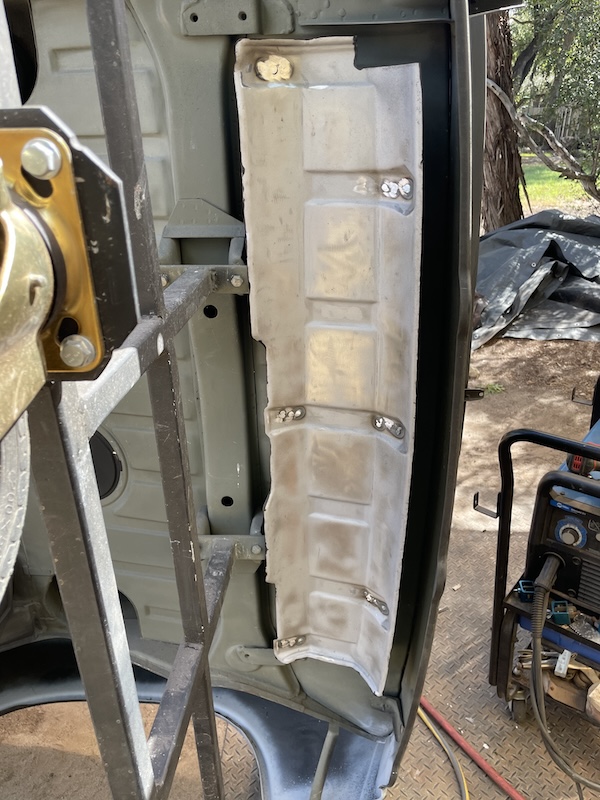 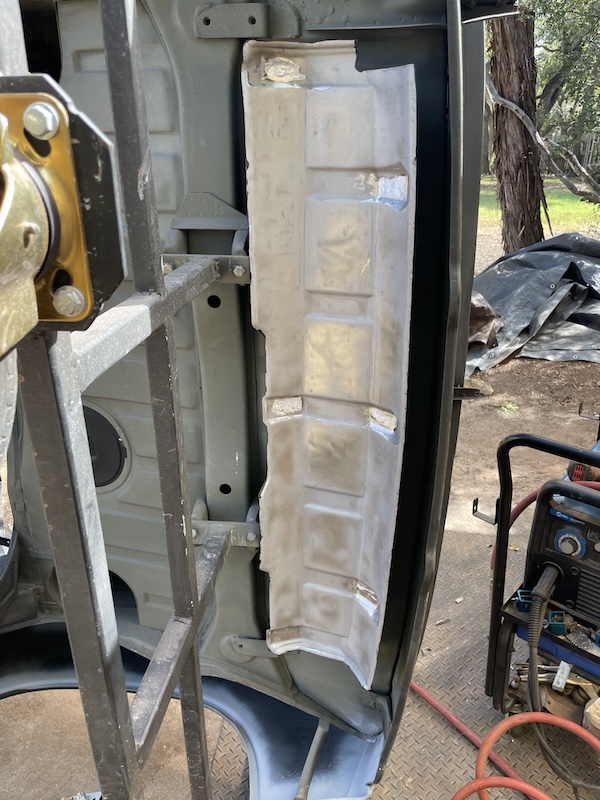 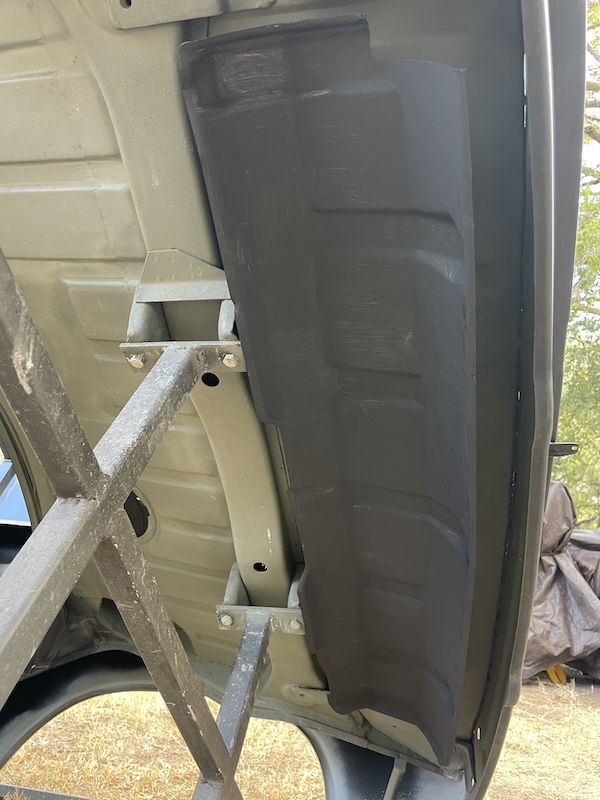 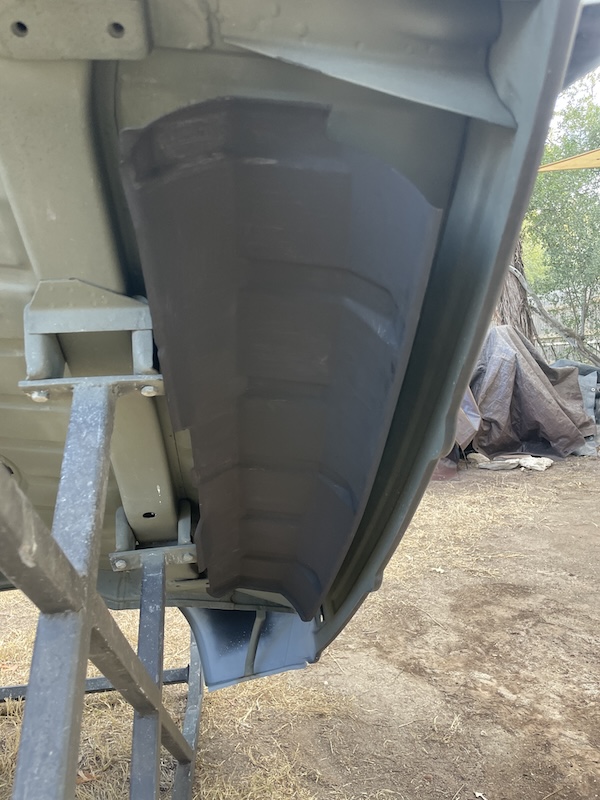 |
| friethmiller |
 Oct 20 2024, 08:43 PM Oct 20 2024, 08:43 PM
Post
#313
|
|
Senior Member    Group: Members Posts: 846 Joined: 10-February 19 From: Austin, TX Member No.: 22,863 Region Association: Southwest Region 
|
Primer Time (10/20/2024):
After a lot of hand sanding with 3M red scratch pads and a bit of D/A sander work here and there, I went around the car shooting 2K black epoxy primer. Took 1 1/2 quarts to get good coverage on the areas including the bottom, rear trunk, engine bay, as well as both rear quarters and the inside floor/dash area. Took several passes through the day to try and get decent coverage. It's not perfect, and I could use another pass on the floors but it will go a long way to keeping the rust out. Plenty of photos here. Enjoy! (IMG:style_emoticons/default/beerchug.gif) 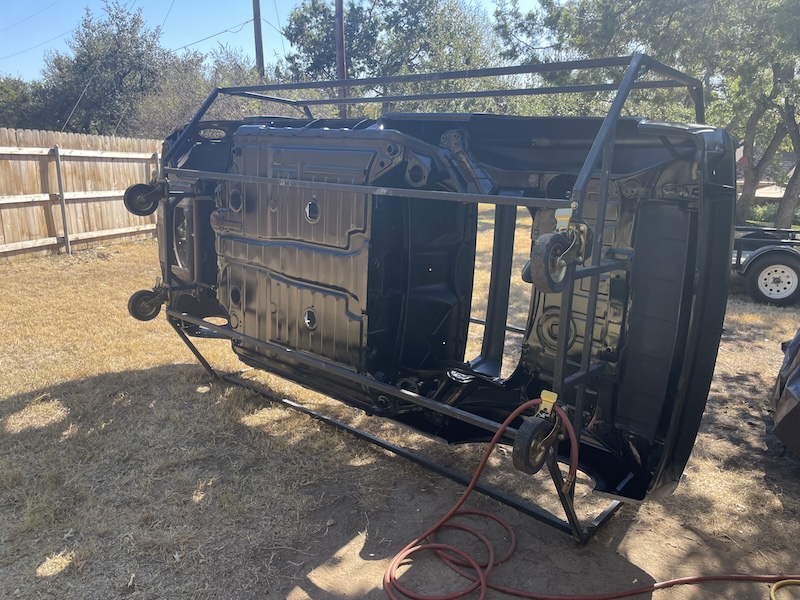 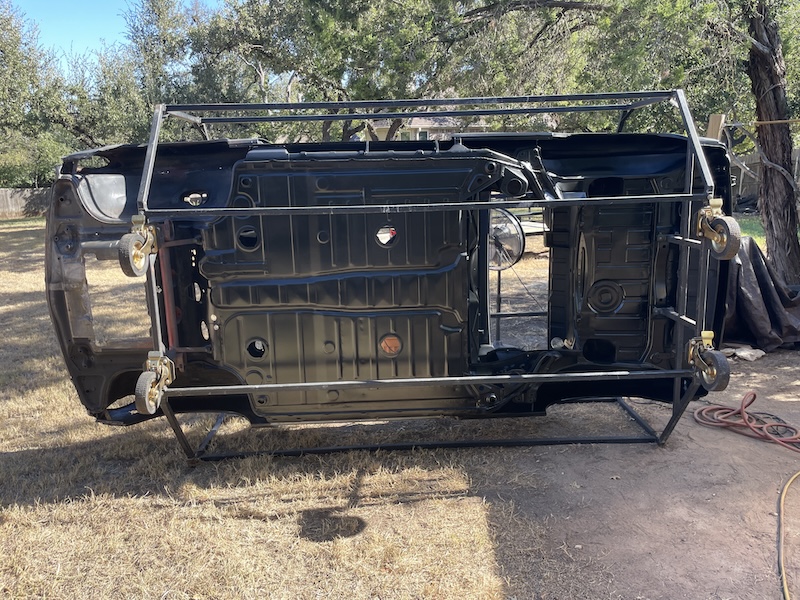 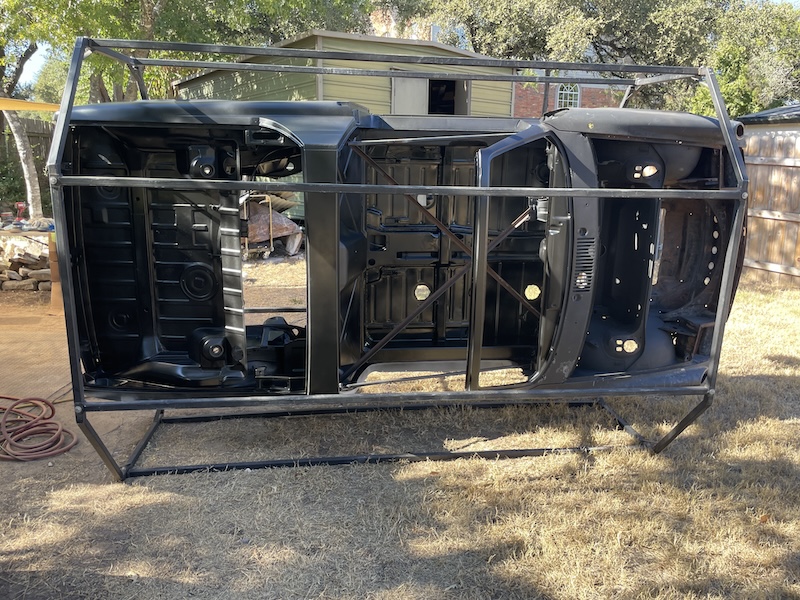 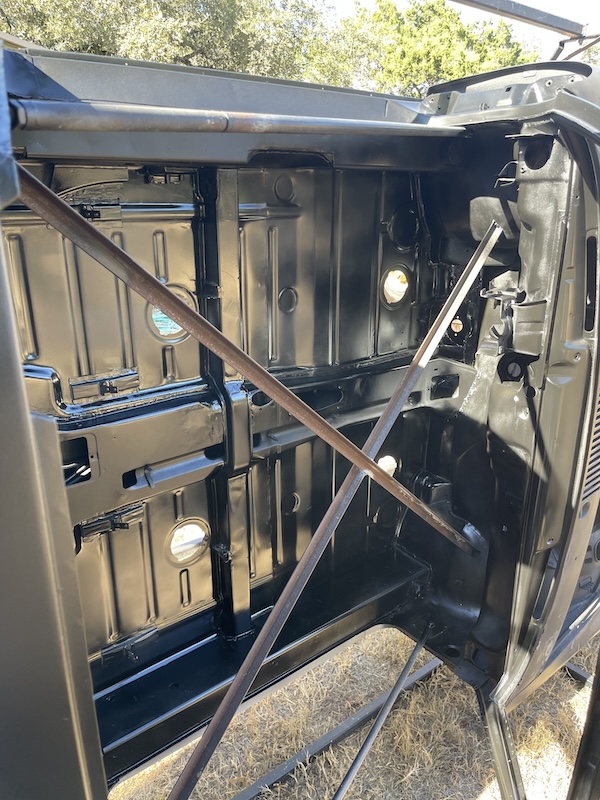 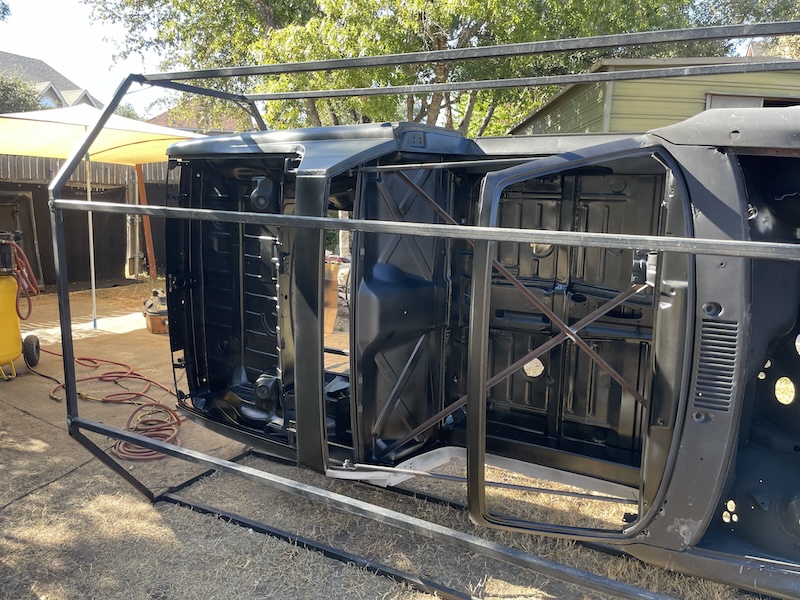 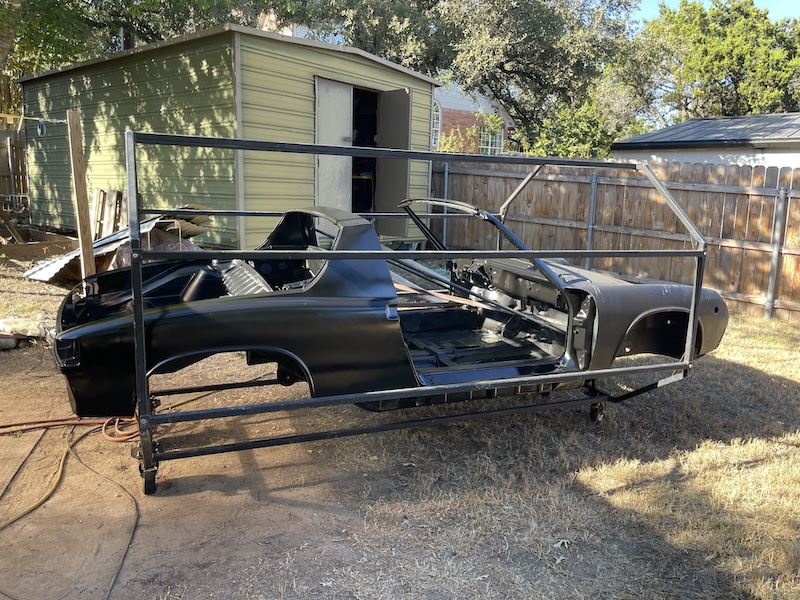 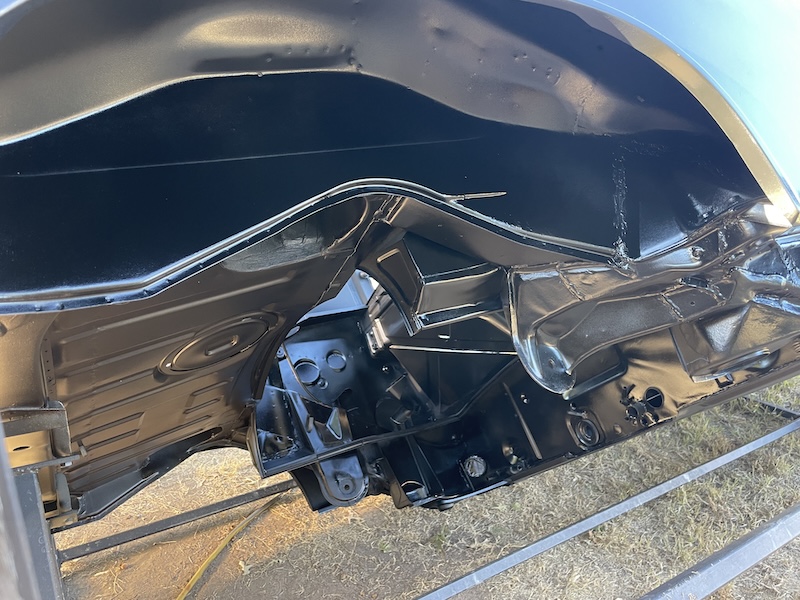 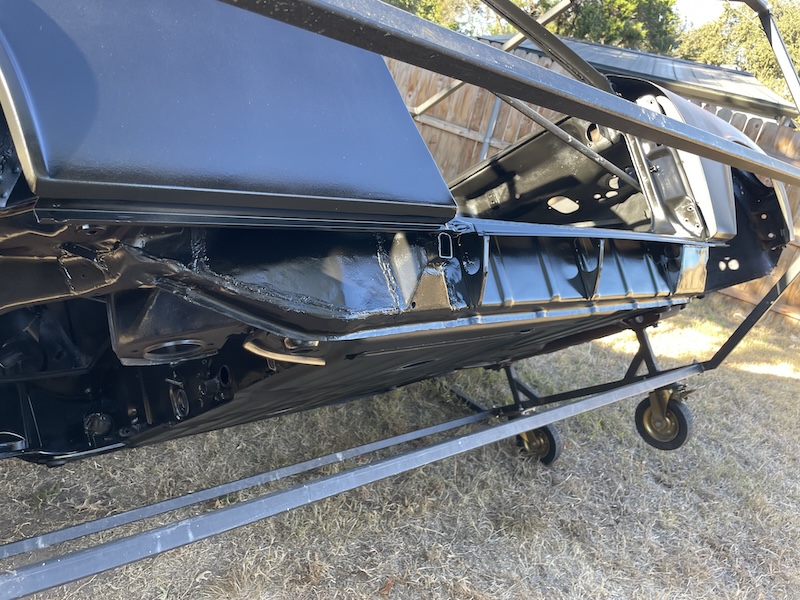 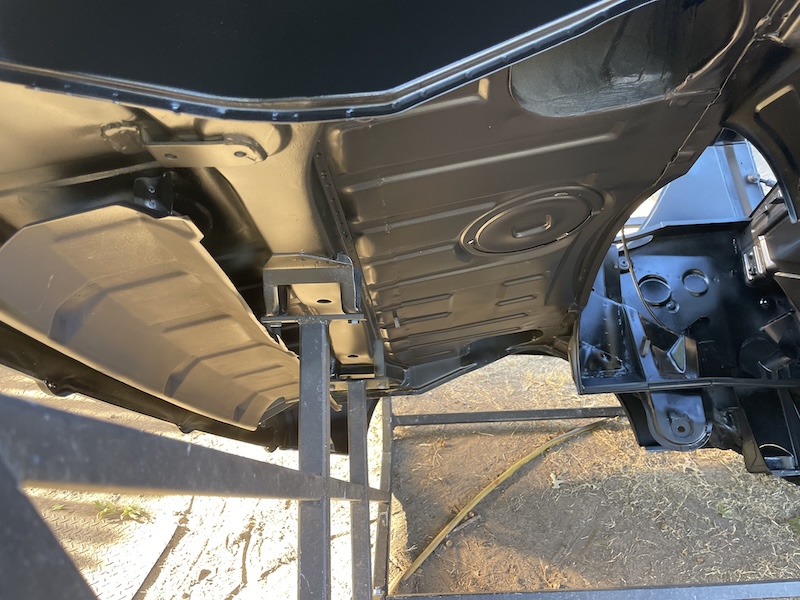 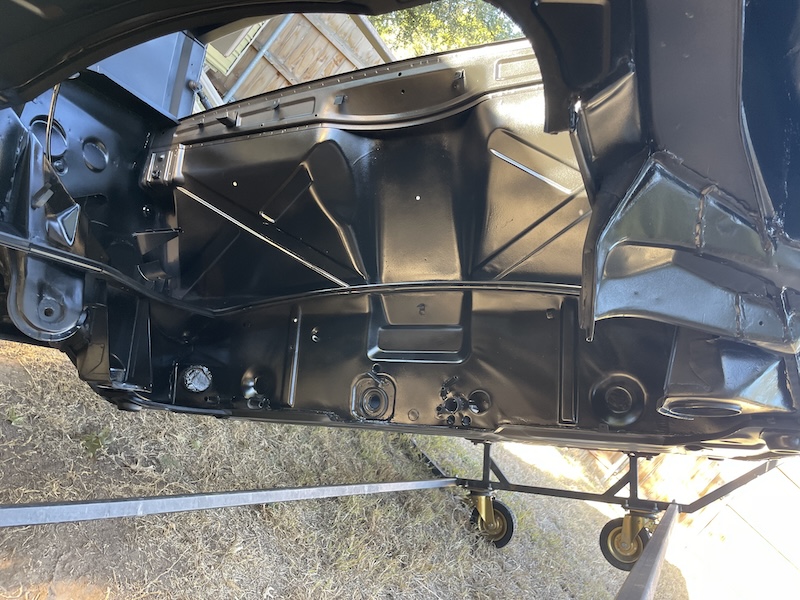 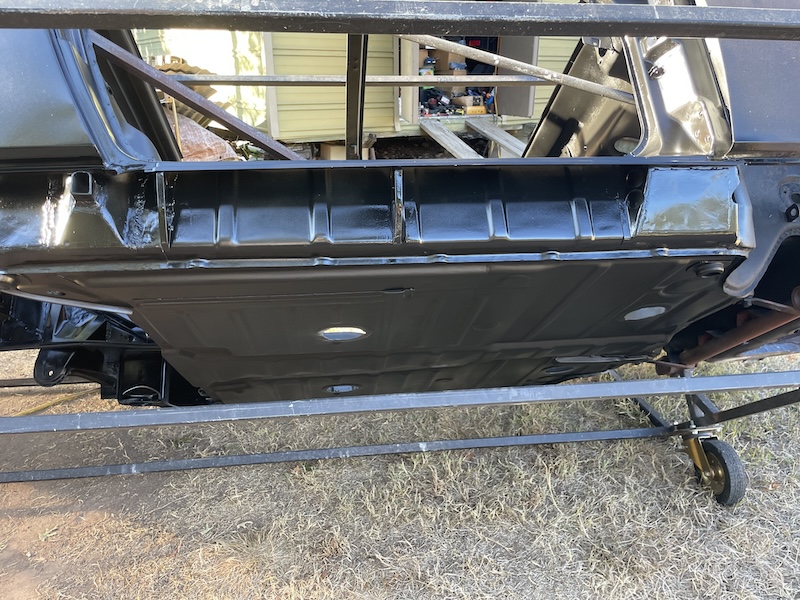 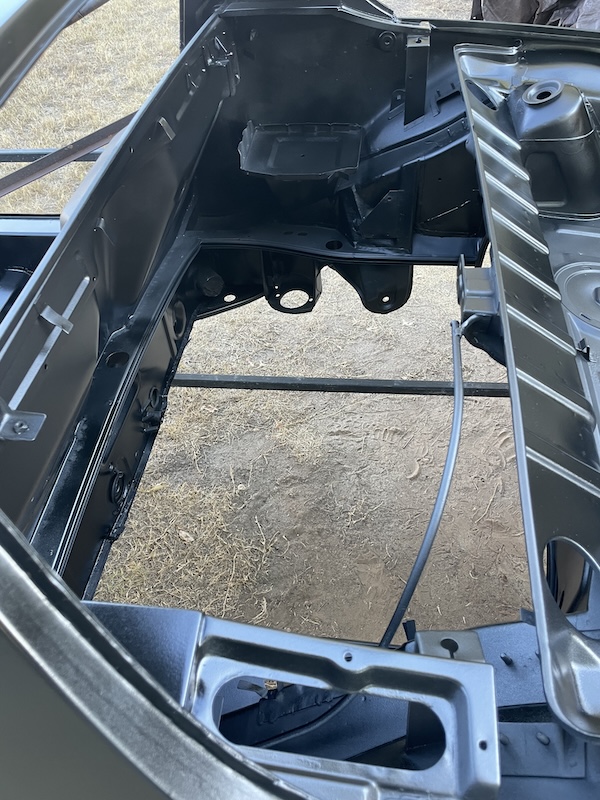 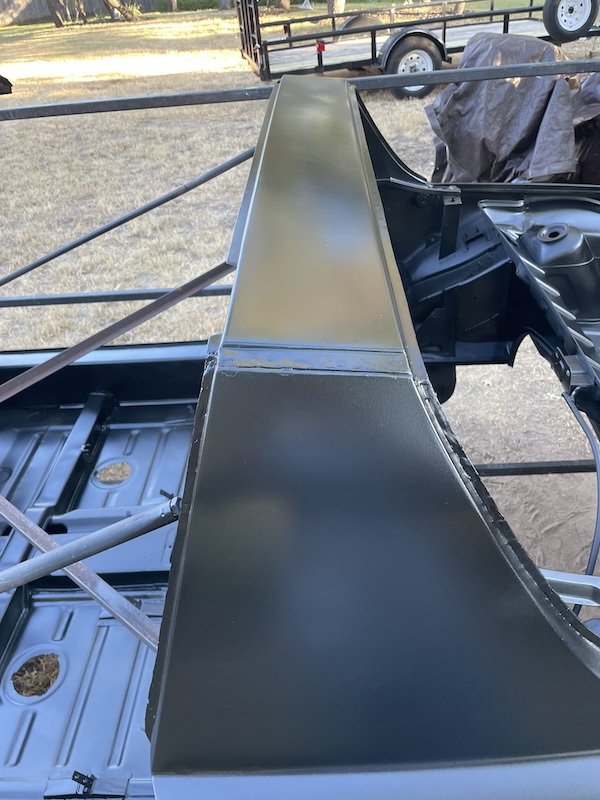 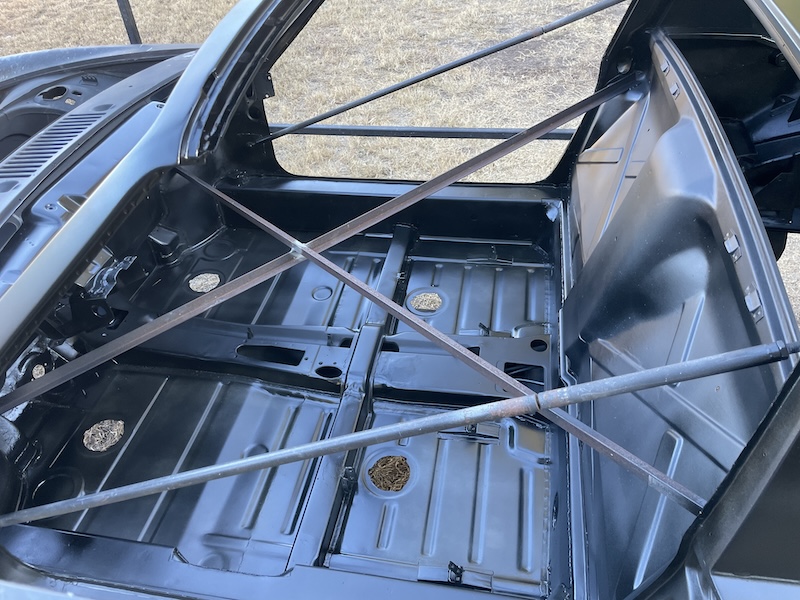 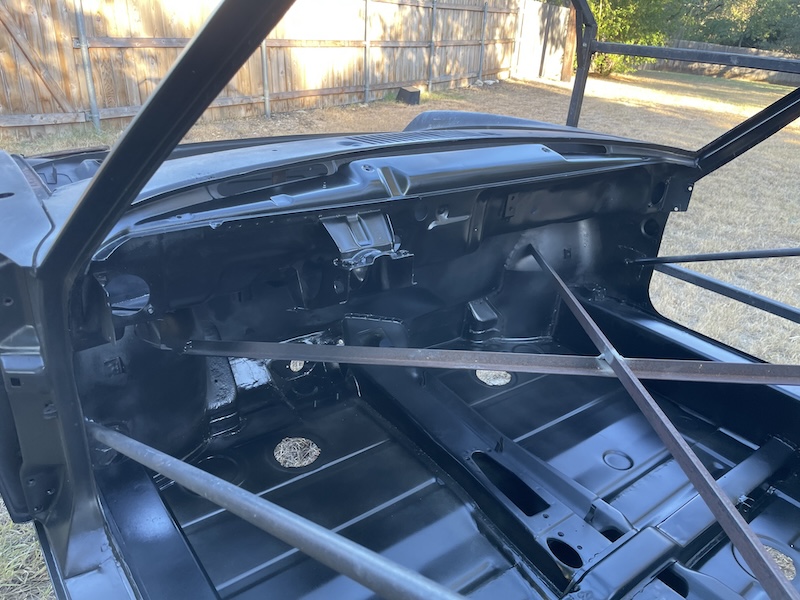 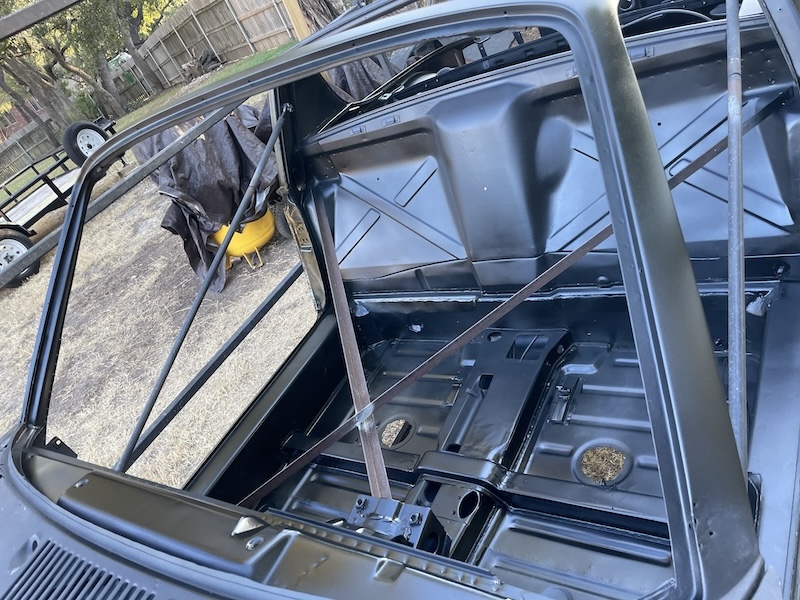 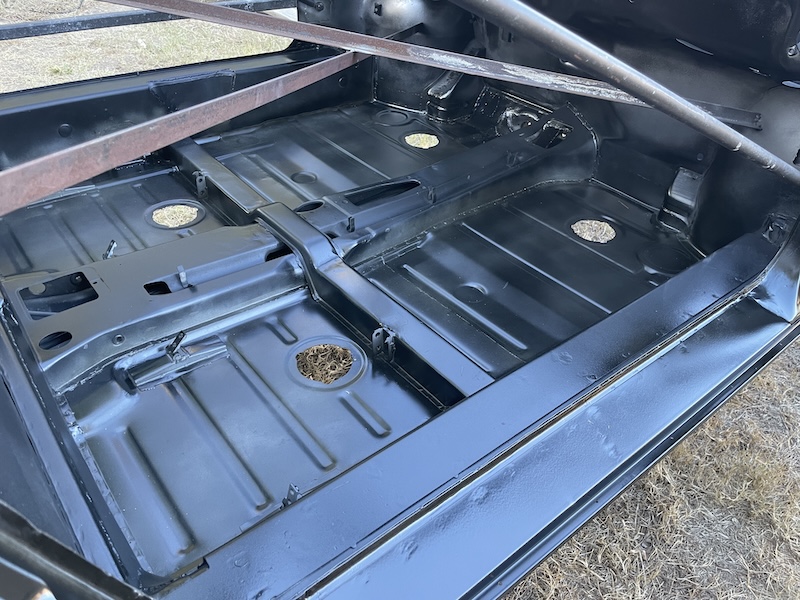 |
| Montreal914 |
 Oct 20 2024, 11:03 PM Oct 20 2024, 11:03 PM
Post
#314
|
|
Senior Member    Group: Members Posts: 1,809 Joined: 8-August 10 From: Claremont, CA Member No.: 12,023 Region Association: Southern California 
|
WOW! (IMG:style_emoticons/default/pray.gif)
Quite a milestone! (IMG:style_emoticons/default/smile.gif) Congrats! |
| 930cabman |
 Oct 21 2024, 05:00 AM Oct 21 2024, 05:00 AM
Post
#315
|
|
Advanced Member     Group: Members Posts: 4,044 Joined: 12-November 20 From: Buffalo Member No.: 24,877 Region Association: North East States 
|
|
| friethmiller |
 Oct 21 2024, 09:08 AM Oct 21 2024, 09:08 AM
Post
#316
|
|
Senior Member    Group: Members Posts: 846 Joined: 10-February 19 From: Austin, TX Member No.: 22,863 Region Association: Southwest Region 
|
Thanks Montreal914 and @930cabman!
Here are a few before and after pics. Wow! Note [in the 1st pic] the "rust tear" at the bottom of the passenger side longitudinal that extends almost to the A pillar. I forgot how bad it was when I started. (IMG:style_emoticons/default/blink.gif) 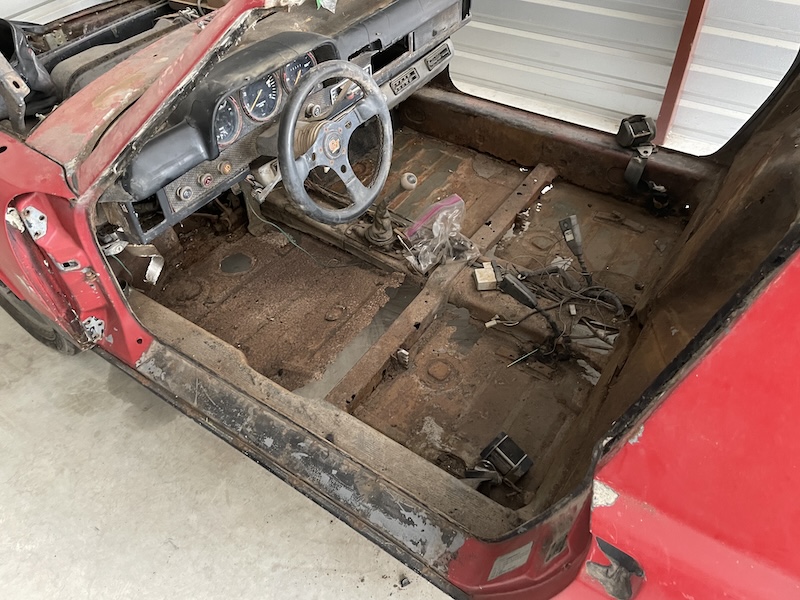 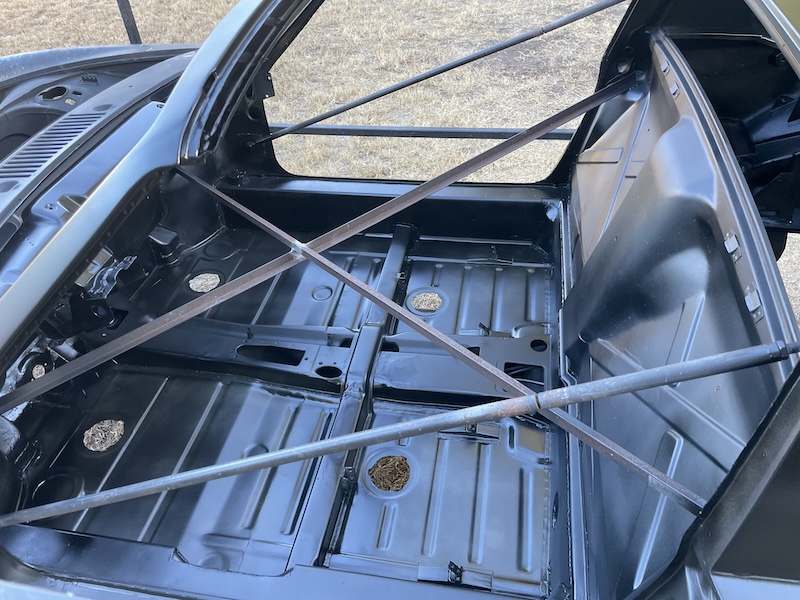 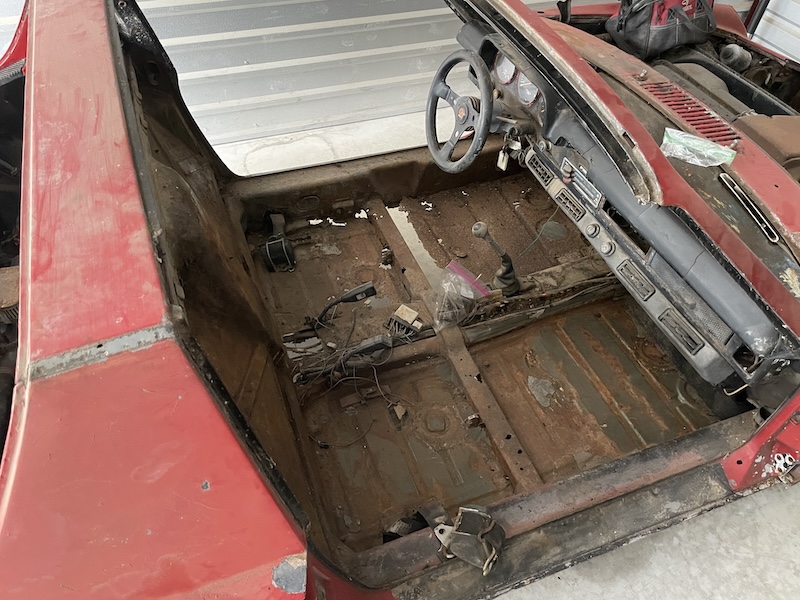 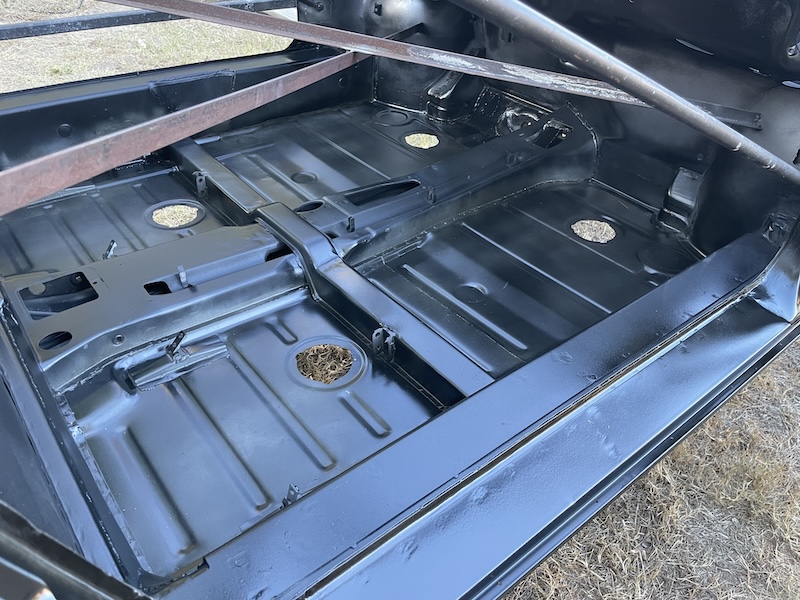 |
| 930cabman |
 Oct 21 2024, 09:43 AM Oct 21 2024, 09:43 AM
Post
#317
|
|
Advanced Member     Group: Members Posts: 4,044 Joined: 12-November 20 From: Buffalo Member No.: 24,877 Region Association: North East States 
|
|
| bkrantz |
 Oct 21 2024, 07:23 PM Oct 21 2024, 07:23 PM
Post
#318
|
|
914 Guru      Group: Members Posts: 8,342 Joined: 3-August 19 From: SW Colorado Member No.: 23,343 Region Association: Rocky Mountains 
|
Congrats. That looks like the end of the beginning, and the beginning of the end (or maybe the middle).
|
| technicalninja |
 Oct 21 2024, 07:51 PM Oct 21 2024, 07:51 PM
Post
#319
|
|
Advanced Member     Group: Members Posts: 2,523 Joined: 31-January 23 From: Granbury Texas Member No.: 27,135 Region Association: Southwest Region 
|
Reality Check!
That work is BETTER than 95% of what you can get at a "Professional" restoration shops IMO. Maybe higher! Just outstanding Fred! Starting to look like a NOS "body in white" cept this one is BLACK. Black is good! Ninja's are in black... (IMG:style_emoticons/default/ninja.gif) |
| seanpaulmc |
 Oct 22 2024, 05:18 AM Oct 22 2024, 05:18 AM
Post
#320
|
|
Member   Group: Members Posts: 381 Joined: 6-December 16 From: Orlando, FL Member No.: 20,649 Region Association: South East States 
|
Outstanding work! Keep it up.
Where there was little to keep you have saved this one from the recycler. Few could or would do what you’ve done to keep this one in the land of the living. (IMG:style_emoticons/default/pray.gif) Now that you’re almost done, I’m sending you mine. (IMG:style_emoticons/default/biggrin.gif) |
  |
1 User(s) are reading this topic (1 Guests and 0 Anonymous Users)
0 Members:

|
Lo-Fi Version | Time is now: 20th April 2025 - 12:38 AM |
Invision Power Board
v9.1.4 © 2025 IPS, Inc.


