|
|

|
Porsche, and the Porsche crest are registered trademarks of Dr. Ing. h.c. F. Porsche AG.
This site is not affiliated with Porsche in any way. Its only purpose is to provide an online forum for car enthusiasts. All other trademarks are property of their respective owners. |
|
|
  |
| 930cabman |
 Oct 22 2024, 05:28 PM Oct 22 2024, 05:28 PM
Post
#321
|
|
Advanced Member     Group: Members Posts: 4,044 Joined: 12-November 20 From: Buffalo Member No.: 24,877 Region Association: North East States 
|
Outstanding work! Keep it up. Where there was little to keep you have saved this one from the recycler. Few could or would do what you’ve done to keep this one in the land of the living. (IMG:style_emoticons/default/pray.gif) Now that you’re almost done, I’m sending you mine. (IMG:style_emoticons/default/biggrin.gif) I'm gonna get in line, quick |
| JeffBowlsby |
 Oct 22 2024, 06:19 PM Oct 22 2024, 06:19 PM
Post
#322
|
|
914 Wiring Harnesses & Beekeeper      Group: Members Posts: 8,890 Joined: 7-January 03 From: San Ramon CA Member No.: 104 Region Association: None 
|
Fred, your skills and work are inspirational.
|
| friethmiller |
 Oct 22 2024, 08:42 PM Oct 22 2024, 08:42 PM
Post
#323
|
|
Senior Member    Group: Members Posts: 846 Joined: 10-February 19 From: Austin, TX Member No.: 22,863 Region Association: Southwest Region 
|
Thanks guys! Appreciate all your comments and observations. There’s a lot of trial and error on my part, I can tell you. Sometimes I catch things when I’m posting these photos. I feel like I’m always having to fix something I didn’t do right. With that said, I do enjoy figuring things out, learning as I go, and saving this rusty hulk to someday drive again. So much more to do, too (IMG:style_emoticons/default/smile.gif) To that end, I’ve already started removing the front fenders to begin the final stage of this body restoration. Looking forward to getting back out there. Cheers! (IMG:style_emoticons/default/beerchug.gif)
|
| friethmiller |
 Nov 10 2024, 08:13 PM Nov 10 2024, 08:13 PM
Post
#324
|
|
Senior Member    Group: Members Posts: 846 Joined: 10-February 19 From: Austin, TX Member No.: 22,863 Region Association: Southwest Region 
|
Passenger Side Front Fender - Part 1 (11/8/2024):
Here we go! With as much cowl damage as this car has, the fenders needs to be completely removed. I know a lot of people cut their way in to gain access but I perfer to pull the entire fender. This job is actually not that hard but it does takes some patience. It typically takes me a few sessions - an hour or two at a time. The images here start at a point where most of the spot welds were already drilled out. I did this work the previous Sunday just to get things rolling on the front of the car. Luckily (or unluckily) for me the "snot weld" that is almost impossible to reach up inside the cowl + fender area had completely rusted out. You'll see the damage to the inside of the fender below. The fender damage will be repaired later prior to reinstall. Plenty of photos here. 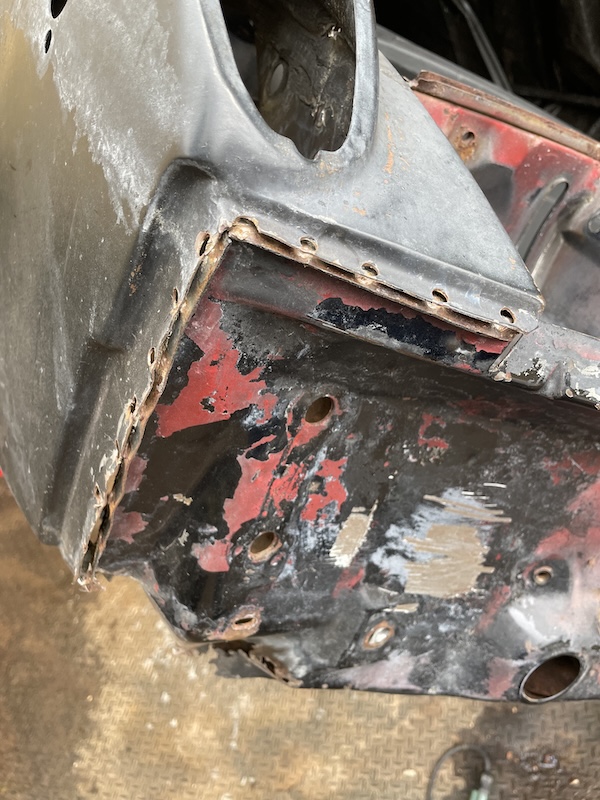 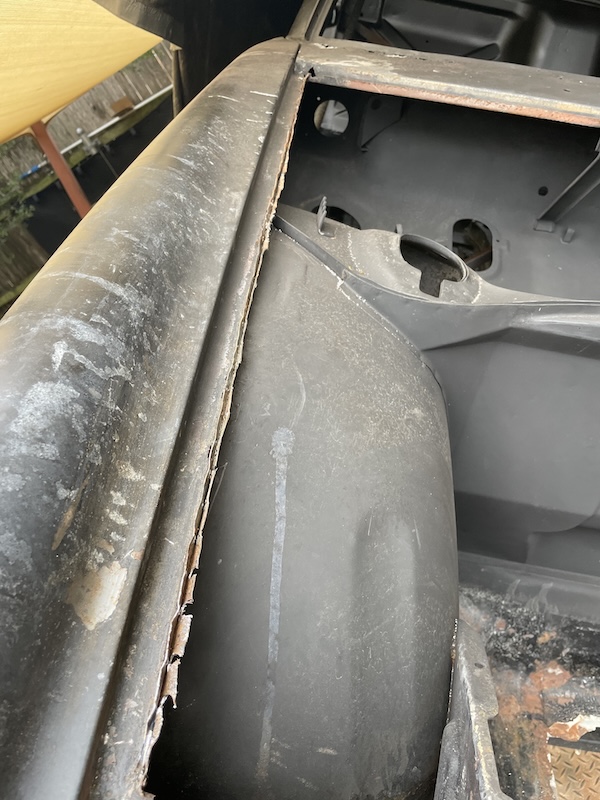 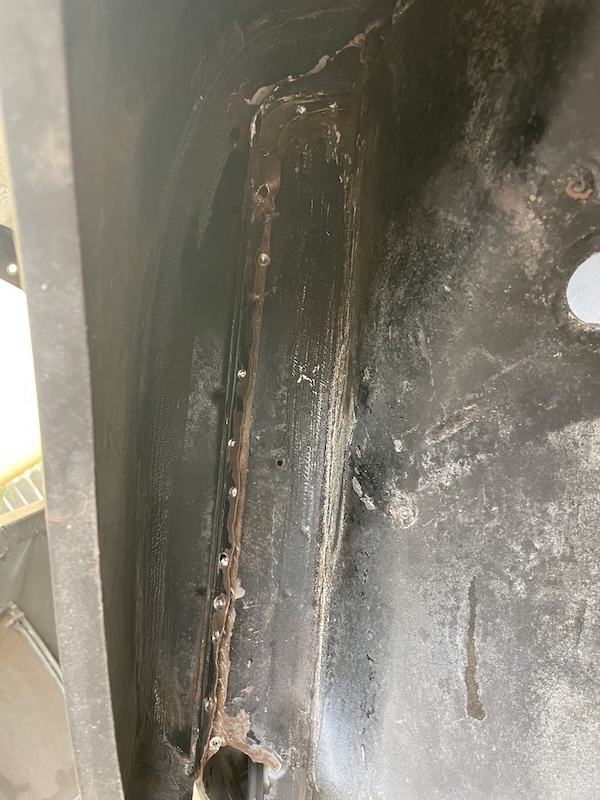 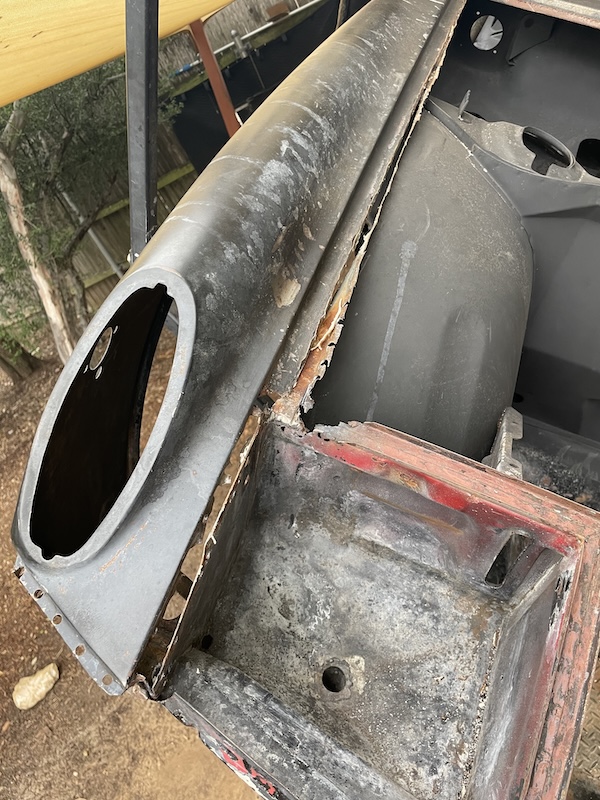 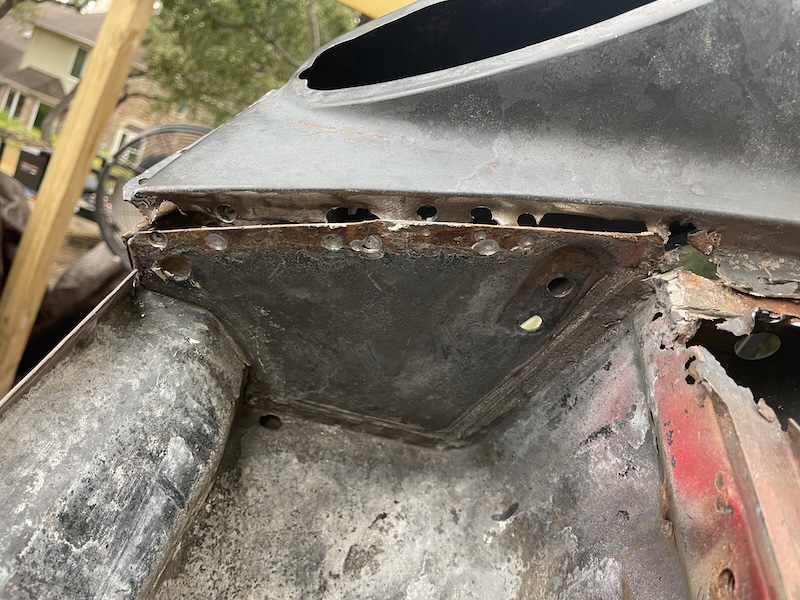 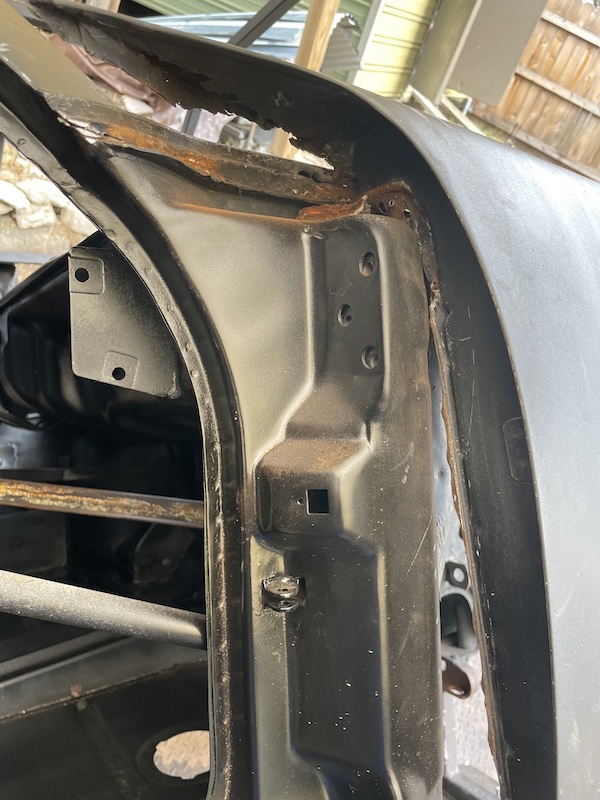 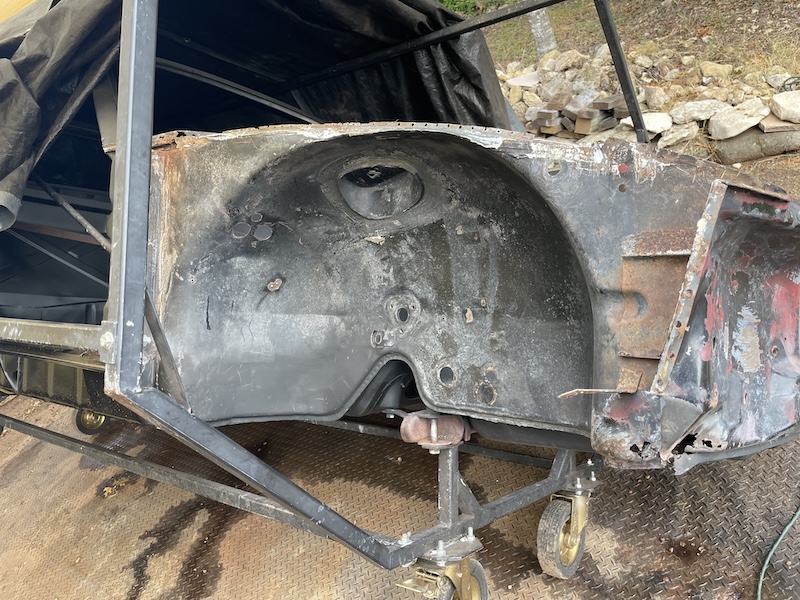 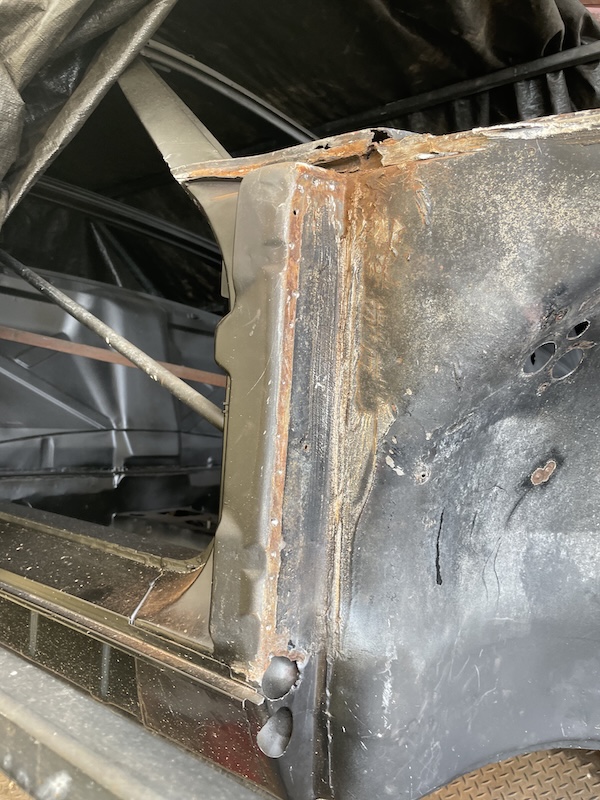 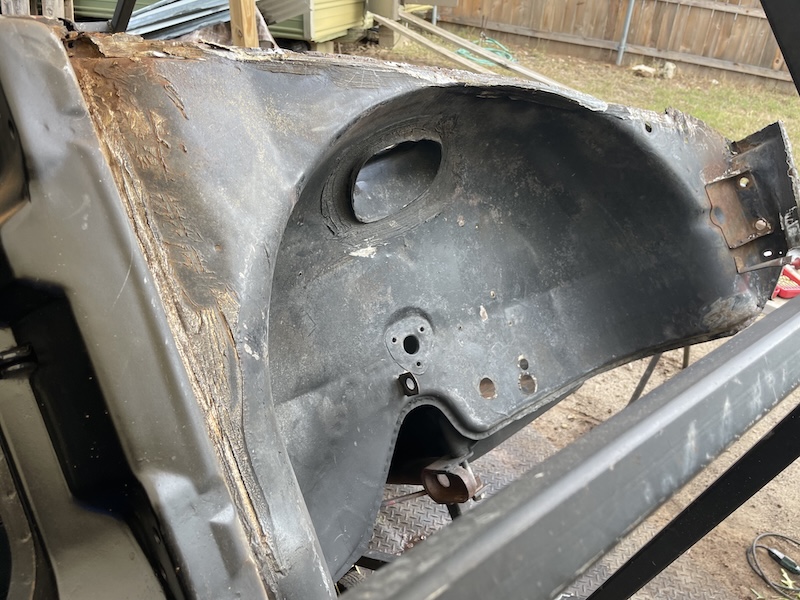 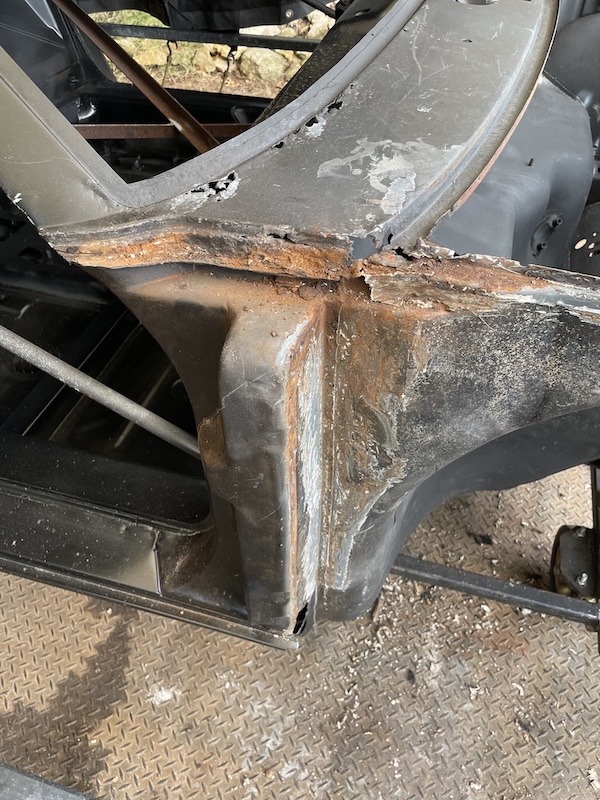 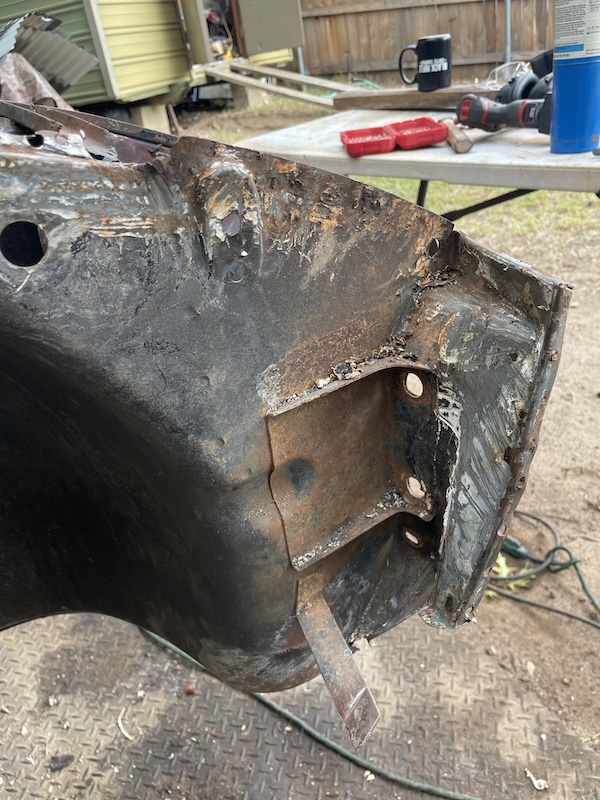 Switching to a stripper disk now to start stripping the rust/paint. I had a few used disks that I needed to burn through before pulling out a new one. I just went as far as I could on the face of the inner fender. I'll get the rest later once I rotate to do things on the bottom part of the inner fender. Man, that area below the bumper mount looks like it'll be a party (IMG:style_emoticons/default/drunk.gif) 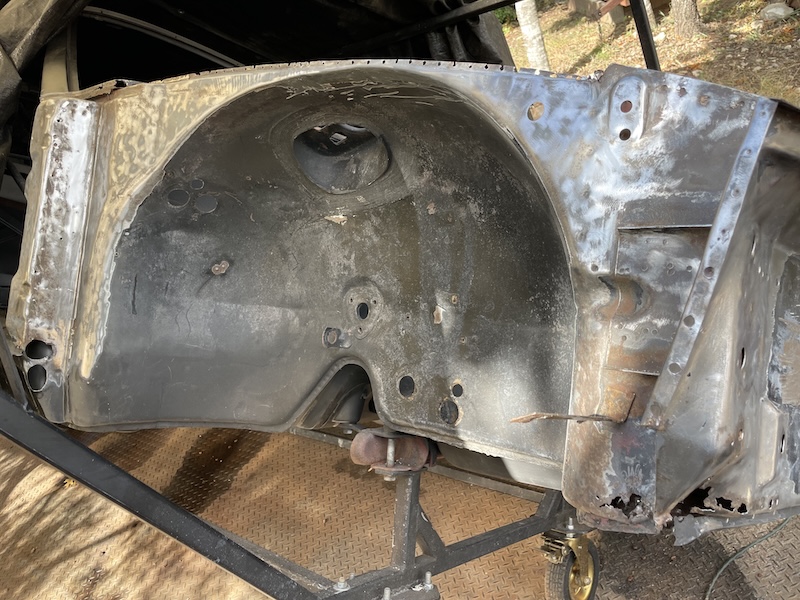 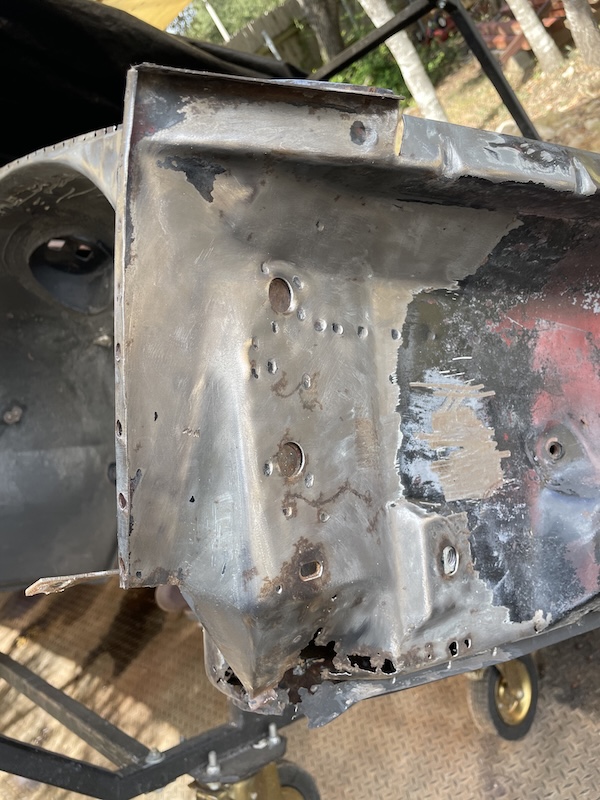 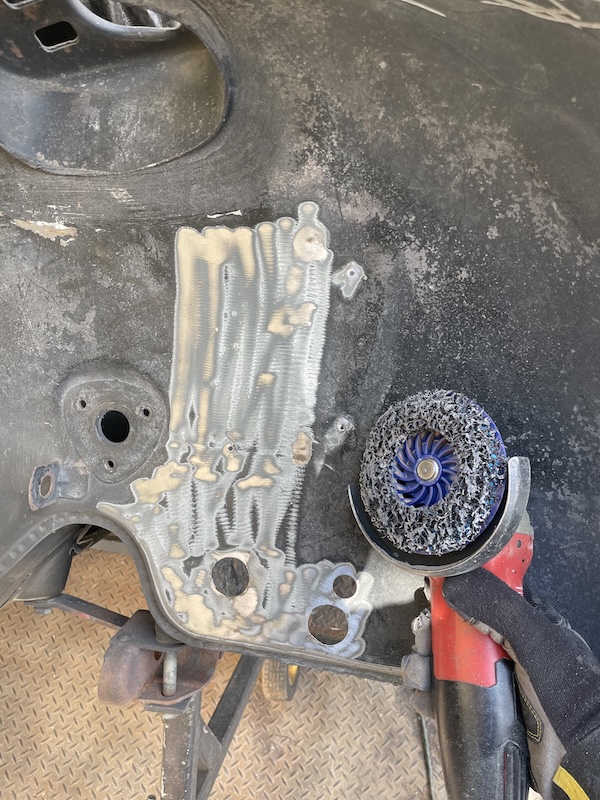 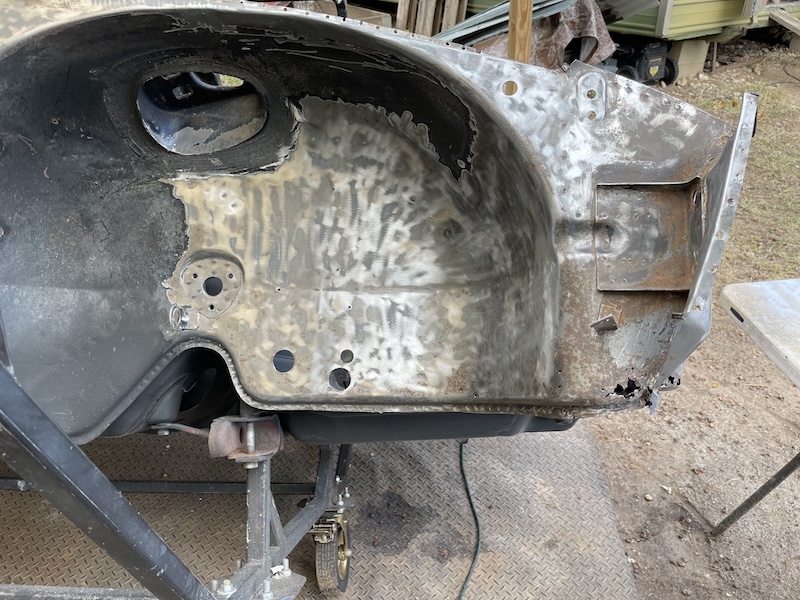 |
| bkrantz |
 Nov 10 2024, 08:33 PM Nov 10 2024, 08:33 PM
Post
#325
|
|
914 Guru      Group: Members Posts: 8,342 Joined: 3-August 19 From: SW Colorado Member No.: 23,343 Region Association: Rocky Mountains 
|
Yes, removing the front fenders will reveal lots of complex joints--and trouble. But it makes them relatively easy to repair (with patience, as always).
|
| friethmiller |
 Nov 10 2024, 08:38 PM Nov 10 2024, 08:38 PM
Post
#326
|
|
Senior Member    Group: Members Posts: 846 Joined: 10-February 19 From: Austin, TX Member No.: 22,863 Region Association: Southwest Region 
|
Passenger Side Front Fender - Part 2 (11/9/2024):
Remembering that I had purchased some patch metal for the cowl, I started preparing things for repair by outlining the patch. Typically, I like to cut the patch down to only replace what is necessary but in this case I think it will be better to use the entire piece. There are also two spots on this side of the fresh air vent that need to be dealt with, as well. 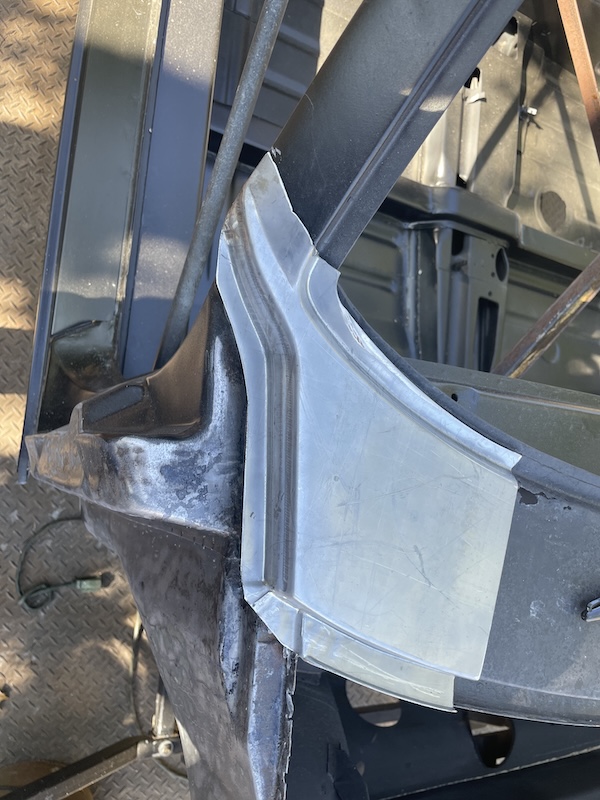 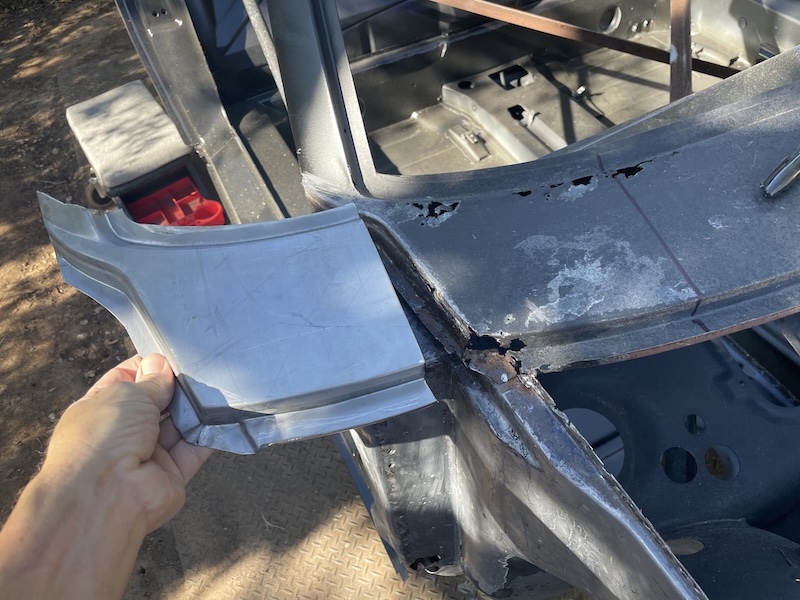 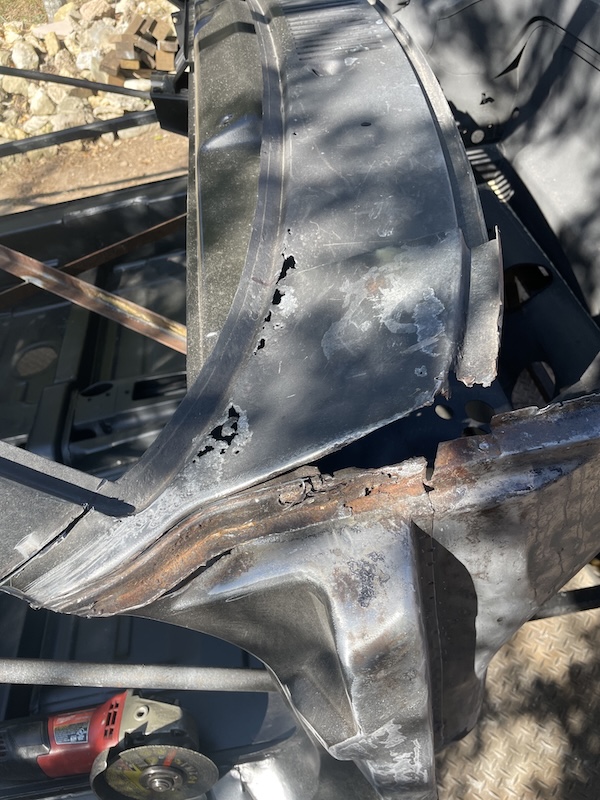 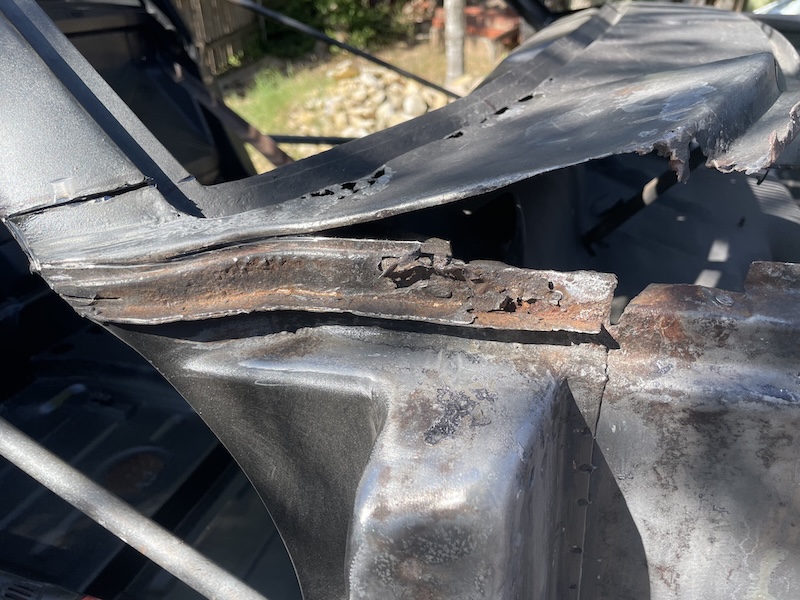 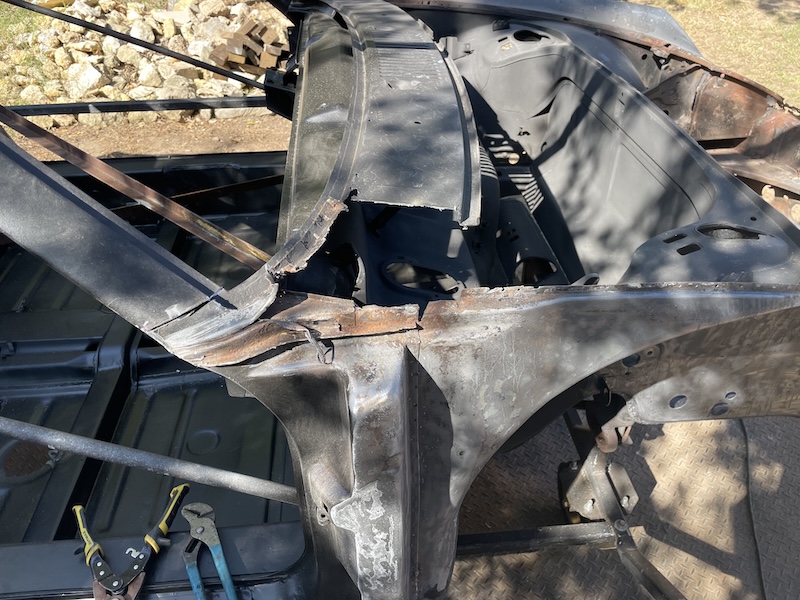 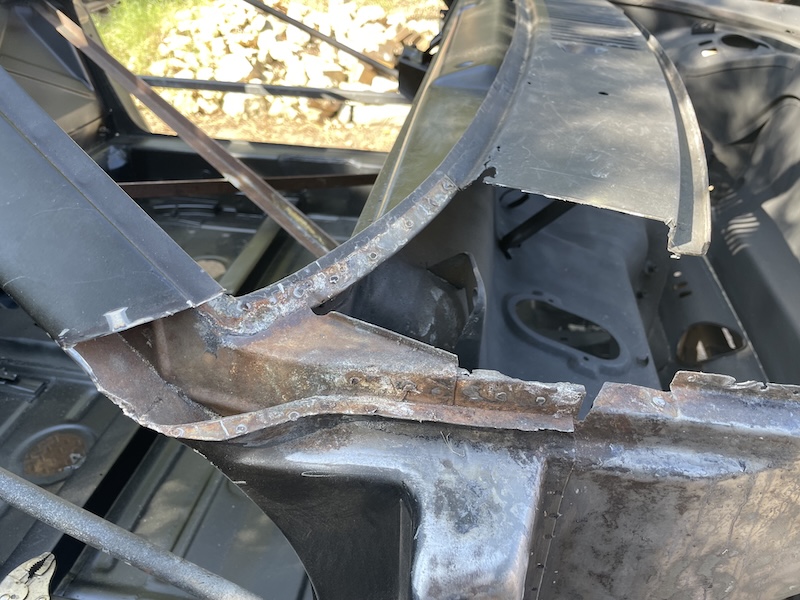 After pulling out the sandblaster and hitting the cowl area, things started looking better (IMG:style_emoticons/default/shades.gif) . Unfortunately, some rust still remained in some pitted areas. Note: I was finally able to remove the rust with a wire wheel the next day prior to welding. This allowed me to simply paint the area with weld-thru primer. The final two photos show my work to prepare the "big patch" for install. I called it a day after that. 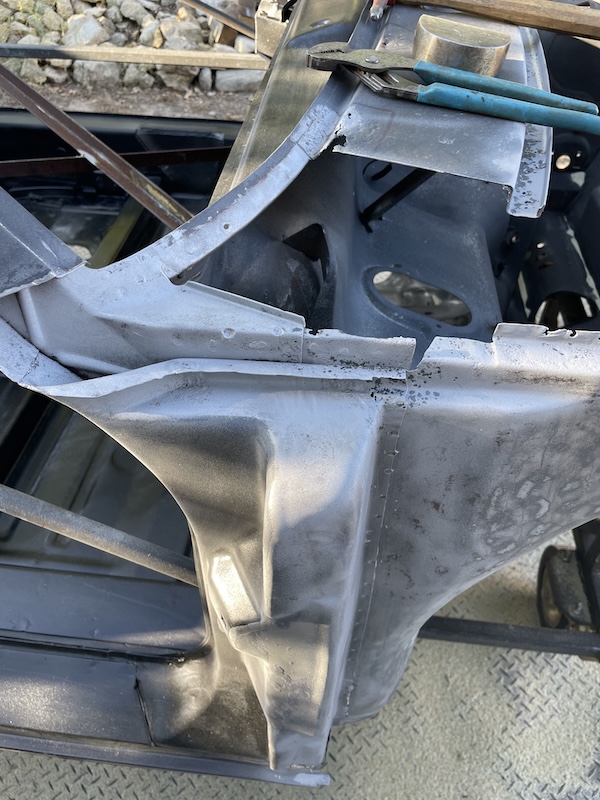 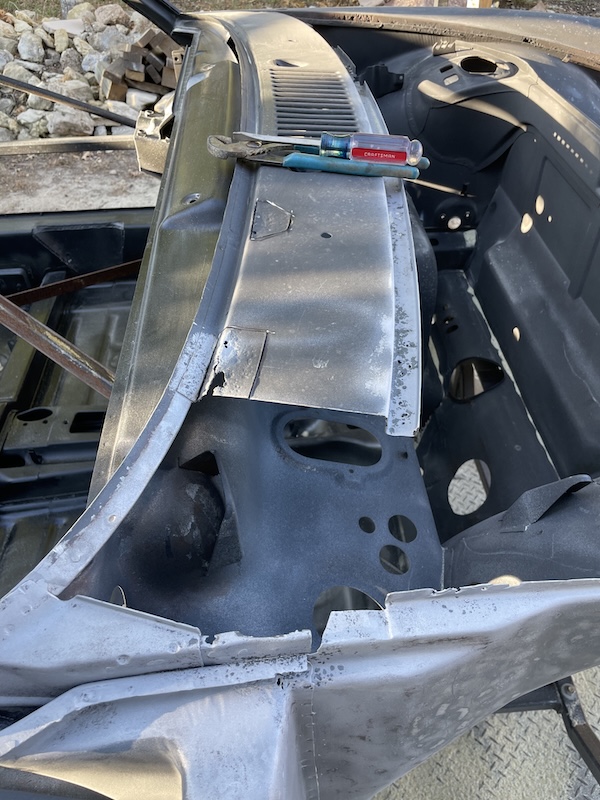 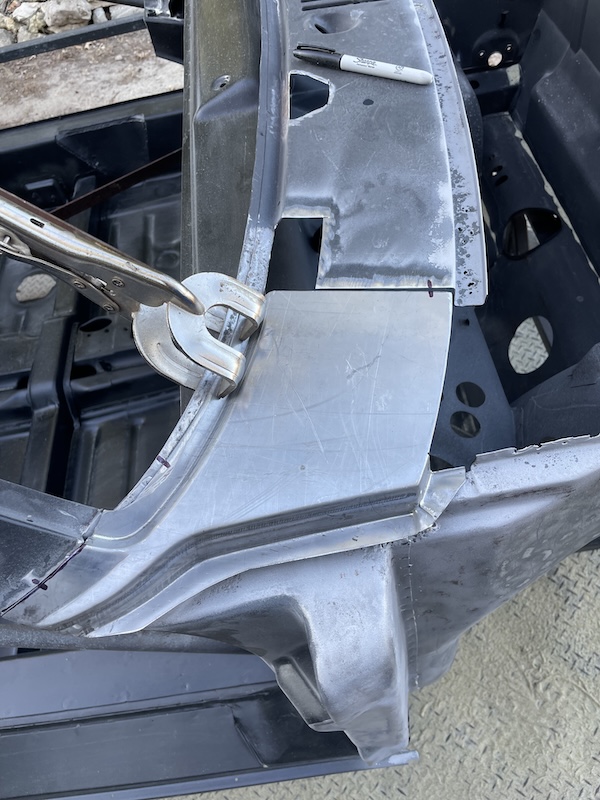 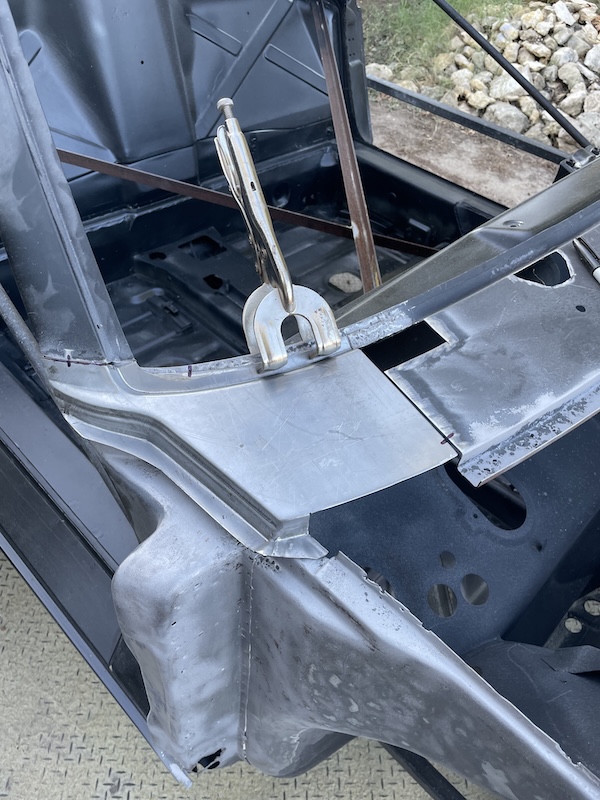 |
| friethmiller |
 Nov 10 2024, 09:16 PM Nov 10 2024, 09:16 PM
Post
#327
|
|
Senior Member    Group: Members Posts: 846 Joined: 10-February 19 From: Austin, TX Member No.: 22,863 Region Association: Southwest Region 
|
Passenger Side Front Fender - Part 3 (11/10/2024):
Welding time! I started this morning making sure the areas below the big patch were ready to go. I didn't catch a good picture before priming but I was able to get the rust "freckles" out with a wire wheel on a high-speed drill. (IMG:style_emoticons/default/aktion035.gif) I also added new metal to some spots on the A-pillar where my spot weld bit went a little too far. Once all this was ready, I roughed up the underside of the patch and primed it with weld through primer. 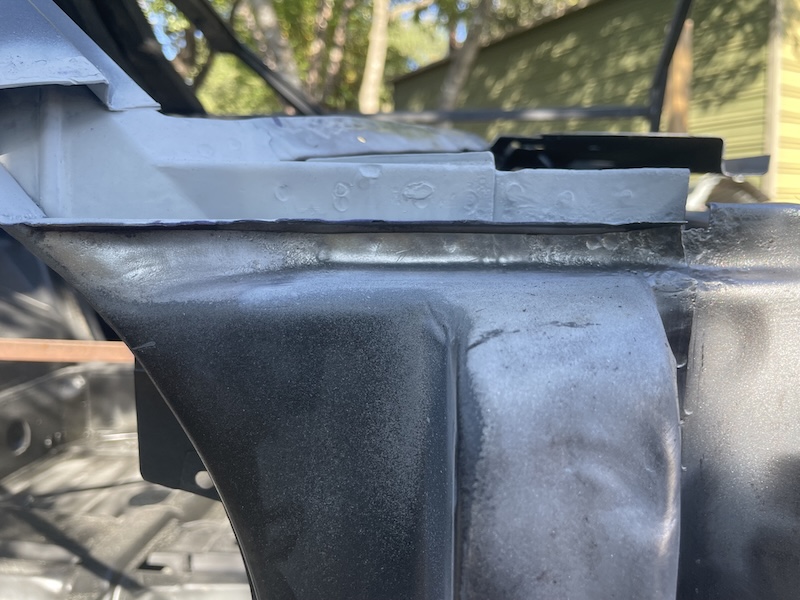 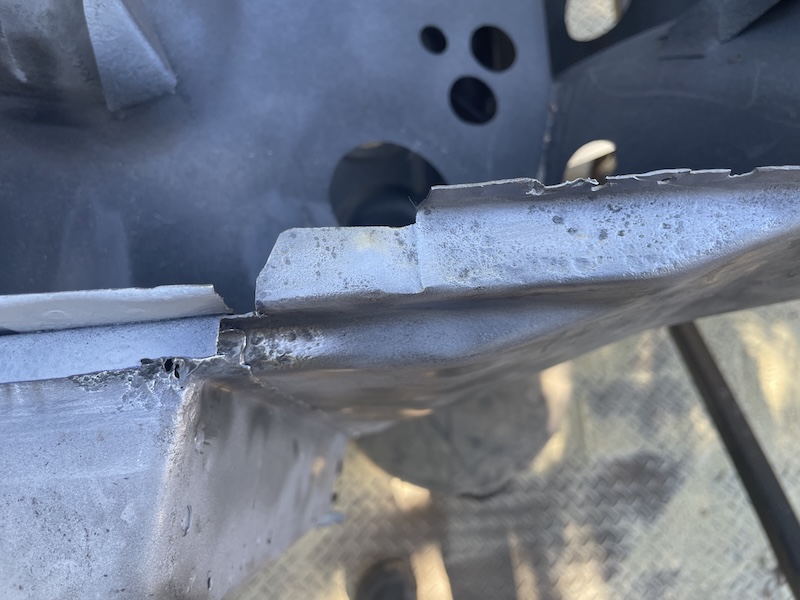 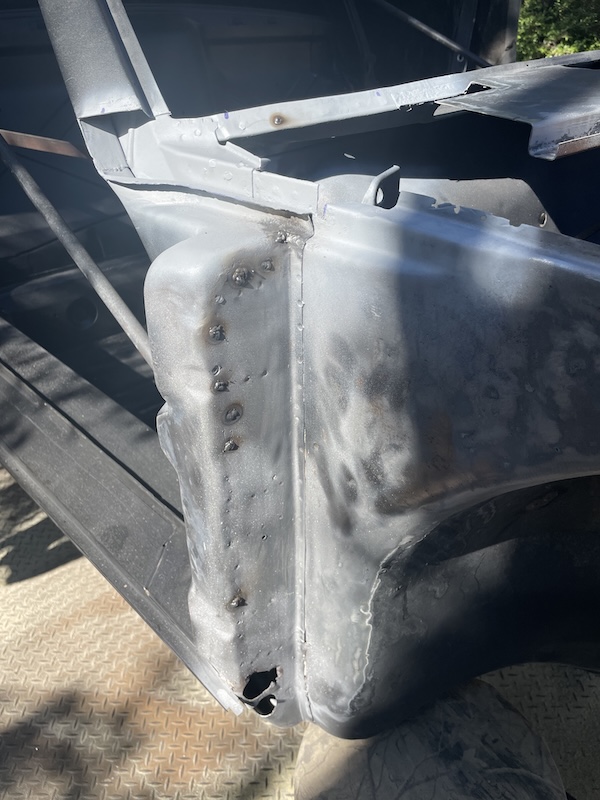 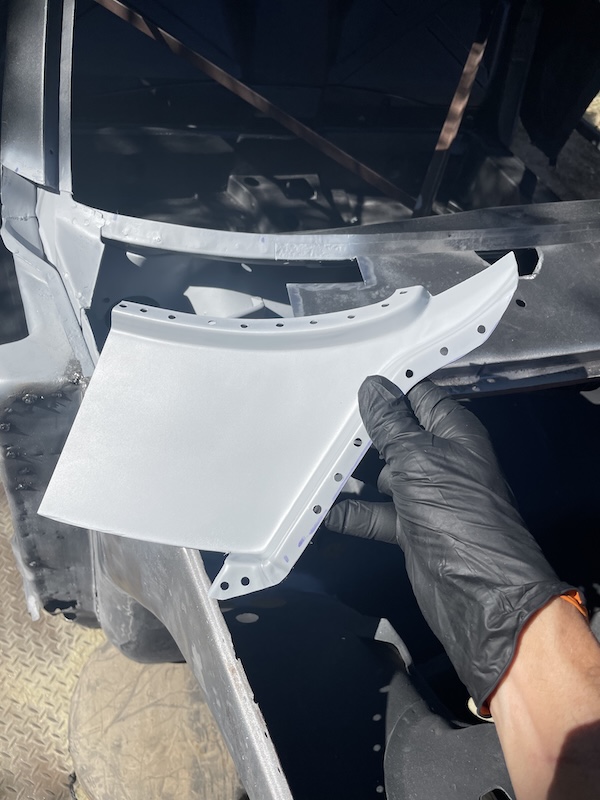 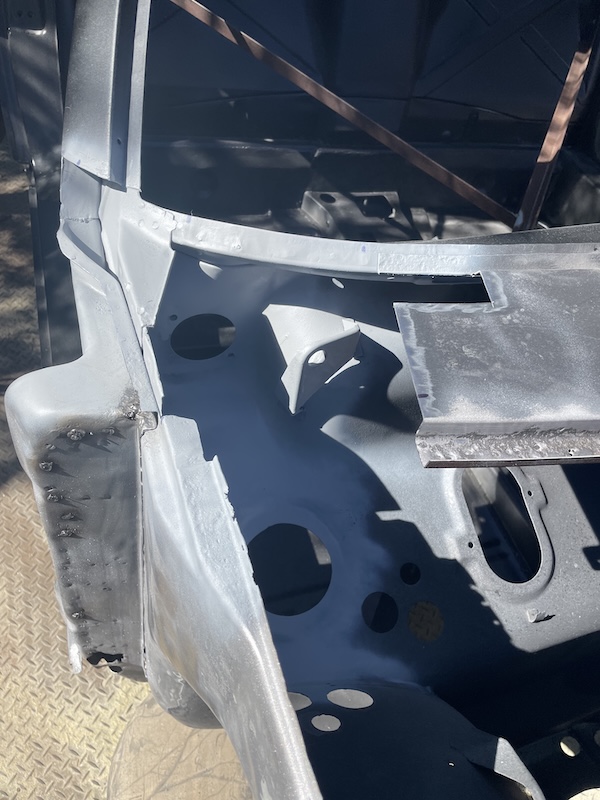 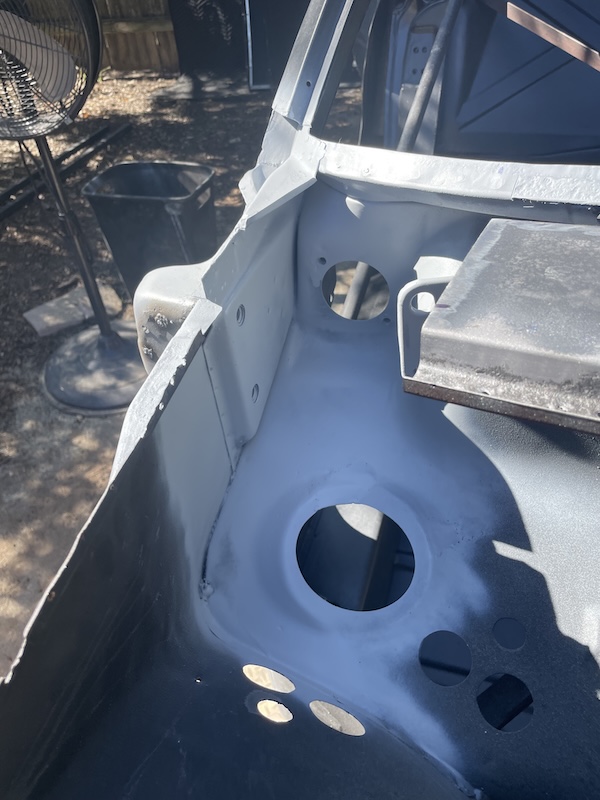 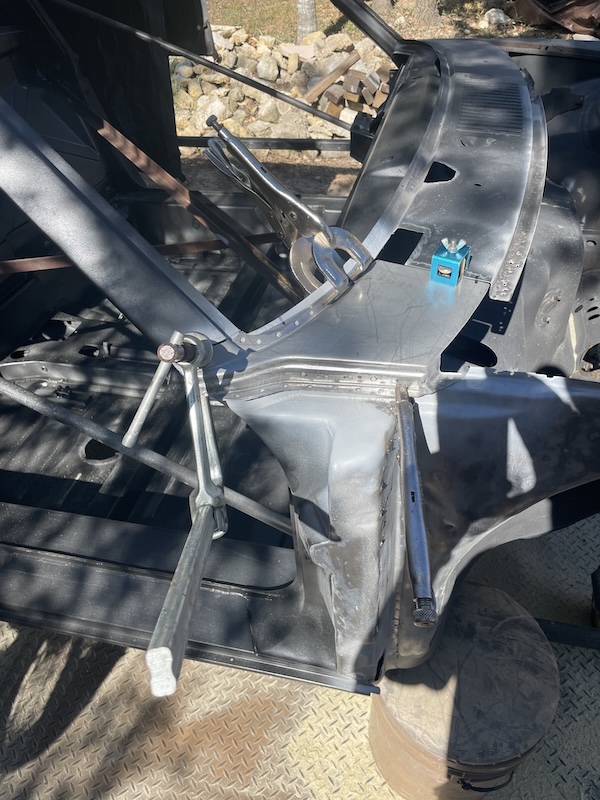 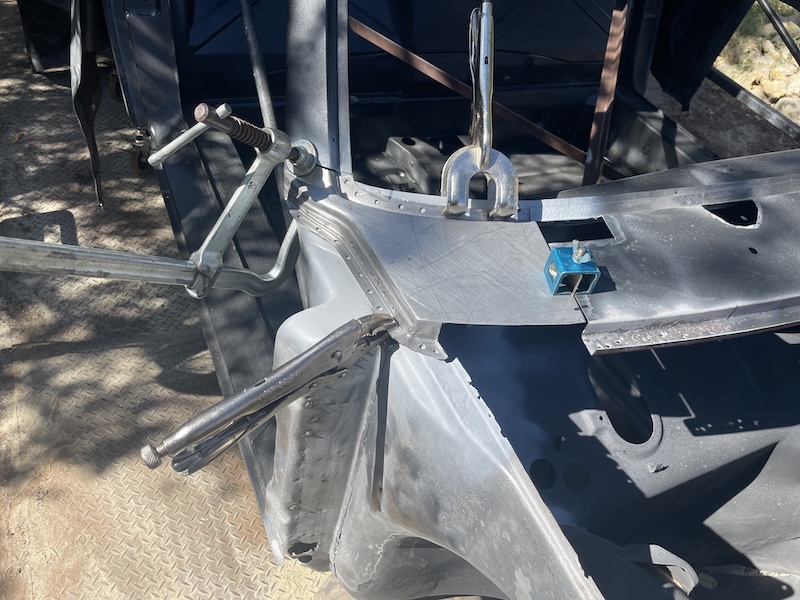 After clamping the patch in place, I decided to pull out the fender and double check height/alignment. Everything looked good so I started welding. Note: cool action shot! I can safely say this is not proper technique. One-handing a welder while snapping a photo isn't easy - nor practical. (IMG:style_emoticons/default/blink.gif) Photos below... 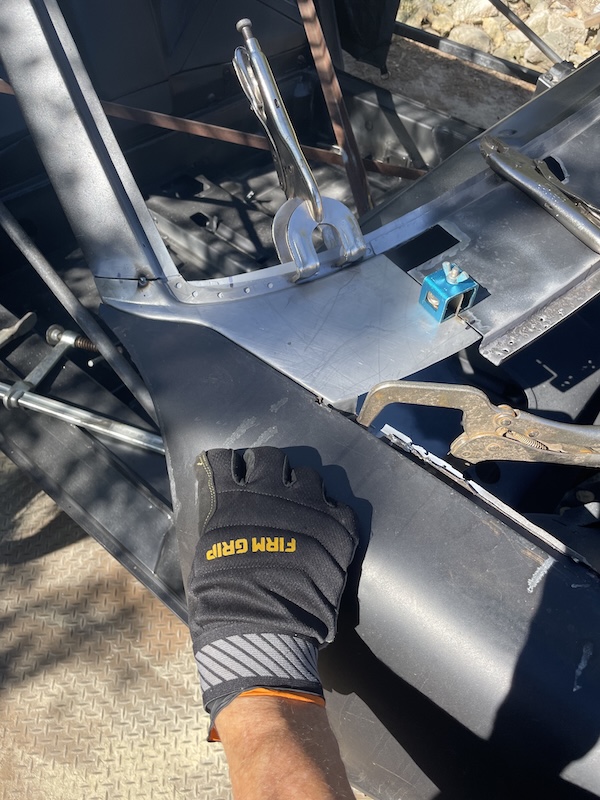 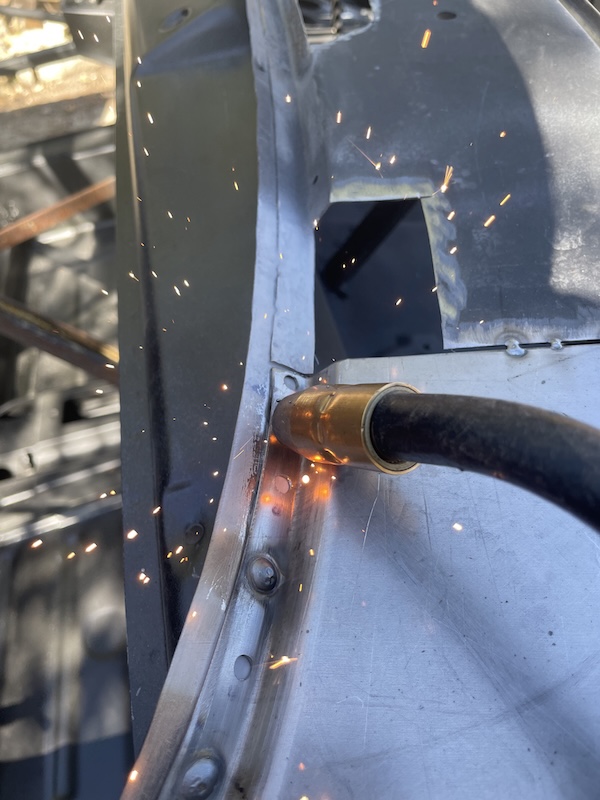 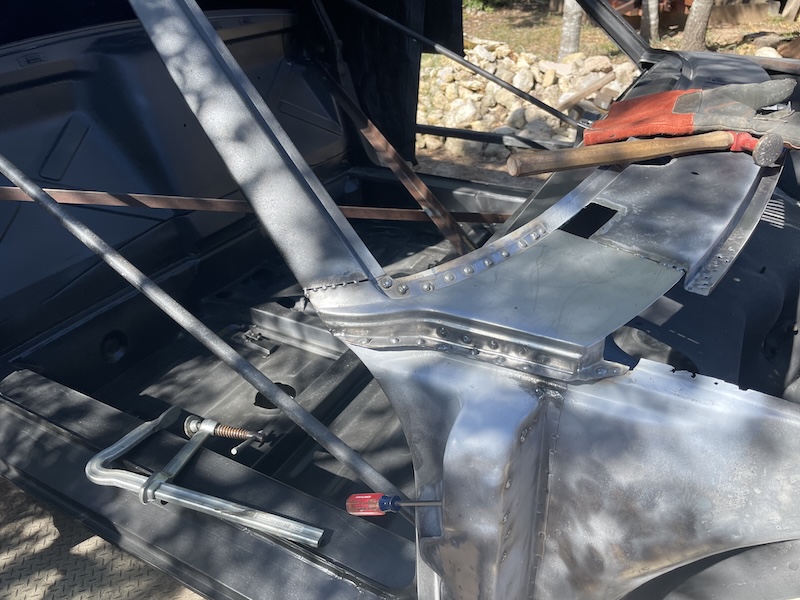 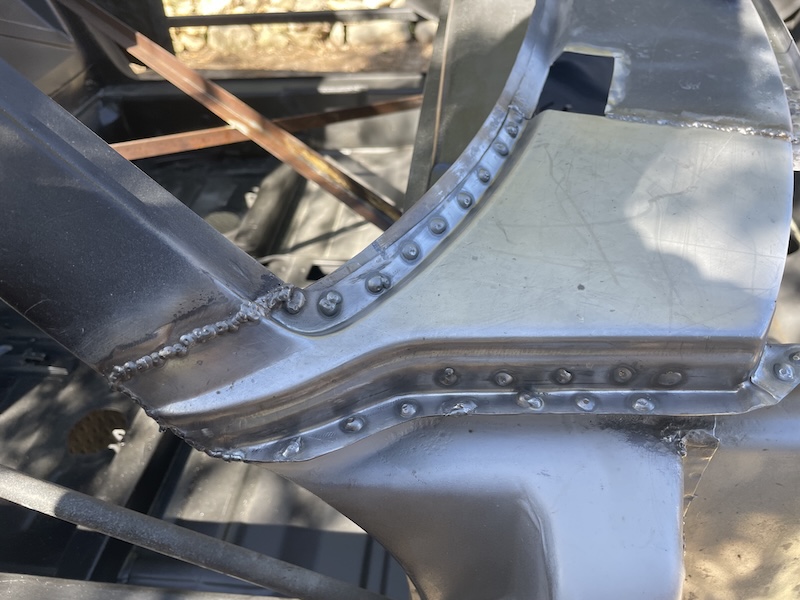 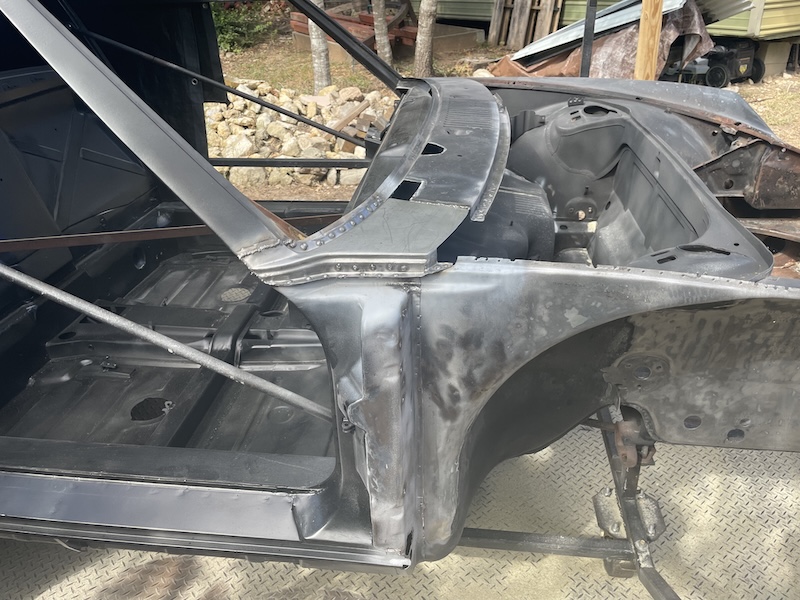 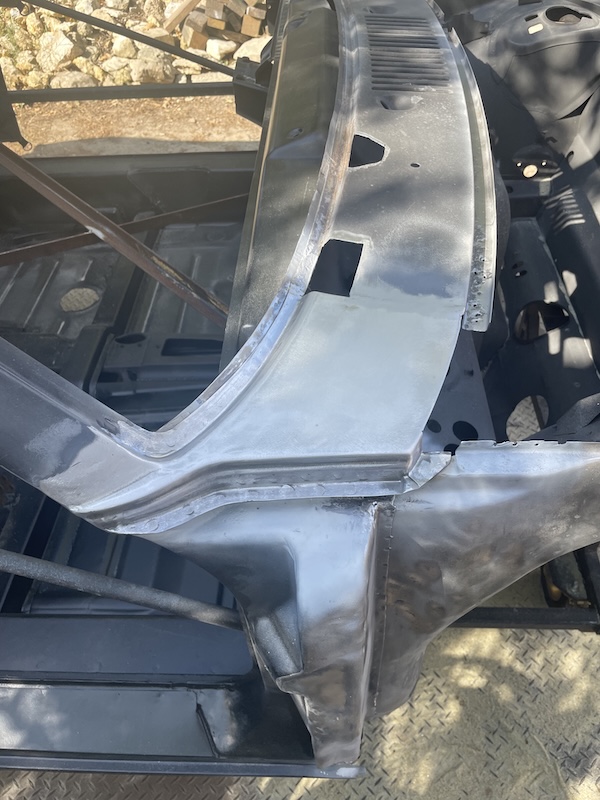 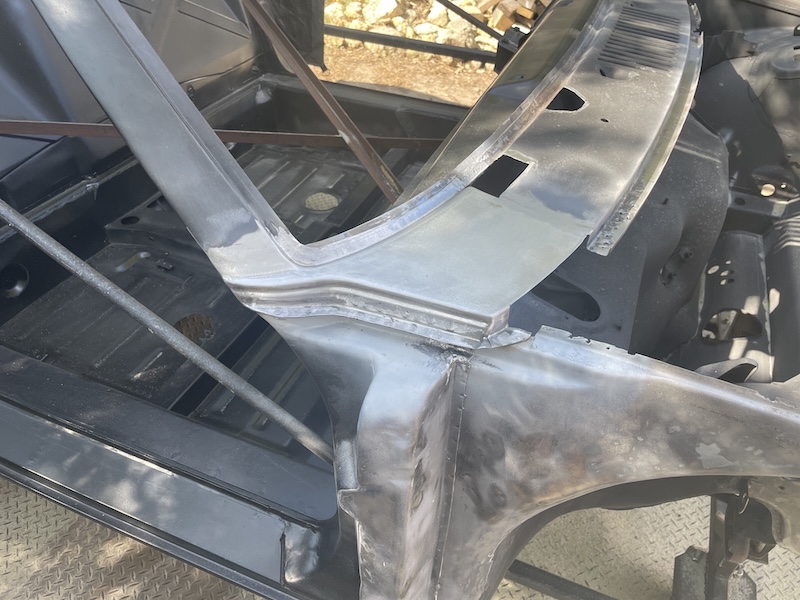 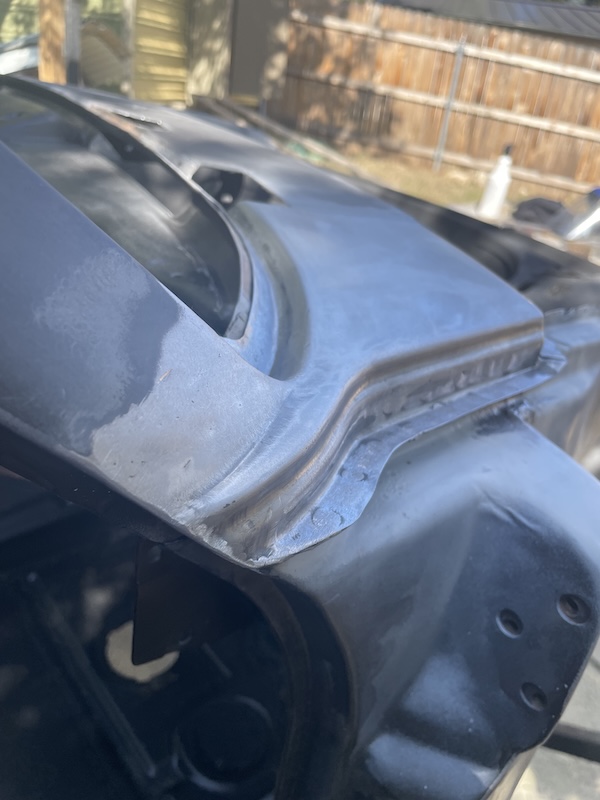 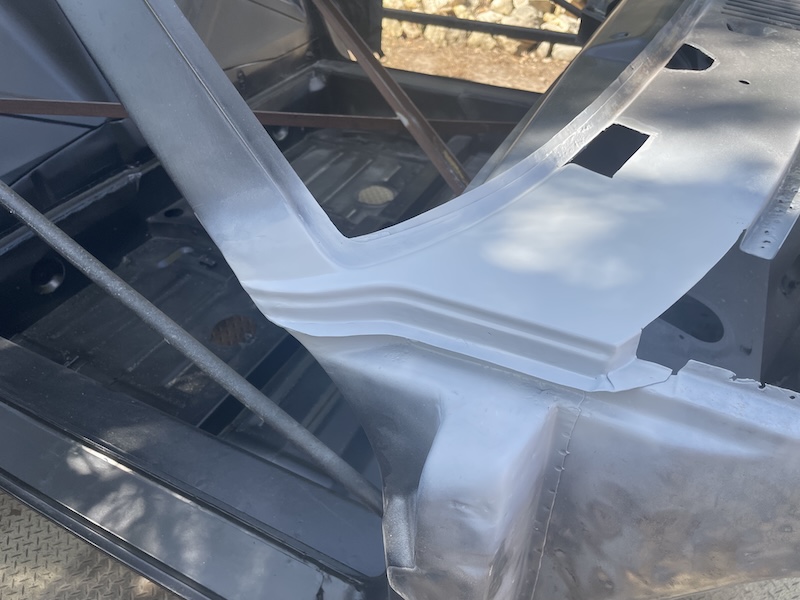 Moving on to the other smaller patches. More photos! 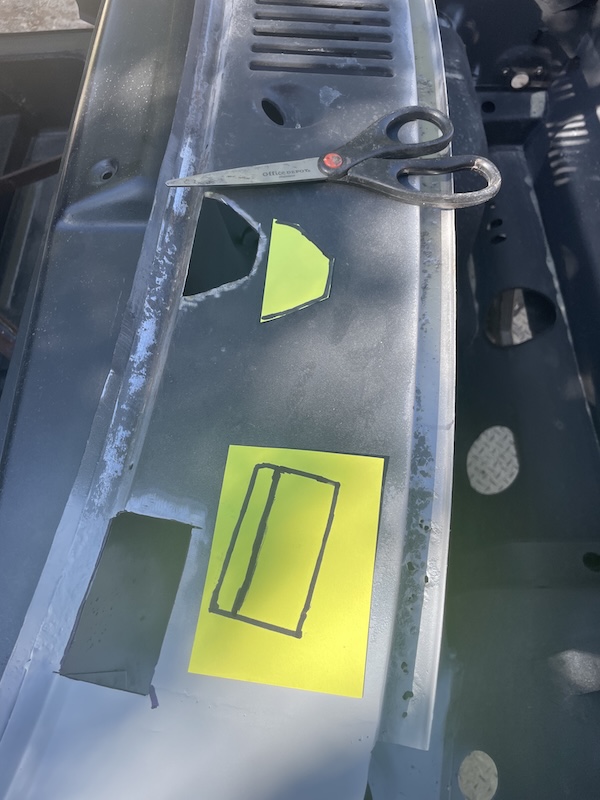 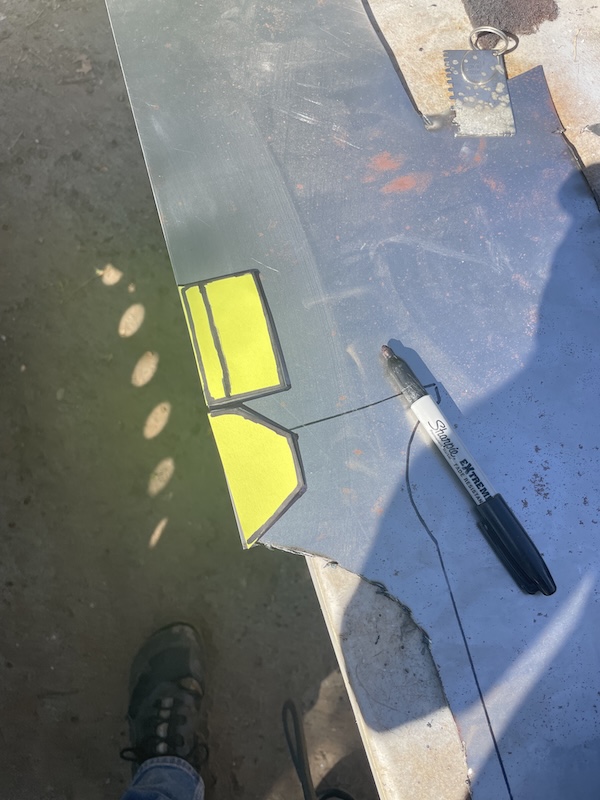 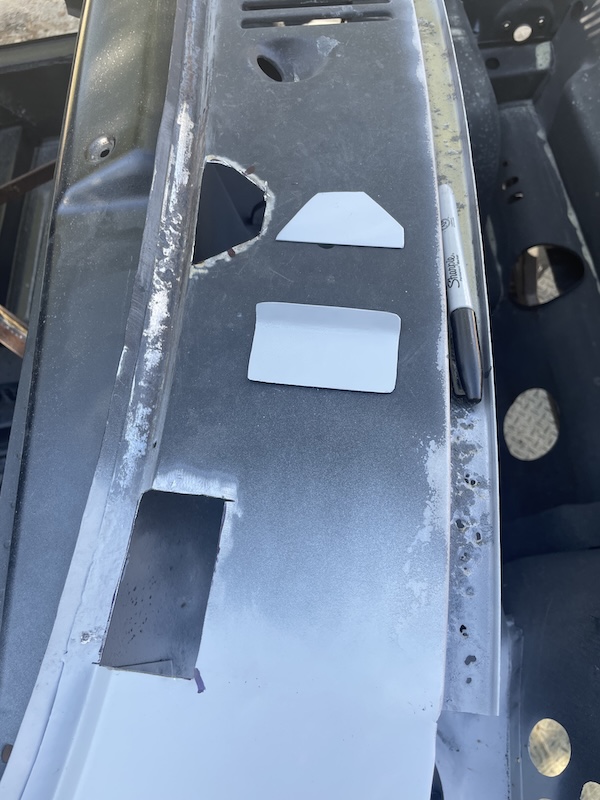 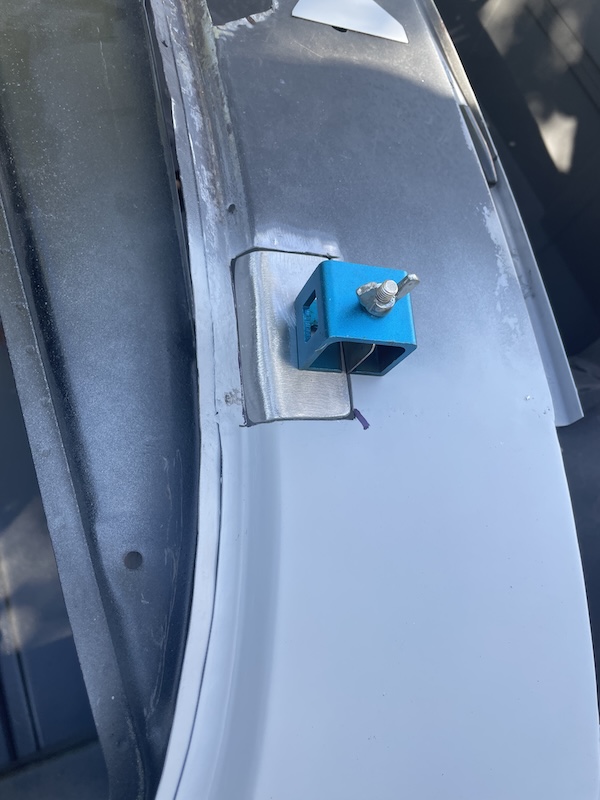 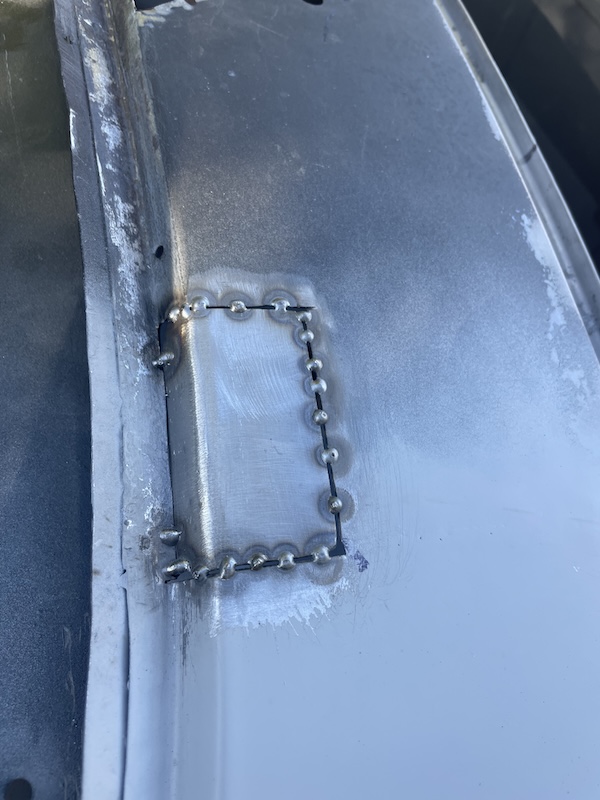 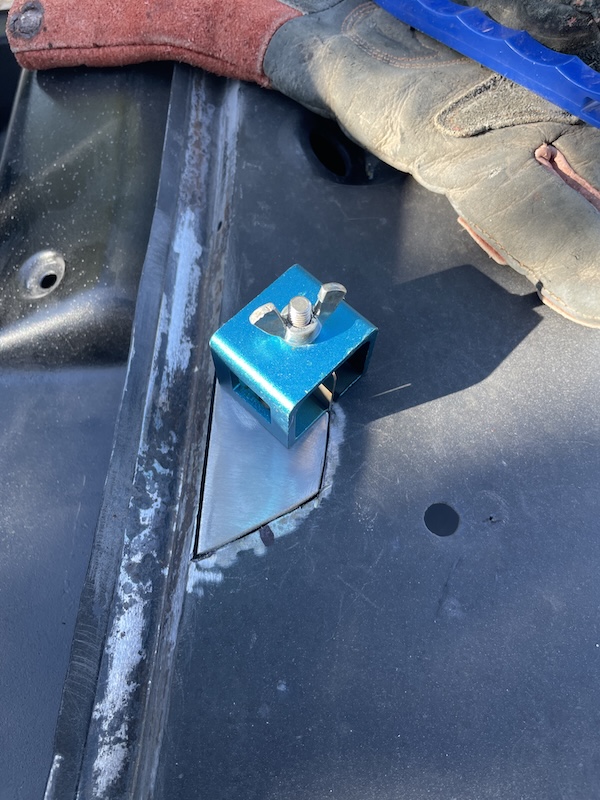 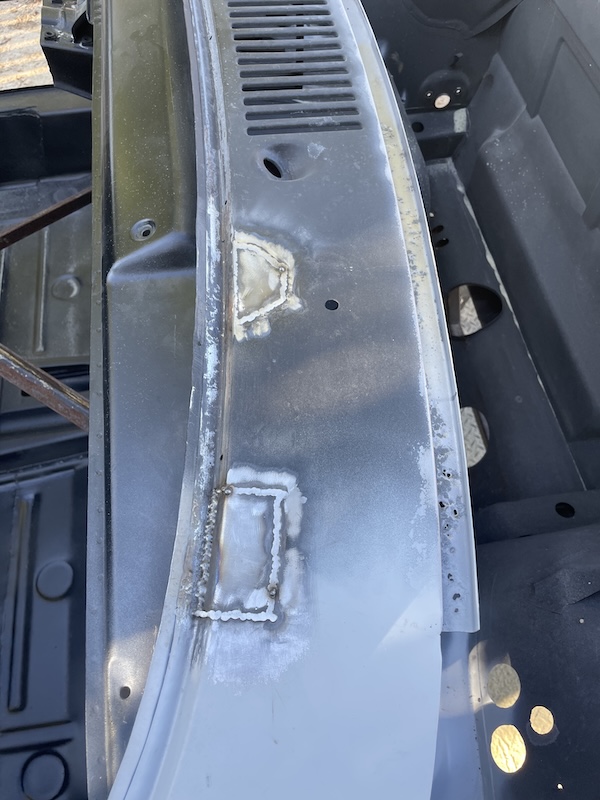 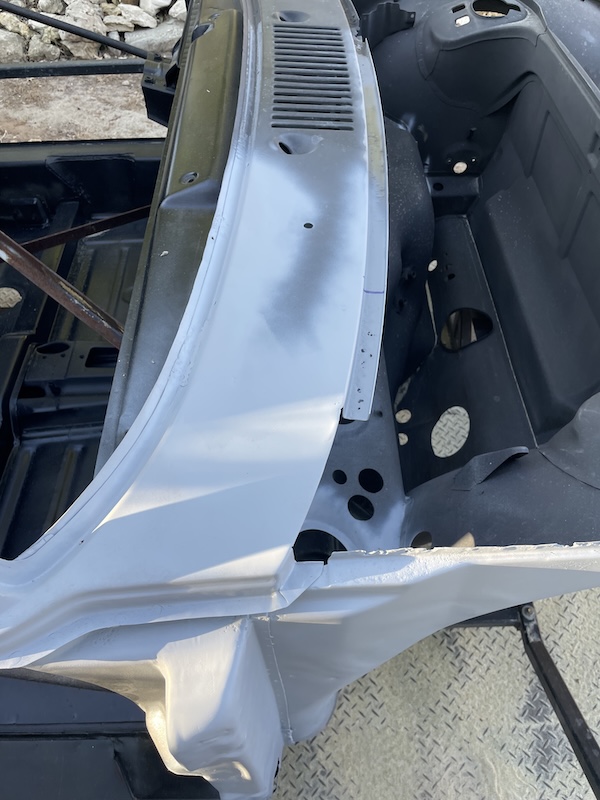 More to come next weekend as I take on the rear hood seal area on the cowl (IMG:style_emoticons/default/flag.gif) |
| friethmiller |
 Nov 10 2024, 09:17 PM Nov 10 2024, 09:17 PM
Post
#328
|
|
Senior Member    Group: Members Posts: 846 Joined: 10-February 19 From: Austin, TX Member No.: 22,863 Region Association: Southwest Region 
|
Yes, removing the front fenders will reveal lots of complex joints--and trouble. But it makes them relatively easy to repair (with patience, as always). (IMG:style_emoticons/default/sawzall-smiley.gif) So true! |
| Dion |
 Nov 11 2024, 07:33 AM Nov 11 2024, 07:33 AM
Post
#329
|
|
RN     Group: Members Posts: 2,839 Joined: 16-September 04 From: Audubon,PA Member No.: 2,766 Region Association: MidAtlantic Region 

|
Way to go. That’s progress. (IMG:style_emoticons/default/welder.gif) (IMG:style_emoticons/default/smash.gif) (IMG:style_emoticons/default/smilie_pokal.gif)
|
| friethmiller |
 Nov 11 2024, 07:59 AM Nov 11 2024, 07:59 AM
Post
#330
|
|
Senior Member    Group: Members Posts: 846 Joined: 10-February 19 From: Austin, TX Member No.: 22,863 Region Association: Southwest Region 
|
Way to go. That’s progress. (IMG:style_emoticons/default/welder.gif) (IMG:style_emoticons/default/smash.gif) (IMG:style_emoticons/default/smilie_pokal.gif) (IMG:style_emoticons/default/agree.gif) Yes, sir! I plan on media blasting that windshield track this week. Rust removal/ panel prep will be ongoing in the background as I fix/replace things. |
| burton73 |
 Nov 11 2024, 09:17 AM Nov 11 2024, 09:17 AM
Post
#331
|
|
Senior member, and old dude     Group: Members Posts: 3,800 Joined: 2-January 07 From: Los Angeles Member No.: 7,414 Region Association: Southern California 
|
Fred, you just keep going. It is incredible how much work that you have done on your LE. Thank you for posting everything for all to see. Staying focused, doing all this work and taking all the pictures as well, truly amazing
Thank you Best Bob B (IMG:style_emoticons/default/first.gif) |
| friethmiller |
 Nov 11 2024, 09:31 AM Nov 11 2024, 09:31 AM
Post
#332
|
|
Senior Member    Group: Members Posts: 846 Joined: 10-February 19 From: Austin, TX Member No.: 22,863 Region Association: Southwest Region 
|
Fred, you just keep going. It is incredible how much work that you have done on your LE. Thank you for posting everything for all to see. Staying focused, doing all this work and taking all the pictures as well, truly amazing Thank you Best Bob B (IMG:style_emoticons/default/first.gif) That means a lot coming from you, Bob. Thanks! Love your 6, BTW (IMG:style_emoticons/default/drooley.gif) |
| friethmiller |
 Nov 12 2024, 06:22 PM Nov 12 2024, 06:22 PM
Post
#333
|
|
Senior Member    Group: Members Posts: 846 Joined: 10-February 19 From: Austin, TX Member No.: 22,863 Region Association: Southwest Region 
|
A Little Mid-week Metal Shaping (11/12/2024):
Just a few pics here this evening. I'm working on the first of two seal track pieces that will, when installed, complete the cowl repair on this side of the car. Most of the bends were done on the metal brake, followed by the shrinker/stretcher. Note: You may notice the extra metal on the top of my patch, that I didn't need. This was "as planned" since I knew I'd need to shrink the center of the piece just a bit. I'd like to think I'm getting smarter about forming the metal. Maybe! (IMG:style_emoticons/default/confused24.gif) The part was then trimmed using the car as a guide, with the final 90 degree bend done by hand with my "vise-grip + channel lock" technique. Plan to tack this patch in and then cut out the rotten section right next to it. Cheers! (IMG:style_emoticons/default/beerchug.gif) 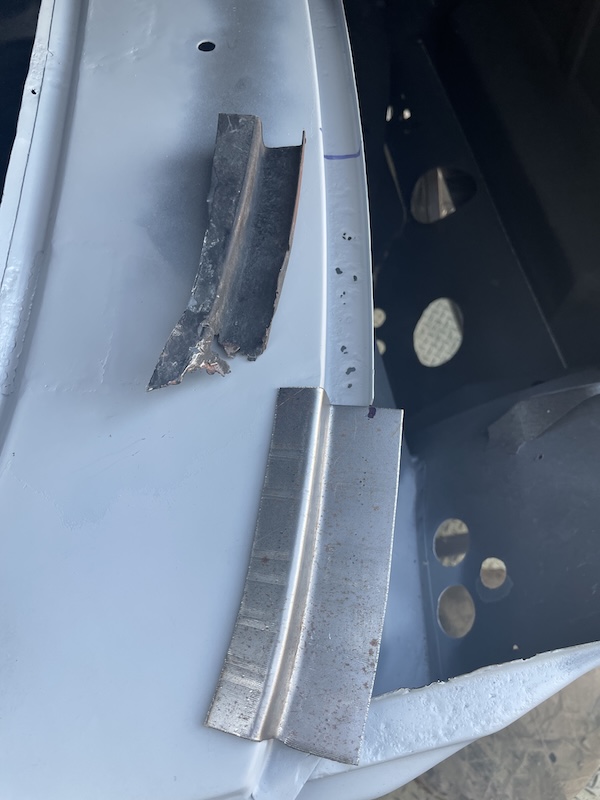 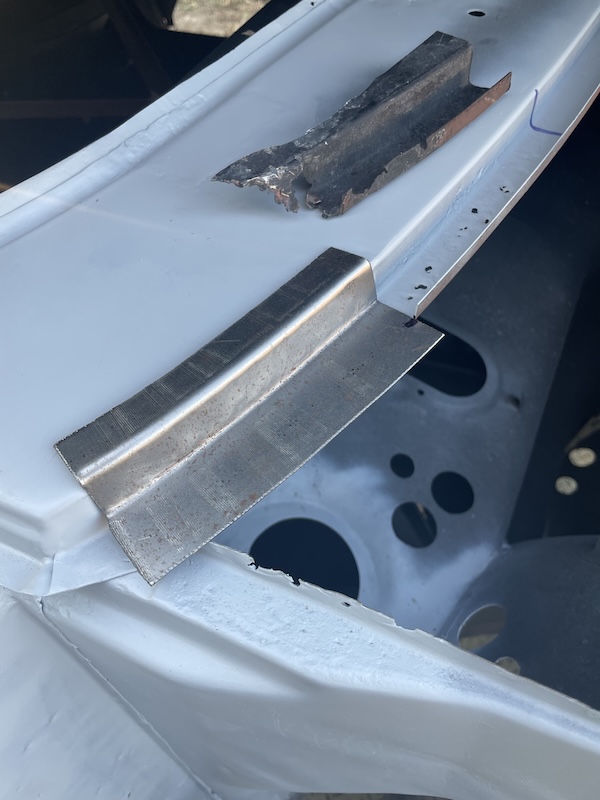 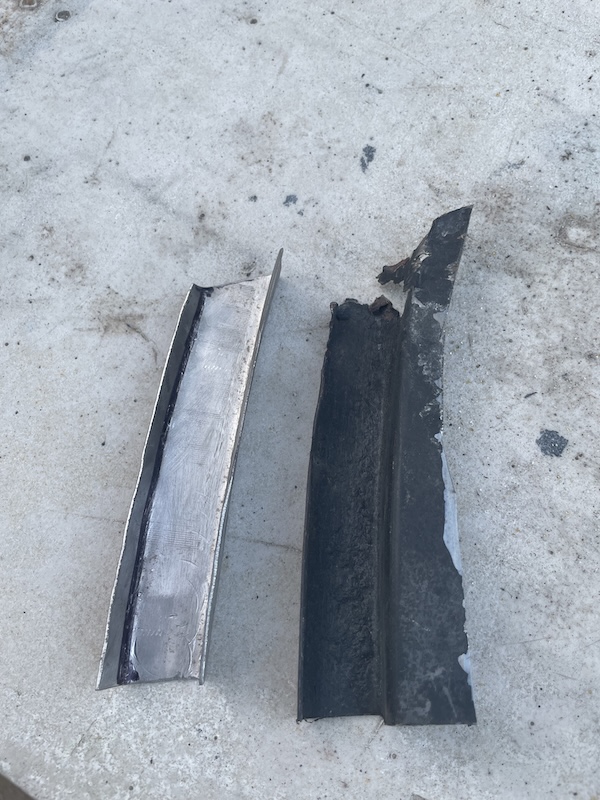 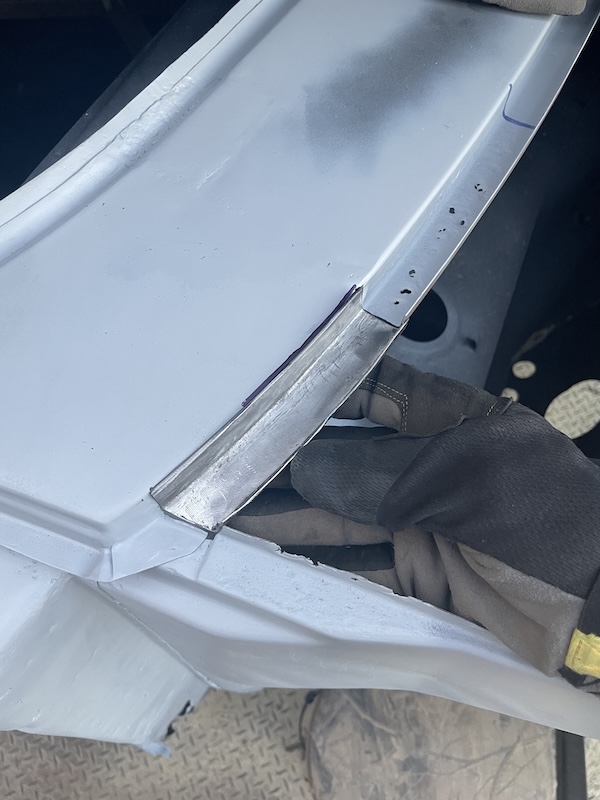 |
| friethmiller |
 Nov 17 2024, 06:29 PM Nov 17 2024, 06:29 PM
Post
#334
|
|
Senior Member    Group: Members Posts: 846 Joined: 10-February 19 From: Austin, TX Member No.: 22,863 Region Association: Southwest Region 
|
Passenger Front Fender Area Repair (11/16/2024):
After forming the two pieces for the hood seal along the cowl, I began by tacking everything in place. I didn't get enough bend in the interior piece so I decide to cut a relieve to allow the track to bend to match the cowl a bit better. I made several passes here in order to get all the seam welded up properly. To be honest, I'm not particularly happy with my job here. I've created a bit of a low spot on the top of the cowl along the "big patch" weld line. I decided to wait till I have the car flipped on it's side again and then see about pounding out the low spot with a hammer & dolly. Worst case I'll cut the weld-line. support both sides [better], and give it another go. 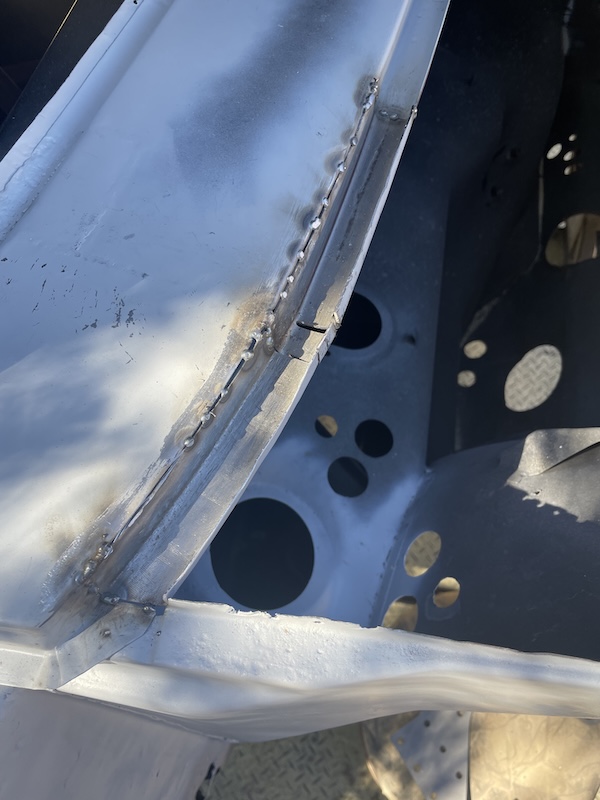 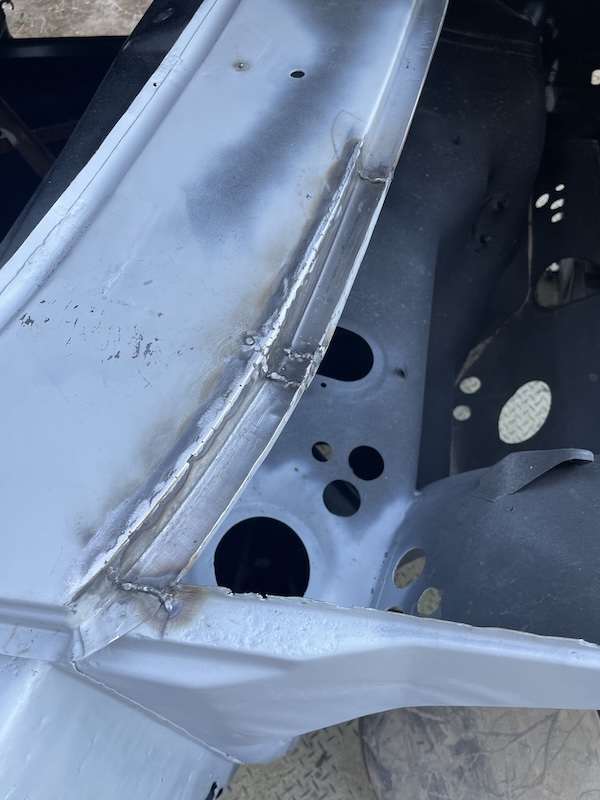 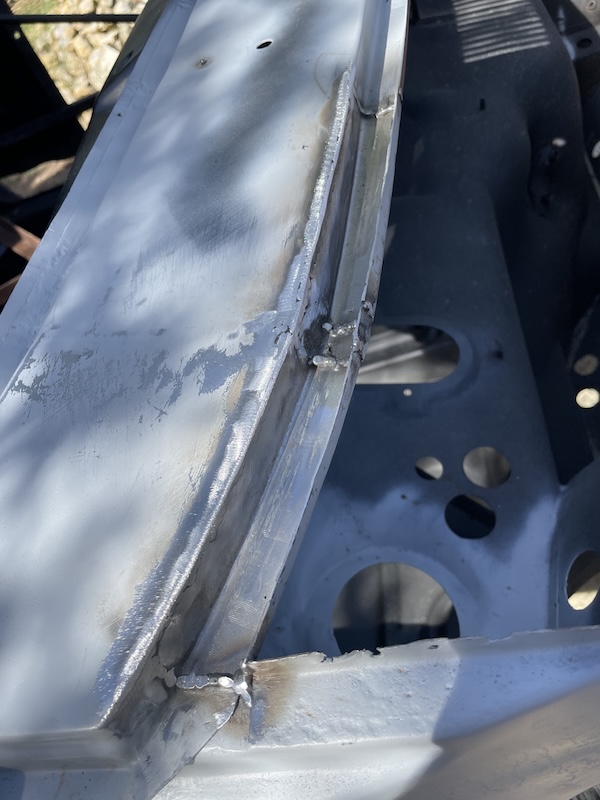 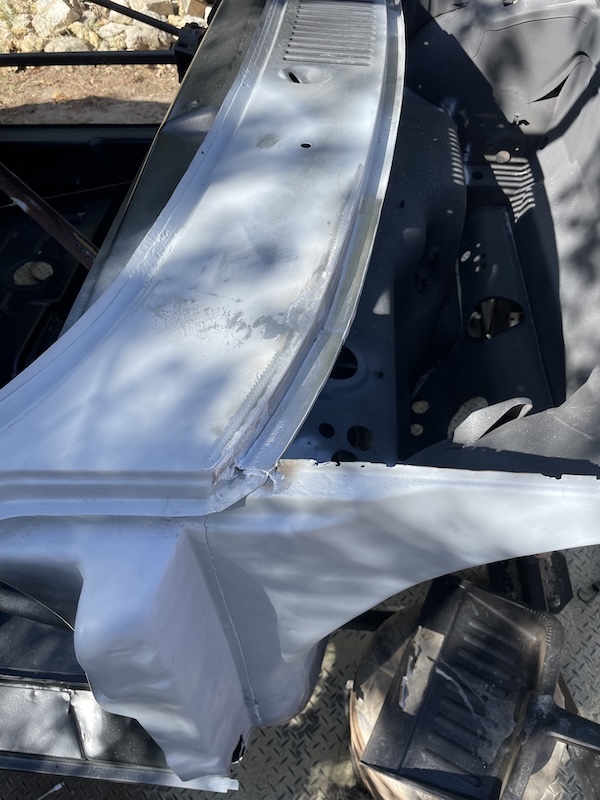 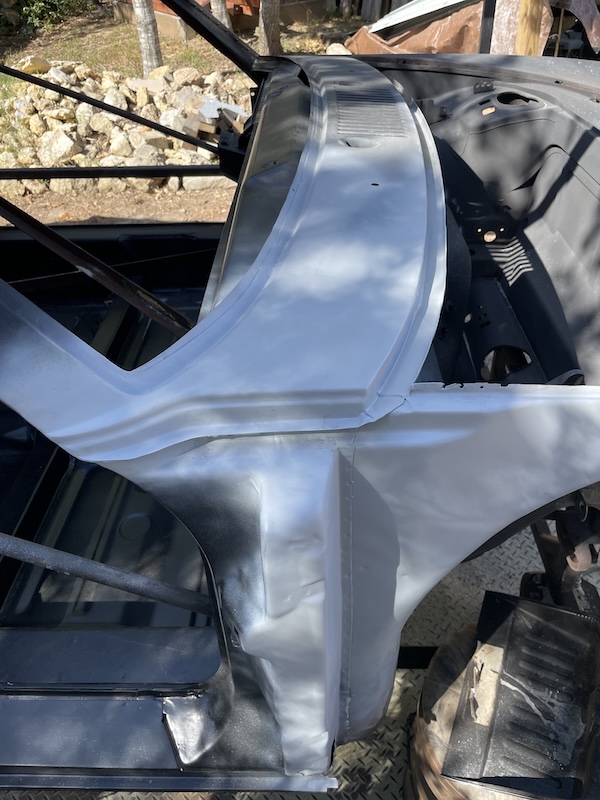 Finally back around to repairing the lower support section of the A-pillar where the A/C lines holes are located. This is a straight-ahead repair... mark cut lines, cut, use piece to cut out new metal, shape and weld-in new metal. 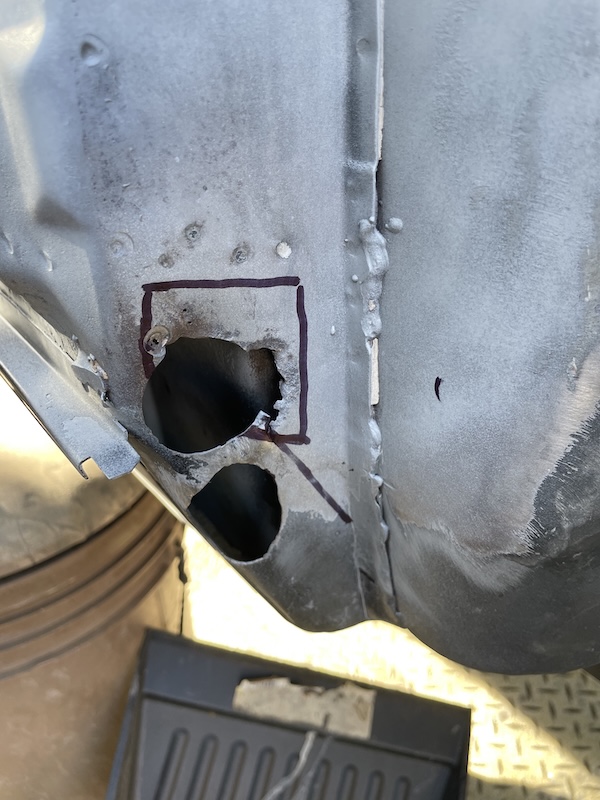 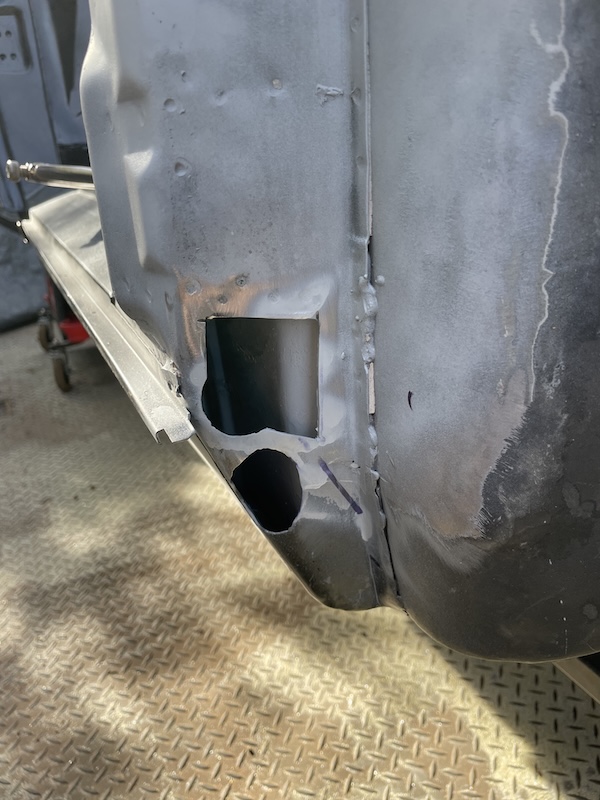 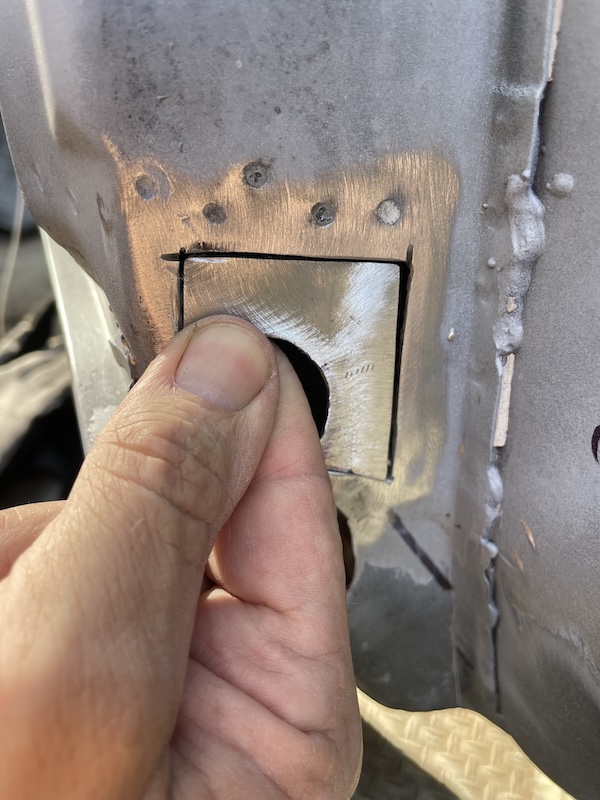 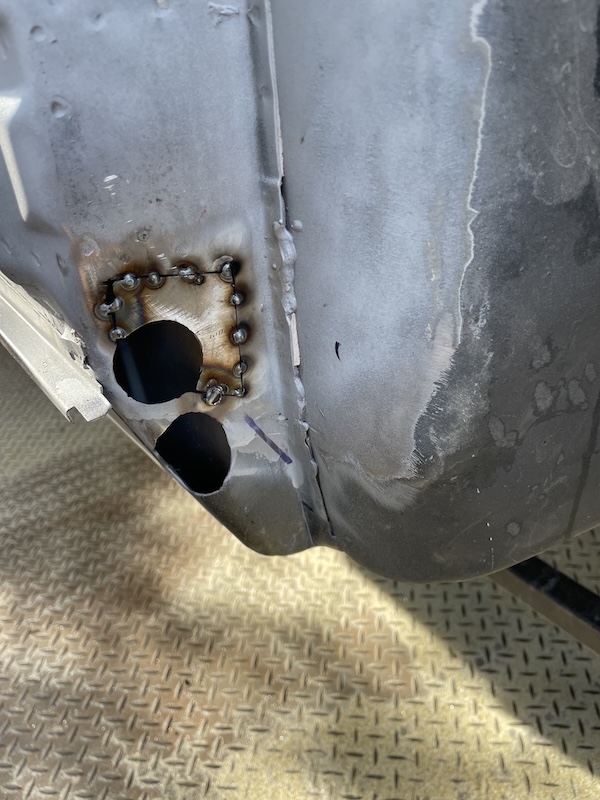 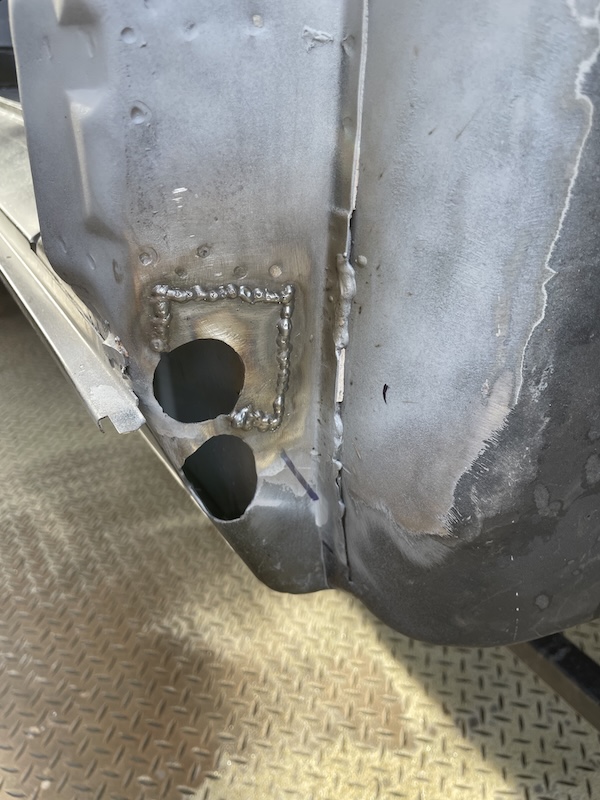 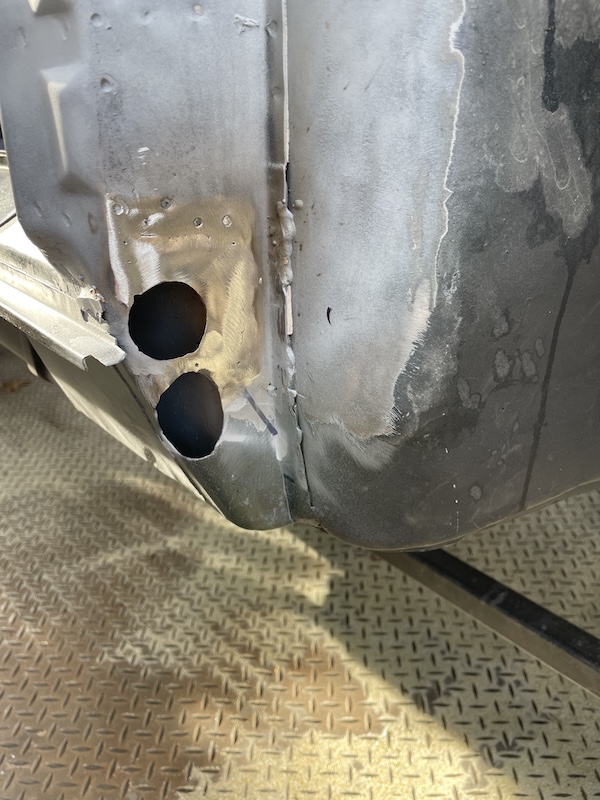 Now that the A-pillar is done, I could then fabricate a new forward support bracket that goes right over this area. The original piece was too rusted away, so my plan was use the piece from the driver side as a template. The follow photos show this process. I made the piece a little oversized and ground it down a bit at the very end. Note: I couldn't find my reamer bit set so I have to wait till later to finish widening the bottom hole. 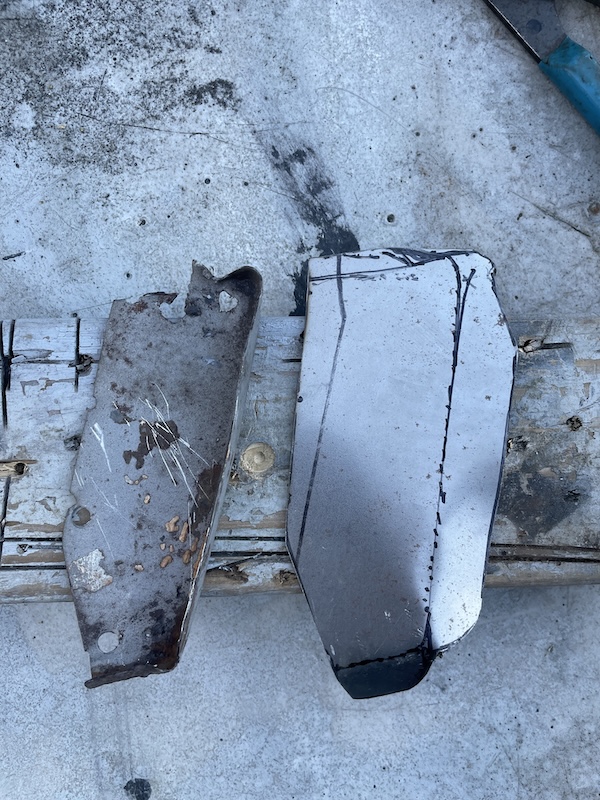 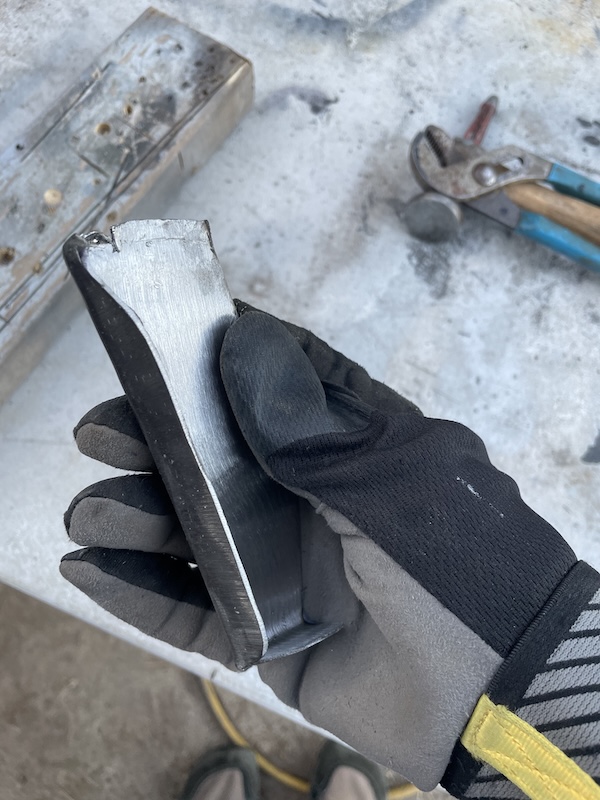 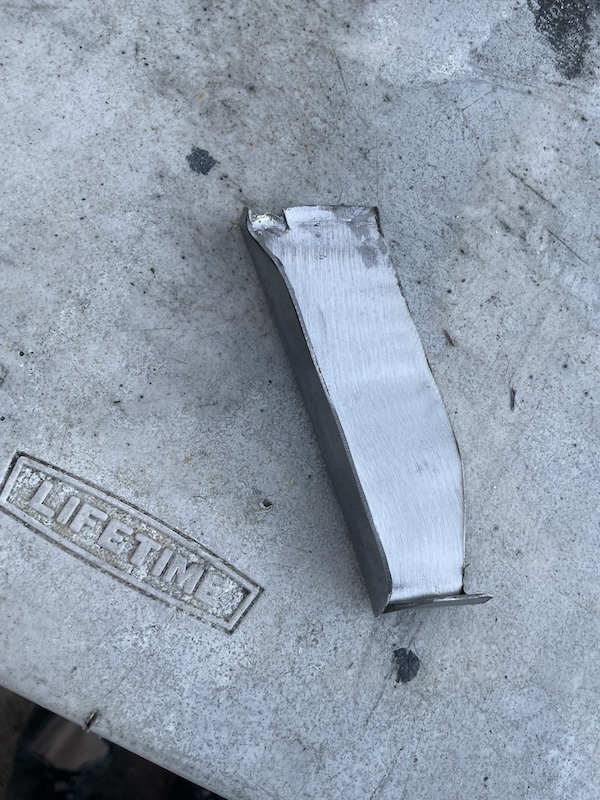 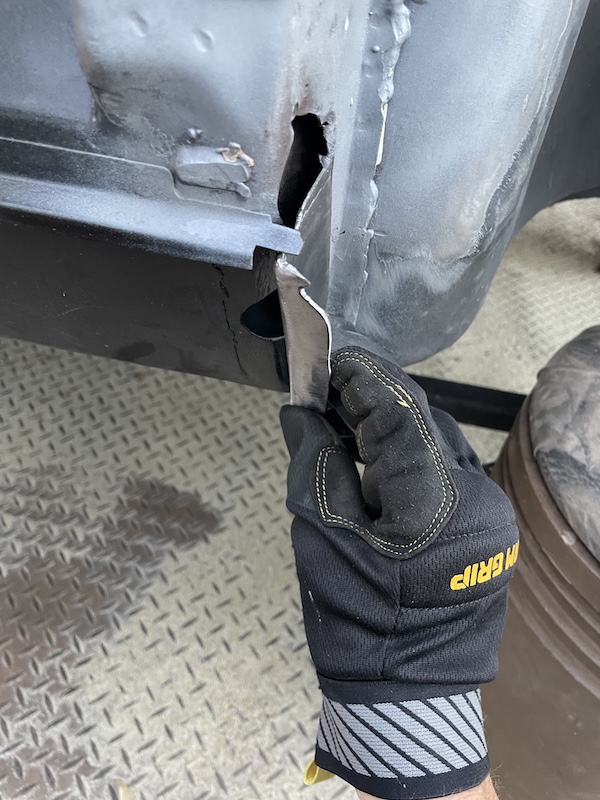 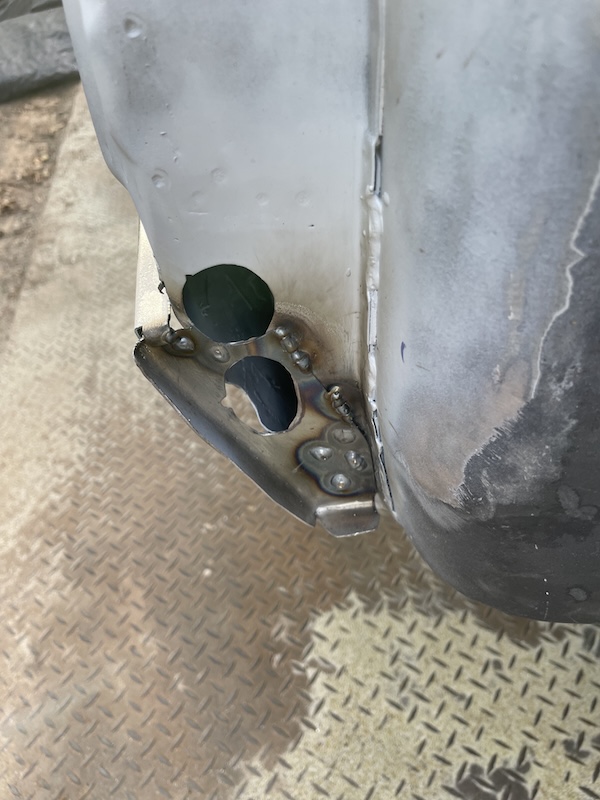 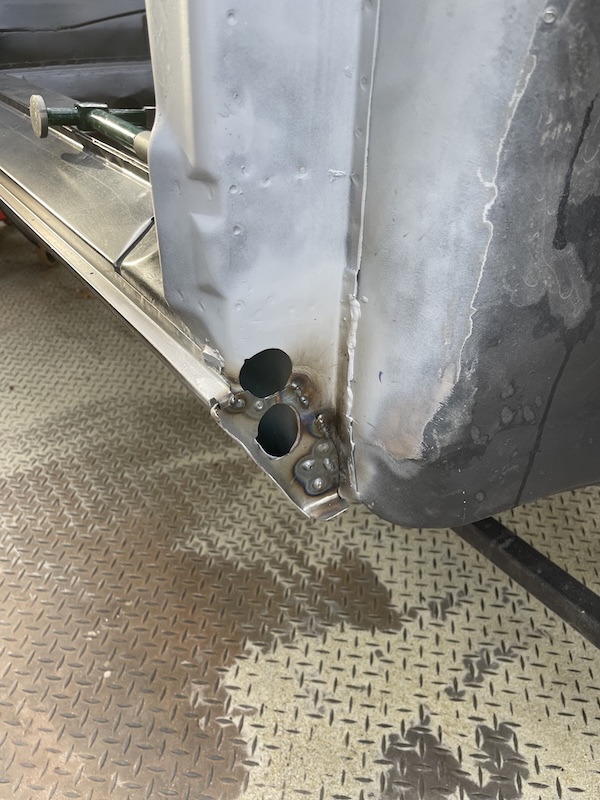 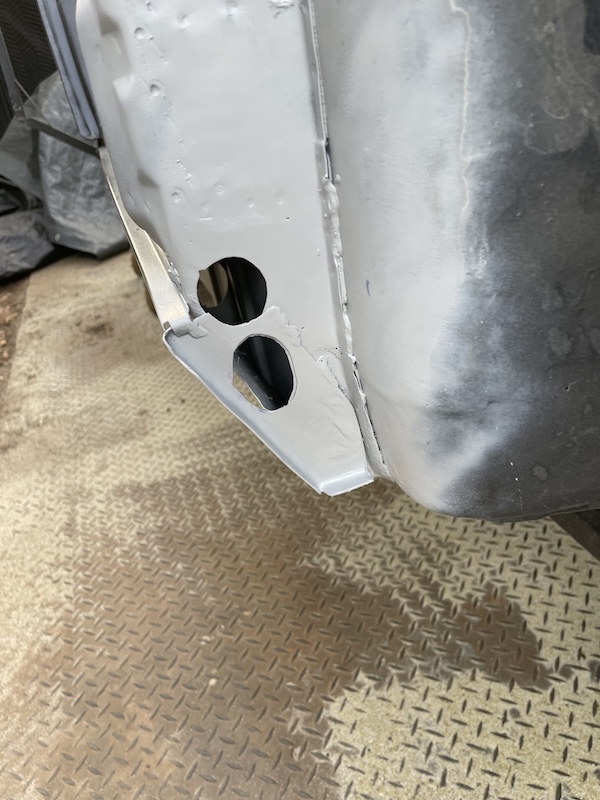 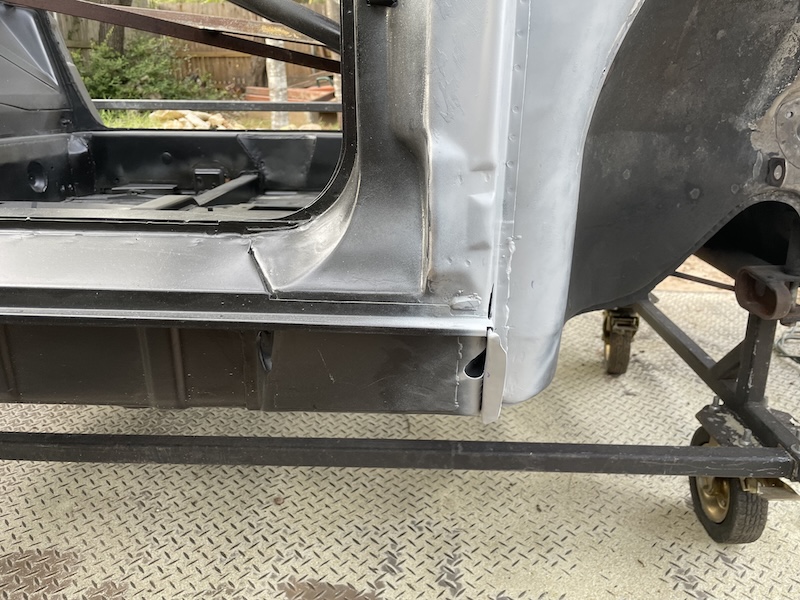 |
| friethmiller |
 Nov 17 2024, 08:21 PM Nov 17 2024, 08:21 PM
Post
#335
|
|
Senior Member    Group: Members Posts: 846 Joined: 10-February 19 From: Austin, TX Member No.: 22,863 Region Association: Southwest Region 
|
Passenger Sway-bar Reinforcement (11/17/2024):
After a bit of paint scraping, I started the process of fitting the sway-bar reinforcement piece to the car. While this upgrade isn't too complicated, the process does take a bit of time. You may notice how i just cut around the brake hose connection point. I've done this job before where I removed and reattach it. In my opinion, it was a waste of time. Additionally, I had to cut a hole on the other end for the "dealer installed" A/C line and had to trim the bottom of the piece so it didn't hang over the edge (see black cut line). 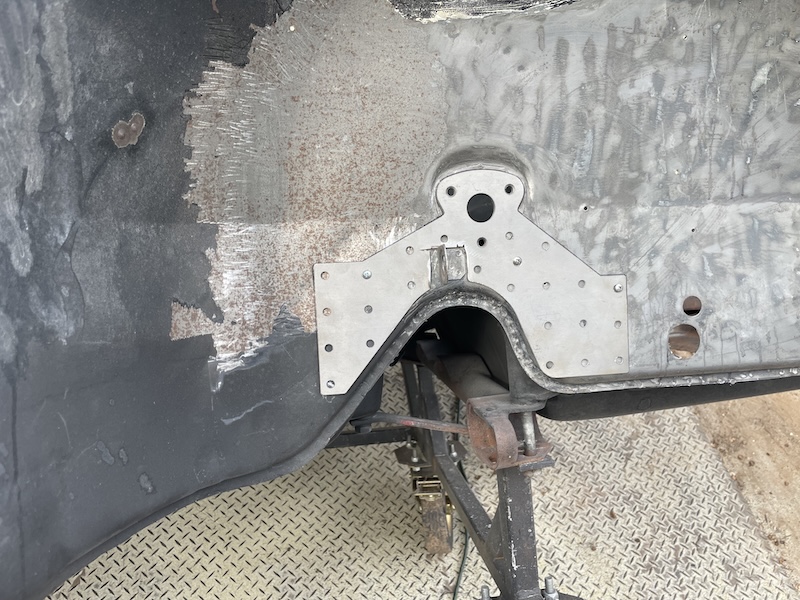 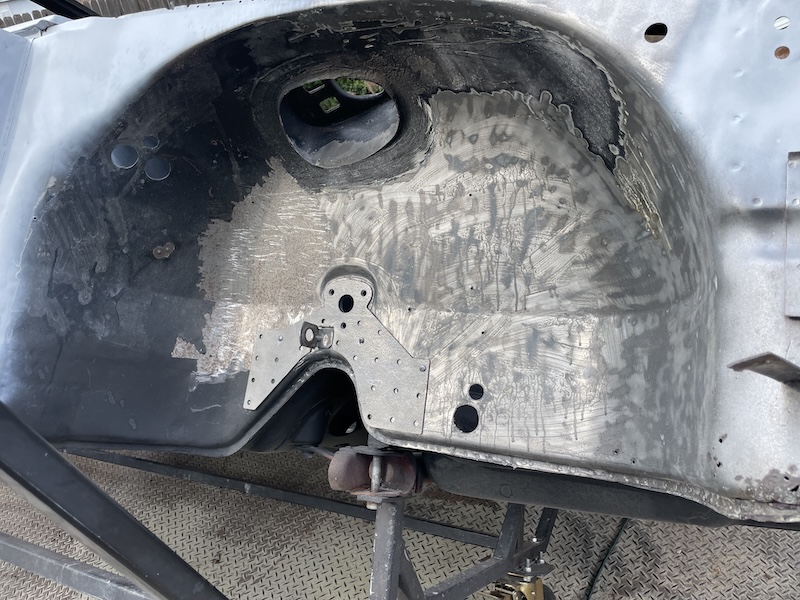 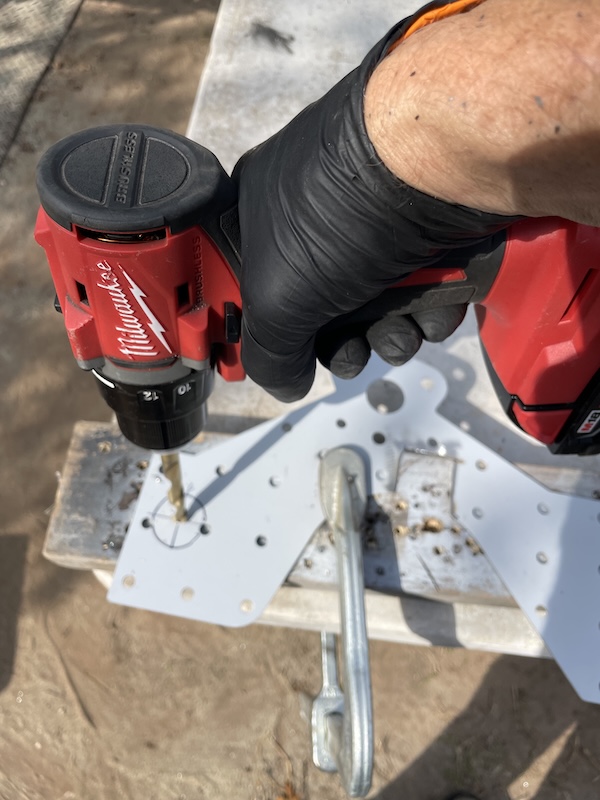 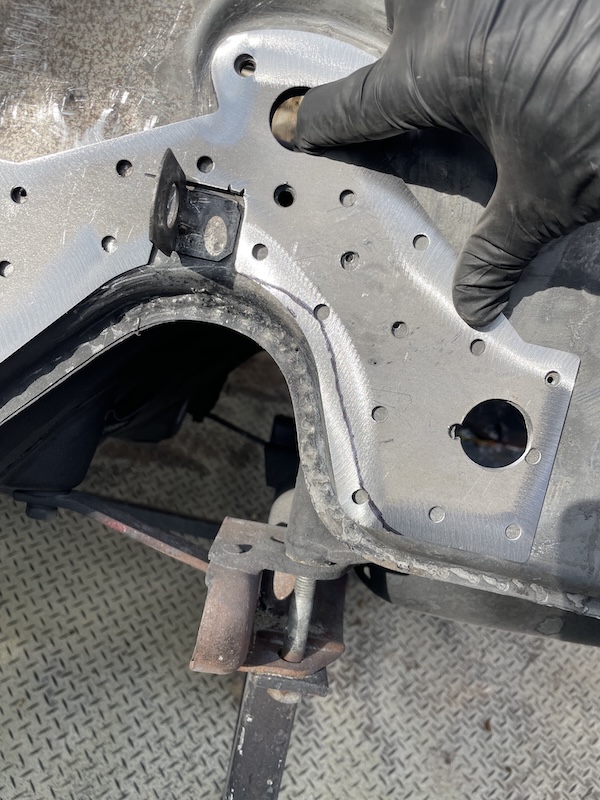 Did a lot of prep work prior to welding. I made sure both side of the metal were completely clean and properly primed. No issues welding everything in/down but I did use a lot of compressed air to keep everything cool. I decided to spare the neighbors the late Sunday afternoon grind. I'll grind down the welds later this week. 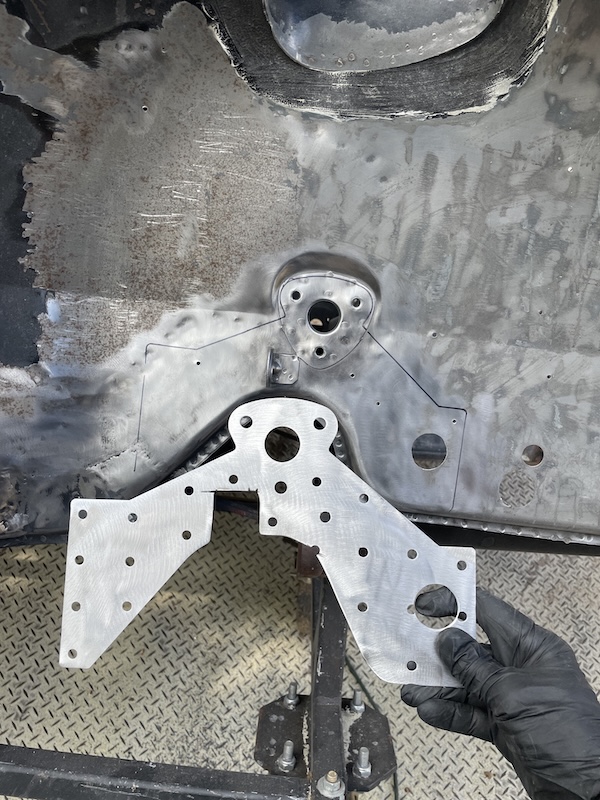 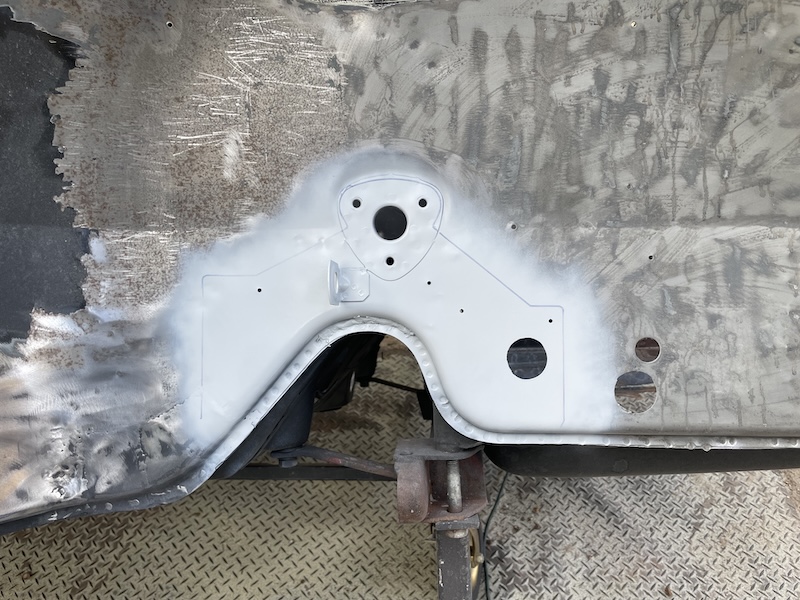 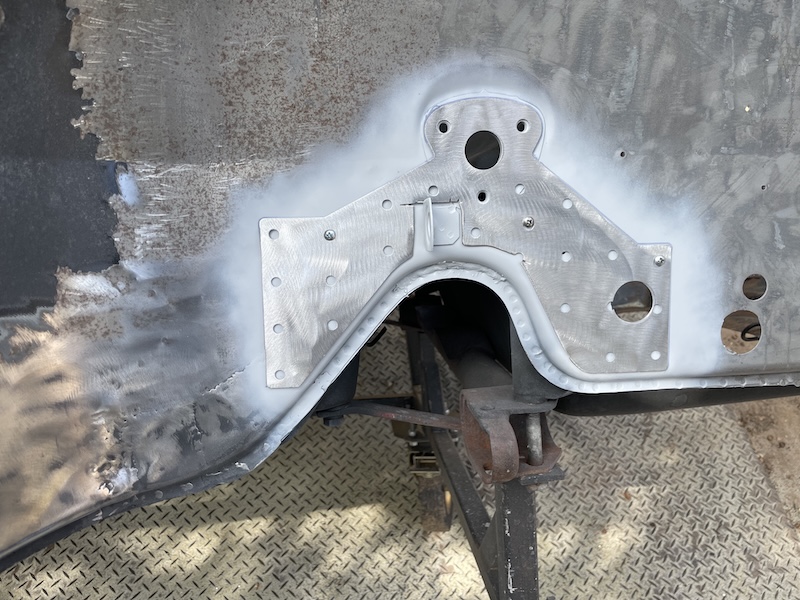 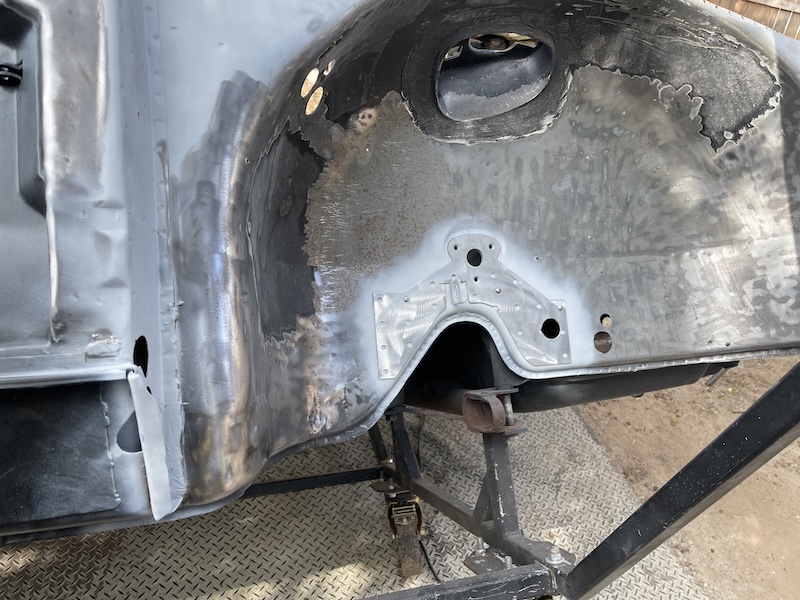 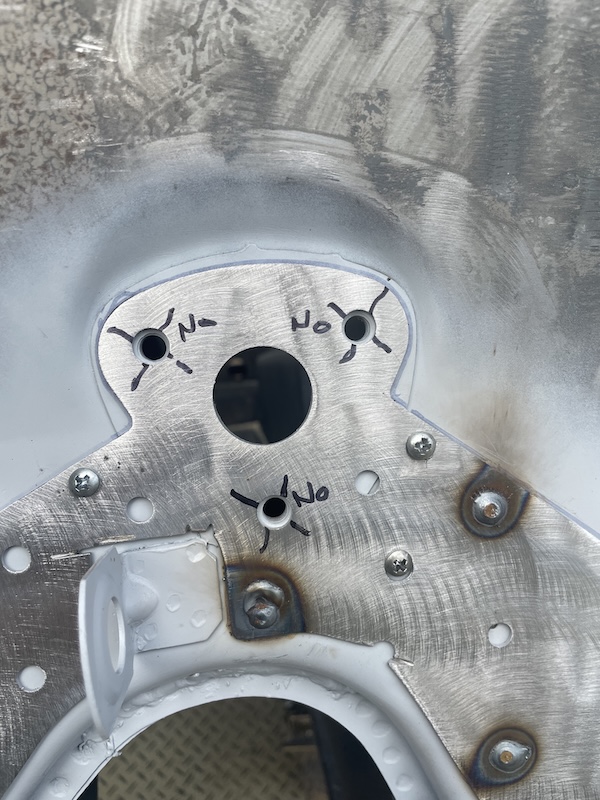 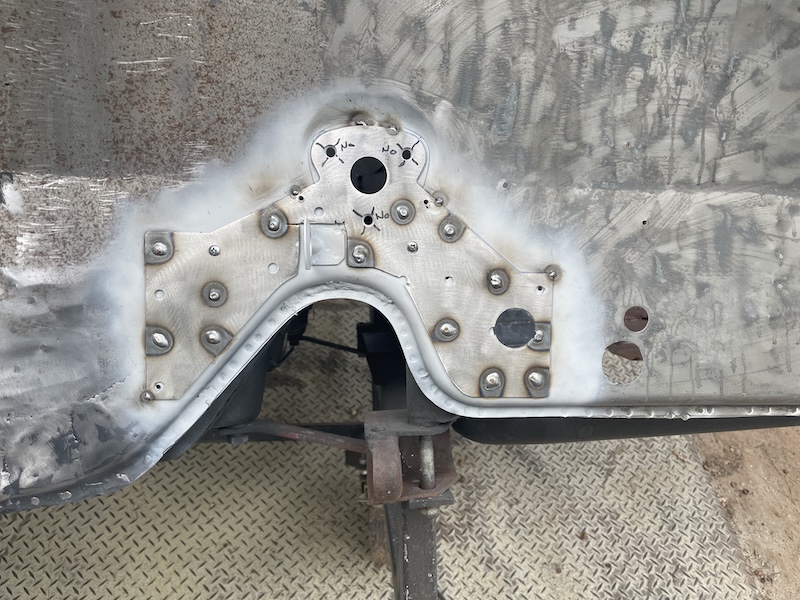 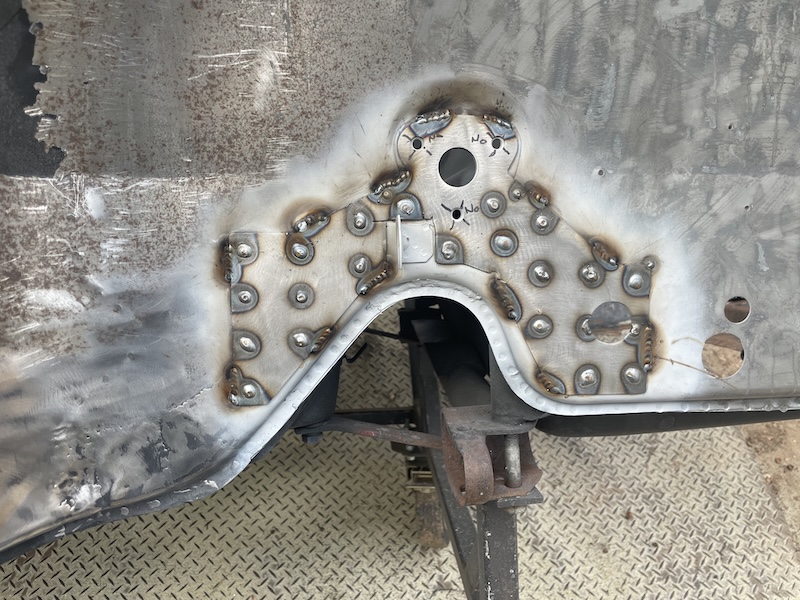 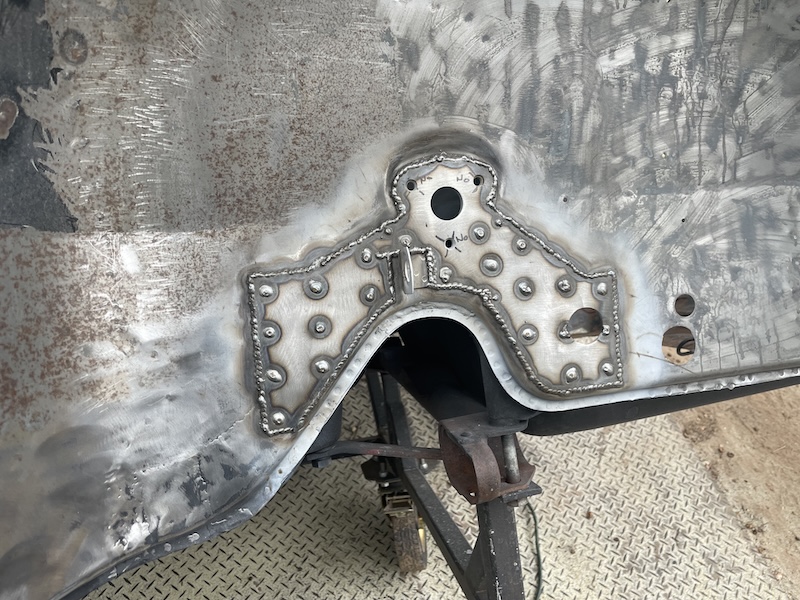 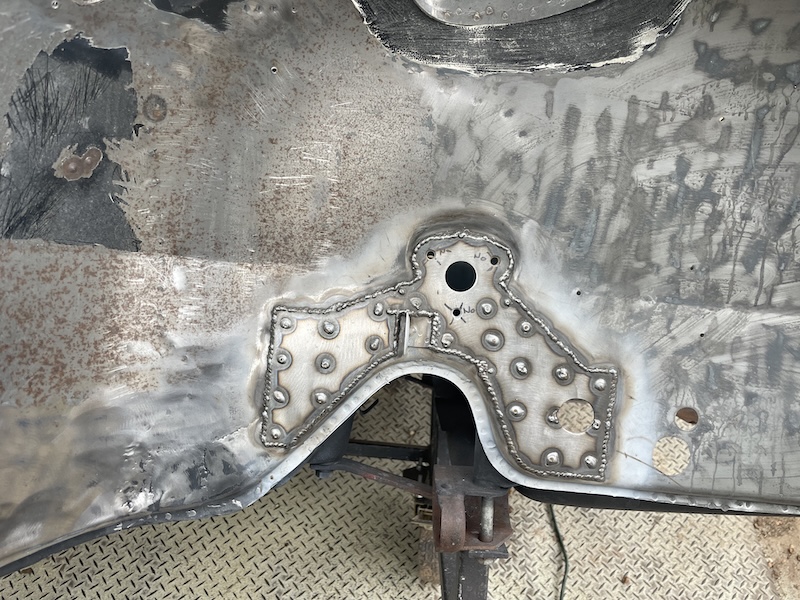 These last three photos show the metal after a quick Ospho treatment. This isn't final but just a step to mitigate any rust from forming before I cat back to the car. We have projected rain in the forecast for tonight and tomorrow. 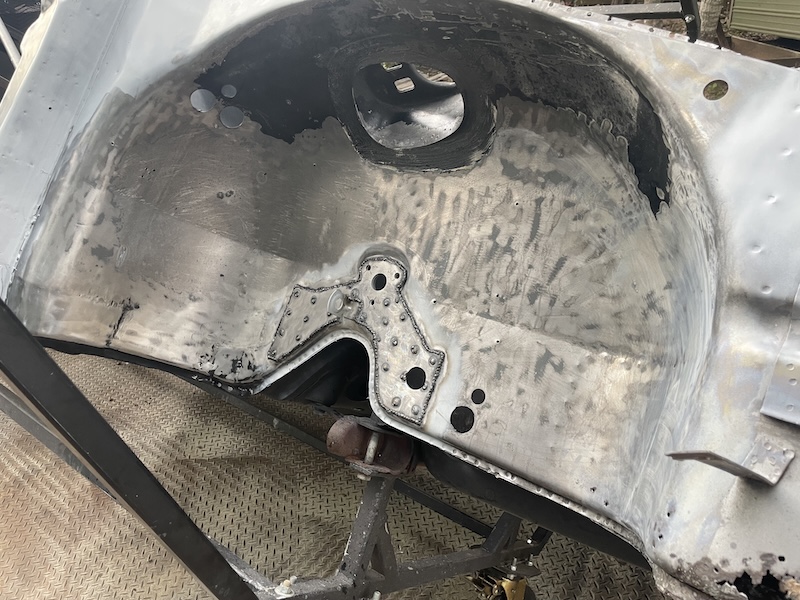 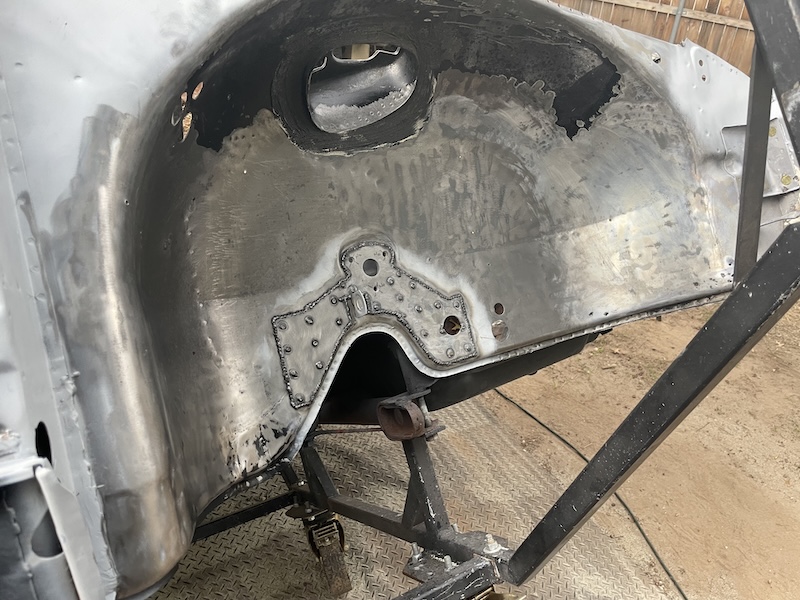 Attached image(s) 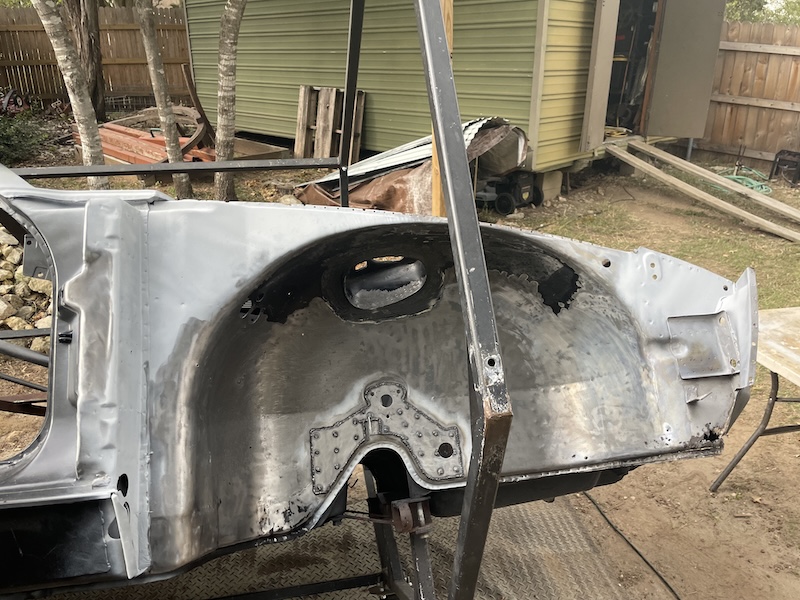
|
| rick 918-S |
 Nov 18 2024, 07:32 AM Nov 18 2024, 07:32 AM
Post
#336
|
|
Hey nice rack! -Celette                Group: Members Posts: 20,925 Joined: 30-December 02 From: Now in Superior WI Member No.: 43 Region Association: Northstar Region 

|
You have come along way! (IMG:style_emoticons/default/sawzall-smiley.gif) (IMG:style_emoticons/default/smash.gif) (IMG:style_emoticons/default/welder.gif)
|
| friethmiller |
 Nov 18 2024, 10:29 AM Nov 18 2024, 10:29 AM
Post
#337
|
|
Senior Member    Group: Members Posts: 846 Joined: 10-February 19 From: Austin, TX Member No.: 22,863 Region Association: Southwest Region 
|
You have come along way! (IMG:style_emoticons/default/sawzall-smiley.gif) (IMG:style_emoticons/default/smash.gif) (IMG:style_emoticons/default/welder.gif) Yes! I'm getting kind of sentimental as I get closer and closer to finishing out the body. This might be my last full restoration. Who knows? (IMG:style_emoticons/default/confused24.gif) |
| Literati914 |
 Nov 18 2024, 10:31 AM Nov 18 2024, 10:31 AM
Post
#338
|
|
Senior Member    Group: Members Posts: 1,910 Joined: 16-November 06 From: Dallas, TX Member No.: 7,222 Region Association: Southwest Region |
.. I decided to spare the neighbors the late Sunday afternoon grind. .. (IMG:style_emoticons/default/biggrin.gif) I know my neighbors are GLAD I'm past body work on my car! .. they just don't know, I have another one waiting! (IMG:style_emoticons/default/shades.gif) You're still making impressive progress, all this welding/grinding will soon be just a distant memory - and you'll be driven to the brink of insanity fighting electrical issues (IMG:style_emoticons/default/av-943.gif) |
| friethmiller |
 Nov 19 2024, 07:55 AM Nov 19 2024, 07:55 AM
Post
#339
|
|
Senior Member    Group: Members Posts: 846 Joined: 10-February 19 From: Austin, TX Member No.: 22,863 Region Association: Southwest Region 
|
.. I decided to spare the neighbors the late Sunday afternoon grind. .. (IMG:style_emoticons/default/biggrin.gif) I know my neighbors are GLAD I'm past body work on my car! .. they just don't know, I have another one waiting! (IMG:style_emoticons/default/shades.gif) You're still making impressive progress, all this welding/grinding will soon be just a distant memory - and you'll be driven to the brink of insanity fighting electrical issues (IMG:style_emoticons/default/av-943.gif) Oh yeah! I can't wait for that stuff [again]. It's enough to wish you were removing old paint & rust from the engine bay. (IMG:style_emoticons/default/blink.gif) Well... almost! |
| Cairo94507 |
 Nov 19 2024, 04:38 PM Nov 19 2024, 04:38 PM
Post
#340
|
|
Michael           Group: Members Posts: 10,297 Joined: 1-November 08 From: Auburn, CA Member No.: 9,712 Region Association: Northern California 
|
Great work Fred; that is going to be a very nice car. (IMG:style_emoticons/default/beerchug.gif)
|
  |
1 User(s) are reading this topic (1 Guests and 0 Anonymous Users)
0 Members:

|
Lo-Fi Version | Time is now: 20th April 2025 - 12:41 AM |
Invision Power Board
v9.1.4 © 2025 IPS, Inc.


