|
|
|
Porsche, and the Porsche crest are registered trademarks of Dr. Ing. h.c. F. Porsche AG.
This site is not affiliated with Porsche in any way. Its only purpose is to provide an online forum for car enthusiasts. All other trademarks are property of their respective owners. |
|
|

  |

| 930cabman |
 Nov 19 2024, 05:50 PM Nov 19 2024, 05:50 PM
Post
#341
|
|
Advanced Member  Group: Members Posts: 4,044 Joined: 12-November 20 From: Buffalo Member No.: 24,877 Region Association: North East States |
QUOTE(Literati914 @ Nov 18 2024, 11:31 AM)  QUOTE(friethmiller @ Nov 17 2024, 08:21 PM) .. I decided to spare the neighbors the late Sunday afternoon grind. .. (IMG:style_emoticons/default/biggrin.gif) I know my neighbors are GLAD I'm past body work on my car! .. they just don't know, I have another one waiting! (IMG:style_emoticons/default/shades.gif) You're still making impressive progress, all this welding/grinding will soon be just a distant memory - and you'll be driven to the brink of insanity fighting electrical issues (IMG:style_emoticons/default/av-943.gif) Not always, I have gotten lucky with many of the restorations I have done. Even a flood Alfa spider, most everything worked after some Deoxit and cleaning Great project Fred, HB Fred's 914 Resto Shop, bet you could make a go of it |
   |

 
|
| friethmiller |
Nov 20 2024, 08:44 AM
Post
#342
|
|
Senior Member Group: Members Posts: 846 Joined: 10-February 19 From: Austin, TX Member No.: 22,863 Region Association: Southwest Region |
QUOTE(930cabman @ Nov 19 2024, 05:50 PM) QUOTE(Literati914 @ Nov 18 2024, 11:31 AM) QUOTE(friethmiller @ Nov 17 2024, 08:21 PM) .. I decided to spare the neighbors the late Sunday afternoon grind. .. (IMG:style_emoticons/default/biggrin.gif) I know my neighbors are GLAD I'm past body work on my car! .. they just don't know, I have another one waiting! (IMG:style_emoticons/default/shades.gif) You're still making impressive progress, all this welding/grinding will soon be just a distant memory - and you'll be driven to the brink of insanity fighting electrical issues (IMG:style_emoticons/default/av-943.gif) Not always, I have gotten lucky with many of the restorations I have done. Even a flood Alfa spider, most everything worked after some Deoxit and cleaning Great project Fred, HB Fred's 914 Resto Shop, bet you could make a go of it A great idea (IMG:style_emoticons/default/biggrin.gif) Might be my retirement gig in a few years. You never know. |
|
|
|
| friethmiller |
Dec 29 2024, 05:45 PM
Post
#343
|
|
Senior Member Group: Members Posts: 846 Joined: 10-February 19 From: Austin, TX Member No.: 22,863 Region Association: Southwest Region |
Passenger Light Bucket Area Repair (11/23 - 11/24/2024):
[Sorry for the delay in posting this one] Equal to the peddle cluster area rust damage is the front corner of this car! My plan was to cut in from the backside and see how bad things were and determine what needed to be replaced. And.... it turned out to be a lot. You gotta love the purple line I made to guide my cuts. By the time I realized I was headed off in the wrong direction, it was too late - I just went with it. (IMG:style_emoticons/default/rolleyes.gif) 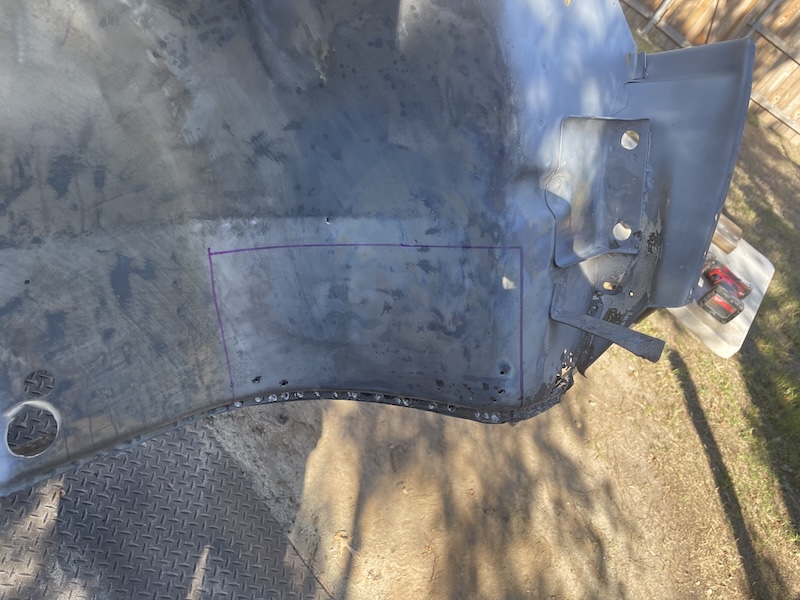 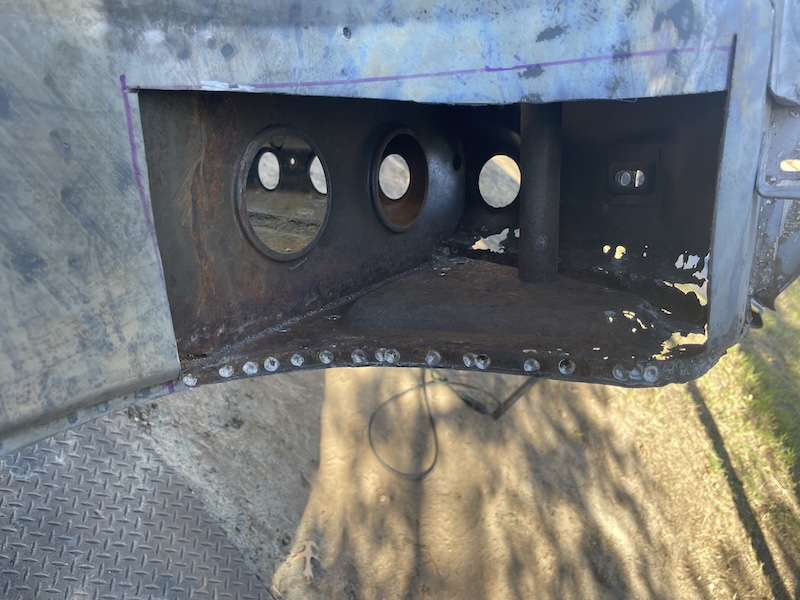 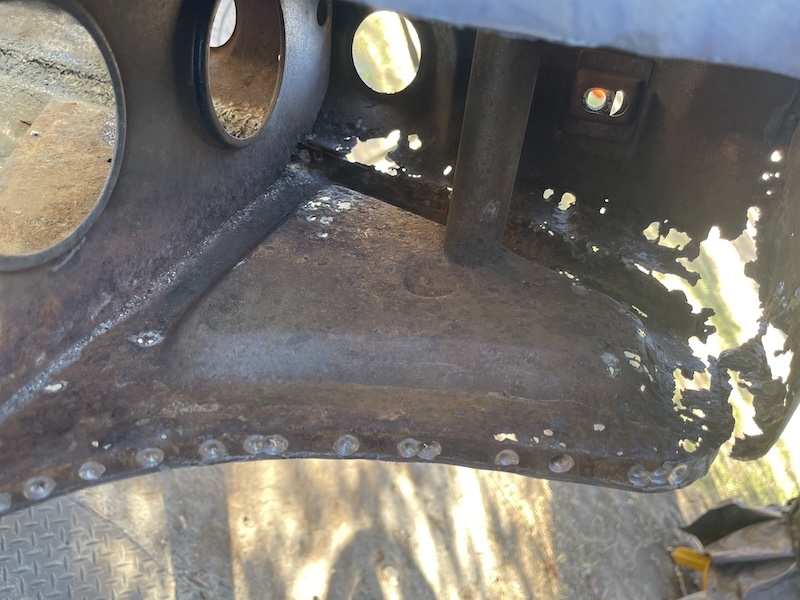 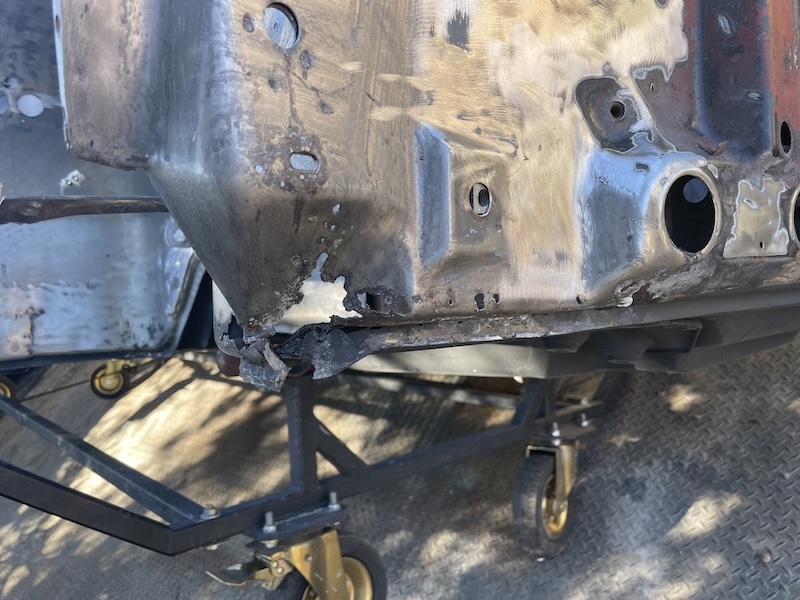 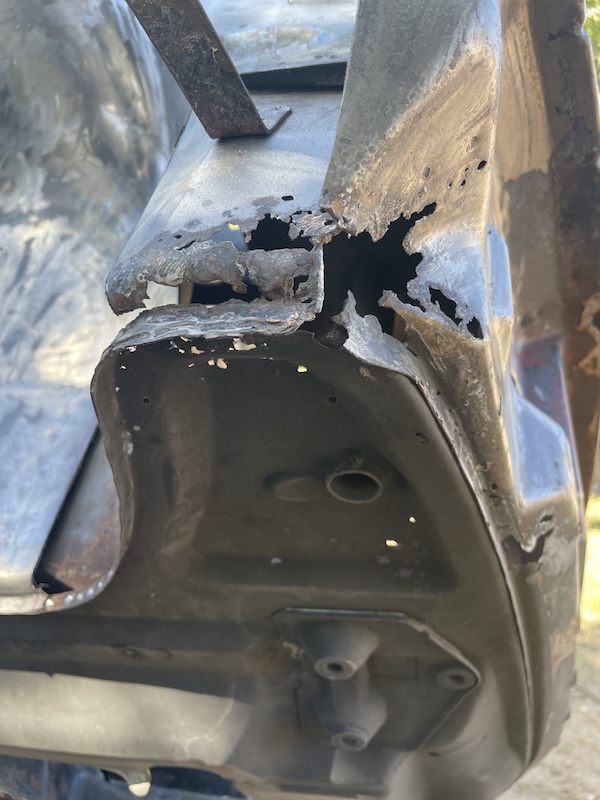 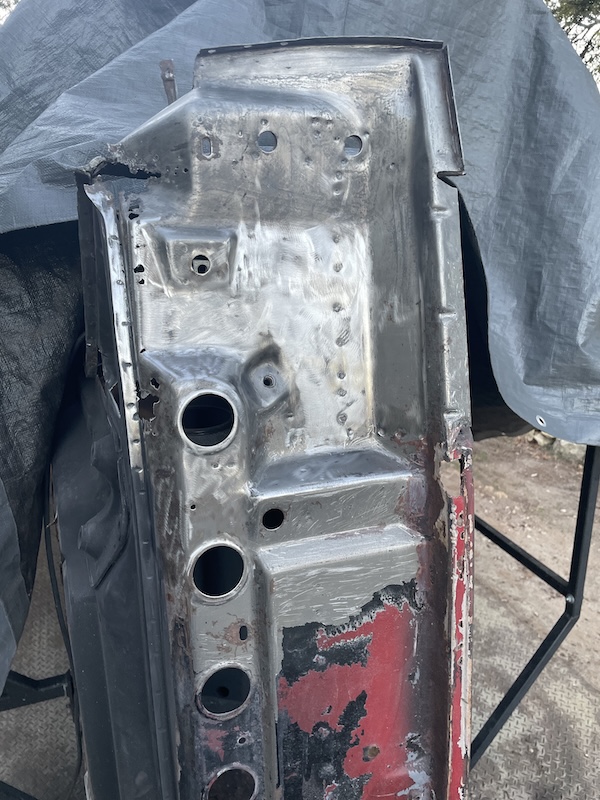 Lined up a few cuts on the bottom. My initial plan was to replace these pieces first and then cut and replace other sections as needed. After further review, I decided just to cut the entire bottom section off completely. Also, I got out the sandblaster and cleaned up there entire area a bit. In doing so, I discovered additional damage on the bottom of the vertical trunk support piece. This needed to replaced first before doing any other repairs. 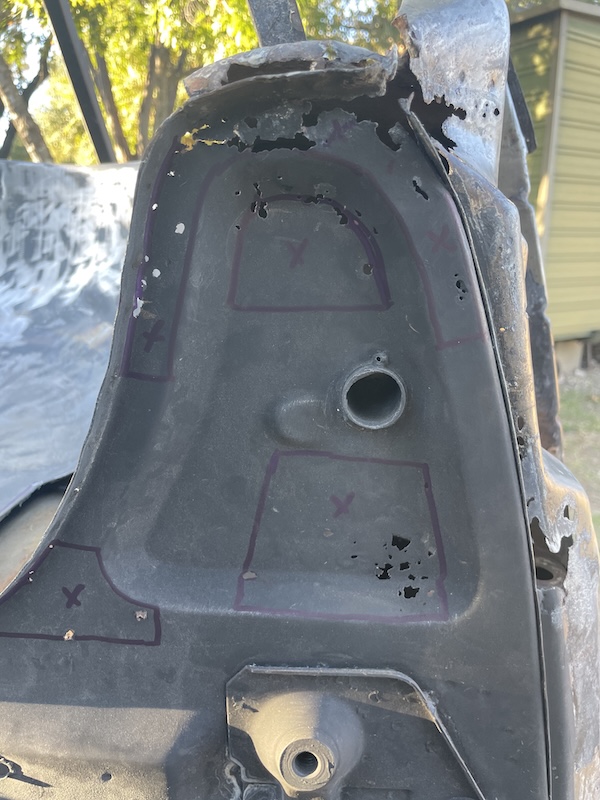 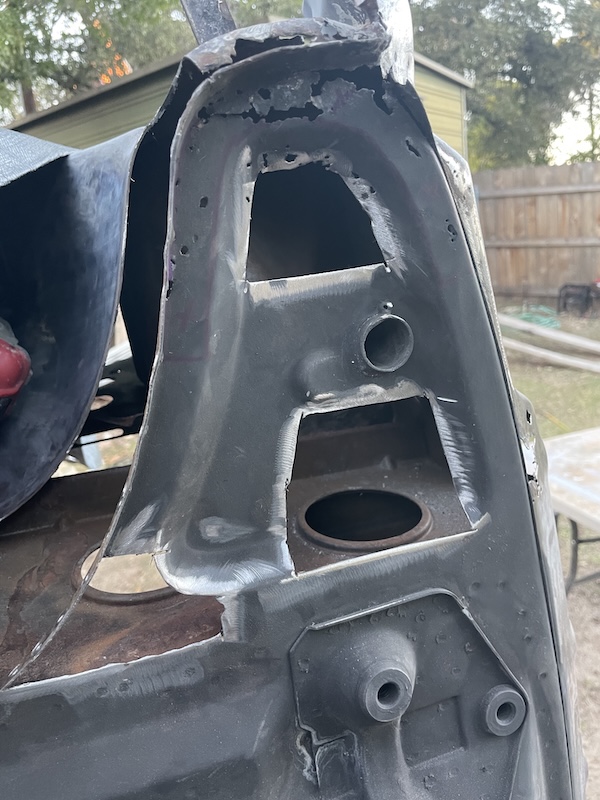 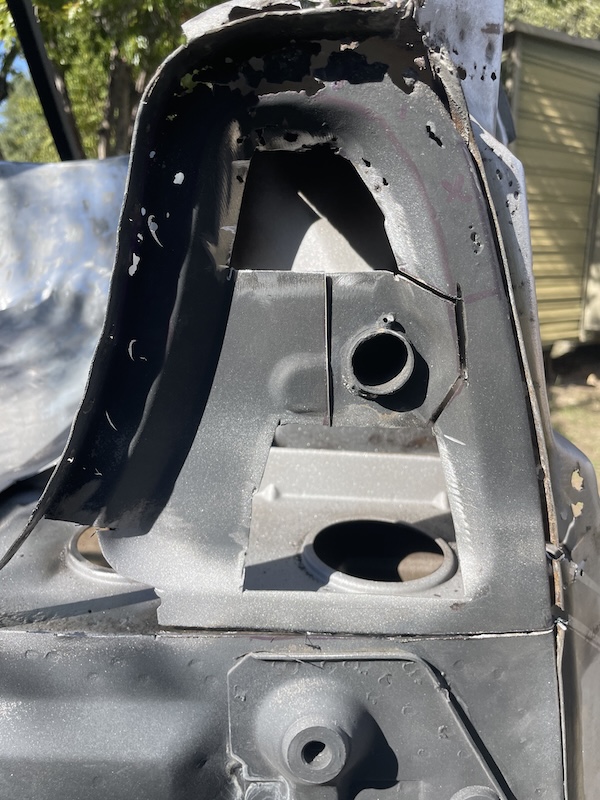 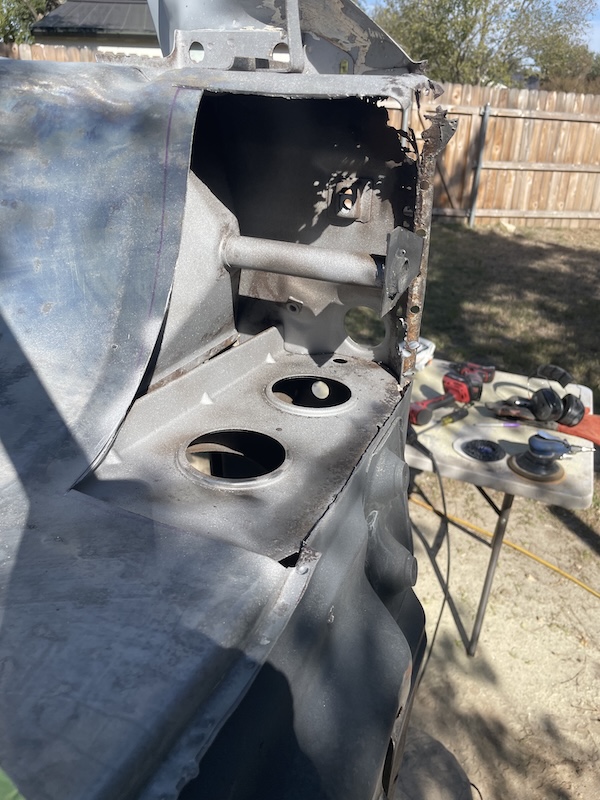 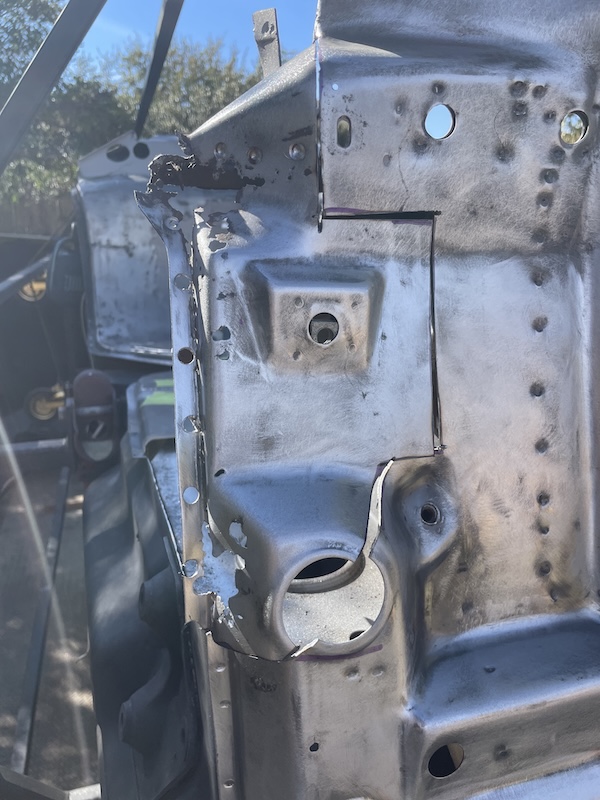 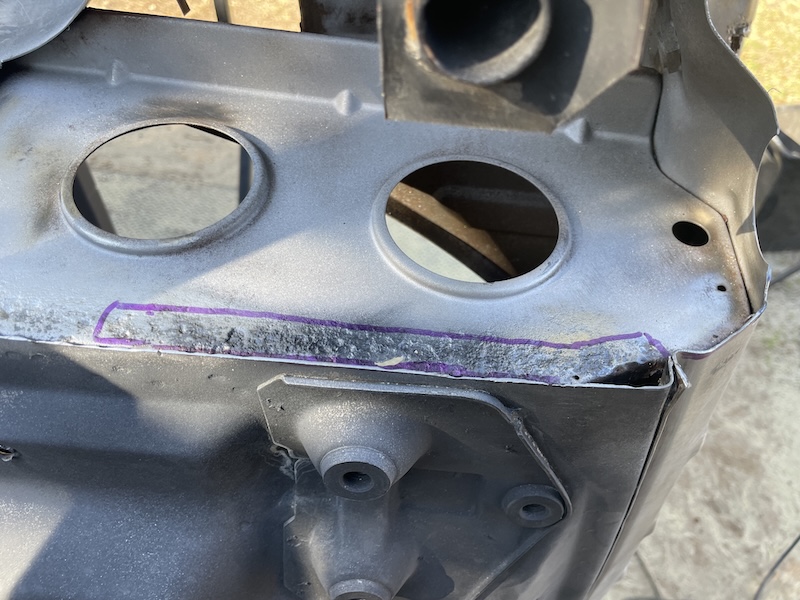 Pics of the support piece after the repair. 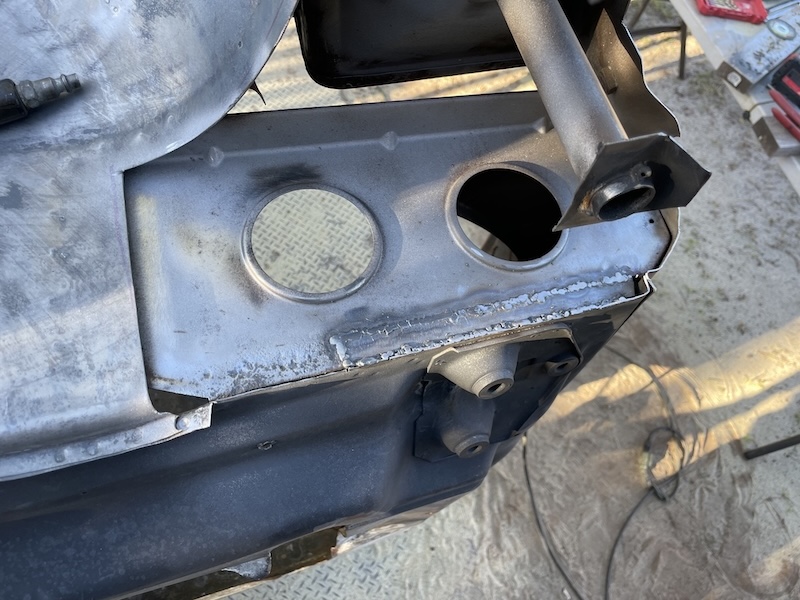 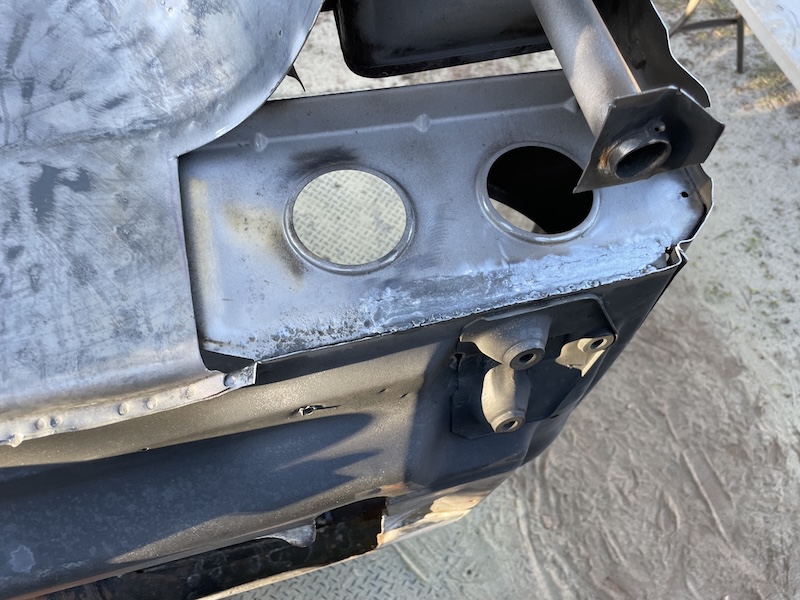 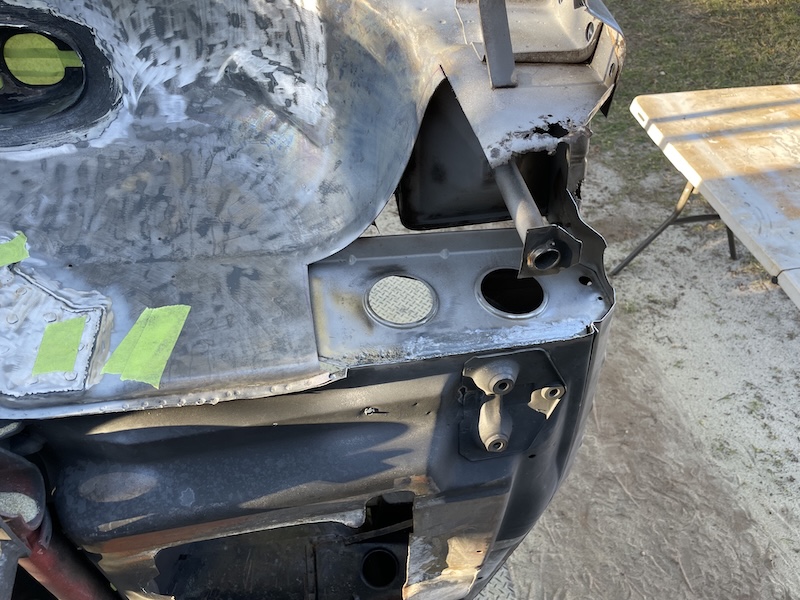 Passenger Light Bucket was a mess! Here's a few pics of the clean-up process well underway. Aside from the damage at the top in a few places, there's also a dime-sized hole in the bottom left and another smaller hole on the bottom right. I'm sure these will be fun to repair. 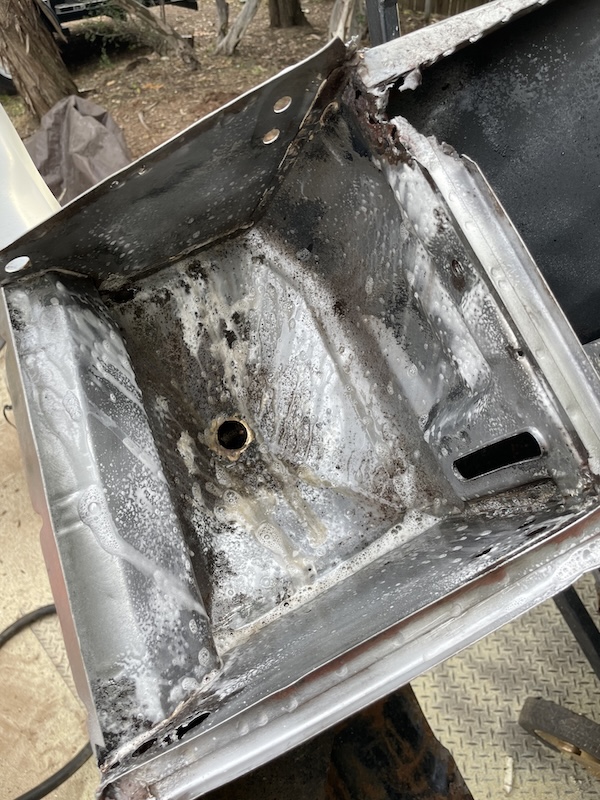 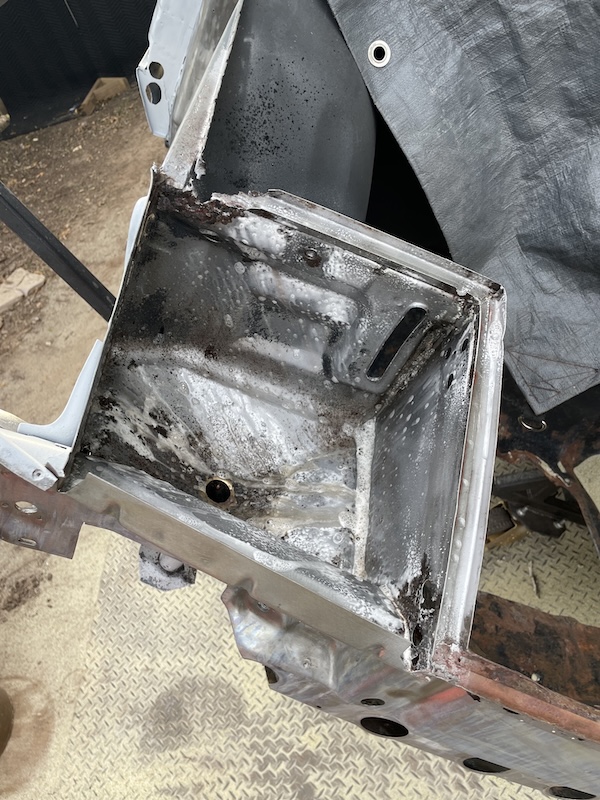 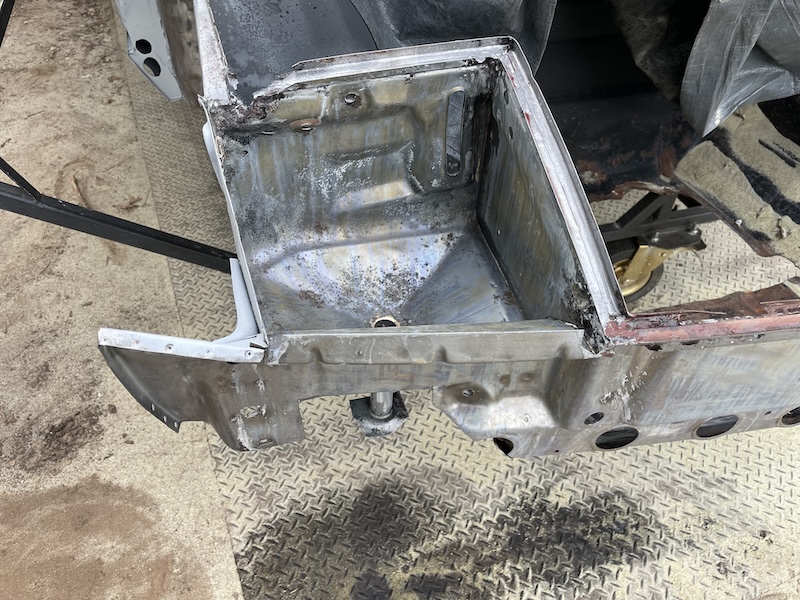 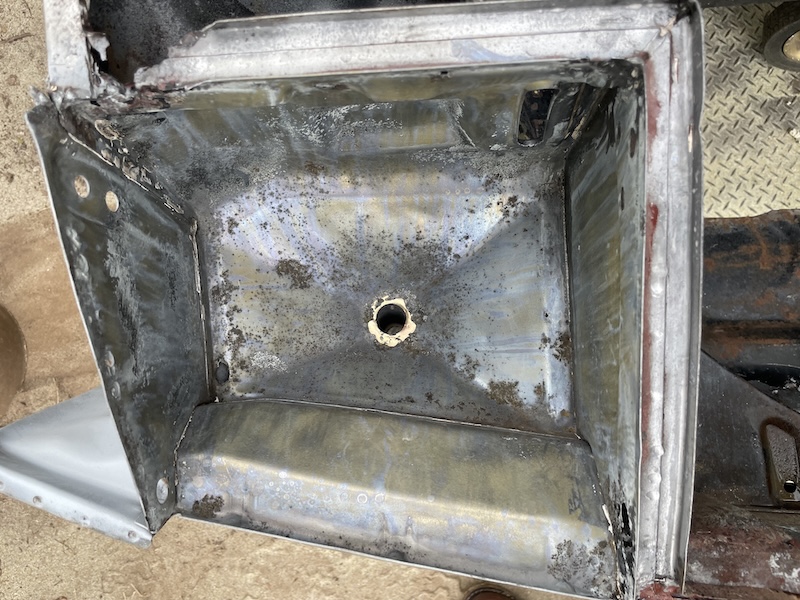 |
|
|
|
| East coaster |
Dec 29 2024, 05:55 PM
Post
#344
|
|
Senior Member Group: Members Posts: 1,834 Joined: 28-March 03 From: Millville, NJ Member No.: 487 Region Association: None |
The fun never ends, does it? I applaud your efforts to fix it all though. It will be nice and solid when you’re done.
|
|
|
|
| friethmiller |
Dec 29 2024, 07:54 PM
Post
#345
|
|
Senior Member Group: Members Posts: 846 Joined: 10-February 19 From: Austin, TX Member No.: 22,863 Region Association: Southwest Region |
QUOTE(East coaster @ Dec 29 2024, 05:55 PM) The fun never ends, does it? I applaud your efforts to fix it all though. It will be nice and solid when you’re done. No. You’re right. My daughter told her mother “Dad has spent the entire weekend fixing one piece of metal”. She wasn’t wrong either. Stay tuned for those photos… |
|
|
|
| friethmiller |
Dec 29 2024, 09:07 PM
Post
#346
|
|
Senior Member Group: Members Posts: 846 Joined: 10-February 19 From: Austin, TX Member No.: 22,863 Region Association: Southwest Region |
Passenger Light Bucket Area Repair - Part 2 (12/27 - 12/28/2024):
Took off Friday since it was my birthday and started on repairing the bottom section of the trunk floor (ear?) that I had removed before Christmas. I began with the initial pieces I had cut from the part. I knew this was going to take a while to do but I chipped away over the course of the day and into Saturday getting it done. Aside from one section, I basically had to reconstruct the part piece-by-piece. The final photo here is where I finished at the end of Friday. 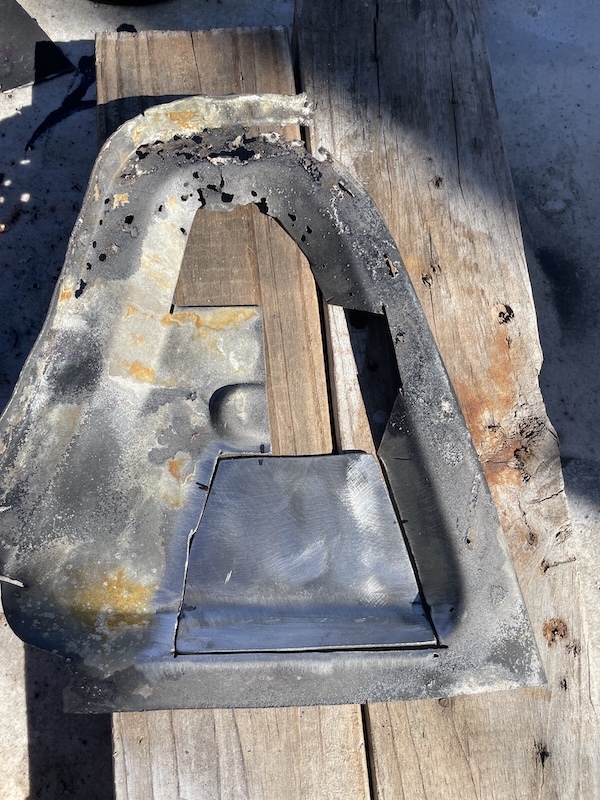 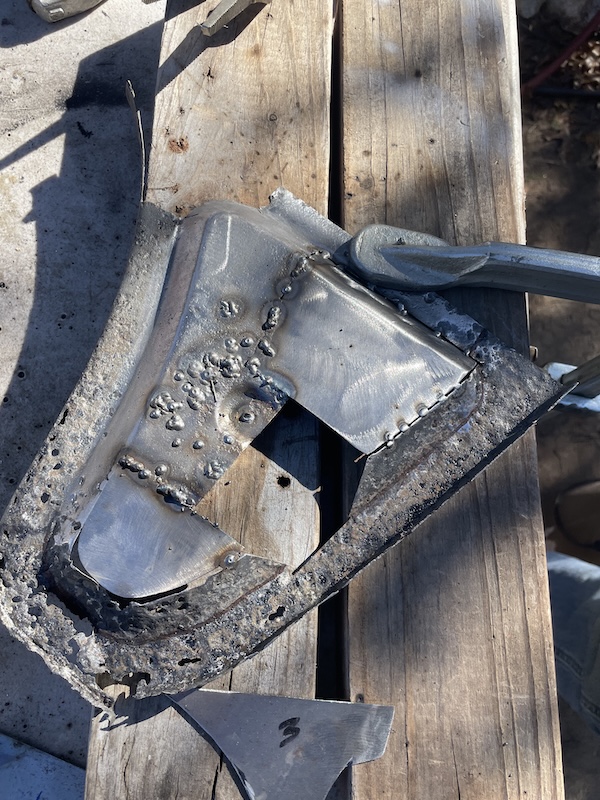 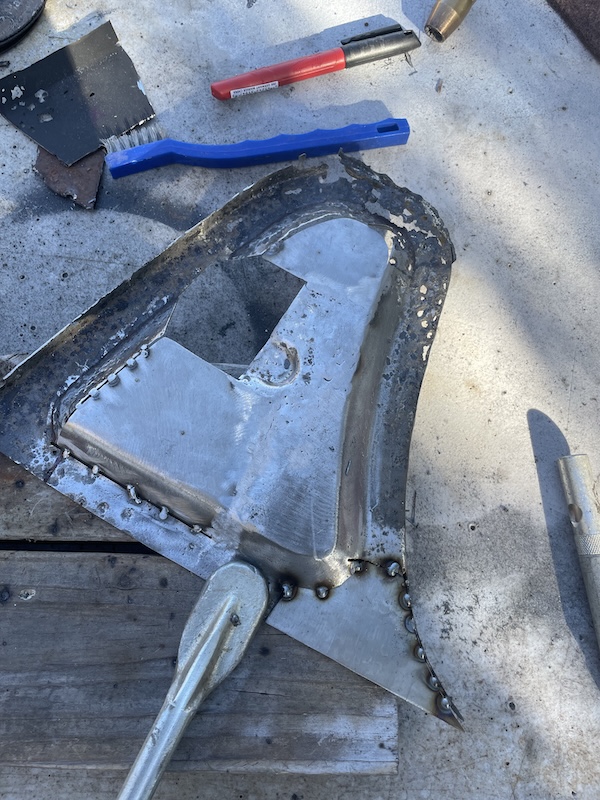 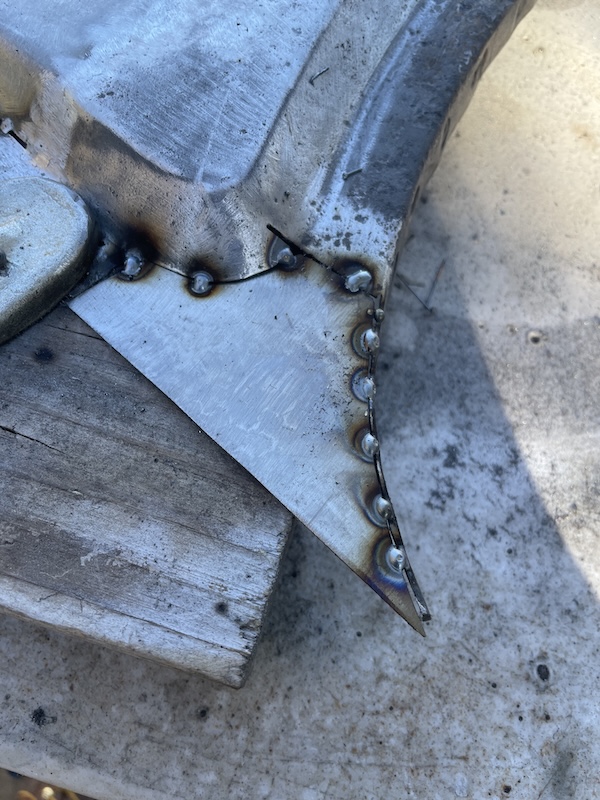 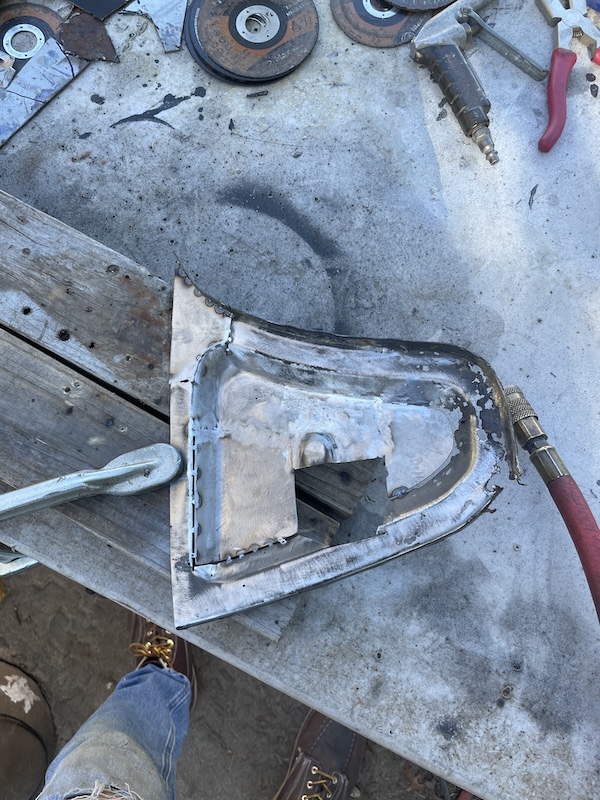 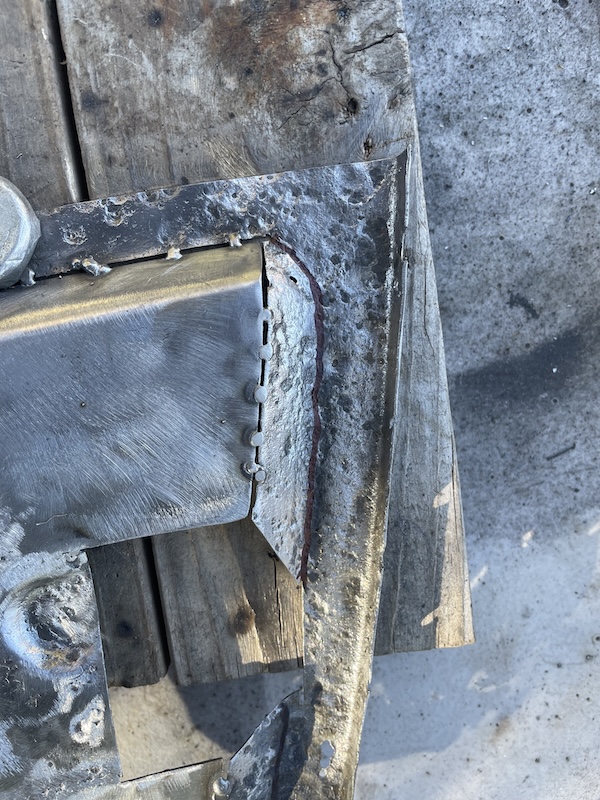 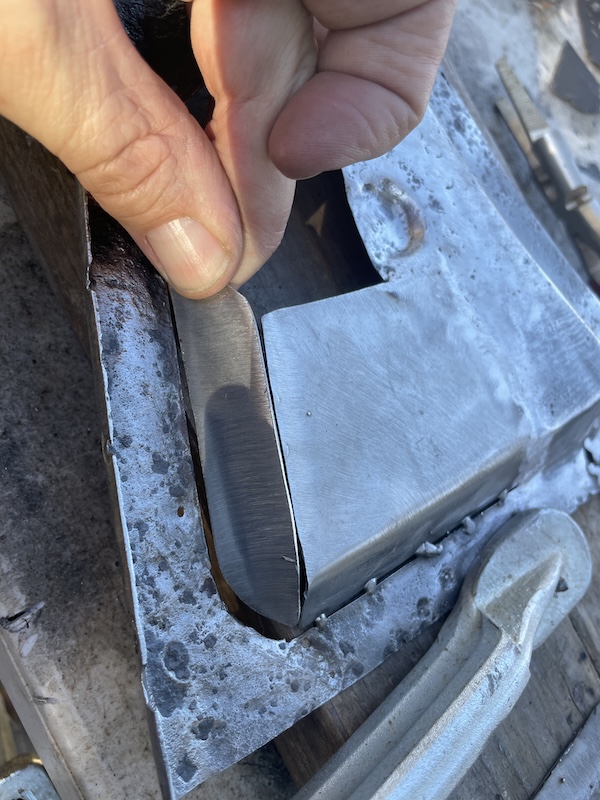 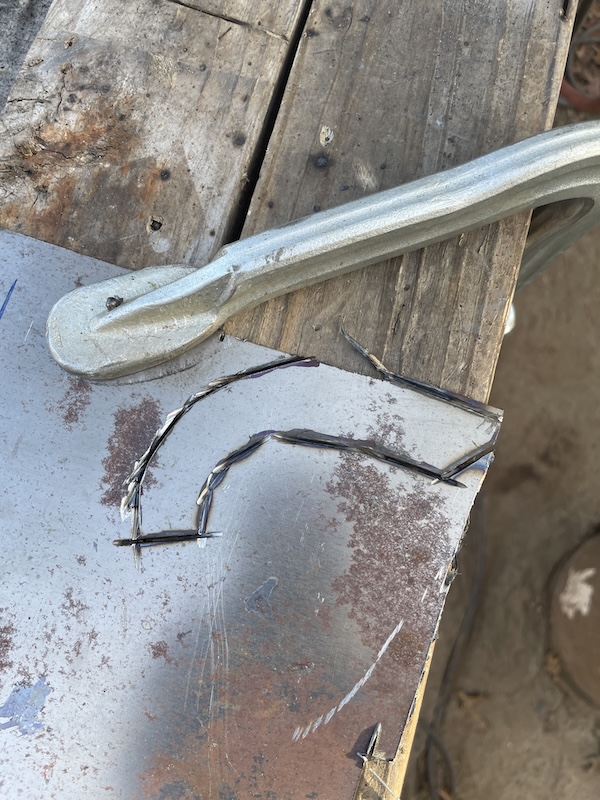 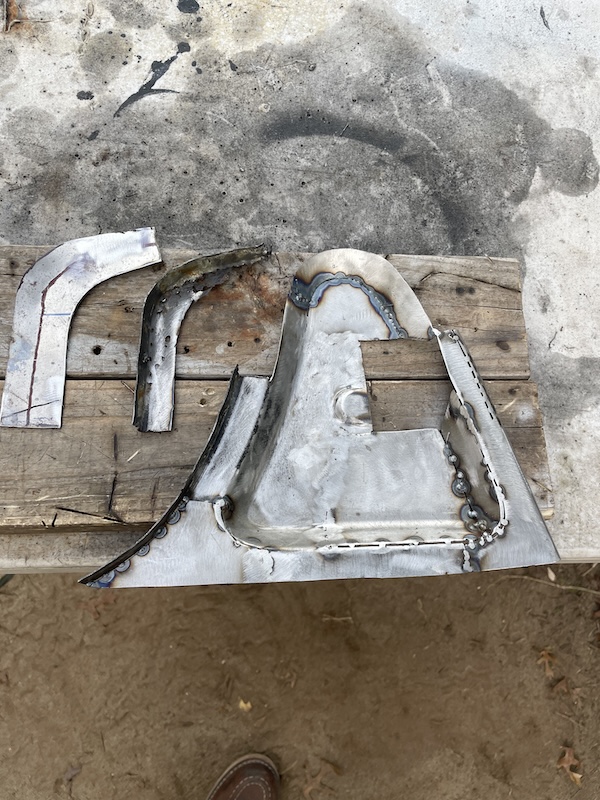 On Saturday, I began by welding in the rounded piece that I formed with vice grips and channel lock pliers. Once this was done, I cut and formed the final piece to complete the repairs. Some of the last photos show the fender area cleaned and ready for paint. I was getting sick of treating the metal with phosphorus spray to keep the rust away. Didn't get any pictures of the painting process but I was able to get most of the exposed metal painted with a can of 2K black epoxy. Plan was to finally weld in the bottom piece on Sunday. 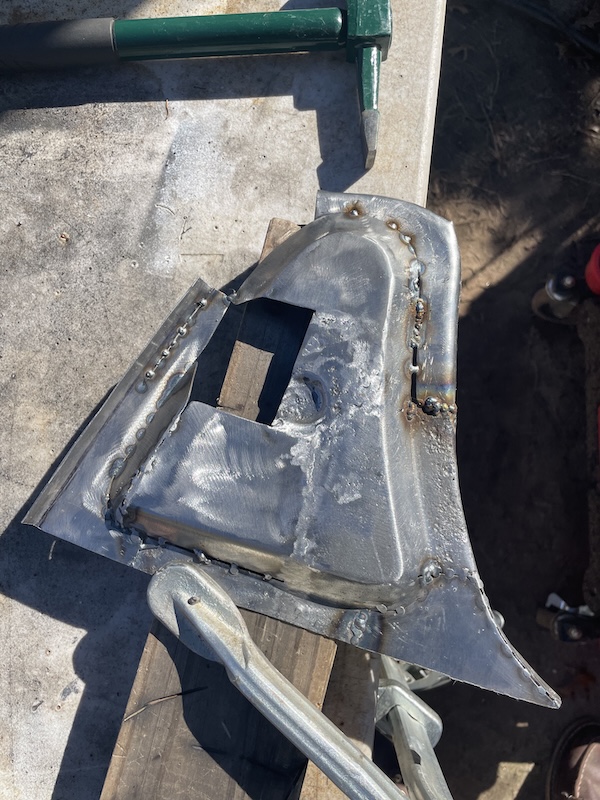 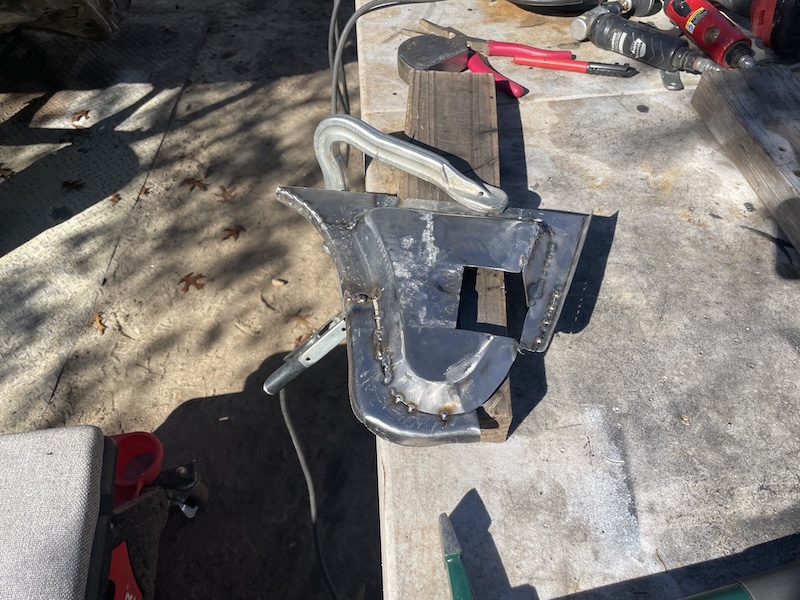 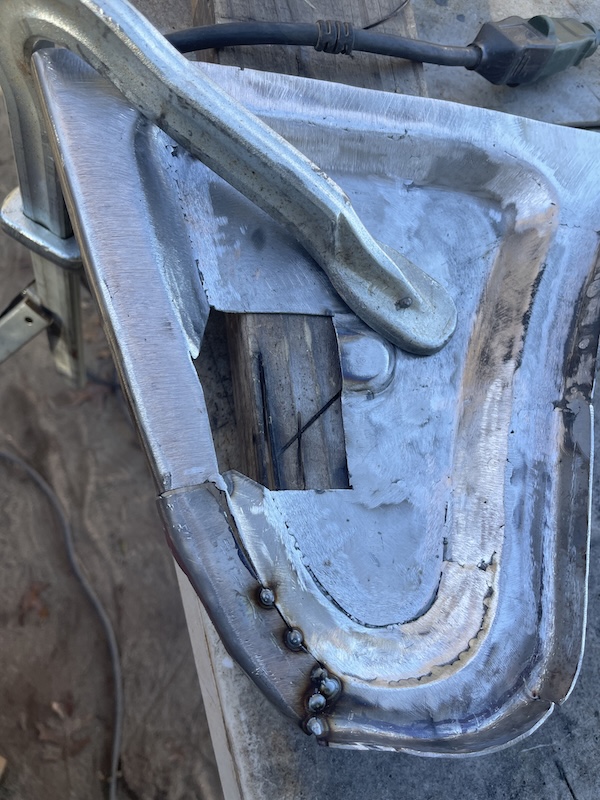 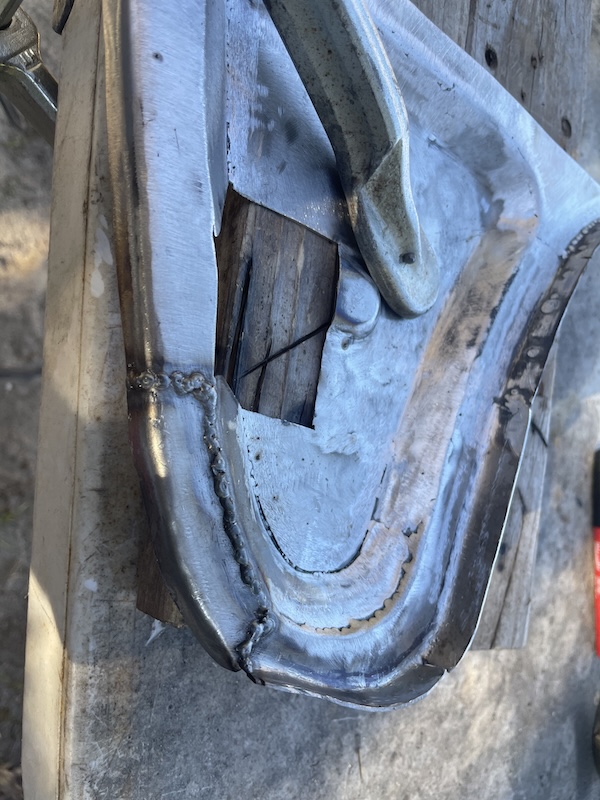 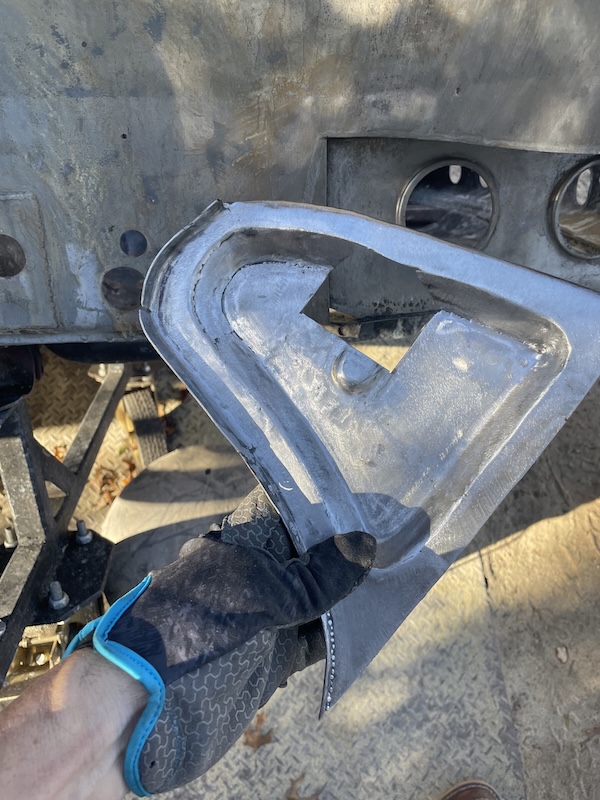 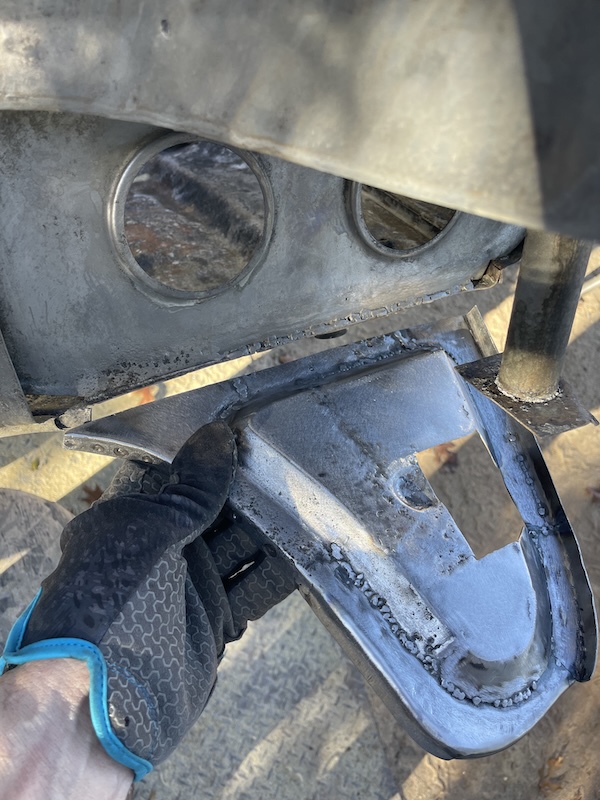 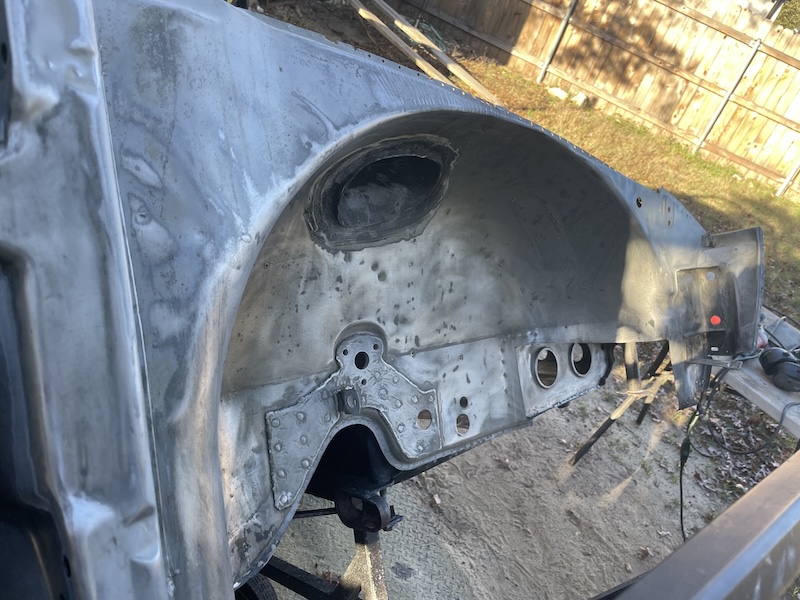 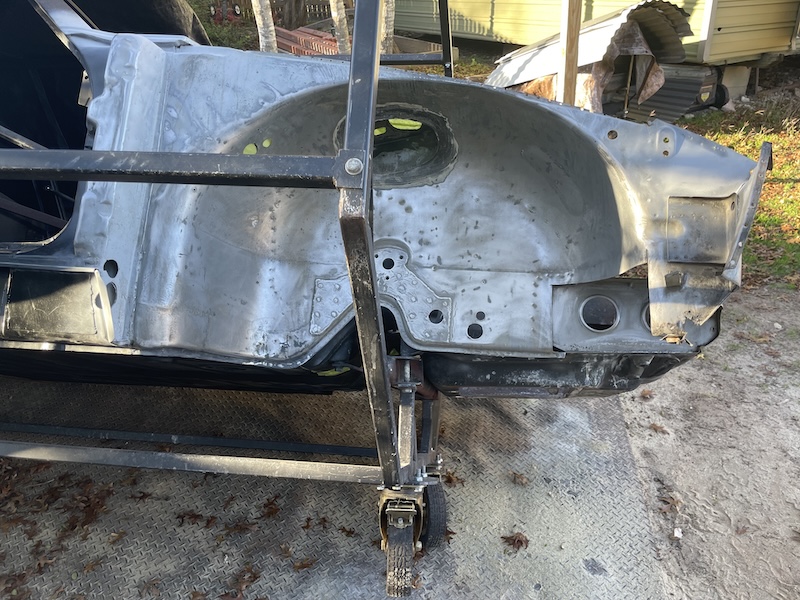 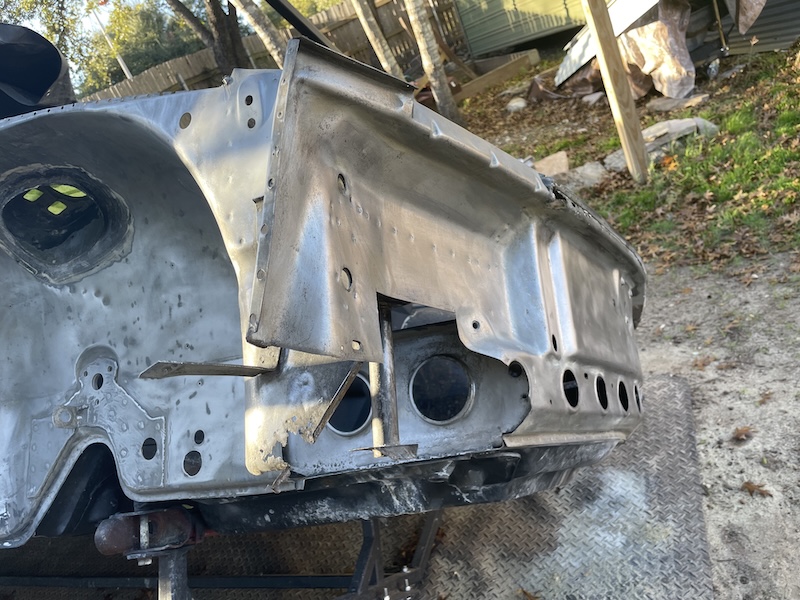 |
|
|
|
| technicalninja |
Dec 29 2024, 09:15 PM
Post
#347
|
|
Advanced Member Group: Members Posts: 2,523 Joined: 31-January 23 From: Granbury Texas Member No.: 27,135 Region Association: Southwest Region |
If the was ever a guy who DESERVED a small workshop, say 30X40, it's you!
Impressive once again! Someone should tell this guy's wife that... |
|
|
|
| friethmiller |
Dec 29 2024, 09:25 PM
Post
#348
|
|
Senior Member Group: Members Posts: 846 Joined: 10-February 19 From: Austin, TX Member No.: 22,863 Region Association: Southwest Region |
Passenger Light Bucket Area Repair - Part 3 (12/29/2024):
I started the day by tacking in the bottom trunk floor piece. This was done with the car at 45 degrees and I found it less than optimal. I decided to flip the car around and get it up on its side to get better access. The following pics show the process of welding and grinding. Didn't go too crazy with the welds on the inside since these will not be seen. 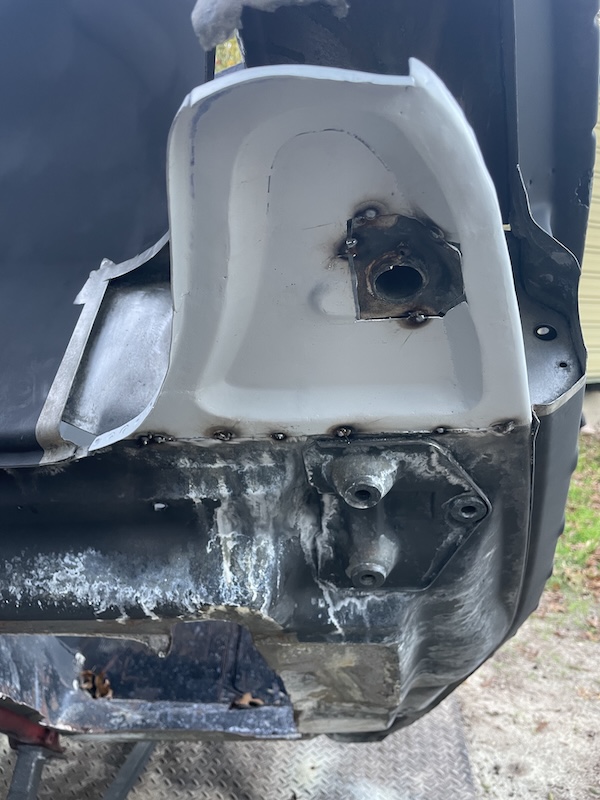 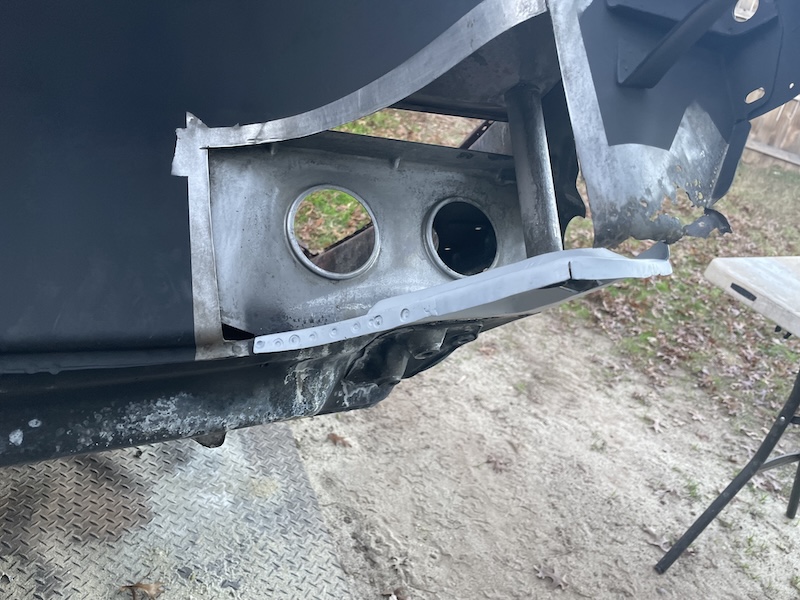 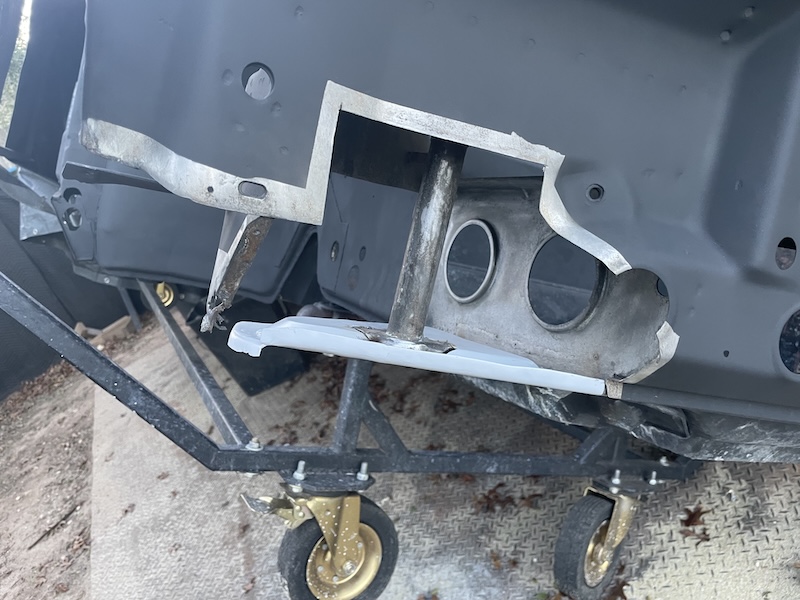 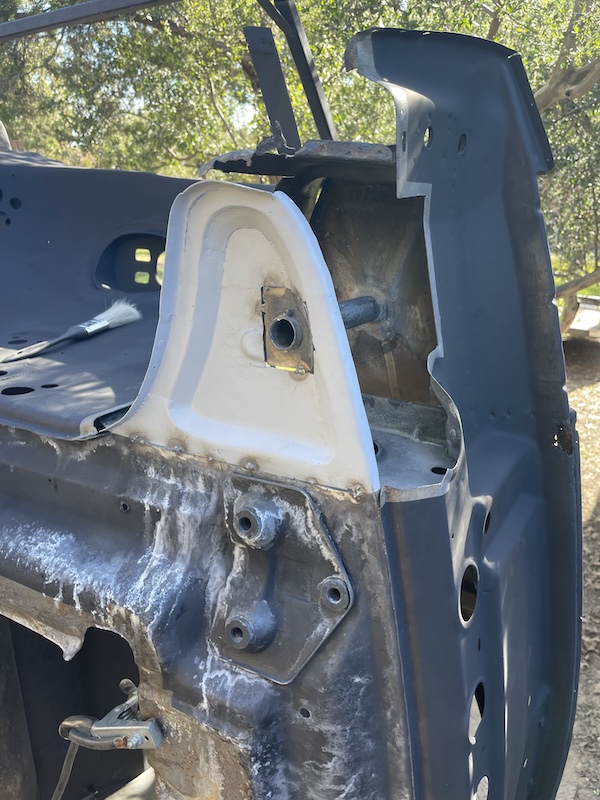  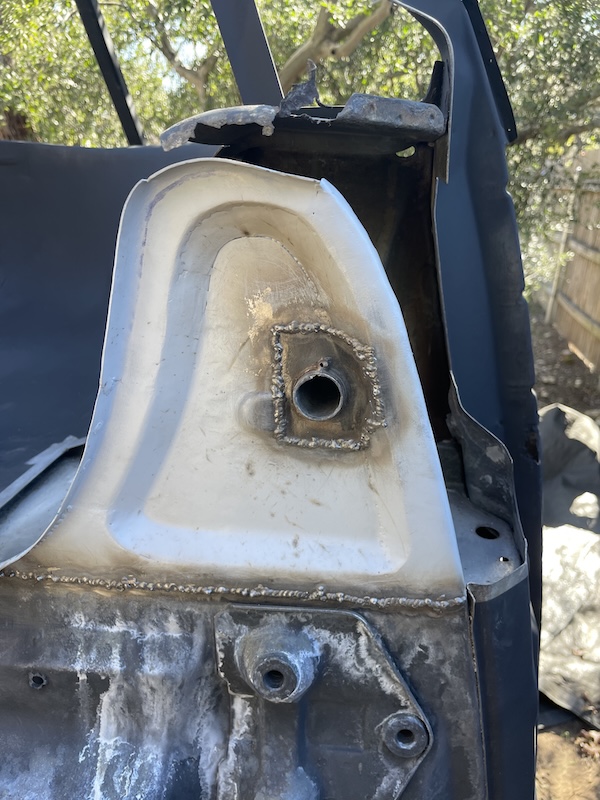 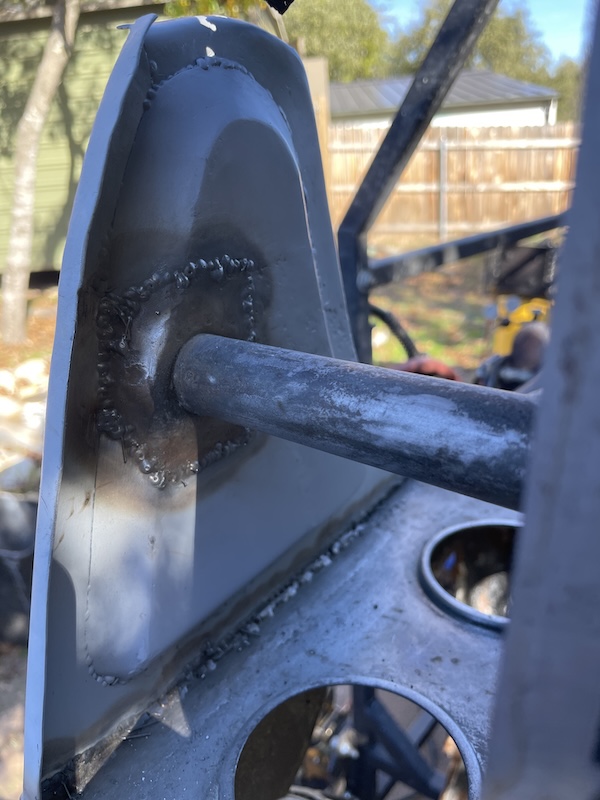 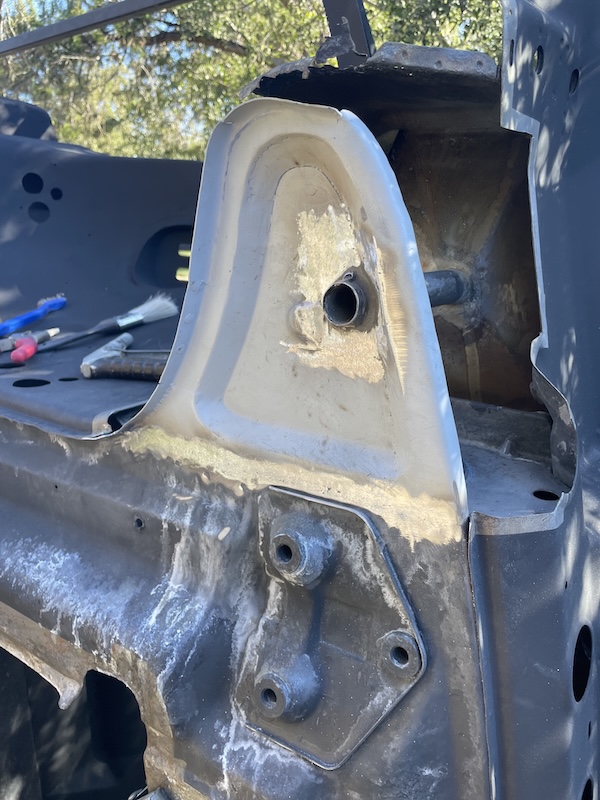 Once the part was in, I decide to go ahead and weld in the front section I had removed. This was without the entire bottom section which I removed. I will have to form new metal here to complete this repair next weekend. After reviewing the photos here, I noticed a few pin holes. Add that to the list of Todos. (IMG:style_emoticons/default/biggrin.gif) I also have some non-POR15 rust encapsulator coming on Tuesday and plan use it to seal up must of the inside area below the light bucket. Stay tuned. 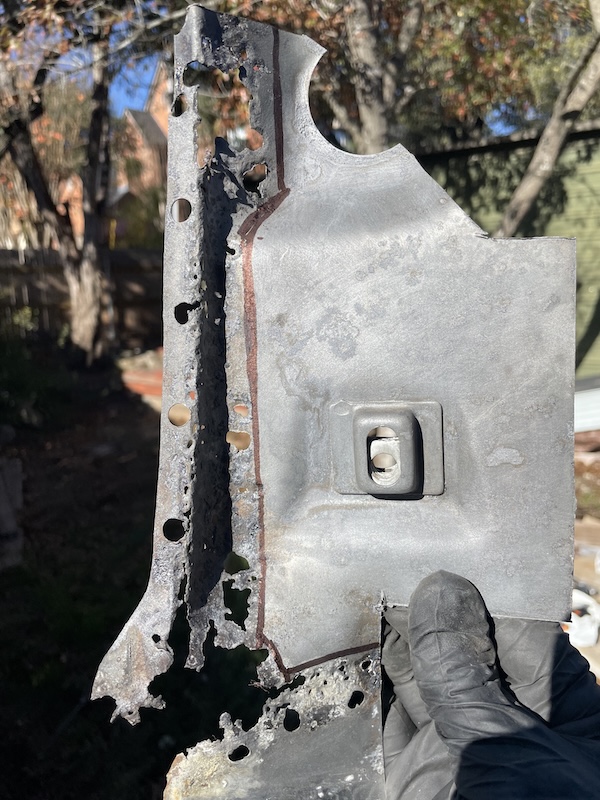 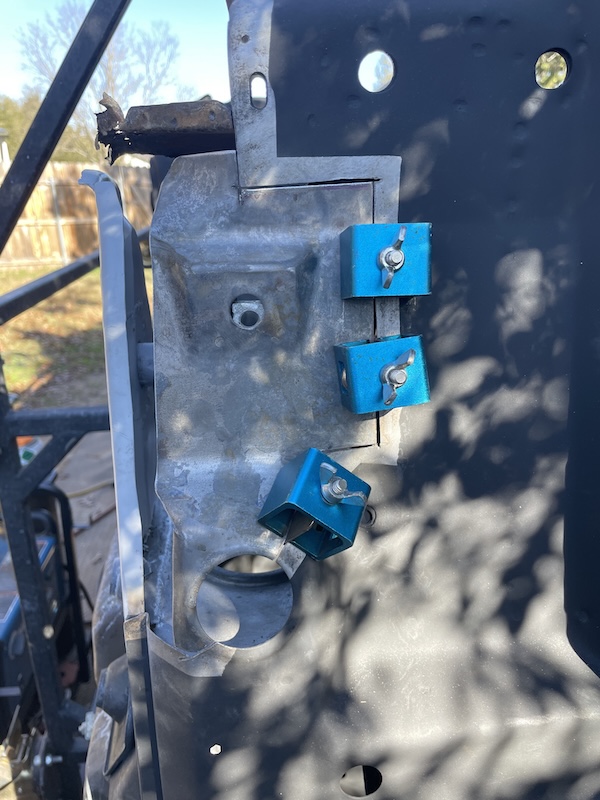 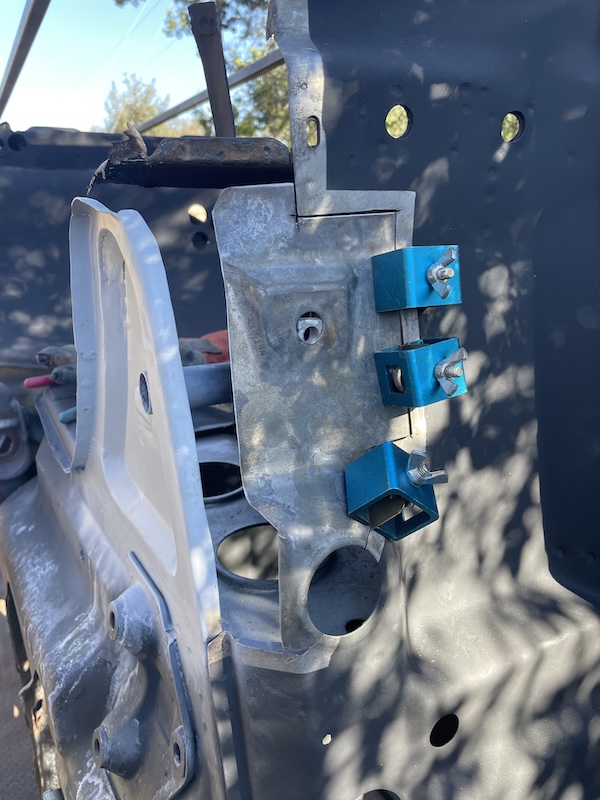 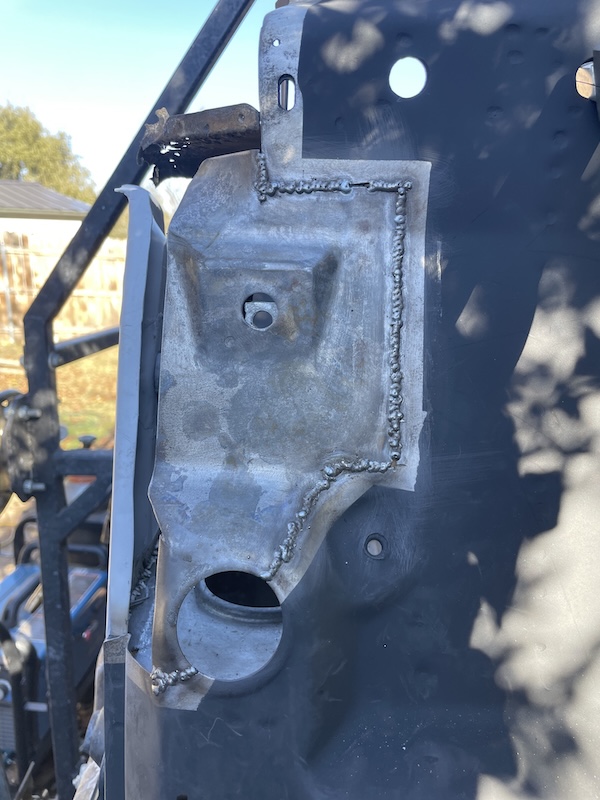 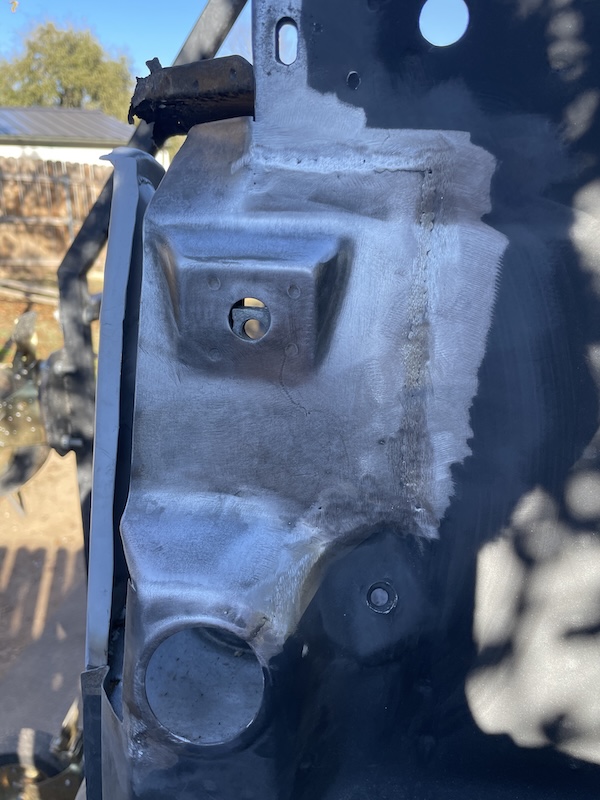 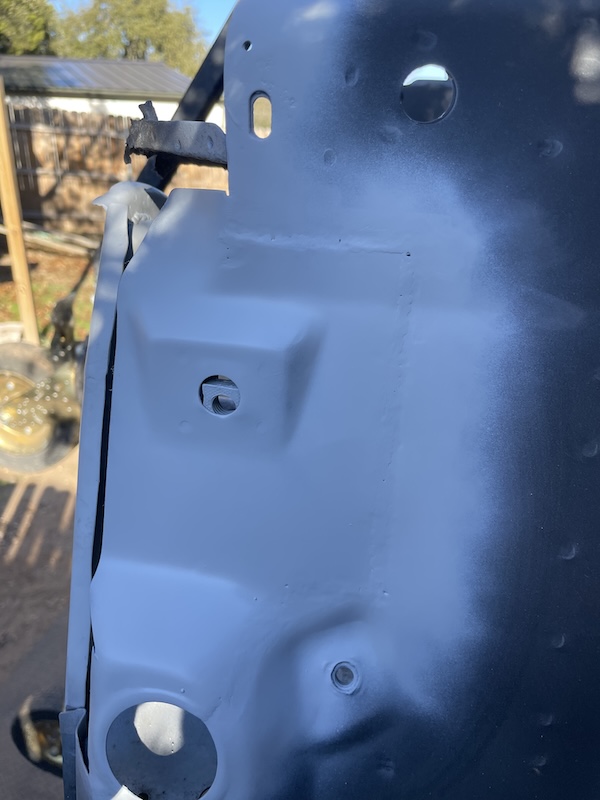 |
|
|
|
| friethmiller |
Dec 31 2024, 10:09 AM
Post
#349
|
|
Senior Member Group: Members Posts: 846 Joined: 10-February 19 From: Austin, TX Member No.: 22,863 Region Association: Southwest Region |
QUOTE(technicalninja @ Dec 29 2024, 09:15 PM) If the was ever a guy who DESERVED a small workshop, say 30X40, it's you! Impressive once again! Someone should tell this guy's wife that... Rick, great idea. I'd be more than willing to change the name of my build thread to mitigate the flash rust that occurs when the humidity goes to 100% around here (IMG:style_emoticons/default/biggrin.gif) |
|
|
|
| 930cabman |
Dec 31 2024, 11:47 AM
Post
#350
|
|
Advanced Member Group: Members Posts: 4,044 Joined: 12-November 20 From: Buffalo Member No.: 24,877 Region Association: North East States |
QUOTE(friethmiller @ Dec 29 2024, 08:54 PM) QUOTE(East coaster @ Dec 29 2024, 05:55 PM) The fun never ends, does it? I applaud your efforts to fix it all though. It will be nice and solid when you’re done. No. You’re right. My daughter told her mother “Dad has spent the entire weekend fixing one piece of metal”. She wasn’t wrong either. Stay tuned for those photos… Gotta laugh, thanks. Does your whole family know you are crazy? btw: once again great workmanship wishing a Happy New Year, maybe she will roll down the road this 2025 |
|
|
|
| friethmiller |
Dec 31 2024, 01:52 PM
Post
#351
|
|
Senior Member Group: Members Posts: 846 Joined: 10-February 19 From: Austin, TX Member No.: 22,863 Region Association: Southwest Region |
QUOTE(930cabman @ Dec 31 2024, 11:47 AM) QUOTE(friethmiller @ Dec 29 2024, 08:54 PM) QUOTE(East coaster @ Dec 29 2024, 05:55 PM) The fun never ends, does it? I applaud your efforts to fix it all though. It will be nice and solid when you’re done. No. You’re right. My daughter told her mother “Dad has spent the entire weekend fixing one piece of metal”. She wasn’t wrong either. Stay tuned for those photos… Gotta laugh, thanks. Does your whole family know you are crazy? btw: once again great workmanship wishing a Happy New Year, maybe she will roll down the road this 2025 Happy New Year, Cabman! Yes, they are all well aware of my "issues" (IMG:style_emoticons/default/screwy.gif) Let's make that a goal for 2025. Get the body done and get her off the rotisserie on 4 wheels. I look forward to buying a nice outdoor cover to keep the rain off. |
|
|
|
| friethmiller |
Jan 5 2025, 08:34 PM
Post
#352
|
|
Senior Member Group: Members Posts: 846 Joined: 10-February 19 From: Austin, TX Member No.: 22,863 Region Association: Southwest Region |
Passenger Light Bucket Area Repair - Part 4 (1/4/2025):
Continued working on the Front Cross Panel in the passenger side light bucket area. The more I work these areas where the body rolls around to a 90 degree interface, the more I tend to use channel locks to create the metal patch. Another trick I like to do, if I can, is to fasten the bottom with sheet metal screws to hold the metal properly and then finishing forming/trimming the metal. These first four photos show this process. 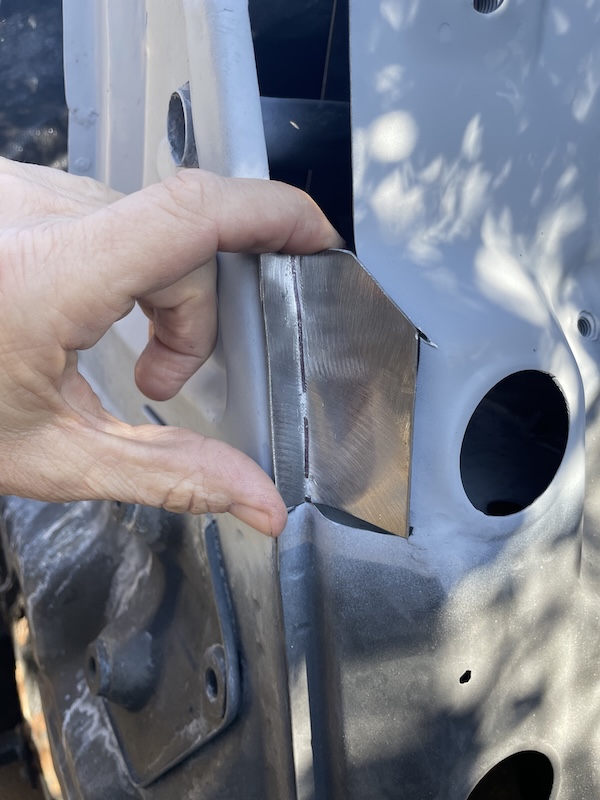 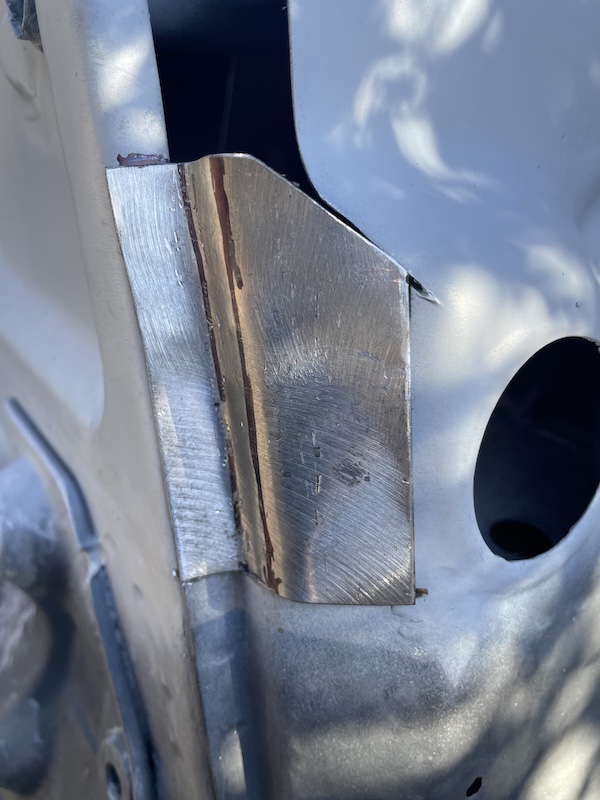  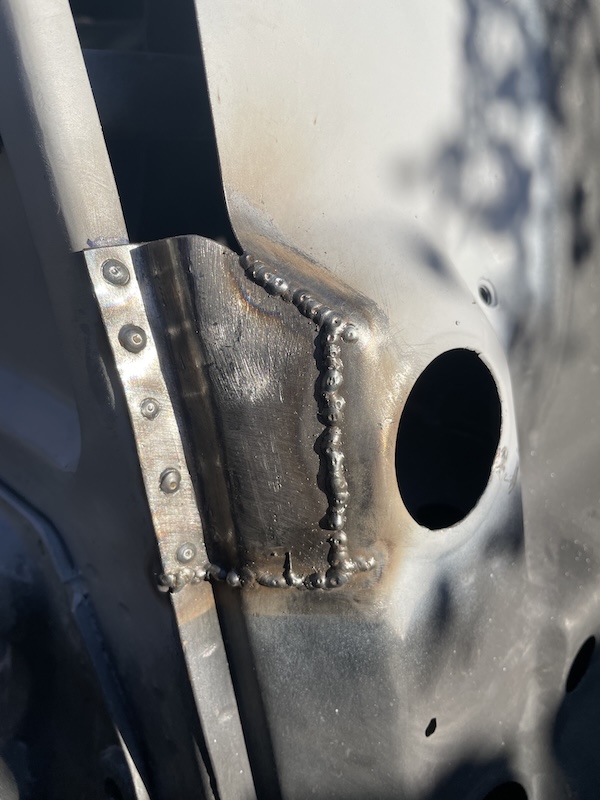 For this next longer piece, I had to study it for a bit. You can see how there was a small gap around my fingers (red arrow) that was caused by the bottom piece being setback just a bit from the original. This meant my patch would need to formed a bit deeper to make up the difference. The second and third photos show the patch being fitted. I'm always looking for geometric facets that I can use as a handrail. You can see how I trimmed off a big section of the patch. This allowed me to repair this triangular area with another separate patch, later. 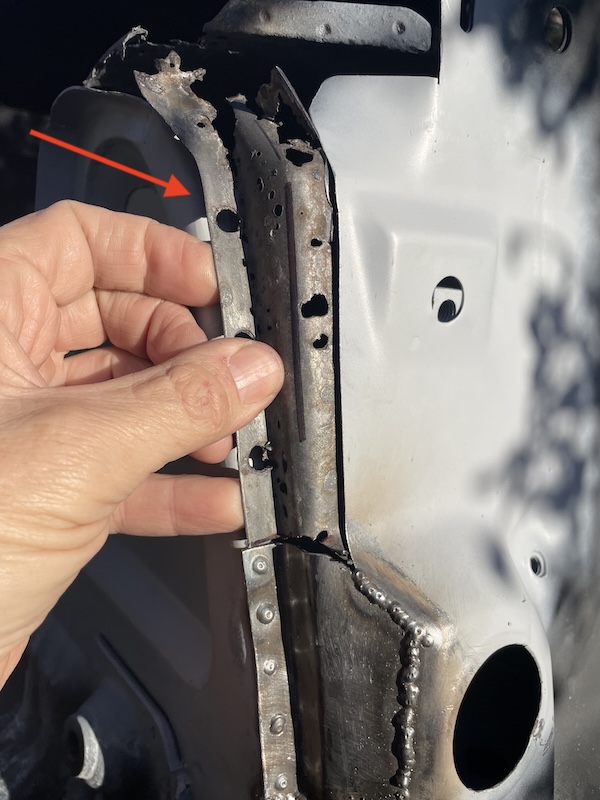 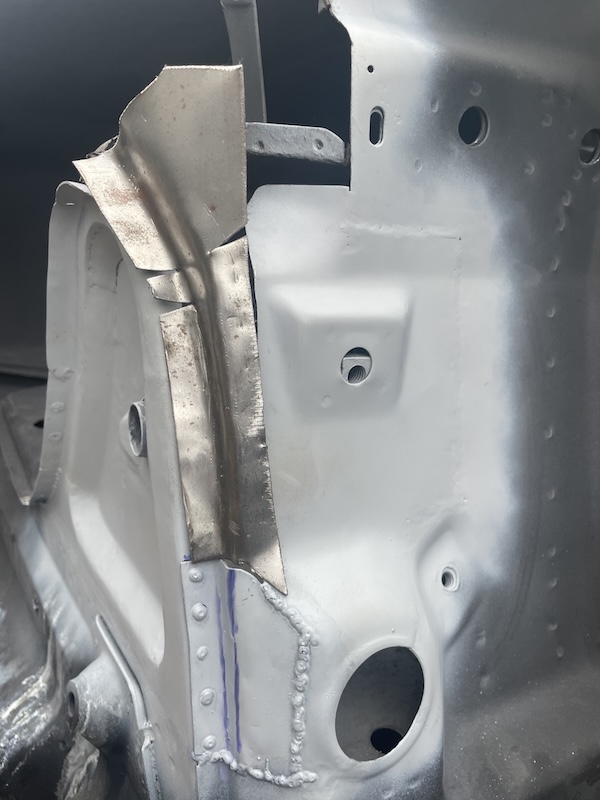 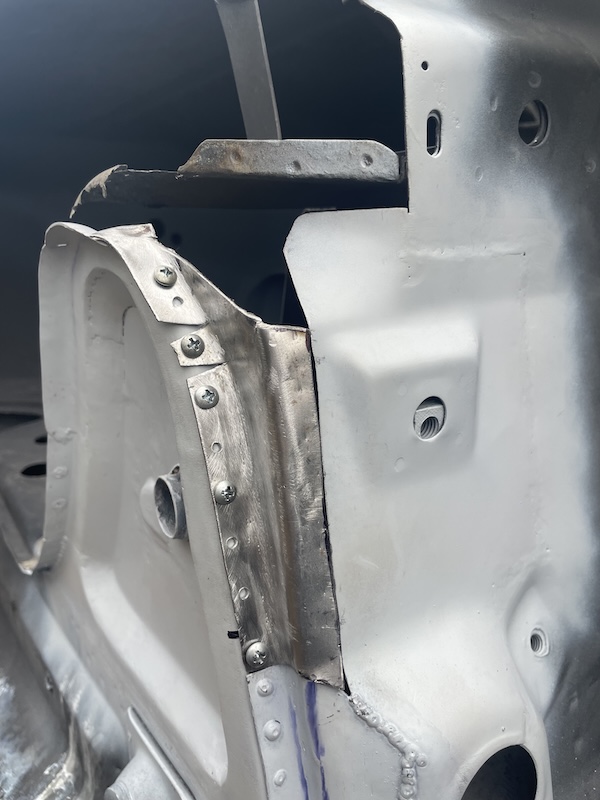 The arrows in this first photo show the area that needed to be longer to accommodate a slightly recessed bottom. The second photo shows the interface at the top. With the bottom of the part secured with screws, I was able to easily bend the patch up. Here the patch overlapped and was simply trimmed with a 3" angle grinder to give me the desired welding gap. The other photos show the welding. Notice the original part being attached for reference for the next patch. 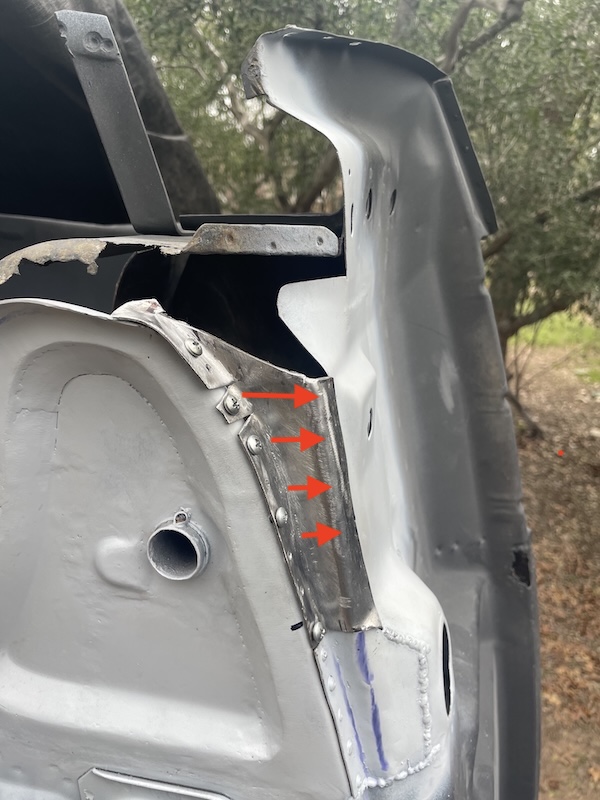 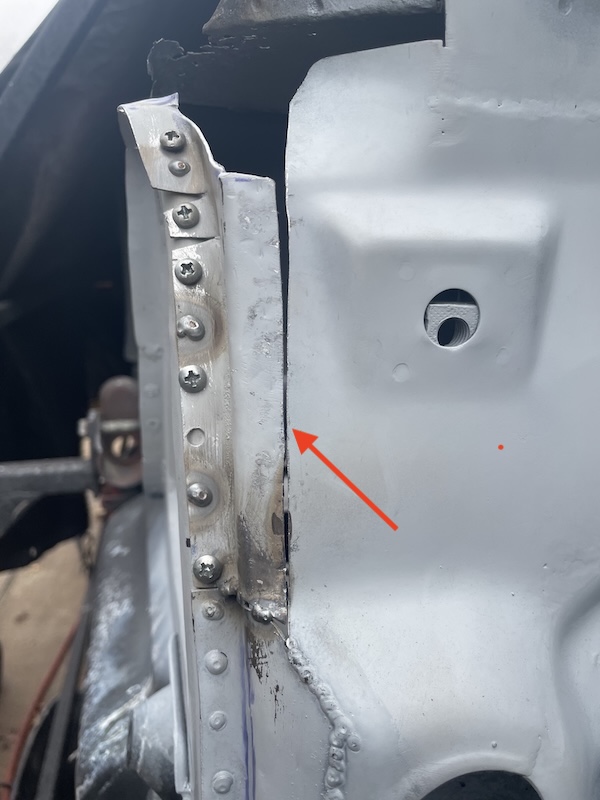 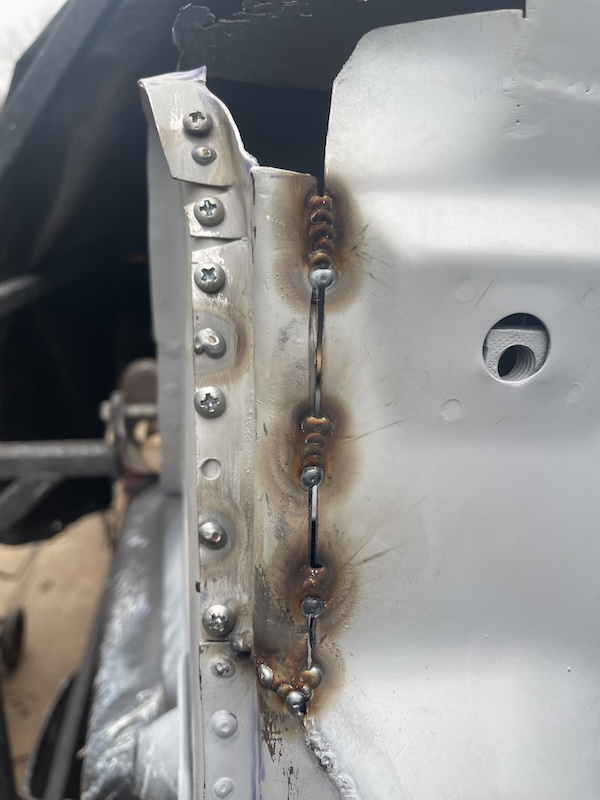 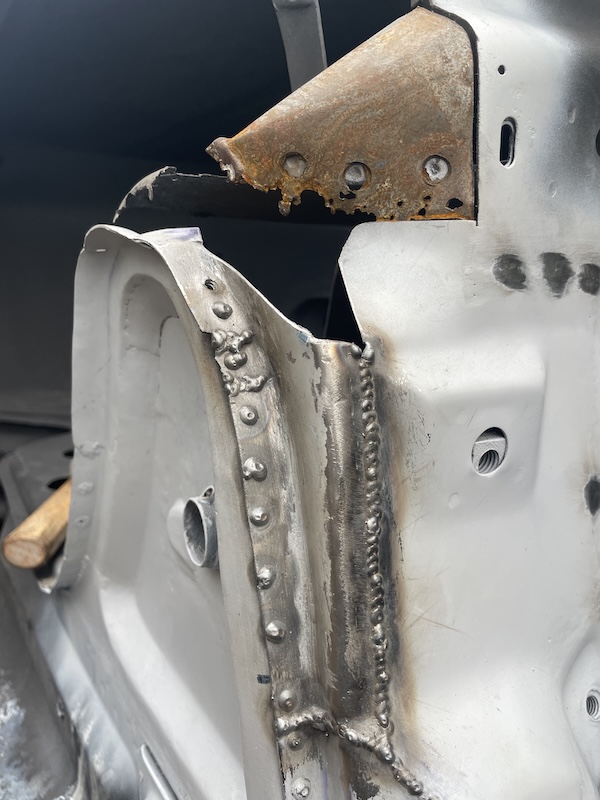 Here's the triangular area patch going in, which turned out to be a polygon (IMG:style_emoticons/default/confused24.gif) This basically got me over to take on the final patch. 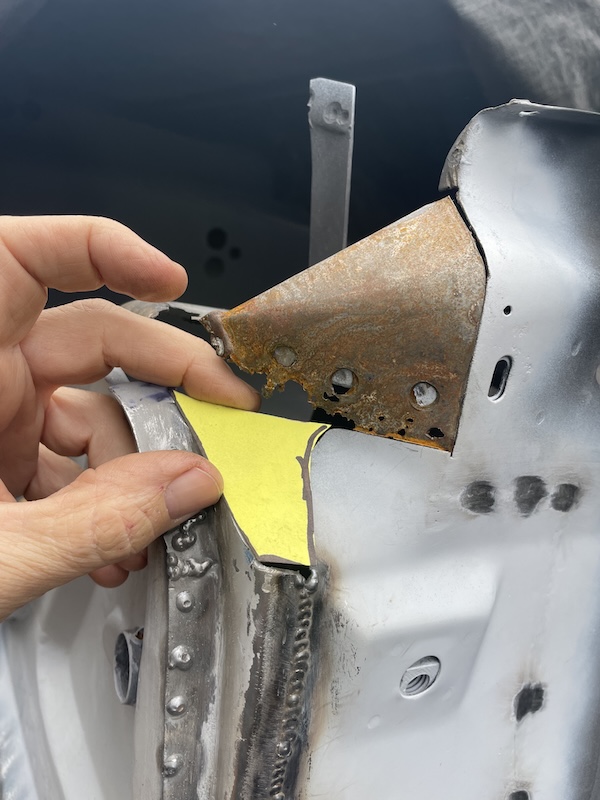 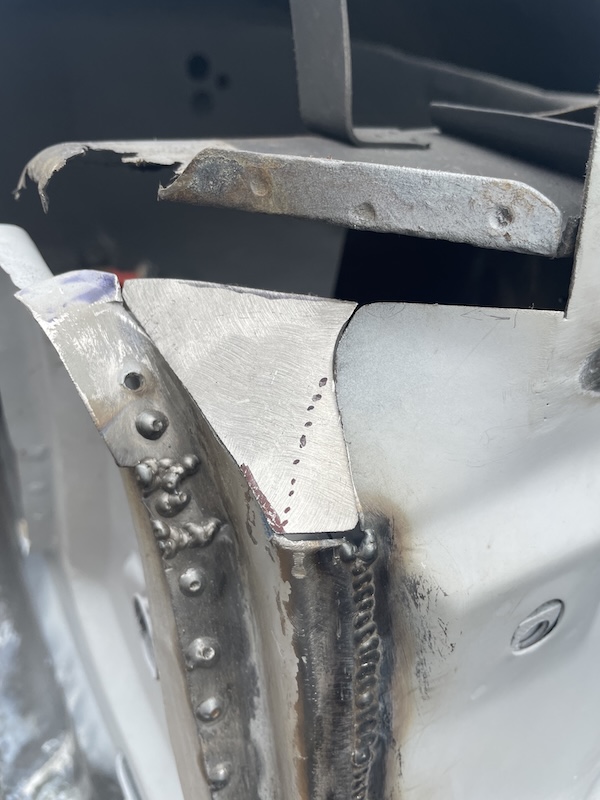 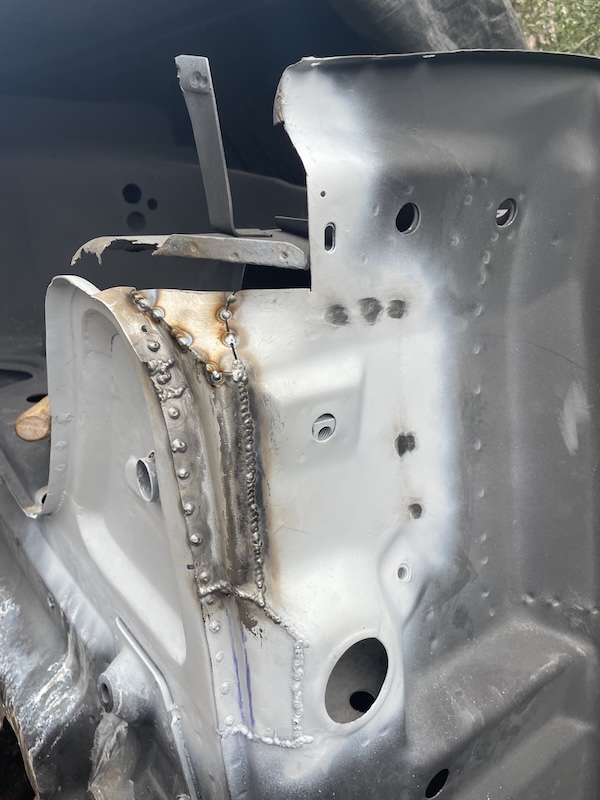 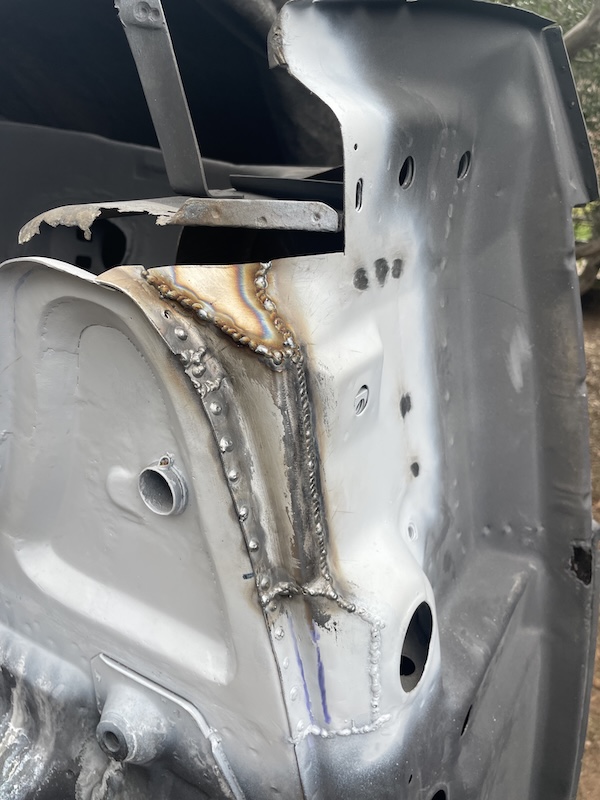 The final patch on this end of the front cross panel was pretty straight forward. Added a tab at the left side-bottom that will later be wrapped around the inner fender metal. Called it a day after I finished grinding and priming to area. Looks pretty good, I guess. (IMG:style_emoticons/default/smile.gif) 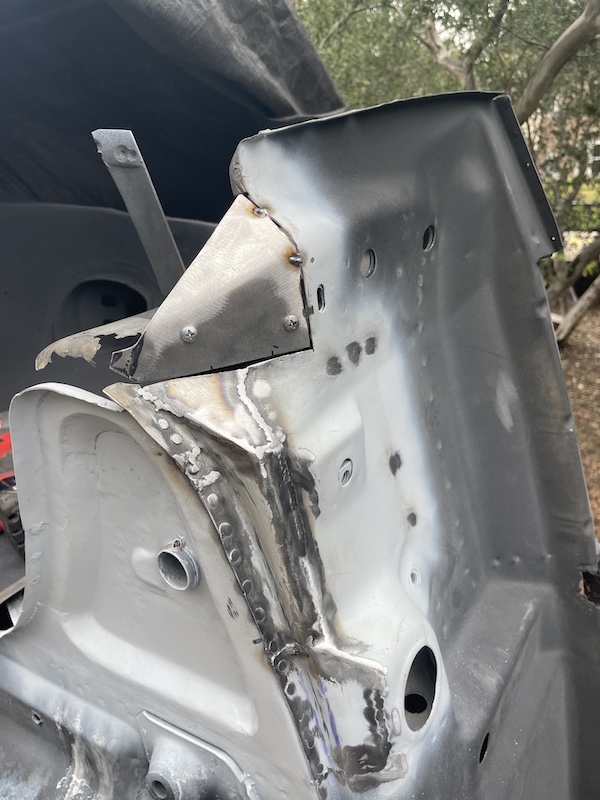 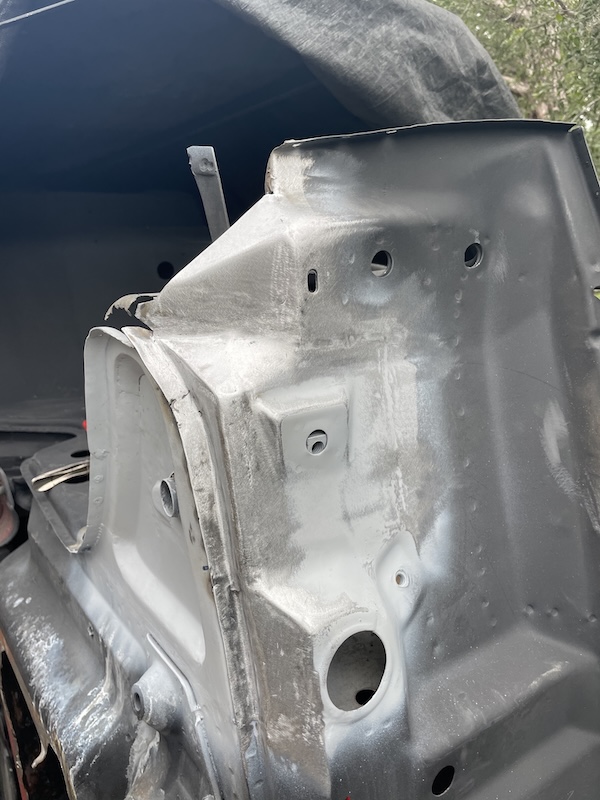 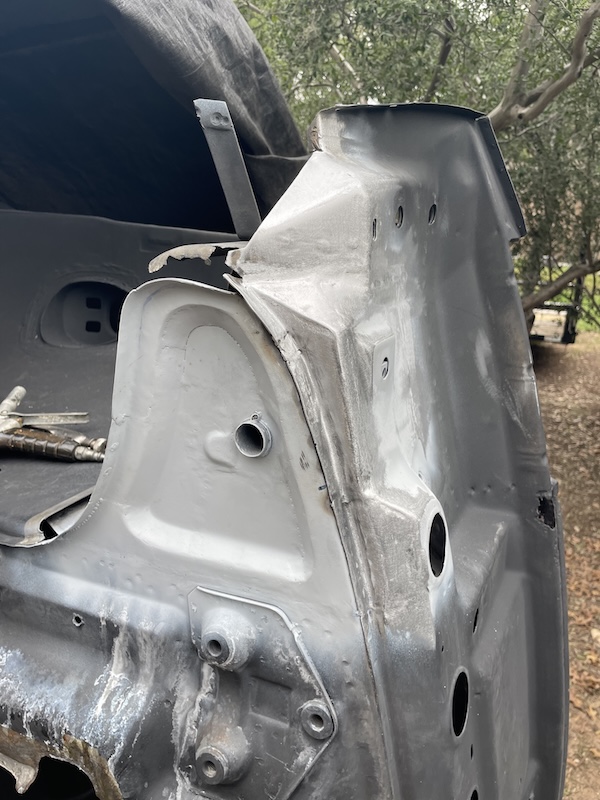 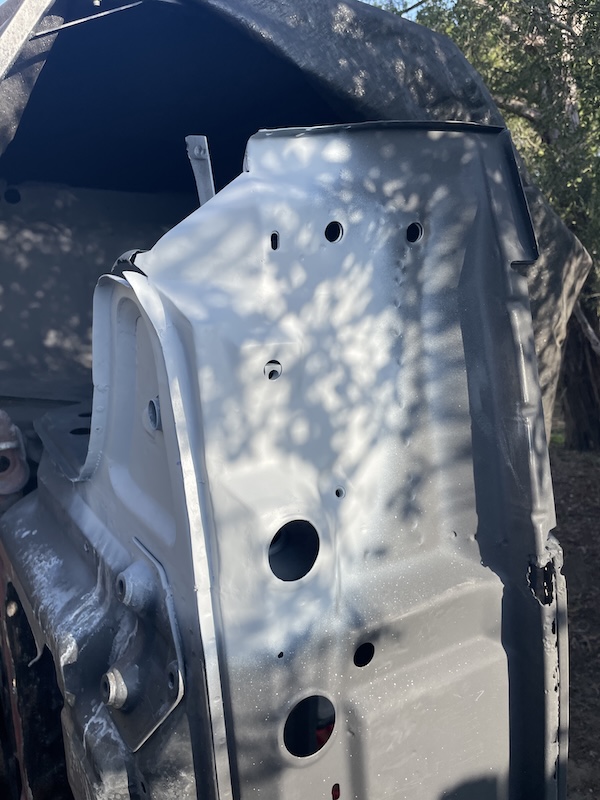 |
|
|
|
| friethmiller |
Jan 5 2025, 09:11 PM
Post
#353
|
|
Senior Member Group: Members Posts: 846 Joined: 10-February 19 From: Austin, TX Member No.: 22,863 Region Association: Southwest Region |
Passenger Light Bucket Area Repair - Part 5 (1/5/2025):
The goal today was to finish a small, tricky repair at the bottom of the inner fender where it interfaces with the edge of the front cross panel. I was able to cut out most of the bad metal with tin snips. Added the first metal patch, making sure it securely welded at the 90 degree interface at the back of the front cross panel. The next patch was formed with channel locks and then cut into three pieces, since it's almost impossible for me to curve the patch with these types of bends already in the metal. The follow photos show the repair. 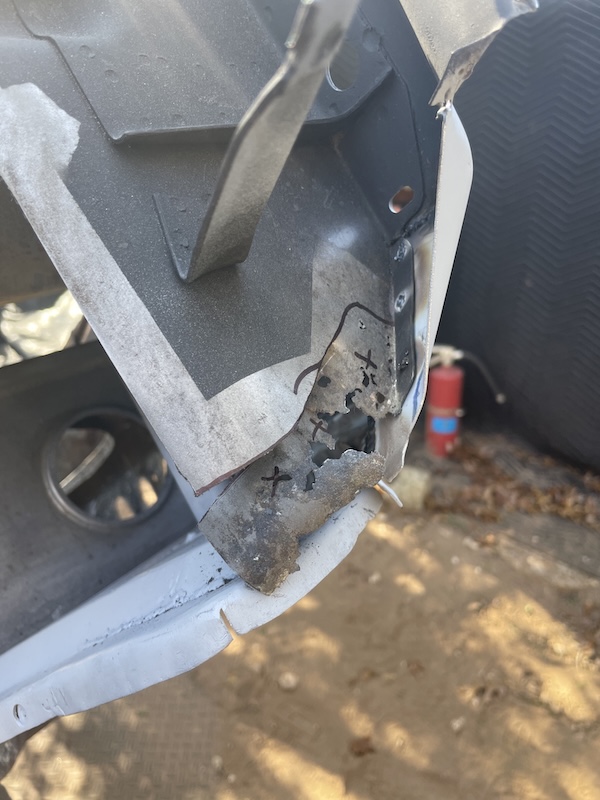 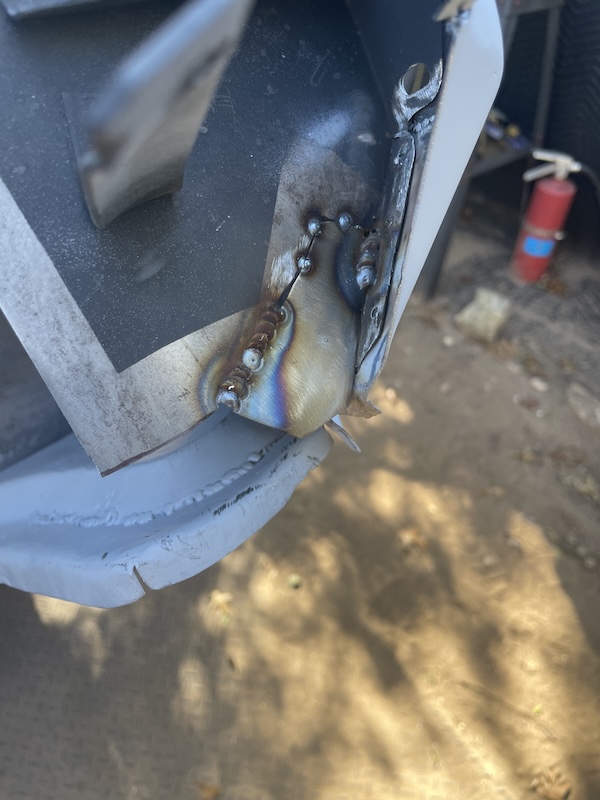 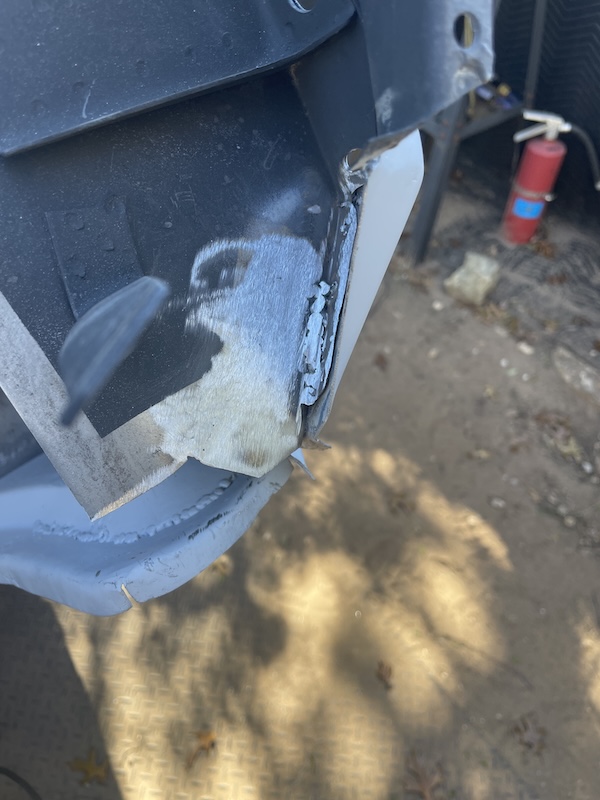 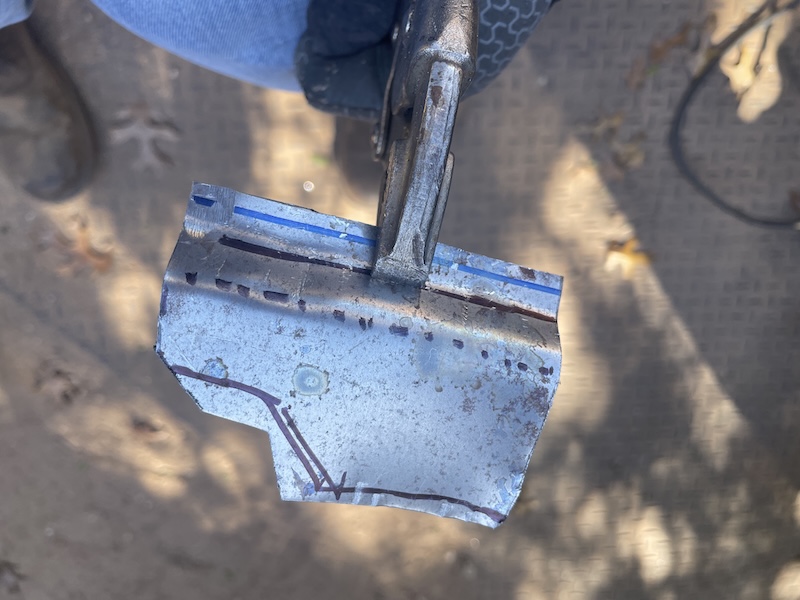 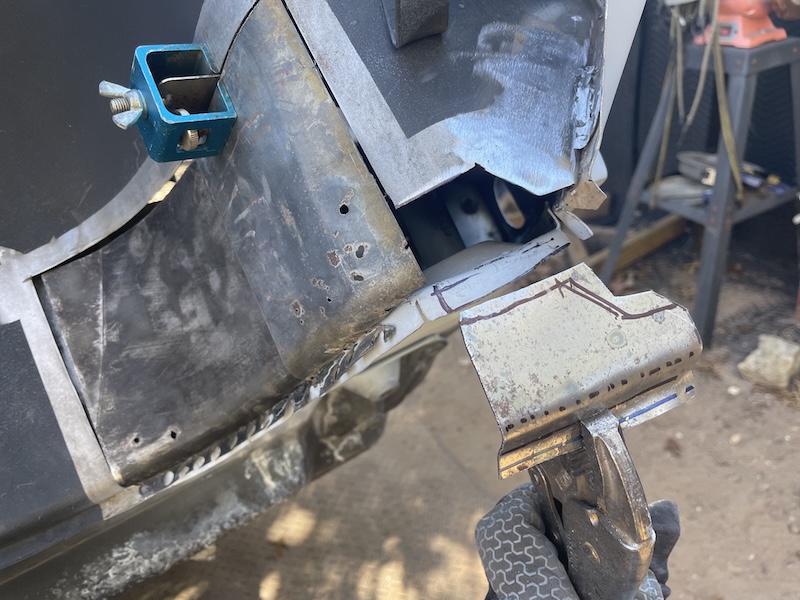 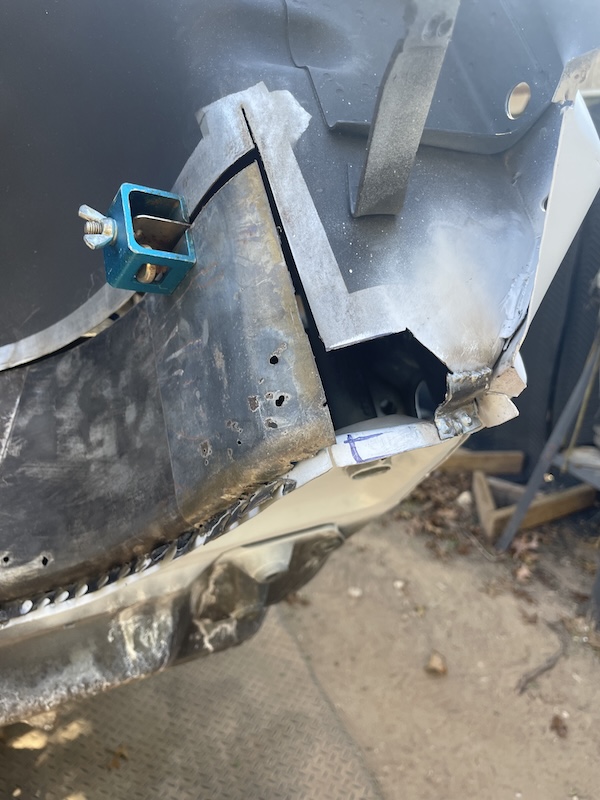 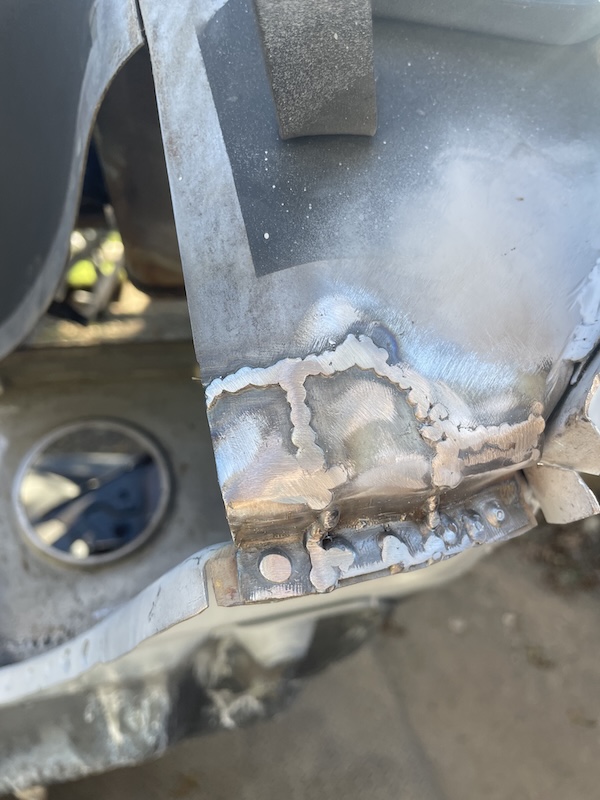 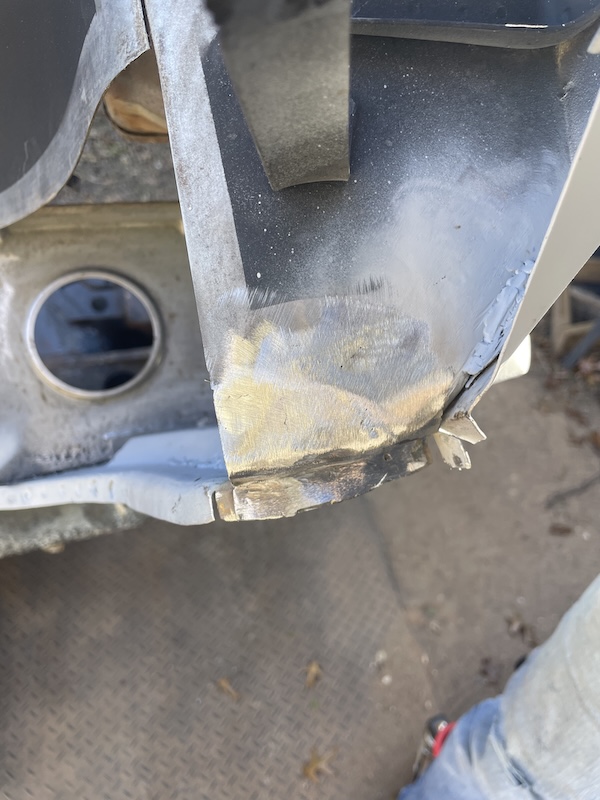 With this repair done, I should be ready to go for next time. I'm currently waiting on some epoxy paint that I plan to use in the enclosed area under the light bucket. After that, I should be able to replace/repair/complete the repair in this area. The following photos show the inside view of all the repairs (that needs to be cleaned-up) and some final shots as the weather changes and the temperature drops. 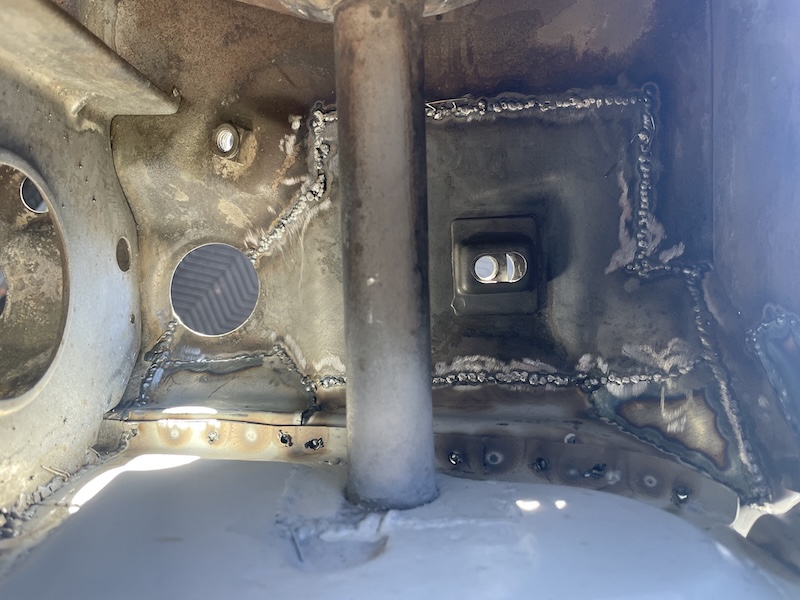 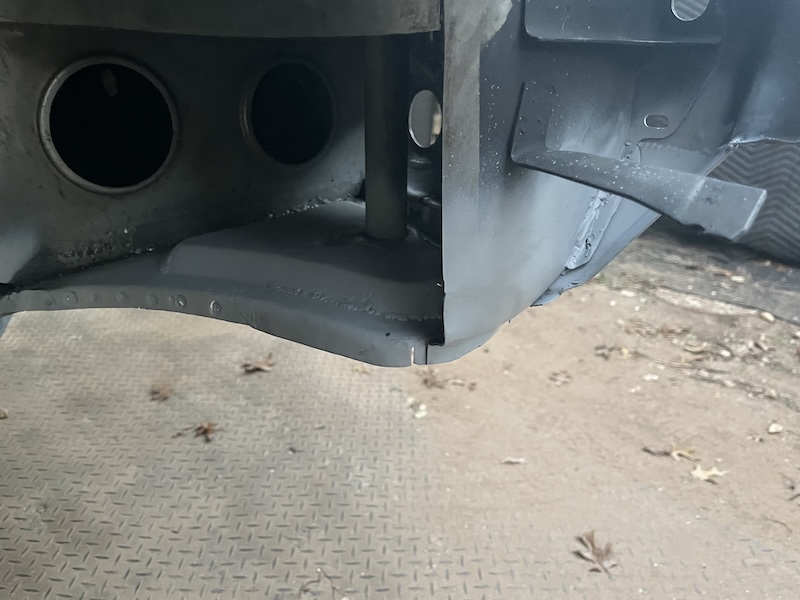 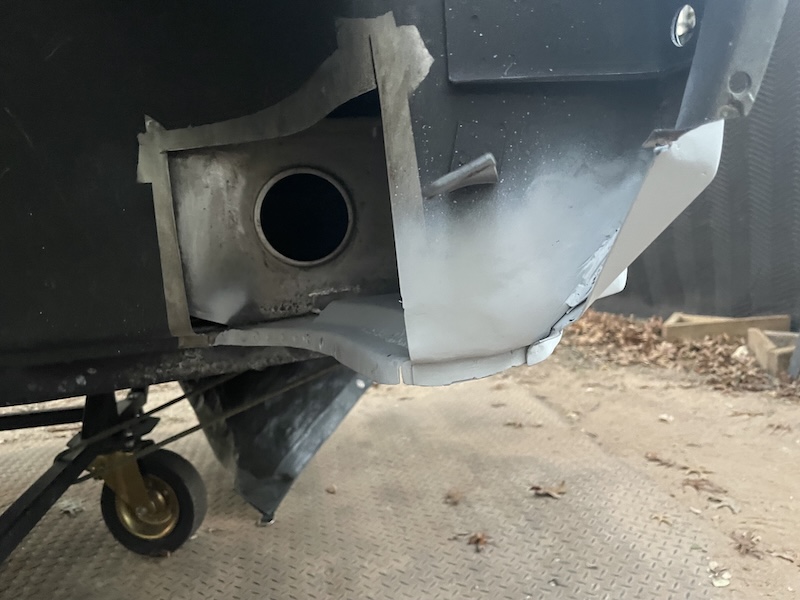  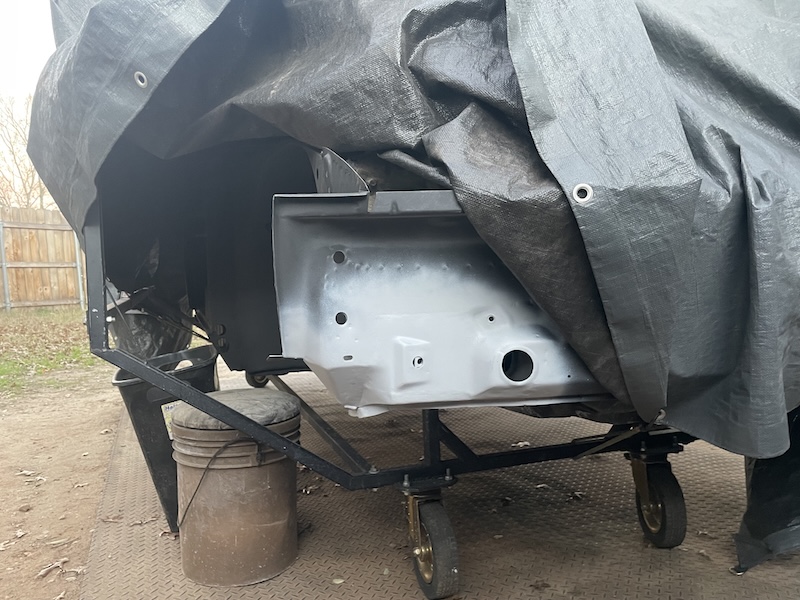 |
|
|
|
| technicalninja |
Jan 6 2025, 09:51 AM
Post
#354
|
|
Advanced Member Group: Members Posts: 2,523 Joined: 31-January 23 From: Granbury Texas Member No.: 27,135 Region Association: Southwest Region |
I KNOW what Fred is!
He's the ANTI-TIN WORM! He puts the metal back on! And he does it sort of slow, much like the original tin worm removed it! Awesome work Fred!!!! (IMG:style_emoticons/default/first.gif) (IMG:style_emoticons/default/first.gif) (IMG:style_emoticons/default/first.gif) (IMG:style_emoticons/default/first.gif) |
|
|
|
| friethmiller |
Jan 6 2025, 11:41 AM
Post
#355
|
|
Senior Member Group: Members Posts: 846 Joined: 10-February 19 From: Austin, TX Member No.: 22,863 Region Association: Southwest Region |
QUOTE(technicalninja @ Jan 6 2025, 09:51 AM) I KNOW what Fred is! He's the ANTI-TIN WORM! He puts the metal back on! And he does it sort of slow, much like the original tin worm removed it! Awesome work Fred!!!! (IMG:style_emoticons/default/first.gif) (IMG:style_emoticons/default/first.gif) (IMG:style_emoticons/default/first.gif) (IMG:style_emoticons/default/first.gif) Thanks man! Just like the peddle cluster, I've had to really slow down in this area. You've got multiple panels coming together in the front corners. One good thing with all of this is the fact that I'll be able to prep and paint the area below the light bucket with ease. That's next on the todo list, followed by closing it up with the final repair. |
|
|
|
| 930cabman |
Jan 7 2025, 06:25 AM
Post
#356
|
|
Advanced Member Group: Members Posts: 4,044 Joined: 12-November 20 From: Buffalo Member No.: 24,877 Region Association: North East States |
Have you moved to a TIG setup?
the last couple patches appear to look different |
|
|
|
| friethmiller |
Jan 7 2025, 06:55 AM
Post
#357
|
|
Senior Member Group: Members Posts: 846 Joined: 10-February 19 From: Austin, TX Member No.: 22,863 Region Association: Southwest Region |
QUOTE(930cabman @ Jan 7 2025, 06:25 AM) Have you moved to a TIG setup? the last couple patches appear to look different No, sir! Still running my Miller 211 MIG with C25 gas and .023 wire. Might be the lighting. Hard to predict the amount of sun, shade, and wind out there. Sunday was a lot windier and I had to turn up the gas and time my welds a bit based on the breeze. That’s a bit of an art form by itself, I’ve discovered. I’m next to a fence too, so that helps, as well. (IMG:style_emoticons/default/welder.gif) |
|
|
|
| slowrodent |
Jan 7 2025, 09:07 AM
Post
#358
|
|
Member Group: Members Posts: 177 Joined: 29-February 20 From: Tucson/Oro Valley Member No.: 23,981 Region Association: Southwest Region |
You do such beautiful work.... (IMG:style_emoticons/default/beer.gif) Hopefully you're paying yourself a lot of money for that level of quality. (IMG:style_emoticons/default/smile.gif)
|
|
|
|
| friethmiller |
Jan 7 2025, 09:59 AM
Post
#359
|
|
Senior Member Group: Members Posts: 846 Joined: 10-February 19 From: Austin, TX Member No.: 22,863 Region Association: Southwest Region |
QUOTE(slowrodent @ Jan 7 2025, 09:07 AM) You do such beautiful work.... (IMG:style_emoticons/default/beer.gif) Hopefully you're paying yourself a lot of money for that level of quality. (IMG:style_emoticons/default/smile.gif) Thanks. Just an amateur here but I'm always researching and trying new techniques. I'd like to get "certified" on this some day... when I grow up. (IMG:style_emoticons/default/biggrin.gif) |
|
|
|
| technicalninja |
Jan 7 2025, 10:11 AM
Post
#360
|
|
Advanced Member Group: Members Posts: 2,523 Joined: 31-January 23 From: Granbury Texas Member No.: 27,135 Region Association: Southwest Region |
You're going to find out being "certified" doesn't mean jack diddly shit!
I've let all of my certifications lapse... Turned out they were more "money game" than real certifications! My wife would argue that I am fully certifiable! At the point you can write the questions for the "certification tests" they no longer count (for you) in my book! Someone just mistook MIG for TIG with you! That's a sign! And not a bad one... (IMG:style_emoticons/default/ninja.gif) |
|
|
|
|
1 User(s) are reading this topic (1 Guests and 0 Anonymous Users)
0 Members:

|
Lo-Fi Version | Time is now: 19th April 2025 - 11:23 PM |
Invision Power Board
v9.1.4 © 2025 IPS, Inc.