|
|
|
Porsche, and the Porsche crest are registered trademarks of Dr. Ing. h.c. F. Porsche AG.
This site is not affiliated with Porsche in any way. Its only purpose is to provide an online forum for car enthusiasts. All other trademarks are property of their respective owners. |
|
|

  |

| morehills |
 Feb 19 2025, 04:59 PM Feb 19 2025, 04:59 PM
Post
#381
|
|
Member  Group: Members Posts: 98 Joined: 2-March 23 From: Great Barrington, MA Member No.: 27,202 Region Association: North East States |
OK, I'm one step from showing up at Fred's house with the three wise men, as this work is certainly immaculate and beyond my conception. But Fred, for the novice back yard mechanic, can you tell us what tools are the essential kit for all this fine work? And what was your prior metal working experience? I want to think I could approach a project like yours in the future. And that's where I will likely leave it -- with the thinking.
|
   |

 
|
| 930cabman |
Feb 19 2025, 05:54 PM
Post
#382
|
|
Advanced Member Group: Members Posts: 4,044 Joined: 12-November 20 From: Buffalo Member No.: 24,877 Region Association: North East States |
QUOTE(morehills @ Feb 19 2025, 05:59 PM)  OK, I'm one step from showing up at Fred's house with the three wise men, as this work is certainly immaculate and beyond my conception. But Fred, for the novice back yard mechanic, can you tell us what tools are the essential kit for all this fine work? And what was your prior metal working experience? I want to think I could approach a project like yours in the future. And that's where I will likely leave it -- with the thinking. Fred is one of those guys with 30 hours in his day, there can be no other way. Will you be toting myrrh in your trek to Fred's? |
 |
|
| friethmiller |
Feb 19 2025, 06:44 PM
Post
#383
|
|
Senior Member Group: Members Posts: 845 Joined: 10-February 19 From: Austin, TX Member No.: 22,863 Region Association: Southwest Region |
Ha! Ha! (IMG:style_emoticons/default/lol-2.gif)
Thanks but I have no "real" tools and certainly no overhead cover! No official training, no training at all actually if you don't count metal shop in high school about 40 years ago. (IMG:style_emoticons/default/biggrin.gif) You (and any others) are always welcome to stop by to check out the LE. Warning: You might get put to work. (IMG:style_emoticons/default/welder.gif) |
|
|
|
| friethmiller |
Feb 19 2025, 07:32 PM
Post
#384
|
|
Senior Member Group: Members Posts: 845 Joined: 10-February 19 From: Austin, TX Member No.: 22,863 Region Association: Southwest Region |
Paint Removal: (the grind continues) - (2/15 & 2/16/2025):
With the seal track completed, I decided to jump right into removing the remaining old paint from the front trunk. There's a lot of painted surfaces to attack here and some old sealant that needed to be removed. I did a lot of this by hand with a scraper but used a paint removing disc on some of the larger areas. The second picture shows some of the seal track drains that I cut in (red arrows). There are 5 drains on this lower section and are approximately 8 inches apart. I will also install a drain hole above each light bucket to allow any water in the fender seal track to drain down into the bucket 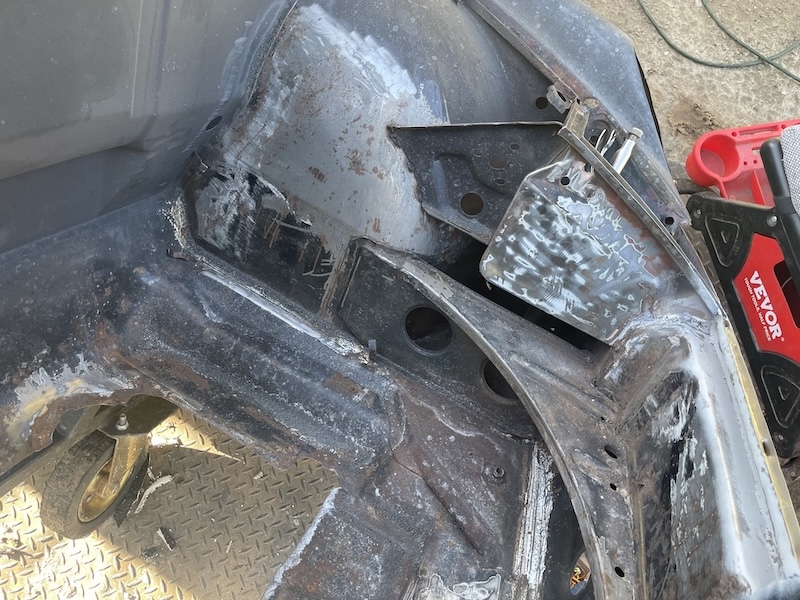 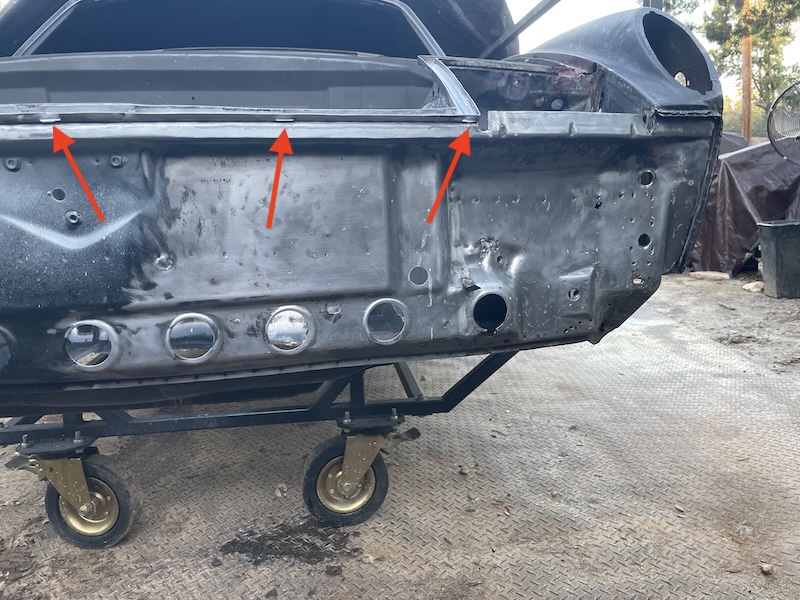 After several hours of scraping, grinding, and sanding I was able to get these areas ready for sandblasting. I don't particularly like to do it but there are times when it's necessary. This trunk is really bad! 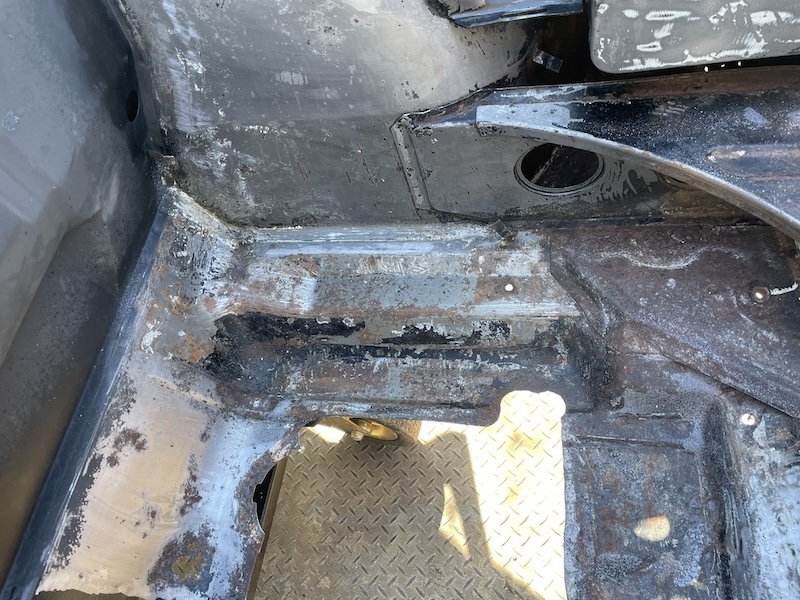 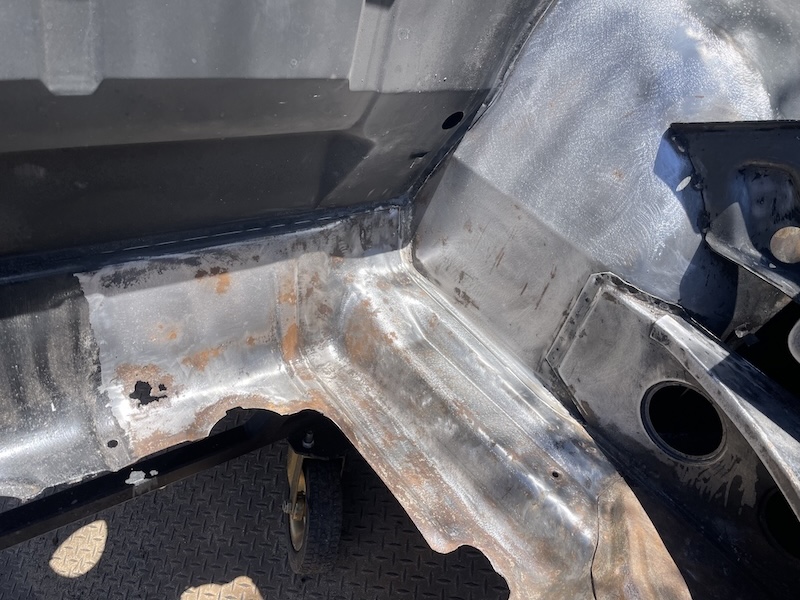 Results of a light sand-blasting: 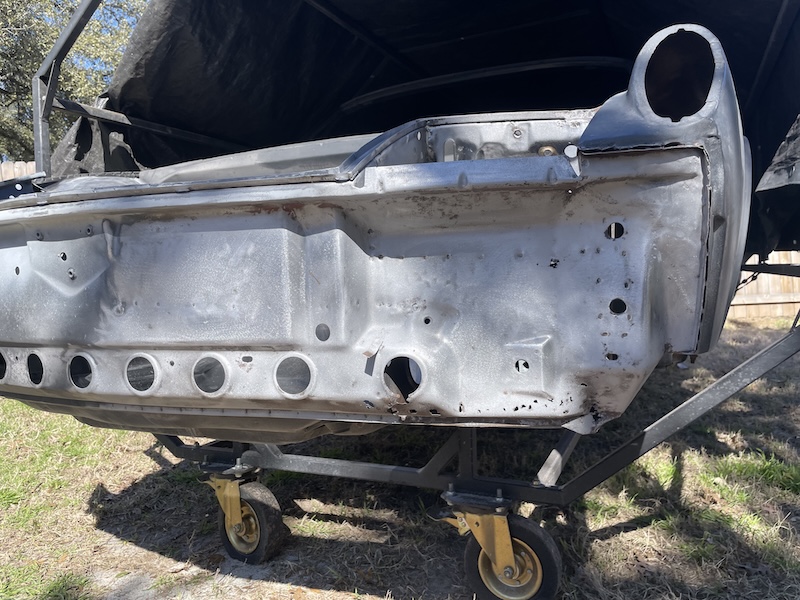 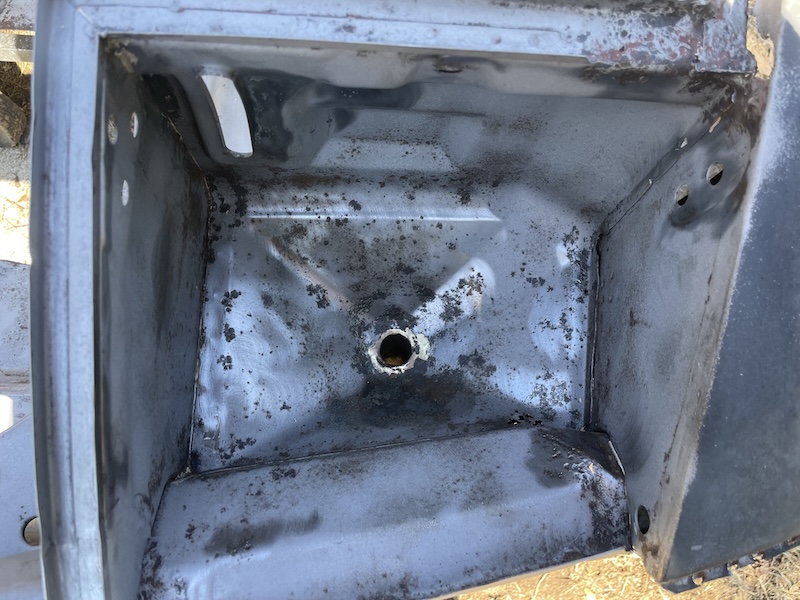 Red arrow shows additional damage that "magically" appeared after blasting in the light bucket. The other photo here shows the damage to the truck reinforcement corners. I'm still debating about replacing both of these. With the supports above, this will not be easy to do. (IMG:style_emoticons/default/idea.gif) 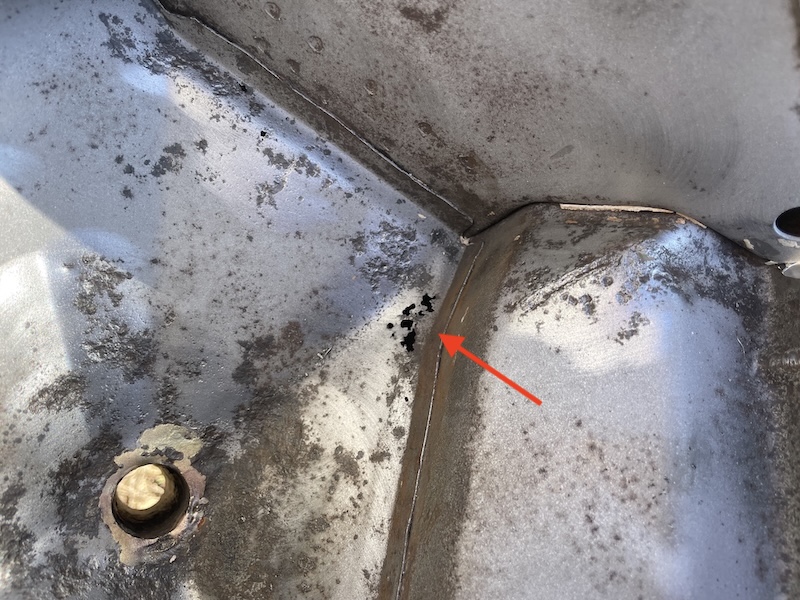  The remaining photos show all the cuts made in the areas that need repair. All of this will be done next weekend (weather dependent). As bad as this front corner looks, it's WAY better than the other side. We'll see. Cheers! (IMG:style_emoticons/default/beer.gif) 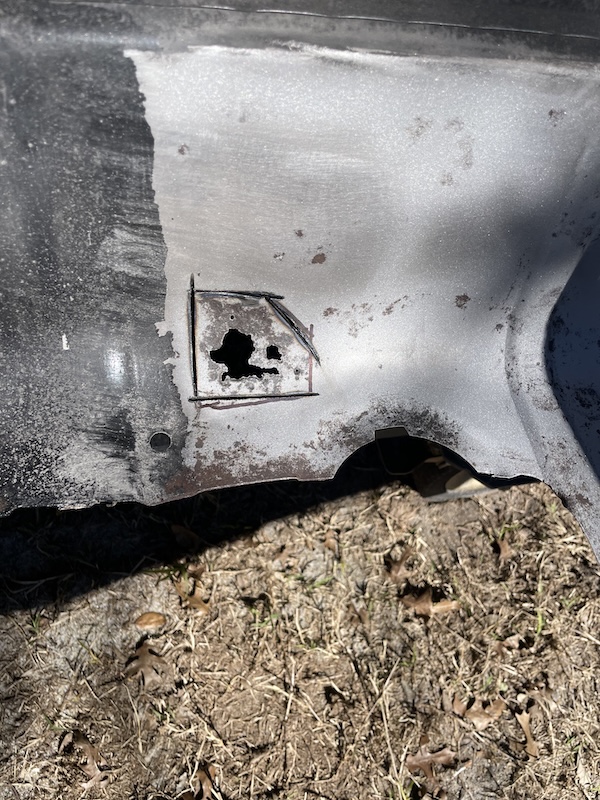 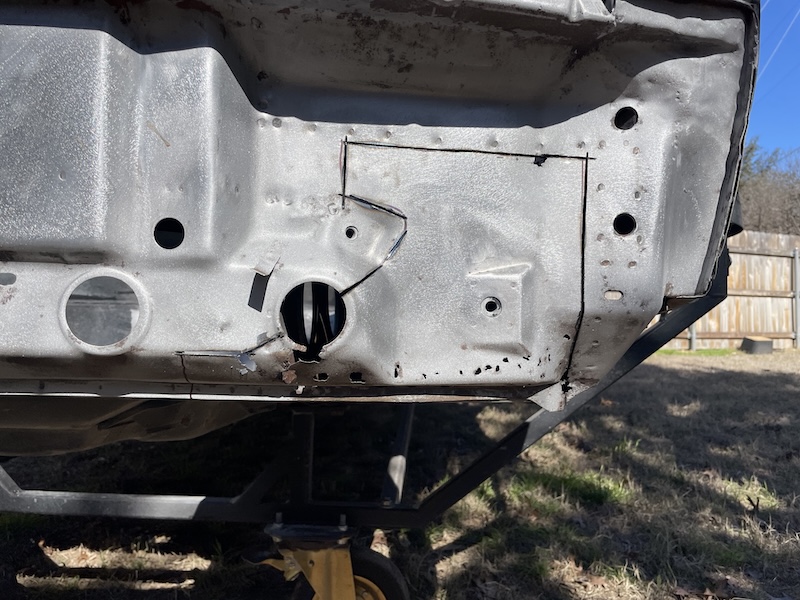 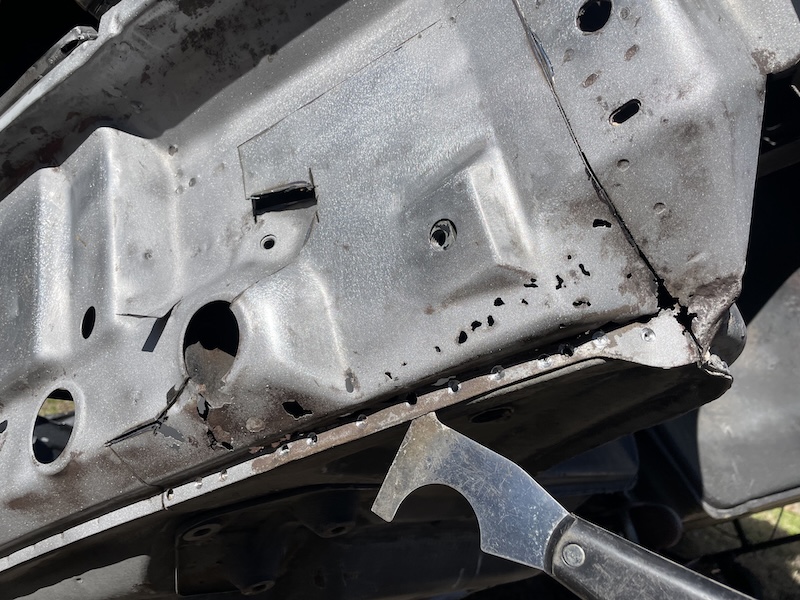 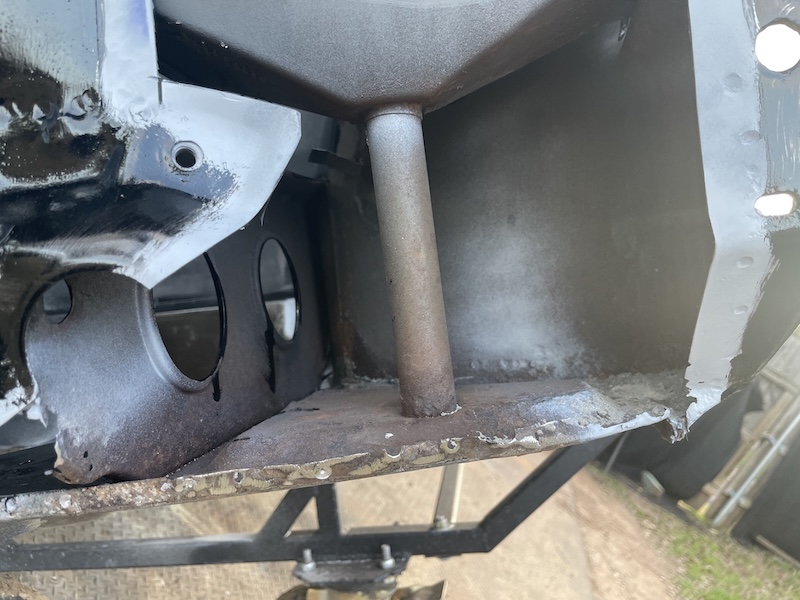 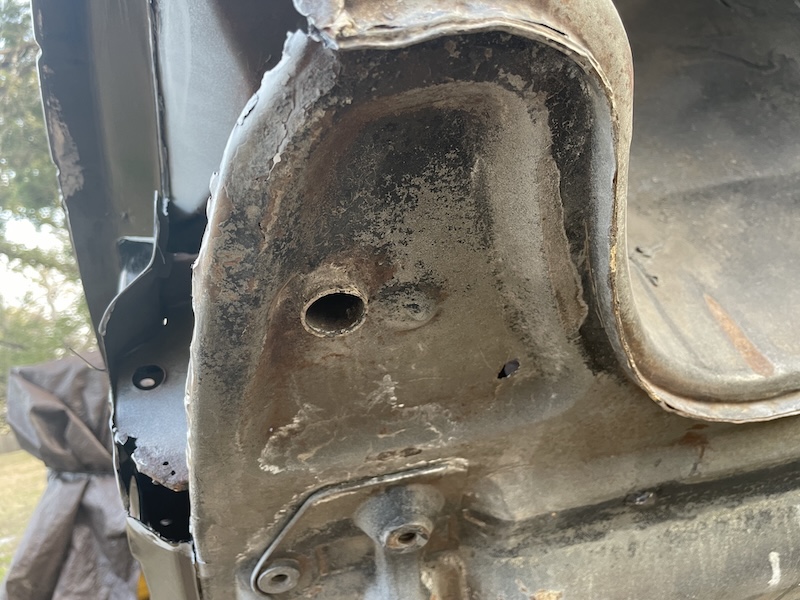 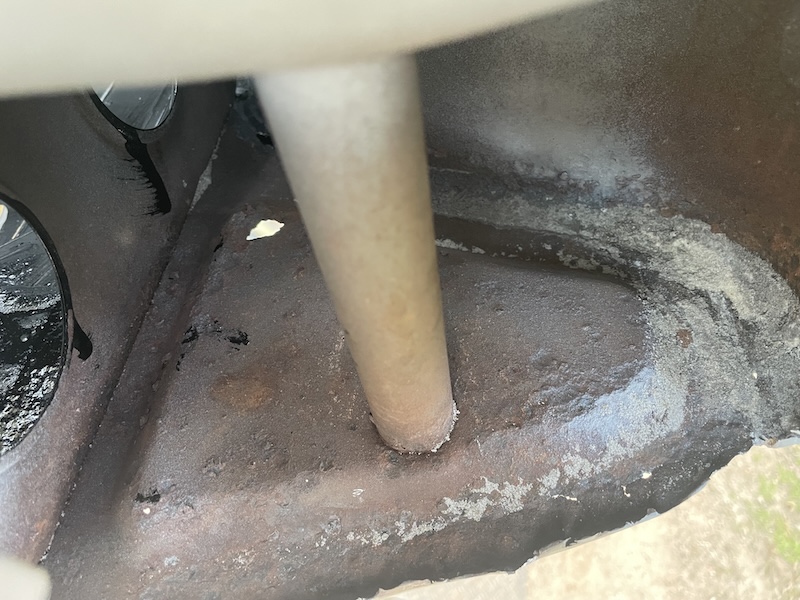 |
|
|
|
| bkrantz |
Feb 19 2025, 08:59 PM
Post
#385
|
|
914 Guru Group: Members Posts: 8,341 Joined: 3-August 19 From: SW Colorado Member No.: 23,343 Region Association: Rocky Mountains |
I know Porsche and Karmann used steel and treatments that were normal for the 914 era, put seeing photos like this still makes me wonder. After all, the body assembly was complex and labor intensive, but so prone to rust in all kinds of places.
|
|
|
|
| friethmiller |
Feb 19 2025, 09:38 PM
Post
#386
|
|
Senior Member Group: Members Posts: 845 Joined: 10-February 19 From: Austin, TX Member No.: 22,863 Region Association: Southwest Region |
QUOTE(bkrantz @ Feb 19 2025, 08:59 PM) I know Porsche and Karmann used steel and treatments that were normal for the 914 era, put seeing photos like this still makes me wonder. After all, the body assembly was complex and labor intensive, but so prone to rust in all kinds of places. Yeah, I agree. I've come to terms with the rust on this car. It must be fixed/solid. BTW, I started drilling out the spot welds on the driver side fender. Like a "pool shark" you've got to think 2 to 3 moves ahead of what's currently "in-play". With that fender removed, I'll get to do more "goodness" in the cowl area. Should be done with the main body (minus doors/hoods) in a few more weekends. |
|
|
|
| Artfrombama |
Feb 20 2025, 01:57 AM
Post
#387
|
|
Member Group: Members Posts: 271 Joined: 21-January 24 From: Alabama Member No.: 27,870 Region Association: South East States |
QUOTE(bkrantz @ Jan 19 2025, 09:02 PM) QUOTE(friethmiller @ Jan 19 2025, 07:25 PM) Passenger Light Bucket Area Repair - Part 6 (1/18/2025): Working the bottom edge: You can see that I worked in small patches to try and match the curve the best I could. I have found it's most important to pay attention to the sides and top of these pieces - making sure everything is as flush as it can be. None of this is going to show too much but I trying to do a little bit better than my previous efforts. Might need an English Wheel or something to create these flowing curves with all the other vertical bends/curves that are necessary (IMG:style_emoticons/default/confused24.gif) The following photos show the process of buttoning up this area. Yay! (IMG:style_emoticons/default/cheer.gif) My scrolling finger hates you! (IMG:style_emoticons/default/bootyshake.gif) |
|
|
|
| Root_Werks |
Feb 20 2025, 10:43 AM
Post
#388
|
|
Village Idiot Group: Members Posts: 8,649 Joined: 25-May 04 From: About 5NM from Canada Member No.: 2,105 Region Association: Pacific Northwest |
Loving all the pictures! Ruts repair on a 914 can be so time consuming.
|
|
|
|
| friethmiller |
Feb 20 2025, 11:23 AM
Post
#389
|
|
Senior Member Group: Members Posts: 845 Joined: 10-February 19 From: Austin, TX Member No.: 22,863 Region Association: Southwest Region |
QUOTE(Artfrombama @ Feb 20 2025, 01:57 AM) QUOTE(Root_Werks @ Feb 20 2025, 10:43 AM) Loving all the pictures! Ruts repair on a 914 can be so time consuming. Yeah, sorry @Artfrombama . I'm try to show my work as it progresses without going overboard. I like to analyze my work: patch/metal gaps, welds, and grinding. I'm my biggest critic, of course (IMG:style_emoticons/default/smash.gif) I've caught a lot of stuff that I had to go back and fix after looking at the posted photos. |
|
|
|
| Artfrombama |
Feb 20 2025, 05:08 PM
Post
#390
|
|
Member Group: Members Posts: 271 Joined: 21-January 24 From: Alabama Member No.: 27,870 Region Association: South East States |
QUOTE(friethmiller @ Feb 20 2025, 11:23 AM) QUOTE(Artfrombama @ Feb 20 2025, 01:57 AM) QUOTE(Root_Werks @ Feb 20 2025, 10:43 AM) Loving all the pictures! Ruts repair on a 914 can be so time consuming. Yeah, sorry @Artfrombama . I'm try to show my work as it progresses without going overboard. I like to analyze my work: patch/metal gaps, welds, and grinding. I'm my biggest critic, of course (IMG:style_emoticons/default/smash.gif) I've caught a lot of stuff that I had to go back and fix after looking at the posted photos. No, love your photo documentation, I look forward to your posts. It's just when someone replies and those photos are posted again. But it's all good. Carry on, I'll let myself out. (IMG:style_emoticons/default/unsure.gif) |
|
|
|
| fiacra |
Feb 20 2025, 08:27 PM
Post
#391
|
|
Person.Woman.Man.Camera.TV Group: Members Posts: 539 Joined: 1-March 19 From: East Bay Region - California Member No.: 22,920 Region Association: Northern California |
QUOTE(friethmiller @ Feb 19 2025, 04:44 PM) Thanks but I have no "real" tools and certainly no overhead cover! No official training, no training at all actually if you don't count metal shop in high school about 40 years ago. (IMG:style_emoticons/default/biggrin.gif) I took high school home-economics but the rye bread rounds that I tried to make this morning turned out more like rye bread biscotti. I took metal shop as well, but my projects always turned out looking like I tried to shape them by running over them with a car. They haven't gotten any better... I also took wood shop, but the fence I built three days ago looks like I don't know how to read a level (fortunately you can only see that on the neighbor's side (IMG:style_emoticons/default/happy11.gif) ). I keep revisiting this thread because of just how amazing it is to me that somewhere in Texas is a man restoring an LE in his backyard, working with a car that looks a lot like swiss cheese, and achieving such remarkable results. I can only imagine what you would have gotten done if you had a fully equipped shop to work in. Wish you were nearby and I could see it happen in person. No disrespect to anyone else's rustoration project, but this is by far the most interesting project thread I've read. Thanks for putting this LE back on the road. |
|
|
|
| friethmiller |
Feb 20 2025, 11:17 PM
Post
#392
|
|
Senior Member Group: Members Posts: 845 Joined: 10-February 19 From: Austin, TX Member No.: 22,863 Region Association: Southwest Region |
QUOTE(fiacra @ Feb 20 2025, 08:27 PM) QUOTE(friethmiller @ Feb 19 2025, 04:44 PM) Thanks but I have no "real" tools and certainly no overhead cover! No official training, no training at all actually if you don't count metal shop in high school about 40 years ago. (IMG:style_emoticons/default/biggrin.gif) I took high school home-economics but the rye bread rounds that I tried to make this morning turned out more like rye bread biscotti. Thanks! I still have a long way to go. I'm sure that rye biscotti would be really good with some coffee! (IMG:style_emoticons/default/smilie_pokal.gif) |
|
|
|
| friethmiller |
Feb 21 2025, 08:38 AM
Post
#393
|
|
Senior Member Group: Members Posts: 845 Joined: 10-February 19 From: Austin, TX Member No.: 22,863 Region Association: Southwest Region |
QUOTE(Artfrombama @ Feb 20 2025, 05:08 PM) No, love your photo documentation, I look forward to your posts. It's just when someone replies and those photos are posted again. But it's all good. Carry on, I'll let myself out. (IMG:style_emoticons/default/unsure.gif) No, you are right. I don't like that either. I'll call it out next time. |
|
|
|
| iankarr |
Feb 23 2025, 06:38 PM
Post
#394
|
|
The wrencher formerly known as Cuddy_K Group: Members Posts: 2,555 Joined: 22-May 15 From: Heber City, UT Member No.: 18,749 Region Association: Intermountain Region |
Phenomenal. Just wow!
|
|
|
|
| friethmiller |
Feb 23 2025, 06:58 PM
Post
#395
|
|
Senior Member Group: Members Posts: 845 Joined: 10-February 19 From: Austin, TX Member No.: 22,863 Region Association: Southwest Region |
Patching Holes and Prep'n the Driver Side Corner - Part 1 of 2: (2/23/2025):
Since Saturday was cold and wet, I only had Sunday to get some progress done on the LE. First order of business was the patch in the back trunk floor, followed by several other small rust holes I discovered here and there. After that, I planned on patching the holes in the driver side light bucket. 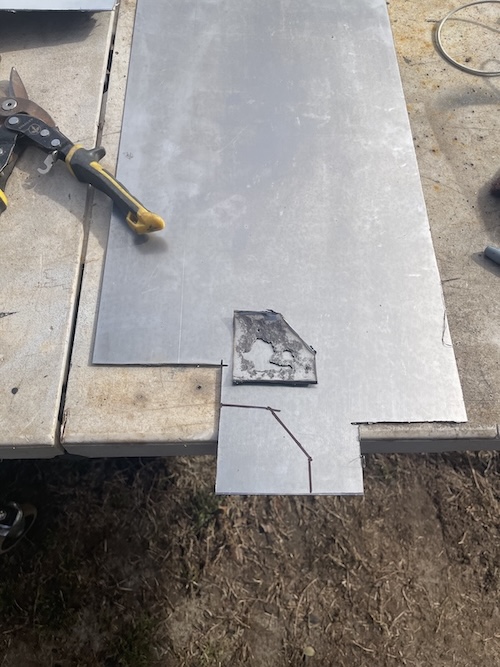 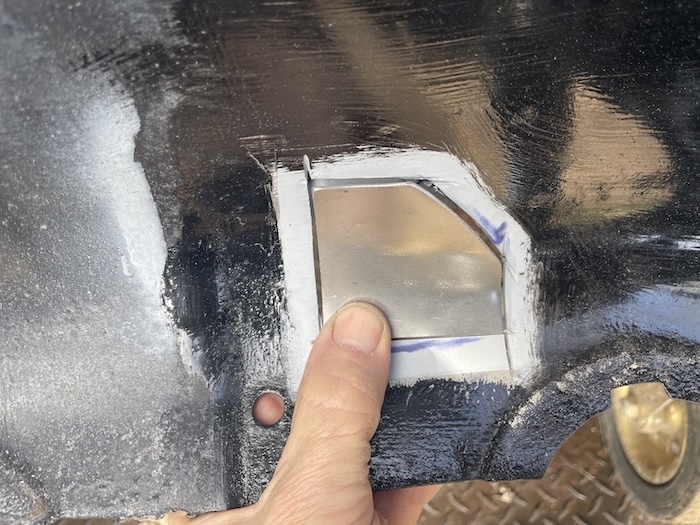 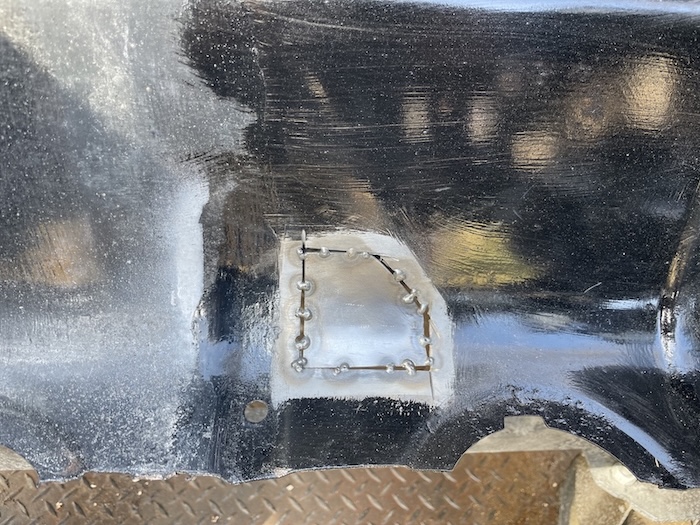 After cutting, forming, and tacking-in the patch, I figured I'd save my back and rotate the car up on the 90 to have better access. This is when the rotisserie is nice! Anytime I bang my head on it, I hate the damn thing. (IMG:style_emoticons/default/huh.gif) Here's a couple shots front and back on this patch. Going to need to jack this thing up off the front hoop at some point so I can grind/remove paint under that steering support rack (thingy). Probably happen right before I paint the bottom of the car. 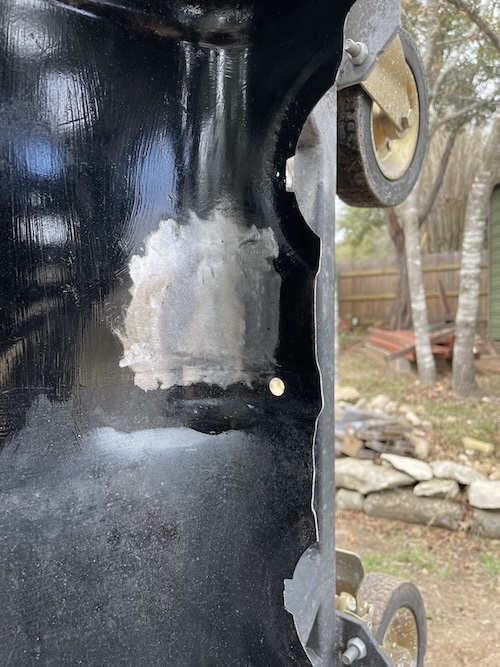 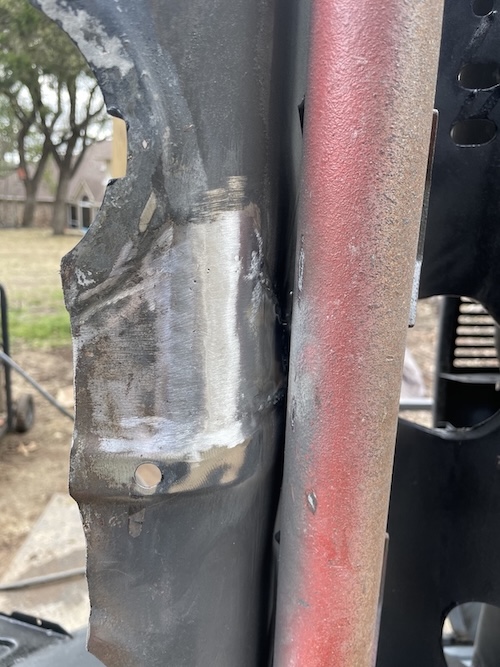 Next up, two rust holes in the passenger side corner support bracket (thingy). Here, I decided on drilling out the bad metal and take a chance on being able to patch with just weld. Risky thing to do on a 914 trunk, I know. Got lucky on these and a few other holes I drilled out in the rear corner. 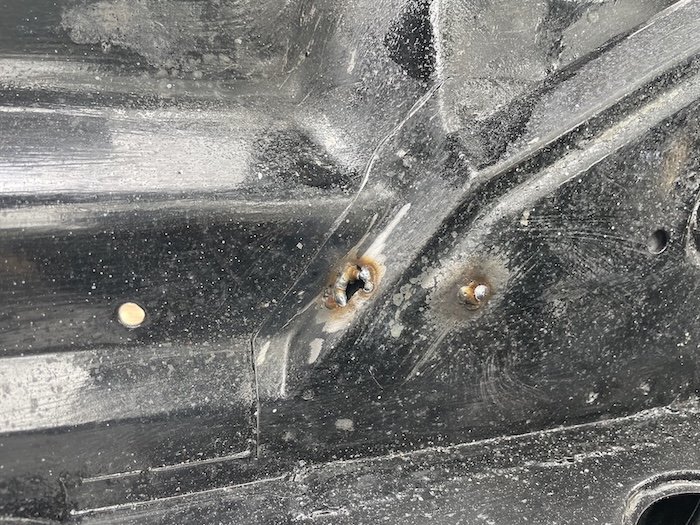 . . 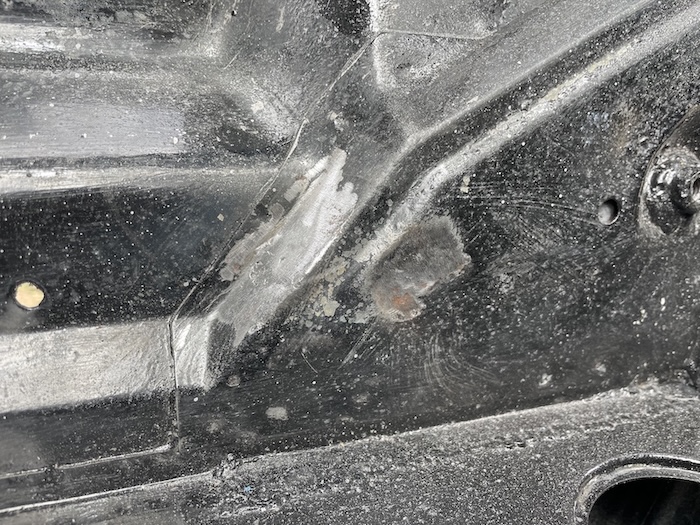 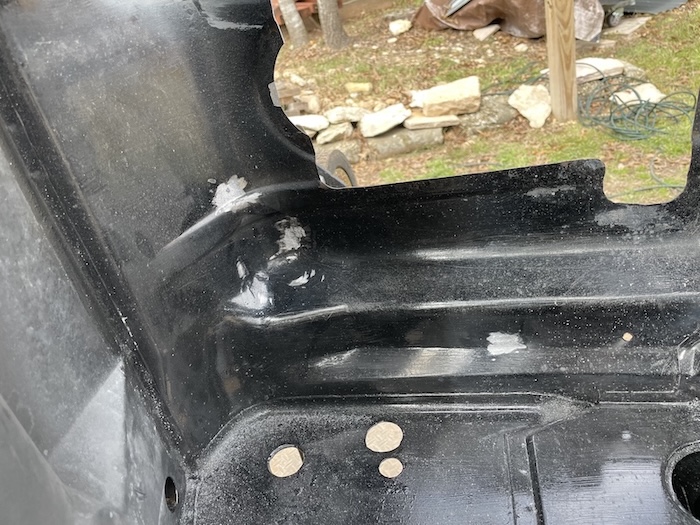 Next, I was able to come in from below on the light bucket and cut out the bad spot with a 3" cutting wheel. The last photo [of the 3] shows the patch in the center and two other holes on either side that where welded close. 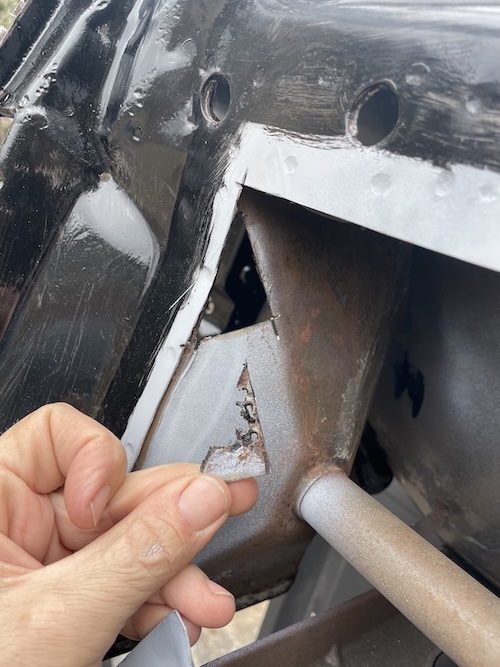 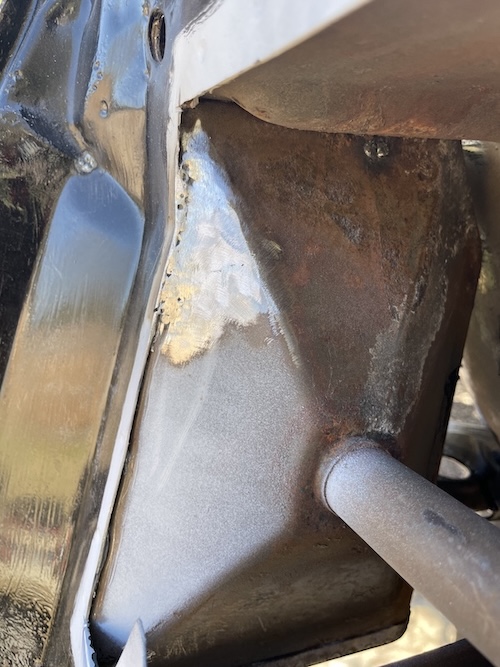 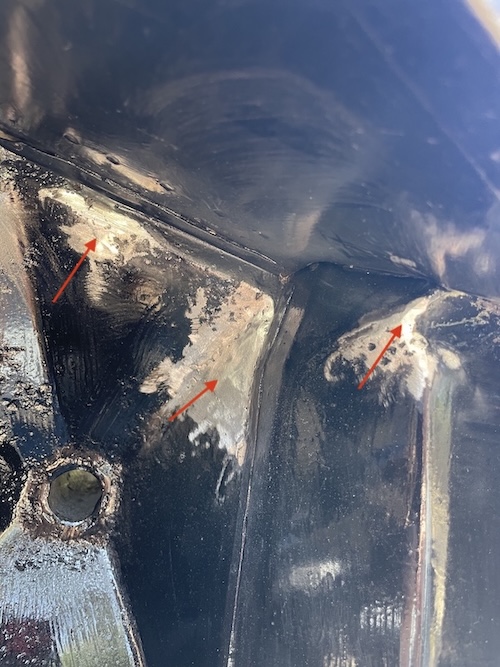 After looking around the entire area I found one more hole on the front cross panel. Note the use of the copper backer. I use this for most holes I weld close. I also got a chance to finally grind down the patch I did a few weeks ago at the bottom of the passenger side support bracket. 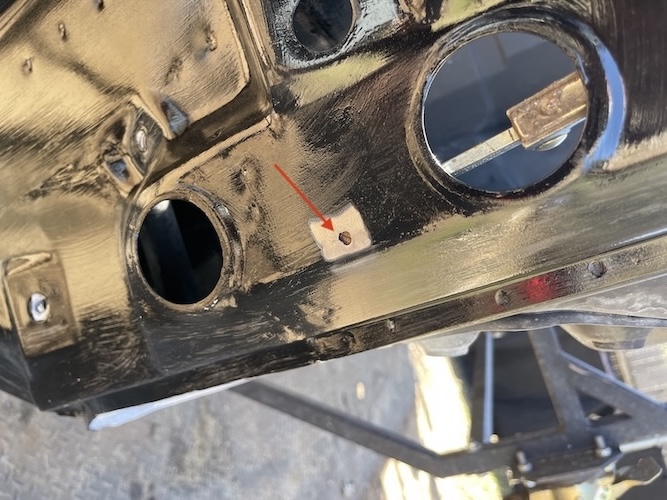 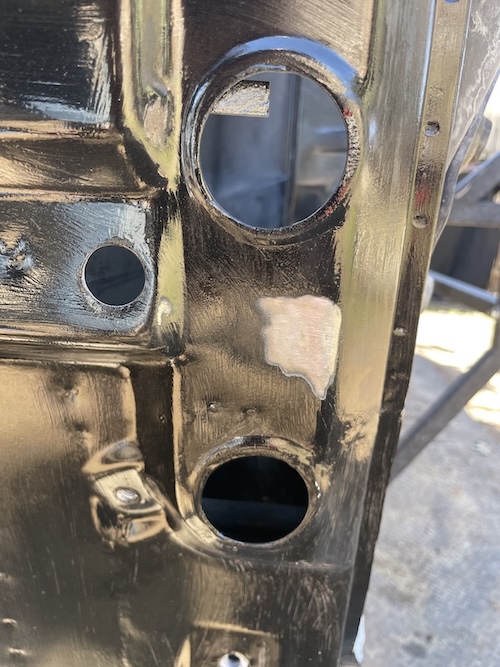 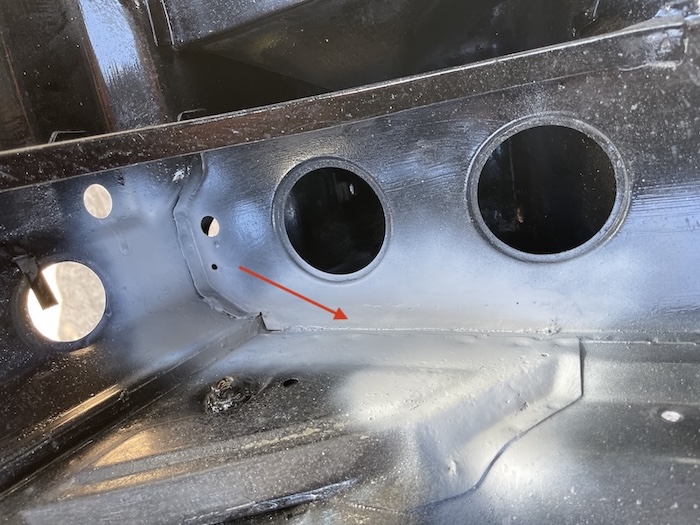 Coming up next in Part 2 - Cutting and blasting below the light bucket... |
|
|
|
| Cairo94507 |
Feb 23 2025, 07:05 PM
Post
#396
|
|
Michael Group: Members Posts: 10,297 Joined: 1-November 08 From: Auburn, CA Member No.: 9,712 Region Association: Northern California |
Really nice work. (IMG:style_emoticons/default/smilie_pokal.gif)
|
|
|
|
| friethmiller |
Feb 23 2025, 07:19 PM
Post
#397
|
|
Senior Member Group: Members Posts: 845 Joined: 10-February 19 From: Austin, TX Member No.: 22,863 Region Association: Southwest Region |
Patching Holes and Prep'n the Driver Side Corner - Part 2 of 2: (2/23/2025):
After all that patching I decided to switch gears and grind off the rest of the old paint from the bottom of the trunk. And just like everywhere else, rust under the paint (IMG:style_emoticons/default/bootyshake.gif) Well, it didn't take too long here to figure out that the bottom of the trunk corner needed to come out and get overhauled - just like the other side (IMG:style_emoticons/default/headbang.gif) The arrows point to the cut lines.  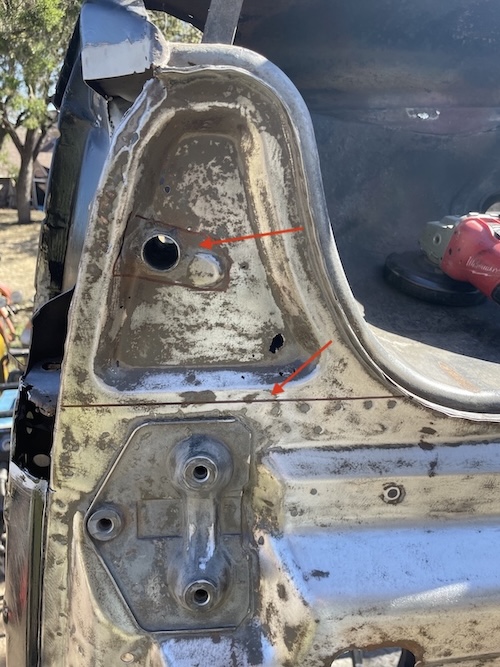 Decided to throw on some quick primer on the trunk (for now) and start the process of drilling out spot welds to get this piece out of the car. Of course, there's like 40 spots welds on this corner. Go grief, that took forever to remove. It looks aweful! 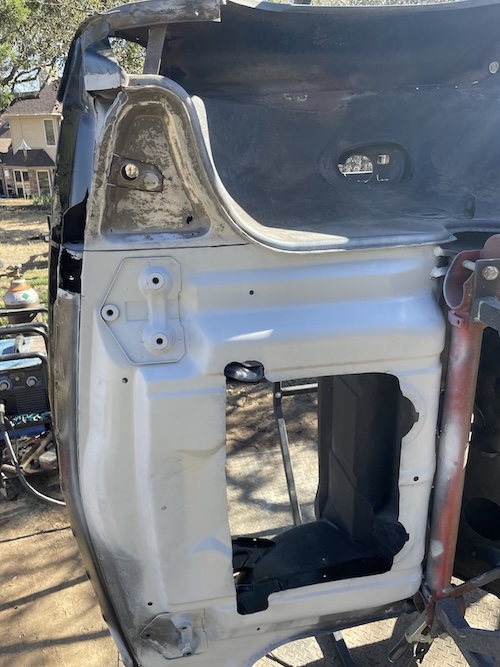 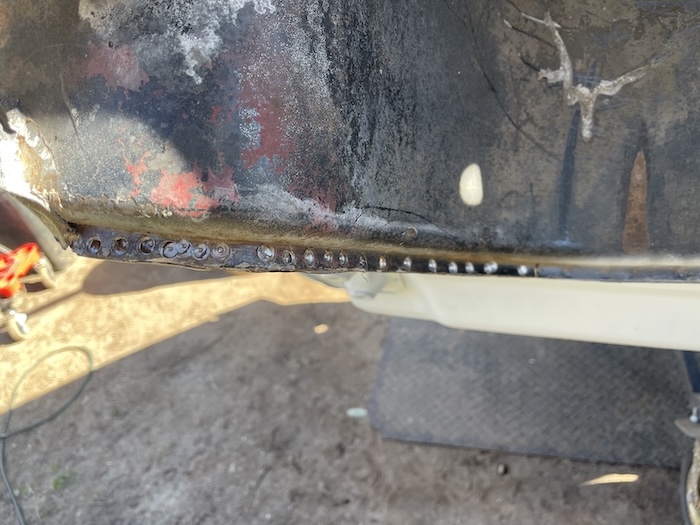 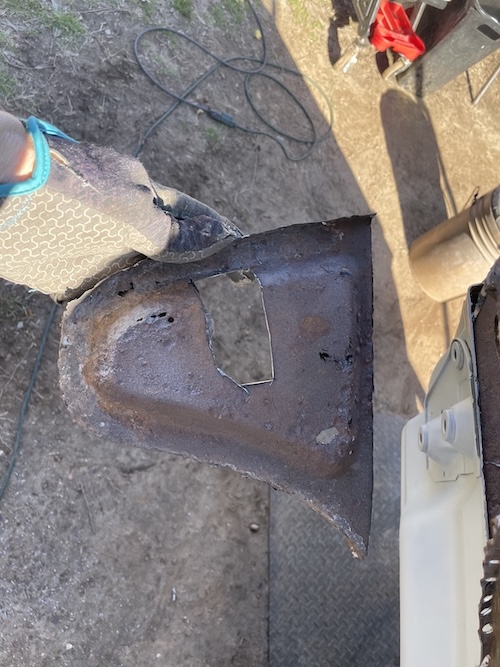 I had some time still left in the day so I pulled out the sandblaster and hit the entire area under the light bucket. Arrow points to the hole that magically appear with a very light blasting. I'm probably going to have to replace a lot of this bottom metal - just like the other side. 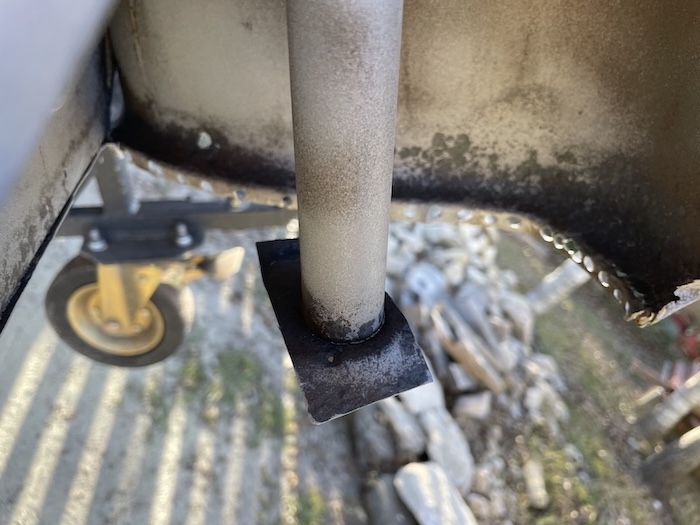 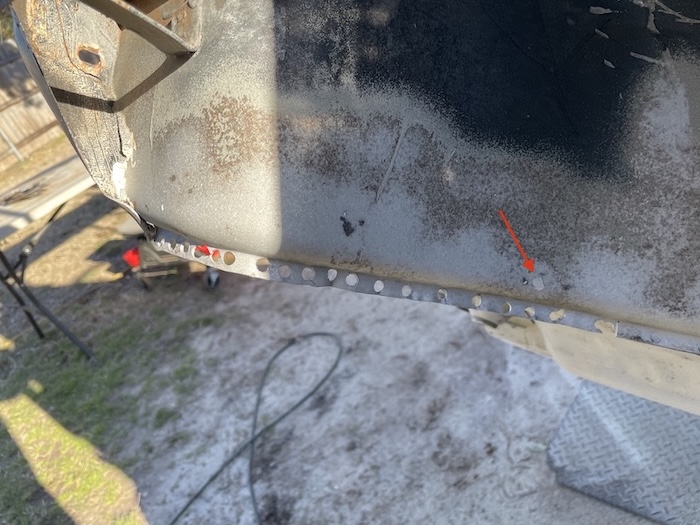 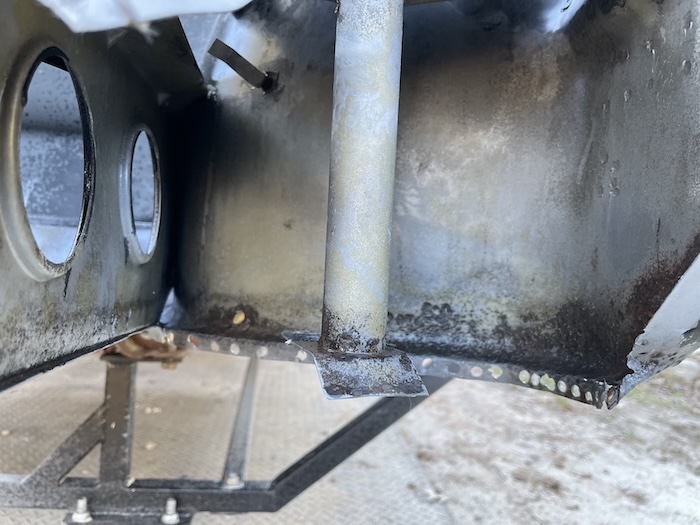 Final shot of the work area. It's coming around. (IMG:style_emoticons/default/biggrin.gif) 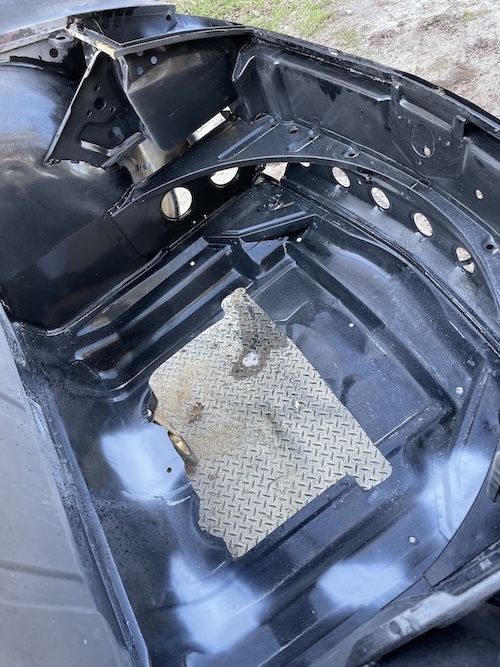 Yours truly out in some beautiful weather, sporting one of his favorite tools. Cheers!  |
|
|
|
| friethmiller |
Feb 23 2025, 07:25 PM
Post
#398
|
|
Senior Member Group: Members Posts: 845 Joined: 10-February 19 From: Austin, TX Member No.: 22,863 Region Association: Southwest Region |
QUOTE(iankarr @ Feb 23 2025, 06:38 PM) Phenomenal. Just wow! QUOTE(Cairo94507 @ Feb 23 2025, 07:05 PM) Thanks guys! |
|
|
|
| 930cabman |
Feb 24 2025, 06:02 AM
Post
#399
|
|
Advanced Member Group: Members Posts: 4,044 Joined: 12-November 20 From: Buffalo Member No.: 24,877 Region Association: North East States |
|
|
|
|
| friethmiller |
Feb 24 2025, 09:15 AM
Post
#400
|
|
Senior Member Group: Members Posts: 845 Joined: 10-February 19 From: Austin, TX Member No.: 22,863 Region Association: Southwest Region |
QUOTE(930cabman @ Feb 24 2025, 06:02 AM) Ha! That's not even a thing! (IMG:style_emoticons/default/confused24.gif) But I certainly appreciate the comment. Thank you, sir! |
|
|
|
|
3 User(s) are reading this topic (1 Guests and 0 Anonymous Users)
2 Members: friethmiller, East coaster

|
Lo-Fi Version | Time is now: 19th April 2025 - 05:49 PM |
Invision Power Board
v9.1.4 © 2025 IPS, Inc.