|
|
|
Porsche, and the Porsche crest are registered trademarks of Dr. Ing. h.c. F. Porsche AG.
This site is not affiliated with Porsche in any way. Its only purpose is to provide an online forum for car enthusiasts. All other trademarks are property of their respective owners. |
|
|

  |

| 930cabman |
 Feb 24 2025, 12:50 PM Feb 24 2025, 12:50 PM
Post
#401
|
|
Advanced Member  Group: Members Posts: 4,044 Joined: 12-November 20 From: Buffalo Member No.: 24,877 Region Association: North East States |
QUOTE(friethmiller @ Feb 24 2025, 10:15 AM)  QUOTE(930cabman @ Feb 24 2025, 06:02 AM) Ha! That's not even a thing! (IMG:style_emoticons/default/confused24.gif) But I certainly appreciate the comment. Thank you, sir! maybe we should make it a thing |
   |

 
|
| friethmiller |
Mar 1 2025, 04:34 AM
Post
#402
|
|
Senior Member Group: Members Posts: 845 Joined: 10-February 19 From: Austin, TX Member No.: 22,863 Region Association: Southwest Region |
Front Trunk Floor Repair: (2/24 - 2/28/2025):
Some sheetmetal fun after work this week. I'm going to be out on Saturday so I thought I get this fixed up and ready to go for Sunday. After dipping the part for a few hours, I was able to see exactly what areas were bad. And, after farting around with potential cuts on the bottom, I decided to just replace it entirely. This actually saved time and effort. Note: I'm only tacking the piece into areas of good metal, which isn't much. (IMG:style_emoticons/default/blink.gif) 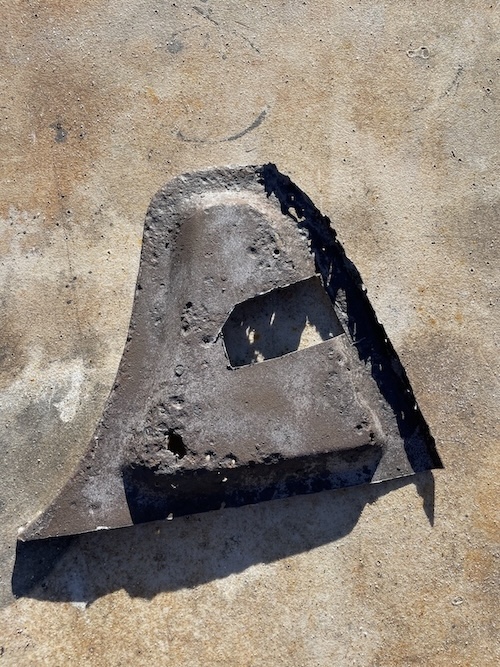 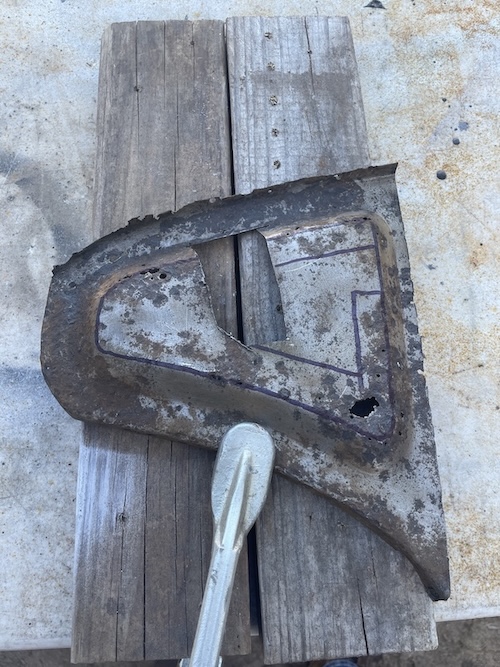  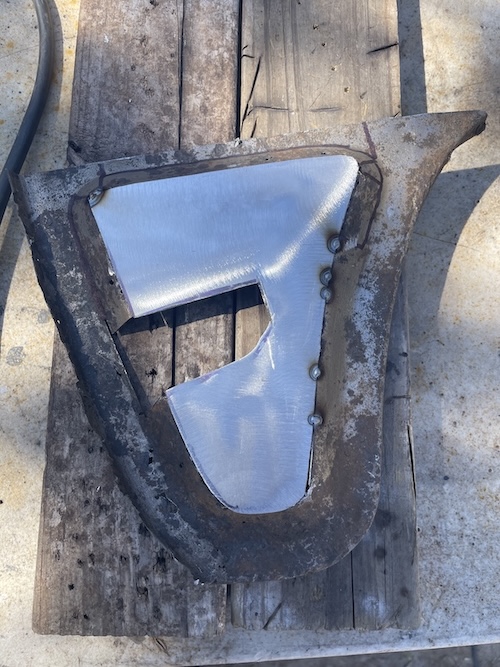 Next, I moved my attention to the sides and began the process of replacing smalll pieces. This is less tedious than you think. There's very little bending and my focus is on the gaps and on strengthening the corners. I'm leaving the tacks dirty here and using a ton of compressed air to keep the part cool. The black vertical lines are where I intend to make bends. 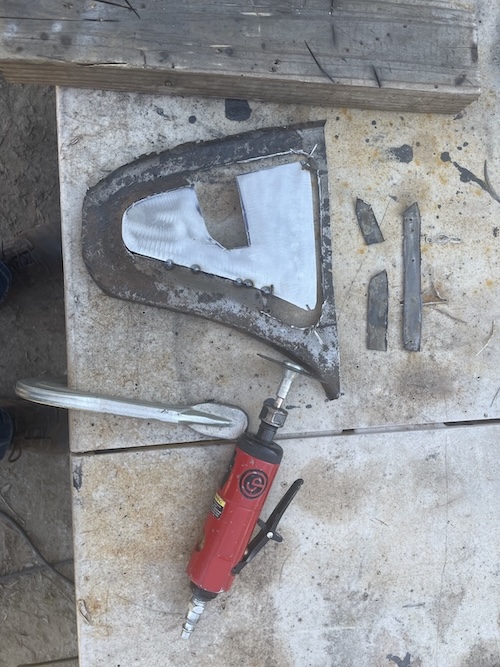 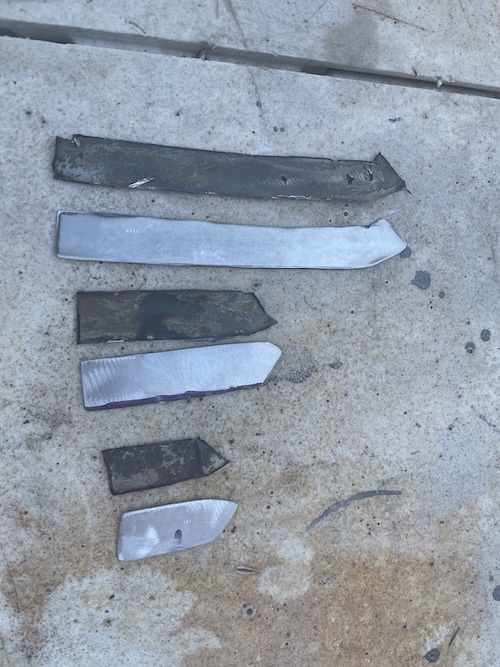 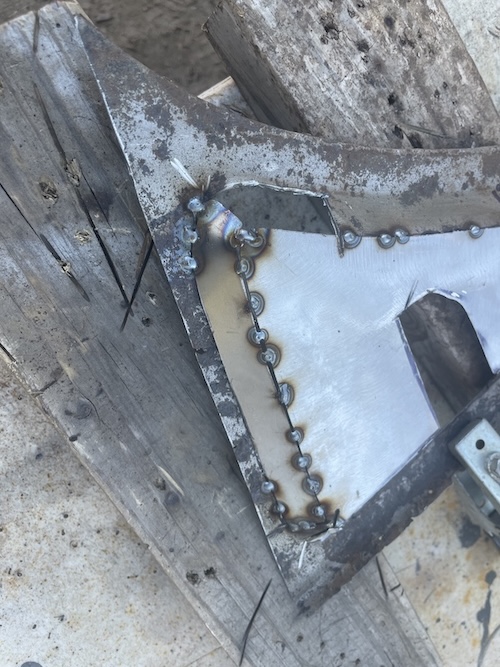 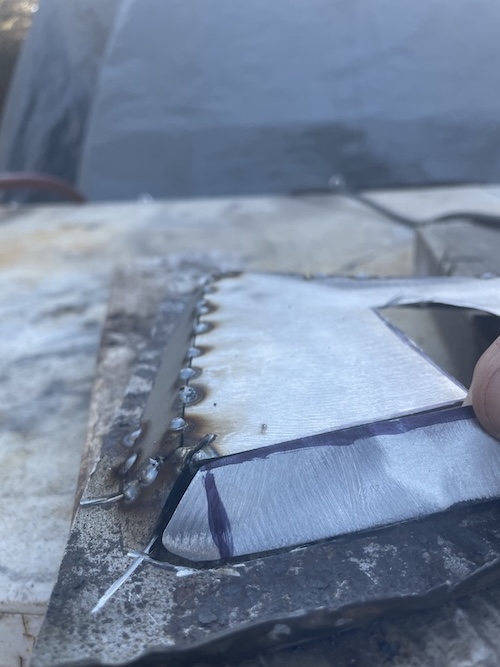 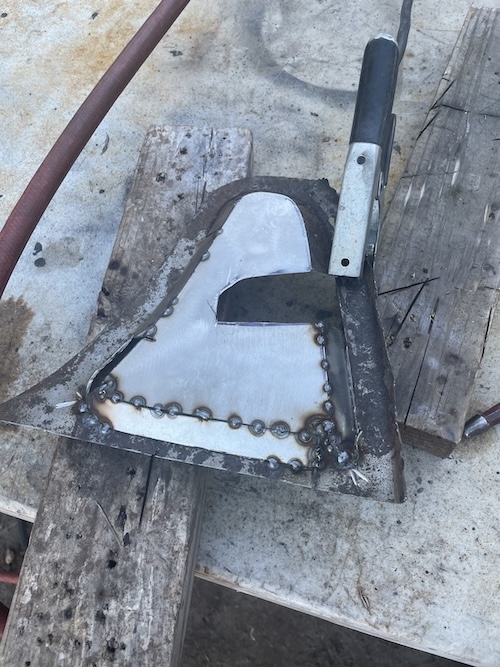 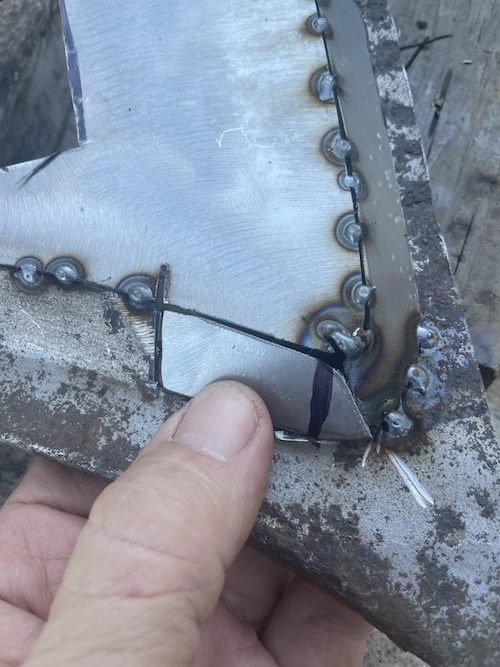 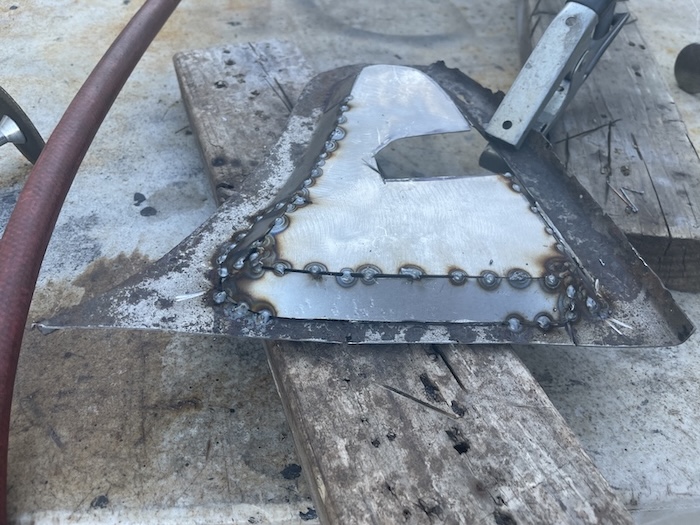 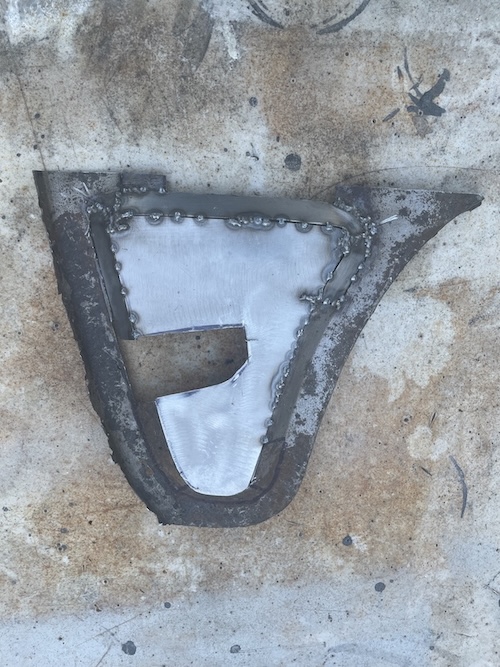 From here I decided to replace the front section and move my way around to the outer, smaller end. This front section was done with only two pieces. I'm trying to keep my cuts where my bends are at the end of the patch to make it easier. I'm doing all my bends with channel locks and pliers; cutting open any tight gaps with my 3" cutter, as needed. 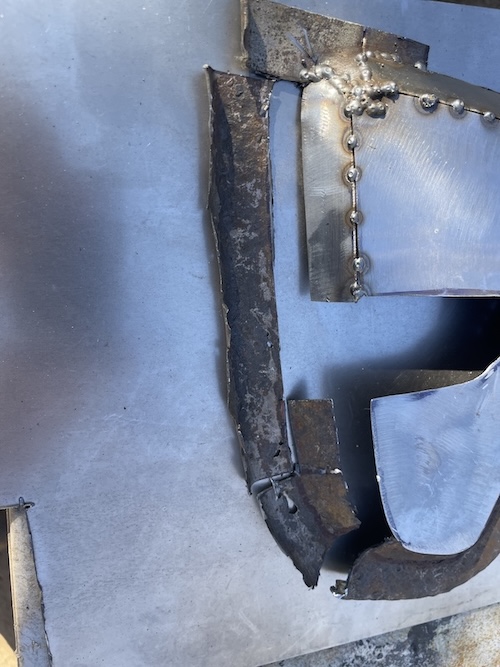 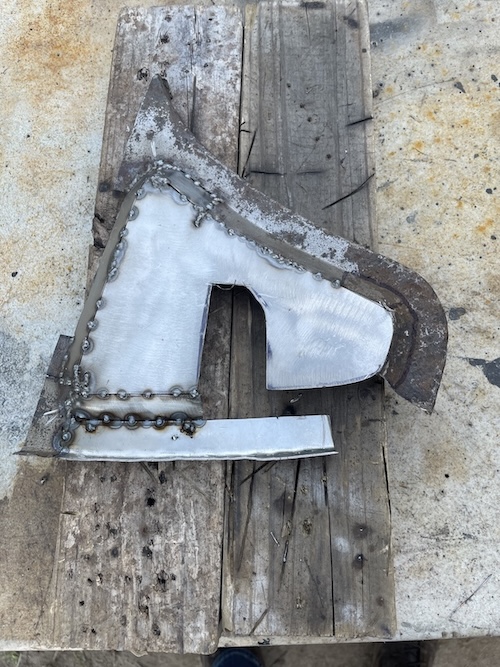 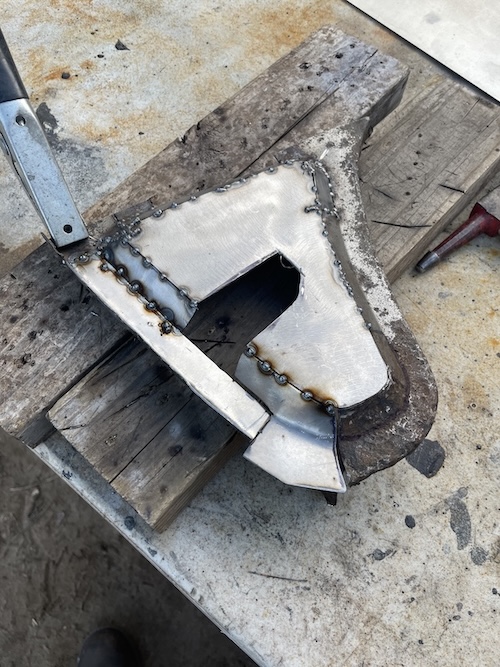 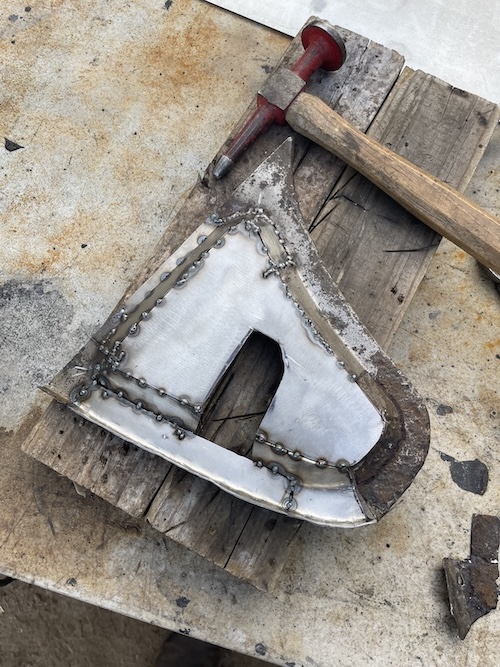 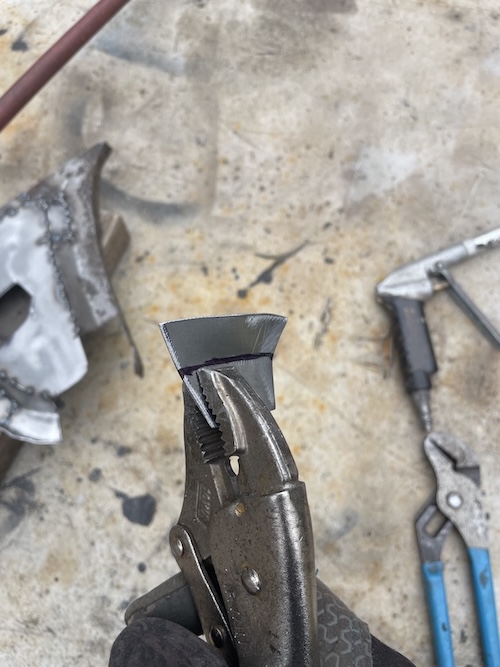 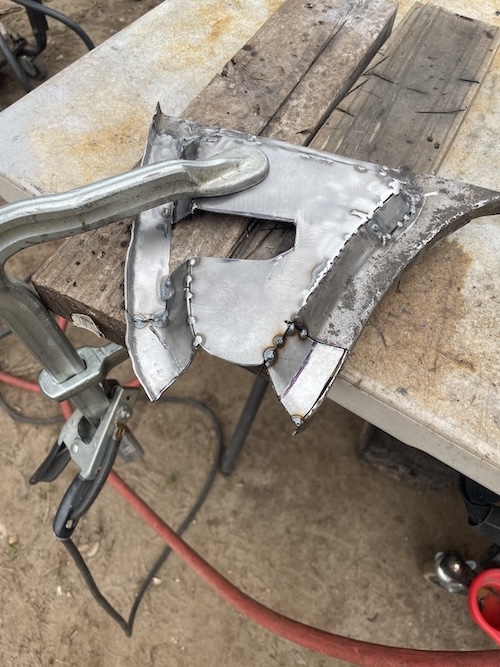 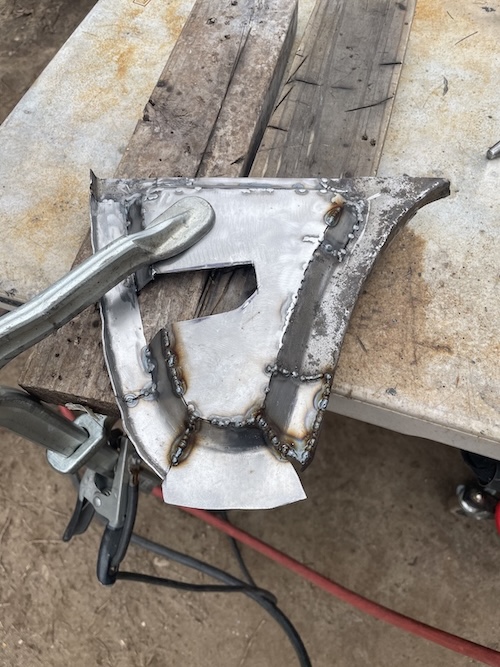 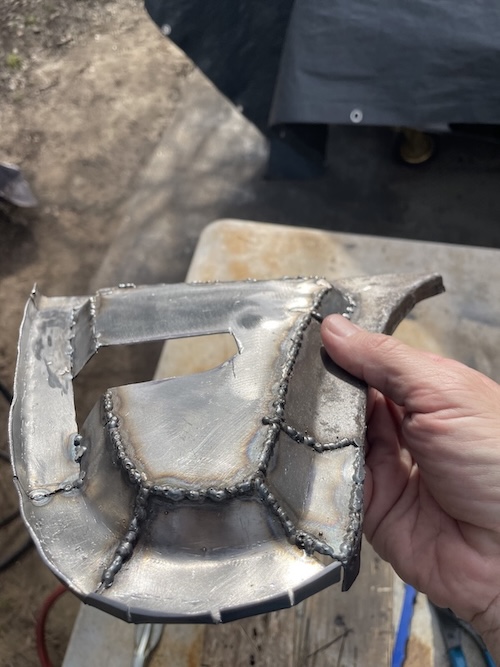 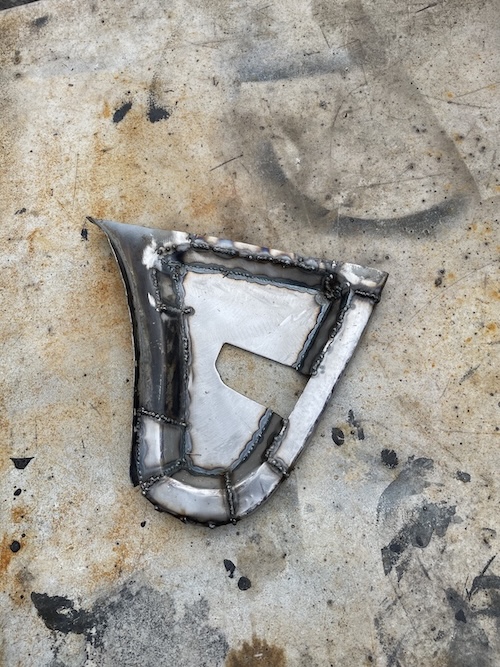 And... after a bit of grinding I'm done. It's not perfect but it should do the job. 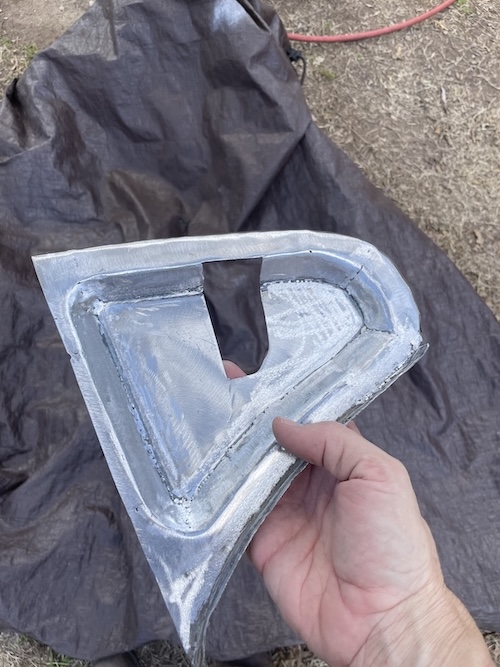 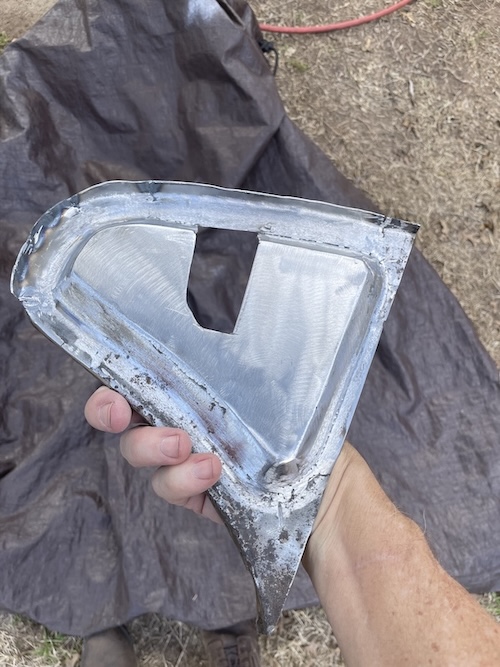 |
|
|
|
| friethmiller |
Mar 2 2025, 09:00 PM
Post
#403
|
|
Senior Member Group: Members Posts: 845 Joined: 10-February 19 From: Austin, TX Member No.: 22,863 Region Association: Southwest Region |
Front Trunk Floor Corner Repair: (3/2/2025):
Today was beautiful but really windy! I had to block the wind as best I could to get any kind of decent welds. (IMG:style_emoticons/default/welder.gif) First four photos show the repair to the trunk support. There was a small section that needed to be replaced at the bottom and another up front where it connects to the front cross panel. 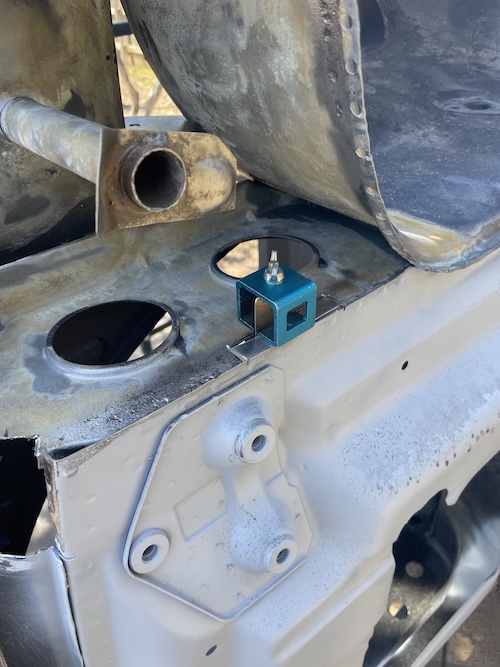 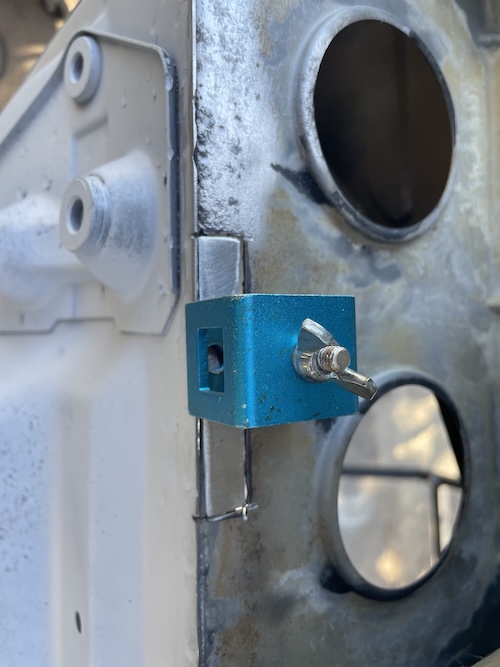 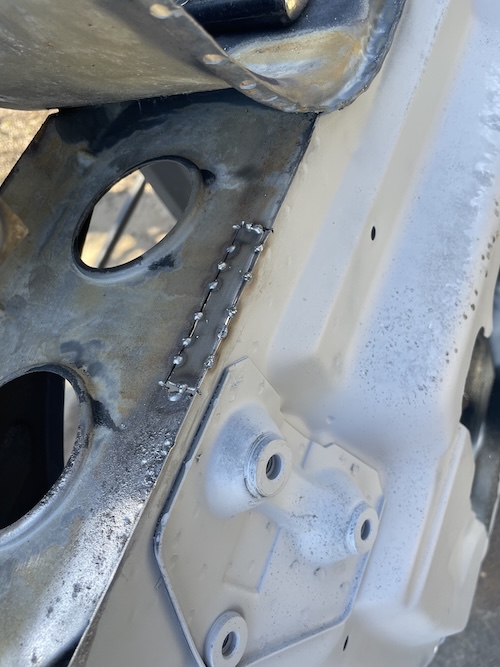 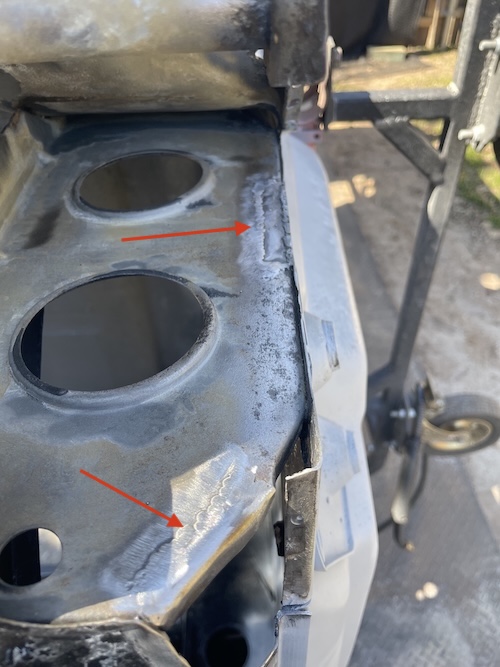 Next, I decided to do things a little differently and go ahead and address the inner fender [now] where it connects to the front corner of trunk floor. After a good review of the damage, I decided to drill out and weld a few spots in the middle section since the rest of the metal around it looked pretty good. Note the arrow pointing to the first hole with a copper backer in place. I worked top to bottom, welded each hole closed utilizing both sides of the metal. After that, I used the 3" cutting wheel to cut out two areas that needed to be replaced. This went fairly well. I left the bottom edges undone so I could have a little wiggle room when I got to welding in the floor corner. The second repair piece was much larger but the curve was pretty easy to replicate. Having the bottom undone here helped since I knew part of this lower section would need to be replaced. 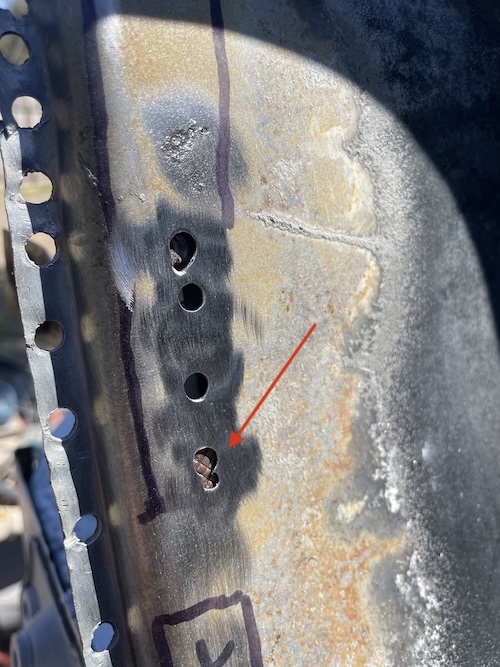 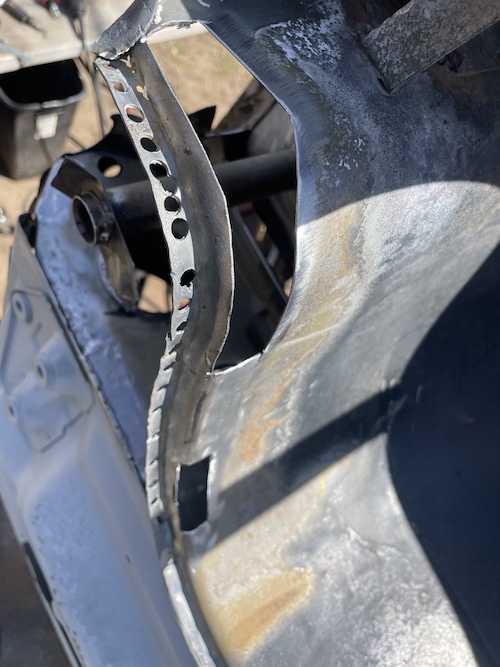 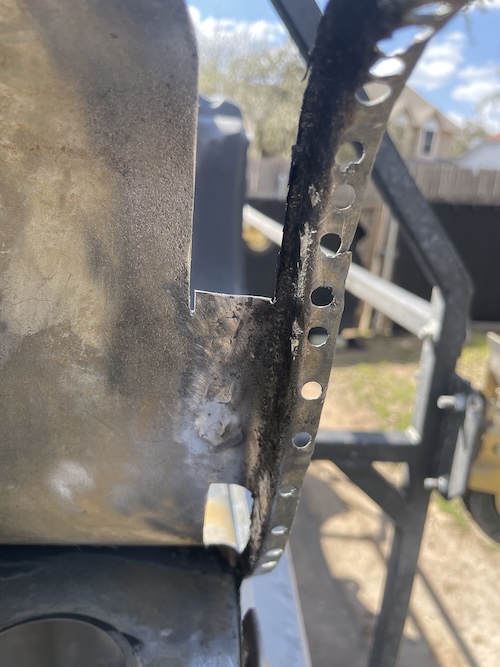 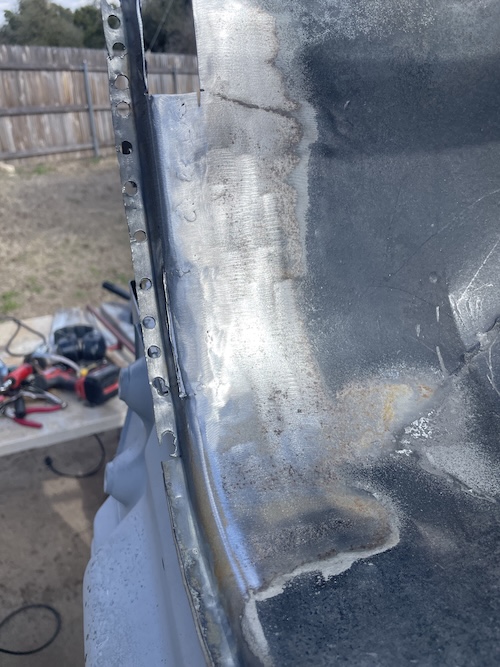  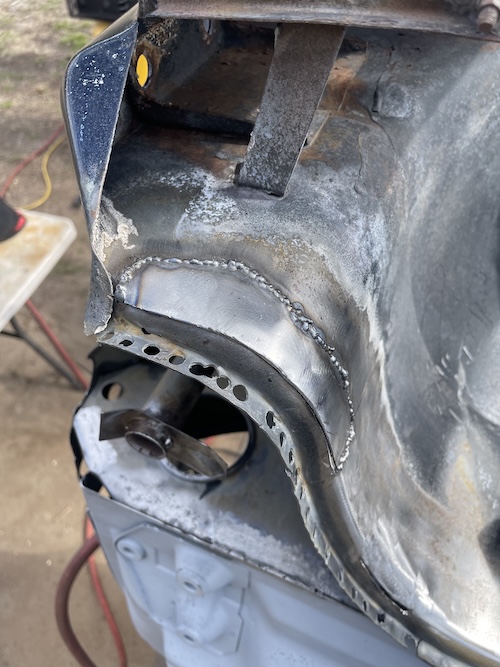 After all this was completed, I decide it was time to get out the repaired floor piece that I had prepared earlier. As I was lining things up, I noticed that my 90 degree bend at the end was 100% wrong! (IMG:style_emoticons/default/confused24.gif) Not sure what I was thinking but no worries. I just bent it back the other way and started the fitment process. Notice that I had already cut out the last remaining rot from the inner fender section. With the day slipping by I decided it would be better to get all the repairs done now and try to grind the welds on another day. Photos show the work to close up the inner fender and reattach the floor corner to the car. 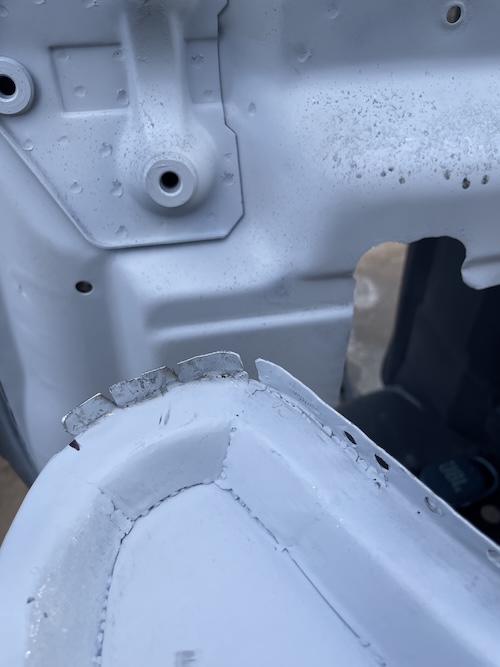 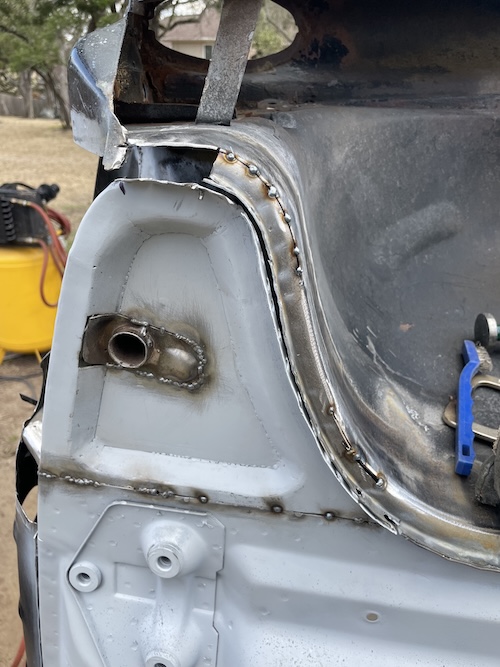 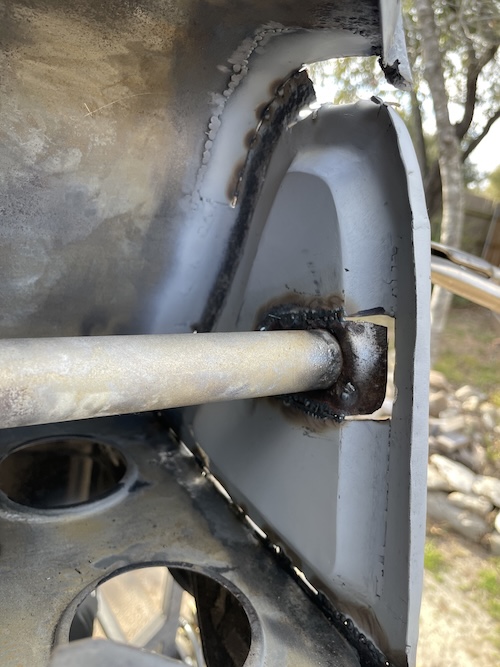 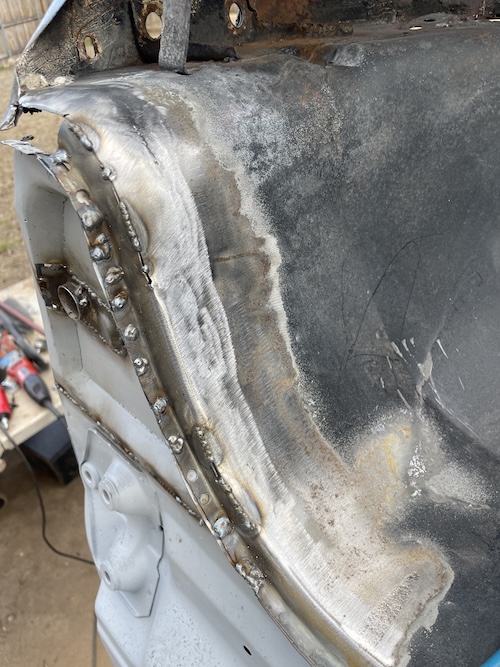  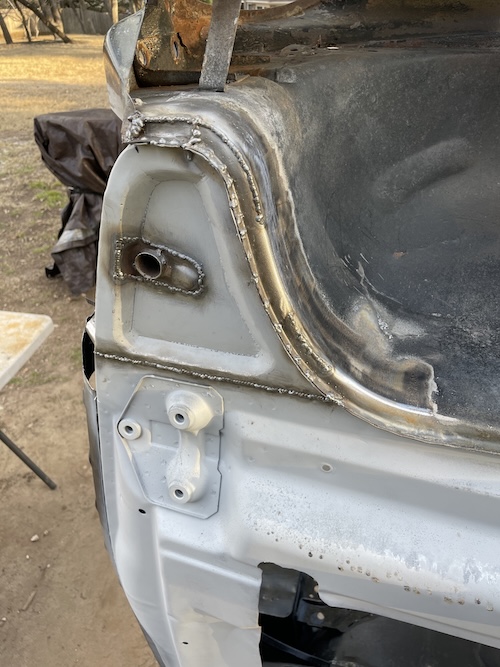 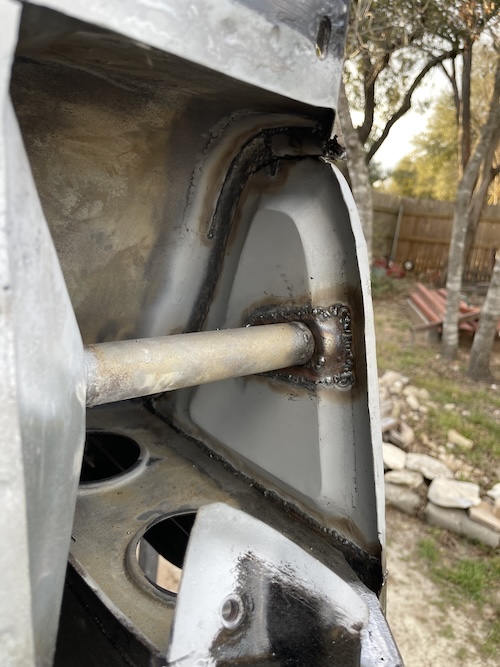 Final shots of the car up on the 90. After all the welds are ground down (later), I will begin repairing the bottom section of the front cross panel that I removed a week ago. 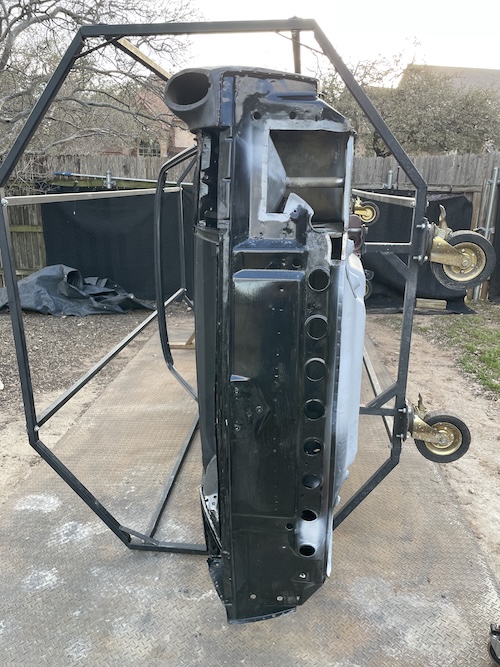  |
|
|
|
| friethmiller |
Mar 3 2025, 01:45 PM
Post
#404
|
|
Senior Member Group: Members Posts: 845 Joined: 10-February 19 From: Austin, TX Member No.: 22,863 Region Association: Southwest Region |
QUOTE(morehills @ Feb 19 2025, 04:59 PM) ...can you tell us what tools are the essential kit for all this fine work? 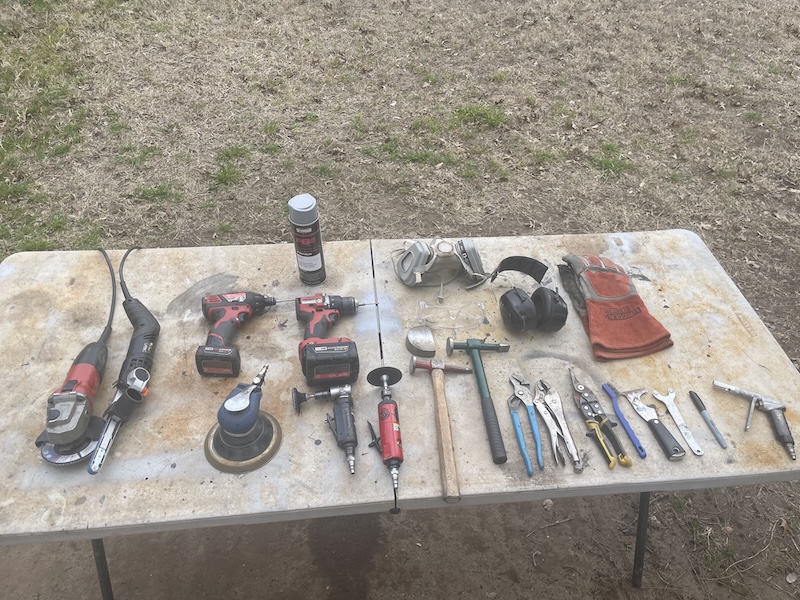 @morehills - Thought I'd post a picture of my standard layout for you. It's usually not this organized but this is what I typically pull out to get started. I do have a small air compressor, a Miller 211 mig welder, and a cheap Tractor Supply sandblaster. I also have a metal brake mounted on my work bench in the garage that I use from time to time. In the summer, I use a cooler full of refreshments (several Gatorades, a bunch of water, maybe a beer) (IMG:style_emoticons/default/beerchug.gif) |
|
|
|
| morehills |
Mar 3 2025, 02:44 PM
Post
#405
|
|
Member Group: Members Posts: 98 Joined: 2-March 23 From: Great Barrington, MA Member No.: 27,202 Region Association: North East States |
Wow, that's it? I feel like I did in my middle school gym locker room, totally inadequate. Great to see you can do all this fine work with such simple tools Fred. Thanks for sharing. John
|
|
|
|
| friethmiller |
Mar 3 2025, 03:02 PM
Post
#406
|
|
Senior Member Group: Members Posts: 845 Joined: 10-February 19 From: Austin, TX Member No.: 22,863 Region Association: Southwest Region |
QUOTE(morehills @ Mar 3 2025, 02:44 PM) Wow, that's it? I feel like I did in my middle school gym locker room, totally inadequate. Great to see you can do all this fine work with such simple tools Fred. Thanks for sharing. John You're funny! (IMG:style_emoticons/default/lol-2.gif) Simple tools for a simple guy! |
|
|
|
| 930cabman |
Mar 3 2025, 03:48 PM
Post
#407
|
|
Advanced Member Group: Members Posts: 4,044 Joined: 12-November 20 From: Buffalo Member No.: 24,877 Region Association: North East States |
QUOTE(friethmiller @ Mar 3 2025, 04:02 PM) QUOTE(morehills @ Mar 3 2025, 02:44 PM) Wow, that's it? I feel like I did in my middle school gym locker room, totally inadequate. Great to see you can do all this fine work with such simple tools Fred. Thanks for sharing. John You're funny! (IMG:style_emoticons/default/lol-2.gif) Simple tools for a simple guy! with great results, thanks for documenting your progress |
|
|
|
| Tim17 |
Mar 3 2025, 07:32 PM
Post
#408
|
|
Member Group: Members Posts: 59 Joined: 3-December 23 From: Newburyport, Massachusetts Member No.: 27,769 Region Association: North East States |
Amazing work Fred!
|
|
|
|
| KELTY360 |
Mar 3 2025, 09:49 PM
Post
#409
|
|
914 Neferati Group: Members Posts: 5,121 Joined: 31-December 05 From: Pt. Townsend, WA Member No.: 5,344 Region Association: Pacific Northwest |
QUOTE(friethmiller @ Mar 3 2025, 11:45 AM) QUOTE(morehills @ Feb 19 2025, 04:59 PM) ...can you tell us what tools are the essential kit for all this fine work? @morehills - Thought I'd post a picture of my standard layout for you. It's usually not this organized but this is what I typically pull out to get started. I do have a small air compressor, a Miller 211 mig welder, and a cheap Tractor Supply sandblaster. I also have a metal brake mounted on my work bench in the garage that I use from time to time. In the summer, I use a cooler full of refreshments (several Gatorades, a bunch of water, maybe a beer) (IMG:style_emoticons/default/beerchug.gif) Don’t forget that great collection of vise grips and clamps for butt welds. You’re killing it without fancy technology! |
|
|
|
| friethmiller |
Mar 4 2025, 09:39 AM
Post
#410
|
|
Senior Member Group: Members Posts: 845 Joined: 10-February 19 From: Austin, TX Member No.: 22,863 Region Association: Southwest Region |
QUOTE(930cabman @ Mar 3 2025, 03:48 PM) with great results, thanks for documenting your progress QUOTE(Tim17 @ Mar 3 2025, 07:32 PM) Amazing work Fred! QUOTE(KELTY360 @ Mar 3 2025, 09:49 PM) Don’t forget that great collection of vise grips and clamps for butt welds. You’re killing it without fancy technology! Thanks guys! Really looking forward to buttoning this corner up so I can remove the driver side fender. This will be the last area of repair on the [main] body. (IMG:style_emoticons/default/tooth.gif) |
|
|
|
| technicalninja |
Mar 4 2025, 09:47 AM
Post
#411
|
|
Advanced Member Group: Members Posts: 2,523 Joined: 31-January 23 From: Granbury Texas Member No.: 27,135 Region Association: Southwest Region |
I'm surprised to not see any panel flanging tools...
Here's a powered variety: I have not used a powered one https://www.harborfreight.com/professional-...ASABEgIaAfD_BwE Manual version: I've used the crap out of mine! Lots of cheaper versions available. https://www.eastwood.com/ew-panel-flanger.h...google&wv=4 |
|
|
|
| friethmiller |
Mar 4 2025, 10:35 AM
Post
#412
|
|
Senior Member Group: Members Posts: 845 Joined: 10-February 19 From: Austin, TX Member No.: 22,863 Region Association: Southwest Region |
QUOTE(technicalninja @ Mar 4 2025, 09:47 AM) I'm surprised to not see any panel flanging tools... Here's a powered variety: I have not used a powered one https://www.harborfreight.com/professional-...ASABEgIaAfD_BwE Manual version: I've used the crap out of mine! Lots of cheaper versions available. https://www.eastwood.com/ew-panel-flanger.h...google&wv=4 Yeah, I have a pneumatic flanger with the hole punch on the other side but I don't like it. Mine has lost its "umpf" over the years. It can't do either job very well on anything thicker than 22 gauge. Besides, I typically prefer to do butt welds. You got me thinking about a tool. (IMG:style_emoticons/default/idea.gif) I've got an idea! |
|
|
|
| friethmiller |
Mar 4 2025, 08:40 PM
Post
#413
|
|
Senior Member Group: Members Posts: 845 Joined: 10-February 19 From: Austin, TX Member No.: 22,863 Region Association: Southwest Region |
Front Trunk Floor Corner Repair - Lunchtime/Evening Work: (3/4/2025):
Grinding my welds from this weekend and sealing up the area under the light bucket. Next step will be closing everything up with the piece I cut out from the front cross panel. This metal has a bit of rust damage at the bottom so it'll need a bit of repair, as well. 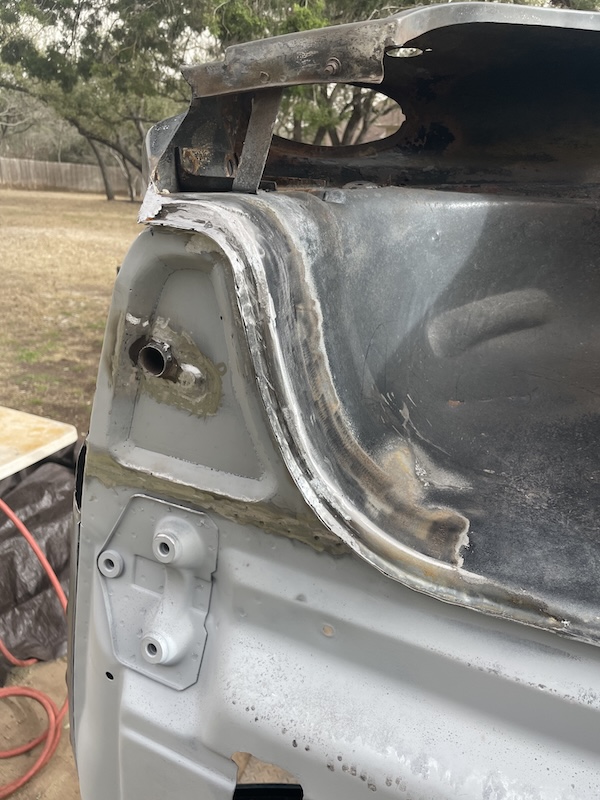 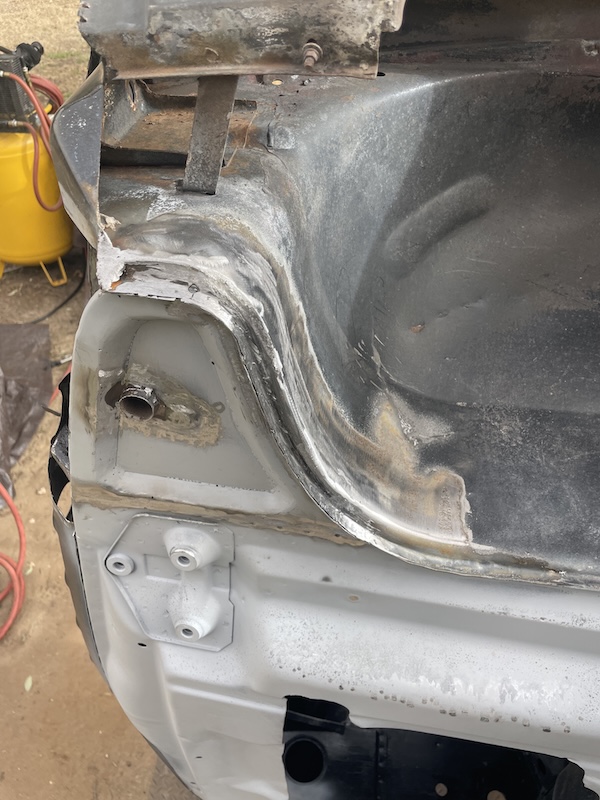 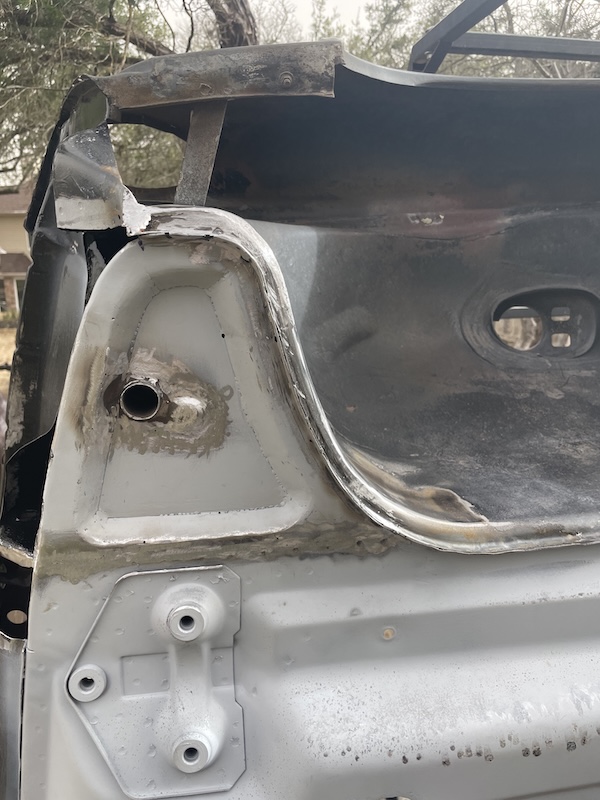 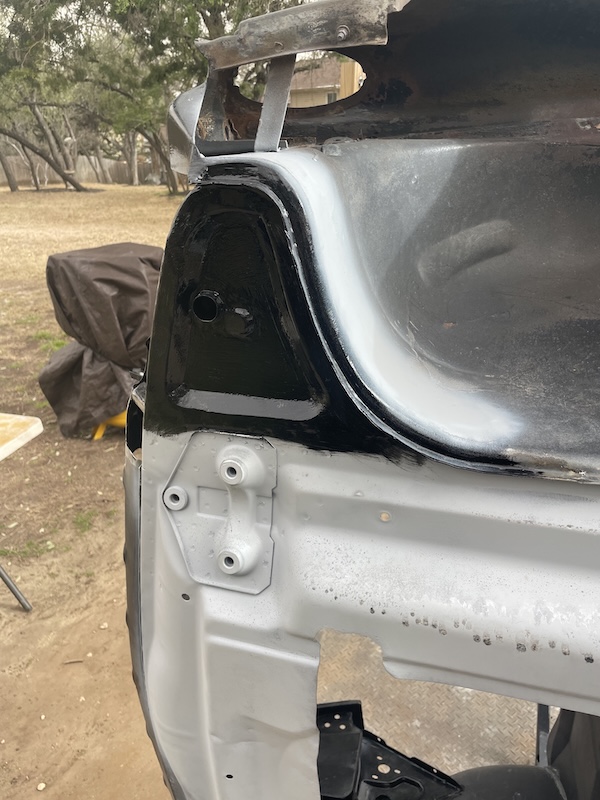 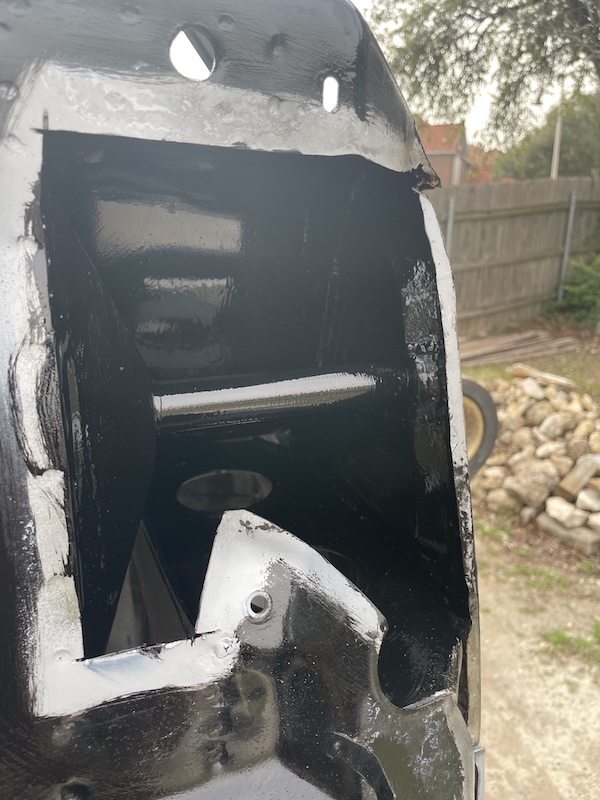 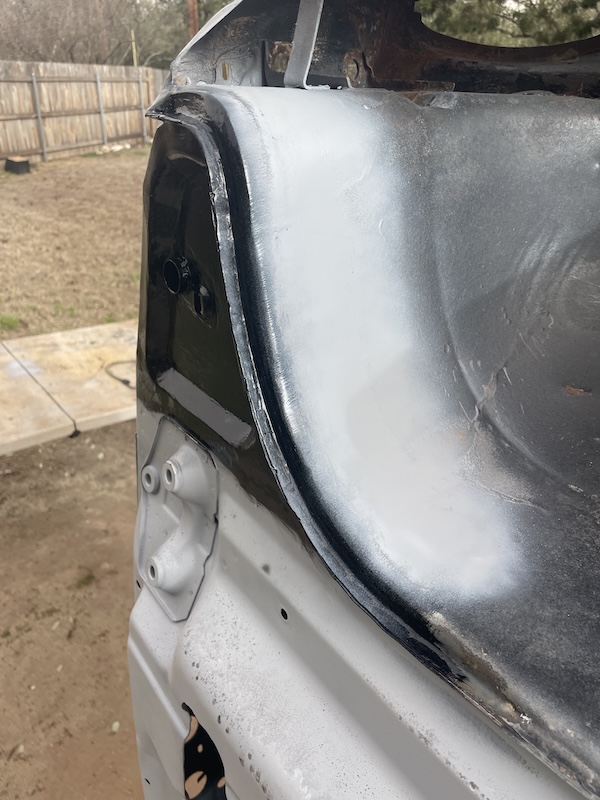 |
|
|
|
| Artfrombama |
Mar 5 2025, 11:30 AM
Post
#414
|
|
Member Group: Members Posts: 271 Joined: 21-January 24 From: Alabama Member No.: 27,870 Region Association: South East States |
@friethmiller , what is your "recipe" for sealing up repaired panels? POR15? Epoxy primer?
Envious of your workmanship and tenacity. |
|
|
|
| friethmiller |
Mar 5 2025, 02:06 PM
Post
#415
|
|
Senior Member Group: Members Posts: 845 Joined: 10-February 19 From: Austin, TX Member No.: 22,863 Region Association: Southwest Region |
QUOTE(Artfrombama @ Mar 5 2025, 11:30 AM) @friethmiller , what is your "recipe" for sealing up repaired panels? POR15? Epoxy primer? Envious of your workmanship and tenacity. Depends. (IMG:style_emoticons/default/rolleyes.gif) I prefer to use my gun and spray a good quality 2K epoxy. It's the cheapest/best way to go. If it's something hard to reach like under the light bucket, I'll seal it with a brush using RustBullet or the like. I won't buy the standard POR-15 anymore. Though, I must admit to having good results with the high-temp POR-15 lately. However, this is typically only used in places like the muffler heat shield or firewall. The problem I have out in the backyard is the elements. I can't wait around to prepare a large area to spray 2K with the compressor. It'll take me 3 weekends to repair one corner of the car and everything will be rusted by then. I have to immediately primer or paint any exposed metal. Using the brush-on epoxy is great for all the cracks too. If rain water does gets in (and it does occasionally), I don't need rust forming in an area that's super hard to dry out. BTW, after I get this driver side front done, my plan is to undercoat/paint the bottom, get it back on a restored suspension/tires and then start the restoration of the hoods & doors. |
|
|
|
| friethmiller |
Mar 8 2025, 08:36 PM
Post
#416
|
|
Senior Member Group: Members Posts: 845 Joined: 10-February 19 From: Austin, TX Member No.: 22,863 Region Association: Southwest Region |
Front Trunk Floor Corner Repair - the final push: (3/8/2025):
Despite the windy conditions, I decided to get going on finishing up this front-end. First up was cutting the rust out from the bottom of the piece of metal I removed to gain access below the light bucket. The goal here was getting the "still" good metal back into the car. Well, I didn't do a very good job blocking the wind and ended up with several pin holes. These small holes were filled later. 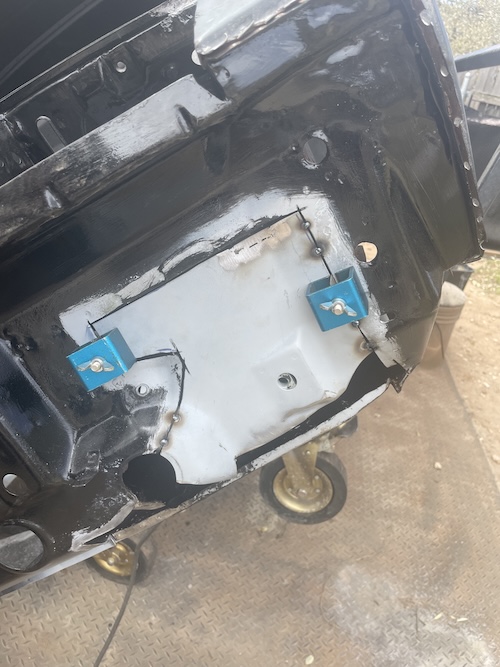 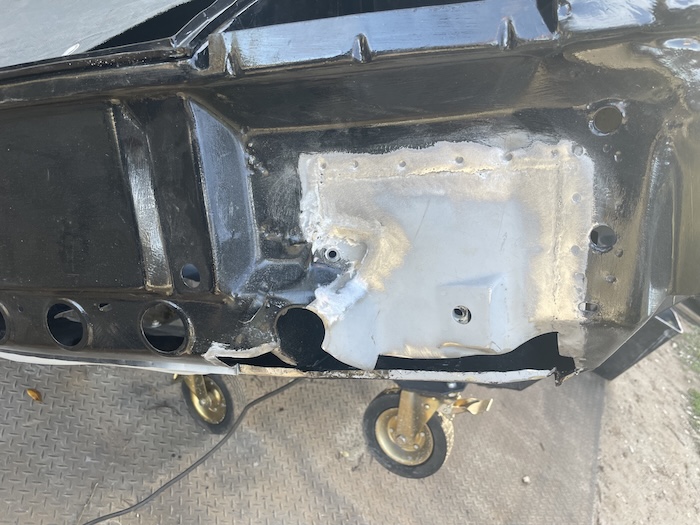 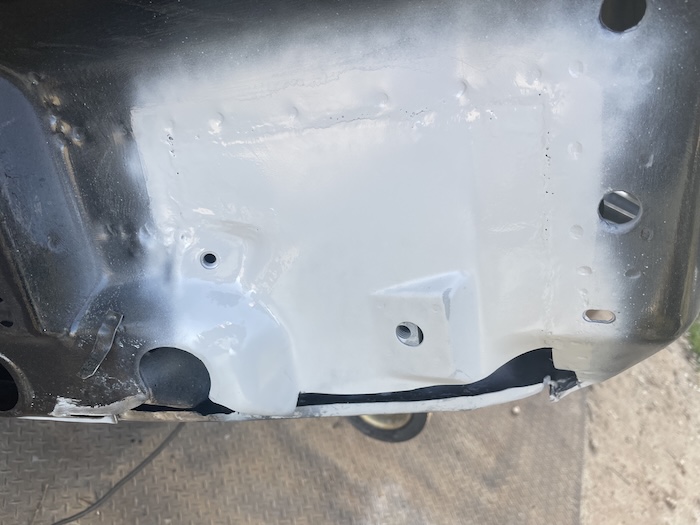 With that piece back in place, I proceeded with patching the bottom of the panel. Working left to right, I took about 2 hours to cut and form the patch around the far right hole. Again, channel locks and pliers did all the bending here. I enjoyed the challenge of trying to mimic the bevel around the hole. Not perfect by any means but I think it looks the part. 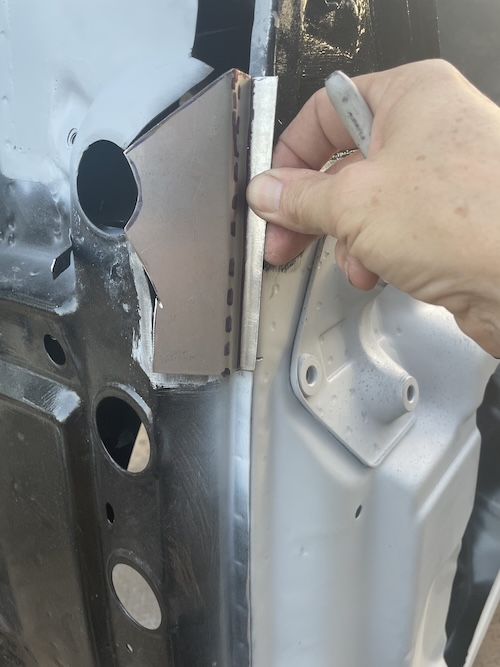 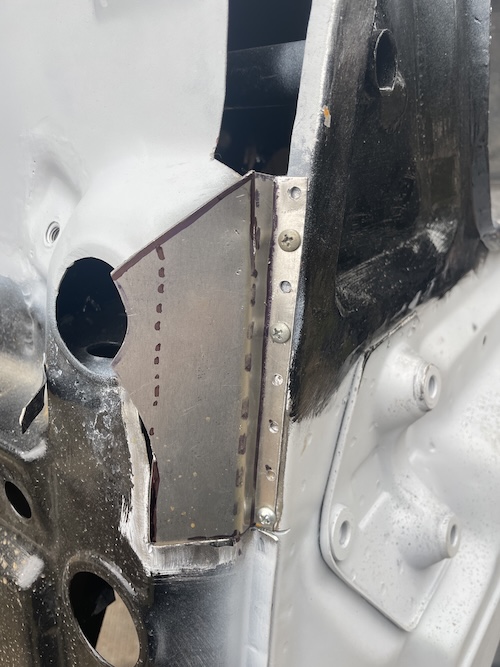 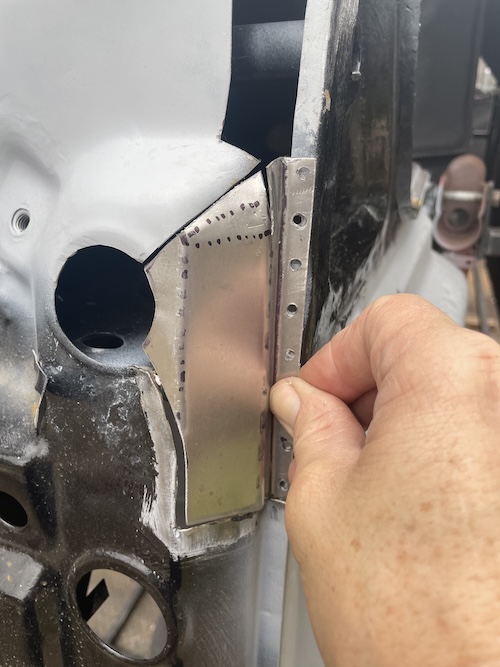 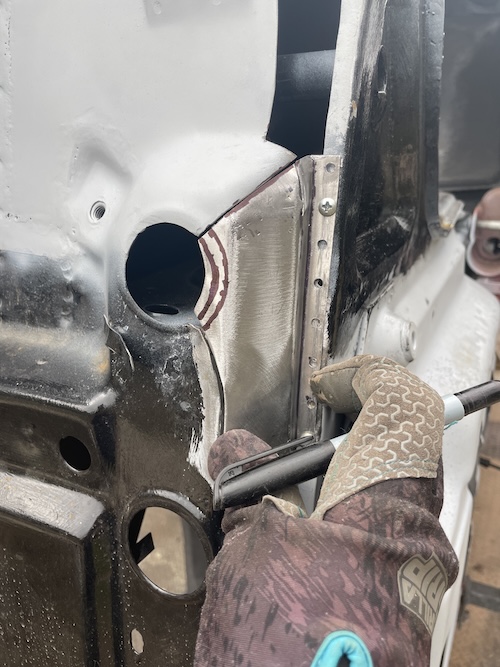 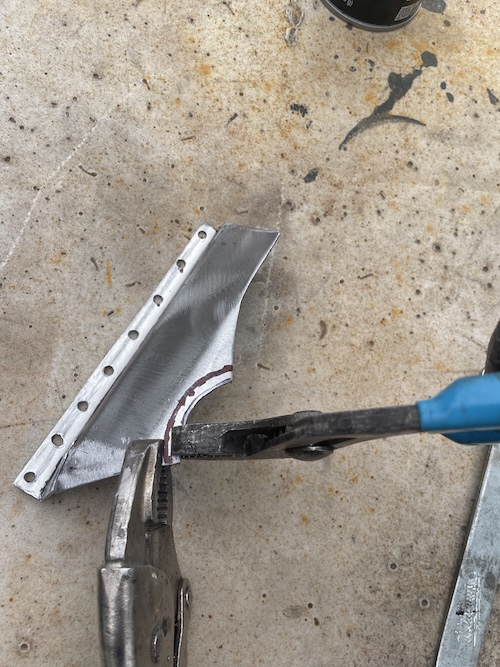 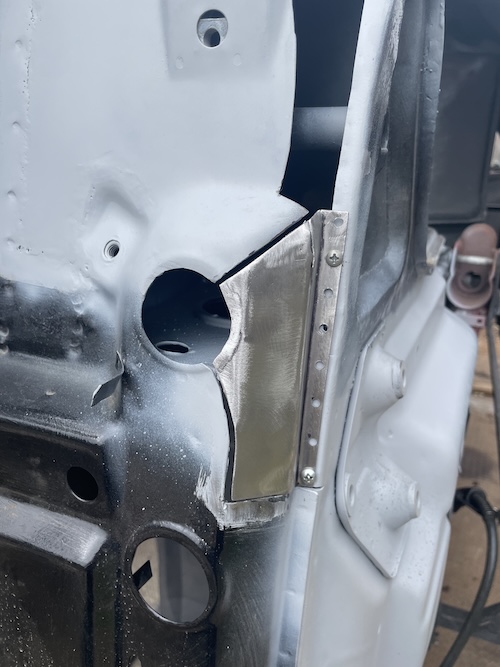 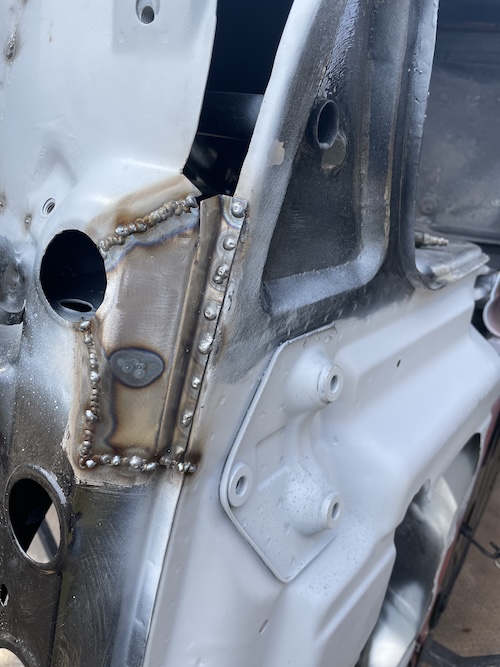 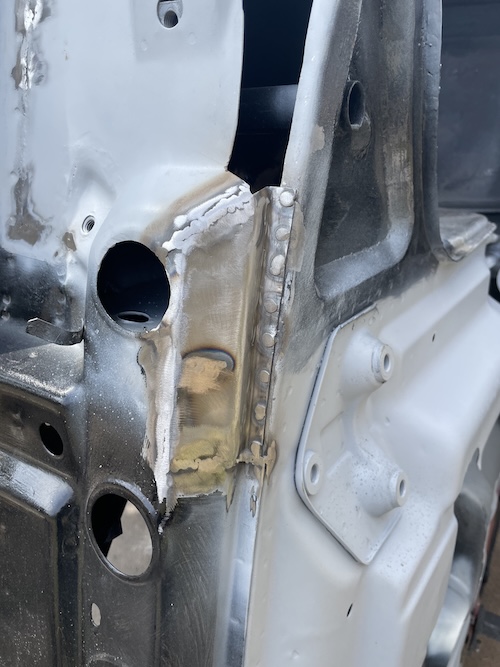 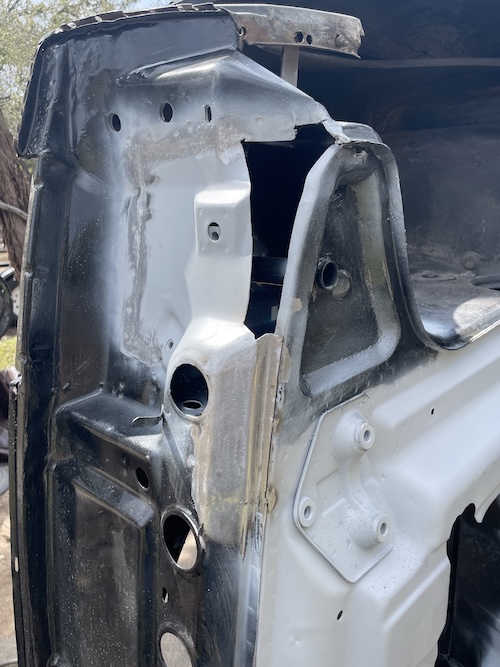 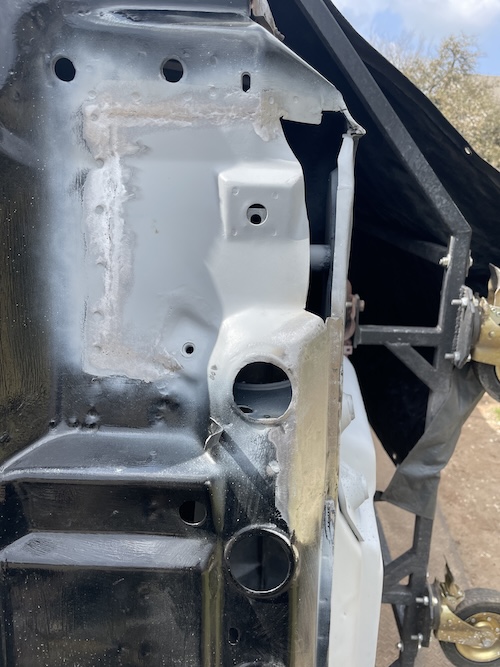 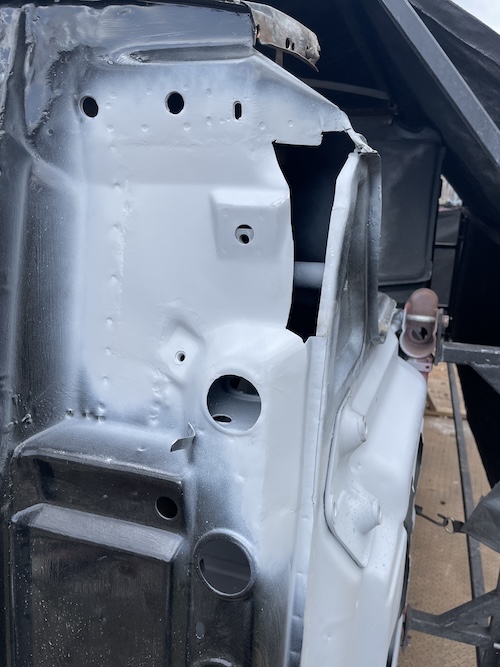 The next patch was a smaller piece but none the less tricky to form. Once in place, I decided to continue on and install a bottom piece that connected to the edge of the inner fender. 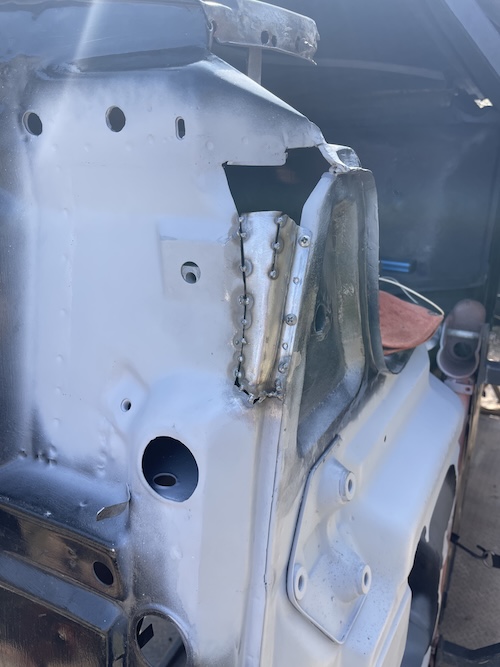 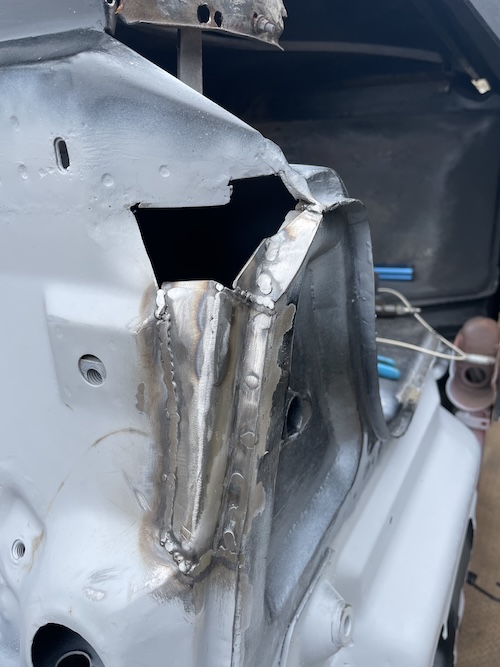 The final patch was completely undersized but I decided to push on and just get it done! (IMG:style_emoticons/default/wacko.gif) The following photos show how I welded the patch in on the right side and tacked it into place with help from a screw driver, pliers, and a body hammer. I would not recommend doing what I did here. Welding these wide gaps is never recommended. (IMG:style_emoticons/default/screwy.gif) Used a 3" cutting wheel to help knock down all these ugly welds. (IMG:style_emoticons/default/barf.gif) This tool is extremely useful in getting to welds that other tools can't get to. 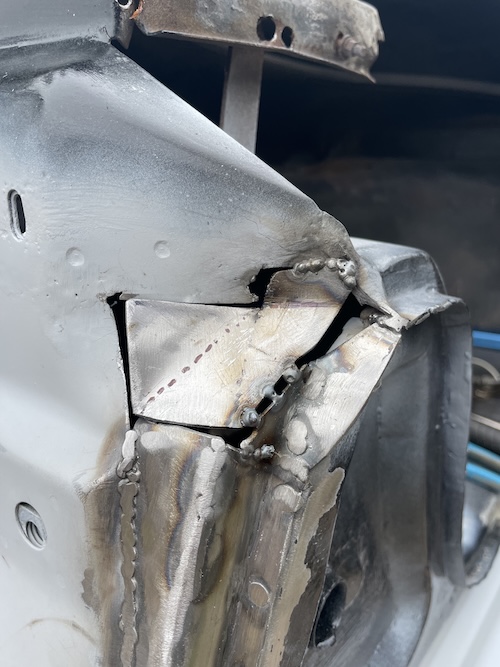 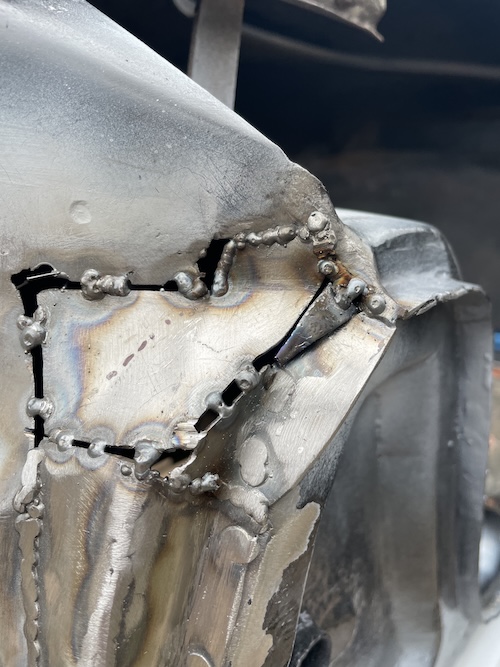 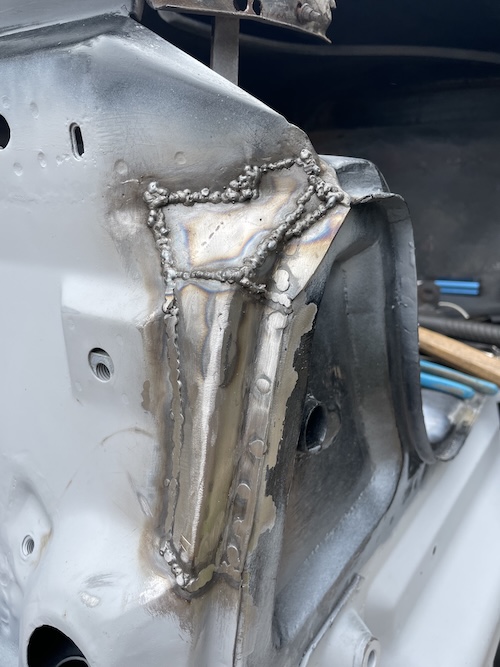 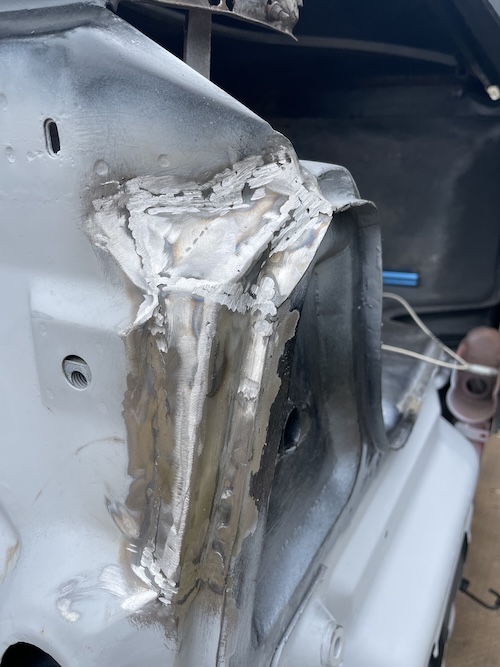 Final photos shows the results of the finger sander and a quick shot with the orbital sander to blend everything in. Sprayed it all down with primer and called it a day. 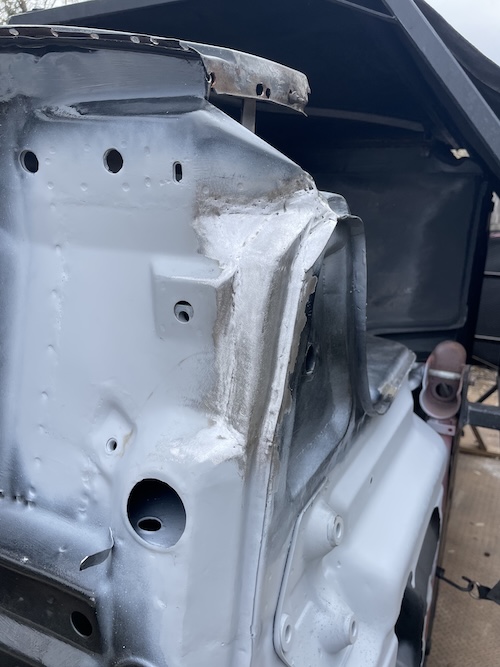 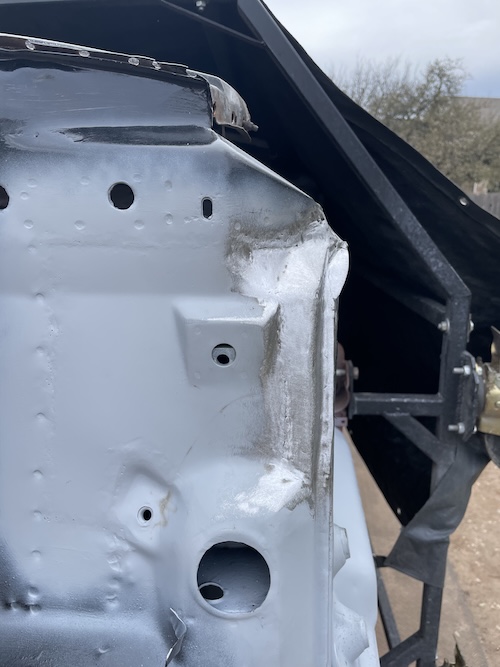 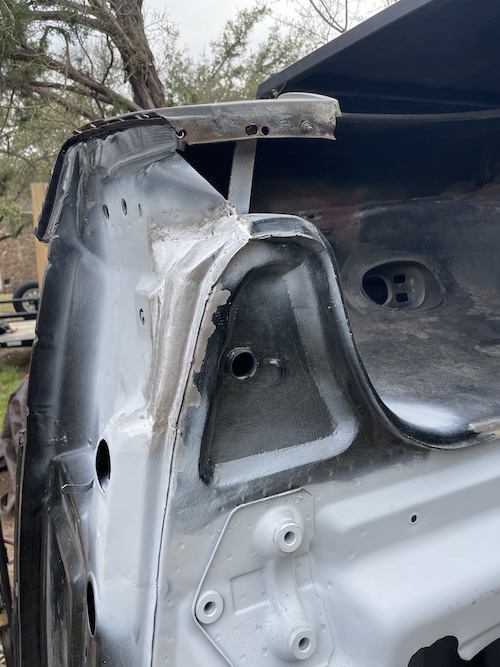 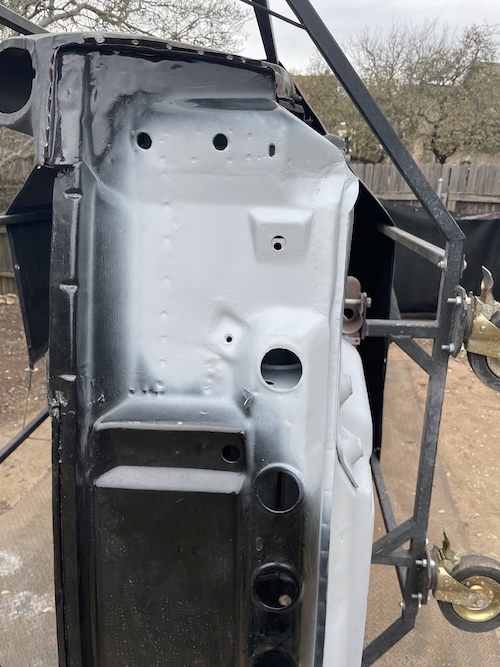 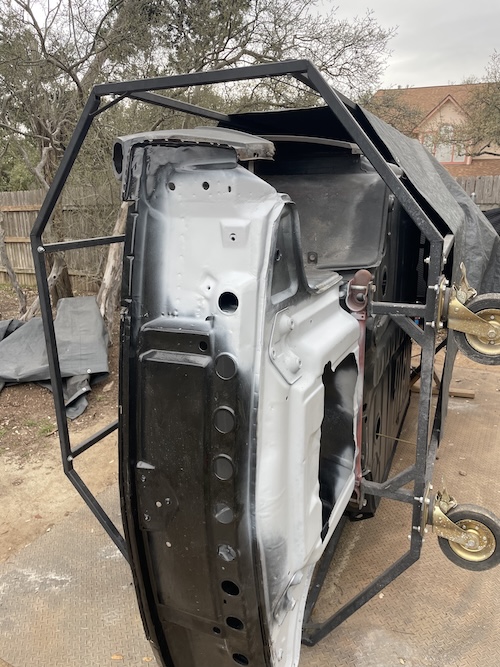 |
|
|
|
| bkrantz |
Mar 8 2025, 09:28 PM
Post
#417
|
|
914 Guru Group: Members Posts: 8,341 Joined: 3-August 19 From: SW Colorado Member No.: 23,343 Region Association: Rocky Mountains |
Fred (and anyone), a suggestion (that might be too late): since we like to use the front donuts for jacking and/or jack stands, you might consider doubling the sheet metal with a patch on the inside of the floor. Otherwise, it is easy to cave the floor in (upwards) a bit with aggressive jacking.
|
|
|
|
| friethmiller |
Mar 8 2025, 10:07 PM
Post
#418
|
|
Senior Member Group: Members Posts: 845 Joined: 10-February 19 From: Austin, TX Member No.: 22,863 Region Association: Southwest Region |
QUOTE(bkrantz @ Mar 8 2025, 09:28 PM) Fred (and anyone), a suggestion (that might be too late): since we like to use the front donuts for jacking and/or jack stands, you might consider doubling the sheet metal with a patch on the inside of the floor. Otherwise, it is easy to cave the floor in (upwards) a bit with aggressive jacking. Great reminder, Bob! I still have to weld in the carpet posts on the floor. Great time to do something like that. Any pics of this modification would be appreciated! |
|
|
|
| friethmiller |
Mar 9 2025, 06:23 PM
Post
#419
|
|
Senior Member Group: Members Posts: 845 Joined: 10-February 19 From: Austin, TX Member No.: 22,863 Region Association: Southwest Region |
Driver Side Fender Removal: (3/9/2025):
I'll spare everyone the details of the fender removal. Of course, there was a lot of drilling, prying, crying and cussing (IMG:style_emoticons/default/hissyfit.gif) Here's the end result. Took some pics of the initial clean-up and some areas of damage that will need to be addressed. Not pictured here is the rust holes on the A-pillar. The other side had similar damage but it was lower and less severe. More on that later. Cheers! (IMG:style_emoticons/default/beerchug.gif) 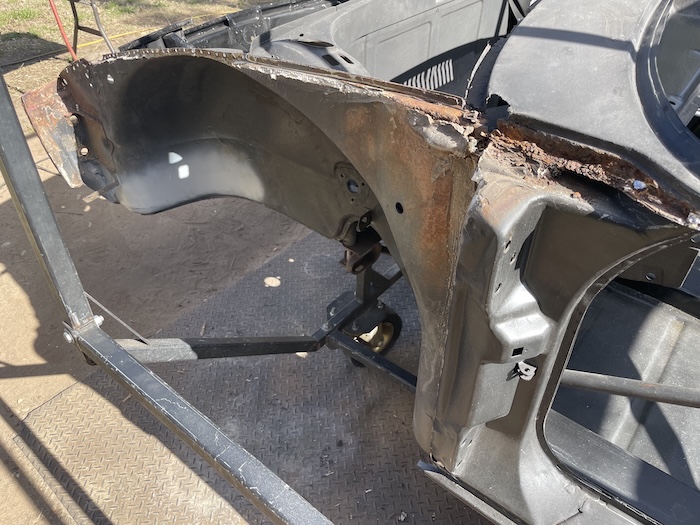 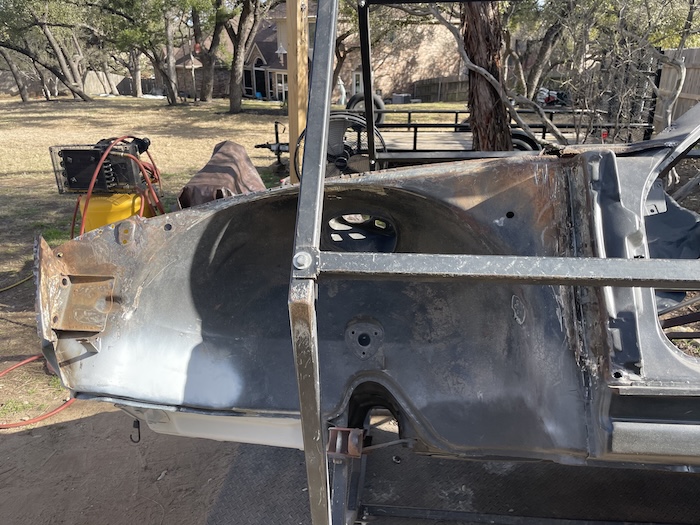 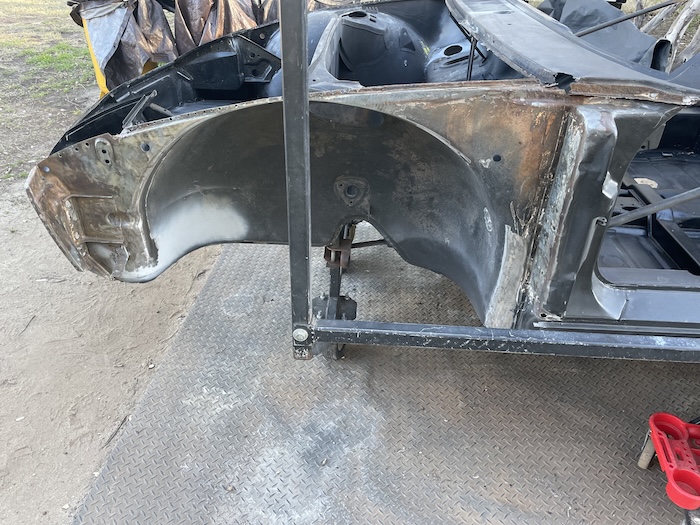 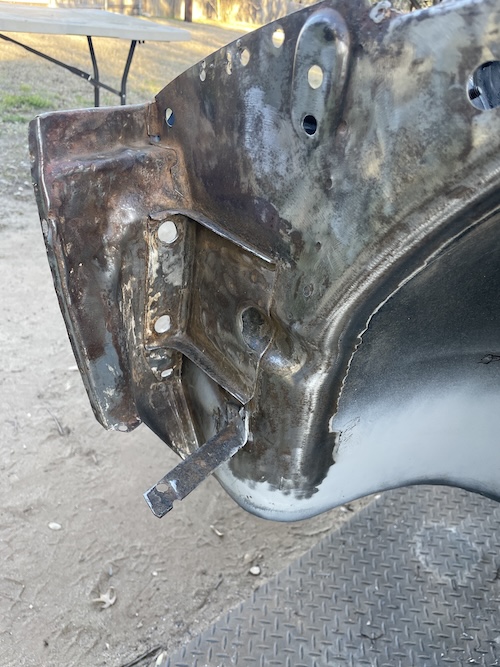 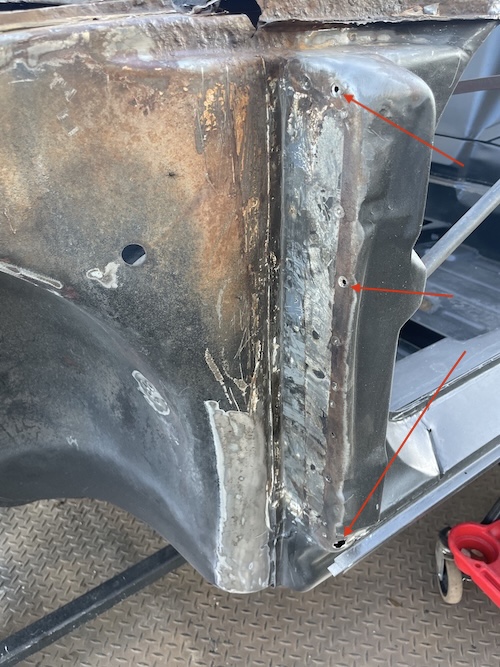 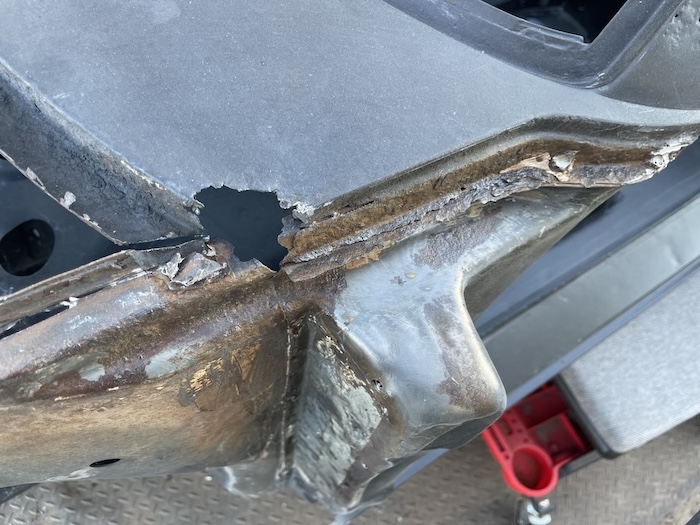 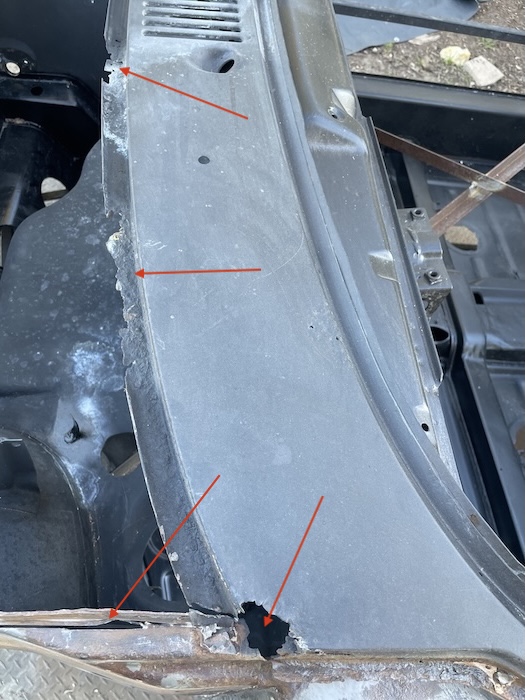  |
|
|
|
| bkrantz |
Mar 9 2025, 08:57 PM
Post
#420
|
|
914 Guru Group: Members Posts: 8,341 Joined: 3-August 19 From: SW Colorado Member No.: 23,343 Region Association: Rocky Mountains |
QUOTE(friethmiller @ Mar 8 2025, 09:07 PM) QUOTE(bkrantz @ Mar 8 2025, 09:28 PM) Fred (and anyone), a suggestion (that might be too late): since we like to use the front donuts for jacking and/or jack stands, you might consider doubling the sheet metal with a patch on the inside of the floor. Otherwise, it is easy to cave the floor in (upwards) a bit with aggressive jacking. Great reminder, Bob! I still have to weld in the carpet posts on the floor. Great time to do something like that. Any pics of this modification would be appreciated! Here's what I did. I think this is minimal. (before spot welding) Attached thumbnail(s) 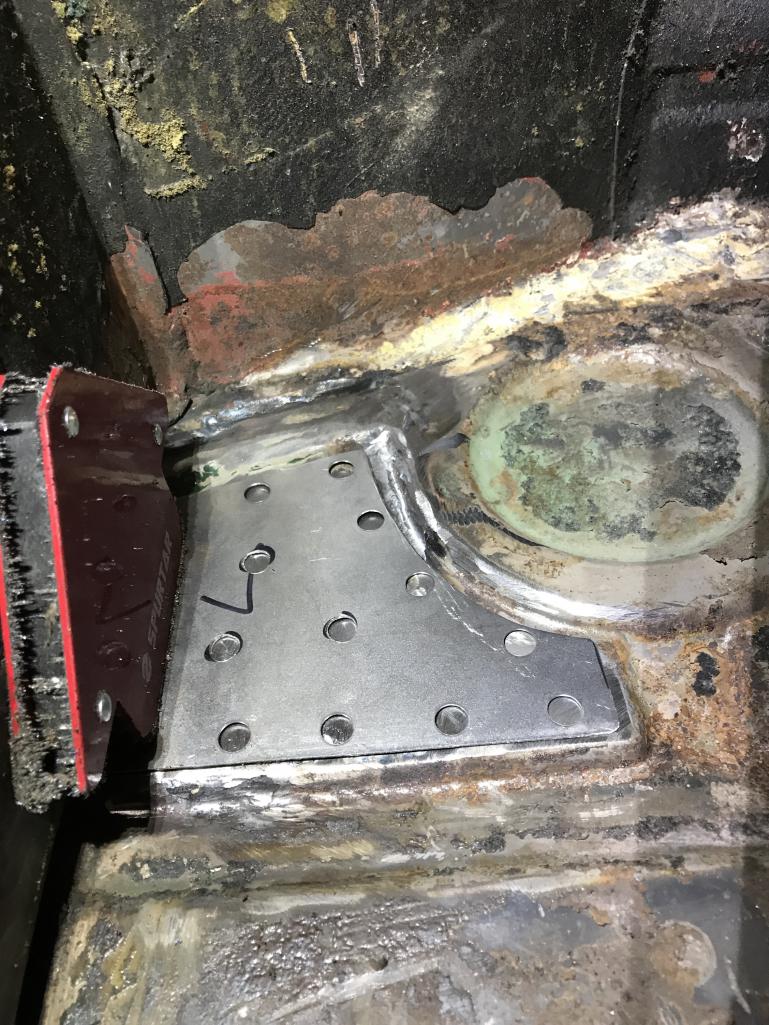
|
|
|
|
|
1 User(s) are reading this topic (1 Guests and 0 Anonymous Users)
0 Members:

|
Lo-Fi Version | Time is now: 19th April 2025 - 02:52 PM |
Invision Power Board
v9.1.4 © 2025 IPS, Inc.