|
|
|
Porsche, and the Porsche crest are registered trademarks of Dr. Ing. h.c. F. Porsche AG.
This site is not affiliated with Porsche in any way. Its only purpose is to provide an online forum for car enthusiasts. All other trademarks are property of their respective owners. |
|
|

  |

| blabla914 |
 Oct 14 2024, 06:22 PM Oct 14 2024, 06:22 PM
Post
#21
|
|
I like primer  Group: Members Posts: 330 Joined: 1-March 04 From: Connecticut Member No.: 1,740 Region Association: None |
Tom,
I generally put my side tins on after I'm in, however I don't have twin plugs or heat exchangers. With a 1.4" drive flex socket and a powered ratchet it's a piece of cake for me to pull them off or put them on engine in. the idea of leaving them loose is a good one. If I had your setup would prob try that. I like to put in carbs and intakes off. As is mentioned above the rear set 1,2,3 carb is pretty tight to the rear trunk. It's also a lot easier to double check placement from the top without the carbs on. I use the 10mm M8 nuts on all my carbs and intakes. I can get to all of them with my 1/4" drive flex socket and powered ratchet except inboard number 5. that takes some fiddling, but it's just one bolt. not too bad. good luck. Kelly |
   |

 
|
| targa72e |
Oct 14 2024, 10:13 PM
Post
#22
|
|
Member Group: Members Posts: 287 Joined: 11-September 16 From: colorado Member No.: 20,392 Region Association: None |
I think different mounts can make the install different. I have the mad dog mounts like you have. I have tried a couple ways. First time with tins on they keep catching on the trailing arm bolts. With the mad dog mounts the front of engine has to go up before its all the way forward, it has to be angled which places the whole assembly spaced a little rearward which makes the tin more likely to catch.
I ended up modifying the front tin by cutting it in half and making a notch for the two halfs to fit together like on 911 rear tin. This way I could put it on easy after engine is installed. Also makes it easy to get aligned with side tin. I found it necessary to leave the two small bolts on each mount loose so that the mounts could move to make it easier to get the long bolts aligned. With out the front tin of you can reach up and get a wrench on the top of the bolts easily. Once the engine is in I attach the side tin and front tin. I have found this to be easiest for me. I use allen bolts on side tin as the space at the narrow end of tin is tight. good luck with install. john |
|
|
|
| gereed75 |
Oct 15 2024, 08:07 AM
Post
#23
|
|
Senior Member Group: Members Posts: 1,342 Joined: 19-March 13 From: Pittsburgh PA Member No.: 15,674 Region Association: North East States |
Actually on the stock six mount the retention bolt screws up into the mount from the bottom. There is a sort of a nut plate on the firewall mount that receives the bolt. This is where I screw a 10” long threaded rod into the nut plate to guide the engine up into the mount from below. Once seated into position I unscrew the rod and replace it with the bolt. That way you don’t have to wiggle under the front tin to hold a top bolt while screwing a nut on the bottom.
No reason that the mad dog mount could be modded to something similar. weld the nuts to the top washers. weld a tie bar across the washers connecting them. The washer/ nut plates would then not turn as you tighten the bolts from the bottom. Voila |
|
|
|
| mlindner |
Oct 15 2024, 11:19 AM
Post
#24
|
|
Senior Member Group: Members Posts: 1,655 Joined: 11-November 11 From: Merrimac, WI Member No.: 13,770 Region Association: Upper MidWest |
My engine install was with a scissor lift. Had to build a box for the engine/trans to set on. rolled under car and lowered the lift. Worked really well but also had problems with the passenger side engine tin. Best, Mark
   |
|
|
|
| rgalla9146 |
Oct 15 2024, 11:23 AM
Post
#25
|
|
Advanced Member Group: Members Posts: 4,736 Joined: 23-November 05 From: Paramus NJ Member No.: 5,176 Region Association: None |
A 911 engine can be removed and installed one handed and blindfolded on a floor jack.
A 914 6 is always a challenge. One tool that I've found to be very helpful especially with a stock 914 6 front mount is a long drift pin. Might be helpful with your front mount as well Tom Attached thumbnail(s) 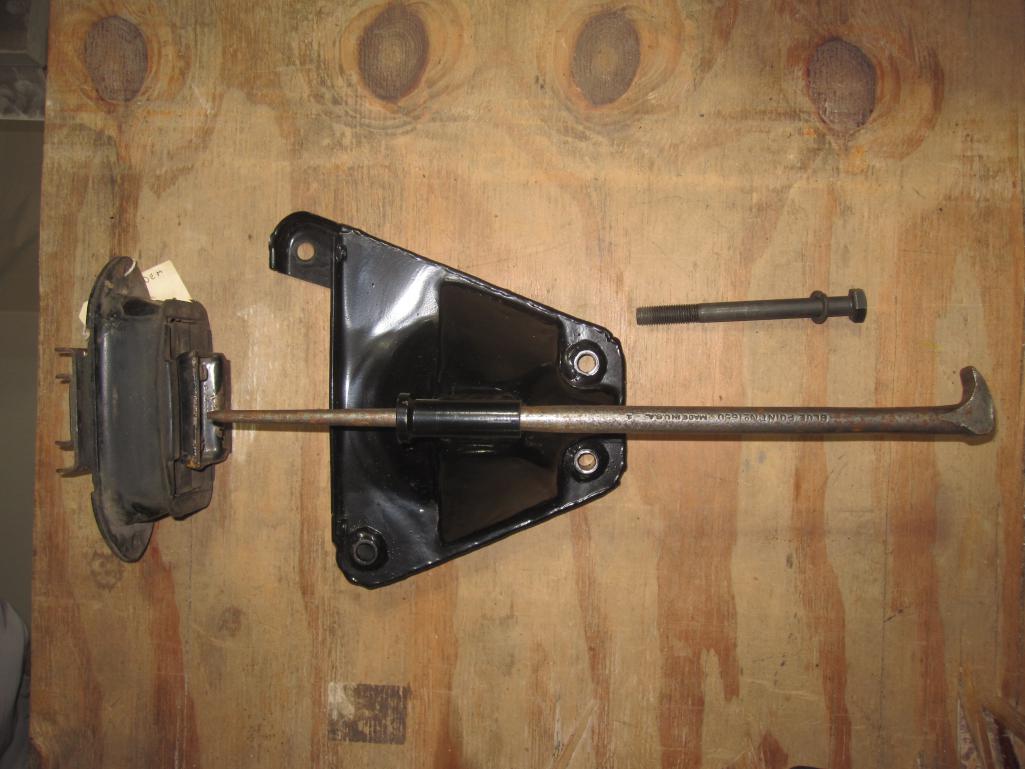
|
|
|
|
| 930cabman |
Oct 15 2024, 12:44 PM
Post
#26
|
|
Advanced Member Group: Members Posts: 4,044 Joined: 12-November 20 From: Buffalo Member No.: 24,877 Region Association: North East States |
QUOTE(mlindner @ Oct 15 2024, 11:19 AM)  My engine install was with a scissor lift. Had to build a box for the engine/trans to set on. rolled under car and lowered the lift. Worked really well but also had problems with the passenger side engine tin. Best, Mark I also used a scissors lift, but I had a rolling cart for the engine/trans to sit onto. Tin was tight, but I got her in there with a few Italian words |
 |
|
| ClayPerrine |
Oct 15 2024, 04:26 PM
Post
#27
|
|
Life's been good to me so far..... Group: Admin Posts: 16,269 Joined: 11-September 03 From: Hurst, TX. Member No.: 1,143 Region Association: NineFourteenerVille |
I use my lift and a harbor freight lift table, and I leave the tin on it.
Never had a problem getting past the mount. I just get it over the trailing arm nuts, then push it slightly rearward to clear the mount. Then once the tin is above the mount, I push it forward. On the big six with the Rich Johnson mount, I switched the bolts and nuts, so the nuts are on top. That way I can slide it forward to get the tin to clear. |
|
|
|
| Tom1394racing |
Oct 16 2024, 05:16 AM
Post
#28
|
|
Member Group: Members Posts: 439 Joined: 25-August 07 From: CT Member No.: 8,039 Region Association: North East States |
Lots of great information here. Thanks for all the replies.
|
|
|
|
| 930cabman |
Oct 16 2024, 02:04 PM
Post
#29
|
|
Advanced Member Group: Members Posts: 4,044 Joined: 12-November 20 From: Buffalo Member No.: 24,877 Region Association: North East States |
QUOTE(Tom1394racing @ Oct 16 2024, 05:16 AM) Lots of great information here. Thanks for all the replies. The crew here is nothing short of the best (IMG:style_emoticons/default/beerchug.gif) |
|
|
|
| Tom1394racing |
Oct 16 2024, 06:05 PM
Post
#30
|
|
Member Group: Members Posts: 439 Joined: 25-August 07 From: CT Member No.: 8,039 Region Association: North East States |
Here is an update.
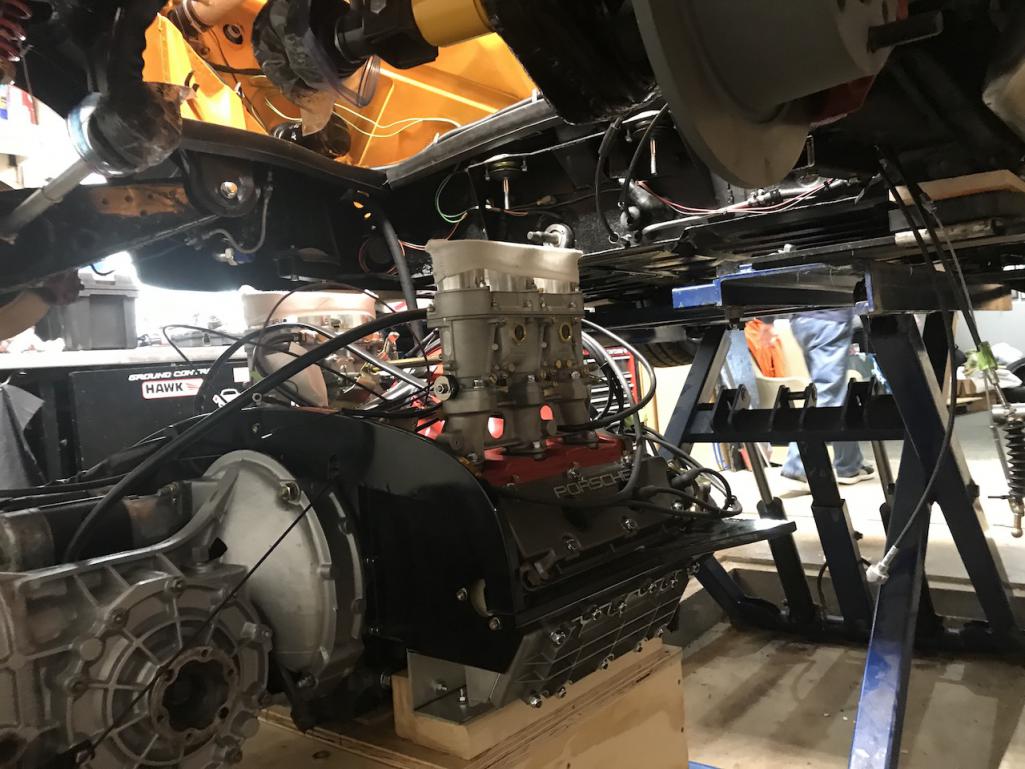
I removed the carbs and zip tied the front tin tilted upward to clear the Mad Dog mount. I did not tilt the front of the engine upward thinking that the front mount will line up better with both the car and engine level. 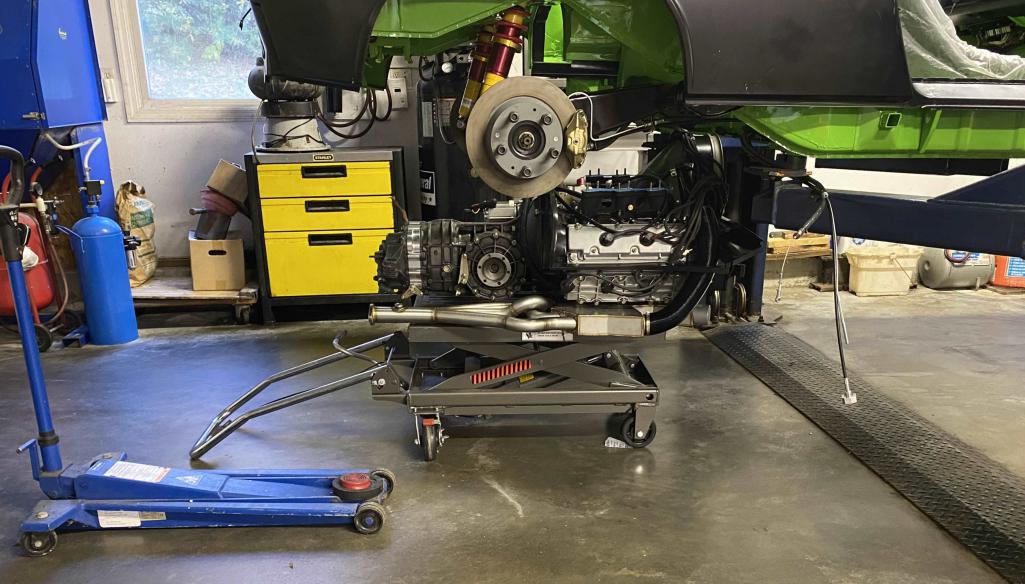  I did a preliminary lift into the chassis to see how tight the clearance will be. Moving the engine forward to allow the front tin to clear the mount, it seemed that the fit between the side tin and the trailing arm nuts was really tight. The concern that stopped me today was checking the fit of my floor jack on the rear of the transmission. I figure I will need that to raise the rear of the transmission onto the rear mounts after the front mount bolts are secured since I am a one man show on this. I think I will have to move the engine reward on the lift table to be able to allow the jack to reach and raise the rear of the transmission. |
|
|
|
| rgalla9146 |
Oct 16 2024, 06:52 PM
Post
#31
|
|
Advanced Member Group: Members Posts: 4,736 Joined: 23-November 05 From: Paramus NJ Member No.: 5,176 Region Association: None |
Tom you can thread a ratchet strap through slots above the trans mounts and pull the trans up |
|
|
|
| Tom1394racing |
Oct 17 2024, 04:52 AM
Post
#32
|
|
Member Group: Members Posts: 439 Joined: 25-August 07 From: CT Member No.: 8,039 Region Association: North East States |
QUOTE(rgalla9146 @ Oct 16 2024, 08:52 PM) Tom you can thread a ratchet strap through slots above the trans mounts and pull the trans up Hey Rory Great suggestion. I thought about that as well. I will take a look at it as I can’t see a way to use the floor jack as it interferes with the lift table even if I reposition the engine on the table. If I can get a ratchet strap up there, I can temporarily support the gearbox, remove the lift table and then use the floor jack to lift the rear mounts into position. |
|
|
|
| gereed75 |
Oct 17 2024, 07:38 AM
Post
#33
|
|
Senior Member Group: Members Posts: 1,342 Joined: 19-March 13 From: Pittsburgh PA Member No.: 15,674 Region Association: North East States |
Smart move to do a test fit. There is always some finagling. I guess if you were doing six a day it would go like clockwork. Ratchet strap idea will work.
|
|
|
|
| Tom1394racing |
Oct 17 2024, 05:56 PM
Post
#34
|
|
Member Group: Members Posts: 439 Joined: 25-August 07 From: CT Member No.: 8,039 Region Association: North East States |
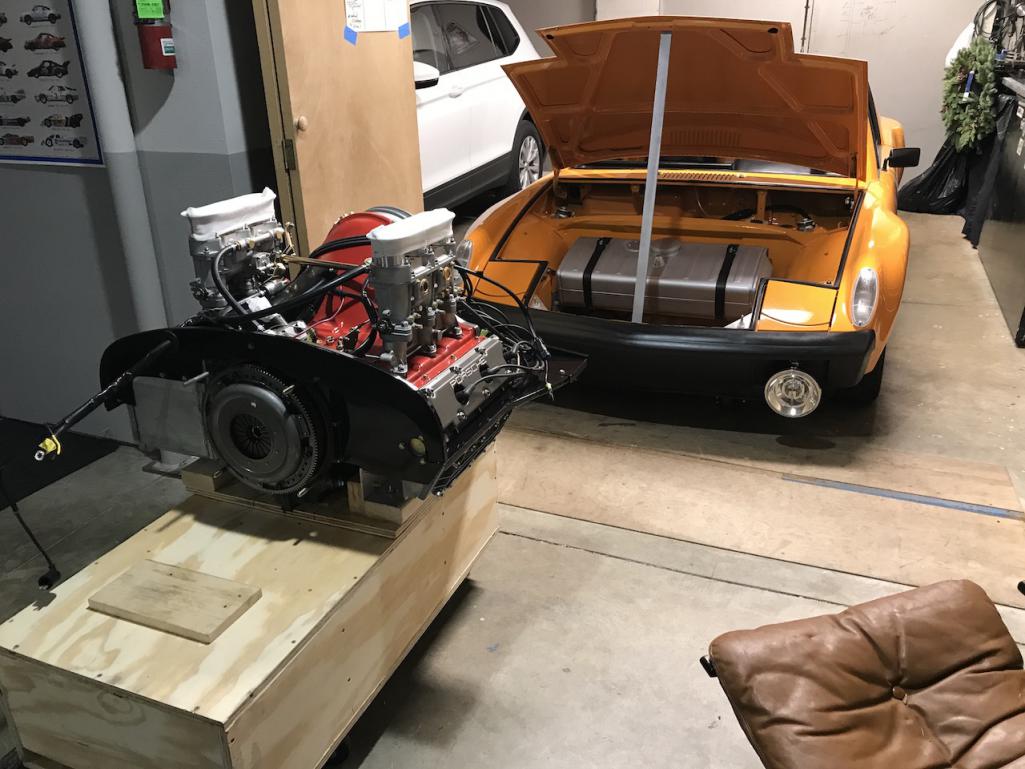
I finished up the engine install today thanks to all the advice I received here.
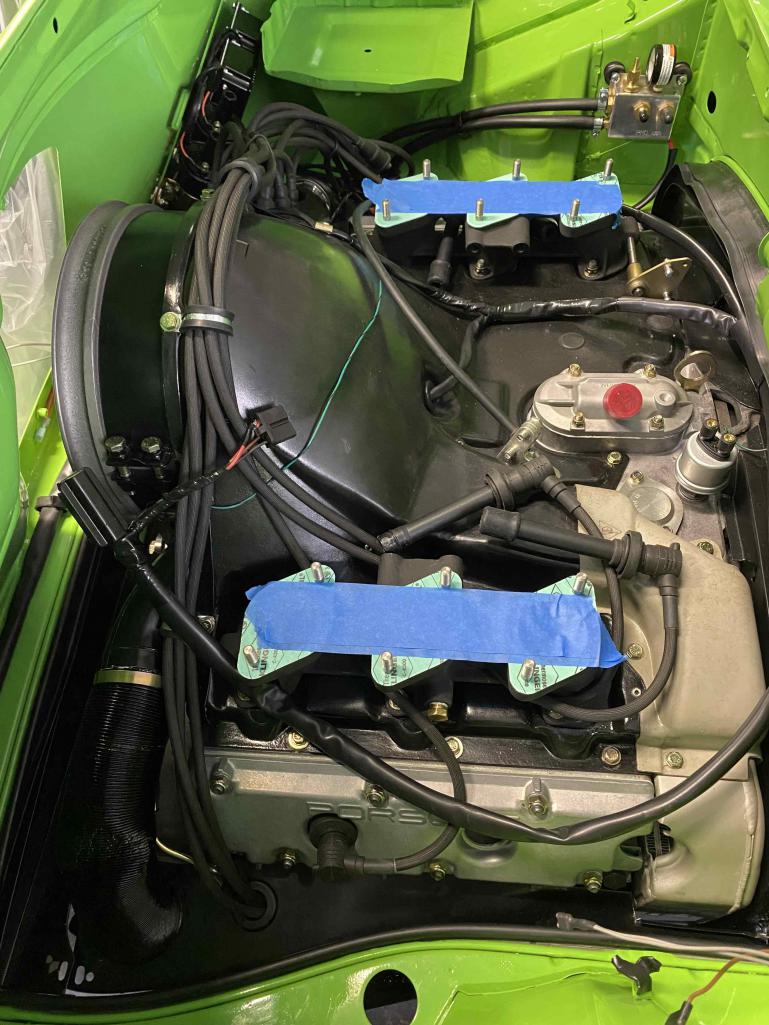 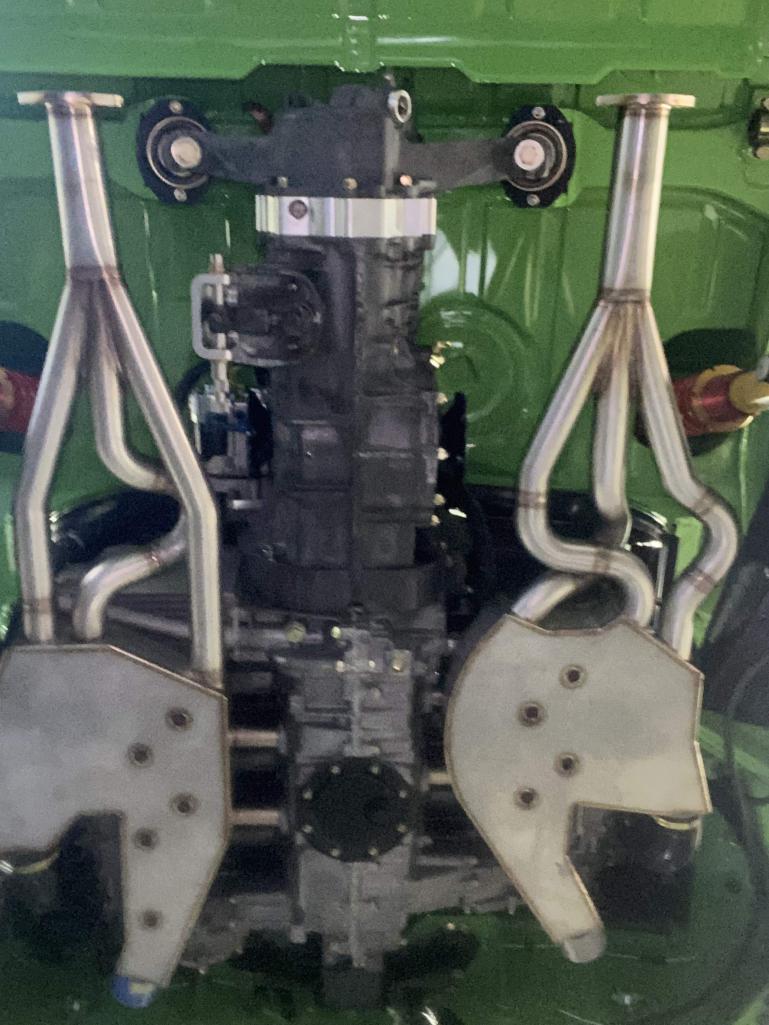 I think the most important tips I learned here were: 1. Loosing and tipping up the front tin to allow it reach over the top of the Mad Dog mount 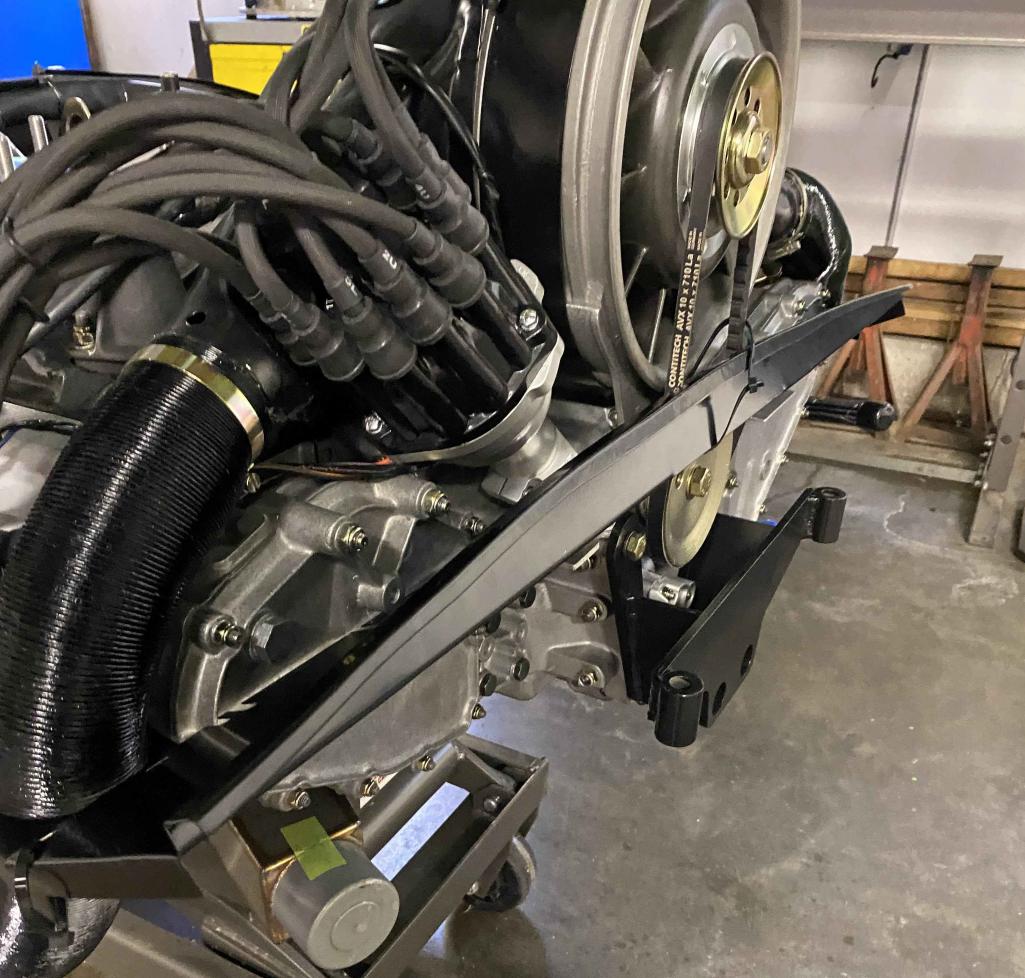 2. Reversing the front mount bolts with the nuts on the top and the bolts on the bottom 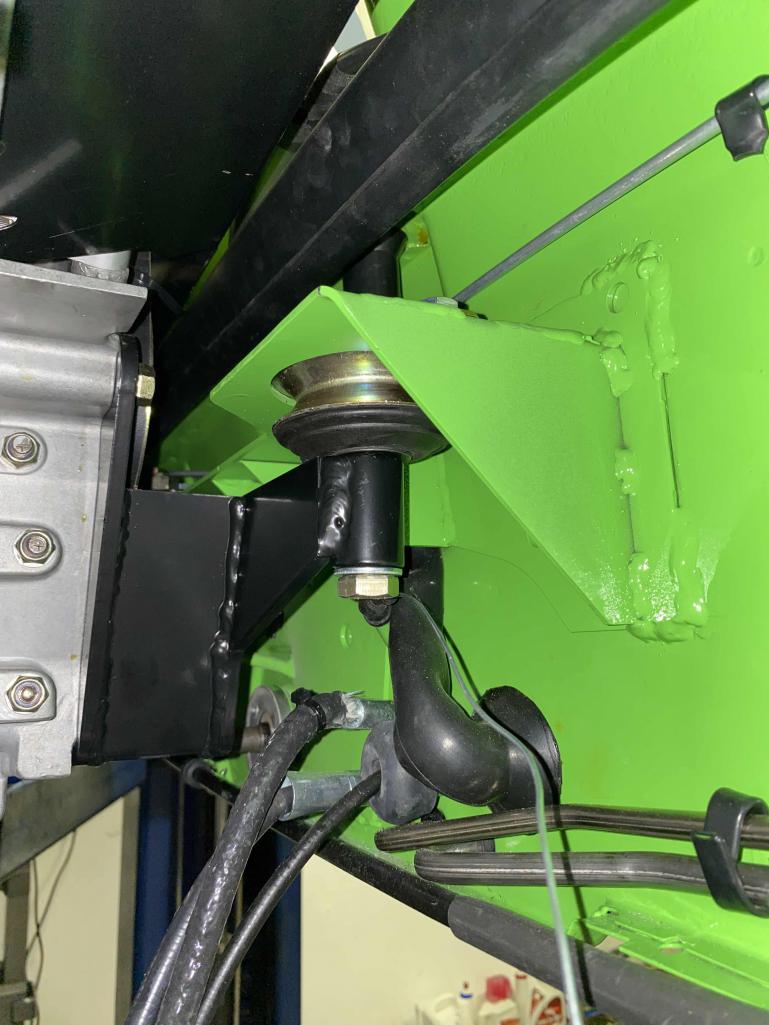 3. Loosening the side tin and using plastic sliders to allow the tin slide over the trailing arm bolts 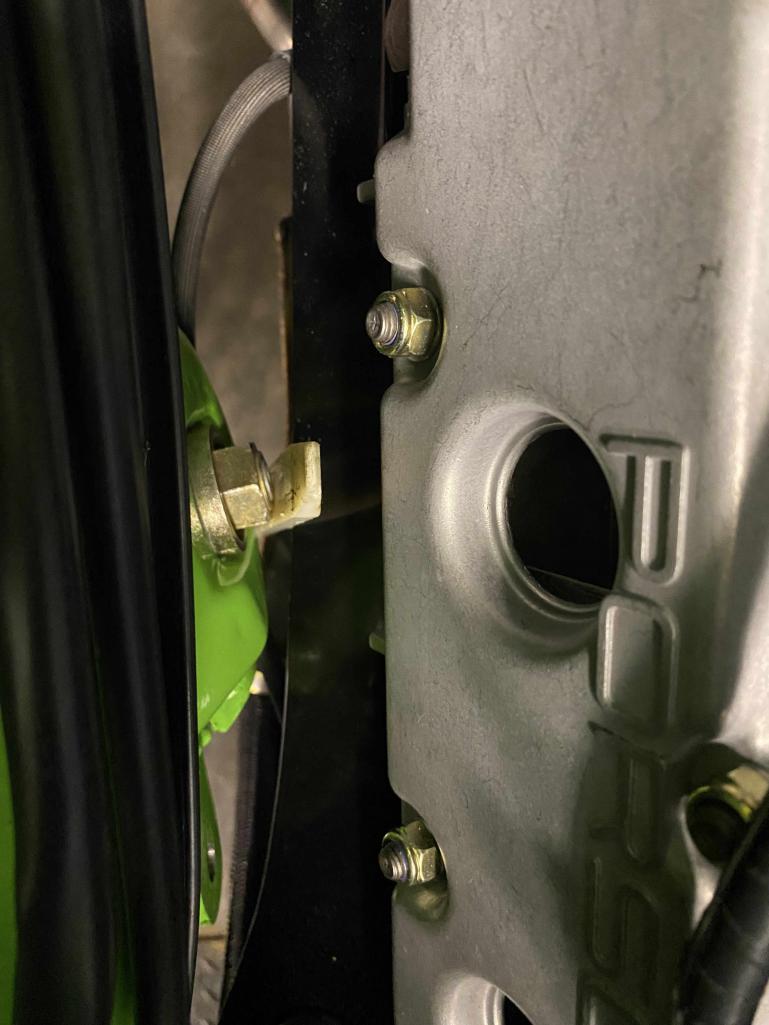 4. Using a ratchet strap to temporarily secure the gearbox while removing the lift table and moving the floor jack into place  Thanks again for all the help |
|
|
|
| Cairo94507 |
Oct 18 2024, 07:11 AM
Post
#35
|
|
Michael Group: Members Posts: 10,297 Joined: 1-November 08 From: Auburn, CA Member No.: 9,712 Region Association: Northern California |
|
|
|
|
| gereed75 |
Oct 18 2024, 08:02 AM
Post
#36
|
|
Senior Member Group: Members Posts: 1,342 Joined: 19-March 13 From: Pittsburgh PA Member No.: 15,674 Region Association: North East States |
Nice wrk. I am just incapable of keeping stuff looking that pristine. Craftsmanship is a knack. You got it or you don’t. Beautiful car.
|
|
|
|
|
1 User(s) are reading this topic (1 Guests and 0 Anonymous Users)
0 Members:

|
Lo-Fi Version | Time is now: 19th April 2025 - 05:45 PM |
Invision Power Board
v9.1.4 © 2025 IPS, Inc.