|
|
|
Porsche, and the Porsche crest are registered trademarks of Dr. Ing. h.c. F. Porsche AG.
This site is not affiliated with Porsche in any way. Its only purpose is to provide an online forum for car enthusiasts. All other trademarks are property of their respective owners. |
|
|

  |

| Jack Standz |
 Feb 14 2025, 04:41 PM Feb 14 2025, 04:41 PM
Post
#21
|
|
Senior Member  Group: Members Posts: 847 Joined: 15-November 19 From: Happy Place (& surrounding area) Member No.: 23,644 Region Association: None |
Modified #2.
Bolt transmission to engine. Remove spark plugs. Make 1000% sure the fuel system and ignition system are disabled. Hook up gauge to where the oil pressure sensor goes (use correct thread gauge). Here's one gauge kit: https://www.harborfreight.com/engine-oil-pr...-kit-62621.html Hopefully, you will have good oil pressure when you crank it. |
   |

 
|
| 930cabman |
Feb 14 2025, 04:52 PM
Post
#22
|
|
Advanced Member Group: Members Posts: 4,714 Joined: 12-November 20 From: Buffalo Member No.: 24,877 Region Association: North East States |
Have you checked crankshaft end play?
|
 |
|
| worn |
Feb 14 2025, 07:12 PM
Post
#23
|
|
Winner of the Utah Twisted Joint Award Group: Members Posts: 3,607 Joined: 3-June 11 From: Madison, WI and North Bend WA Member No.: 13,152 Region Association: Upper MidWest |
QUOTE(sdoolin @ Feb 7 2025, 05:27 PM)  Yep, I don't want this help. Y'all go build your own shit. I am afraid that I have to agree. The help is valuable and the helpers are first rate. Still, simply discarding and disbelieving what you posted wasn’t fair nor was it helpful. I am only chiming in because not doing that is what makes this board great compared to some where a poster is assumed to be stupid until proven otherwise. All of the posters are people that I respect and admire. To put my own neck on the block I would say that my experience with a 2056 has been to reduce compression. Too much heat. But I am the idiot who doesn’t torque head nuts (IMG:style_emoticons/default/headbang.gif) |
|
|
|
| sdoolin |
Feb 15 2025, 08:38 AM
Post
#24
|
|
Member Group: Members Posts: 423 Joined: 1-May 14 From: LouKY Member No.: 17,299 Region Association: None |
QUOTE(Jack Standz @ Feb 14 2025, 05:41 PM) Modified #2. Bolt transmission to engine. Remove spark plugs. Make 1000% sure the fuel system and ignition system are disabled. Hook up gauge to where the oil pressure sensor goes (use correct thread gauge). Here's one gauge kit: https://www.harborfreight.com/engine-oil-pr...-kit-62621.html Hopefully, you will have good oil pressure when you crank it. Thanks for this, and the link. This will be my plan. Carbs won't be installed, no plugs. So no fuel and no spark. I'll order that gauge. Cabman - I have checked end play, per the instructions in my 40 years old Haynes manual. Installed 2 shims, then flywheel, measured, subtracted .004 (or whatever the manual says), and then selected the third shim based on that measurement. I have not re-measured after third shim selection (flywheel not yet installed). |
|
|
|
| sdoolin |
Feb 15 2025, 08:44 AM
Post
#25
|
|
Member Group: Members Posts: 423 Joined: 1-May 14 From: LouKY Member No.: 17,299 Region Association: None |
QUOTE(worn @ Feb 14 2025, 08:12 PM) QUOTE(sdoolin @ Feb 7 2025, 05:27 PM) Yep, I don't want this help. Y'all go build your own shit. I am afraid that I have to agree. The help is valuable and the helpers are first rate. Still, simply discarding and disbelieving what you posted wasn’t fair nor was it helpful. I am only chiming in because not doing that is what makes this board great compared to some where a poster is assumed to be stupid until proven otherwise. All of the posters are people that I respect and admire. To put my own neck on the block I would say that my experience with a 2056 has been to reduce compression. Too much heat. But I am the idiot who doesn’t torque head nuts (IMG:style_emoticons/default/headbang.gif) Thank you worn. The first few responses to my original question were not helpful, and in fact I think the opposite. I try to post concise questions, based on things that I really need help with. By and large, over the years, this forum and most of the members have been greatly helpful to me and most others. This build will have slightly reduced compression over my first build. If I solve the oil pressure problem I'll be a happy camper. |
|
|
|
| Al Meredith |
Feb 15 2025, 05:02 PM
Post
#26
|
|
Senior Member Group: Members Posts: 984 Joined: 4-November 04 From: Atlanta, ga Member No.: 3,061 |
Years ago when Len Hoffman was rebuilding heads he took a set of my 1.8 heads and welded up the stock 1.8 spark plug location and relocated it to the 2.0 location . Then he would tap the hole for a smaller motorcycle plug thus allowing more meat between the plug and the exhaust valve seat where the cracks form. The 1.8 has a combustion chamber of 52/53 CC and the 2.0 at 58/60 CC which calculates to 9.5 CR. KB 96MM pistons and a .040 squelch. The KB literature claims that the tight clearance makes the head run cooler. I'm running 44 MM carbs which tend to run rich therefor cooler. I have no cooling problems Al
|
|
|
|
| worn |
Feb 15 2025, 08:49 PM
Post
#27
|
|
Winner of the Utah Twisted Joint Award Group: Members Posts: 3,607 Joined: 3-June 11 From: Madison, WI and North Bend WA Member No.: 13,152 Region Association: Upper MidWest |
QUOTE(Al Meredith @ Feb 15 2025, 03:02 PM) Years ago when Len Hoffman was rebuilding heads he took a set of my 1.8 heads and welded up the stock 1.8 spark plug location and relocated it to the 2.0 location . Then he would tap the hole for a smaller motorcycle plug thus allowing more meat between the plug and the exhaust valve seat where the cracks form. The 1.8 has a combustion chamber of 52/53 CC and the 2.0 at 58/60 CC which calculates to 9.5 CR. KB 96MM pistons and a .040 squelch. The KB literature claims that the tight clearance makes the head run cooler. I'm running 44 MM carbs which tend to run rich therefor cooler. I have no cooling problems Al What a story. Thanks. Adding this to a recent post in another thread from Clay I now know that 914s can run, and run quite well, with motorcycle parts sourced from Walmart. |
|
|
|
| sdoolin |
Feb 16 2025, 04:08 PM
Post
#28
|
|
Member Group: Members Posts: 423 Joined: 1-May 14 From: LouKY Member No.: 17,299 Region Association: None |
QUOTE(930cabman @ Feb 14 2025, 05:52 PM) Have you checked crankshaft end play? So I re-checked this today. Installed three shims (as measured for), rear main seal, and flywheel. Just trying to move the crank "for and aft" by hand, or even with an easy/gentle pry produces no discernable movement. Setting up a dial indicator to measure for and aft movement again yields no discernable movement. Spinning the crank with the dial indicator positioned as pictured below produces a maximum needle sweep in the dial of .1 mm (.0039"). Which might be right? I am not particularly comfortable with this measurement. 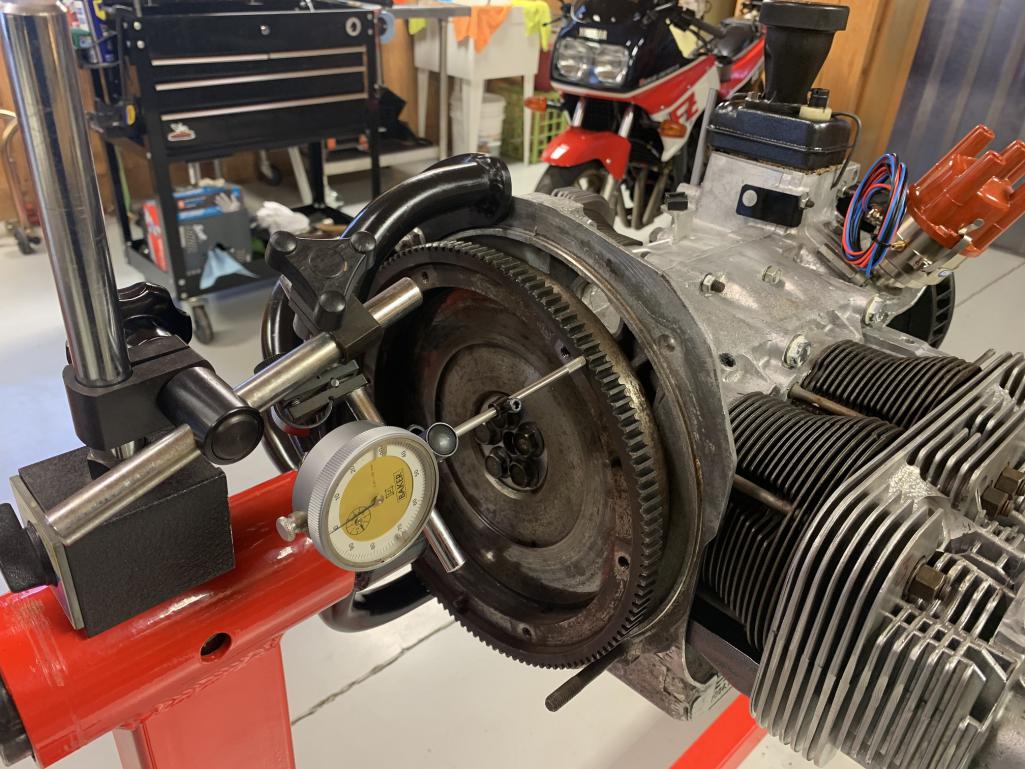 |
|
|
|
| Superhawk996 |
Feb 16 2025, 04:30 PM
Post
#29
|
|
914 Guru Group: Members Posts: 7,905 Joined: 25-August 18 From: Woods of N. Idaho Member No.: 22,428 Region Association: Galt's Gulch |
No discernible crank end play is a no-go.
Redo until it is correct. Likely shims weren’t correctly measured / calculated. There is no harm in doing this several times to be sure it’s correct. When doing the mockup / measurement of shims the flywheel must be fully installed and torqued so that the flywheel s firmly seated to the crank. Personally I set and measure end play before installing the RMS since you need to remove / install flywheel several times to get the right shim selected and measured. Disregard spinning the crank measurement that has no relevance to crank end play. Hint #1: when you make this measurement the dial indicator must be perpendicular to the the flywheel. May just the the angle of the photo but to me it looks like it is at an angle. Hint #2: mount your dial indicator to the engine. You want the relative measurement between the case and the flywheel only. Mounting the indicator to the engine stand adds error and uncertainty to what you are trying to measure . Alternatively you could have the magnetic base on the flywheel and the dial indicator touching off the case. |
|
|
|
| sdoolin |
Feb 17 2025, 08:09 AM
Post
#30
|
|
Member Group: Members Posts: 423 Joined: 1-May 14 From: LouKY Member No.: 17,299 Region Association: None |
QUOTE(Superhawk996 @ Feb 16 2025, 05:30 PM) No discernible crank end play is a no-go. Redo until it is correct. Likely shims weren’t correctly measured / calculated. There is no harm in doing this several times to be sure it’s correct. When doing the mockup / measurement of shims the flywheel must be fully installed and torqued so that the flywheel s firmly seated to the crank. Personally I set and measure end play before installing the RMS since you need to remove / install flywheel several times to get the right shim selected and measured. Disregard spinning the crank measurement that has no relevance to crank end play. Hint #1: when you make this measurement the dial indicator must be perpendicular to the the flywheel. May just the the angle of the photo but to me it looks like it is at an angle. Hint #2: mount your dial indicator to the engine. You want the relative measurement between the case and the flywheel only. Mounting the indicator to the engine stand adds error and uncertainty to what you are trying to measure . Alternatively you could have the magnetic base on the flywheel and the dial indicator touching off the case. Thank you Superhawk. I only installed the RMS as I had measured for the third shim and figured (wrongly) that I'd be good to go. I will re-measure all of this, and will attach the dial indicator to the flywheel as you suggest. I had not thought of that. I have a total of 6 shims, so hopefully some combination of them will work. |
|
|
|
| stownsen914 |
Feb 17 2025, 08:15 AM
Post
#31
|
|
Senior Member Group: Members Posts: 1,015 Joined: 3-October 06 From: Ossining, NY Member No.: 6,985 Region Association: None |
Separate from the crank end play, if you are asking if .004" of longitudinal runout measured as pictured at the perimeter of the flywheel is acceptable ... personally that amount would not concern me.
|
|
|
|
| sdoolin |
Feb 17 2025, 01:16 PM
Post
#32
|
|
Member Group: Members Posts: 423 Joined: 1-May 14 From: LouKY Member No.: 17,299 Region Association: None |
QUOTE(stownsen914 @ Feb 17 2025, 09:15 AM) Separate from the crank end play, if you are asking if .004" of longitudinal runout measured as pictured at the perimeter of the flywheel is acceptable ... personally that amount would not concern me. Understood, thanks. |
|
|
|
| sdoolin |
Feb 18 2025, 05:25 PM
Post
#33
|
|
Member Group: Members Posts: 423 Joined: 1-May 14 From: LouKY Member No.: 17,299 Region Association: None |
I have measured all of the shims I have on hand (6 of them). They are - .0115, .0115, .012, .012, .014 & .015. My dial indicator and I had some long conversations today about positioning as I see fit, and I believe I came out on top. Will have the magnetic base on the flywheel, dial indicator tip on the case.
I'm gonna install the 2 thinnest shims I have, bolt up the flywheel and measure (again). After the snowstorm comes and goes... 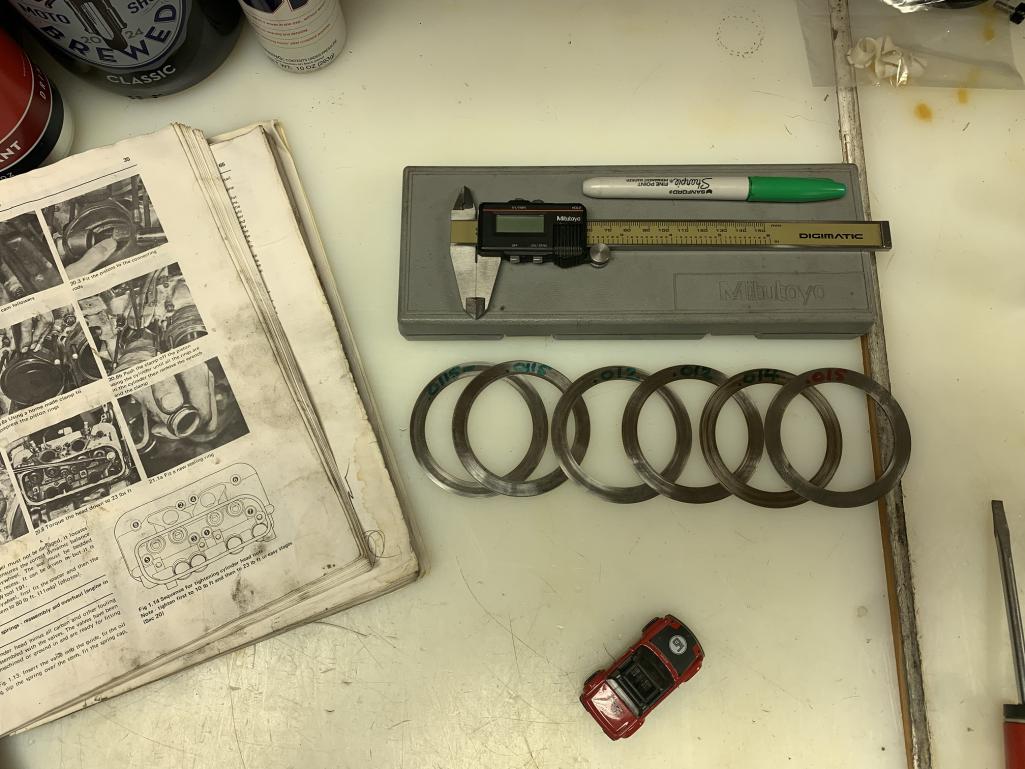 |
|
|
|
| sdoolin |
Feb 22 2025, 01:05 PM
Post
#34
|
|
Member Group: Members Posts: 423 Joined: 1-May 14 From: LouKY Member No.: 17,299 Region Association: None |
So, I re-measured crank end play. Installed flywheel (no RMS) with two shims behind it. Measure end play with dial indicator on the flywheel tip of dial indicator on the case. I can't move the crank noticeably for and aft by hand. Prying very gently on the flywheel in the direction away from the cases I measure .43mm (.0169"). This is repeatable.
My manual says to subtract .004" from this, which yields .012". I have a shim of that thickness. I'm not sure what value I am ultimately looking for after I install this third .012" shim? Am I looking for .004" thrust with all three shims? |
|
|
|
| Superhawk996 |
Feb 22 2025, 01:16 PM
Post
#35
|
|
914 Guru Group: Members Posts: 7,905 Joined: 25-August 18 From: Woods of N. Idaho Member No.: 22,428 Region Association: Galt's Gulch |
QUOTE(sdoolin @ Feb 22 2025, 03:05 PM) Am I looking for .004" thrust with all three shims? Yes |
|
|
|
| sdoolin |
Feb 22 2025, 02:04 PM
Post
#36
|
|
Member Group: Members Posts: 423 Joined: 1-May 14 From: LouKY Member No.: 17,299 Region Association: None |
Thank you Superhawk. Installed third shim, remeasured. I am getting .14mm (.005") repeatedly. Based on my selection of shims, I am calling this good.
Now a strange question. Recall from a few posts back I am going to turn this engine over with the starter while it is on the bench. I'd like to confirm oil pressure. But, I'm not 100% certain how to do this? Bolt up flywheel, bolt on transmission, install starter. Run the positive battery cable to the starter. Then? Do I need to ground the engine somehow? It will be sitting on an hydraulic lifting table that has a thick (1/2") sheet of delrin type material on it. |
|
|
|
| Jack Standz |
Feb 22 2025, 02:24 PM
Post
#37
|
|
Senior Member Group: Members Posts: 847 Joined: 15-November 19 From: Happy Place (& surrounding area) Member No.: 23,644 Region Association: None |
Add a cable from the negative side of the battery to the ground strap/bolt on the transmission.
Then attach a remote starter switch like this one, make your own, or use a heavy enough gauge wire to momentarily engage the starter. https://www.amazon.com/INNOVA-3630-Remote-S...C176&sr=8-4 |
|
|
|
| Superhawk996 |
Feb 22 2025, 07:09 PM
Post
#38
|
|
914 Guru Group: Members Posts: 7,905 Joined: 25-August 18 From: Woods of N. Idaho Member No.: 22,428 Region Association: Galt's Gulch |
QUOTE(sdoolin @ Feb 22 2025, 04:04 PM) Thank you Superhawk. Installed third shim, remeasured. I am getting .14mm (.005") repeatedly. Based on my selection of shims, I am calling this good. Agree. That is in spec. Better a smidge loose than too tight. If I recall I think Raby may have posted somewhere he runs .006” on his high HP builds. |
|
|
|
| Superhawk996 |
Feb 22 2025, 07:17 PM
Post
#39
|
|
914 Guru Group: Members Posts: 7,905 Joined: 25-August 18 From: Woods of N. Idaho Member No.: 22,428 Region Association: Galt's Gulch |
I’m going to ask a question that I’ve assumed you already have done.
Did you use assembly lube on all bearings and cam / cam lobes / lifters as you did final assembly? You shouldn’t be spinning dry waiting on oil pressure from the pump. Apologize I didn’t bring this up earlier 2nd - have you primed the oil pump gears with a light coat of petroleum grease? This helps ensure a quick prime and build of oil pressure. Again sorry I’m asking late but this is easy to do still. |
|
|
|
| sdoolin |
Feb 23 2025, 09:20 AM
Post
#40
|
|
Member Group: Members Posts: 423 Joined: 1-May 14 From: LouKY Member No.: 17,299 Region Association: None |
QUOTE(Superhawk996 @ Feb 22 2025, 08:17 PM) I’m going to ask a question that I’ve assumed you already have done. Did you use assembly lube on all bearings and cam / cam lobes / lifters as you did final assembly? You shouldn’t be spinning dry waiting on oil pressure from the pump. Apologize I didn’t bring this up earlier 2nd - have you primed the oil pump gears with a light coat of petroleum grease? This helps ensure a quick prime and build of oil pressure. Again sorry I’m asking late but this is easy to do still. Yep, all bearing inserts (cam & crank) coated with assembly lube (Red Line). Cam lobes coated with assembly lube, same with lifters. Rockers & pushrods & valve tops lightly primed with engine oil. Cylinders coated with engine oil. Oil pump gears coated with engine oil. Update on oil pressure - spinning the engine by hand produced oil at the oil pump output. Bolted on oil filter mount, turning the engine by hand produces oil into the filter. Installing oil filter and oil cooler and more turning by hand and I am getting oil at the oil pressure sending unit bore. So I will forego mounting the transmission and starter to spin the engine, and will install into the chassis. I still plan to use my new oil pressure gauge on first cranking when the engine is in the car (no carbs no plugs). Thanks everyone for all the help. |
|
|
|
|
1 User(s) are reading this topic (1 Guests and 0 Anonymous Users)
0 Members:

|
Lo-Fi Version | Time is now: 20th June 2026 - 10:16 AM |
Invision Power Board
v9.1.4 © 2026 IPS, Inc.