|
|
|
Porsche, and the Porsche crest are registered trademarks of Dr. Ing. h.c. F. Porsche AG.
This site is not affiliated with Porsche in any way. Its only purpose is to provide an online forum for car enthusiasts. All other trademarks are property of their respective owners. |
|
|

  |

| trojanhorsepower |
 Aug 11 2025, 03:06 PM Aug 11 2025, 03:06 PM
Post
#1
|
|
Senior Member  Group: Members Posts: 909 Joined: 21-September 03 From: Marion, NC Member No.: 1,179 Region Association: None |
How did you handle this area of the carpet?
|
   |

 
|
| iankarr |
Aug 11 2025, 04:57 PM
Post
#2
|
|
The wrencher formerly known as Cuddy_K Group: Members Posts: 2,568 Joined: 22-May 15 From: Heber City, UT Member No.: 18,749 Region Association: Intermountain Region |
You just need to pull and stretch, and have a really strong glue like DAP Weldwood Landau Top and Trim.
|
|
|
|
| trojanhorsepower |
Aug 11 2025, 05:06 PM
Post
#3
|
|
Senior Member Group: Members Posts: 909 Joined: 21-September 03 From: Marion, NC Member No.: 1,179 Region Association: None |
Thanks Ian,
I was just hoping for some pictures of the area so I can see how other people handle the area around Handle and cables. Thanks Peter |
|
|
|
| wonkipop |
Aug 11 2025, 05:16 PM
Post
#4
|
|
Advanced Member Group: Members Posts: 4,917 Joined: 6-May 20 From: north antarctica Member No.: 24,231 Region Association: NineFourteenerVille |
@trojanhorsepower
the factory handled this whole sill piece differently in the carpet itself. it had a kind of clear plastic backing and this was added to the carpet stock backing. then it appeared to have been pressed in a heat form to the shape of the lhs sill. the passenger side was just normal carpet stock. a couple of other interior carpet pieces were formed the same way. namely the one behind the passenger seat which was formed to go over electrical connections and relays for interlock and also the central tunnel piece. of course impossible to replicate. (IMG:style_emoticons/default/biggrin.gif) (IMG:style_emoticons/default/biggrin.gif) (IMG:style_emoticons/default/smile.gif) (IMG:style_emoticons/default/sad.gif) you have to do it as @iankarr says i started at the hand brake recess and then worked away in both directions. mine is of course rhd so i was never going to be able to buy any factory NOS stock no matter what. i got a good result. but the trick is start glueing at the recess itself. get it nailed down and then work away from it. the tunnel represents similar challenges to get the shape to conform just right, but not as difficult as sill. the factory never glued that down on the tunnel - it conformed to the shape naturally with the moulding layer on the backing. i found if i only glued along the flat edges where it sits on the cabin floor i got a pretty good result. also easy to get up again if needing to do tunnel work, cables access etc. |
|
|
|
| trojanhorsepower |
Aug 11 2025, 05:27 PM
Post
#5
|
|
Senior Member Group: Members Posts: 909 Joined: 21-September 03 From: Marion, NC Member No.: 1,179 Region Association: None |
Thanks, I guess Ill just do my best.
|
|
|
|
| bkrantz |
Aug 11 2025, 07:35 PM
Post
#6
|
|
914 Guru Group: Members Posts: 8,478 Joined: 3-August 19 From: SW Colorado Member No.: 23,343 Region Association: Rocky Mountains |
One thing to think about: if you have stock type carpet, with the obvious rows, you can keep the rows straight on top of the sill, or along the base of the side. Whichever you choose, the rows will curve on the other.
I chose the top, and probably added work, but I like the results. Attached thumbnail(s) 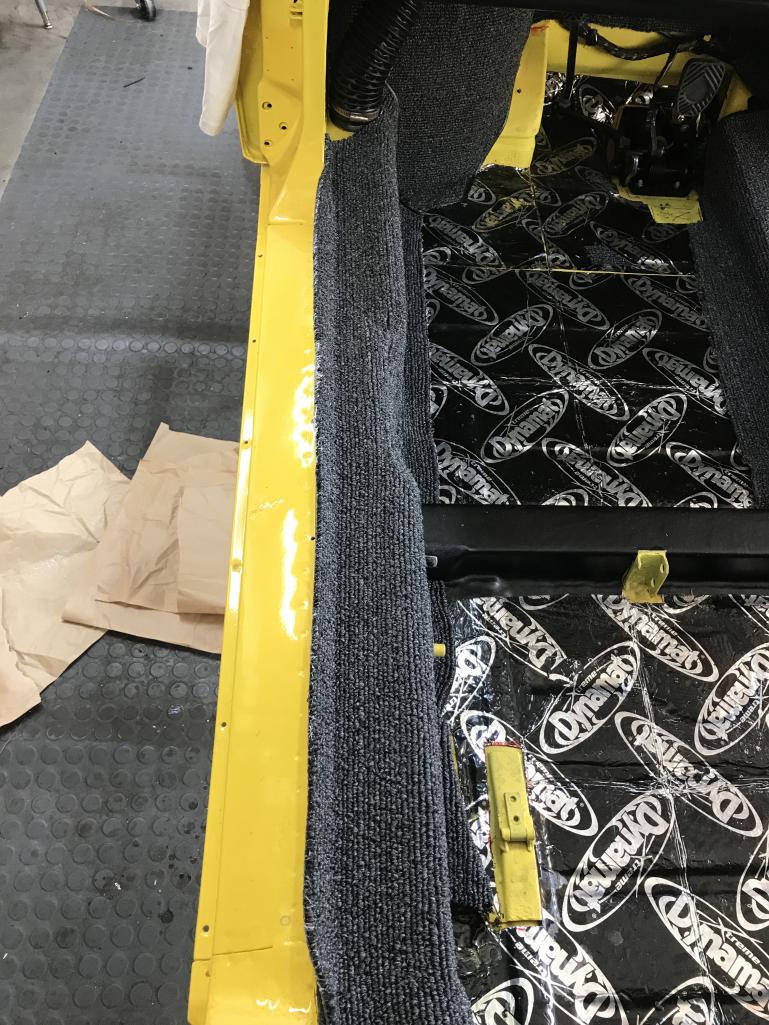
|
|
|
|
| bkrantz |
Aug 11 2025, 07:36 PM
Post
#7
|
|
914 Guru Group: Members Posts: 8,478 Joined: 3-August 19 From: SW Colorado Member No.: 23,343 Region Association: Rocky Mountains |
View of the side.
Attached thumbnail(s) 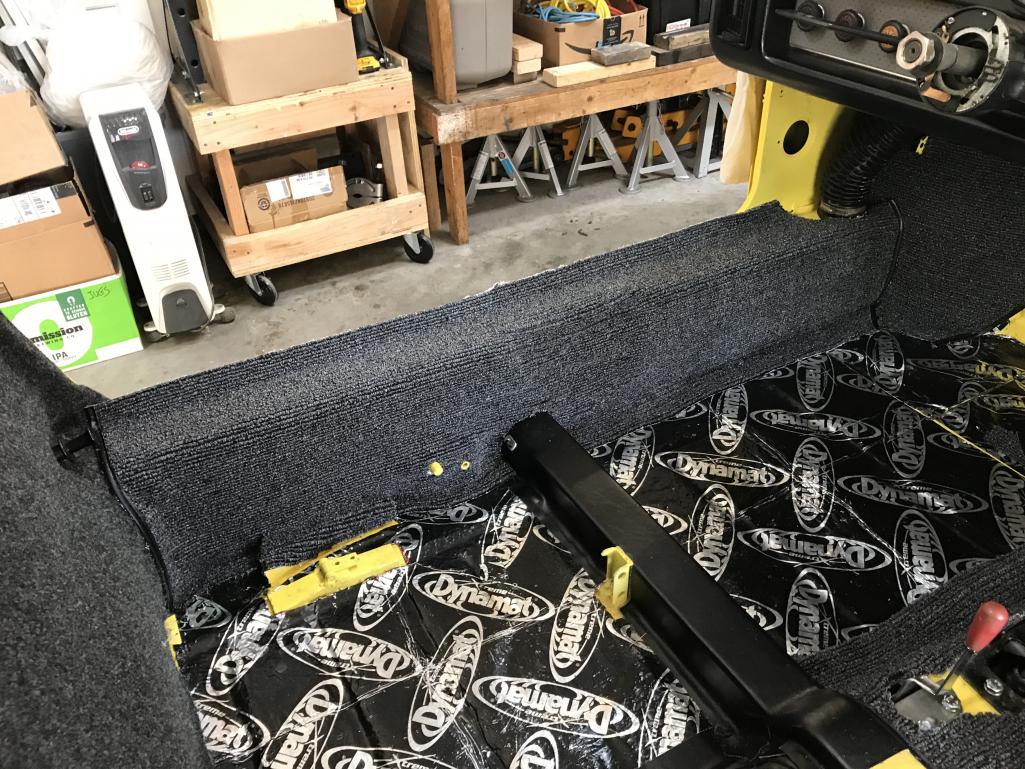
|
|
|
|
| trojanhorsepower |
Aug 12 2025, 09:53 AM
Post
#8
|
|
Senior Member Group: Members Posts: 909 Joined: 21-September 03 From: Marion, NC Member No.: 1,179 Region Association: None |
Thanks bkrantz.
This is what I wound up with. It's OK, but.... Attached image(s) 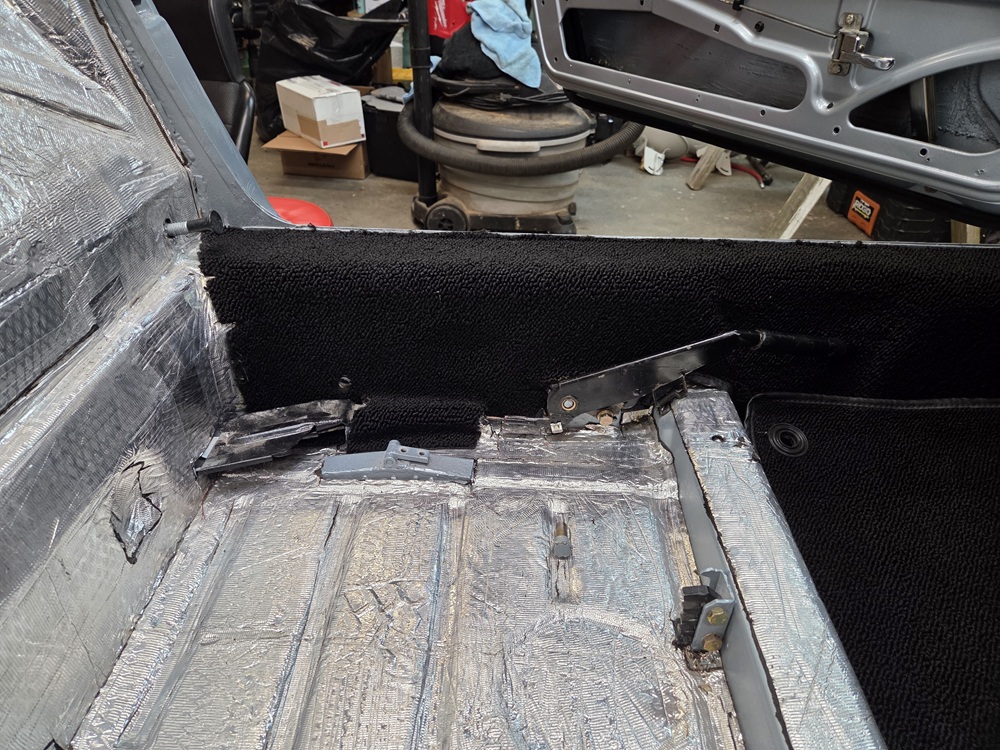 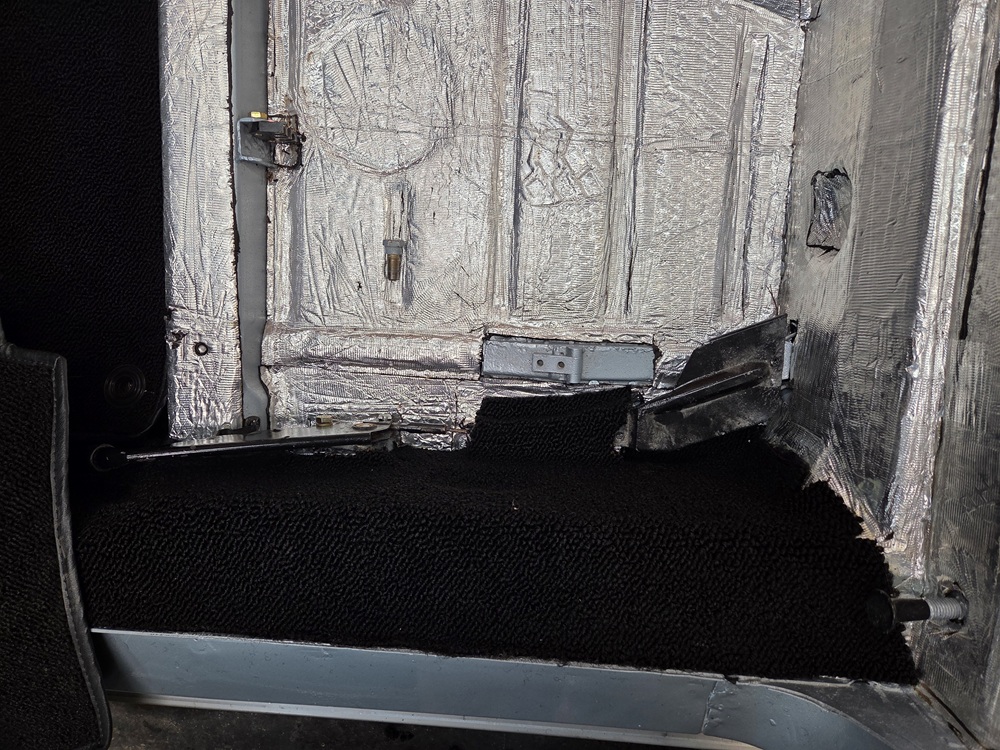
|
|
|
|
| Root_Werks |
Aug 12 2025, 02:07 PM
Post
#9
|
|
Village Idiot Group: Members Posts: 8,757 Joined: 25-May 04 From: About 5NM from Canada Member No.: 2,105 Region Association: Pacific Northwest |
I need to do something with my carpet around the ebrake as well. I've heard a heat gun will help mold the carpet into the e-brake detent?
|
|
|
|
| bkrantz |
Aug 12 2025, 07:00 PM
Post
#10
|
|
914 Guru Group: Members Posts: 8,478 Joined: 3-August 19 From: SW Colorado Member No.: 23,343 Region Association: Rocky Mountains |
QUOTE(Root_Werks @ Aug 12 2025, 02:07 PM)  I need to do something with my carpet around the ebrake as well. I've heard a heat gun will help mold the carpet into the e-brake detent? I used heat, two doses of contact cement, and clamping with a block of wood cut to fit the recess. |
|
|
|
|
1 User(s) are reading this topic (1 Guests and 0 Anonymous Users)
0 Members:

|
Lo-Fi Version | Time is now: 14th August 2025 - 04:04 AM |
Invision Power Board
v9.1.4 © 2025 IPS, Inc.