|
|
|
Porsche, and the Porsche crest are registered trademarks of Dr. Ing. h.c. F. Porsche AG.
This site is not affiliated with Porsche in any way. Its only purpose is to provide an online forum for car enthusiasts. All other trademarks are property of their respective owners. |
|
|

  |

| Literati914 |
 Apr 8 2026, 03:13 PM Apr 8 2026, 03:13 PM
Post
#1
|
|
Advanced Member  Group: Members Posts: 2,261 Joined: 16-November 06 From: Dallas, TX Member No.: 7,222 Region Association: Southwest Region |
Couple months back I bought a Phoenix Red 1.7L '73 that I planned to do a "quick resto/refresh" on. The idea was to get it back on the road as a very descent driver, no rotisserie work or complete strip down for repaint. Mainly wanted to make it structurally and mechanically sound. I've been working on it and snapping a few pic as I go, so I thought I'd go ahead and post a thread about it here.
Attached thumbnail(s) 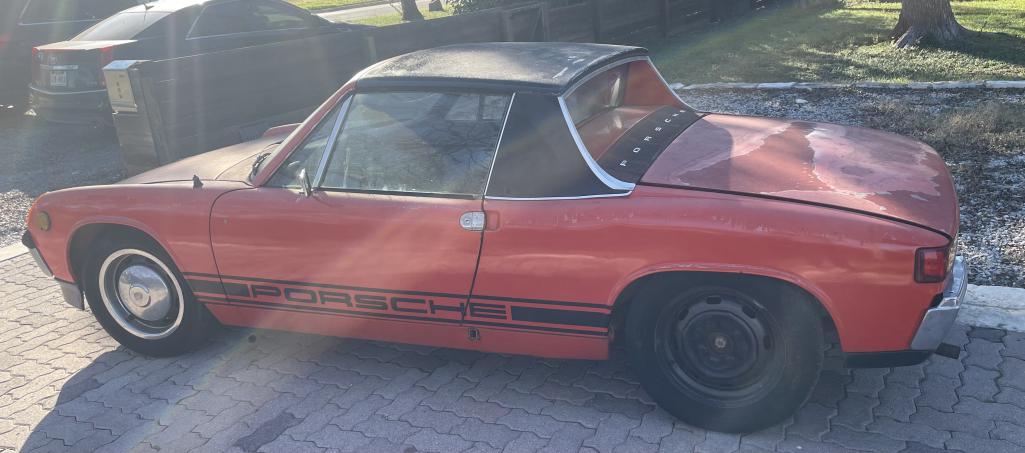
|
   |

 
|
| Literati914 |
Apr 8 2026, 03:33 PM
Post
#2
|
|
Advanced Member Group: Members Posts: 2,261 Joined: 16-November 06 From: Dallas, TX Member No.: 7,222 Region Association: Southwest Region |
Basic Appearance:
First of all, it obviously needs paint. There are nick, chips and scratches as well as some hail damage. Also, a previous owner applied a clear coat to the paint (Phoenix Red) and it has flaked off in large areas. So paint is needed.. not sure if I'm gonna do that for a while or not. It's not as bad in person as the picture, and could be seen as a descent patina car for now, in imo. The Targa surface is in bad shape and I will do addressing that soon. Black steelies with all hub caps and beauty rings present (I kinda like the look tbh). All glass is good though the front windshield has been replaced at some point with an aftermarket one.. it was glued in but the trim did not make it back on the car (nor was it included). On the interior door cards need work, carpets were missing and seats could stand a re-do - all things I plan to address. The stock fuse panel has been replaced with a modern style and there is a working push button start button on the dash. For some reason the Fresh Air Defrost controller unit has been removed from the dash and lost (IMG:style_emoticons/default/confused24.gif) , but the box is still present under cowl. Luckily I have extras. Oh, and there is an interesting steering wheel (let me know if anyone knows anything about it) with a Porsche crest horn button. I may paint it and have it recovered. Attached thumbnail(s)  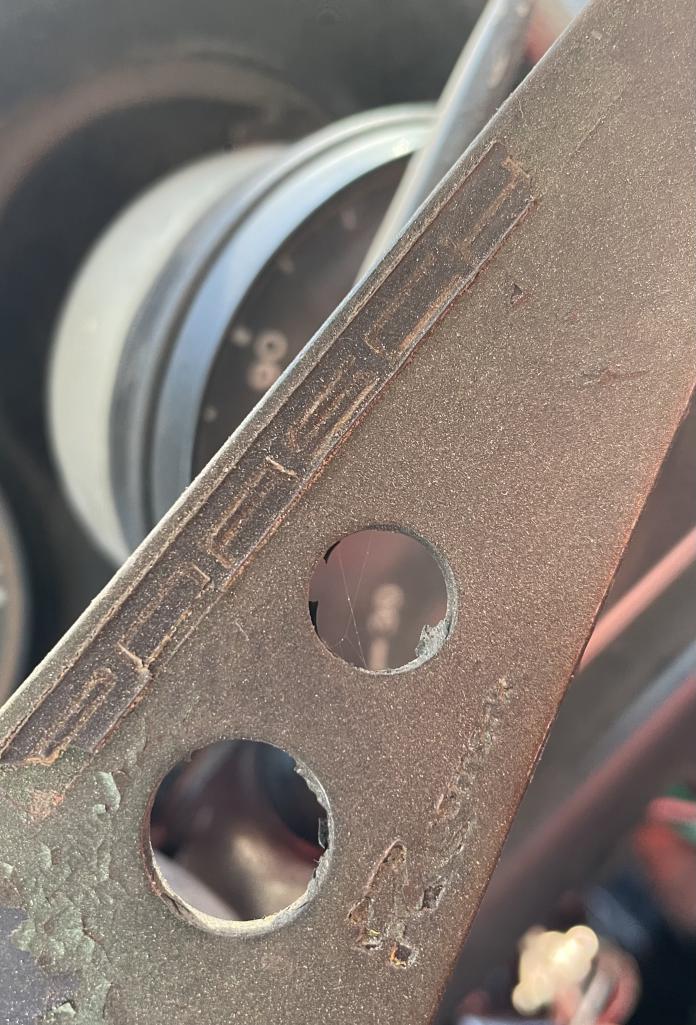
|
|
|
|
| Literati914 |
Apr 8 2026, 03:54 PM
Post
#3
|
|
Advanced Member Group: Members Posts: 2,261 Joined: 16-November 06 From: Dallas, TX Member No.: 7,222 Region Association: Southwest Region |
Obvious Issues:
Leaning right rear wheel and a riveted on license plate covering a rust hole on the firewall behind the right side, driver's seat. Structural Repairs: First I removed the engine and pulled all tin for a clean up and respray. I removed the trailing arms on both sides, stripped the equipment off of them, cleaned and resprayed. I then cut off the rust damaged right side suspension console ear and replaced it. I took many measurements from two other 914s I have and made sure the new ear was precisely placed. I used a combo of both flange/plug welds and seam/edge welds here for strength. All was primed, seam sealed and top coated. This area is now very solid and I'm happy with the repair, should last far into the future now. Attached thumbnail(s) 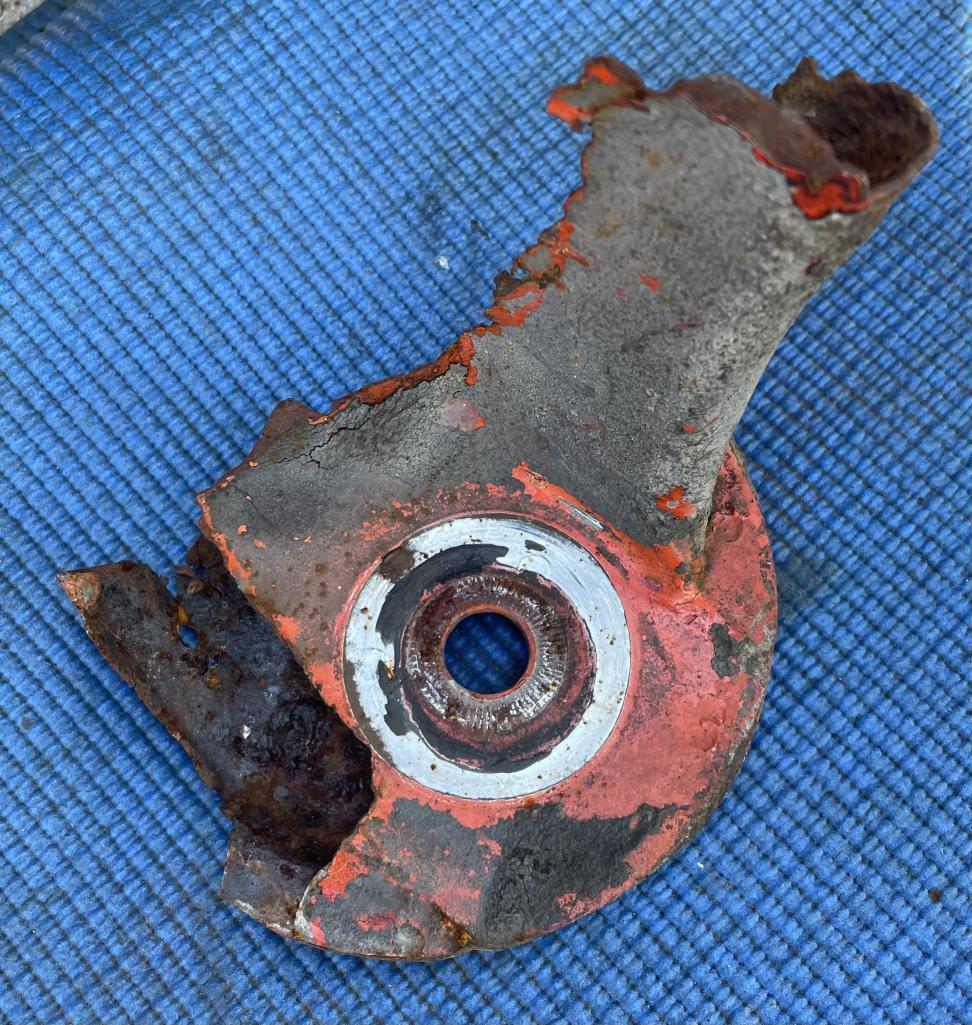 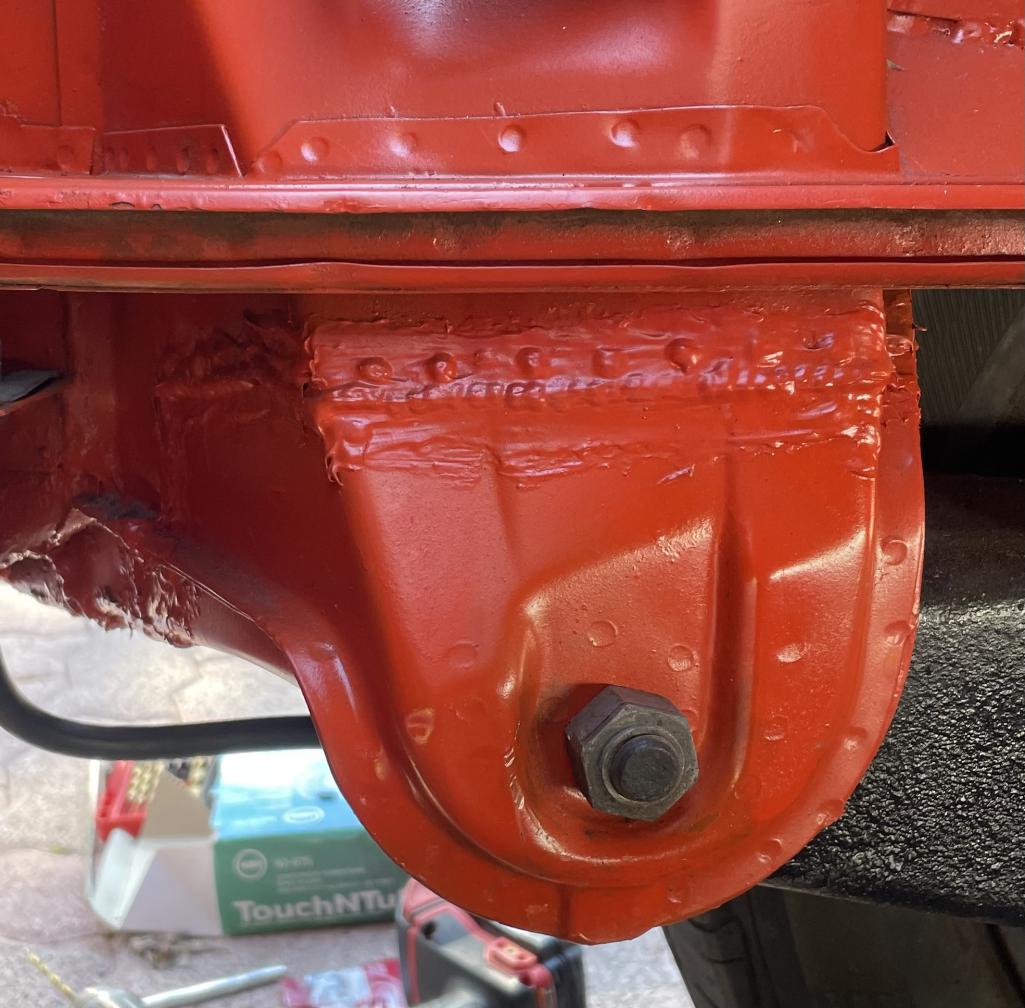
|
|
|
|
| Literati914 |
Apr 8 2026, 03:59 PM
Post
#4
|
|
Advanced Member Group: Members Posts: 2,261 Joined: 16-November 06 From: Dallas, TX Member No.: 7,222 Region Association: Southwest Region |
Then it was on to the riveted license late that was along with some caulking, covering a rusted firewall area behind the diver's seat. Long story short, I found an area behind the passenger seat that would soon be in the same shape - and I fixed both side.
Attached thumbnail(s) 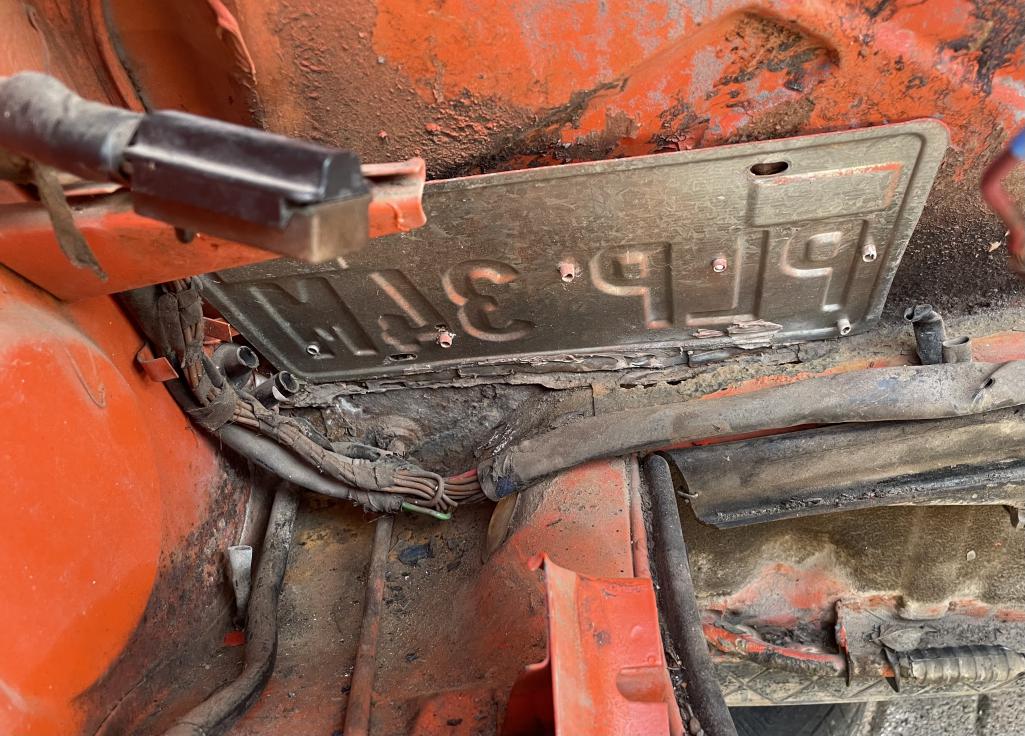
|
|
|
|
| Literati914 |
Apr 8 2026, 04:06 PM
Post
#5
|
|
Advanced Member Group: Members Posts: 2,261 Joined: 16-November 06 From: Dallas, TX Member No.: 7,222 Region Association: Southwest Region |
Repairs
Attached thumbnail(s) 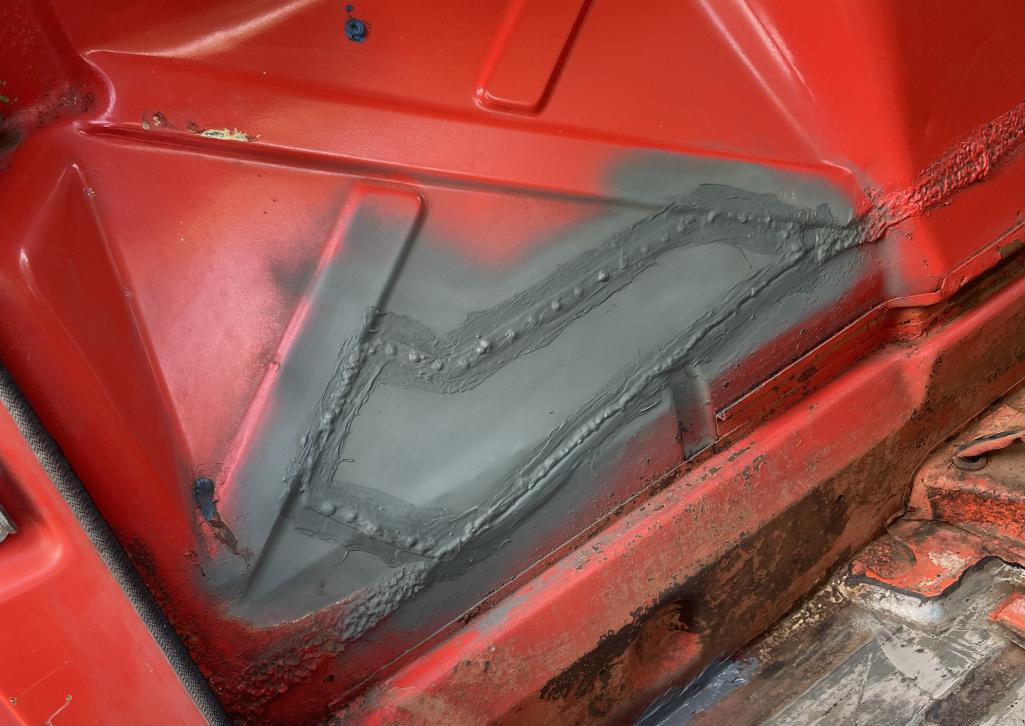 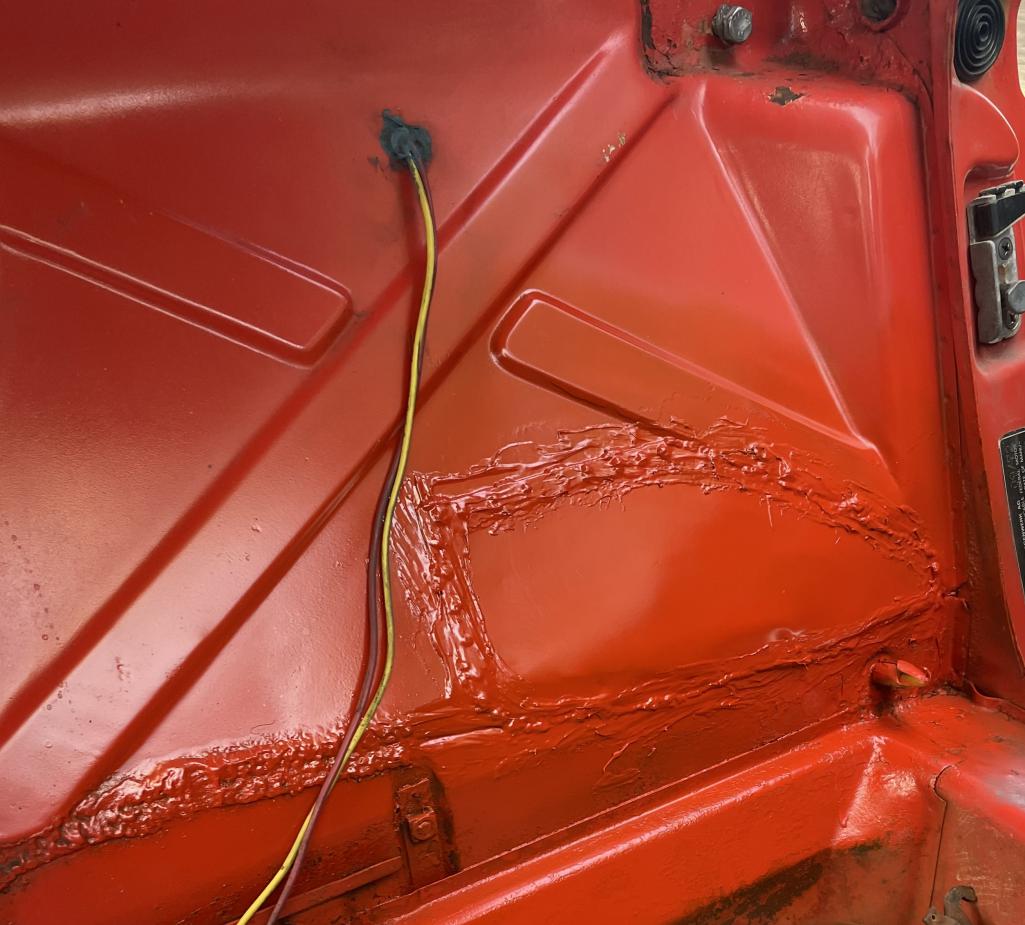
|
|
|
|
| Literati914 |
Apr 8 2026, 04:14 PM
Post
#6
|
|
Advanced Member Group: Members Posts: 2,261 Joined: 16-November 06 From: Dallas, TX Member No.: 7,222 Region Association: Southwest Region |
Engine Compartment:
The hell-hole is in great condition on this car, no issues there. The original battery stand was in great shape also, but the battery tray needed some attention. So, I removed and replaced it. Attached thumbnail(s) 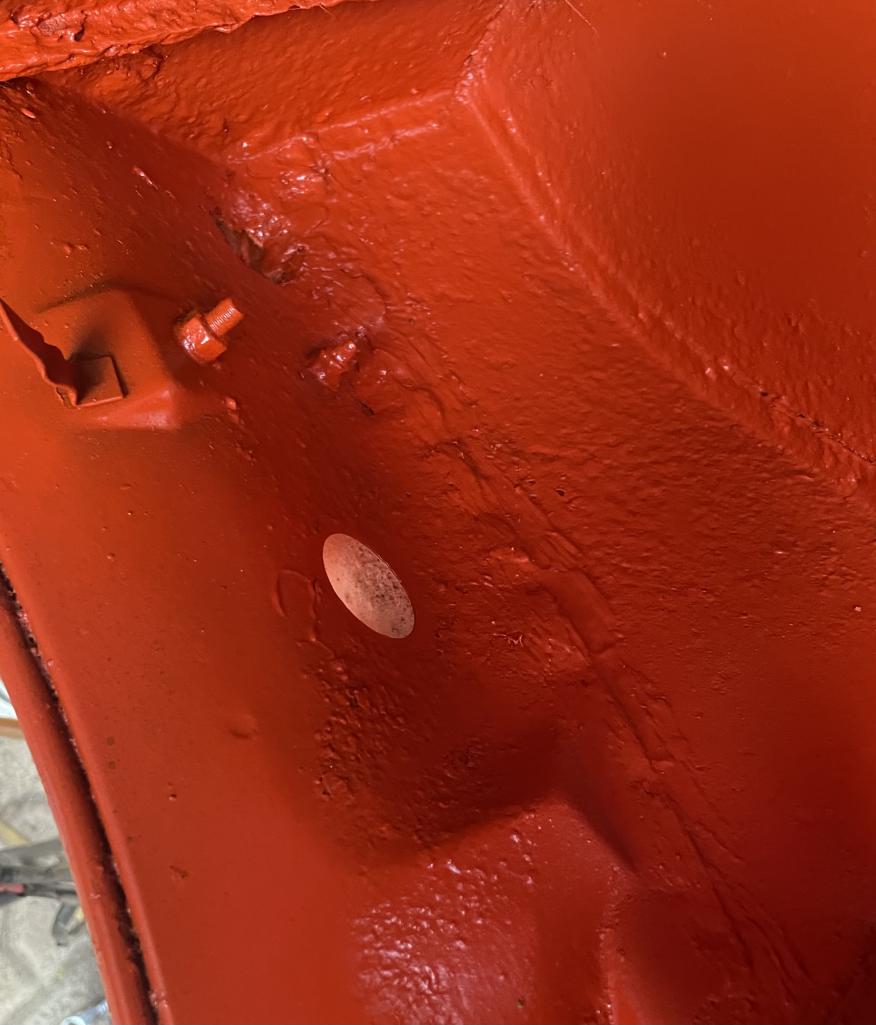 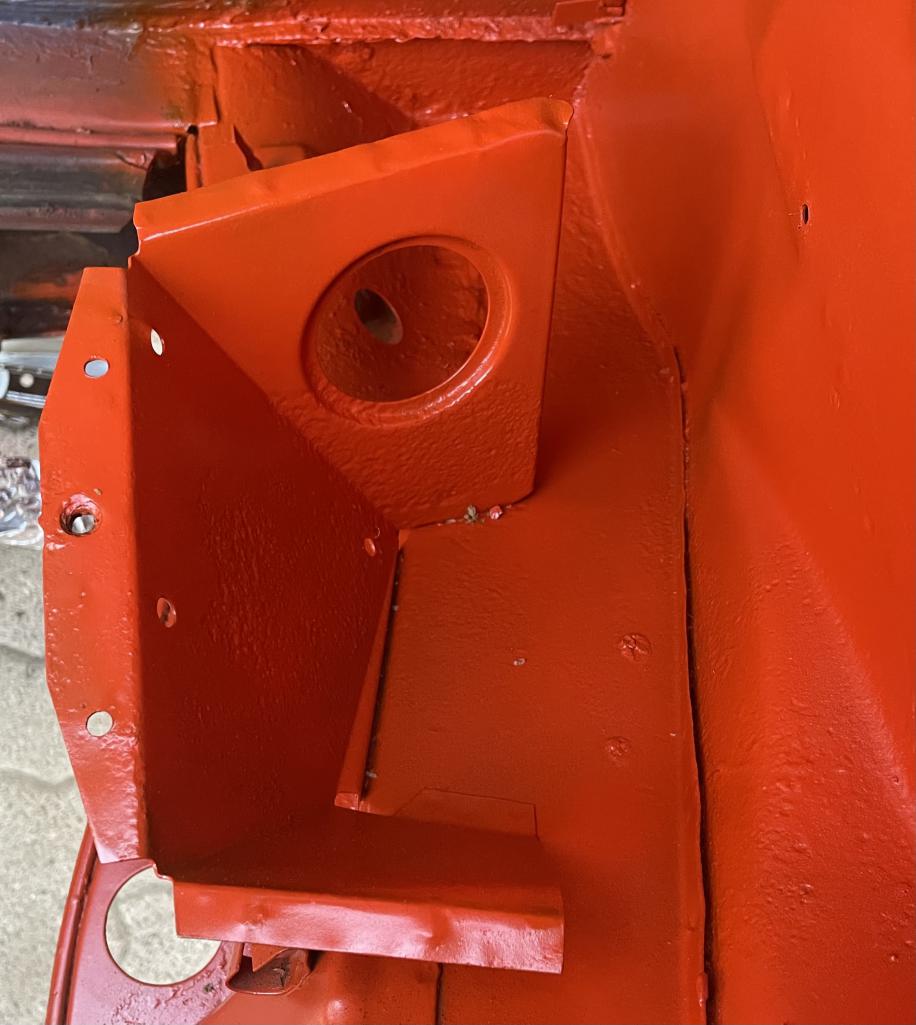
|
|
|
|
| Literati914 |
Apr 8 2026, 04:16 PM
Post
#7
|
|
Advanced Member Group: Members Posts: 2,261 Joined: 16-November 06 From: Dallas, TX Member No.: 7,222 Region Association: Southwest Region |
..and the replacement tray
Attached thumbnail(s) 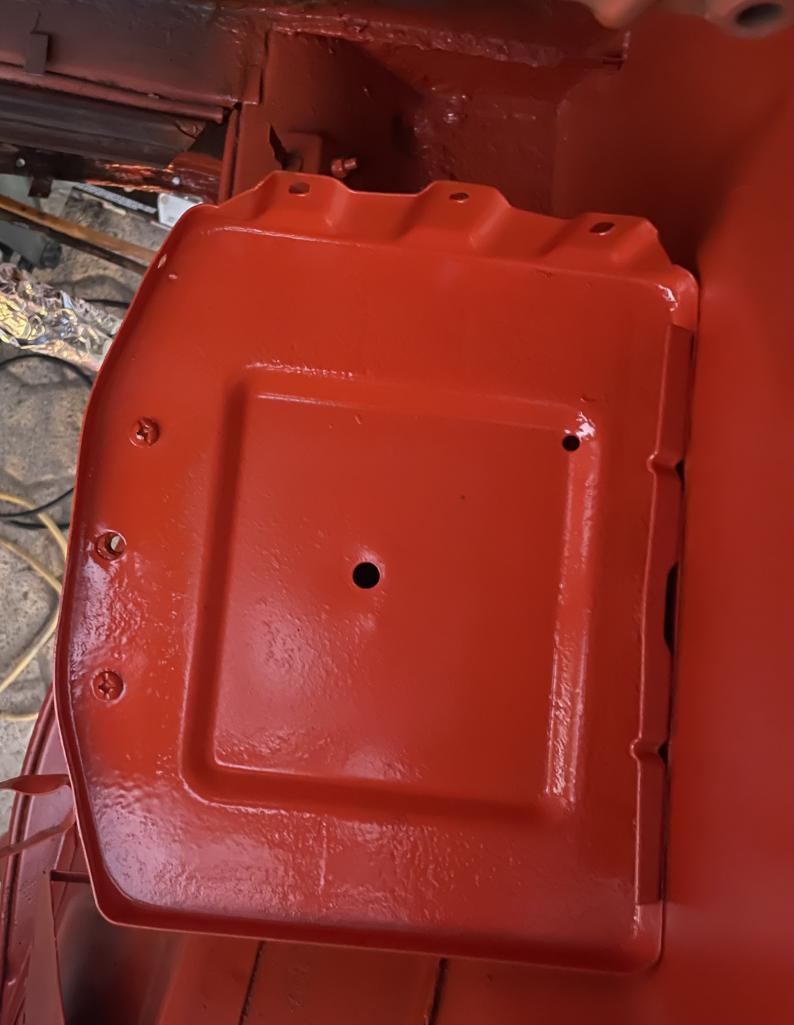
|
|
|
|
| Literati914 |
Apr 8 2026, 04:18 PM
Post
#8
|
|
Advanced Member Group: Members Posts: 2,261 Joined: 16-November 06 From: Dallas, TX Member No.: 7,222 Region Association: Southwest Region |
I also, weld/reinforced the engine lid brackets under the glass, as well as the trunk bracket receivers at the upper sides in the engine compartment. Then I cleaned up the engine bay and top coated the paint.
Attached thumbnail(s) 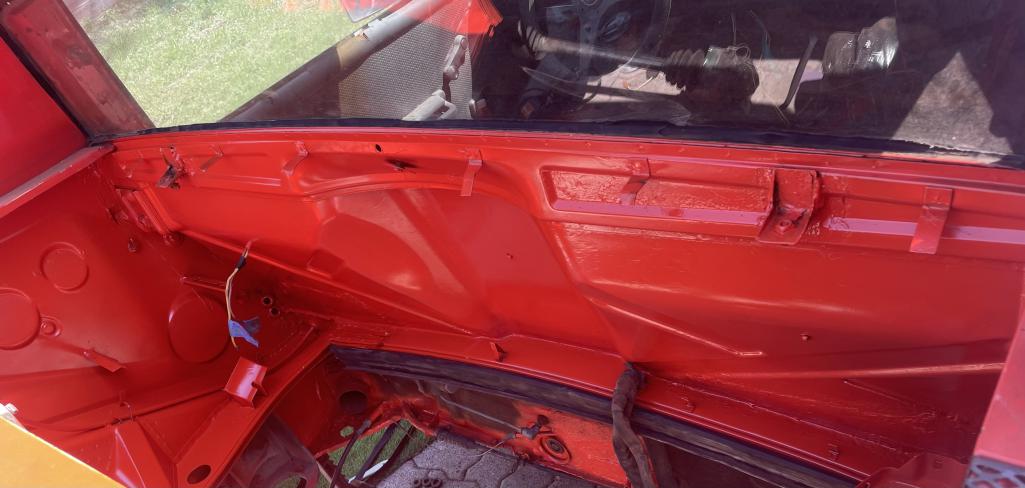
|
|
|
|
| Literati914 |
Apr 8 2026, 04:24 PM
Post
#9
|
|
Advanced Member Group: Members Posts: 2,261 Joined: 16-November 06 From: Dallas, TX Member No.: 7,222 Region Association: Southwest Region |
There was a repair at the lower firewall area at the "cables" area, done by a previous owner. Usually when I see this, it's poorly done and in terrible shape but on this car, the repair is very solid. I cleaned it up real good, primed, sealed and top coated it.
Attached thumbnail(s) 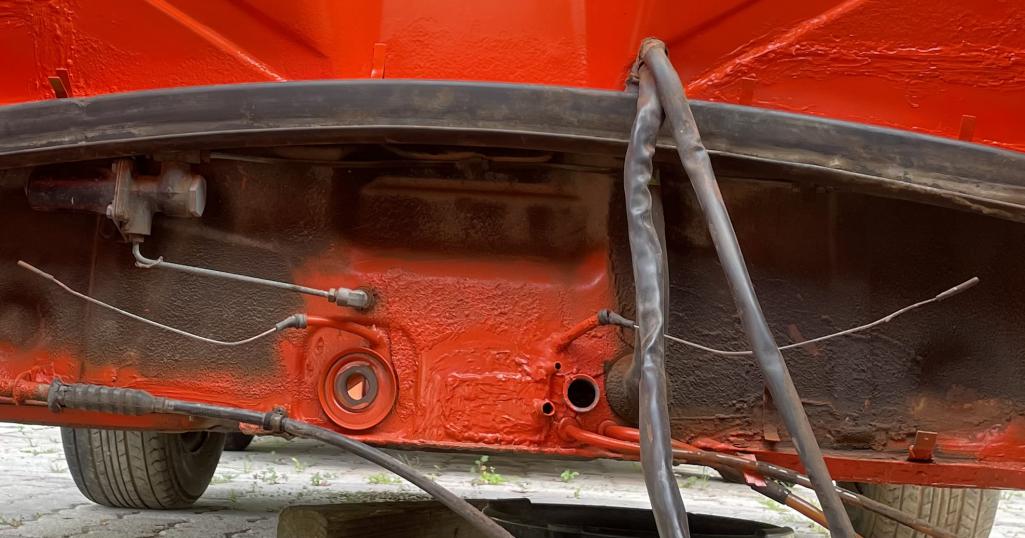
|
|
|
|
| Literati914 |
Apr 8 2026, 04:33 PM
Post
#10
|
|
Advanced Member Group: Members Posts: 2,261 Joined: 16-November 06 From: Dallas, TX Member No.: 7,222 Region Association: Southwest Region |
Then I turned my attention to the floors:
I removed the stock sound deadener and poked around with a screw driver. I found plenty of areas needing attention. Luckily I have a parts car and was able to cut repair patches that matched areas that I had to cut away. I primed then welded the areas up, primed, seam sealed and primed again. examples- Attached thumbnail(s) 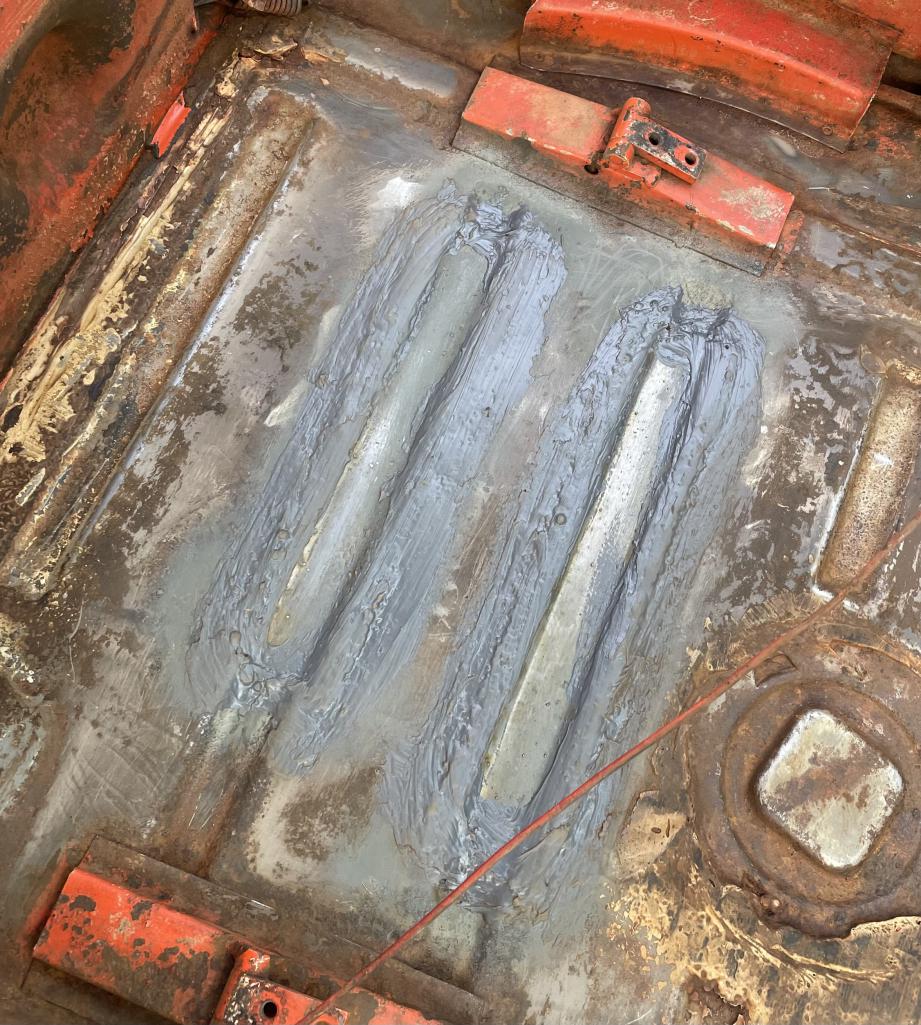
|
|
|
|
| Literati914 |
Apr 8 2026, 04:35 PM
Post
#11
|
|
Advanced Member Group: Members Posts: 2,261 Joined: 16-November 06 From: Dallas, TX Member No.: 7,222 Region Association: Southwest Region |
more examples -
Attached thumbnail(s) 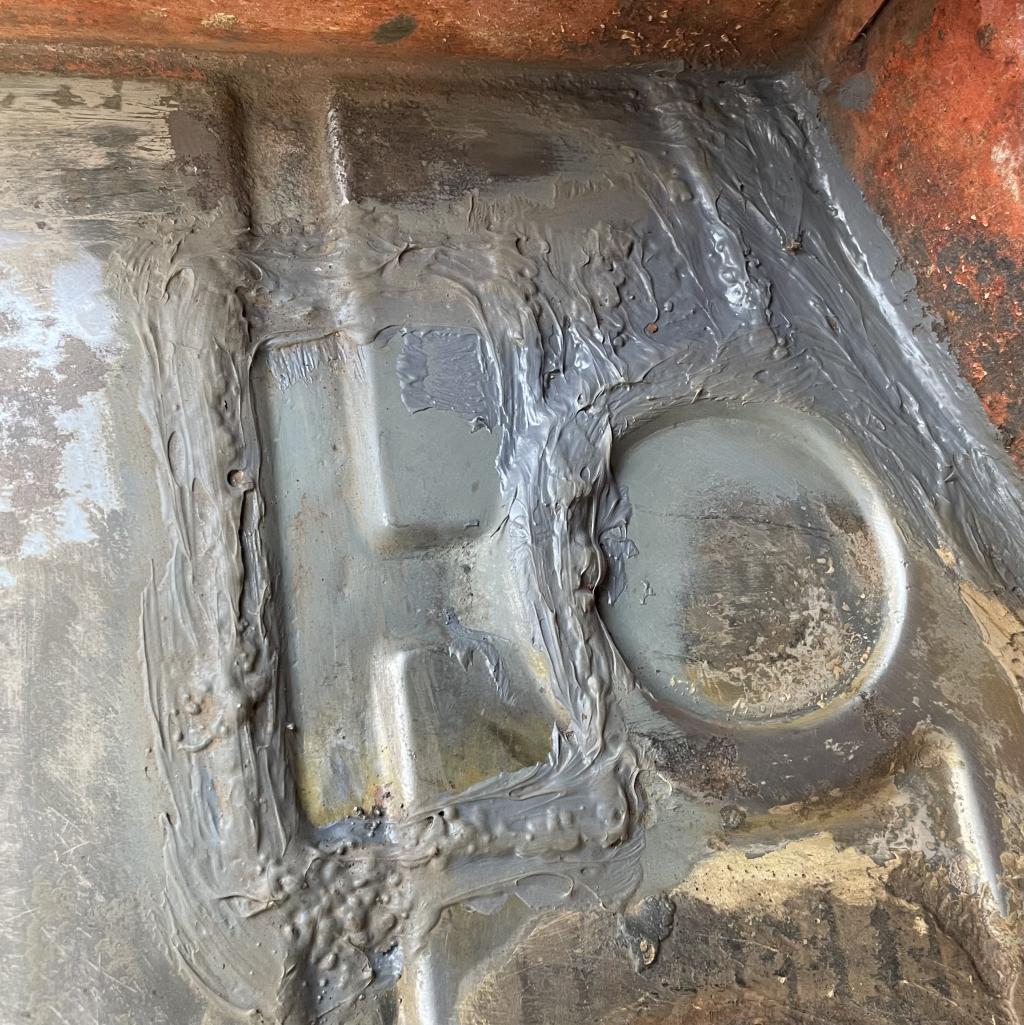
|
|
|
|
| Literati914 |
Apr 8 2026, 04:38 PM
Post
#12
|
|
Advanced Member Group: Members Posts: 2,261 Joined: 16-November 06 From: Dallas, TX Member No.: 7,222 Region Association: Southwest Region |
Finally I added two coats of Chassis Saver rust preventative encapsulating paint to the entire floor pan area.
Attached thumbnail(s) 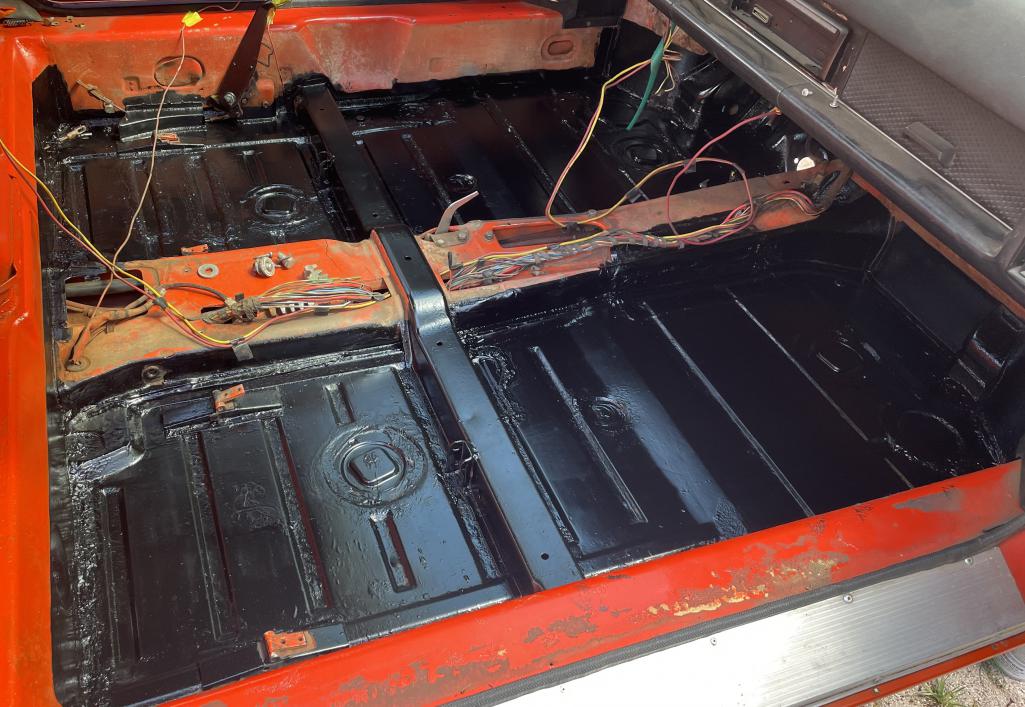
|
|
|
|
| Literati914 |
Apr 8 2026, 04:46 PM
Post
#13
|
|
Advanced Member Group: Members Posts: 2,261 Joined: 16-November 06 From: Dallas, TX Member No.: 7,222 Region Association: Southwest Region |
I re-installed the cleaned up and re-sprayed trailing arms and brackets (they had a lot of orange over spray on them from a previous owner and it bugged me). Then I installed new soft brake hoses back there as well.
Attached thumbnail(s) 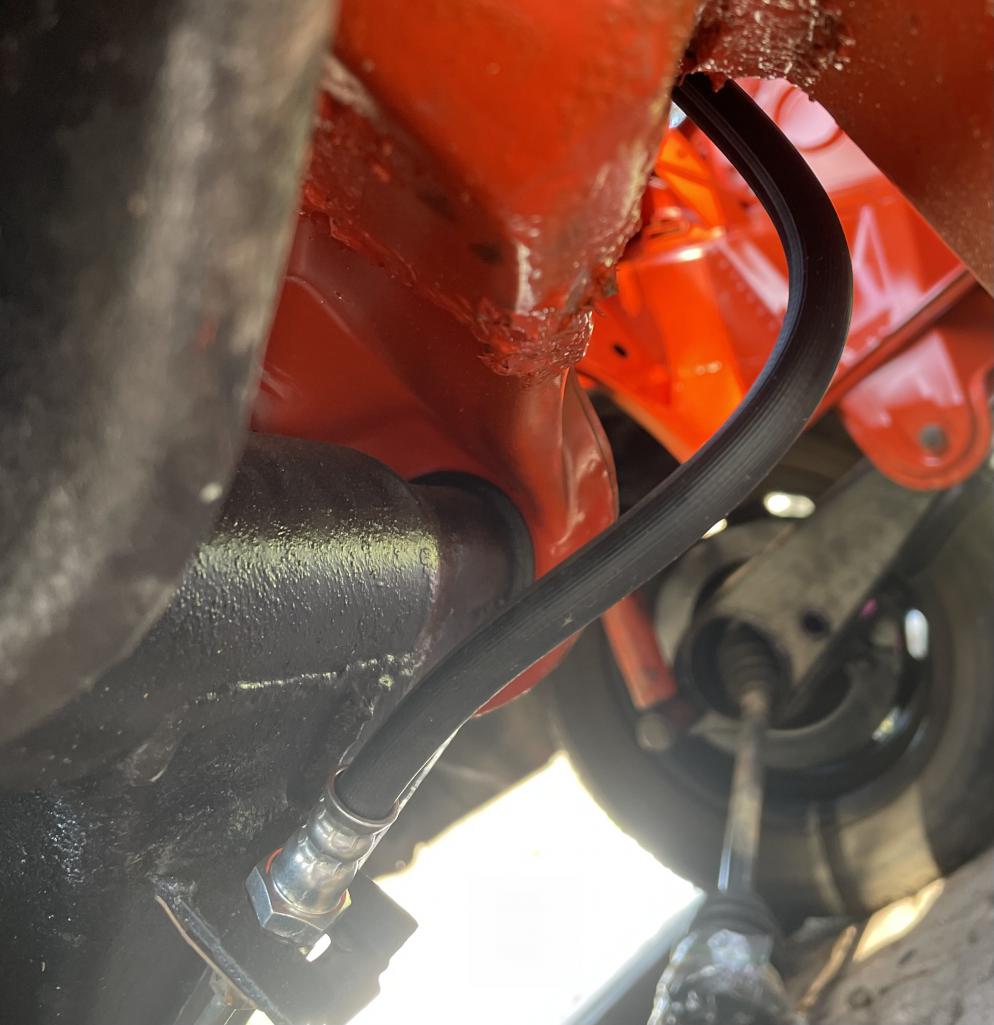
|
|
|
|
| seanpaulmc |
Apr 8 2026, 05:19 PM
Post
#14
|
|
Member Group: Members Posts: 441 Joined: 6-December 16 From: Orlando, FL Member No.: 20,649 Region Association: South East States |
Good on you for bringing another one back! So good to see.
What’s the color? And, what are you using for paint? Cheers (IMG:style_emoticons/default/beerchug.gif) |
|
|
|
| Literati914 |
Apr 8 2026, 05:42 PM
Post
#15
|
|
Advanced Member Group: Members Posts: 2,261 Joined: 16-November 06 From: Dallas, TX Member No.: 7,222 Region Association: Southwest Region |
QUOTE(seanpaulmc @ Apr 8 2026, 06:19 PM)  Good on you for bringing another one back! So good to see. What’s the color? And, what are you using for paint? Cheers (IMG:style_emoticons/default/beerchug.gif) Tag on the door post says "L32K" , Phoenix Red. I'm using a Rustoleum spray bomb at the engine compartment, etc., that basically matches to a T, "Fire Orange", only available in Satin which is great for this kind of match up to aged single stage. Here I've cleaned up the rocker/longs on both sides and used the Rustoleum product - Attached thumbnail(s) 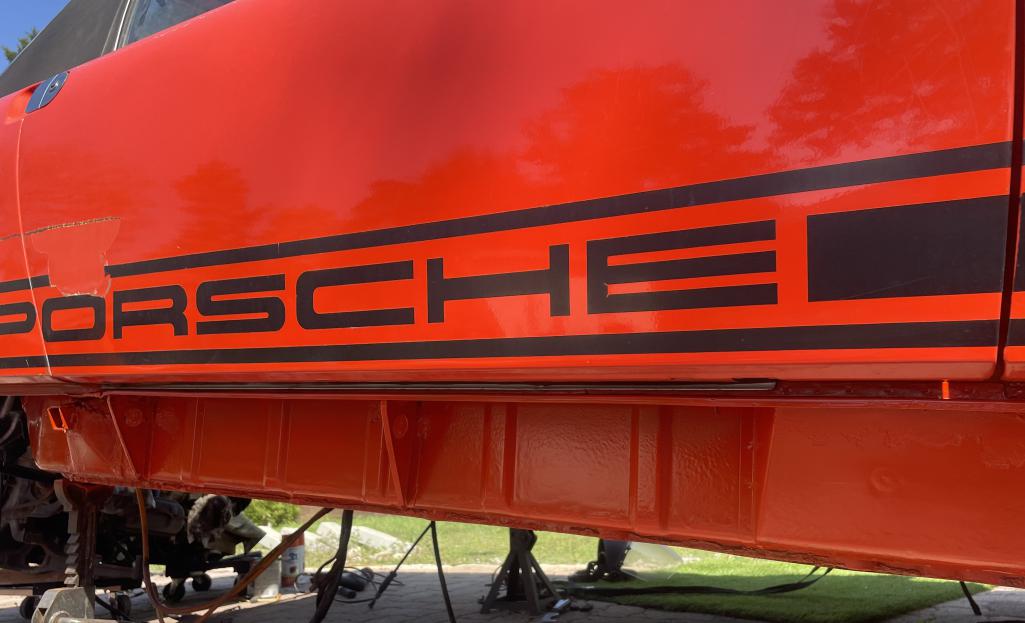
|
|
|
|
| 930cabman |
Apr 8 2026, 06:11 PM
Post
#16
|
|
Advanced Member Group: Members Posts: 4,578 Joined: 12-November 20 From: Buffalo Member No.: 24,877 Region Association: North East States |
QUOTE(Literati914 @ Apr 8 2026, 03:54 PM) Obvious Issues: Leaning right rear wheel and a riveted on license plate covering a rust hole on the firewall behind the right side, driver's seat. Structural Repairs: First I removed the engine and pulled all tin for a clean up and respray. I removed the trailing arms on both sides, stripped the equipment off of them, cleaned and resprayed. I then cut off the rust damaged right side suspension console ear and replaced it. I took many measurements from two other 914s I have and made sure the new ear was precisely placed. I used a combo of both flange/plug welds and seam/edge welds here for strength. All was primed, seam sealed and top coated. This area is now very solid and I'm happy with the repair, should last far into the future now. New ear is great, how did you manage the "connector" between the inner and outer sections? Nice project, looks as though she could have used some sun screen |
|
|
|
| Literati914 |
Apr 8 2026, 07:30 PM
Post
#17
|
|
Advanced Member Group: Members Posts: 2,261 Joined: 16-November 06 From: Dallas, TX Member No.: 7,222 Region Association: Southwest Region |
QUOTE(930cabman @ Apr 8 2026, 07:11 PM) New ear is great, how did you manage the "connector" between the inner and outer sections? Nice project, looks as though she could have used some sun screen That section is hollow except for the frame rail that is internal. But the frame rail was not effected by any rust, only the ear itself. They sell whole sections for restoration, that go above and below the engine shelf - so I cut way more from my donor car than needed for this repair, not knowing how deep the rust extended. I was pleasantly surprised. Here's a pic of the parts I didn't use from my donor (this has been left out in the elements since the cuts, repair... btw, the ear got paint internally too) Attached thumbnail(s) 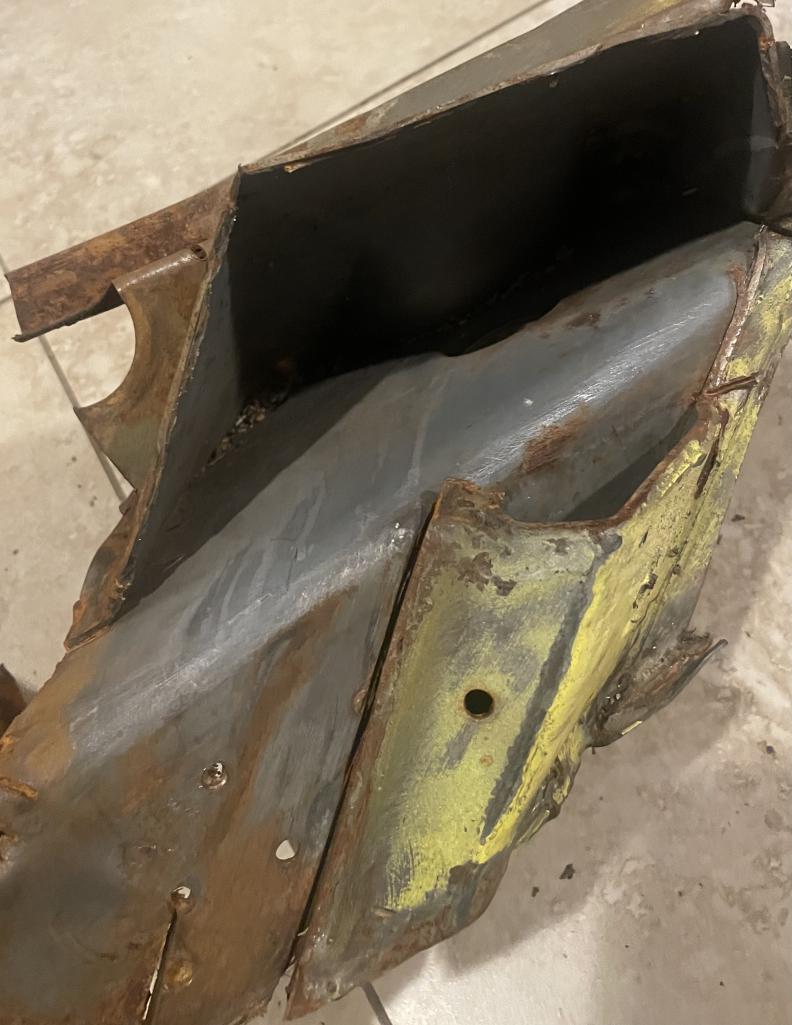
|
|
|
|
| Literati914 |
Apr 8 2026, 07:34 PM
Post
#18
|
|
Advanced Member Group: Members Posts: 2,261 Joined: 16-November 06 From: Dallas, TX Member No.: 7,222 Region Association: Southwest Region |
Here's the other rocker, I did work on the receiver here too,
Attached thumbnail(s) 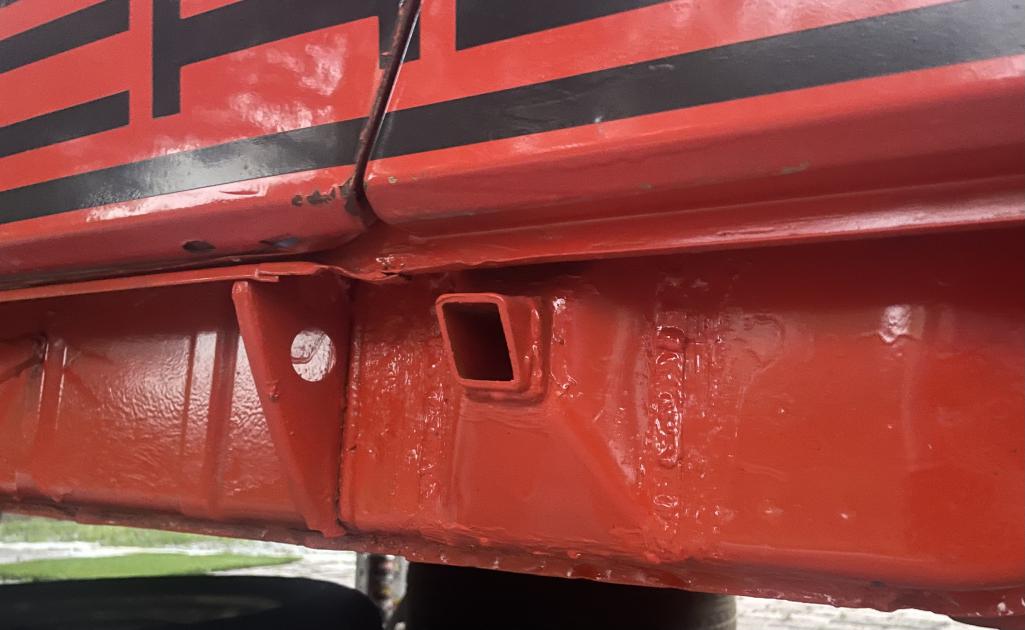
|
|
|
|
| Literati914 |
Apr 8 2026, 07:38 PM
Post
#19
|
|
Advanced Member Group: Members Posts: 2,261 Joined: 16-November 06 From: Dallas, TX Member No.: 7,222 Region Association: Southwest Region |
The car was missing it's trunk torsion rods and since (I feel) like they've helped cause the bracket mounts to loosen (as I mentioned earlier), plus I got tired of propping the lid open - I added hydraulic lifts.
Attached thumbnail(s) 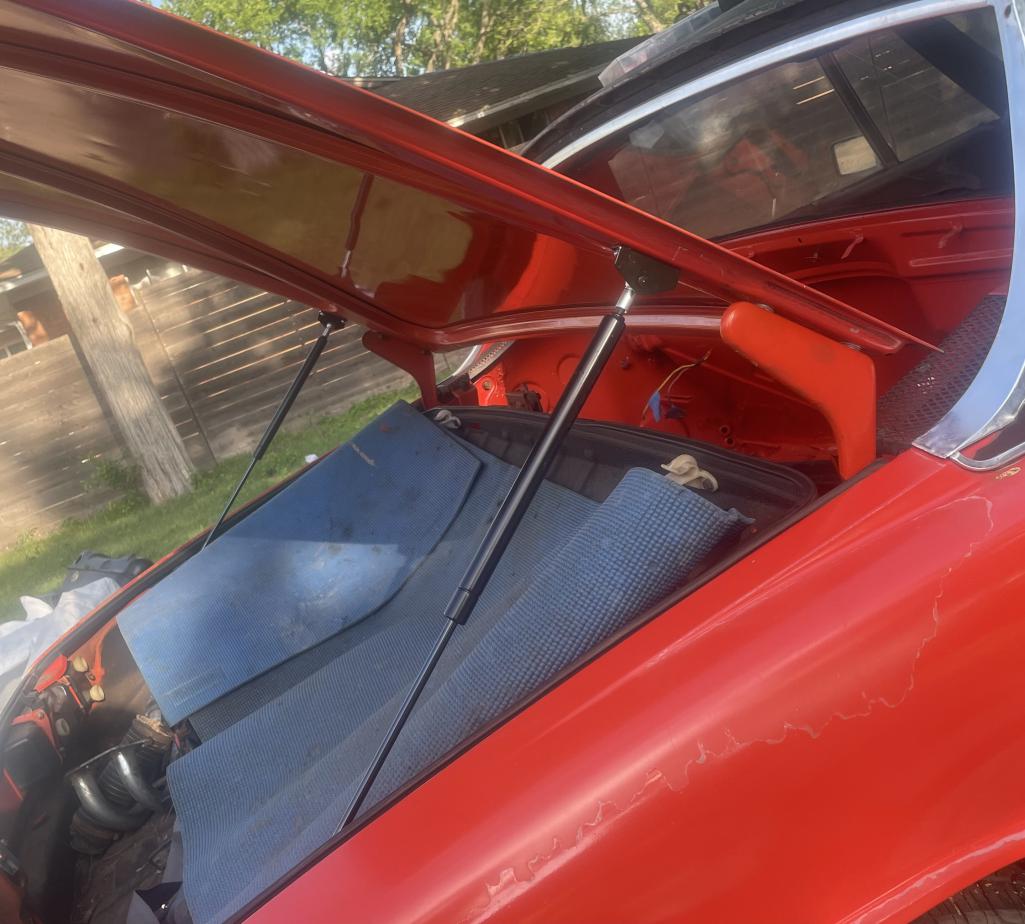
|
|
|
|
| Literati914 |
Apr 8 2026, 07:42 PM
Post
#20
|
|
Advanced Member Group: Members Posts: 2,261 Joined: 16-November 06 From: Dallas, TX Member No.: 7,222 Region Association: Southwest Region |
I currently got the nose up to work on fuel tank etc.
Attached thumbnail(s) 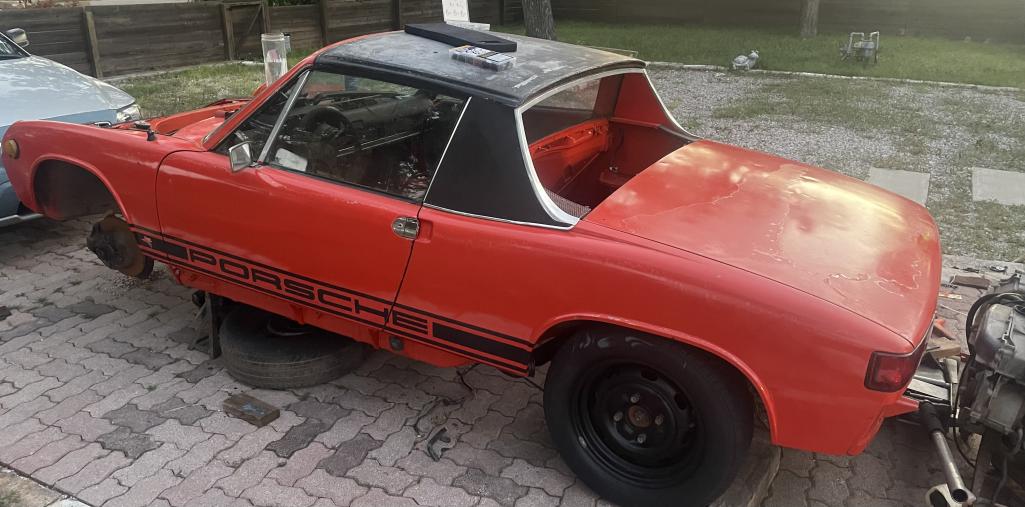
|
|
|
|
|
1 User(s) are reading this topic (1 Guests and 0 Anonymous Users)
0 Members:

|
Lo-Fi Version | Time is now: 9th April 2026 - 12:50 AM |
Invision Power Board
v9.1.4 © 2026 IPS, Inc.