|
|
|
Porsche, and the Porsche crest are registered trademarks of Dr. Ing. h.c. F. Porsche AG.
This site is not affiliated with Porsche in any way. Its only purpose is to provide an online forum for car enthusiasts. All other trademarks are property of their respective owners. |
|
|

  |

| Doug Leggins |
 Apr 18 2006, 09:13 PM Apr 18 2006, 09:13 PM
Post
#141
|
|
Senior Member  Group: Benefactors Posts: 1,358 Joined: 6-February 03 From: Nashville, Indiana Member No.: 261 Region Association: None |
puffed and cracked
|
   |

 
|
| Doug Leggins |
Apr 18 2006, 09:18 PM
Post
#142
|
|
Senior Member Group: Benefactors Posts: 1,358 Joined: 6-February 03 From: Nashville, Indiana Member No.: 261 Region Association: None |
I considered several options for repairing the fiberboard and decided to use fiberglass resin. So far it seems to be working out very well. I used clamps and pads wrapped in plastic bags to compress and hold the repair areas in place until the resin cured. The plastic peeled away from the resin very clean leaving a good repair surface.
Several areas clamped and curing. Attached image(s) 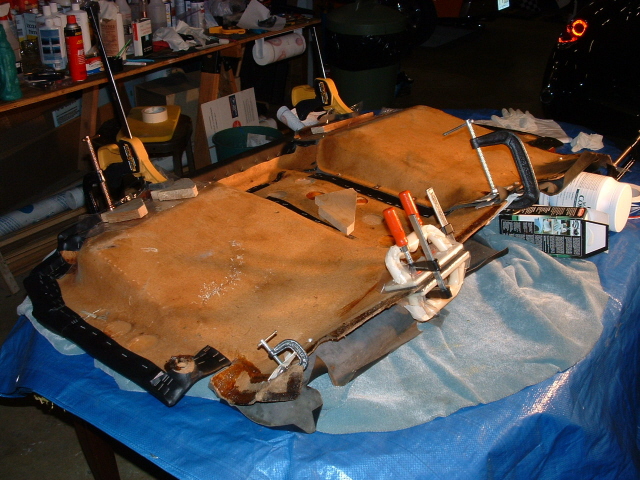
|
|
|
|
| Doug Leggins |
Apr 18 2006, 09:23 PM
Post
#143
|
|
Senior Member Group: Benefactors Posts: 1,358 Joined: 6-February 03 From: Nashville, Indiana Member No.: 261 Region Association: None |
completed repairs. I also put a light coating of fiberglass resin around the perimeter of the fiberboard to tighten up the fiberboard. Then I used 3M spray adhesive to reattach the vinyl to the fiberboard. Instead of spraying the adhesive directly onto the fiberboard and vinyl, I sprayed the adhesive into a container and then brushed it onto the 2 surfaces -much cleaner process for me.
Attached image(s) 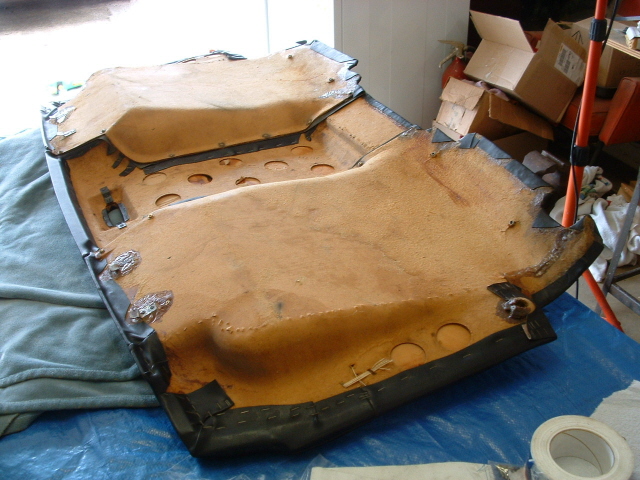
|
|
|
|
| Doug Leggins |
Apr 18 2006, 09:25 PM
Post
#144
|
|
Senior Member Group: Benefactors Posts: 1,358 Joined: 6-February 03 From: Nashville, Indiana Member No.: 261 Region Association: None |
The effort paid off well!
Attached image(s) 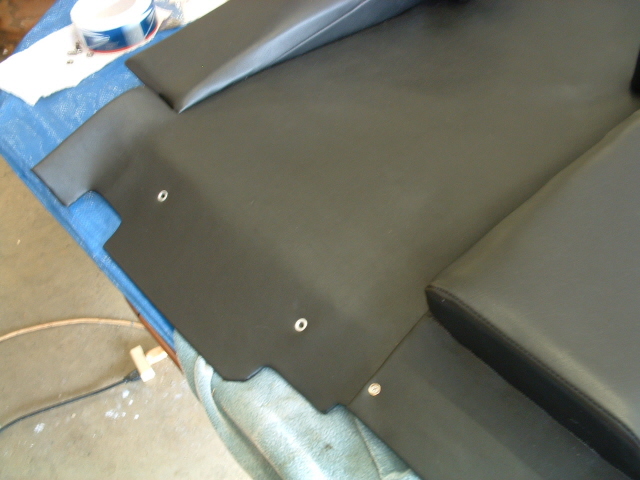
|
|
|
|
| Doug Leggins |
Apr 18 2006, 09:27 PM
Post
#145
|
|
Senior Member Group: Benefactors Posts: 1,358 Joined: 6-February 03 From: Nashville, Indiana Member No.: 261 Region Association: None |
Hours of work ... but the finished pad is nice!
Attached image(s) 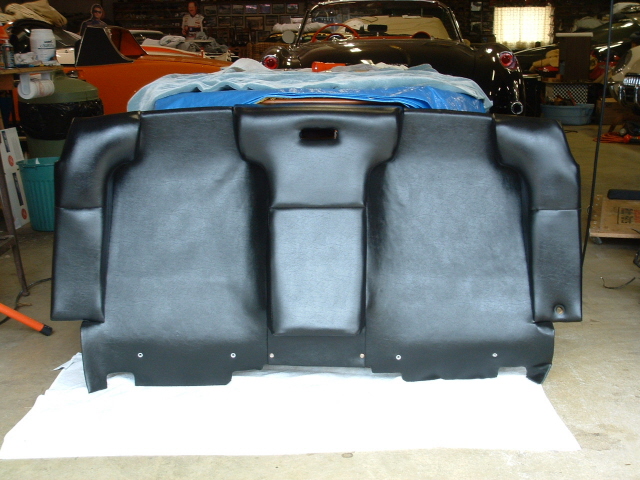
|
|
|
|
| Doug Leggins |
Apr 18 2006, 09:33 PM
Post
#146
|
|
Senior Member Group: Benefactors Posts: 1,358 Joined: 6-February 03 From: Nashville, Indiana Member No.: 261 Region Association: None |
A little prep before installing the rear targa bar pad. I painted a small area black where there is a gap between the targa pad and the pillar covers. Without the black there would have been orange visible in the gap after the parts were installed.
Attached image(s) 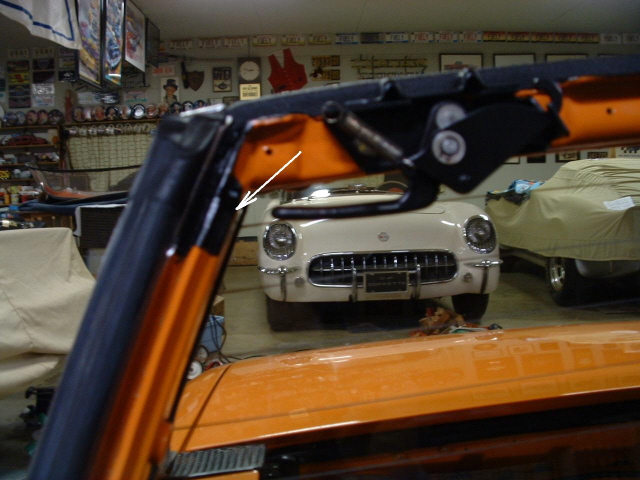
|
|
|
|
| Doug Leggins |
Apr 18 2006, 09:35 PM
Post
#147
|
|
Senior Member Group: Benefactors Posts: 1,358 Joined: 6-February 03 From: Nashville, Indiana Member No.: 261 Region Association: None |
Got real lucky and found a NOS targa pad -thanks Glenn!
Attached image(s) 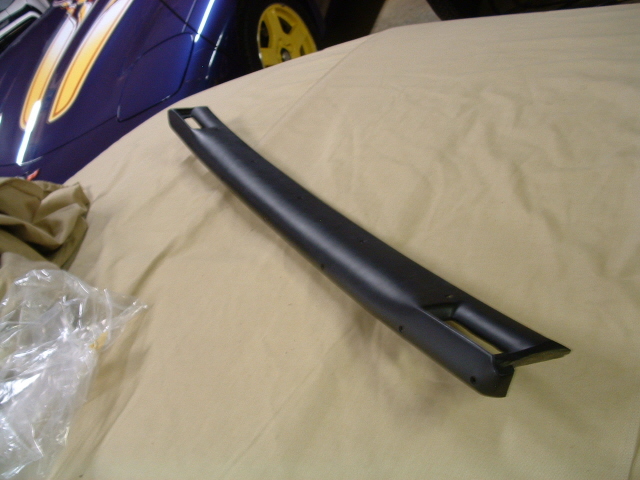
|
|
|
|
| Doug Leggins |
Apr 18 2006, 09:38 PM
Post
#148
|
|
Senior Member Group: Benefactors Posts: 1,358 Joined: 6-February 03 From: Nashville, Indiana Member No.: 261 Region Association: None |
targa pad installed, also installed 2 rows of black tape at the bottom of the rear window and the vinyl strips behind the seat belt reels.
Attached image(s) 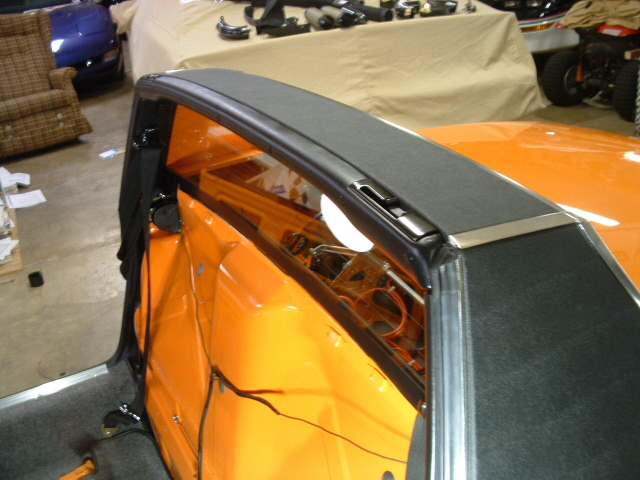
|
|
|
|
| Doug Leggins |
Apr 18 2006, 09:39 PM
Post
#149
|
|
Senior Member Group: Benefactors Posts: 1,358 Joined: 6-February 03 From: Nashville, Indiana Member No.: 261 Region Association: None |
backpad installed
Attached image(s) 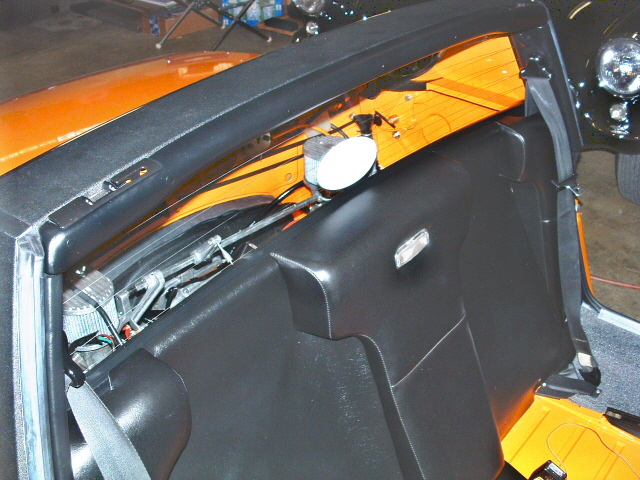
|
|
|
|
| Doug Leggins |
Apr 18 2006, 09:42 PM
Post
#150
|
|
Senior Member Group: Benefactors Posts: 1,358 Joined: 6-February 03 From: Nashville, Indiana Member No.: 261 Region Association: None |
Another pic of backpad repair that I wanted to show y'all. The repair of the previously puffed and cracked area turned out very nice.
Attached image(s) 
|
|
|
|
| Doug Leggins |
Apr 18 2006, 09:45 PM
Post
#151
|
|
Senior Member Group: Benefactors Posts: 1,358 Joined: 6-February 03 From: Nashville, Indiana Member No.: 261 Region Association: None |
Seat rails painted with Eastwood's Silver Cad rattle can paint. Nice finish! but I don't think that it is very representative of real silver cad. I painted the adjustment hoops with VHT black. I am curious to see if the black holds up under use.
Attached image(s) 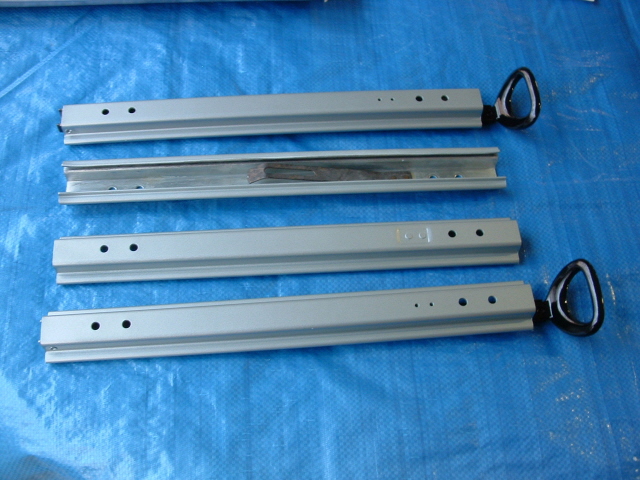
|
|
|
|
| Doug Leggins |
Apr 18 2006, 09:53 PM
Post
#152
|
|
Senior Member Group: Benefactors Posts: 1,358 Joined: 6-February 03 From: Nashville, Indiana Member No.: 261 Region Association: None |
I also spent a bunch of hours cleaning up and repairing a set of seats. They turned out great! I used a Permatex vinyl repair kit to touch up some small flaws. The repair areas were small, but i was impressed with how well the repair areas blended in. To improve the blending I used color coded black vinyl dye over the repairs. -Thanks Karl for the post on where to purchase the correct vinyl dye.
The passenger seat is original and is excellent. The driver's seat is a very good recover and looks great. If anyone has an original black driver's seat that is in excellent condition and you are willing to sell it -please let me know! Attached image(s) 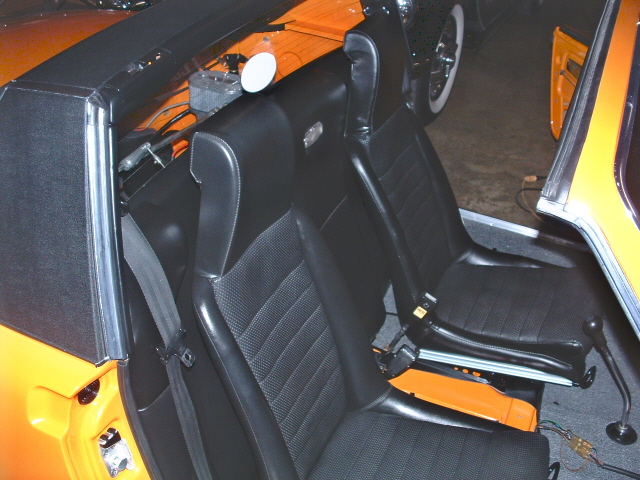
|
|
|
|
| Doug Leggins |
Apr 18 2006, 09:55 PM
Post
#153
|
|
Senior Member Group: Benefactors Posts: 1,358 Joined: 6-February 03 From: Nashville, Indiana Member No.: 261 Region Association: None |
another
Attached image(s) 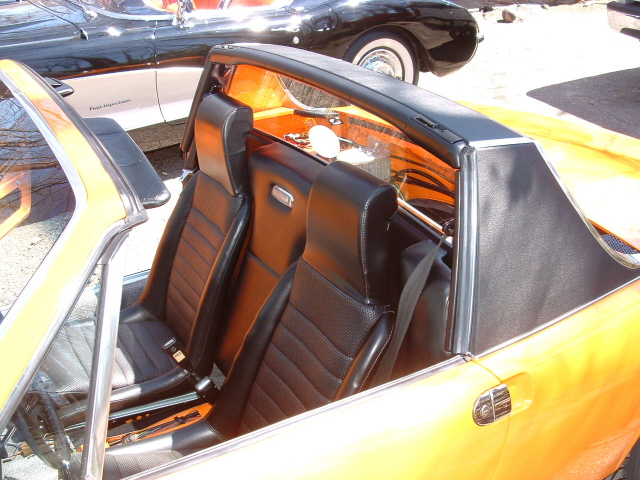
|
|
|
|
| Doug Leggins |
Apr 18 2006, 09:59 PM
Post
#154
|
|
Senior Member Group: Benefactors Posts: 1,358 Joined: 6-February 03 From: Nashville, Indiana Member No.: 261 Region Association: None |
That last pic reminds me that I lost one of my favorite parts of the car during the drive tonight. The oval on the rear window is the static cling 914 club sticker. It blew out of the window at around 65 mph -damit, didn't have it stuck down very well. Anyone have a spare they are willing to sell me.
|
|
|
|
| Lou W |
Apr 18 2006, 09:59 PM
Post
#155
|
|
"Here Kitty Kitty" my ass...... Group: Members Posts: 4,109 Joined: 9-May 04 From: Roseburg, OR. Member No.: 2,039 Region Association: Spain |
Fantastic job Doug, sure does look sweet. (IMG:style_emoticons/default/clap56.gif) (IMG:style_emoticons/default/clap56.gif) (IMG:style_emoticons/default/clap56.gif)
|
|
|
|
| Doug Leggins |
Apr 18 2006, 10:01 PM
Post
#156
|
|
Senior Member Group: Benefactors Posts: 1,358 Joined: 6-February 03 From: Nashville, Indiana Member No.: 261 Region Association: None |
Last pic for now.
I'll try to keep up with posting progress being made to get prepped for a drive to the Blue Grass Classic. Attached image(s) 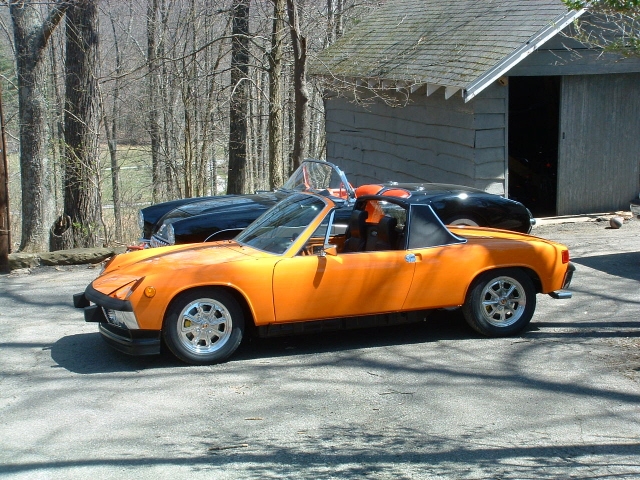
|
|
|
|
| Bertus |
Apr 19 2006, 06:12 AM
Post
#157
|
|
Member Group: Members Posts: 222 Joined: 2-May 05 From: Lexington, KY Member No.: 4,021 Region Association: South East States |
Doug, your car looks good! (IMG:style_emoticons/default/clap56.gif) Can't wait to see the car in person at the Bluegrass Classic!
Bert |
|
|
|
| robby750 |
Apr 19 2006, 07:41 AM
Post
#158
|
|
Senior Member Group: Members Posts: 646 Joined: 6-April 03 From: Lexington, Ky Member No.: 521 Region Association: South East States |
I can't wait to see the finished product too. The first time I saw this car it was nothing more than a white shell. Only problem, when you park next to Doug's, your car starts to look like crap.
|
|
|
|
| Doug Leggins |
Apr 23 2006, 07:41 PM
Post
#159
|
|
Senior Member Group: Benefactors Posts: 1,358 Joined: 6-February 03 From: Nashville, Indiana Member No.: 261 Region Association: None |
Got a little driving time in this weekend. The car is up to 73 miles now. I completed a couple of tasks over the weekend and have a couple of new ones to the list.
I rejetted the carbs. Went from 130 mains to 125. It had an impact on the stall at about 2300 RPM but did not get rif of it. I'm considering going back to the 130 and give them another try. I finally was able to get the driver's side headlight aligned and eyebrow installed. I was able to get the headlight aligned very well after some component manipulation. The eyebrow needs just a little more work but its not bad for now. I also finished the cleanup and reassembly of the center console. Unfortunately I have 2 new issues. I am getting oil near cylinder 3 on top of the tin. I thought that it was due to a poor connection of the oil breather hose to the breather port, but I redid the connection and still have the leak. I also have a little bit of fuel leaking out of the pass side carb. (IMG:style_emoticons/default/headbang.gif) Here are a couple of pics. Attached image(s) 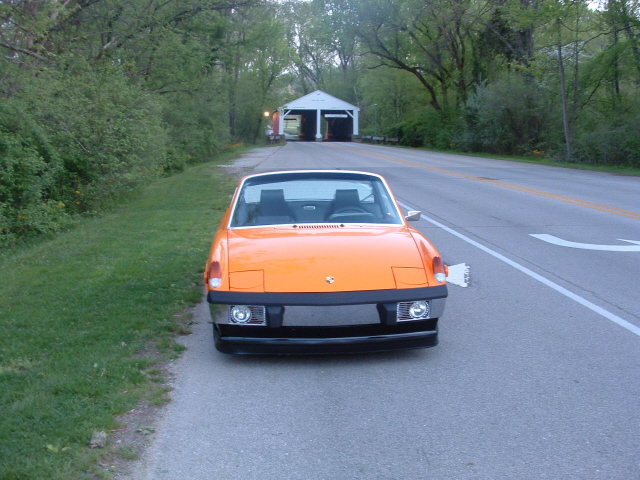
|
|
|
|
| Doug Leggins |
Apr 23 2006, 07:43 PM
Post
#160
|
|
Senior Member Group: Benefactors Posts: 1,358 Joined: 6-February 03 From: Nashville, Indiana Member No.: 261 Region Association: None |
I was thrilled to get pics of the car somewhere besides in the garage or in my driveway.
Attached image(s) 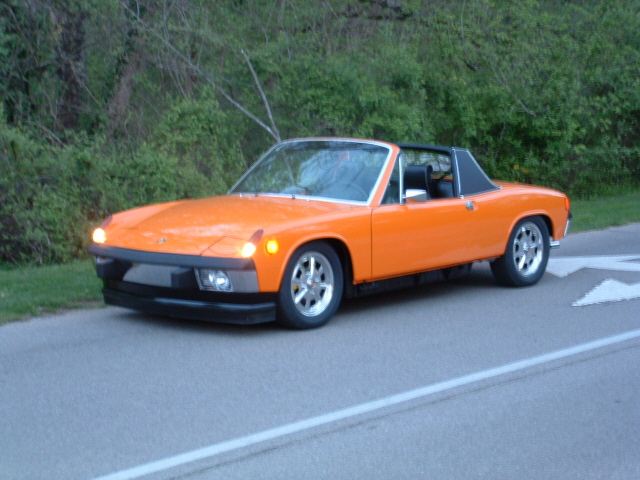
|
|
|
|
|
2 User(s) are reading this topic (2 Guests and 0 Anonymous Users)
0 Members:

|
Lo-Fi Version | Time is now: 8th February 2025 - 01:08 PM |
Invision Power Board
v9.1.4 © 2025 IPS, Inc.