|
|

|
Porsche, and the Porsche crest are registered trademarks of Dr. Ing. h.c. F. Porsche AG.
This site is not affiliated with Porsche in any way. Its only purpose is to provide an online forum for car enthusiasts. All other trademarks are property of their respective owners. |
|
|
  |
| bondo |
 Dec 14 2005, 09:41 PM Dec 14 2005, 09:41 PM
Post
#21
|
|
Practicing my perpendicular parking     Group: Members Posts: 4,277 Joined: 19-April 03 From: Los Osos, CA Member No.: 587 Region Association: Central California |
What if you have an early car with no dash side vents? Those holes come in handy.
|
| markb |
 Dec 14 2005, 10:01 PM Dec 14 2005, 10:01 PM
Post
#22
|
|
914less :(      Group: Members Posts: 5,449 Joined: 22-January 03 From: Nipomo, CA Member No.: 180 Region Association: Central California 
|
You can get to them, it's just a little tougher. You don't have the vents in the way, so once you have the instruments moved, and the glove box out, you can get to the nuts.
|
| boxstr |
 Dec 14 2005, 10:40 PM Dec 14 2005, 10:40 PM
Post
#23
|
|
MEMBER:PACIFIC NORTHWEST REGION      Group: Members Posts: 7,522 Joined: 25-December 02 From: OREGON Member No.: 12 Region Association: Pacific Northwest |
One thing you will find is that some of the nuts are alloy, and not always nylon.
Great thread. CCLINCOMPLETYLEYNUTZ |
| jfort |
 Dec 15 2005, 07:36 AM Dec 15 2005, 07:36 AM
Post
#24
|
|
Senior Member    Group: Members Posts: 1,163 Joined: 5-May 03 From: Findlay, OH Member No.: 652 Region Association: Upper MidWest 
|
thanks for the documentation and especially the pictures. the more of this type of thing the better!!
|
| Bartlett 914 |
 Dec 15 2005, 08:02 AM Dec 15 2005, 08:02 AM
Post
#25
|
|
Advanced Member     Group: Members Posts: 2,218 Joined: 30-August 05 From: South Elgin IL Member No.: 4,707 Region Association: Upper MidWest |
Great thread! I was getting ready to do this myself for the first time. You just took a lot of the guesswork out.
Mark |
| tat2dphreak |
 Dec 15 2005, 09:12 AM Dec 15 2005, 09:12 AM
Post
#26
|
||
|
stoya, stoya, stoya      Group: Benefactors Posts: 8,797 Joined: 6-June 03 From: Wylie, TX Member No.: 792 Region Association: Southwest Region  |
(IMG:http://www.914world.com/bbs2/html/emoticons/agree.gif) this is one of the most frustrating things to do the first time, a good walkthrough like this helps a ton... good job! |
||
| rhodyguy |
 Dec 15 2005, 09:26 AM Dec 15 2005, 09:26 AM
Post
#27
|
|
Chimp Sanctuary NW. Check it out.                Group: Members Posts: 22,236 Joined: 2-March 03 From: Orion's Bell. The BELL! Member No.: 378 Region Association: Galt's Gulch |
great write up and photos. perfect opportunity to clean the fresh air fan contacts too. (IMG:http://www.914world.com/bbs2/html/emoticons/wink.gif)
k |
| Tobra |
 Dec 15 2005, 11:55 AM Dec 15 2005, 11:55 AM
Post
#28
|
|
Senior Member    Group: Members Posts: 1,453 Joined: 22-August 05 From: Sacramento, CA Member No.: 4,634 |
Very cool, you must have small digital camera and little hands for some of those picks. Can you get the seal between the dash and the windshield out with the dash removed, or does the windshield have to be out too?
|
| Aaron Cox |
 Dec 15 2005, 12:02 PM Dec 15 2005, 12:02 PM
Post
#29
|
||
|
Professional Lawn Dart                Group: Retired Admin Posts: 24,541 Joined: 1-February 03 From: Corona, CA Member No.: 219 Region Association: Southern California |
its replaceable with the dash in...AND the window in.... ive done it |
||
| Jeffs9146 |
 Dec 15 2005, 12:14 PM Dec 15 2005, 12:14 PM
Post
#30
|
||
|
Ski Bum     Group: Members Posts: 4,062 Joined: 10-January 03 From: Discovery Bay, Ca Member No.: 128 |
You don't even have to take off the wheel! |
||
| grasshopper |
 Dec 18 2005, 06:52 PM Dec 18 2005, 06:52 PM
Post
#31
|
|
Advanced Member     Group: Members Posts: 2,613 Joined: 10-December 04 From: Valdosta, GA Member No.: 3,258 Region Association: None |
well, i used this thread, and it worked great!! Since i am completely stripping this car, i decided to add to your thread, and remove the dash frame under it. it only took me about an hour. first, you need to remove all of the switches, the steering wheel, and disconnect all the other electrical connections, and pull them down below
With the steering wheel off, and the switches pull out of the back Attached image(s) 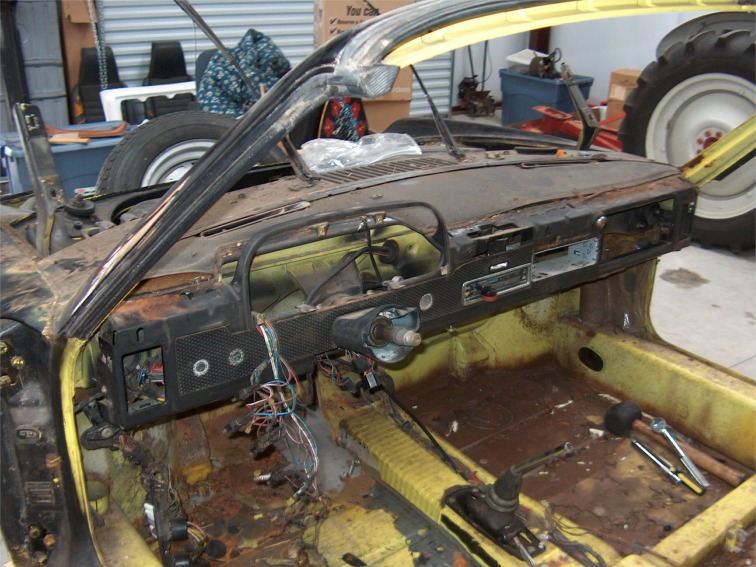
|
| grasshopper |
 Dec 18 2005, 06:57 PM Dec 18 2005, 06:57 PM
Post
#32
|
|
Advanced Member     Group: Members Posts: 2,613 Joined: 10-December 04 From: Valdosta, GA Member No.: 3,258 Region Association: None |
next, remove the fresh air control unit in the dash. There are two ...8mm? nuts holding the cables to it, and a 10mm nut holding it to the body. Pull it out the front. Next, remove the steering column: there are four 7mm allen bolts holding it to the body
Attached image(s) 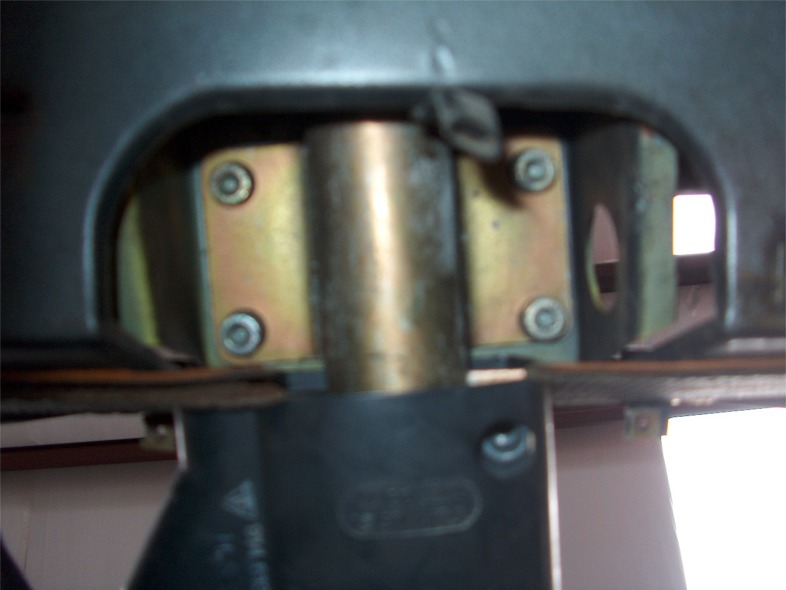
|
| grasshopper |
 Dec 18 2005, 06:58 PM Dec 18 2005, 06:58 PM
Post
#33
|
|
Advanced Member     Group: Members Posts: 2,613 Joined: 10-December 04 From: Valdosta, GA Member No.: 3,258 Region Association: None |
with the nuts out
Attached image(s) 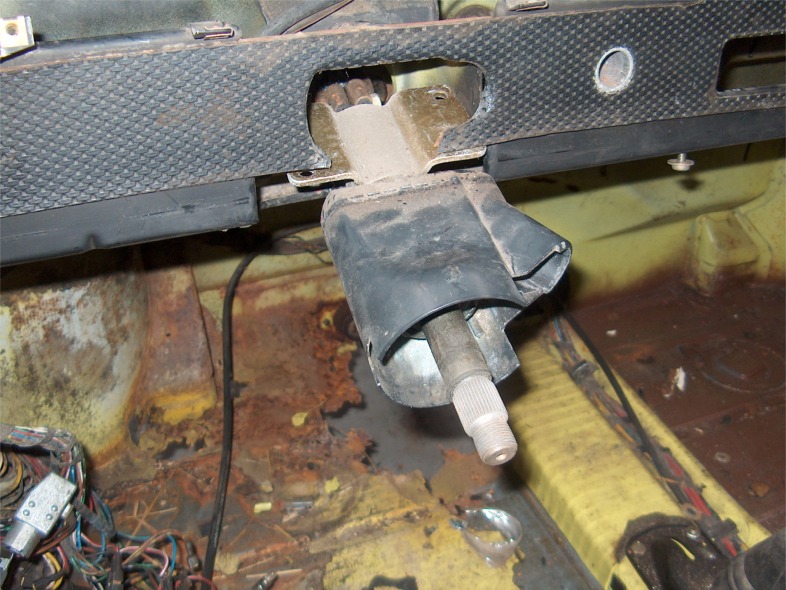
|
| grasshopper |
 Dec 18 2005, 07:00 PM Dec 18 2005, 07:00 PM
Post
#34
|
|
Advanced Member     Group: Members Posts: 2,613 Joined: 10-December 04 From: Valdosta, GA Member No.: 3,258 Region Association: None |
disconnect the universal joint: 13mm bolt, and 14mm nut
Attached image(s) 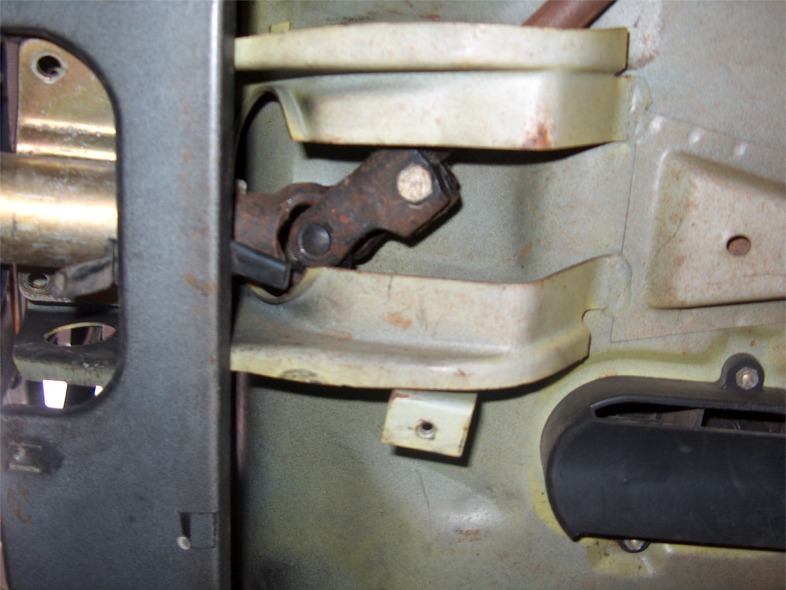
|
| grasshopper |
 Dec 18 2005, 07:02 PM Dec 18 2005, 07:02 PM
Post
#35
|
|
Advanced Member     Group: Members Posts: 2,613 Joined: 10-December 04 From: Valdosta, GA Member No.: 3,258 Region Association: None |
with it removed:
Attached image(s) 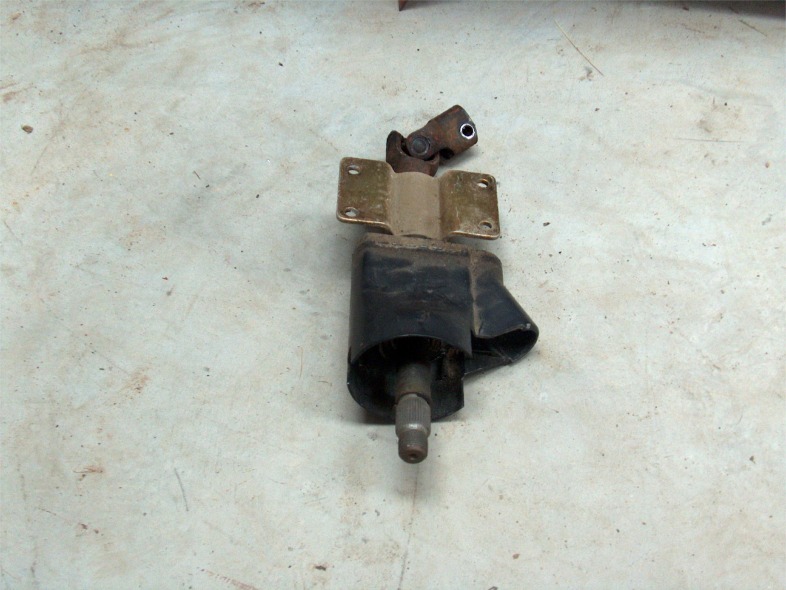
|
| grasshopper |
 Dec 18 2005, 07:06 PM Dec 18 2005, 07:06 PM
Post
#36
|
|
Advanced Member     Group: Members Posts: 2,613 Joined: 10-December 04 From: Valdosta, GA Member No.: 3,258 Region Association: None |
next, remove the two upped dash vents. They seperate from the larger units in the front trunk, with two clips. Push them up a little, and pull them down and toward the front of the car. The drivers side can be a little tight, but it is possible with the gas tank in...i did it, you just have to wiggle it around alot. With it out
Attached image(s) 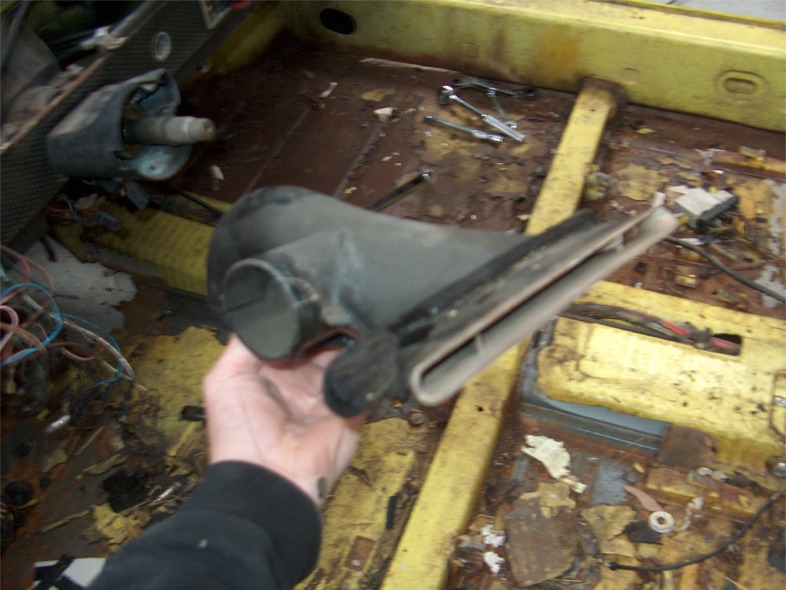
|
| grasshopper |
 Dec 18 2005, 07:08 PM Dec 18 2005, 07:08 PM
Post
#37
|
|
Advanced Member     Group: Members Posts: 2,613 Joined: 10-December 04 From: Valdosta, GA Member No.: 3,258 Region Association: None |
next, remove the two screws on each side of the dash, right next the the air vents... on earlier cars, these screws should still be there..??.. i dont know
Attached image(s) 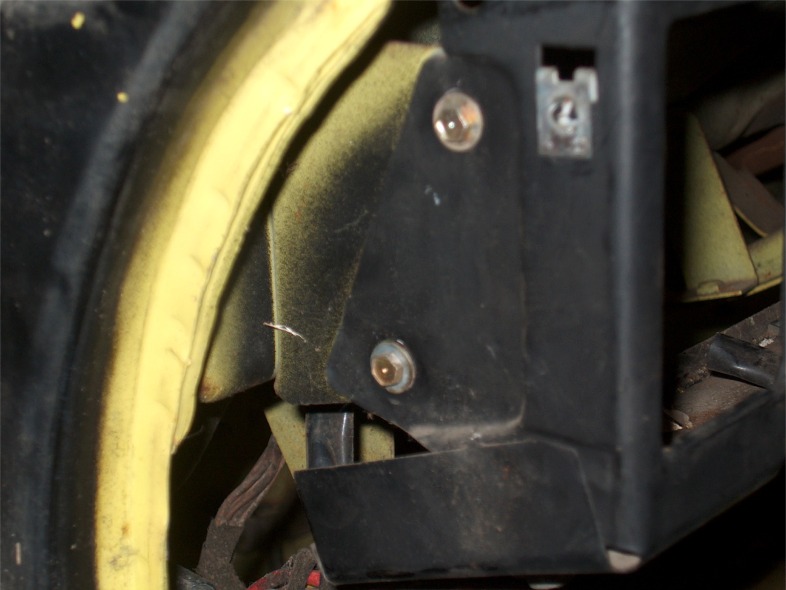
|
| grasshopper |
 Dec 18 2005, 07:10 PM Dec 18 2005, 07:10 PM
Post
#38
|
|
Advanced Member     Group: Members Posts: 2,613 Joined: 10-December 04 From: Valdosta, GA Member No.: 3,258 Region Association: None |
now your dash should look like this, you need to remove the two screws pointed out here, too. I would have missed that, but michel reminded me
Attached image(s) 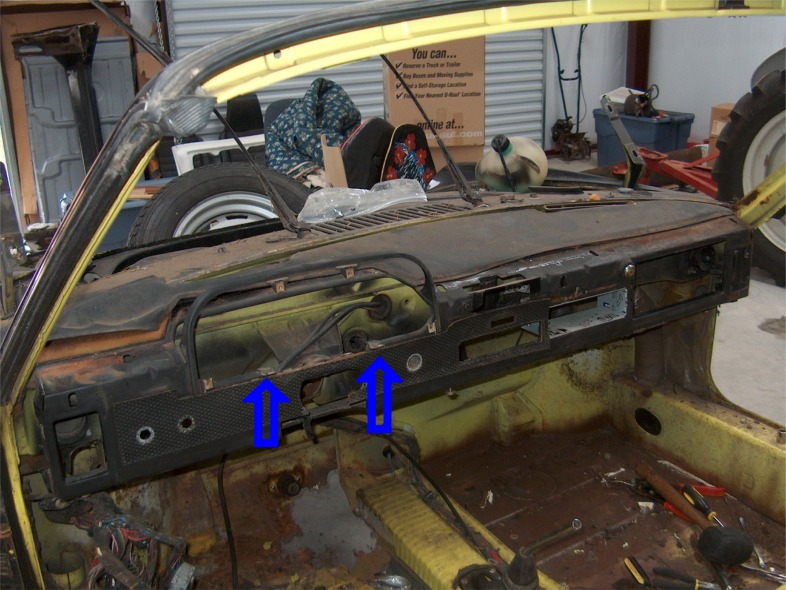
|
| grasshopper |
 Dec 18 2005, 07:12 PM Dec 18 2005, 07:12 PM
Post
#39
|
|
Advanced Member     Group: Members Posts: 2,613 Joined: 10-December 04 From: Valdosta, GA Member No.: 3,258 Region Association: None |
remove the 10mm nut under the dash, connecting the dash frame to the body. This nut isn't hidden, it is right in the middle, but this is a bad pic.
Attached image(s) 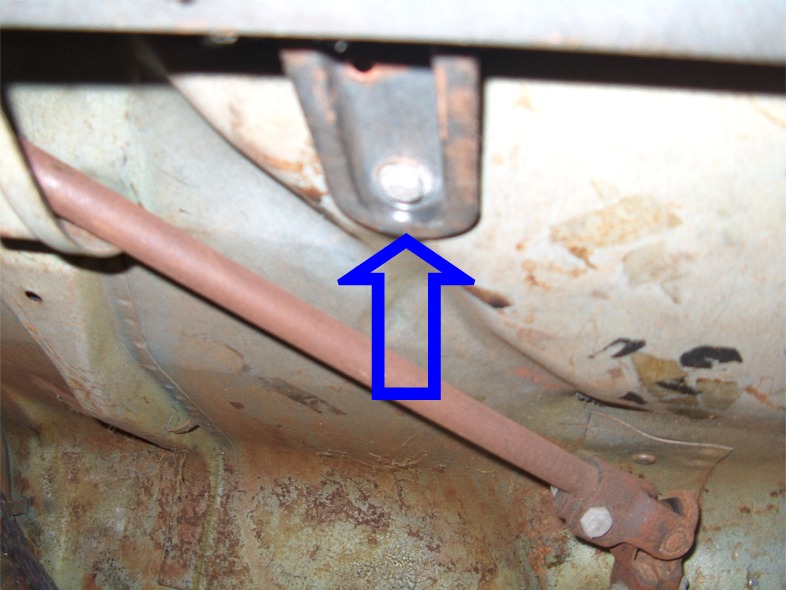
|
| grasshopper |
 Dec 18 2005, 07:17 PM Dec 18 2005, 07:17 PM
Post
#40
|
|
Advanced Member     Group: Members Posts: 2,613 Joined: 10-December 04 From: Valdosta, GA Member No.: 3,258 Region Association: None |
now there are only four more nuts holding the dash frame on. You will need to remove the nut holding in the windshield washer fluid bottle, and pull it forward. Then you should be able to get to the first nut. It is a 10mm nut. It is right next to the tube that feeds the fresh air vents in later cars. The nut:
Attached image(s) 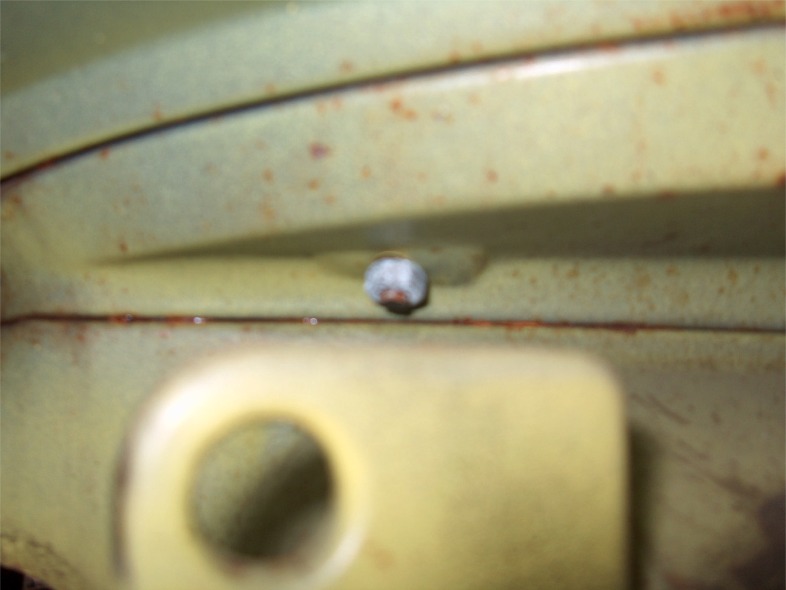
|
  |
1 User(s) are reading this topic (1 Guests and 0 Anonymous Users)
0 Members:

|
Lo-Fi Version | Time is now: 2nd April 2025 - 01:38 AM |
Invision Power Board
v9.1.4 © 2025 IPS, Inc.


