|
|

|
Porsche, and the Porsche crest are registered trademarks of Dr. Ing. h.c. F. Porsche AG.
This site is not affiliated with Porsche in any way. Its only purpose is to provide an online forum for car enthusiasts. All other trademarks are property of their respective owners. |
|
|
  |
| Andyrew |
 Mar 24 2006, 05:57 PM Mar 24 2006, 05:57 PM
Post
#81
|
|
Spooling.... Please wait           Group: Members Posts: 13,377 Joined: 20-January 03 From: Riverbank, Ca Member No.: 172 Region Association: Northern California 
|
Matt, no... I did them myself with the same mig pictured.
Brant, Good tip. I know doing the longs I would have to use a screwdriver to scratch up the paint with, then it would take a second to burn the paint and then I was good.. I'll use that for the rest of my work. The wire wheel couldnt get all the paint, and it took forever. How did you take the seam sealer off? wire wheel or burned it? Wire wheel took forever on the tower pictured. |
| MattR |
 Mar 24 2006, 05:57 PM Mar 24 2006, 05:57 PM
Post
#82
|
||
|
Advanced Member     Group: Members Posts: 3,279 Joined: 23-January 04 From: SF Bay Area Member No.: 1,589 Region Association: Northern California |
A little modesty goes a long way. I see why you an alpha clash so often... its like watching two positive poles of a magnet being throw at eachother really fast. At first you repel but one of you will eventually flip and you'll be inseperable (except one of you will be face down). |
||
| Andyrew |
 Mar 24 2006, 06:02 PM Mar 24 2006, 06:02 PM
Post
#83
|
||
|
Spooling.... Please wait           Group: Members Posts: 13,377 Joined: 20-January 03 From: Riverbank, Ca Member No.: 172 Region Association: Northern California 
|
I never said I was GOOD at welding, I just said I could do it..
Geez matt, You PMSing today? cus all I hear is bitch bitch bitch... (IMG:http://www.914world.com/bbs2/html/emoticons/wink.gif)
Just like you and aaron? Aw, how cute.. But im taken.. sorry |
||
| Sideways |
 Mar 24 2006, 06:10 PM Mar 24 2006, 06:10 PM
Post
#84
|
||
|
Member   Group: Members Posts: 119 Joined: 18-October 05 From: Calgary, AB, Canada Member No.: 4,969 |
Which Lincoln are you using? |
||
| Andyrew |
 Mar 24 2006, 06:12 PM Mar 24 2006, 06:12 PM
Post
#85
|
|
Spooling.... Please wait           Group: Members Posts: 13,377 Joined: 20-January 03 From: Riverbank, Ca Member No.: 172 Region Association: Northern California 
|
135
one's on ebay.. http://cgi.ebay.com/LINCOLN-SP-135T-sp-135...1QQcmdZViewItem If I were to do it again, I'd get the plus. my school has the plus, makes a much better connection.. Makes me think mine is setup wrong.. |
| Aaron Cox |
 Mar 24 2006, 06:24 PM Mar 24 2006, 06:24 PM
Post
#86
|
||||
|
Professional Lawn Dart                Group: Retired Admin Posts: 24,541 Joined: 1-February 03 From: OC Member No.: 219 Region Association: Southern California |
hey! i got no dog in this fight..... leave me outta this... i think its cool youre going for chassis rigidity. have you given any thought to warpage? ala... weld and then move on to a different area. ive read people have warped their chassis' by laying continous bead after bead..... (IMG:http://www.914world.com/bbs2/html/emoticons/wacko.gif) |
||||
| Andyrew |
 Mar 24 2006, 06:33 PM Mar 24 2006, 06:33 PM
Post
#87
|
|
Spooling.... Please wait           Group: Members Posts: 13,377 Joined: 20-January 03 From: Riverbank, Ca Member No.: 172 Region Association: Northern California 
|
Yup, My mind is all on shrinkage... (IMG:http://www.914world.com/bbs2/html/emoticons/biggrin.gif)
Thats why I only laid one bead.. and I generally moved from one side, back to another.. let it cool down a bit. "stitch" welding... one stitch at a time |
| J P Stein |
 Mar 24 2006, 08:20 PM Mar 24 2006, 08:20 PM
Post
#88
|
|
Irrelevant old fart      Group: Members Posts: 8,797 Joined: 30-December 02 From: Vancouver, WA Member No.: 45 Region Association: None |
You want the surfaces *clean*....no paint or other guck
in the weld area....real clean. On that overhead, grind the pinch seam down so both sections of metal are the same height & CLEAN. You gotta get your face up close to that joint to keep right on that parting line & I ran it down hand. I never found shrinkage to be an issue....just laid it on. This was a similar seam, but 3 sections of metal & almost flat. Attached thumbnail(s) 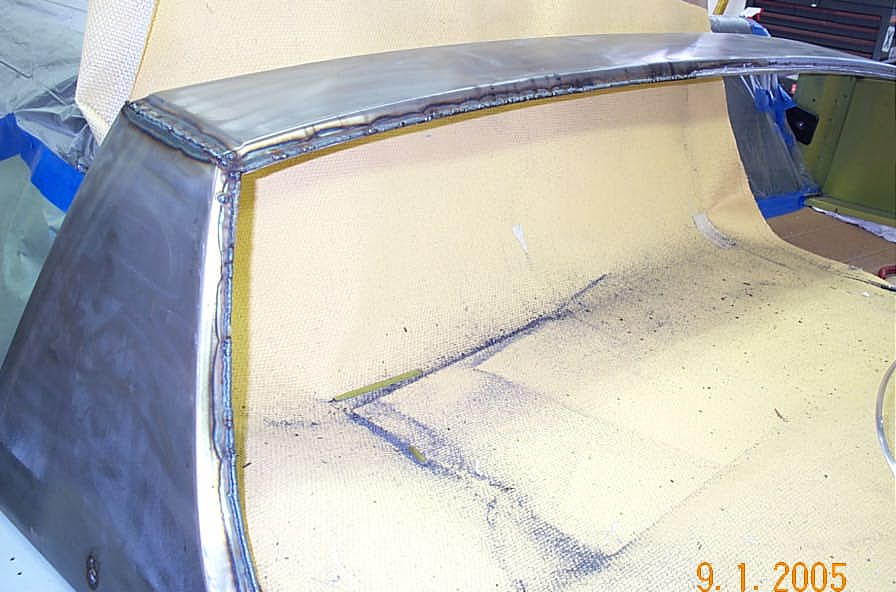
|
| J P Stein |
 Mar 24 2006, 08:22 PM Mar 24 2006, 08:22 PM
Post
#89
|
|
Irrelevant old fart      Group: Members Posts: 8,797 Joined: 30-December 02 From: Vancouver, WA Member No.: 45 Region Association: None |
Grinders are gud.
Attached thumbnail(s) 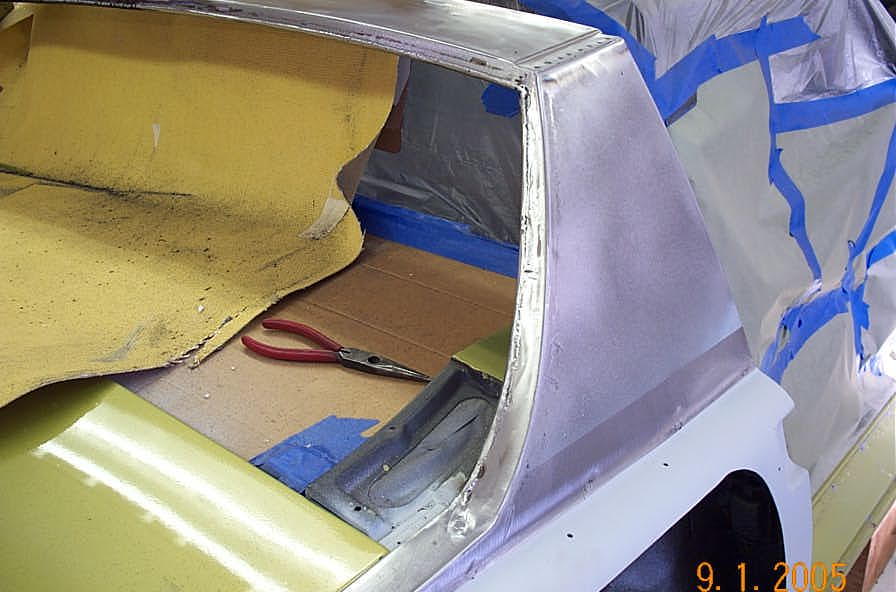
|
| J P Stein |
 Mar 24 2006, 08:24 PM Mar 24 2006, 08:24 PM
Post
#90
|
|
Irrelevant old fart      Group: Members Posts: 8,797 Joined: 30-December 02 From: Vancouver, WA Member No.: 45 Region Association: None |
But bondo is better.
Attached thumbnail(s) 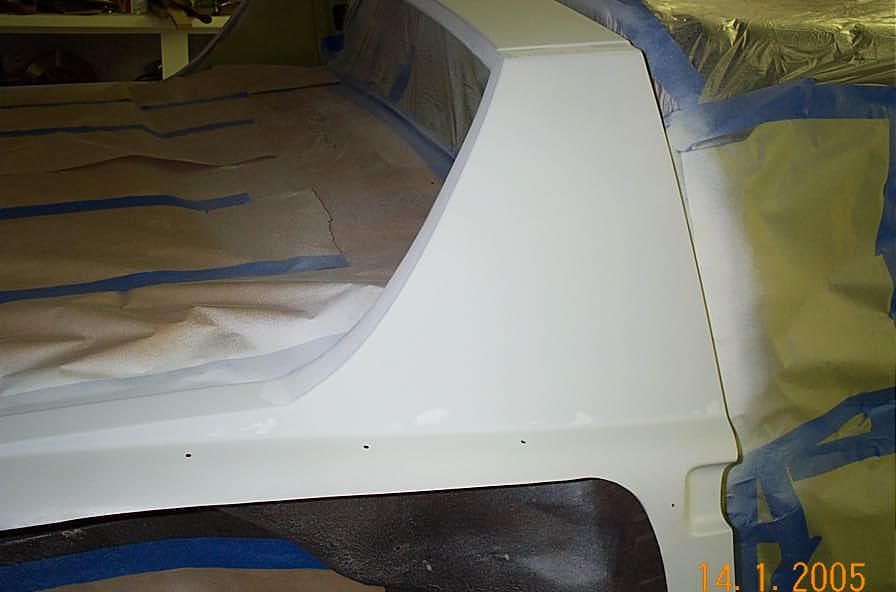
|
| Andyrew |
 Mar 24 2006, 08:29 PM Mar 24 2006, 08:29 PM
Post
#91
|
|
Spooling.... Please wait           Group: Members Posts: 13,377 Joined: 20-January 03 From: Riverbank, Ca Member No.: 172 Region Association: Northern California 
|
Did you have trouble keeping the wire on the seam as well?
You seam welded, ground it down, and welded it again? Explain to me what you did with that sail pannel.. Thats my next weld project.. |
| J P Stein |
 Mar 24 2006, 08:50 PM Mar 24 2006, 08:50 PM
Post
#92
|
|
Irrelevant old fart      Group: Members Posts: 8,797 Joined: 30-December 02 From: Vancouver, WA Member No.: 45 Region Association: None |
As I said, there are 3 layers of sheet metal there.
I had to do about 3-5 inches at a time as the spotwelds holding it together are.....disappeared. After the "fin" is ground down just a bit proud of the flat surface, you're faced with metal, gap, metal, gap, metal. Naturally when you have a deal like that , blow thrus are a problem.....but just keep doing a wash pass and seal em' up. On that lower pinch seam, I ground as described, welded, (Yes, a hell of a time keeping on the parting line.....get close. & brace on your other hand....even when it's on fire) then came back and smoothed things out with various grinding instruments. An angle grinder for the big globs, then a sanding disc and/or rice cake on a die grinder to make things pretty (kinda). You don't wanna leave sharp edges or joggles....stress points crack....or start em'. Smooth is gud. IMO, that arch is a high stress area on the car. |
| Brando |
 Mar 24 2006, 10:15 PM Mar 24 2006, 10:15 PM
Post
#93
|
|
BUY MY SPARE KIDNEY!!!     Group: Members Posts: 3,935 Joined: 29-August 04 From: Santa Ana, CA Member No.: 2,648 Region Association: Southern California |
another idea would be to take your grinder (you should have one for a welding job like this) and grind at an angle on the flange that sticks out where the two pieces are laid together. In metal shop this is a trick we used for flange welds.
|
| Brando |
 Mar 24 2006, 10:17 PM Mar 24 2006, 10:17 PM
Post
#94
|
|
BUY MY SPARE KIDNEY!!!     Group: Members Posts: 3,935 Joined: 29-August 04 From: Santa Ana, CA Member No.: 2,648 Region Association: Southern California |
This is how the body is normally "welded" together. Spots welds on a flange that's painted over. Very little surface area to weld on, you're going to get gobs of weld material where it rolls down, cools and puddles into large globs. More difficult than it has to be, plus you have a small target to aim for to keep the 2 pieces together.
Attached image(s) 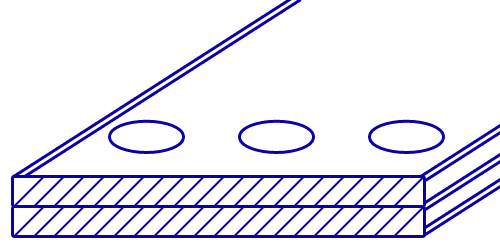
|
| J P Stein |
 Mar 24 2006, 10:18 PM Mar 24 2006, 10:18 PM
Post
#95
|
|
Irrelevant old fart      Group: Members Posts: 8,797 Joined: 30-December 02 From: Vancouver, WA Member No.: 45 Region Association: None |
Hummm.....gud idea. Where were ya when I was doing this? (IMG:http://www.914world.com/bbs2/html/emoticons/biggrin.gif)
|
| Jeroen |
 Mar 24 2006, 10:19 PM Mar 24 2006, 10:19 PM
Post
#96
|
|
914 Guru      Group: Members Posts: 7,887 Joined: 24-December 02 From: The Netherlands Member No.: 3 Region Association: Europe |
I'm not much of a welder (varying results) but cleaning to bare metal, like JP mentioned is a MUST
If you don't your results will suck no matter what... The paint and other crap that's still there will contaminate your weld. Your weld will sputter like mad and you get lousy penetration ( = bad weld) Wirebrush on an electric drill works perfectly fine, but yes, you'll have to put some elbow grease into it... no pain, no gain (IMG:http://www.914world.com/bbs2/html/emoticons/biggrin.gif) seam sealer comes off best with the wirewheel too if your weld sucks, just grind it down and have at it again... |
| Brando |
 Mar 24 2006, 10:19 PM Mar 24 2006, 10:19 PM
Post
#97
|
|
BUY MY SPARE KIDNEY!!!     Group: Members Posts: 3,935 Joined: 29-August 04 From: Santa Ana, CA Member No.: 2,648 Region Association: Southern California |
But if you use your angle grinder and do about a 60º angle going through both pieces, you can get more surface area to weld on. Afterwards you're going to grind it to the appropriate shape so this will not matter. You are achieving the same goal (seam welding) but doing it cleaner to begin with. Just don't be a doof and cut yourself on your freshly-made lap weld area.
PS: It's always easier to lap weld two pieces together than flange weld... Attached image(s) 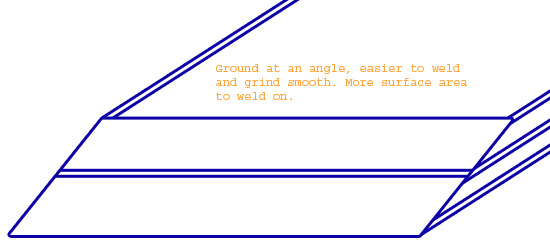
|
| J P Stein |
 Mar 24 2006, 10:48 PM Mar 24 2006, 10:48 PM
Post
#98
|
|
Irrelevant old fart      Group: Members Posts: 8,797 Joined: 30-December 02 From: Vancouver, WA Member No.: 45 Region Association: None |
Nice sketch, but I visualized it.
The long side opposite your gun would prolly be consumed....a gud thing.....but you don't have to go overhead...just kinda angle the gun upward some......which I really like. Some fussing would be in order.....isn't there always? |
| Brando |
 Mar 25 2006, 04:28 AM Mar 25 2006, 04:28 AM
Post
#99
|
|
BUY MY SPARE KIDNEY!!!     Group: Members Posts: 3,935 Joined: 29-August 04 From: Santa Ana, CA Member No.: 2,648 Region Association: Southern California |
I drew pictures because not everyone can clearly visualize what I was saying (IMG:http://www.914world.com/bbs2/html/emoticons/smile.gif)
|
| Andyrew |
 Mar 25 2006, 05:33 AM Mar 25 2006, 05:33 AM
Post
#100
|
|
Spooling.... Please wait           Group: Members Posts: 13,377 Joined: 20-January 03 From: Riverbank, Ca Member No.: 172 Region Association: Northern California 
|
Thanks a ton bondo!!!
That really helps. I will hence forth do this. And prep my area better.. |
  |
3 User(s) are reading this topic (3 Guests and 0 Anonymous Users)
0 Members:

|
Lo-Fi Version | Time is now: 26th December 2024 - 03:27 PM |
Invision Power Board
v9.1.4 © 2024 IPS, Inc.


