|
|

|
Porsche, and the Porsche crest are registered trademarks of Dr. Ing. h.c. F. Porsche AG.
This site is not affiliated with Porsche in any way. Its only purpose is to provide an online forum for car enthusiasts. All other trademarks are property of their respective owners. |
|
|
  |
| m_davidson |
 Jul 16 2006, 01:49 PM Jul 16 2006, 01:49 PM
Post
#21
|
|
Newbie  Group: Members Posts: 37 Joined: 20-November 05 From: Bellingham WA Member No.: 5,156 |
did you drive it to Aker's picnic, saw a 914 same color with a six leaving as I got there. A neighbor down the street did the same MM deal 6 years ago, he was happy one stop shopping , did take a couple of months for every part to get there, but they did. whats that Trekor quote " in the future we all will have sixes" Jeff, Yup, that was me at Aker's picnic. His shop does nice work. They redid the top end of the 3.0L in my 911 after one of my Dilavar studs went "ping." I'll post a few more comments and pics later. Mel |
| Brando |
 Jul 16 2006, 02:09 PM Jul 16 2006, 02:09 PM
Post
#22
|
|
BUY MY SPARE KIDNEY!!!     Group: Members Posts: 3,935 Joined: 29-August 04 From: Santa Ana, CA Member No.: 2,648 Region Association: Southern California |
dont they rebuild engines with used parts?? As a matter of fact... you walk through their "machine shop" you will see shelves and shelves of "good used parts". The only place that does machine work for them is Ollie's in Santa Ana, but only when a customer brings back one of their warrantied grenades as they only have the minimal necessary work done. |
| Brad Roberts |
 Jul 16 2006, 11:51 PM Jul 16 2006, 11:51 PM
Post
#23
|
|
914 Freak!                Group: Members Posts: 19,148 Joined: 23-December 02 Member No.: 8 Region Association: None |
Cool project!
Post more pics and keep us up to date on how it runs and performs. I have found some people make out "Ok" with MM and some dont. B |
| Sammy |
 Jul 17 2006, 08:50 AM Jul 17 2006, 08:50 AM
Post
#24
|
|
.    Group: Members Posts: 1,190 Joined: 21-January 03 From: Orange, Ca Member No.: 178 |
Let's be honest here guys, no way could MM stay in business if they totally screwed every customer. maybe 1 out of 3, but not all of them.
|
| 914rat |
 Jul 17 2006, 10:57 AM Jul 17 2006, 10:57 AM
Post
#25
|
|
Member   Group: Members Posts: 279 Joined: 3-July 06 From: Maryland Member No.: 6,362 |
Looks good! Good luck. I had them do some Weber work. What they did was decent. Dealing with them was troublesome. What they didn't do will have to be redone and cost the same money to have done over again. That hasn't been everyone's experience. I hope your one of the lucky ones. Post more pics! It appears that many of you have the same reguard for MM as I do for AA. |
| m_davidson |
 Jul 19 2006, 11:08 PM Jul 19 2006, 11:08 PM
Post
#26
|
|
Newbie  Group: Members Posts: 37 Joined: 20-November 05 From: Bellingham WA Member No.: 5,156 |
Nice to have some support, anyway. Don't all engine re-builders use used parts where possible? I figured at the price I paid, I couldn't be getting a factory-new engine. For those other newbies who might be looking at the same conversion, I'll lay out some the details with pictures.
I did some mechanical work in my not-mis-spent-enough youth with flathead Ford V8s and even converted a Ford 6 to a flathead. I've owned two 356s and still own a '76 911. I got the idea for this project from Jim Pasha's April 2005 “Excellence” article and used George Hussey's “How to convert a 914/4 to a 914/6” booklet, Haynes 914 and 911 manuals, and Pelican Parts' technical articles. It helped to have the reference 911 (see pics) and to meet a 914 guru with a yard full of (12) 914s (see pics), a shop full of parts, and a portable welder. I ordered the engine kit about a year ago for delivery in 14 weeks, about mid-October '05. I planned on driving my 914 until the engine arrived and it was a good thing. Motor Meister's build times first slipped to early November. I asked for a slight delay, but I don't think the engine was ready anyway. Then the date slipped to mid-December (right before Christmas and I'm a grandfather!). My engine finally shipped with a bunch of others at year end (probably to get them on the 2005 accounts-receivable books). Attached image(s) 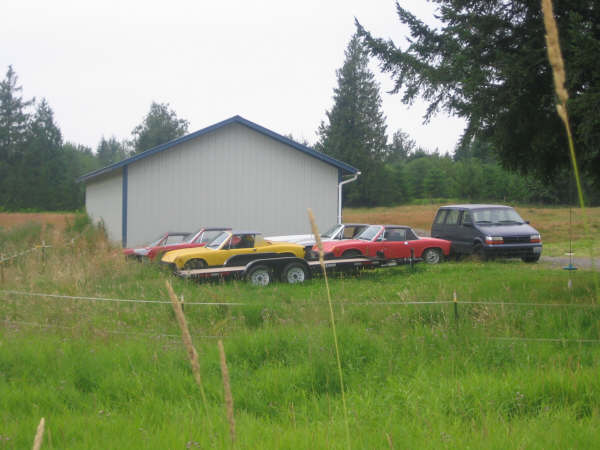 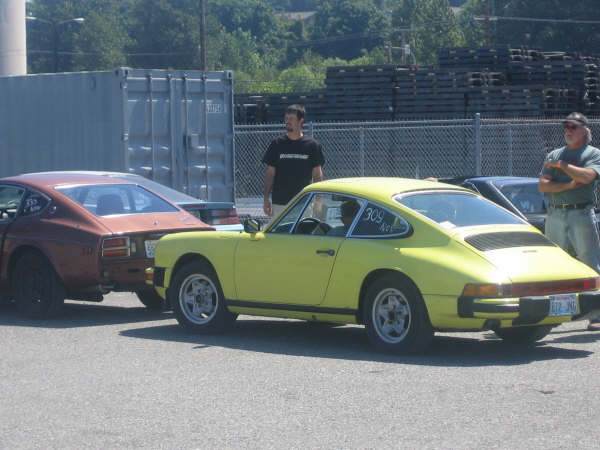 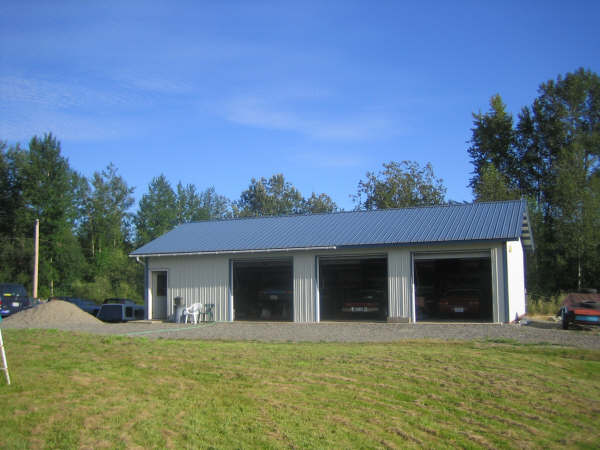
|
| sixnotfour |
 Jul 19 2006, 11:26 PM Jul 19 2006, 11:26 PM
Post
#27
|
|
914 Wizard           Group: Members Posts: 10,681 Joined: 12-September 04 From: Life Elevated..planet UT. Member No.: 2,744 Region Association: Rocky Mountains 

|
So thats where all the north end 914's go. Does he want a couple more?
|
| porsha916 |
 Jul 19 2006, 11:46 PM Jul 19 2006, 11:46 PM
Post
#28
|
|
Member   Group: Members Posts: 214 Joined: 1-June 04 From: Greenwood, SC Member No.: 2,137 Region Association: None |
Maybe...?!! What you got? (IMG:style_emoticons/default/biggrin.gif) (IMG:style_emoticons/default/biggrin.gif) |
| sixnotfour |
 Jul 20 2006, 12:15 AM Jul 20 2006, 12:15 AM
Post
#29
|
|
914 Wizard           Group: Members Posts: 10,681 Joined: 12-September 04 From: Life Elevated..planet UT. Member No.: 2,744 Region Association: Rocky Mountains 

|
pm sent
|
| bigequip |
 Jul 20 2006, 03:34 AM Jul 20 2006, 03:34 AM
Post
#30
|
|
bigequip  Group: Members Posts: 23 Joined: 6-December 04 From: Corona, CA Member No.: 3,237 |
If you advertise, they will come!
A friend of mine had Motor Meister do his 3.0 engine last year. (Found them on internet) When he got it back he started checking where his $5000.00 went and found they did not do anything but clean it up. Tolerances were all wrong. MM put bearings in and reground the valves, along with a nice rattle can paint job. My friend threatened a lawsuit and they returned most of his money. He then rebuilt the engine himself and had the machine work done in a really qualified machine shop with new pistons, crankshaft polished, etc.. |
| kenikh |
 Jul 20 2006, 09:05 AM Jul 20 2006, 09:05 AM
Post
#31
|
|
Newbie  Group: Members Posts: 46 Joined: 24-May 06 From: Seattle Member No.: 6,061 |
914 noob here, but my 911 experience is extensive.
Go to Pelicanparts forums. Enter "Motor Meister" in the search field. Read. Read again. Yes, the money is spent and we wish the best of luck to everyone on this board, but by not harshly speaking of MM here, we end up condoning their use by others in the future. I use Henry at Supertec as there is nothing more expensive than a job done twice. Find a good wrench and use him; MM does not fit this category. |
| m_davidson |
 Jul 20 2006, 01:19 PM Jul 20 2006, 01:19 PM
Post
#32
|
|
Newbie  Group: Members Posts: 37 Joined: 20-November 05 From: Bellingham WA Member No.: 5,156 |
I got my MM's Quick Six "kit" in early January and tore the car apart. I installed steel fuel lines, using the Pelican technical article, and a new low-pressure fuel pump with filter (pictured) up front. I re-bushed the pedal cluster and installed a 19mm master cylinder for conversion next winter to 911 front brakes. I have most of the parts but am still looking for a pair of 6Jx15 cookie cutters. Since I don't need it the return line for carburetors, I plugged both ends. I ran the main line continuously from the firewall under the engine through the stock holes to above the tinware (pictured).
The bulkhead engine mount installed easily using MM's instructions. I spaced the brake pressure compensator out from the bulkhead about 3/8 inch to clear the mount plate and drilled a new 1-inch hole to re-route the wiring harness vertically through the sheet-metal web at the firewall where the rear wiring rises from the tunnel below the tinware to above. This was to keep the wiring harness away from the right-hand front engine mount (pictured) (IMG:style_emoticons/default/type.gif) . I stripped the entire wiring harness from the rear of the car to pull it back through the original hole to thread it through the new hole. Is there an easier way to do this wiring work and keep the stock harness? Porsh916 (Bill) brought a portable welder over and tack-welded the bulkhead mount in place. Mel Attached image(s) 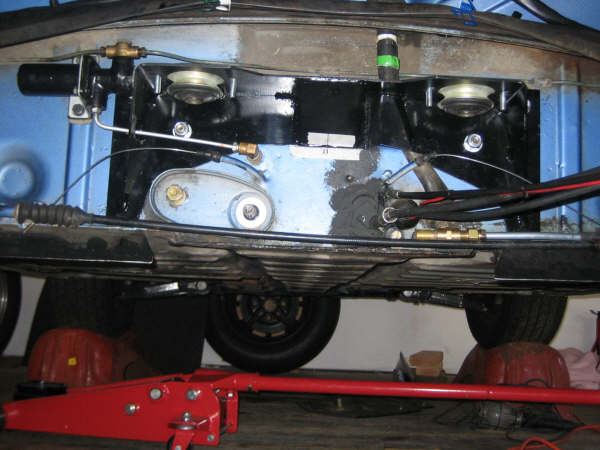 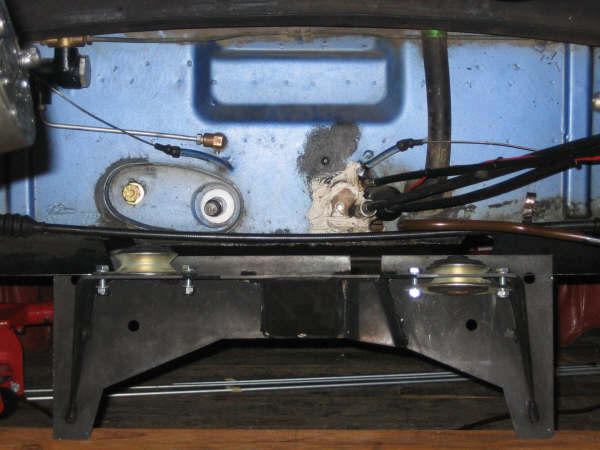 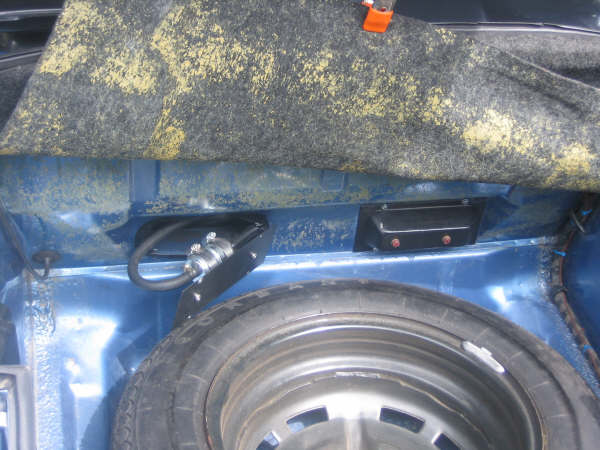 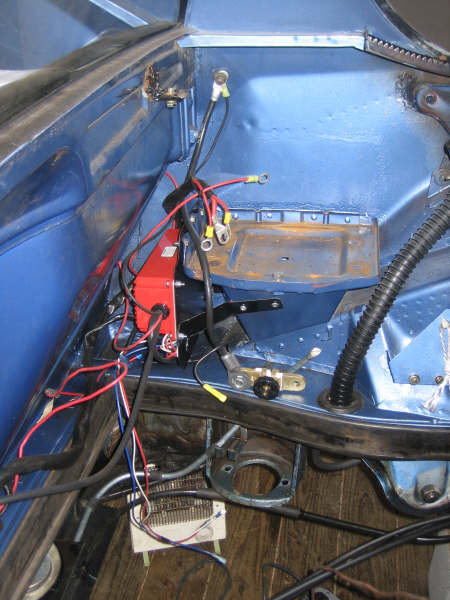
|
| brant |
 Jul 20 2006, 01:47 PM Jul 20 2006, 01:47 PM
Post
#33
|
|
914 Wizard           Group: Members Posts: 11,824 Joined: 30-December 02 From: Colorado Member No.: 47 Region Association: Rocky Mountains 

|
914 noob here, but my 911 experience is extensive. Go to Pelicanparts forums. Enter "Motor Meister" in the search field. Read. Read again. Yes, the money is spent and we wish the best of luck to everyone on this board, but by not harshly speaking of MM here, we end up condoning their use by others in the future. I use Henry at Supertec as there is nothing more expensive than a job done twice. Find a good wrench and use him; MM does not fit this category. Ken, Welcome to the crazyness of this board... now that your here, I hope they told you that the initiation ritual was that you find me a set of 69 2.0S heads..... lol.. (they told you right?) (IMG:style_emoticons/default/biggrin.gif) brant |
| kenikh |
 Jul 20 2006, 01:50 PM Jul 20 2006, 01:50 PM
Post
#34
|
|
Newbie  Group: Members Posts: 46 Joined: 24-May 06 From: Seattle Member No.: 6,061 |
Ken, Welcome to the crazyness of this board... now that your here, I hope they told you that the initiation ritual was that you find me a set of 69 2.0S heads..... lol.. (they told you right?) (IMG:style_emoticons/default/biggrin.gif) brant Damn I just sent my NOS set off for assembly! Next time, then... This board is sweet! I am still trying to figure out a way to break to my wife my need for a 914-6GT. Any ideas? (IMG:style_emoticons/default/chair.gif) |
| brant |
 Jul 20 2006, 01:53 PM Jul 20 2006, 01:53 PM
Post
#35
|
|
914 Wizard           Group: Members Posts: 11,824 Joined: 30-December 02 From: Colorado Member No.: 47 Region Association: Rocky Mountains 

|
Ken, Welcome to the crazyness of this board... now that your here, I hope they told you that the initiation ritual was that you find me a set of 69 2.0S heads..... lol.. (they told you right?) (IMG:style_emoticons/default/biggrin.gif) brant Damn I just sent my NOS set off for assembly! Next time, then... This board is sweet! I am still trying to figure out a way to break to my wife my need for a 914-6GT. Any ideas? (IMG:style_emoticons/default/chair.gif) is Henry doing them? stainless valves or stock valves? hmmm regarding another car. lately I've seen a trend of buying the dream car and then storing it in a friends garage for a while without telling the significant other. I know that locally a few guys have been pulling this one.... not saying its good advice, just an idea... brant |
| m_davidson |
 Jul 25 2006, 05:58 PM Jul 25 2006, 05:58 PM
Post
#36
|
|
Newbie  Group: Members Posts: 37 Joined: 20-November 05 From: Bellingham WA Member No.: 5,156 |
After removing the 4-cyl engine and doing some of the preparation work, came the final irreversible drilling of the holes in the left side of the engine compartment for the oil tank. Took me a couple of days to work up the courage to cut the 4-inch hole for the filter console with a 4" hole saw from the local hardware store. I replaced the saw's 1/4-inch pilot drill with the cut-off end of a 1/4-inch bolt to avoid having the pilot drill enlarge the previously drilled pilot hole while sawing the larger hole.
Motor Meister originally planned to use a Velios tank from Patrick Motor Sports, but they became unavailable by the time to ship the tank six months later. We used Don Welch's 914/6 aluminum oil tank (sold through the club and elsewhere), which came without (the stock) filter console or filler neck. Motor Meister provided some of the extra parts and some I bought from Ottos Venice and the local Porsche garage. I found it best to take all hole-drilling measurements directly from the tank, triangulating the dimensions where appropriate. The pattern in George Hussey's how-to booklet is useless, because the dimensions are distorted by the printing process, which is perhaps why he re-printed the mirror-image of what you need. My measurements landed very near the centers of the bosses in the fender liner. But there is no boss for the lower oil line connector. Don't be chicken: drill it oversize enough to turn the oil line fitting (gently) with a socket wrench. Mel The new tank is bigger and more rectangular than the stock tank. It does not fit well with the stock rubber collar for the filter console (Don Welch please take note). I had to trim away much of the rubber to fit. If the narrow part of the tank were carried a little further from the console area, it would work fine. Otherwise the tank seems a better than the Velios tank and easier to install. Attached image(s) 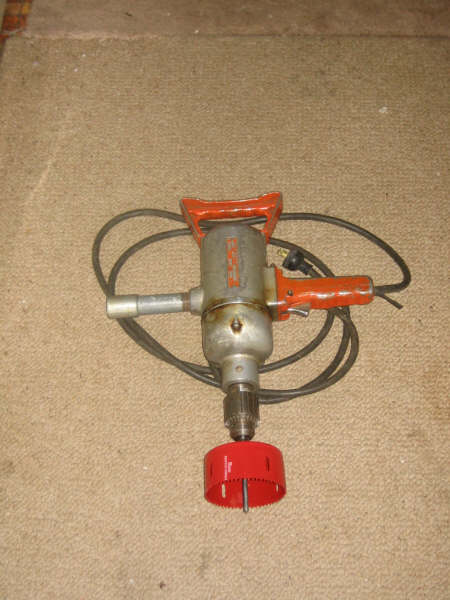
|
| m_davidson |
 Jul 25 2006, 06:02 PM Jul 25 2006, 06:02 PM
Post
#37
|
|
Newbie  Group: Members Posts: 37 Joined: 20-November 05 From: Bellingham WA Member No.: 5,156 |
whoops, forgot to click a button for other pics.
Mel 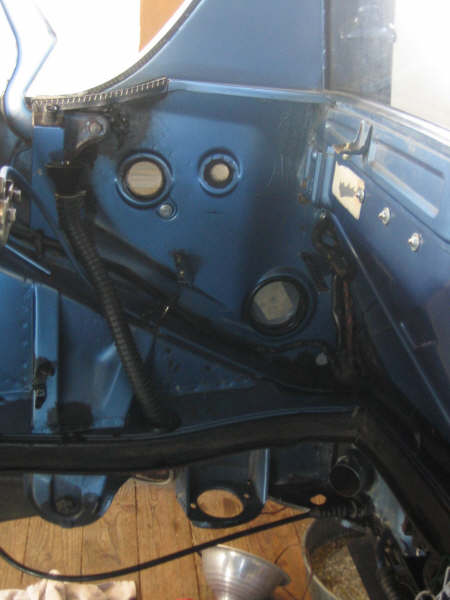 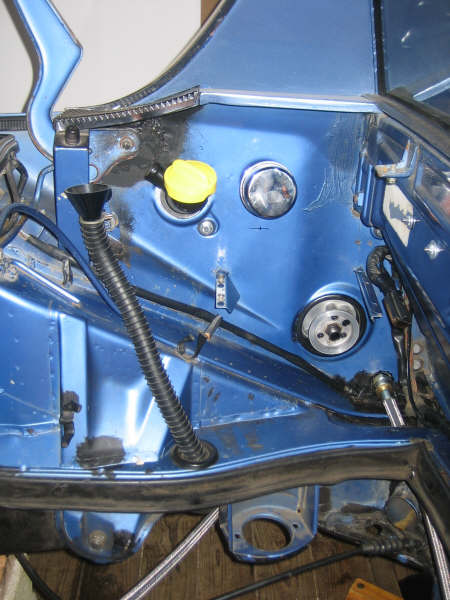 |
| m_davidson |
 Aug 9 2006, 03:56 PM Aug 9 2006, 03:56 PM
Post
#38
|
|
Newbie  Group: Members Posts: 37 Joined: 20-November 05 From: Bellingham WA Member No.: 5,156 |
More about my Quick Six conversion: It was almost the end of January when I started on the electrics. I bought 911 gauges on eBay and tested them in my '76 911. I then replaced the 914 combination/fuel gauge with a 911 oil temperature/pressure gauge and the tachometer with a 911 tach. I used the stock engine compartment relay board and stock wiring harness, which requires separate wires to the engine wiring harness connector on the relay board for oil temperature and pressure and from the relay board front harness connector through the tunnel to the dash. The stock harnesses provide only a line for the low-oil-pressure warning light. I mounted a separate fuel gauge to a bracket tucked under the center of the dash with the low-fuel warning light in the instrument cluster in the place of the EGR light from a '75-'76 California car. The fuel pump relay was originally grounded under control of the 1.7L engine computer, not necessary with carburetors. So I ran a jumper from relay board Pin III to the socket for Pin 86 of the (unused) rear window defroster relay socket (see pic), which is grounded to the chassis through Pin #10 of the main harness connector near the front of the relay board. Is this this jumper also used when converting a 4-cyl car from fuel injection to carburetors?
With an engine harness connector and some miscellaneous wiring from Porscha916 (Bill), I wired the engine harness as follows: Pin #1, low oil pressure light sender; #2, backup light switch; #3, oil pressure sender; #4, backup light switch; #5, MSD tachometer sender; #6, starter solenoid; #7, + 12V to distributor and MSD unit; #8 – no pin; #9 – not used; #10 – oil temperature sender; #11 – not used; #12, not used. I ran the oil pressure and temperature sender lines through the chassis harness connector at Pins #6 and 11, respectively. These chassis harness pins are not used in the stock harness but connect in the relay board to the appropriate engine harness pins listed above. I wired the alternator to a stock 914-4 connector and to the stock 914-4 regulator. When I first started the engine, the alternator put out 18V and the generator/alternator dash light glowed faintly; sure signs I had mistakenly reversed two of the alternator connections. I left the original 120mph speedometer in the 914 for the engine warranty period but will swap it for a 150mph unit eventually. I mounted the MSD unit with tach adapter on a vertical plate in place of the 1.7L engine computer just below the front of the battery. Mel 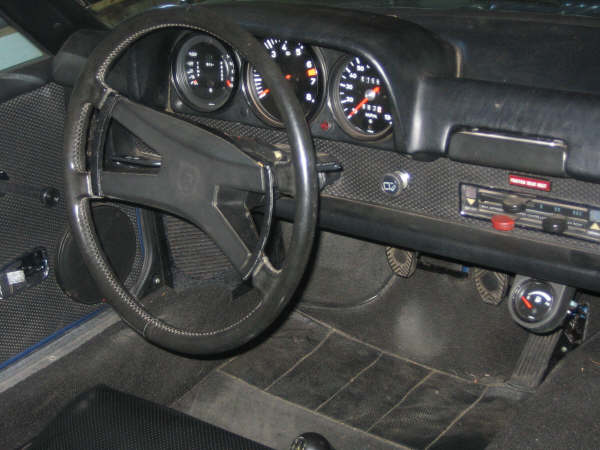 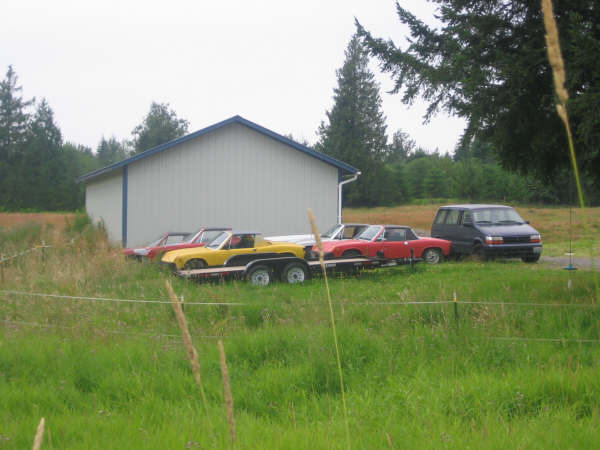 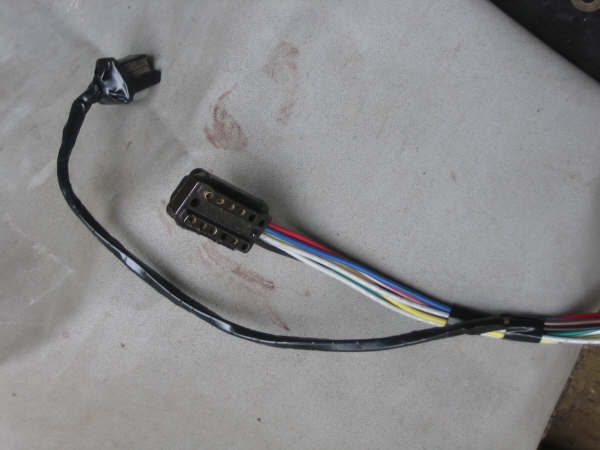 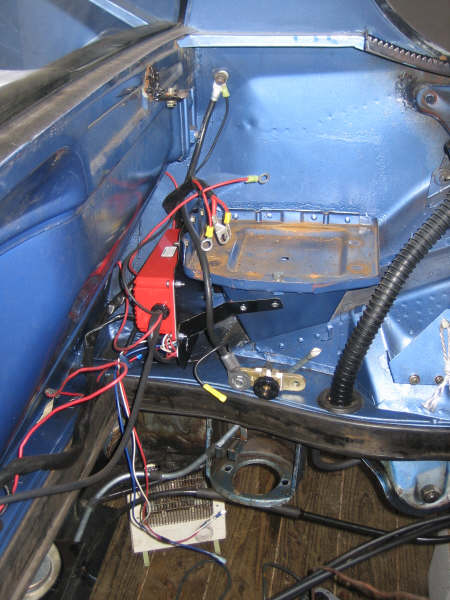 |
| m_davidson |
 Aug 9 2006, 04:06 PM Aug 9 2006, 04:06 PM
Post
#39
|
|
Newbie  Group: Members Posts: 37 Joined: 20-November 05 From: Bellingham WA Member No.: 5,156 |
Whoops, wrong picture in my last posting. Try this:
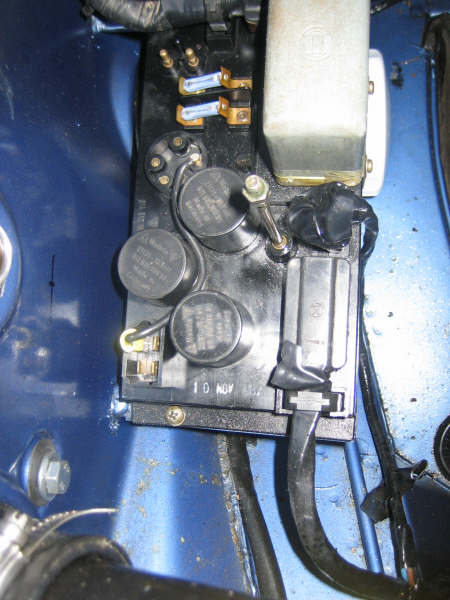 My relay board looks stock 914-4. The 90-degree bend in the breather hose from the engine is a hardware-store pipe fitting. 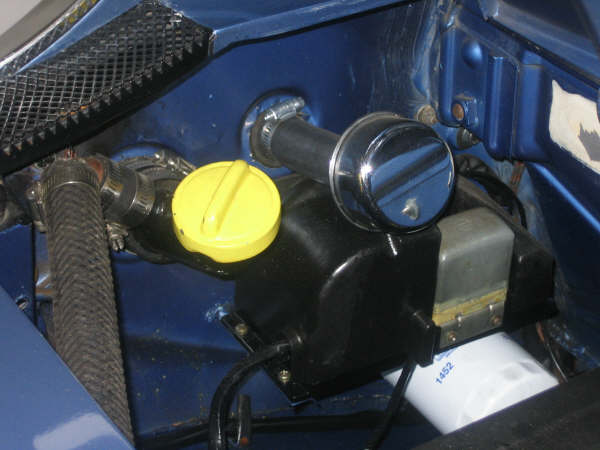 |
| m_davidson |
 Aug 23 2006, 11:28 AM Aug 23 2006, 11:28 AM
Post
#40
|
|
Newbie  Group: Members Posts: 37 Joined: 20-November 05 From: Bellingham WA Member No.: 5,156 |
When I finished prepping the car and its wiring and started planning the oil line routing, I discovered Motor Meister had sent an oil cooler with a straight outlet (see pic) instead a 90 degree bend toward the front of the car. Apparently in the end-of-the-year shuffle, they left a test-stand cooler on my engine. It took us a couple of weeks to sort that out. Plus, I should have pointed the new fitting down a few more degrees for more clearance at the suspension swing arm pivot when I epoxied the threads in place. Motor Meister provided AN12 oil hose fittings at both engine and oil tank, but the local hydraulic shop could have provided either metric- or AN-fitted hoses. I bought slightly over-length hoses with fittings on one end of each, measured them in the car, and had the second ends installed in a second trip. On request, Motor Meister sent me under-car photos of an existing car as a routing guide, but I used a slightly different route for the return hose to clear the shifter coupling boot at the firewall. I used steel-braided lines on Motor Meister's recommendation for heat protection, but the lines can be routed to clear the exhaust headers using an oil discharge pipe similar to the one Patrick Motorsports sells, and the hydraulic pressures are low. So cheaper non-braided lines should be fine for street use especially.
I used a Patrick Motorsports 914-6 accelerator cable, but it was about 2 inches too long for my car. I telescoped two short pieces of steel fuel line from my fuel line replacement project over the bulkhead end to space the cable housing away from the bulkhead under the engine. This works, but I don't understand why their cable was so long. Dan Root (914club directory: Root_Werks) re-worked my shift bar for about $100 during an afternoon visit. The original 0.8hp 914-4 starter (also used on early 911s) worked just fine, but I installed a “rebuilt” 1.5hp Bosch 911 starter on eBay to be sure of hot starts. I used a new 18-inch transmission ground strap; long enough to swing the rear of the tranny down for better access to the 911's alternator and fan assembly. Porsha916 and I slid the engine into the car and it started right up. As near to being a turn-key installation as I could hope for. (IMG:style_emoticons/default/thumb3d.gif) 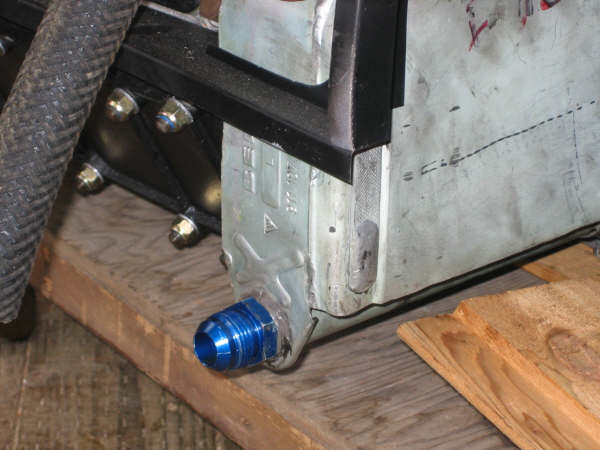 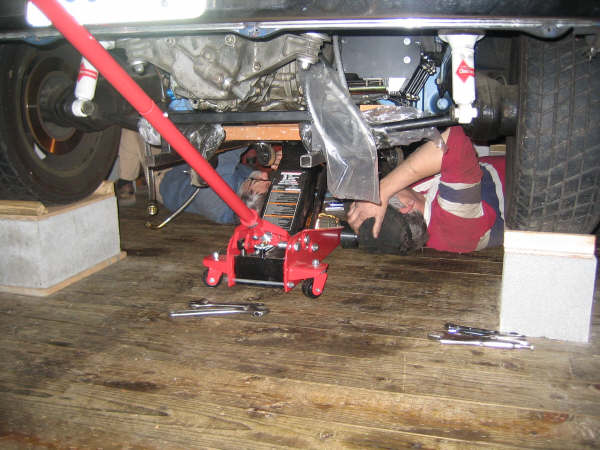 |
  |
1 User(s) are reading this topic (1 Guests and 0 Anonymous Users)
0 Members:

|
Lo-Fi Version | Time is now: 26th December 2024 - 07:45 PM |
Invision Power Board
v9.1.4 © 2024 IPS, Inc.


