|
|

|
Porsche, and the Porsche crest are registered trademarks of Dr. Ing. h.c. F. Porsche AG.
This site is not affiliated with Porsche in any way. Its only purpose is to provide an online forum for car enthusiasts. All other trademarks are property of their respective owners. |
|
|
  |
| andys |
 Nov 30 2006, 10:40 AM Nov 30 2006, 10:40 AM
Post
#61
|
|
Advanced Member     Group: Members Posts: 2,165 Joined: 21-May 03 From: Valencia, CA Member No.: 721 Region Association: None 
|
Thomas,
Nice work. Very time consuming for sure, but it come with rewards. Question: After your initial filling and blocking, did you spray any etching primer to cover the exposed metal areas? Andys |
| thomasotten |
 Nov 30 2006, 11:46 AM Nov 30 2006, 11:46 AM
Post
#62
|
|
Senior Member    Group: Members Posts: 1,565 Joined: 16-November 03 From: San Antonio, Texas Member No.: 1,349 |
Yes, I always sprayed etching primer on the exposed metal surfaces. Generally, I am against stripping a car down to the metal, for this very reason. And also, the factory paint is providing a pretty string defense against rust, so I didn't want to disturb that barrier and cause more problems.
|
| thomasotten |
 Nov 30 2006, 04:42 PM Nov 30 2006, 04:42 PM
Post
#63
|
|
Senior Member    Group: Members Posts: 1,565 Joined: 16-November 03 From: San Antonio, Texas Member No.: 1,349 |
So, when all was sanded flat, back into the paint booth we went....
Attached image(s) 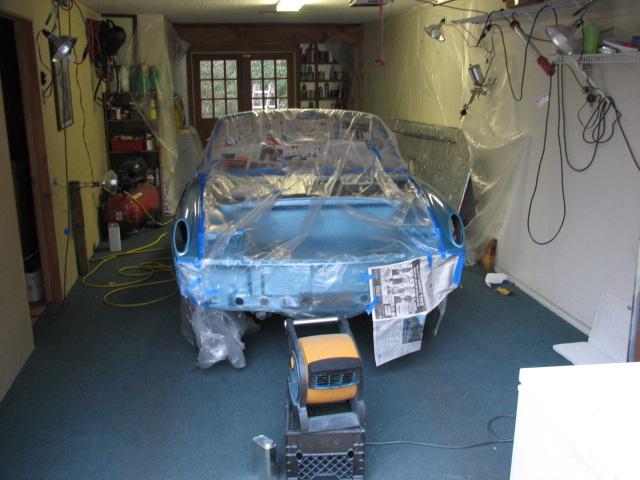
|
| thomasotten |
 Nov 30 2006, 05:15 PM Nov 30 2006, 05:15 PM
Post
#64
|
|
Senior Member    Group: Members Posts: 1,565 Joined: 16-November 03 From: San Antonio, Texas Member No.: 1,349 |
And out we come, now woth 5 total coats of clear...
Attached image(s) 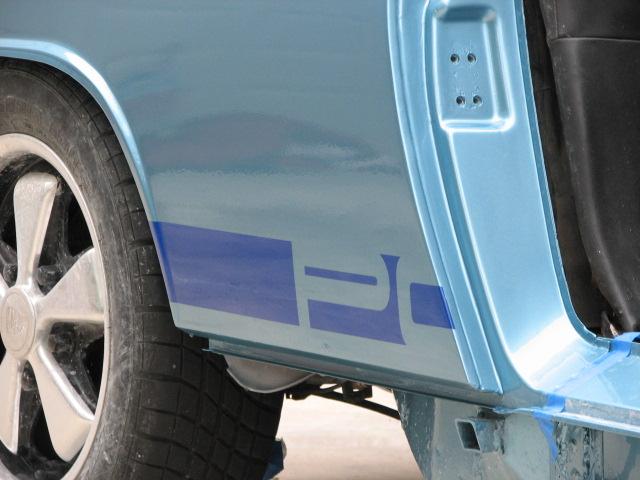 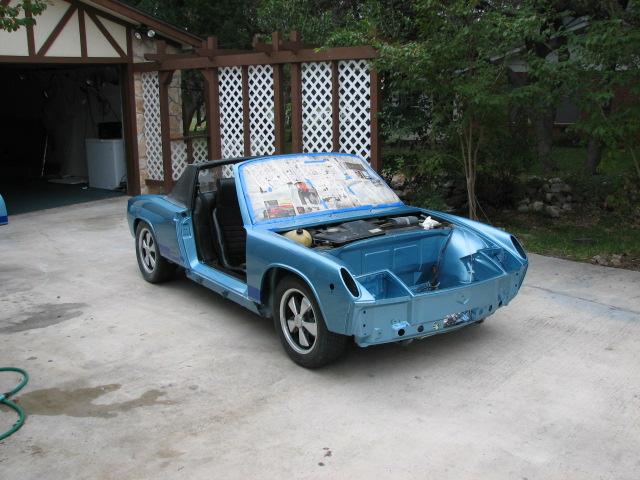 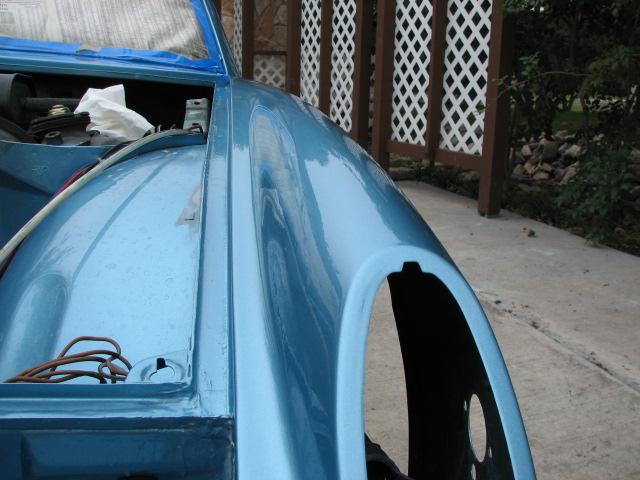
|
| HeloMech |
 Nov 30 2006, 06:07 PM Nov 30 2006, 06:07 PM
Post
#65
|
|
Go Ahead, Get Pistoph!    Group: Members Posts: 691 Joined: 31-August 05 From: Roy, WA Member No.: 4,718 Region Association: Southern California |
don't stop there... I mean, since you over estimated how much you needed, SPRAY it ALL.... sandy sandy, painty painty, sandy sandy, painty painty, sandy, buffy, drivey... weeeeeeeeeeeee
I've seen "those" car guys do like 20 coats of clear... seems crazy to me, however, it looks like you can "walk into" their paintjobs Now, if you're not quite happy with your paintjob, I'd be more than happy to let you "learn" on my car until you're perfect! (IMG:style_emoticons/default/smile.gif) |
| thomasotten |
 Nov 30 2006, 07:51 PM Nov 30 2006, 07:51 PM
Post
#66
|
|
Senior Member    Group: Members Posts: 1,565 Joined: 16-November 03 From: San Antonio, Texas Member No.: 1,349 |
Well, so now, It was time for buffing. The final two coats of clear reintroduced orange peel, as one can see in the photo...
Attached image(s) 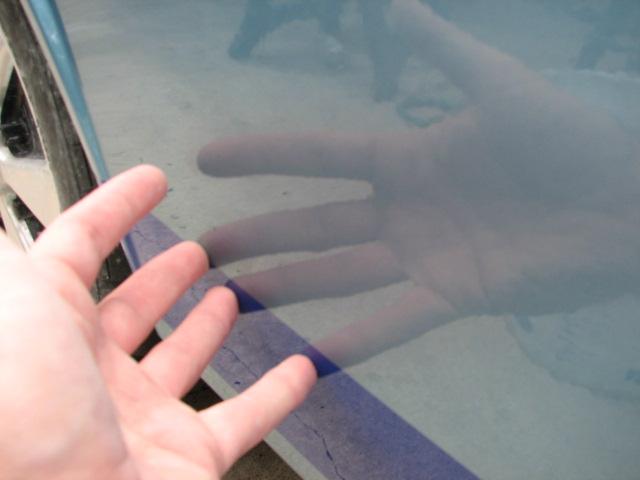
|
| thomasotten |
 Nov 30 2006, 07:53 PM Nov 30 2006, 07:53 PM
Post
#67
|
|
Senior Member    Group: Members Posts: 1,565 Joined: 16-November 03 From: San Antonio, Texas Member No.: 1,349 |
I started sanding with 1200...
Attached image(s) 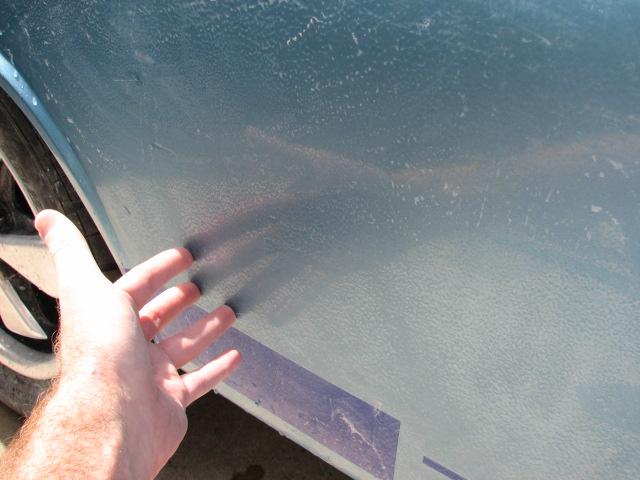
|
| thomasotten |
 Nov 30 2006, 07:55 PM Nov 30 2006, 07:55 PM
Post
#68
|
|
Senior Member    Group: Members Posts: 1,565 Joined: 16-November 03 From: San Antonio, Texas Member No.: 1,349 |
And then I sanded with 1500 and finally with 2000 till it looked flat like this...
Attached image(s) 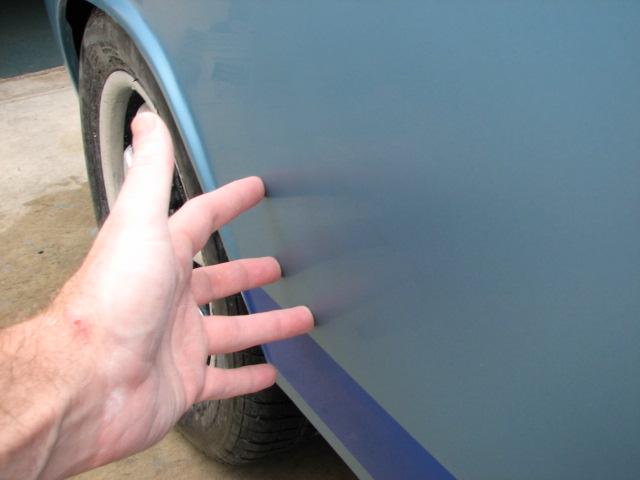
|
| thomasotten |
 Nov 30 2006, 07:58 PM Nov 30 2006, 07:58 PM
Post
#69
|
|
Senior Member    Group: Members Posts: 1,565 Joined: 16-November 03 From: San Antonio, Texas Member No.: 1,349 |
Then, it was time for buffing. Note to anyone considering this, it is always better to sand and buff your fresh clear within 3 days after painting. Buffing is much easier to do during that time period.
Attached image(s) 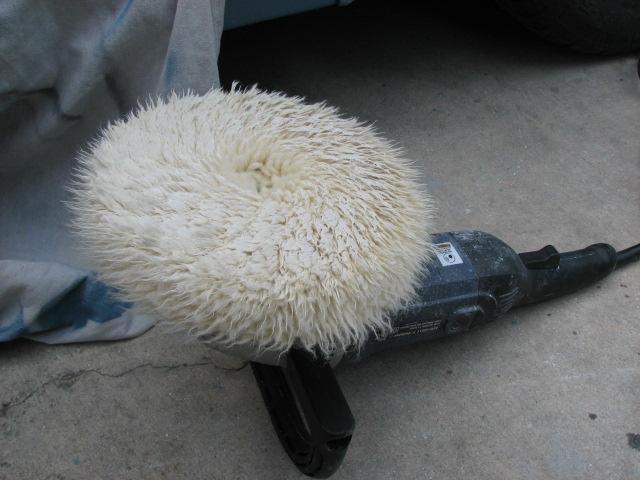
|
| project-914 |
 Nov 30 2006, 08:01 PM Nov 30 2006, 08:01 PM
Post
#70
|
|
Member   Group: Members Posts: 181 Joined: 2-August 06 From: Oklahoma Member No.: 6,571 |
more more I'm lovin' it
|
| thomasotten |
 Nov 30 2006, 08:01 PM Nov 30 2006, 08:01 PM
Post
#71
|
|
Senior Member    Group: Members Posts: 1,565 Joined: 16-November 03 From: San Antonio, Texas Member No.: 1,349 |
I use this stuff made by Wizard. It smells good, but be careful....Bees like the smell too!
Attached image(s) 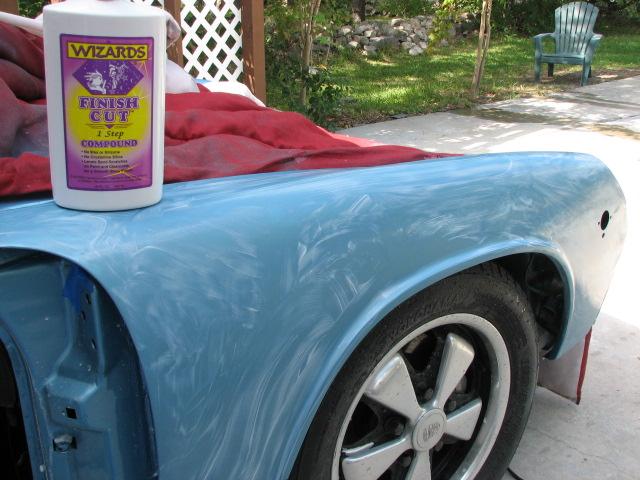
|
| thomasotten |
 Nov 30 2006, 08:04 PM Nov 30 2006, 08:04 PM
Post
#72
|
|
Senior Member    Group: Members Posts: 1,565 Joined: 16-November 03 From: San Antonio, Texas Member No.: 1,349 |
OK, so after buffing with the cutting pad, and the polishing pad, you can see in this photo, that the quality of the shine and finish is greatly enhanced.
Attached image(s) 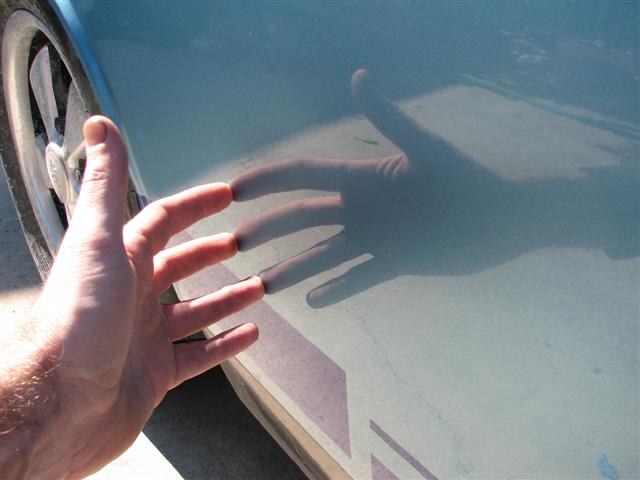
|
| thomasotten |
 Nov 30 2006, 08:06 PM Nov 30 2006, 08:06 PM
Post
#73
|
|
Senior Member    Group: Members Posts: 1,565 Joined: 16-November 03 From: San Antonio, Texas Member No.: 1,349 |
Sometimes I just like to stare at my car...
Attached image(s) 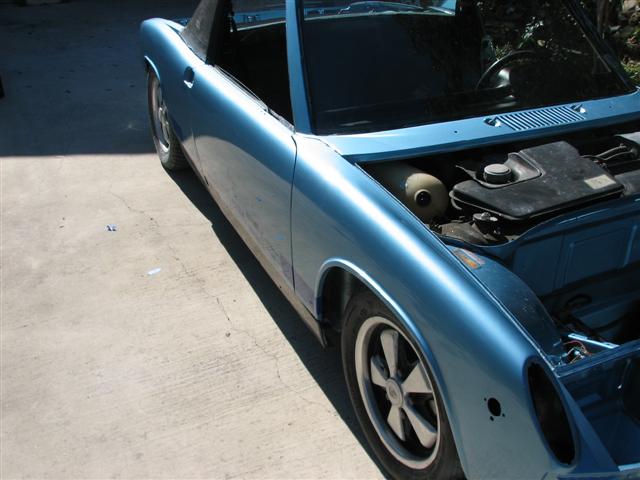
|
| thomasotten |
 Nov 30 2006, 08:07 PM Nov 30 2006, 08:07 PM
Post
#74
|
|
Senior Member    Group: Members Posts: 1,565 Joined: 16-November 03 From: San Antonio, Texas Member No.: 1,349 |
...
Attached image(s) 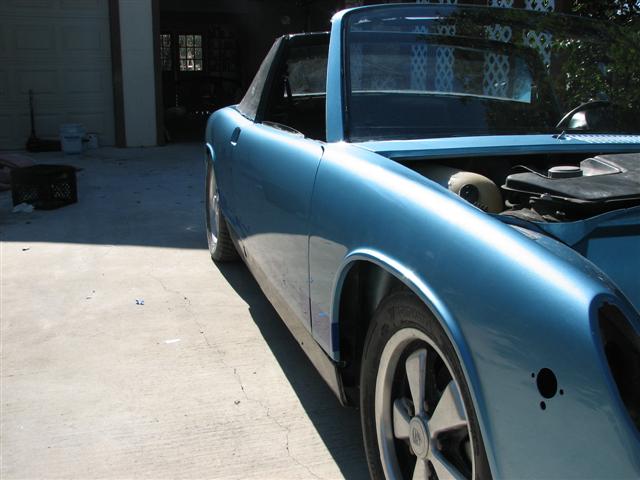 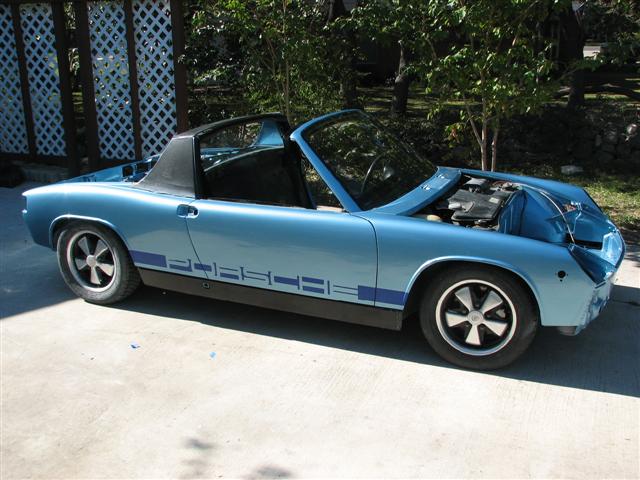
|
| AZ914 |
 Dec 1 2006, 08:50 AM Dec 1 2006, 08:50 AM
Post
#75
|
|
914 Dumbass    Group: Members Posts: 1,461 Joined: 6-January 03 From: Sunny Tucson Member No.: 98 Region Association: Southwest Region |
(IMG:style_emoticons/default/clap56.gif) (IMG:style_emoticons/default/drooley.gif) (IMG:style_emoticons/default/beerchug.gif)
Lookin great!! |
| SGB |
 Dec 1 2006, 10:58 AM Dec 1 2006, 10:58 AM
Post
#76
|
|
just visiting     Group: Members Posts: 4,086 Joined: 8-March 03 From: Huntsville, AL Member No.: 404 Region Association: South East States |
sha-zaam!
I just like staring at your car too. |
| JmuRiz |
 Dec 1 2006, 11:43 AM Dec 1 2006, 11:43 AM
Post
#77
|
|
914 Guru      Group: Members Posts: 5,554 Joined: 30-December 02 From: NoVA Member No.: 50 Region Association: MidAtlantic Region 
|
Wow, too bad you don't contract out work and live in the DC area!!!
|
| sjhowitson |
 Dec 1 2006, 12:25 PM Dec 1 2006, 12:25 PM
Post
#78
|
|
Member   Group: Members Posts: 478 Joined: 4-August 04 From: Moraga, CA Member No.: 2,449 |
For those of us that are lurking and loving it. How did you buff the area around the windshield and other small area.? Keep up the good work. The car looks great !!!
(IMG:style_emoticons/default/popcorn[1].gif) |
| thomasotten |
 Dec 1 2006, 12:30 PM Dec 1 2006, 12:30 PM
Post
#79
|
|
Senior Member    Group: Members Posts: 1,565 Joined: 16-November 03 From: San Antonio, Texas Member No.: 1,349 |
For those of us that are lurking and loving it. How did you buff the area around the windshield and other small area.? Keep up the good work. The car looks great !!! (IMG:style_emoticons/default/popcorn[1].gif) I stood on the seats and buffed the top of the frame. If the area is too small, you may not be able to buff it, at least not with a machine. For instance, under the rollbar. I will be doing that by hand... and I am not looking forward to it! Again, the best thing you can do for yourself is sand and buff as much as you can in that 3-day window after shooting your final clear. It is so much easier... |
| jfort |
 Dec 1 2006, 03:45 PM Dec 1 2006, 03:45 PM
Post
#80
|
|
Senior Member    Group: Members Posts: 1,163 Joined: 5-May 03 From: Findlay, OH Member No.: 652 Region Association: Upper MidWest 
|
very cool. enjoyed the thread immensely!
|
  |
1 User(s) are reading this topic (1 Guests and 0 Anonymous Users)
0 Members:

|
Lo-Fi Version | Time is now: 4th April 2025 - 05:25 AM |
Invision Power Board
v9.1.4 © 2025 IPS, Inc.


