|
|
|
Porsche, and the Porsche crest are registered trademarks of Dr. Ing. h.c. F. Porsche AG.
This site is not affiliated with Porsche in any way. Its only purpose is to provide an online forum for car enthusiasts. All other trademarks are property of their respective owners. |
|
|

  |

| DrifterJay |
 Jul 15 2007, 02:27 PM Jul 15 2007, 02:27 PM
Post
#101
|
|
I break stuff...  Group: Members Posts: 1,034 Joined: 25-May 03 From: Oceanside, California Member No.: 737 Region Association: None |
Wish I could be there to make fun of your progress...
|
   |

 
|
| skline |
Jul 17 2007, 05:44 PM
Post
#102
|
|
Born to Drive Group: Members Posts: 7,910 Joined: 26-December 02 From: Costa Mesa, CA Member No.: 17 Region Association: Southern California |
Well, I am not giving up and figured since I was already out here working on it I might as well get as much done as I can. The last 2 days I have been welding and pounding and welding some more and today I am filing and grinding and using a little filler to get the panel as straight as I can. I applied some etching primer to the inside of the car and I am going to paint the inside probably tomorrow. I ordered the primer for it yesterday and it should be here tomorrow at which time I am going to try to primer the whole car and start looking for defects to fix. Once I have got all the defects taken care of I will start block sanding till it is as smooth as a baby's behind and then I am going to shoot the base coat. Which by the way, I am going to try out the new Duplicolor system available at any Kragen auto parts store. It's about $23.00 a quart and I am going to shoot 4 quarts on it and then colorsand and shoot 2 or 3 coats of clear and see how it comes out. The whole paint job will probably cost around $190.00 for materials. We will see how it come out. Here is a current pic of the fender so far. Another hour or so and it should be good to go.
Attached image(s) 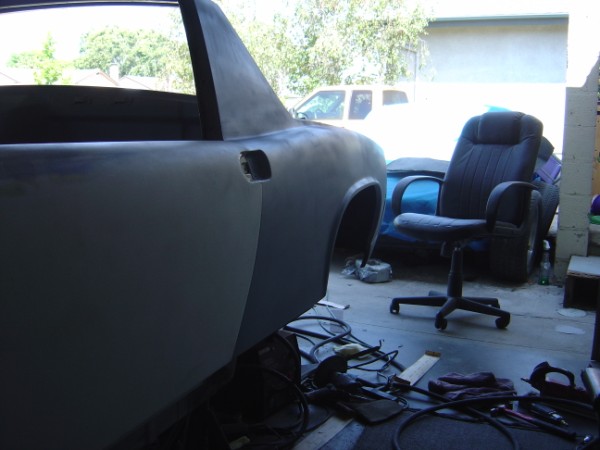
|
|
|
|
| spunone |
Jul 17 2007, 06:53 PM
Post
#103
|
|
Senior Member Group: Members Posts: 945 Joined: 6-April 04 From: Anaheim CA Member No.: 1,901 Region Association: Southern California |
Heh Scott wish i could get back to workin on my car kind of busy at this time. If ya need any Metal you know where to go. Keep at it (IMG:style_emoticons/default/smash.gif) (IMG:style_emoticons/default/sawzall-smiley.gif)
|
|
|
|
| skline |
Jul 18 2007, 03:52 PM
Post
#104
|
|
Born to Drive Group: Members Posts: 7,910 Joined: 26-December 02 From: Costa Mesa, CA Member No.: 17 Region Association: Southern California |
Thanks Paul, I appreciate the offer. I have found the only way to get time to work on these cars is to make time. Mine being in the garage lets me work on it at night with the door closed. I still need to keep the noise down to a minimum but there is a lot of sanding to do and some of it needs to be done by hand like door jambs and stuff. My 2k primer came in today so I shot the inside back wall and the fender I welded on to see all the imperfections. Still needs more work but it is getting there.
|
|
|
|
| DrifterJay |
Jul 18 2007, 05:21 PM
Post
#105
|
|
I break stuff... Group: Members Posts: 1,034 Joined: 25-May 03 From: Oceanside, California Member No.: 737 Region Association: None |
Ok....I have restrained myself...but I will finally do it....for the first time...
(IMG:style_emoticons/default/thisthreadisworthlesswithoutpics.gif) |
|
|
|
| skline |
Jul 18 2007, 10:18 PM
Post
#106
|
|
Born to Drive Group: Members Posts: 7,910 Joined: 26-December 02 From: Costa Mesa, CA Member No.: 17 Region Association: Southern California |
With it all one color and this great primer, I can see every imperfection. I will work on these tomorrow. Here is a picture for you Jay.
Attached image(s) 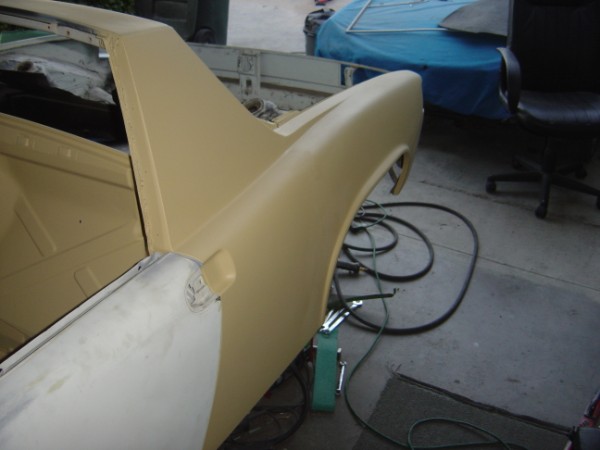
|
|
|
|
| JB 914 |
Jul 18 2007, 10:36 PM
Post
#107
|
|
Daddy! Finish my car NOW!!! Group: Members Posts: 1,593 Joined: 26-September 04 From: Garden Grove, CA Member No.: 2,831 |
|
|
|
|
| drive-ability |
Jul 18 2007, 10:47 PM
Post
#108
|
|
Senior Member Group: Members Posts: 1,169 Joined: 18-March 05 From: Orange County, California Member No.: 3,782 |
QUOTE(skline @ Jul 18 2007, 09:18 PM)  With it all one color and this great primer, I can see every imperfection. I will work on these tomorrow. Here is a picture for you Jay. Scott, I have to say you do fine work! That car looks fantastic, its amazing how something so "used and neglected" can come back in the right hands. How's you engine coming? |
|
|
|
| skline |
Jul 18 2007, 10:54 PM
Post
#109
|
|
Born to Drive Group: Members Posts: 7,910 Joined: 26-December 02 From: Costa Mesa, CA Member No.: 17 Region Association: Southern California |
I am short on funds right now so the engine is still at the machinist. I need to take my rods over to him so he can recon them. I still have a ton of work to do. Some PO has sprayed undercoating in both front and rear trunks and then painted the white over it. It is making a huge mess just trying to clean it up and ready for paint. With any luck, I will have the whole car in primer and ready to block it by the end of the weekend. Maybe, just maybe it will be ready for paint next week. The paint all came in today with the primer, the only thing missing is the clear, I should have it next week.
|
|
|
|
| skline |
Jul 19 2007, 04:35 PM
Post
#110
|
|
Born to Drive Group: Members Posts: 7,910 Joined: 26-December 02 From: Costa Mesa, CA Member No.: 17 Region Association: Southern California |
Today's progress so far. Elliot just came by to chat for awhile while the first coat of primer dried. Now it is time to start block sanding the whole car. A word of advice to anyone deciding to paint their own car, if you use 2k primer, wear a good mask or respirator, I was coughing it up the whole time Elliot was here. Anyway, here is how she looks right now before the block sanding.
Attached image(s) 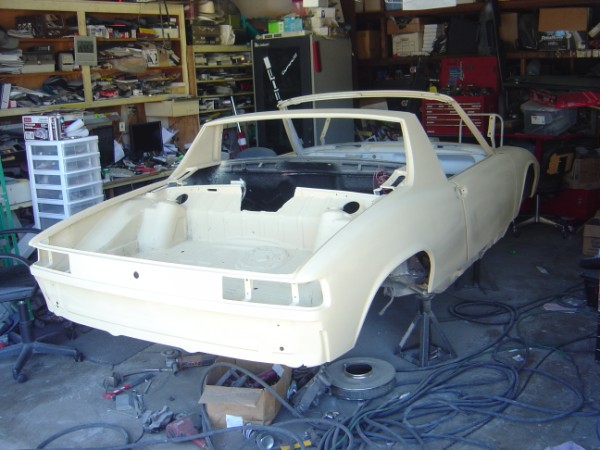 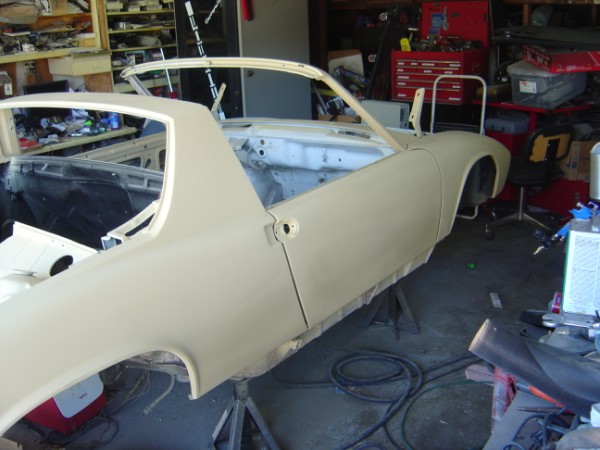 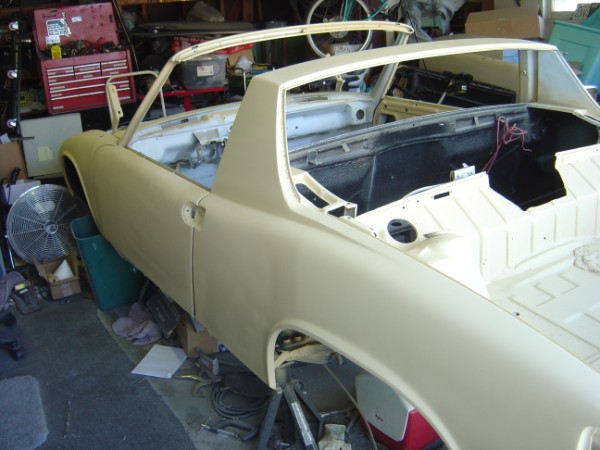 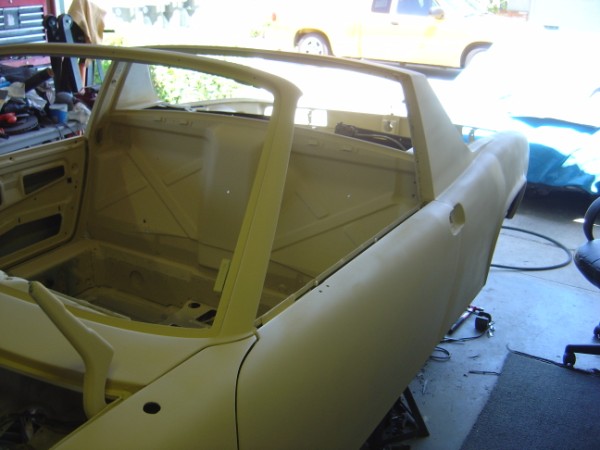 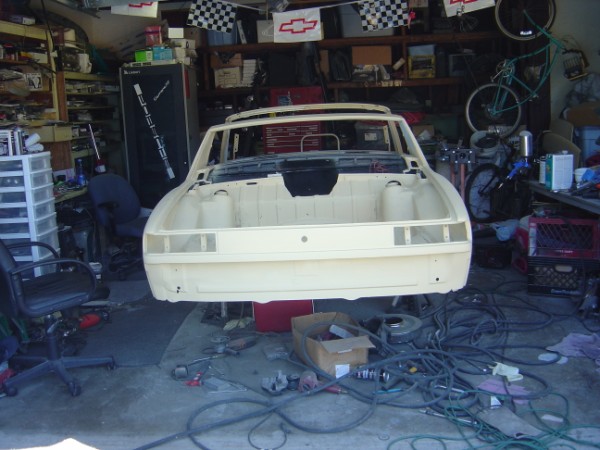
|
|
|
|
| DrifterJay |
Jul 19 2007, 04:52 PM
Post
#111
|
|
I break stuff... Group: Members Posts: 1,034 Joined: 25-May 03 From: Oceanside, California Member No.: 737 Region Association: None |
my what a big hole you have for the distributor....must be for that twin plug HEI setup your gonna run...hehe...
|
|
|
|
| Brando |
Jul 19 2007, 05:12 PM
Post
#112
|
|
BUY MY SPARE KIDNEY!!! Group: Members Posts: 3,935 Joined: 29-August 04 From: Santa Ana, CA Member No.: 2,648 Region Association: Southern California |
Lookin damn good skliney! If I hadn't lost a transmission on the way home from jack in the box today, I'd be down there helping you paint. Now I gotta wait till it cools off to install some trans mounts. Ugh...
|
|
|
|
| skline |
Jul 19 2007, 05:53 PM
Post
#113
|
|
Born to Drive Group: Members Posts: 7,910 Joined: 26-December 02 From: Costa Mesa, CA Member No.: 17 Region Association: Southern California |
QUOTE(Brando @ Jul 19 2007, 03:12 PM) Lookin damn good skliney! If I hadn't lost a transmission on the way home from jack in the box today, I'd be down there helping you paint. Now I gotta wait till it cools off to install some trans mounts. Ugh... I don't really need help with painting, it's the block sanding that is hard on me. I just did the driver side and my back is now killing me. So I thought I would take a short break and eat something. I am going over the whole car with 320 and then I will shoot it again and check for imperfections and then block it again with 400 or 600 before shooting the color base coat. |
|
|
|
| LarryR |
Jul 19 2007, 10:15 PM
Post
#114
|
|
Senior Member Group: Members Posts: 929 Joined: 15-March 07 From: E. Bay Area, N. California Member No.: 7,604 |
Great progress... I wish I was a painter... I plan on doing the pan replacement on the drivers floor since I can weld but painting is another story... I might have to learn since it seems that good paint jobs are now in the 6-7K range... and a paint job to the level of what you are doing would cost ~18-25K.
|
|
|
|
| skline |
Jul 19 2007, 10:22 PM
Post
#115
|
|
Born to Drive Group: Members Posts: 7,910 Joined: 26-December 02 From: Costa Mesa, CA Member No.: 17 Region Association: Southern California |
It's all the prep work and taking the time to sand, prime, sand again, prime again and then block it out before painting the color coat. I know it wont be perfect but it will be close. There are some flaws in the body I just dont want to mess with and if you dont know they are there you probably would never notice. Then again, maybe you would. I just want a nice shiny paint job on it that I am not embarrassed about. Anyone could paint a car with the right tools and patience.
Orange peel and runs are easy to fix with a little color sanding and buffing. It's the dents and ripples that are hard to deal with and get perfect. I just spent the day block sanding the whole car with 320 and now I am ready to shoot another coat of primer so I can do it all again tomorrow with 400 or 600 grit. I had forgotten how much work it really is. I should charge myself about 6 or 7k for this work. (IMG:style_emoticons/default/biggrin.gif) |
|
|
|
| JB 914 |
Jul 19 2007, 11:55 PM
Post
#116
|
|
Daddy! Finish my car NOW!!! Group: Members Posts: 1,593 Joined: 26-September 04 From: Garden Grove, CA Member No.: 2,831 |
QUOTE(DrifterJay @ Jul 19 2007, 03:52 PM) my what a big hole you have for the distributor....must be for that twin plug HEI setup your gonna run...hehe... Big? you call that big? Jesus, you should set the gaping fuchin crater the PO cut in my car. i can almost put the engine in thru it! (IMG:style_emoticons/default/laugh.gif) |
|
|
|
| skline |
Jul 20 2007, 11:51 AM
Post
#117
|
|
Born to Drive Group: Members Posts: 7,910 Joined: 26-December 02 From: Costa Mesa, CA Member No.: 17 Region Association: Southern California |
Well, the paint is here, the body work is mostly done, still a few things I am not happy with I will fix today, and I am almost ready to shoot the color coat. I will most likely shoot the inside and front and rear trunks today. I employed the boys yesterday when they got home to scrub and sand the front trunk and inside floor and under dash as those are tedious to do. I am sure I will have to go over them again to make sure they are good to go. It's really starting to take shape now. Here are some pics from last night. And of course, the paint I am using. Chrome Yellow from Duplicolor. I will let you know how good it is after I shoot it. I also have 2 quarts of clear by the same company I will apply after I am done with the color coat.
Attached image(s) 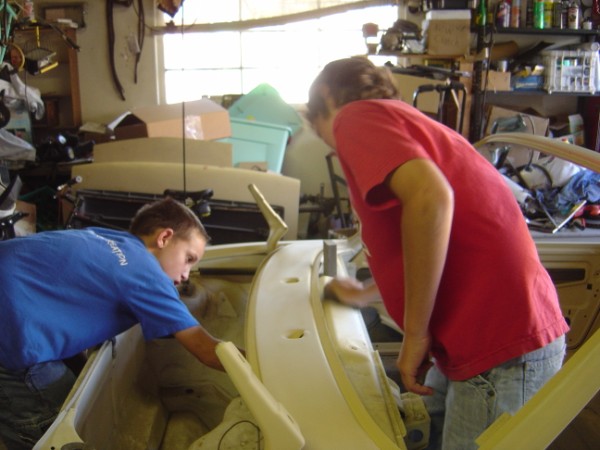 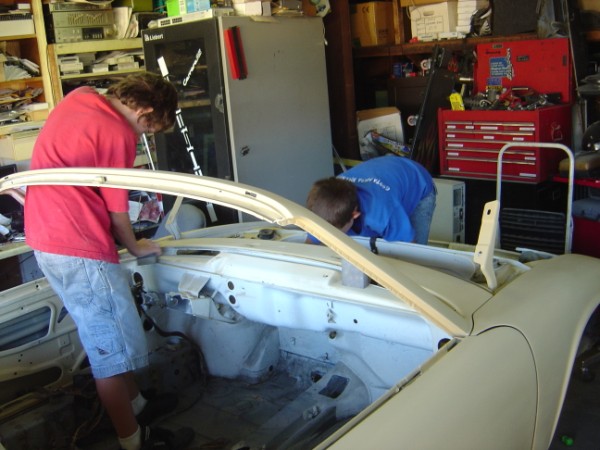 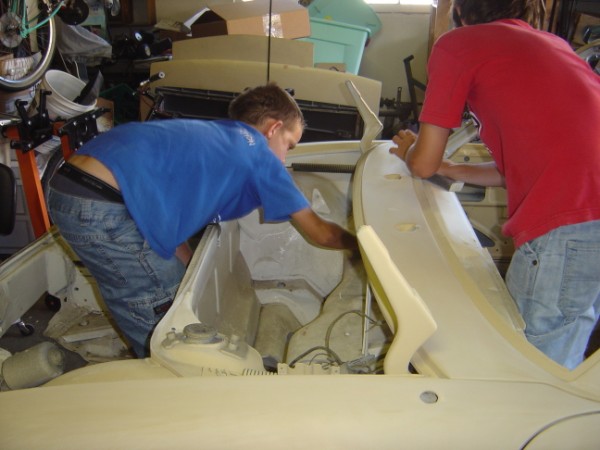 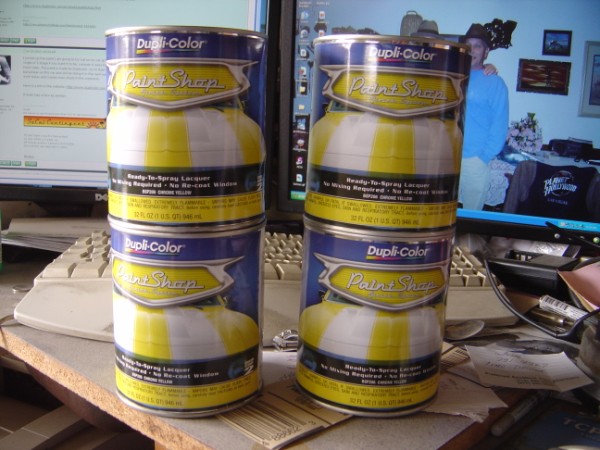
|
|
|
|
| DrifterJay |
Jul 20 2007, 11:57 AM
Post
#118
|
|
I break stuff... Group: Members Posts: 1,034 Joined: 25-May 03 From: Oceanside, California Member No.: 737 Region Association: None |
If you think they are good at sanding...Watch them work on the sound deadening...Jonny did all my wheelwells....
|
|
|
|
| skline |
Jul 20 2007, 12:18 PM
Post
#119
|
|
Born to Drive Group: Members Posts: 7,910 Joined: 26-December 02 From: Costa Mesa, CA Member No.: 17 Region Association: Southern California |
QUOTE(DrifterJay @ Jul 20 2007, 09:57 AM) If you think they are good at sanding...Watch them work on the sound deadening...Jonny did all my wheelwells.... They are both at camp during the day so they can only help in the evenings. Reece doesn't really want to help but Jonny is all over it if you offer money. When their friends come around, they lose interest and start slacking off till I tell them to just go. I will worry about the underside after the rest is done. Most of the sound deadening is going to stay in the wheel wells but I need to clean it off where the sway bar support goes in the front and the rear I already did to install the stiffening kits. |
|
|
|
| Brian Mifsud |
Jul 20 2007, 12:27 PM
Post
#120
|
|
Mechanical Engineer Group: Members Posts: 981 Joined: 3-March 03 From: Penngrove, CA Member No.: 384 Region Association: None |
QUOTE(skline @ Jul 20 2007, 11:18 AM) QUOTE(DrifterJay @ Jul 20 2007, 09:57 AM) If you think they are good at sanding...Watch them work on the sound deadening...Jonny did all my wheelwells.... They are both at camp during the day so they can only help in the evenings. Reece doesn't really want to help but Jonny is all over it if you offer money. When their friends come around, they lose interest and start slacking off till I tell them to just go. I will worry about the underside after the rest is done. Most of the sound deadening is going to stay in the wheel wells but I need to clean it off where the sway bar support goes in the front and the rear I already did to install the stiffening kits. This is a great project. Your sons appear to be near the age of my oldest (10) and this is his summer of "discovery". He has taken a strong interest in cars (out of nowhere). While when requested to clean up his toys, or quit wrestling/teasing his younger brother (8) I get nothing but attitude, he JUMPS at the chance to do anything related to working on cars. This was an unexpected "perk" of the car hobby. Good luck with it and enjoy the company of your son while it lasts..... |
|
|
|
|
38 User(s) are reading this topic (38 Guests and 0 Anonymous Users)
0 Members:

|
Lo-Fi Version | Time is now: 15th January 2025 - 09:11 AM |
Invision Power Board
v9.1.4 © 2025 IPS, Inc.