|
|
|
Porsche, and the Porsche crest are registered trademarks of Dr. Ing. h.c. F. Porsche AG.
This site is not affiliated with Porsche in any way. Its only purpose is to provide an online forum for car enthusiasts. All other trademarks are property of their respective owners. |
|
|

  |

| skline |
 Jul 20 2007, 12:32 PM Jul 20 2007, 12:32 PM
Post
#121
|
|
Born to Drive  Group: Members Posts: 7,910 Joined: 26-December 02 From: Costa Mesa, CA Member No.: 17 Region Association: Southern California |
QUOTE(Brian Mifsud @ Jul 20 2007, 10:27 AM)  QUOTE(skline @ Jul 20 2007, 11:18 AM) QUOTE(DrifterJay @ Jul 20 2007, 09:57 AM) If you think they are good at sanding...Watch them work on the sound deadening...Jonny did all my wheelwells.... They are both at camp during the day so they can only help in the evenings. Reece doesn't really want to help but Jonny is all over it if you offer money. When their friends come around, they lose interest and start slacking off till I tell them to just go. I will worry about the underside after the rest is done. Most of the sound deadening is going to stay in the wheel wells but I need to clean it off where the sway bar support goes in the front and the rear I already did to install the stiffening kits. This is a great project. Your sons appear to be near the age of my oldest (10) and this is his summer of "discovery". He has taken a strong interest in cars (out of nowhere). While when requested to clean up his toys, or quit wrestling/teasing his younger brother (8) I get nothing but attitude, he JUMPS at the chance to do anything related to working on cars. This was an unexpected "perk" of the car hobby. Good luck with it and enjoy the company of your son while it lasts..... Actually Brian, Jonny is 10 and Reece is 8 so the kids are the same age. And they are constantly at each others throats so there is a lot of intervention required at all times. They were even bickering while they were working on the car. I should have had one in the front of the car and one in the back just to keep them separated. |
   |

 
|
| Brian Mifsud |
Jul 20 2007, 02:00 PM
Post
#122
|
|
Mechanical Engineer Group: Members Posts: 981 Joined: 3-March 03 From: Penngrove, CA Member No.: 384 Region Association: None |
Scott... I have to laugh at that... I don't feel so bad now in thinking my kids are frequently arguing and fighting because I don't spend enough time with them.
Since the older one is very "technically oriented", and the younger is the artist, I'm hoping to get them involved for mechanical, then paint work seperately. |
|
|
|
| skline |
Jul 23 2007, 12:04 AM
Post
#123
|
|
Born to Drive Group: Members Posts: 7,910 Joined: 26-December 02 From: Costa Mesa, CA Member No.: 17 Region Association: Southern California |
Yesterday and today's progress, The pictures are only half the story here. I wire wheeled the front inner fender wells and prepped for the sway bar stiffening kit from Engman and molded in the rear window trim with fiberglass and then went to try to make it all straight and smooth. Lot's more work to do yet but it is getting there. I decided not to rush applying the color coat so it won't be this weekend, maybe next. The body has to be as perfect as I can get it before I shoot it. I still want to clean out the front trunk of all the seam sealer and finish the rear trunk as well. But here is what it is looking like so far. My primer gun was spitting and sputtering so it may be time to take it all apart and clean it out really good. It took forever to get this coat of primer on.
Attached image(s) 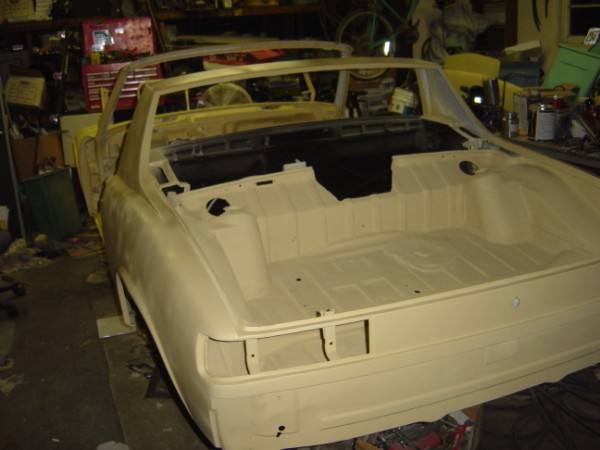 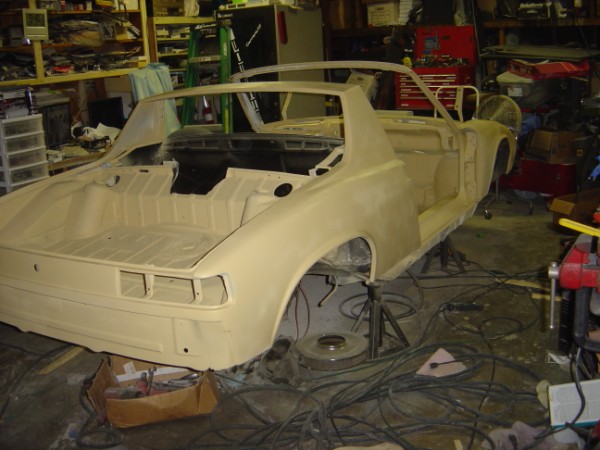 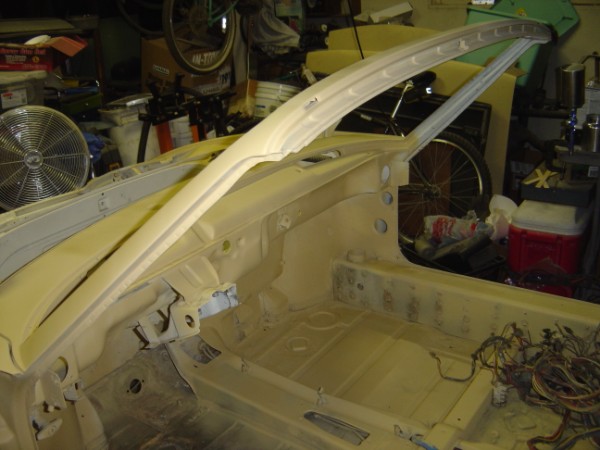
|
|
|
|
| JB 914 |
Jul 23 2007, 01:27 AM
Post
#124
|
|
Daddy! Finish my car NOW!!! Group: Members Posts: 1,593 Joined: 26-September 04 From: Garden Grove, CA Member No.: 2,831 |
looking good Scott,
Not sure if this will help, but, when i was shooting gelcoat on my boat i had the clogging, spatter problem. Gelcoat is alot thicker than paint and you have to get the right consistency to thin, it runs to thick it clogs. after each quart we had another quart of acetone and ran that thru it into a 5 gallon bucket. maybe you can try that between primer coats. It helped keep the gun clean and clog free. |
|
|
|
| skline |
Jul 27 2007, 06:00 PM
Post
#125
|
|
Born to Drive Group: Members Posts: 7,910 Joined: 26-December 02 From: Costa Mesa, CA Member No.: 17 Region Association: Southern California |
This is what I am going for, actually, this is a really small image I want to try to target for my sig. It's way too hot to work on my car right now so I am just wasting time.
Attached image(s) 
|
|
|
|
| skline |
Jul 27 2007, 06:02 PM
Post
#126
|
|
Born to Drive Group: Members Posts: 7,910 Joined: 26-December 02 From: Costa Mesa, CA Member No.: 17 Region Association: Southern California |
Hehehehehe (IMG:style_emoticons/default/smile.gif) It worked!
|
|
|
|
| jonferns |
Jul 27 2007, 09:28 PM
Post
#127
|
|
Advanced Member Group: Members Posts: 2,081 Joined: 29-March 07 From: New Jersey Member No.: 7,631 Region Association: North East States |
slantnose....nice
|
|
|
|
| Lou W |
Jul 27 2007, 10:36 PM
Post
#128
|
|
"Here Kitty Kitty" my ass...... Group: Members Posts: 4,109 Joined: 9-May 04 From: Roseburg, OR. Member No.: 2,039 Region Association: Spain |
Scott, it sure is looking good. (IMG:style_emoticons/default/beerchug.gif)
|
|
|
|
| Brando |
Jul 28 2007, 04:50 PM
Post
#129
|
|
BUY MY SPARE KIDNEY!!! Group: Members Posts: 3,935 Joined: 29-August 04 From: Santa Ana, CA Member No.: 2,648 Region Association: Southern California |
Too hot to work on your car? What is it ... like 85 down there? I'm gonna be working on mine in the blazing sun and it's 90+ here!
|
|
|
|
| skline |
Jul 28 2007, 09:55 PM
Post
#130
|
|
Born to Drive Group: Members Posts: 7,910 Joined: 26-December 02 From: Costa Mesa, CA Member No.: 17 Region Association: Southern California |
Well, I fired up the fan today and did some work on my car. It got me out of the house for awhile. The dirtiest nastiest job I have had to do so far is removing the seam sealer and undercoating from this car. I think the seam sealer is the worst. I got this 4" wire wheel for my angle grinder and it strips the stuff off really well and fast but the crap goes everywhere and sticks to everything. What a mess it makes. I welded in the little piece that my door jamb was short from my screw up in not measuring before cutting (IMG:style_emoticons/default/headbang.gif)
I also test fitted the radiator and found out my front end is different than the one this kit is for. This is a 75 and the front of the car is a little different than the 74 and older 914's so the side aluminum pieces will need to be modified a little for the final fitting. Attached image(s) 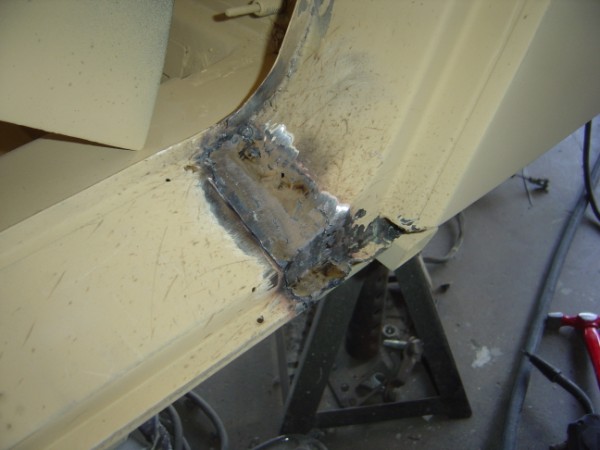 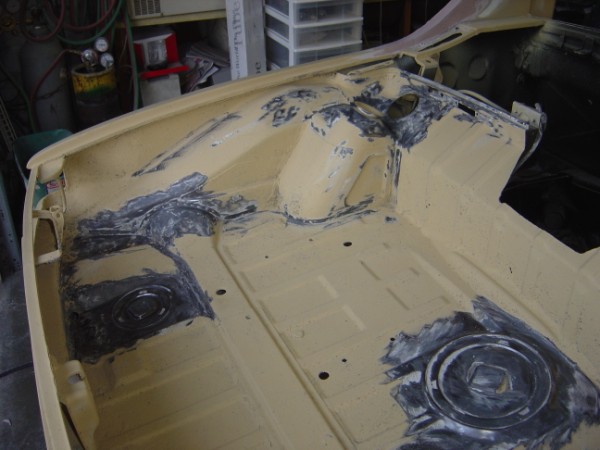 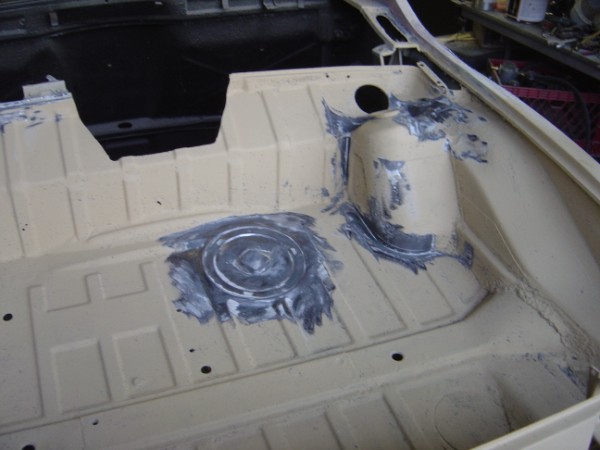 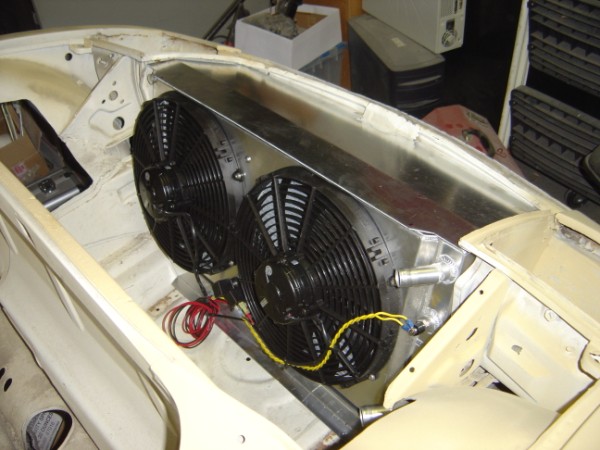 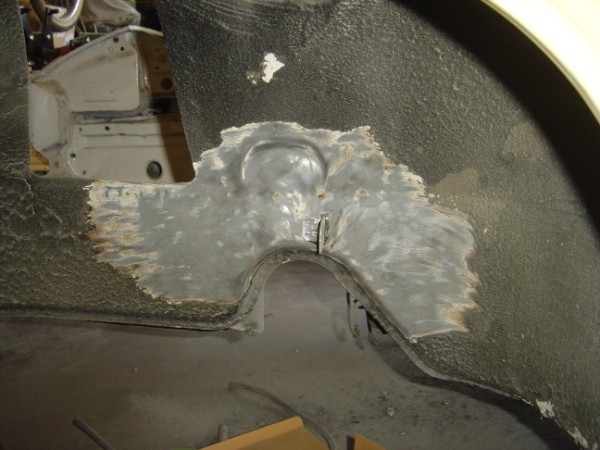
|
|
|
|
| skline |
Aug 1 2007, 02:10 PM
Post
#131
|
|
Born to Drive Group: Members Posts: 7,910 Joined: 26-December 02 From: Costa Mesa, CA Member No.: 17 Region Association: Southern California |
Has anyone else welded these in? They look like they will stiffen up the front pretty good, I just dont want mine to do what Brandons did on him. This just might be the ticket. It is a PIA to do however, Hey Engman! You should cut a notch in the bracket for the brake line guide, it seems to be right where the bracket goes. I notched it with an angle grinder till it fit right. Came out ok, now I just need to grind down the welds and clean it up a little.
Attached image(s) 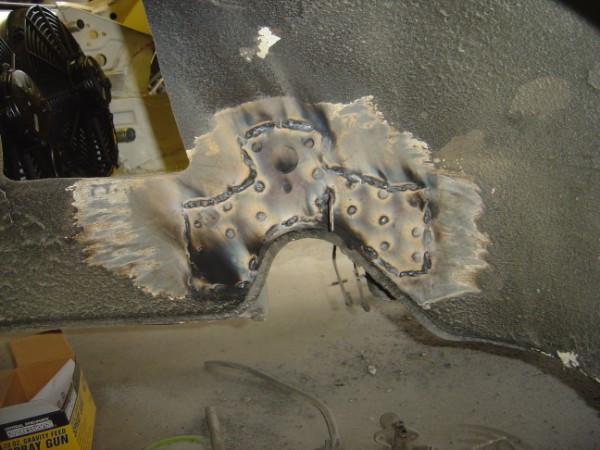
|
|
|
|
| skline |
Aug 22 2007, 06:43 PM
Post
#132
|
|
Born to Drive Group: Members Posts: 7,910 Joined: 26-December 02 From: Costa Mesa, CA Member No.: 17 Region Association: Southern California |
Picked up my rotisserie from Joe Sharp's house yesterday and will be welding it together this week so I can get the car up on it this weekend. That is all the updates for now. Pictures coming when I get the car on the tilter. (IMG:style_emoticons/default/sawzall-smiley.gif) (IMG:style_emoticons/default/welder.gif) (IMG:style_emoticons/default/biggrin.gif)
|
|
|
|
| Engman |
Aug 22 2007, 07:33 PM
Post
#133
|
|
Zoisite Group: Benefactors Posts: 1,349 Joined: 25-March 03 From: New Albany, IN Member No.: 475 |
Scott - I considered the notch thing until I measured my two cars - there was a variance of 1/4". Best to cut off, gring smooth and reattach.
Thanks for the thought tho.. Your car is coming along nicely. M |
|
|
|
| rhodyguy |
Aug 23 2007, 10:03 AM
Post
#134
|
|
Chimp Sanctuary NW. Check it out. Group: Members Posts: 22,207 Joined: 2-March 03 From: Orion's Bell. The BELL! Member No.: 378 Region Association: Galt's Gulch |
nice work scott. the seam sealant comes off in no time with a heat gun and a 1" putty knife. i doubt that tidbit is of much help now.
k |
|
|
|
| skline |
Aug 23 2007, 10:51 AM
Post
#135
|
|
Born to Drive Group: Members Posts: 7,910 Joined: 26-December 02 From: Costa Mesa, CA Member No.: 17 Region Association: Southern California |
I first tried a heat gun and got impatient and went to the torch, that was a huge mistake and the fumes caused illness. Then I went and bought a wire wheel for the 4" angle grinder and that really made it come off quick. The drawback however, was the mess of crap it threw all over the place. Not that it was hard to clean up but when the grinder throws it all over the place, it is hot and sticky wherever it goes and sticks to everything. I am still cleaning it up everywhere.
Live and learn (IMG:style_emoticons/default/smile.gif) |
|
|
|
| rhodyguy |
Aug 23 2007, 11:03 AM
Post
#136
|
|
Chimp Sanctuary NW. Check it out. Group: Members Posts: 22,207 Joined: 2-March 03 From: Orion's Bell. The BELL! Member No.: 378 Region Association: Galt's Gulch |
the old "time saving technique (torch)" saved no time. bummer. that's the chore (heat gun)for the apprentices, paid by the foot not by the hour.
k |
|
|
|
|
2 User(s) are reading this topic (2 Guests and 0 Anonymous Users)
0 Members:

|
Lo-Fi Version | Time is now: 15th January 2025 - 05:10 AM |
Invision Power Board
v9.1.4 © 2025 IPS, Inc.