|
|

|
Porsche, and the Porsche crest are registered trademarks of Dr. Ing. h.c. F. Porsche AG.
This site is not affiliated with Porsche in any way. Its only purpose is to provide an online forum for car enthusiasts. All other trademarks are property of their respective owners. |
|
|
  |
| Eric_Shea |
 Aug 20 2008, 09:25 AM Aug 20 2008, 09:25 AM
Post
#341
|
|
PMB Performance                Group: Admin Posts: 19,301 Joined: 3-September 03 From: Salt Lake City, UT Member No.: 1,110 Region Association: Rocky Mountains  |
Looking great Jeff. Is a GT shroud going to fit in there? Are those bottom pieces going to tie into the crossbar somehow?
I've been wanting to do the same bracing up front but I haven't been able to figure out a way around the oil lines on the left and the fuel pump on the right. Looks like your design would clear the fuel pump though. |
| Jeff Hail |
 Aug 20 2008, 10:02 AM Aug 20 2008, 10:02 AM
Post
#342
|
|
Senior Member    Group: Members Posts: 1,141 Joined: 3-May 07 From: LA/ CA Member No.: 7,712 |
Looking great Jeff. Is a GT shroud going to fit in there? Are those bottom pieces going to tie into the crossbar somehow? I've been wanting to do the same bracing up front but I haven't been able to figure out a way around the oil lines on the left and the fuel pump on the right. Looks like your design would clear the fuel pump though. The lower base plates at the bulkhead attach directly on the opposite side of the suspension crossmember mounts. Those will get reinforced also inside the tunnel spreading the load area out further. Gt shroud? Nope! Have something else in mind. |
| Jeff Hail |
 Aug 30 2008, 08:02 PM Aug 30 2008, 08:02 PM
Post
#343
|
|
Senior Member    Group: Members Posts: 1,141 Joined: 3-May 07 From: LA/ CA Member No.: 7,712 |
Have not had much time to play. Day job busy. Helping others with projects. Like they say nice guys finish last!
The passenger side of the car is officially completed (minus RR flare which is will be done soon in CF). Today I finished all the mounts for the right side front fender. Added the two remaining Dzus fasteners on top. Little things take time. Done! All the mount brackets on the underside also have backing plates bonded to the fender itself so it does not crush or crack. Attached image(s) 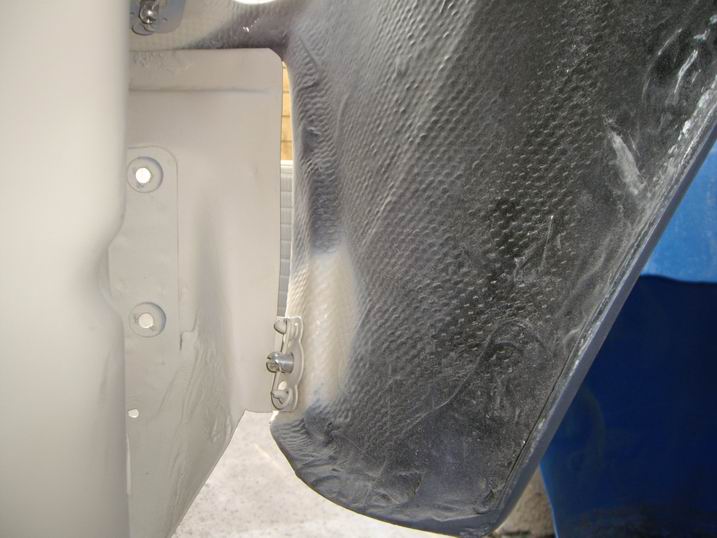 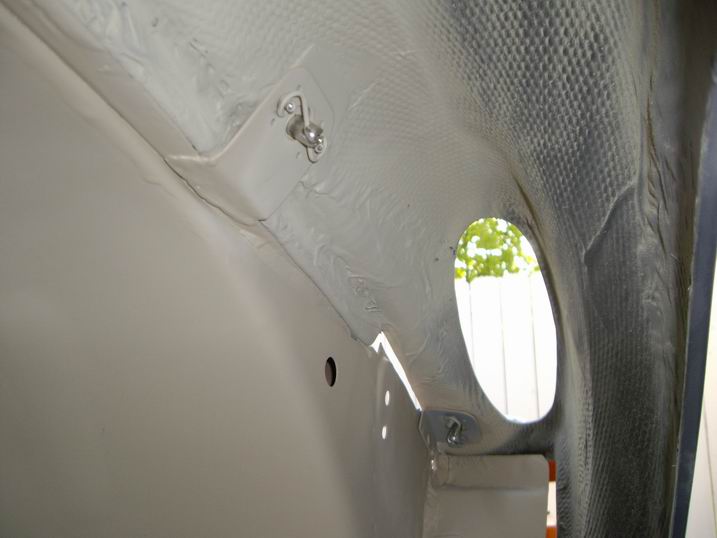 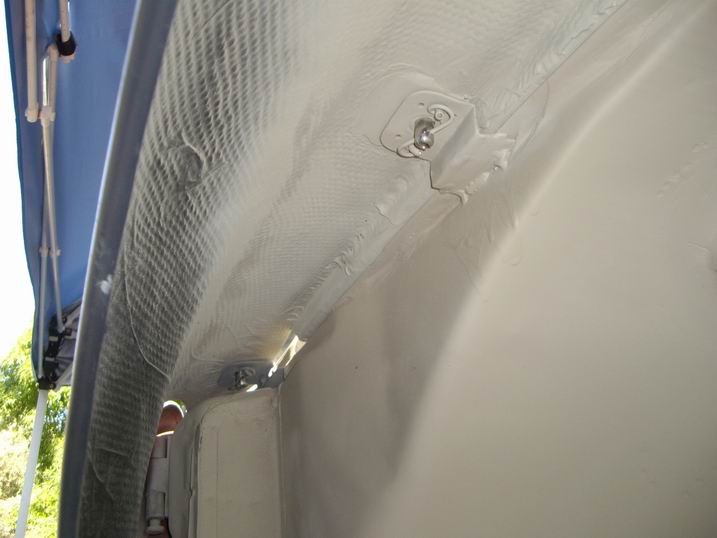 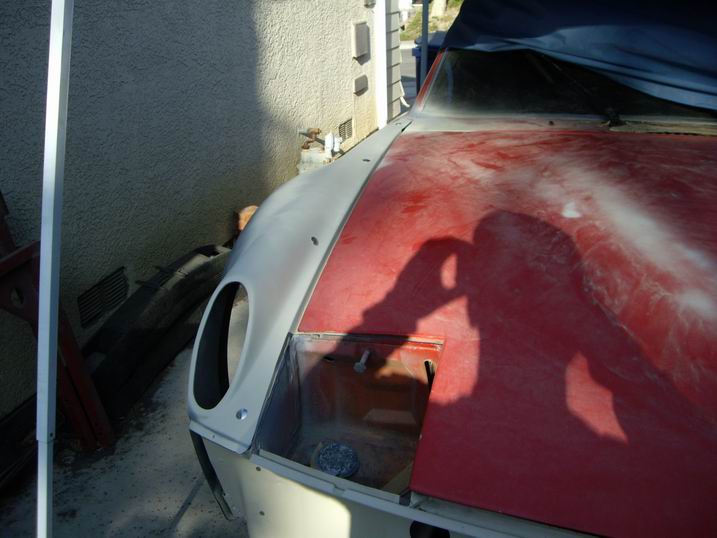
|
| Jeff Hail |
 Aug 30 2008, 08:05 PM Aug 30 2008, 08:05 PM
Post
#344
|
|
Senior Member    Group: Members Posts: 1,141 Joined: 3-May 07 From: LA/ CA Member No.: 7,712 |
Finished up the front structure.
It is still only tacked at the base plates but all the tube to tube joints are welded. I need to cut the tacks and work on the right side front control arm mount bracket. (it has a minor issue to address) Attached image(s) 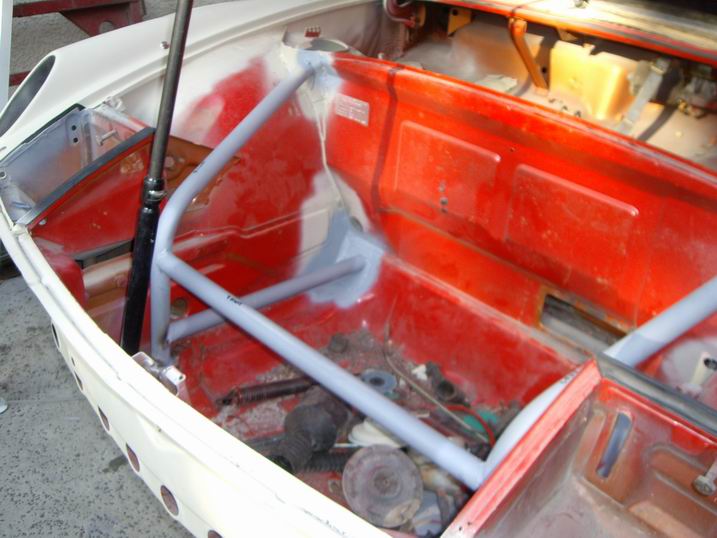 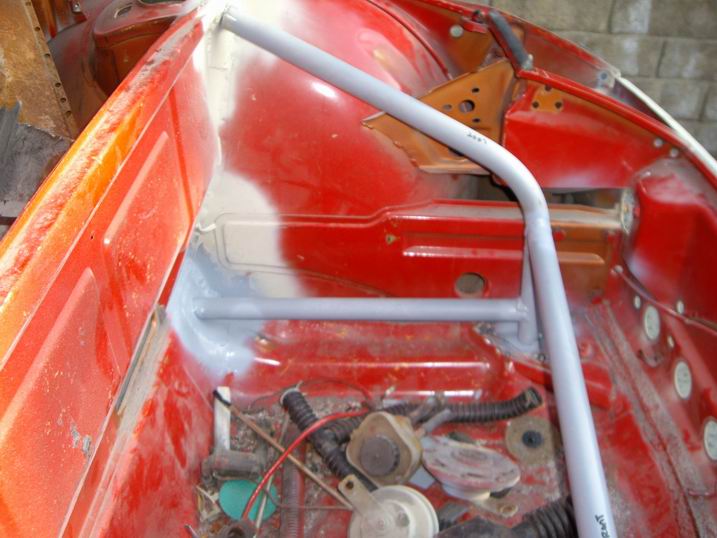
|
| ChrisFoley |
 Aug 31 2008, 05:45 AM Aug 31 2008, 05:45 AM
Post
#345
|
|
I am Tangerine Racing      Group: Members Posts: 7,981 Joined: 29-January 03 From: Bolton, CT Member No.: 209 Region Association: None 
|
Looks good Jeff!
Eric, a gt cooler shroud would fit fine. The tubular structure is wider and higher than the f/g piece. |
| Rocket Man |
 Sep 5 2008, 08:20 PM Sep 5 2008, 08:20 PM
Post
#346
|
|
Newbie  Group: Members Posts: 2 Joined: 31-August 08 From: Dayton, Ohio Member No.: 9,486 Region Association: Upper MidWest |
Jeff,
Awesome work and great thread… (IMG:style_emoticons/default/smilie_pokal.gif) you have inspired me. I have a couple of questions to help me determine where to re-start on my garage queen teener. 1. Where did you find the factory tolerance info on the starting page of your thread, quoted below? “Keep in mind that tolerances for the 914 were 7-9mm from the factory so anything you can do to make it better is worth it.” Is this info documented anywhere, and do the tolerances include door gaps and hood-fender gaps? My rear trunk lid to fender gap gets wider on both sides going from the back to the front…I suspect it could be from a questionable fender flaring process from the PO. 2. Is there a preferred way to remove/separate parts that have previously been seam welded rather than spot welded together, such as a previously replaced battery box or front fender, without damaging either the part being removed, or the part it is removed from? A battery box is not so valuable, but a front fender is. I want to remove and re-use the fender, and do it right, unlike the PO. Thanks, and keep your progress updates coming. |
| Eric_Shea |
 Sep 5 2008, 08:58 PM Sep 5 2008, 08:58 PM
Post
#347
|
|
PMB Performance                Group: Admin Posts: 19,301 Joined: 3-September 03 From: Salt Lake City, UT Member No.: 1,110 Region Association: Rocky Mountains  |
QUOTE Eric, a gt cooler shroud would fit fine. The tubular structure is wider and higher than the f/g piece. That's what I was thinking. There might be hope for a suspension tie-in for me yet. |
| Jeff Hail |
 Sep 12 2008, 02:44 PM Sep 12 2008, 02:44 PM
Post
#348
|
|
Senior Member    Group: Members Posts: 1,141 Joined: 3-May 07 From: LA/ CA Member No.: 7,712 |
Attached image(s) 
|
| r_towle |
 Sep 12 2008, 02:49 PM Sep 12 2008, 02:49 PM
Post
#349
|
|
Custom Member                Group: Members Posts: 24,705 Joined: 9-January 03 From: Taxachusetts Member No.: 124 Region Association: North East States 
|
What did Jeff do this week???
Inquiring minds want to SEE Rich |
| Jeff Hail |
 Sep 13 2008, 09:00 PM Sep 13 2008, 09:00 PM
Post
#350
|
|
Senior Member    Group: Members Posts: 1,141 Joined: 3-May 07 From: LA/ CA Member No.: 7,712 |
|
| Jeff Hail |
 Sep 13 2008, 09:03 PM Sep 13 2008, 09:03 PM
Post
#351
|
|
Senior Member    Group: Members Posts: 1,141 Joined: 3-May 07 From: LA/ CA Member No.: 7,712 |
Bits and pieces done today.
Repaired and sectioned a piece at bottom of the front wheelhouse. Crap I couldnt even find the seam when I was done. Closed the antenna wire hole. I swear that had one purpose! To leak! Just had to stick my finger in the wet primer. Nope not dry yet! Attached image(s) 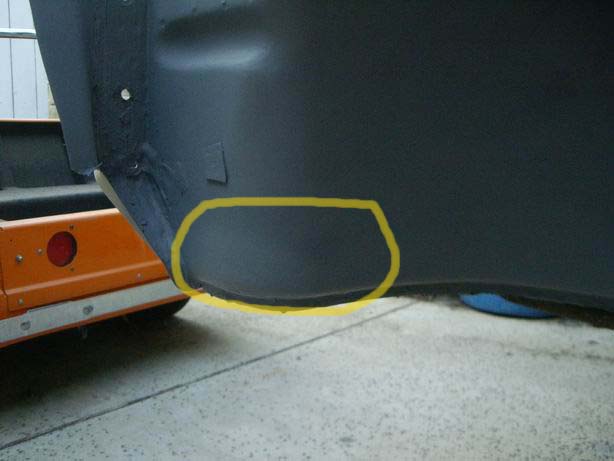 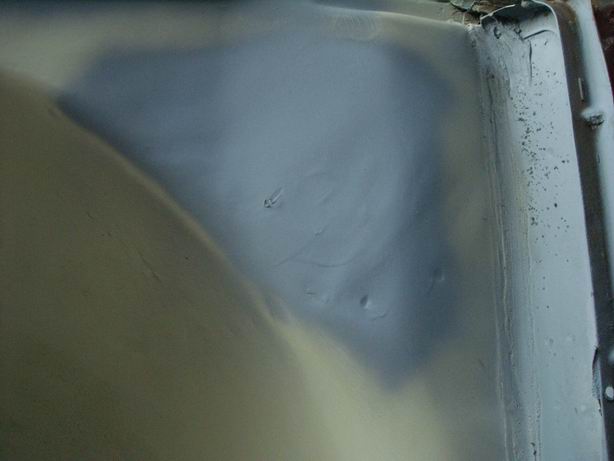
|
| Jeff Hail |
 Sep 13 2008, 09:05 PM Sep 13 2008, 09:05 PM
Post
#352
|
|
Senior Member    Group: Members Posts: 1,141 Joined: 3-May 07 From: LA/ CA Member No.: 7,712 |
Lower left front wheelhouse. Not bad. Little piece to replace.
Attached image(s) 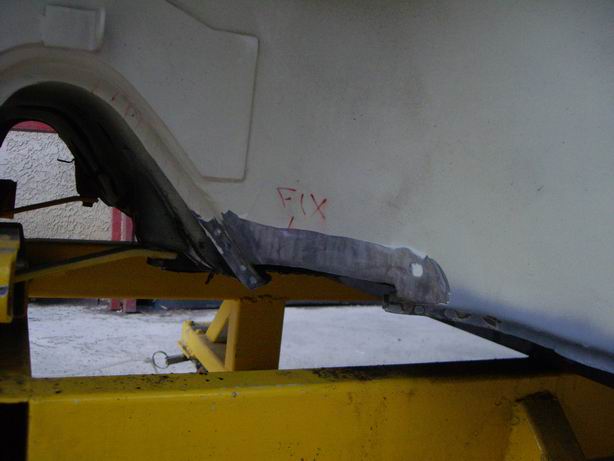
|
| Jeff Hail |
 Sep 13 2008, 09:17 PM Sep 13 2008, 09:17 PM
Post
#353
|
|
Senior Member    Group: Members Posts: 1,141 Joined: 3-May 07 From: LA/ CA Member No.: 7,712 |
Front left floor is not as bad as I first thought. The pedal base is all good steel.
Just to the left where I cut the dead foot out is easily repaired. Attached image(s) 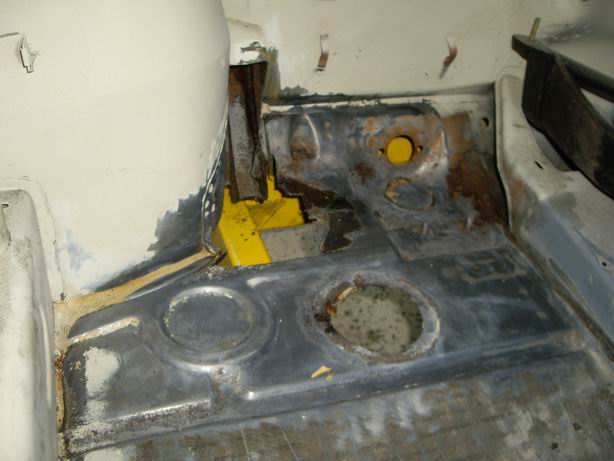 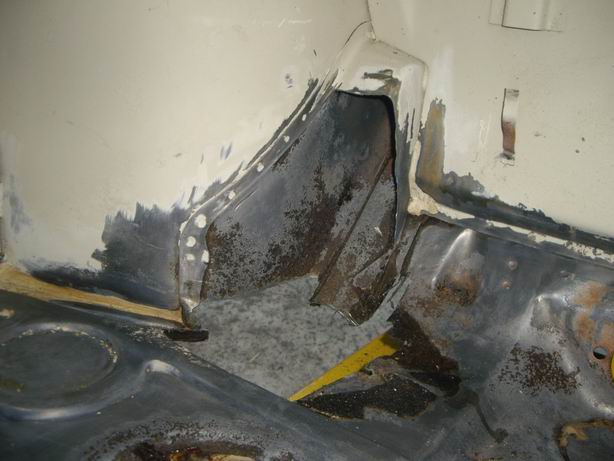 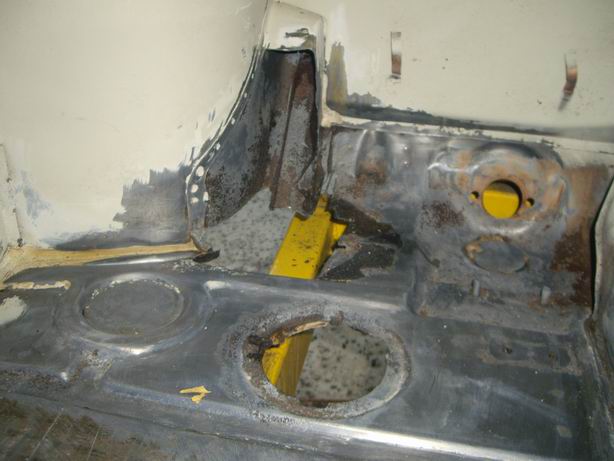 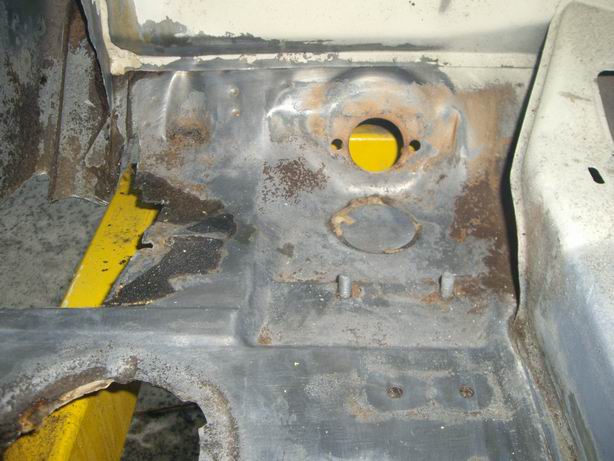
|
| Jeff Hail |
 Sep 13 2008, 09:38 PM Sep 13 2008, 09:38 PM
Post
#354
|
|
Senior Member    Group: Members Posts: 1,141 Joined: 3-May 07 From: LA/ CA Member No.: 7,712 |
One thing I did notice is two cracks in the sheetmetal where the suspension crossmember hump is. I saw these from underneath the body. This required removal of the dead foot to access the area. The cracks are clean and appear to be from the forming process not stress.
When sheetmetal is formed in a die the edges/bends need to be smooth or polished otherwise the metal will not draw smoothly and thin out at the bend. Wax or lube used during the forming process also helps a lot. This will eventually split open. Any of you guys who reload will understand. Try sizing a case without lube. I will need to media blast this area clean. Fab the pieces and as Shea would say "do that welding thing I do". Water entry did not help this area. Although that came from the cowl above. Surprisingly the steel is in good condition with the exception of what I cut out. Attached image(s) 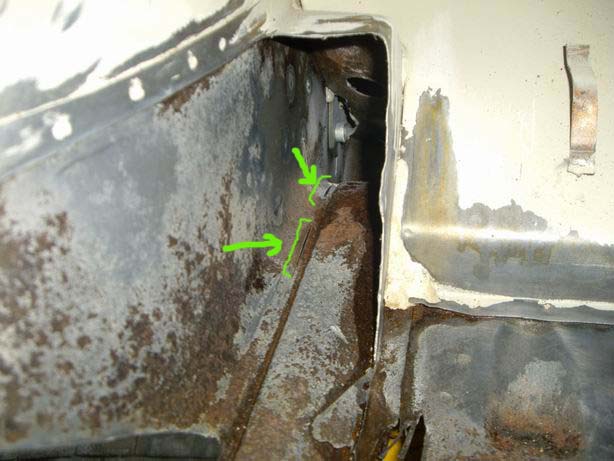
|
| Jeff Hail |
 Sep 18 2008, 12:57 AM Sep 18 2008, 12:57 AM
Post
#355
|
|
Senior Member    Group: Members Posts: 1,141 Joined: 3-May 07 From: LA/ CA Member No.: 7,712 |
Cut and trimmed the front floor footwell. Media blasted the surface flash.
Easier to do the repair in two pieces (actually 3) The piece just to the left of the pedal box is an easy part to make. Just a rectangle cut to size and burn it in. Attached image(s) 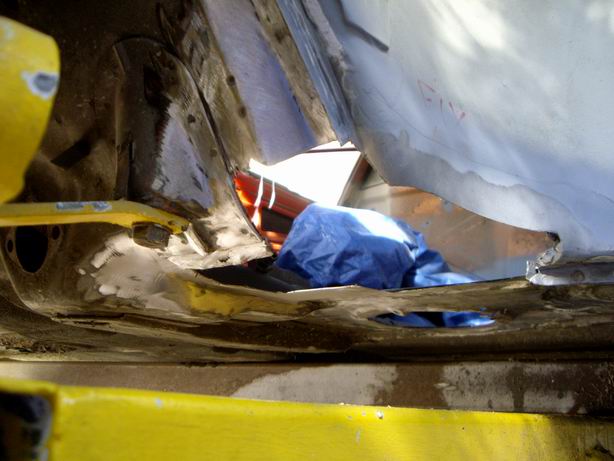 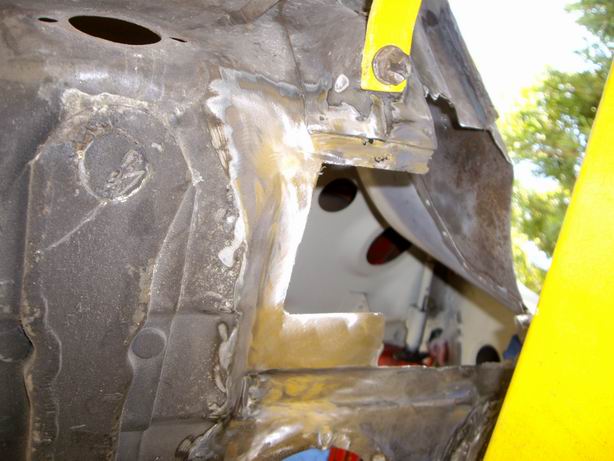 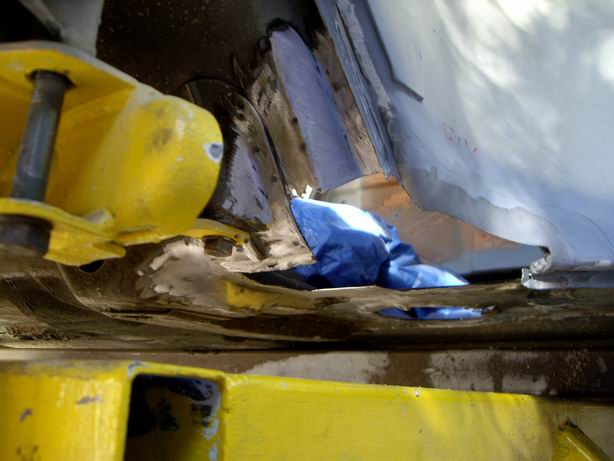
|
| Jeff Hail |
 Sep 18 2008, 12:59 AM Sep 18 2008, 12:59 AM
Post
#356
|
|
Senior Member    Group: Members Posts: 1,141 Joined: 3-May 07 From: LA/ CA Member No.: 7,712 |
The second piece to the left of that took some "beating". My beating bag of choice.
Attached image(s) 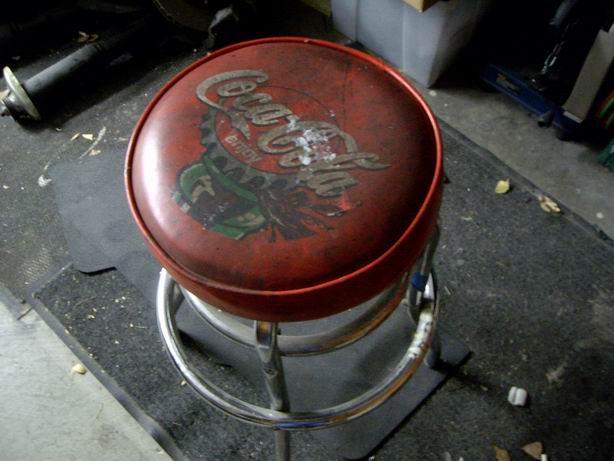
|
| Jeff Hail |
 Sep 18 2008, 01:01 AM Sep 18 2008, 01:01 AM
Post
#357
|
|
Senior Member    Group: Members Posts: 1,141 Joined: 3-May 07 From: LA/ CA Member No.: 7,712 |
Cut the template
Attached image(s) 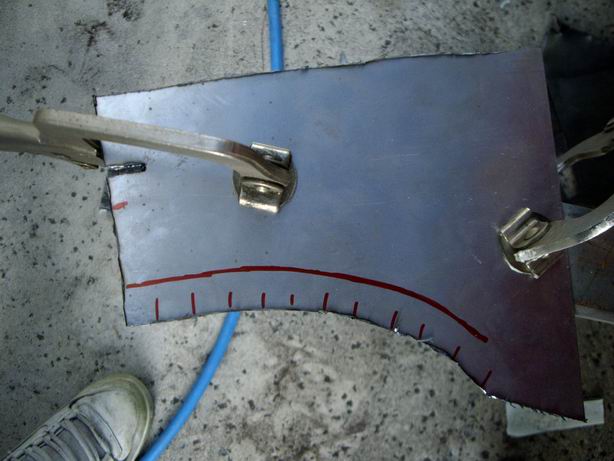
|
| Jeff Hail |
 Sep 18 2008, 01:02 AM Sep 18 2008, 01:02 AM
Post
#358
|
|
Senior Member    Group: Members Posts: 1,141 Joined: 3-May 07 From: LA/ CA Member No.: 7,712 |
Piece #1 clamped and ready for fire.
Attached image(s) 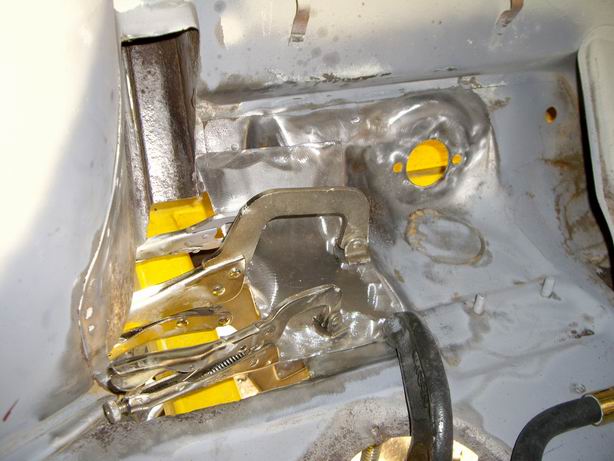
|
| Jeff Hail |
 Sep 18 2008, 01:04 AM Sep 18 2008, 01:04 AM
Post
#359
|
|
Senior Member    Group: Members Posts: 1,141 Joined: 3-May 07 From: LA/ CA Member No.: 7,712 |
Piece #2
Attached image(s) 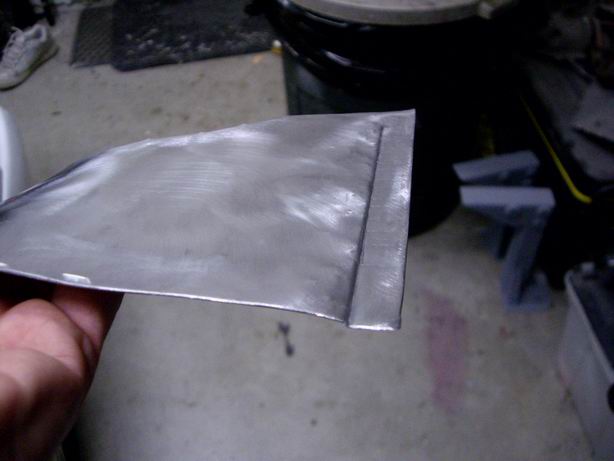 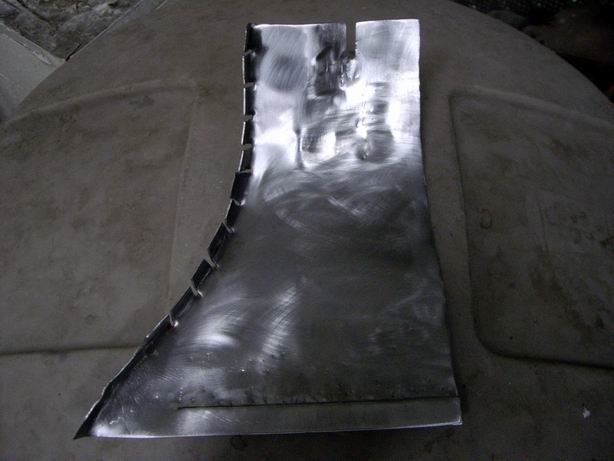 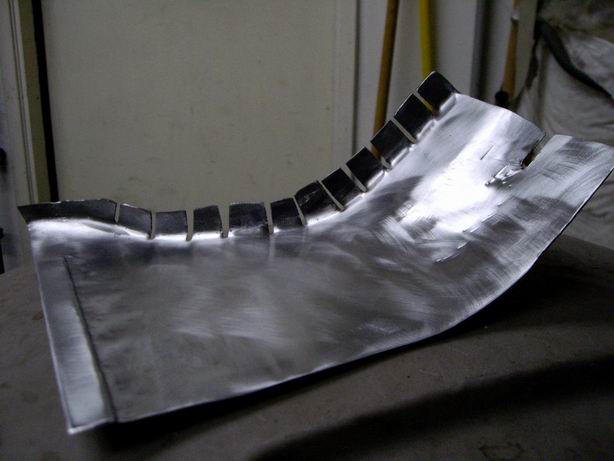 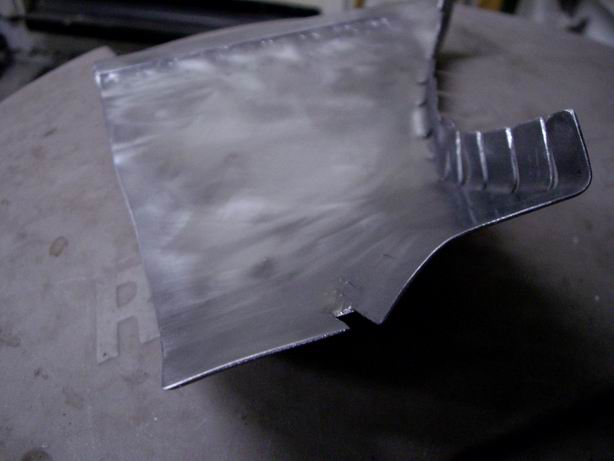 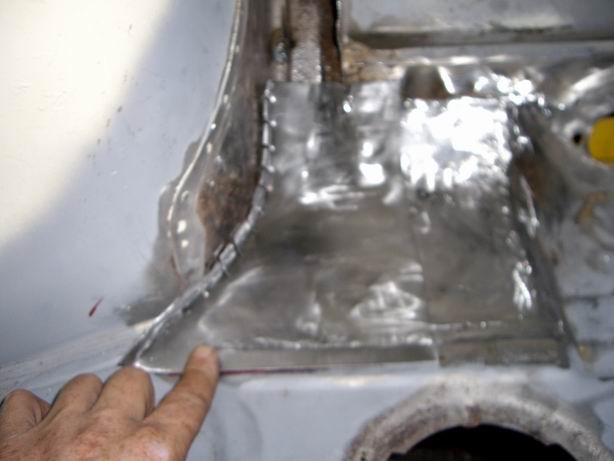
|
| Jeff Hail |
 Sep 18 2008, 01:07 AM Sep 18 2008, 01:07 AM
Post
#360
|
|
Senior Member    Group: Members Posts: 1,141 Joined: 3-May 07 From: LA/ CA Member No.: 7,712 |
Ran out of daylite. Piece #2 will be burned on Thursday.
Attached image(s) 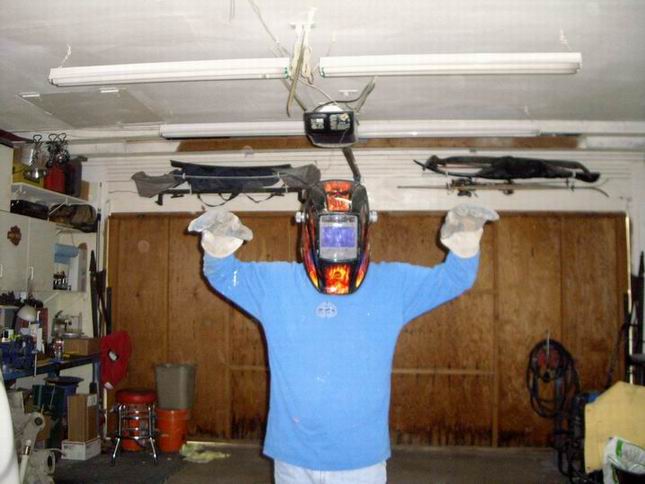
|
  |
2 User(s) are reading this topic (2 Guests and 0 Anonymous Users)
0 Members:

|
Lo-Fi Version | Time is now: 25th April 2025 - 02:03 PM |
Invision Power Board
v9.1.4 © 2025 IPS, Inc.


