|
|

|
Porsche, and the Porsche crest are registered trademarks of Dr. Ing. h.c. F. Porsche AG.
This site is not affiliated with Porsche in any way. Its only purpose is to provide an online forum for car enthusiasts. All other trademarks are property of their respective owners. |
|
|
  |
| 9146FAN |
 Apr 14 2008, 10:55 PM Apr 14 2008, 10:55 PM
Post
#21
|
|
Member   Group: Members Posts: 294 Joined: 20-July 04 From: ROSSMOOR, CA Member No.: 2,378 |
next
Attached image(s) 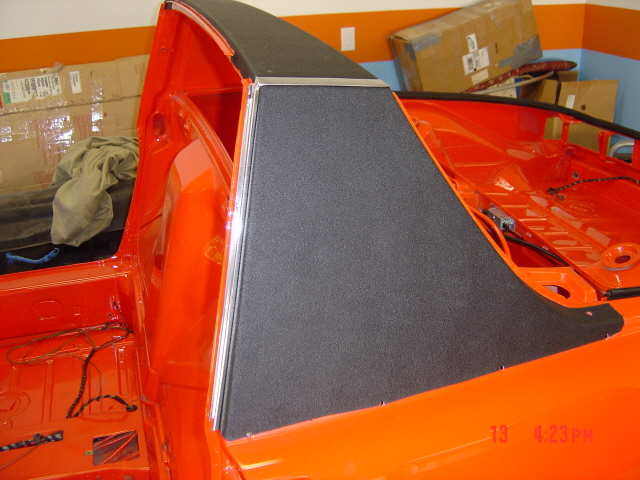
|
| 9146FAN |
 Apr 14 2008, 10:56 PM Apr 14 2008, 10:56 PM
Post
#22
|
|
Member   Group: Members Posts: 294 Joined: 20-July 04 From: ROSSMOOR, CA Member No.: 2,378 |
last one for now
Attached image(s) 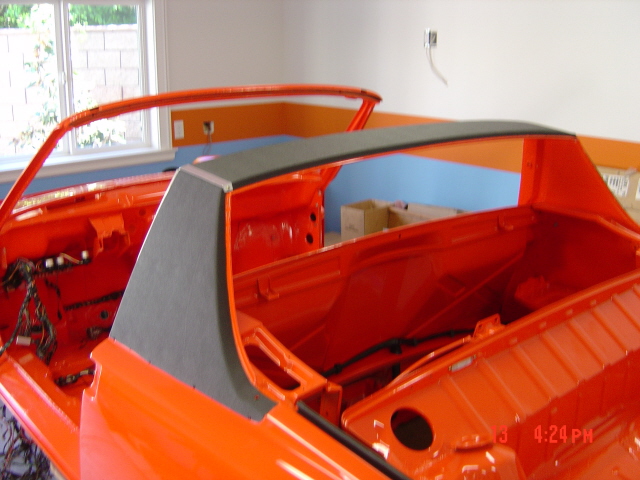
|
| smg914 |
 Apr 14 2008, 11:11 PM Apr 14 2008, 11:11 PM
Post
#23
|
|
Sahara Beige Steve    Group: Members Posts: 1,969 Joined: 22-February 04 From: Tampa, FL Member No.: 1,695 Region Association: None  |
I'm sure you know that the area that would be below the side engine lid grills needs to be painted black.
|
| 9146FAN |
 Apr 14 2008, 11:28 PM Apr 14 2008, 11:28 PM
Post
#24
|
|
Member   Group: Members Posts: 294 Joined: 20-July 04 From: ROSSMOOR, CA Member No.: 2,378 |
Thanks for reminding me.
Attached image(s) 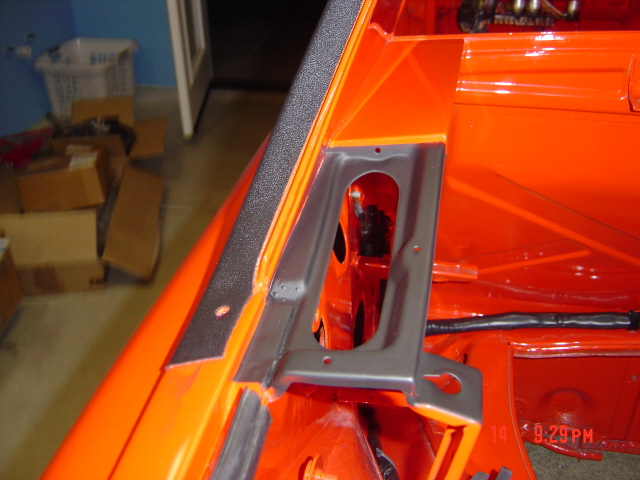
|
| 9146FAN |
 Apr 14 2008, 11:28 PM Apr 14 2008, 11:28 PM
Post
#25
|
|
Member   Group: Members Posts: 294 Joined: 20-July 04 From: ROSSMOOR, CA Member No.: 2,378 |
other side
Attached image(s) 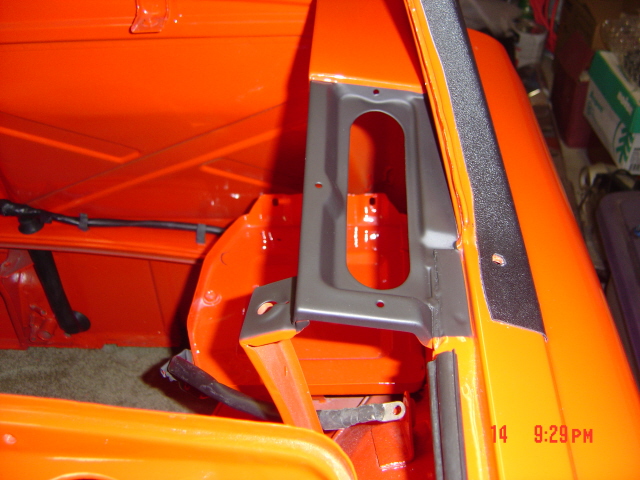
|
| 9146FAN |
 Apr 14 2008, 11:34 PM Apr 14 2008, 11:34 PM
Post
#26
|
|
Member   Group: Members Posts: 294 Joined: 20-July 04 From: ROSSMOOR, CA Member No.: 2,378 |
I'm sure you know that the area that would be below the side engine lid grills needs to be painted black. BTW smg, Your Sahara Beige is one beautiful machine. A friend of mine saw it in person at Datytona and said it was perfect. (IMG:style_emoticons/default/beerchug.gif) cheers. |
| thesey914 |
 Apr 15 2008, 03:58 AM Apr 15 2008, 03:58 AM
Post
#27
|
|
Senior Member    Group: Benefactors Posts: 1,155 Joined: 1-January 03 From: Staffordshire -England Member No.: 66  |
Can you give me any details of how you fitted the vinyl. It looks so professional. I'm just about to tackle mine. Did you trim the edges with scissors and how did you punch the holes?
|
| pete914 |
 Apr 15 2008, 05:48 AM Apr 15 2008, 05:48 AM
Post
#28
|
|
Member   Group: Members Posts: 178 Joined: 21-August 07 From: east coast Member No.: 8,025 |
wow,
I wish i had done that clean a job on my sail trim vinyl! Everything is looking damn near perfect Do you have a choice for an engine? (IMG:style_emoticons/default/beer.gif) |
| degreeoff |
 Apr 15 2008, 06:56 AM Apr 15 2008, 06:56 AM
Post
#29
|
|
I like big butts and I can not lie!    Group: Members Posts: 1,622 Joined: 9-February 03 From: Booowieeee MD (near DC) Member No.: 275 Region Association: MidAtlantic Region |
I said DAMN that looks good....I wanna paint booth too!!
|
| stephenaki |
 Apr 15 2008, 08:05 AM Apr 15 2008, 08:05 AM
Post
#30
|
|
Can I get this one dad??    Group: Members Posts: 1,183 Joined: 11-August 07 From: Palmetto, FL Member No.: 7,987 Region Association: None |
|
| 9146FAN |
 Apr 15 2008, 10:09 PM Apr 15 2008, 10:09 PM
Post
#31
|
|
Member   Group: Members Posts: 294 Joined: 20-July 04 From: ROSSMOOR, CA Member No.: 2,378 |
Can you give me any details of how you fitted the vinyl. It looks so professional. I'm just about to tackle mine. Did you trim the edges with scissors and how did you punch the holes? Thanks for the compliment. I'm no professional, but I did talk to a one before i tackeled it. Here's what I did: 1. Lay the aluminum trim pieces on the roll bar and attach with blue tape. 2. Using blue masking tape, trace the area where the glue should be sprayed less 1/4 inch inside, and lots of plastic to protect from overspray 3. Scratch the painted surface with a scoth bright pad, then remove any dust with clean, dry cloth. 4. I used 3M Super 77 spray adhesive. Spraying roll bar and back side of vinyl evenly. 5. Let dry for only 30-seconds. It is very tacky at this point but not dry. 6. While positioning, you need to "stretch" the vinyl, starting at the top. Remember, it's very sticky, once it's on, it's very hard to move. 7. Wait a while, then peal back the masing tape and blue tape because there's no glue there. Then trim with scizzors. 8. Once everything is where you want it, use a sharp scribe to poke holes. then trimm around the poked holes with a sharp pointy exacto knife to make the holes round. There is a liitle patience needed at the top corners, kinda like gift wrapping. BTW, all the stainless is new which makes the job look like a pro did it. Good luck! |
| 9146FAN |
 Apr 15 2008, 10:19 PM Apr 15 2008, 10:19 PM
Post
#32
|
|
Member   Group: Members Posts: 294 Joined: 20-July 04 From: ROSSMOOR, CA Member No.: 2,378 |
wow, I wish i had done that clean a job on my sail trim vinyl! Everything is looking damn near perfect Do you have a choice for an engine? (IMG:style_emoticons/default/beer.gif) Thanks for the compliment. This was a normal driving six 2.0. Way Too Slowww. My driving choice is high RPM with high HP and lower torque. What I chose was a perfect 7R case (I know that's hard to believe), all mods done by Ollies, 2.7 RS Spec., NOS Mahle 8.5 European Spec., New "S" cams (yes, I know they're peaky) I'll run Weber 40's. Everything in the motor is new. Should be in the 200-215HP range. We'll see. My goal is to open the engine lid and look like a '70 period motor. No electronics etc. |
| 9146FAN |
 Apr 15 2008, 10:22 PM Apr 15 2008, 10:22 PM
Post
#33
|
|
Member   Group: Members Posts: 294 Joined: 20-July 04 From: ROSSMOOR, CA Member No.: 2,378 |
|
| 9146FAN |
 Apr 15 2008, 10:25 PM Apr 15 2008, 10:25 PM
Post
#34
|
|
Member   Group: Members Posts: 294 Joined: 20-July 04 From: ROSSMOOR, CA Member No.: 2,378 |
|
| thesey914 |
 Apr 18 2008, 04:10 AM Apr 18 2008, 04:10 AM
Post
#35
|
|
Senior Member    Group: Benefactors Posts: 1,155 Joined: 1-January 03 From: Staffordshire -England Member No.: 66  |
beautiful pictures -thanks for the 'how-to' on the vinyl
Be very interested in seeing more progress pics |
| 9146FAN |
 Jul 6 2008, 10:17 PM Jul 6 2008, 10:17 PM
Post
#36
|
|
Member   Group: Members Posts: 294 Joined: 20-July 04 From: ROSSMOOR, CA Member No.: 2,378 |
Got the hardware back from the plating co (thanks Bruce).
The front dust shields are modified to fit with Brembo 4-piston front calipers from a 968. I cut the tin, then sent to plater. 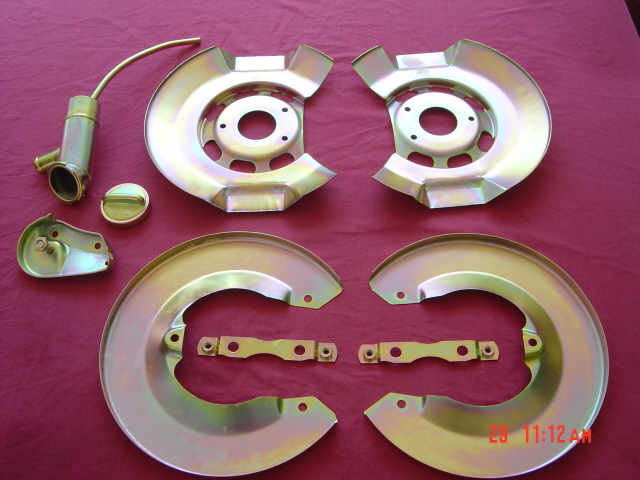 |
| 9146FAN |
 Jul 6 2008, 10:19 PM Jul 6 2008, 10:19 PM
Post
#37
|
|
Member   Group: Members Posts: 294 Joined: 20-July 04 From: ROSSMOOR, CA Member No.: 2,378 |
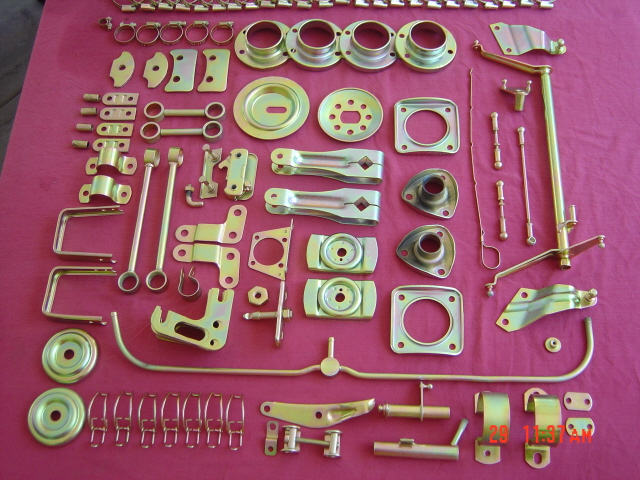
more plated hardware using yellow zink.
 |
| 9146FAN |
 Jul 6 2008, 10:20 PM Jul 6 2008, 10:20 PM
Post
#38
|
|
Member   Group: Members Posts: 294 Joined: 20-July 04 From: ROSSMOOR, CA Member No.: 2,378 |
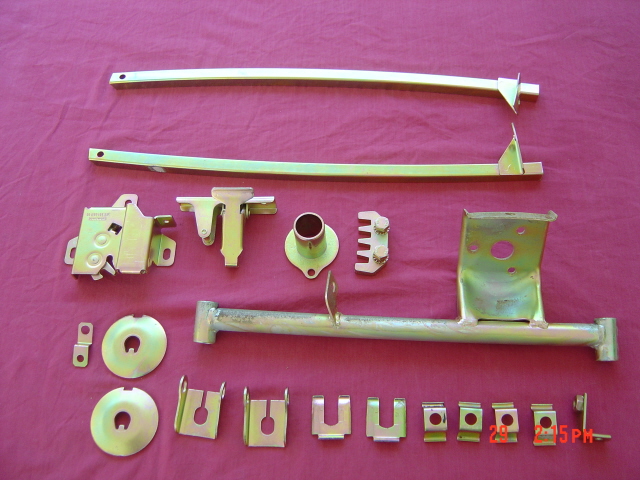
some more hardware
 |
| 9146FAN |
 Jul 6 2008, 10:21 PM Jul 6 2008, 10:21 PM
Post
#39
|
|
Member   Group: Members Posts: 294 Joined: 20-July 04 From: ROSSMOOR, CA Member No.: 2,378 |
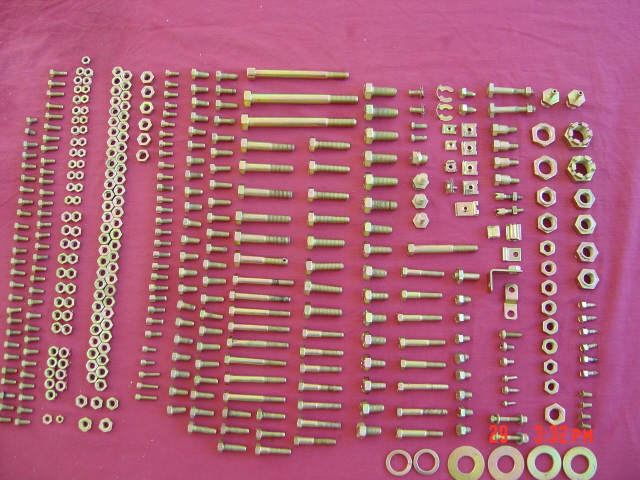
and the nuts-n-bolts
 |
| 9146FAN |
 Jul 6 2008, 10:22 PM Jul 6 2008, 10:22 PM
Post
#40
|
|
Member   Group: Members Posts: 294 Joined: 20-July 04 From: ROSSMOOR, CA Member No.: 2,378 |
I also painted the black area of the engine lid.
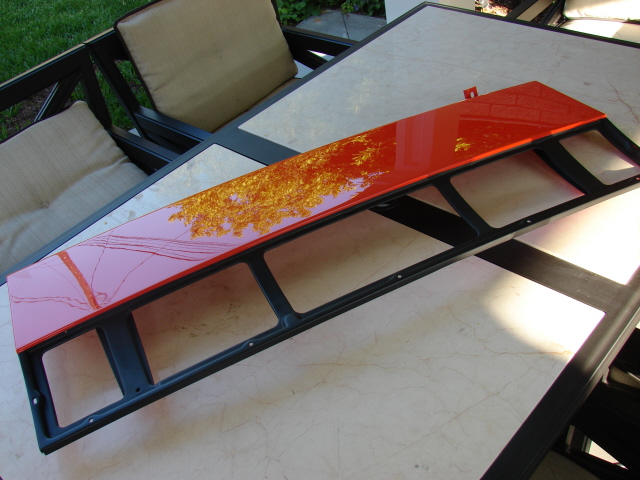 |
  |
2 User(s) are reading this topic (2 Guests and 0 Anonymous Users)
0 Members:

|
Lo-Fi Version | Time is now: 25th November 2024 - 04:29 AM |
Invision Power Board
v9.1.4 © 2024 IPS, Inc.


