|
|

|
Porsche, and the Porsche crest are registered trademarks of Dr. Ing. h.c. F. Porsche AG.
This site is not affiliated with Porsche in any way. Its only purpose is to provide an online forum for car enthusiasts. All other trademarks are property of their respective owners. |
|
|
  |
| my928s4 |
 Nov 9 2009, 10:15 PM Nov 9 2009, 10:15 PM
Post
#121
|
|
Member   Group: Members Posts: 349 Joined: 18-August 07 From: Spokane, WA Member No.: 8,018 Region Association: Pacific Northwest |
More bits and pieces, keep chipping away.
Welded in a patch to replace the rusted area in the door jamb and welded up the small holes. 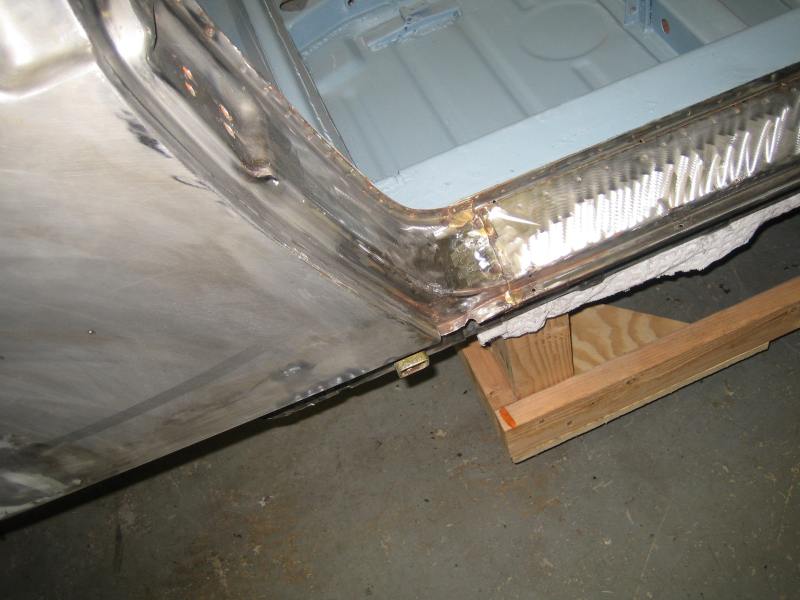 So I got a little over zealous with removing brackets, looking at how the front trunk shocks mount and they use the bracket where the spring used to mount ... oooppps. So made a couple of brackets and welded back on. 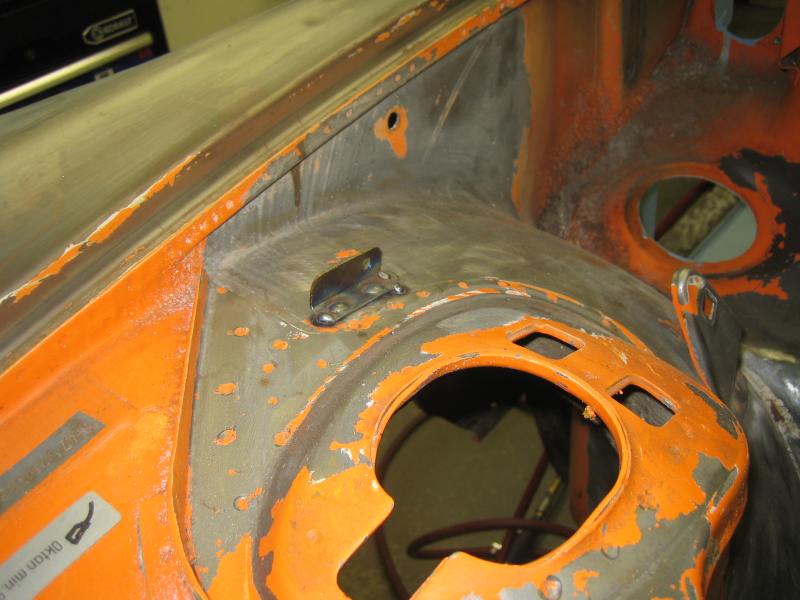 My spray gun came with a fairly large cannister which was a PIA when trying to get into smaller areas, went to the local supply store and they came up with this solution which works great. Not only does it make nooks and crannys more accessible cleanup is easier too! 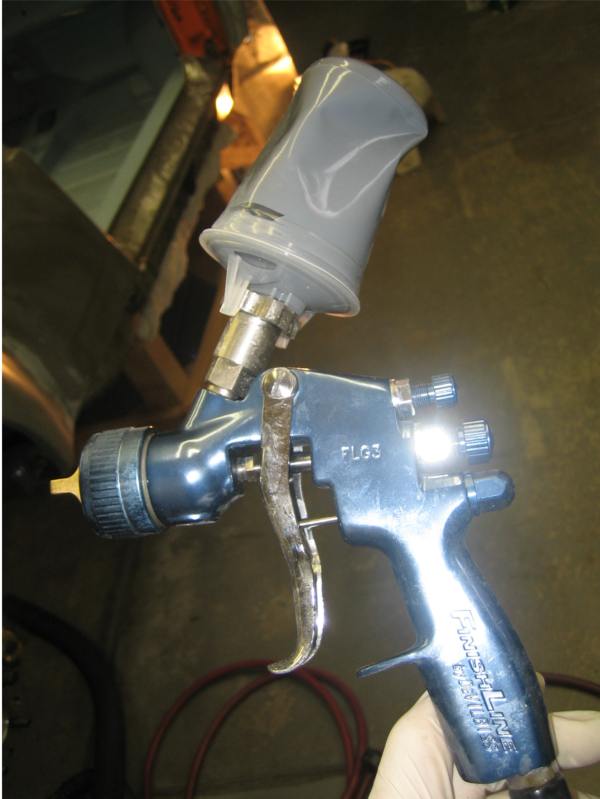 Front wheel wells are finished, same old routine, epoxy primer, seam sealer, epoxy primer and undercoat. 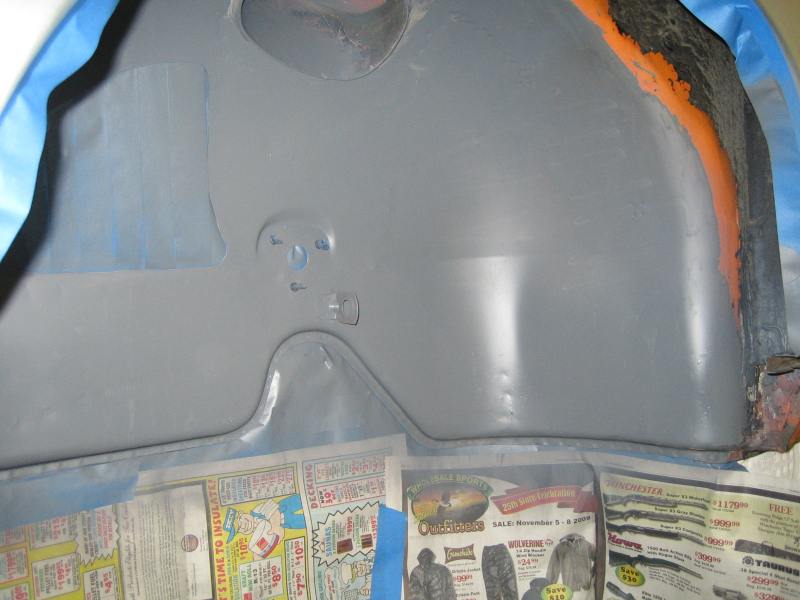 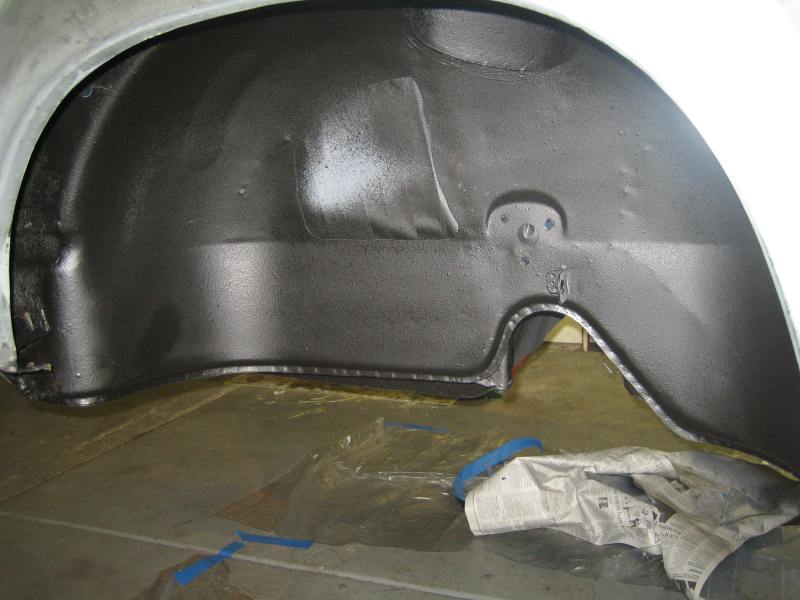 Been stripping small areas at a time while working on other jobs, found it easier this way. Leave the stripper for 24hours then remove loose paint, use paint thinner to clean and then wire wheel any small areas. 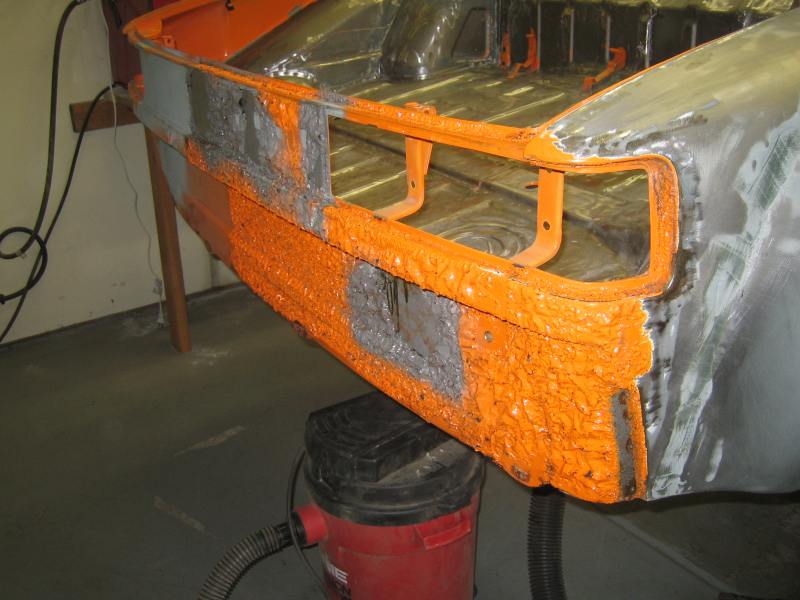 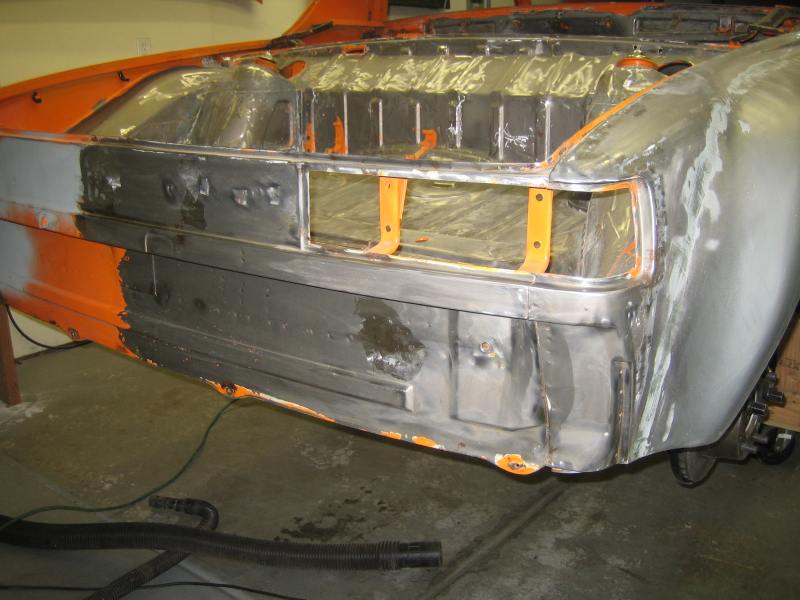 |
| Socalandy |
 Nov 10 2009, 12:00 AM Nov 10 2009, 12:00 AM
Post
#122
|
|
Its got to be Yellow!!!     Group: Members Posts: 2,432 Joined: 29-August 09 From: Orange Member No.: 10,742 Region Association: Southern California  |
Bad ass!!! Your getting me fired up to start on my -6 car
Great work (IMG:style_emoticons/default/aktion035.gif) |
| charliew |
 Nov 10 2009, 09:31 AM Nov 10 2009, 09:31 AM
Post
#123
|
|
Advanced Member     Group: Members Posts: 2,363 Joined: 31-July 07 From: Crawford, TX. Member No.: 7,958 |
Great work. Those little spiders are not to visable until the paint is removed. The rust under the doorjamb will be a lot worse on the bottomside, thats where it started and finally came through the top side. The only thing is I would have put a black top coat, even if it is just industrial enamel, over the primer in the wheelwells to seal the pores in the primer. Then the under coat. Epoxy primer is great stuff but it will be better sealed with a top coat. Rockguard is also a good coating in the wheelwells to cushion the rocks impact. It's probably not a big deal though as I've used dp90 on the aluminum sill trim pieces on a hunting jeep truck and it has held up well by itself.
Touch up guns are great for the tight areas. Turn the fan way down and move back about twice as far as normal and don't spray in one spot and you won't need to get as close in to the area you are trying to cover. You can spray a area the size of a quarter with low pressure, although thats not really necessary in most cases. Thats what you will need up under the battery tray if you have it already installed. Primer first before the bondo. Primer sticks way better and seals way better than bondo. Primer bondo and more primer. |
| my928s4 |
 Nov 10 2009, 10:17 AM Nov 10 2009, 10:17 AM
Post
#124
|
|
Member   Group: Members Posts: 349 Joined: 18-August 07 From: Spokane, WA Member No.: 8,018 Region Association: Pacific Northwest |
Great work. Those little spiders are not to visable until the paint is removed. The rust under the doorjamb will be a lot worse on the bottomside, thats where it started and finally came through the top side. Primer first before the bondo. Primer sticks way better and seals way better than bondo. Primer bondo and more primer. Hi Charlie, good advice as usual. I cleaned up the area under the sill so hopefully if I can get both sides prepped and sealed it should keep the rust at bay for a while. On the bondo v primer and which comes first I have read conflicting stories on that one. Here AutobodyStore they did an experiment and the bondo adhered much better to bare metal than primer. |
| charliew |
 Nov 10 2009, 05:05 PM Nov 10 2009, 05:05 PM
Post
#125
|
|
Advanced Member     Group: Members Posts: 2,363 Joined: 31-July 07 From: Crawford, TX. Member No.: 7,958 |
I promise you the primer will stop rust from forming under the bondo much better than just the filler over the bare metal. I'm a old guy and have been fighting rust for 40 years. Almost that long on the same cars. Filler is porous and moisture can get under it. Kitty hare is a long or short strand filler that is supposed to be waterproof but it's harder to get smooth and work with. It's great for strength and stiffness but not the easiest to get on without small voids and holes. I use it where the metal will be under vibration or in a twisting area to keep it in place but it has to be top coated with a regular type filler to get the pin holes filled in.
My 75 914 also has some rust in the sill area, thats why I mentioned about under the bottom. It also has a small hole up by the inner latch support where dirt must have set for awhile. My car is a CO. and WY. car so it's been in a low humidity area most of it's life and it's still got some rust. I agree filler adheres well to bare metal especially if it has a texture to it but that doesn't keep the moisture from forming under it and causing a rust bubble. Who's to say how much moisture gets in filler as you mix and spread it. |
| my928s4 |
 Dec 13 2009, 12:08 PM Dec 13 2009, 12:08 PM
Post
#126
|
|
Member   Group: Members Posts: 349 Joined: 18-August 07 From: Spokane, WA Member No.: 8,018 Region Association: Pacific Northwest |
Between family visiting over thanksgiving and frigid weather progress has been slowed.
Cleaned up the engine bay area some more, one hole to weld on the drivers side hinge but looking ready for some primer. 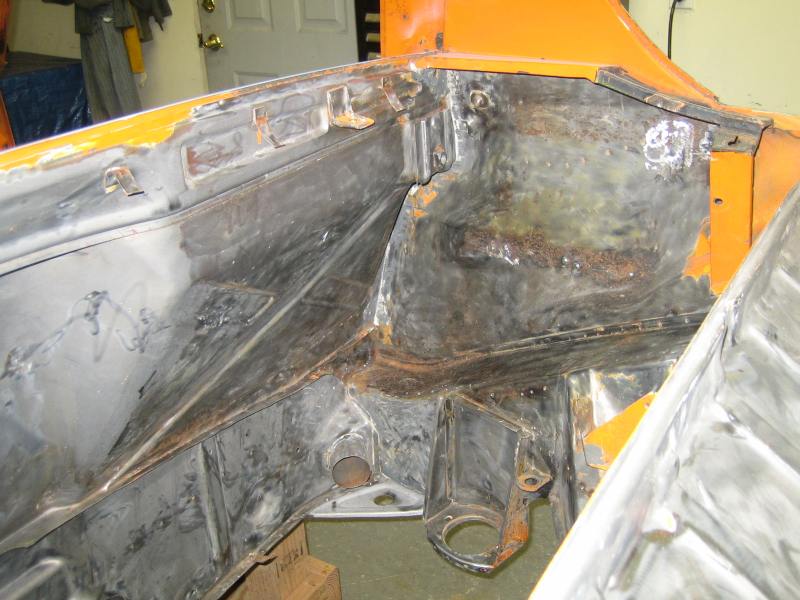 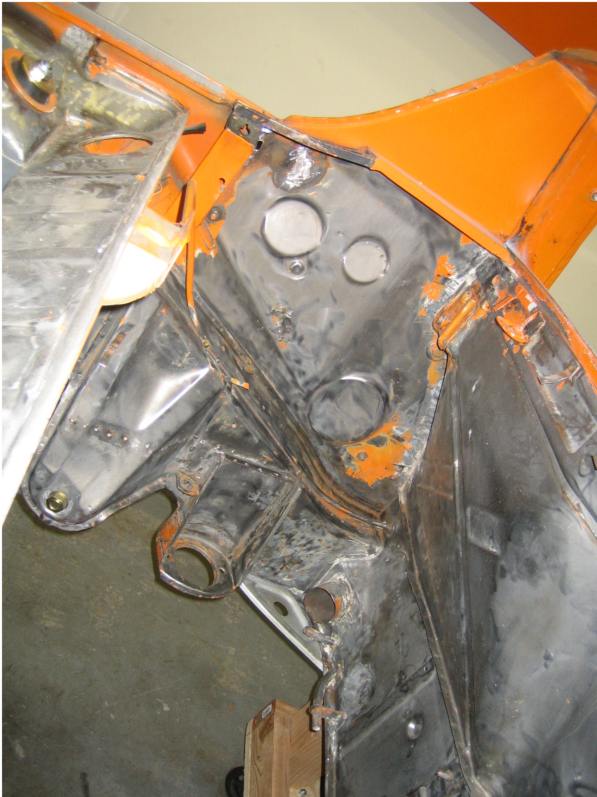 I welded on the front trunk lip, a workmate had a few made up so if anyone wants one let me know, yours for the cost of shipping. (BTW the wheels in the trunk are there to help balance the chassis which got rear heavy when I put the rear suspension on.) 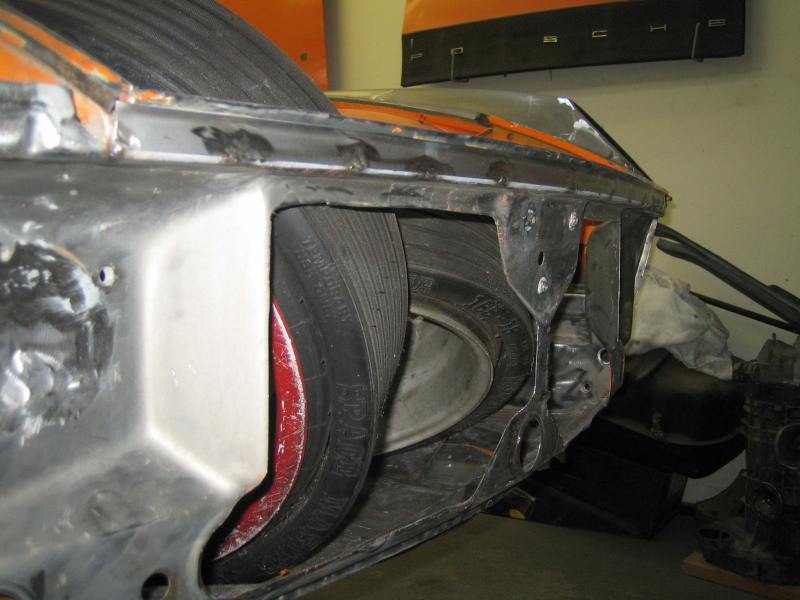 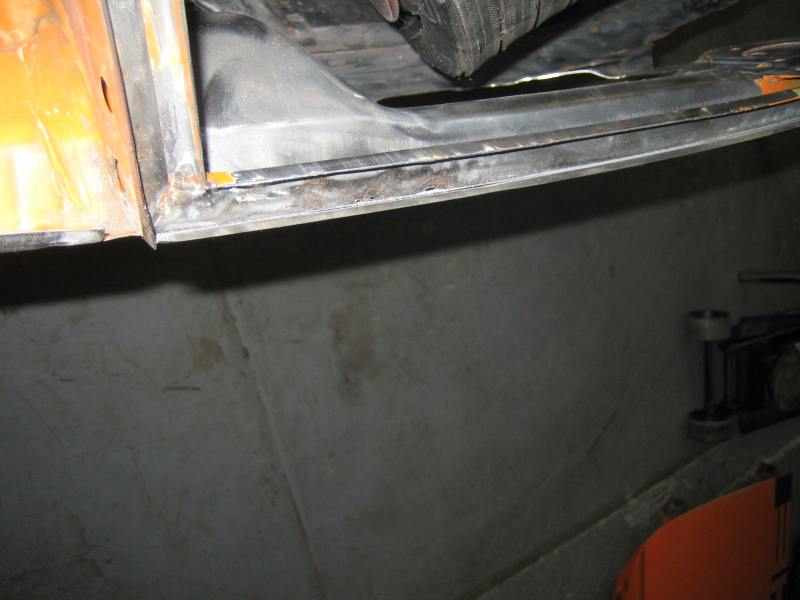 |
| my928s4 |
 Dec 13 2009, 12:20 PM Dec 13 2009, 12:20 PM
Post
#127
|
|
Member   Group: Members Posts: 349 Joined: 18-August 07 From: Spokane, WA Member No.: 8,018 Region Association: Pacific Northwest |
So this is where I have been on the learning curve, it is like the welding, practice, practice, practice.
I went with the Rage Extreme, which seems to work for me. All I had to begin with was 80grit and progress was slow so I thought I need some air tools but after doing some reading air tools and a beginer can be a negative on filler so I went and got some 40grit. Mucho better, knock it down with 40grit and then hit with 80. It took me a long time to get a 'feel' for where to add filler and how much, it seemed I always had a high point or edge that felt wrong. There must be 10 or so applications on the rear where I started, I am on my 3rd on the front which is not finished but much better than the rear. 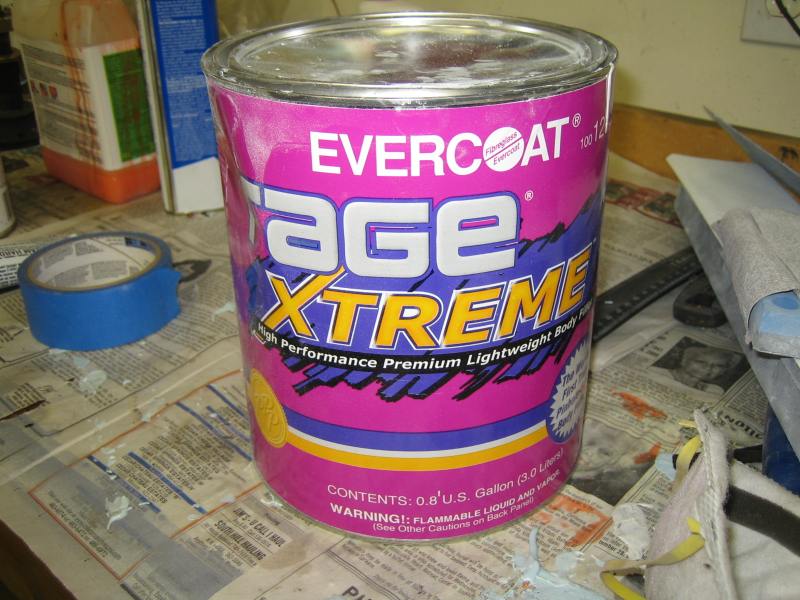 I bought a few blocks but these are the ones I have ended up using so far. 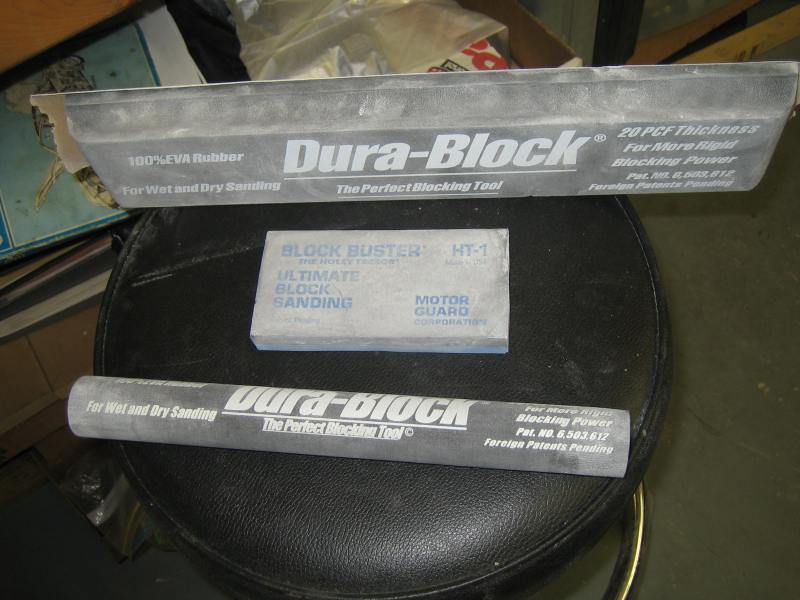 I have found 2-3hours at a time and best to walk away, after a break you tend to critque the work more. 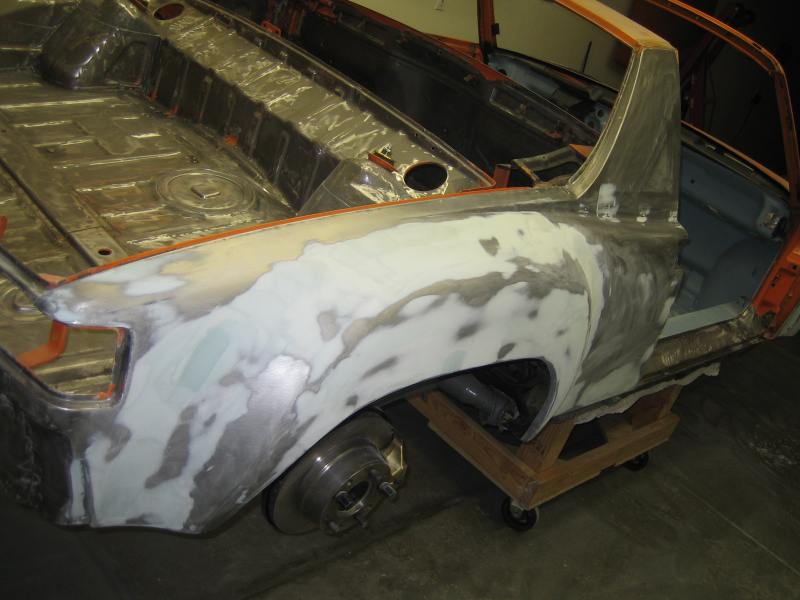 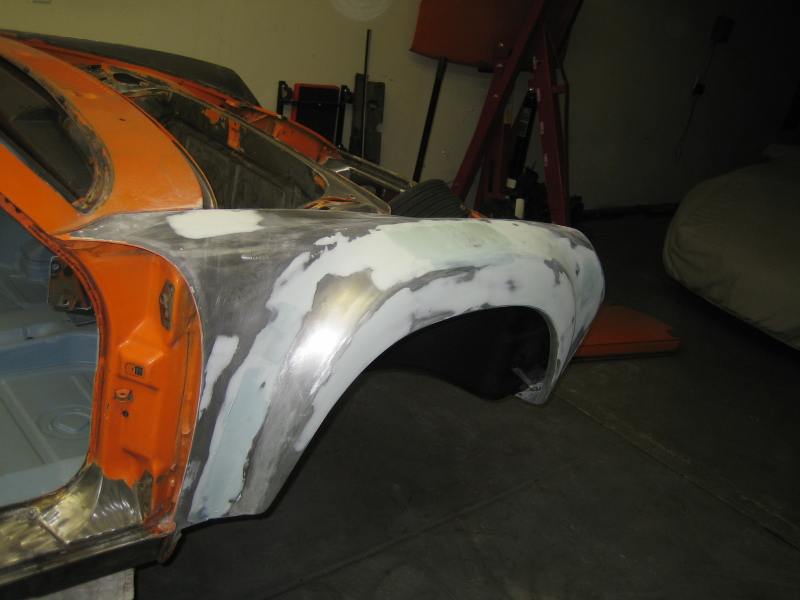 After reviewing my fiber glass GT rocker panels and trial fitting a number of times I have given up on them. Even though once side lines up pretty well they fit like crap. My plan right now is to modify the original metal ones. |
| scotty b |
 Dec 13 2009, 12:25 PM Dec 13 2009, 12:25 PM
Post
#128
|
|
rust free you say ?                Group: Members Posts: 16,375 Joined: 7-January 05 From: richmond, Va. Member No.: 3,419 Region Association: None |
FWIW. One of the reasons rust will form under bondo more so than under primer is that when you mix the bondo there is a chemical reaction that produces heat. This is easy to tell just by placing your hand on it as it begins to set up. Knowing this, you are applying a heat producing chemical reaction directly to cold, bare steel. Sweat happens when heat and cold are combined. Simple science. Granted, in this day and age most of these cars will be kept inddors, and pamperd, but your best bet is still to prime ( etch prime ) and seal first, THEN do your bondo work. Yes it is more work, yes it is more materials, yes it is much better (IMG:style_emoticons/default/smile.gif)
|
| my928s4 |
 Dec 13 2009, 01:25 PM Dec 13 2009, 01:25 PM
Post
#129
|
|
Member   Group: Members Posts: 349 Joined: 18-August 07 From: Spokane, WA Member No.: 8,018 Region Association: Pacific Northwest |
QUOTE FWIW. One of the reasons rust will form under bondo more so than under primer is that when you mix the bondo there is a chemical reaction that produces heat. This is easy to tell just by placing your hand on it as it begins to set up. Knowing this, you are applying a heat producing chemical reaction directly to cold, bare steel. Sweat happens when heat and cold are combined. Simple science. Granted, in this day and age most of these cars will be kept inddors, and pamperd, but your best bet is still to prime ( etch prime ) and seal first, THEN do your bondo work. Yes it is more work, yes it is more materials, yes it is much better (IMG:style_emoticons/default/smile.gif) You are the master (IMG:style_emoticons/default/pray.gif) so no argument here, hopefully others can learn how not do it. From my point of view the cost of extra materials and work is not an issue, just got to go through the learning curve. |
| Gint |
 Dec 13 2009, 01:29 PM Dec 13 2009, 01:29 PM
Post
#130
|
|
Mike Ginter                Group: Admin Posts: 16,096 Joined: 26-December 02 From: Denver CO. Member No.: 20 Region Association: Rocky Mountains  |
Thanks for posting the pics of your progess. (IMG:style_emoticons/default/smilie_pokal.gif)
|
| jd74914 |
 Dec 13 2009, 01:36 PM Dec 13 2009, 01:36 PM
Post
#131
|
|
Its alive     Group: Members Posts: 4,841 Joined: 16-February 04 From: CT Member No.: 1,659 Region Association: North East States |
The car is looking great Chris! (IMG:style_emoticons/default/smile.gif)
|
| my928s4 |
 Jan 9 2010, 05:17 PM Jan 9 2010, 05:17 PM
Post
#132
|
|
Member   Group: Members Posts: 349 Joined: 18-August 07 From: Spokane, WA Member No.: 8,018 Region Association: Pacific Northwest |
So first pass on the bondo is complete on all 4 fenders, went to the body shop and bought some epoxy and 2K high build primer. On the first visit I bought grey epoxy and then thought how am I going to tell if I sand through the 2K? Went back and bought some white ....
I put two coats of the Epoxy on the passenger rear fender, I figured no point in screwing up a large area all in one go so start small. Going to let this cure till tomorrow even though it say 30 mins is OK then spray on the 2K. I can already see imperfections that need work but it looks great to see a uniform color over the area!! 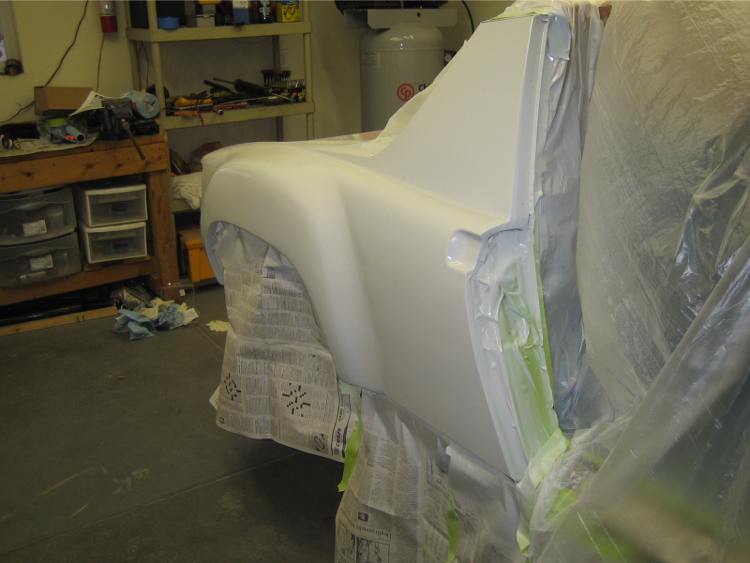 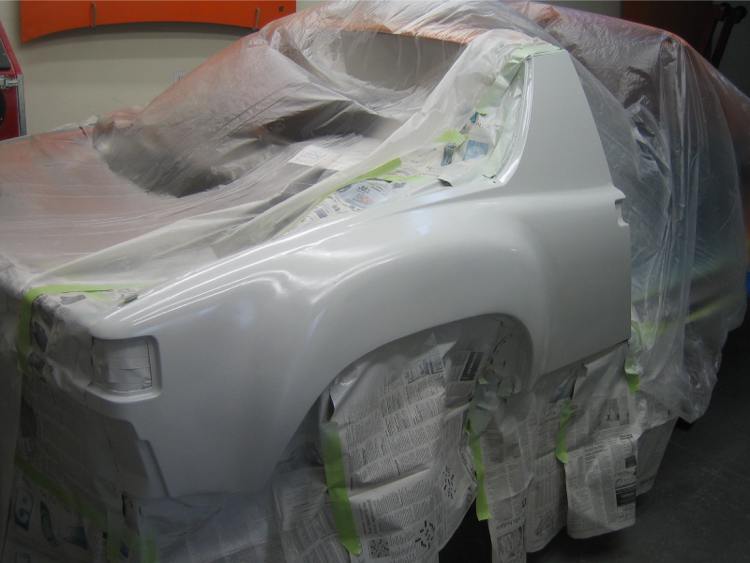 |
| my928s4 |
 Jan 10 2010, 01:36 PM Jan 10 2010, 01:36 PM
Post
#133
|
|
Member   Group: Members Posts: 349 Joined: 18-August 07 From: Spokane, WA Member No.: 8,018 Region Association: Pacific Northwest |
OK got the 2K is on, was a little gun shy on the first 2 coats but you can spray this stuff on thick. I can really see the problem areas now, leave this for a couple of days and then I will start sanding and fixing the issues.
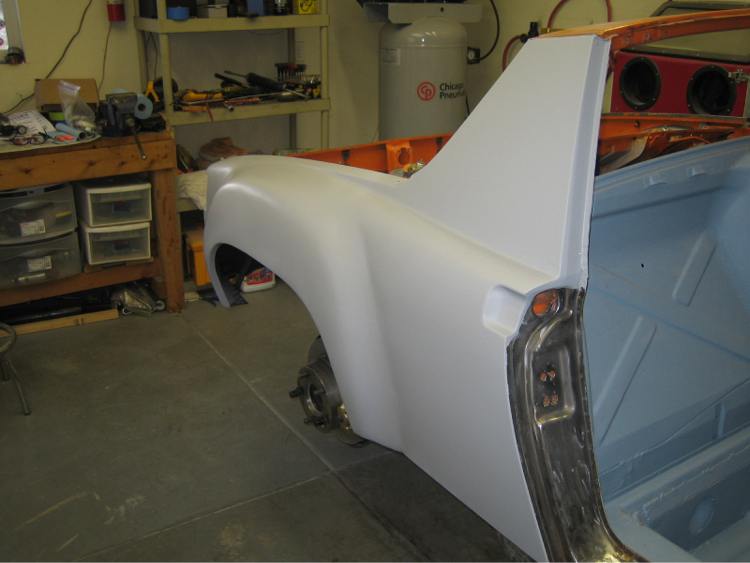 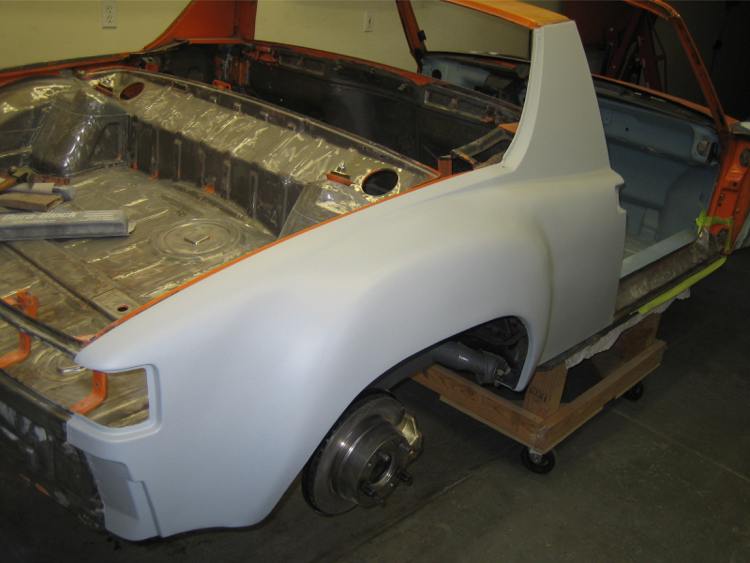 |
| scotty b |
 Jan 10 2010, 03:48 PM Jan 10 2010, 03:48 PM
Post
#134
|
|
rust free you say ?                Group: Members Posts: 16,375 Joined: 7-January 05 From: richmond, Va. Member No.: 3,419 Region Association: None |
(IMG:style_emoticons/default/beerchug.gif) looking good mang (IMG:style_emoticons/default/aktion035.gif)
|
| my928s4 |
 Jan 23 2010, 03:27 PM Jan 23 2010, 03:27 PM
Post
#135
|
|
Member   Group: Members Posts: 349 Joined: 18-August 07 From: Spokane, WA Member No.: 8,018 Region Association: Pacific Northwest |
Thanks Scotty, yes looking more like a car now too.
Been working on both passenger fenders, you can see from the earlier shots of the rear fender the shadow on the leading edge of the flare. Well 2K primer is not going to be able to sort that so back to filler, there were a couple of other smaller areas that needed attention too. I am hoping another shot of 2K and some sanding and these are done. Was going to start the drivers side and rear but I am running low on the 2K and the store shuts early on Sat. Oh well next weekend. 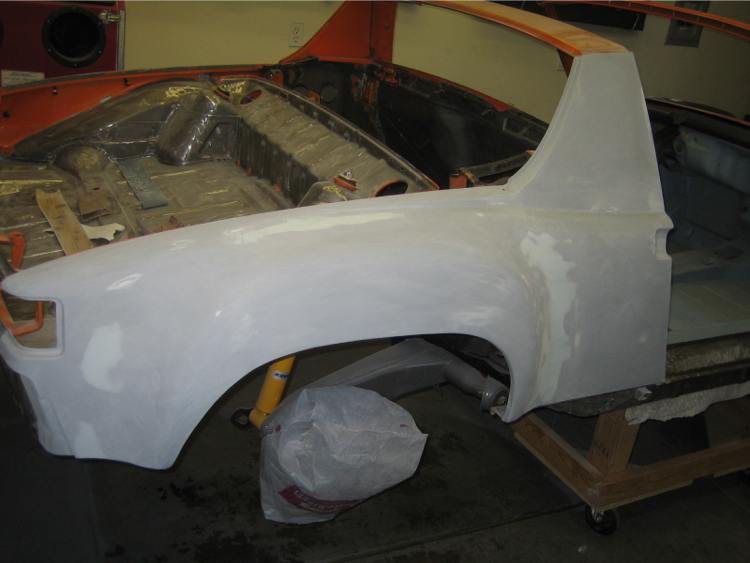 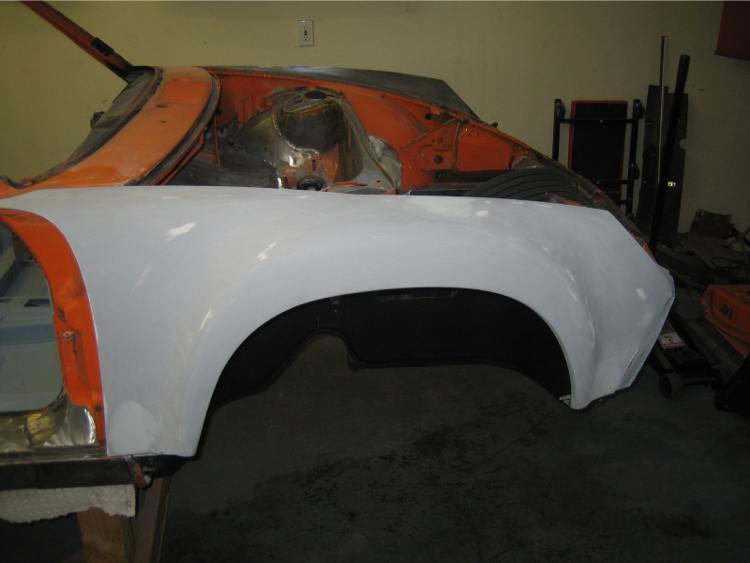 |
| my928s4 |
 Feb 1 2010, 08:30 AM Feb 1 2010, 08:30 AM
Post
#136
|
|
Member   Group: Members Posts: 349 Joined: 18-August 07 From: Spokane, WA Member No.: 8,018 Region Association: Pacific Northwest |
Last weekend sucked, I was admiring how good the rear fender looked and saw what I thought was a dog hair. Further examination showed it to be a crack, a little prying and this is the result.
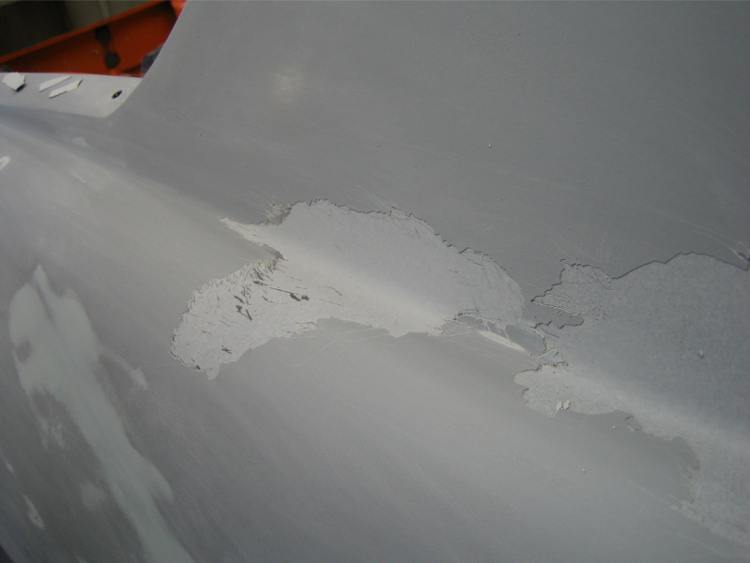 To say I was pissed is an understatement, eventually summoned courage to ask those with some experience what had gone wrong. The 1st and 2nd Epoxy layers did not attach, I was not expecting any issue with the Epoxy .... garage was at 65F, I recoated within 24hours and I let it sit in the pot 15mins before using. I must have screwed up mixing the hardener or something is all I or anyone else can think off. With mild heat the rest came of in a couple of hours which made less mess than sanding. The passenger front fender is fine, glad I did one fender at a time to begin with as hopefully I isolated the problem. 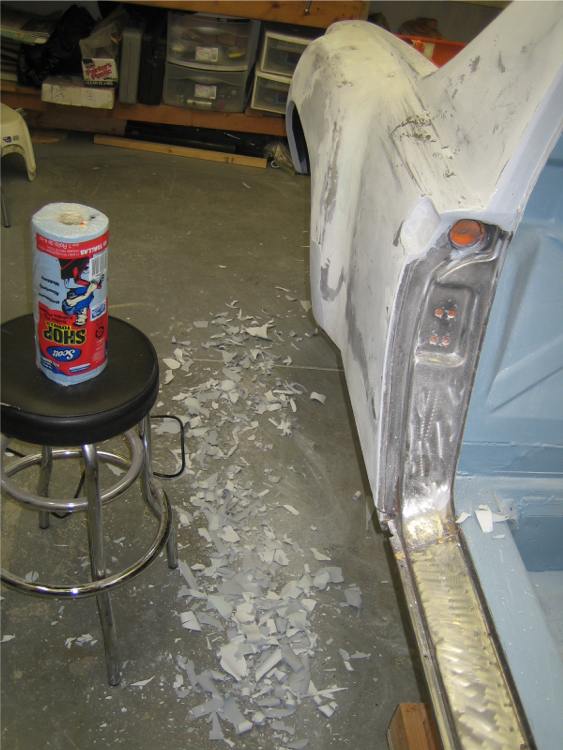 Some sanding and filler to patch up some damage I did with the scraper. 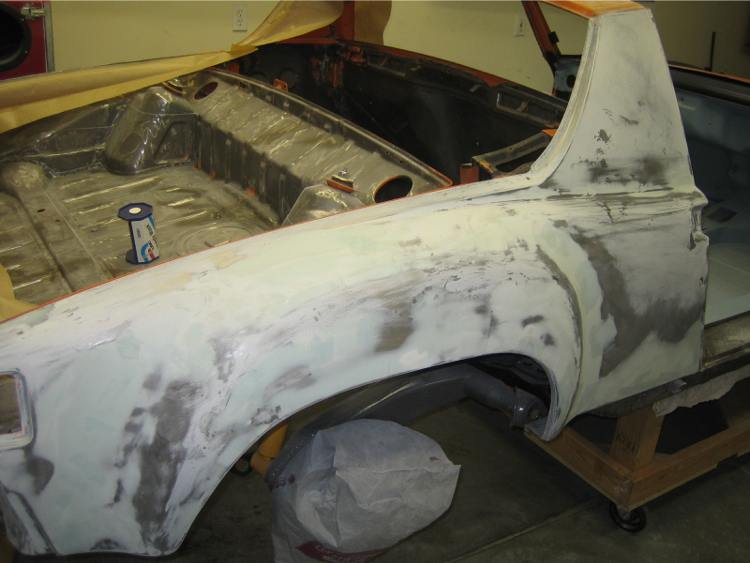 Yesterday I heated the garage up to 70F, the wife complained it was warmer in the garage than in the house .... I put just a single layer of Epoxy on this time as 2 was mentioned as overkill. Followed up with 3 layers of 2K. After 20 mins the 2K was gumming up my gun, did not have this issue before but then the garage was warmer this time. This is where the car is at now, going to England this coming weekend so I am happy to leave the car like this before I go. 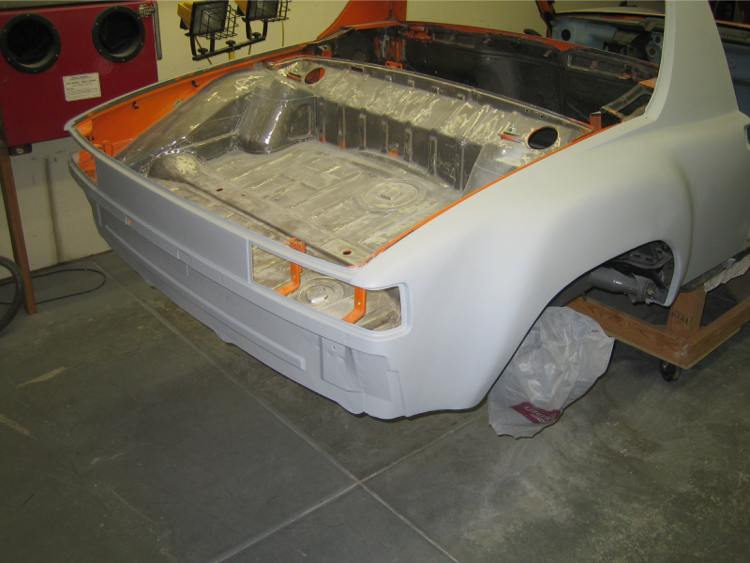 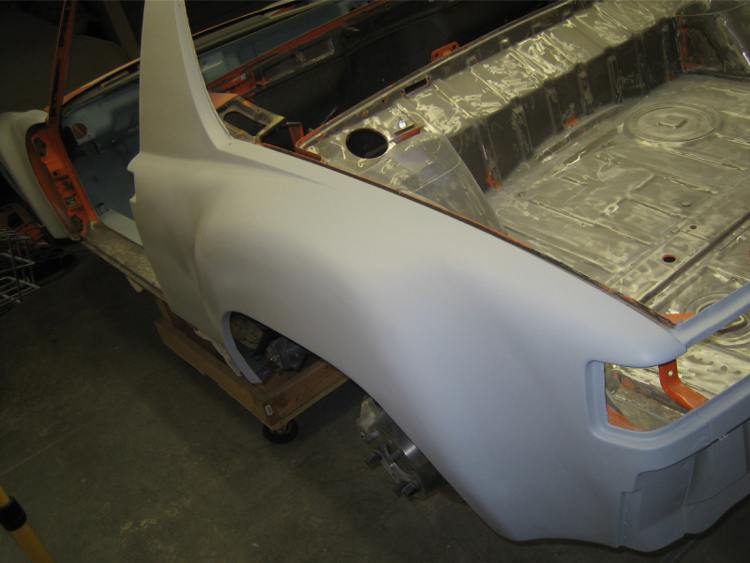 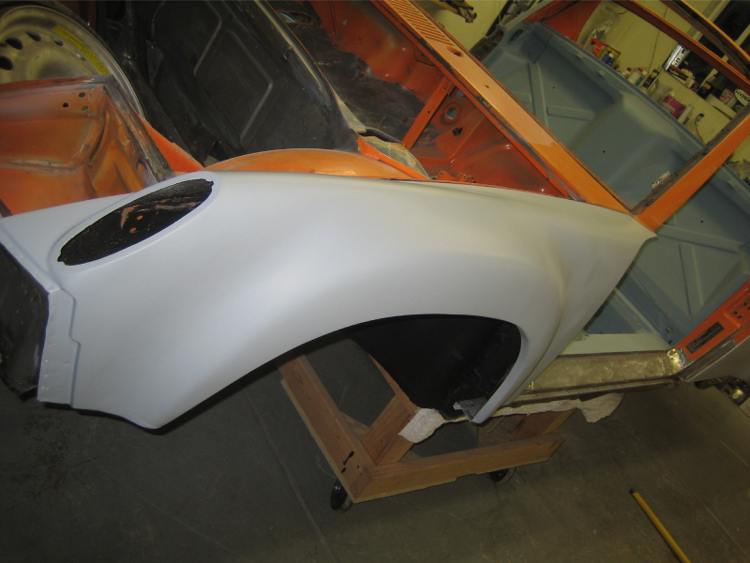 |
| my928s4 |
 Mar 7 2010, 08:25 PM Mar 7 2010, 08:25 PM
Post
#137
|
|
Member   Group: Members Posts: 349 Joined: 18-August 07 From: Spokane, WA Member No.: 8,018 Region Association: Pacific Northwest |
OK back from vacation and we have unseasonably warm weather so cleaned up the garage and wheeled the car outside and used compressed air to create a dust cloud cleaning up all the winters remanents from the car.
When I was cleaning up the drivers sill plate there was a lot of pitting and small rust holes, I figured easier to just replace with a new part. It came in the mail along with two Koni Sport front struts, been too long since the last parts package .. gotta love car parts in the mail (IMG:style_emoticons/default/smile.gif) OK so this must be the easiest piece of spot welded metal I have removed, every drilled weld popped with very little persuasion. Looked like this after removal, note I left the leading edge of the sill on the car, nothing wrong with it and easy to cut here with the new metal. 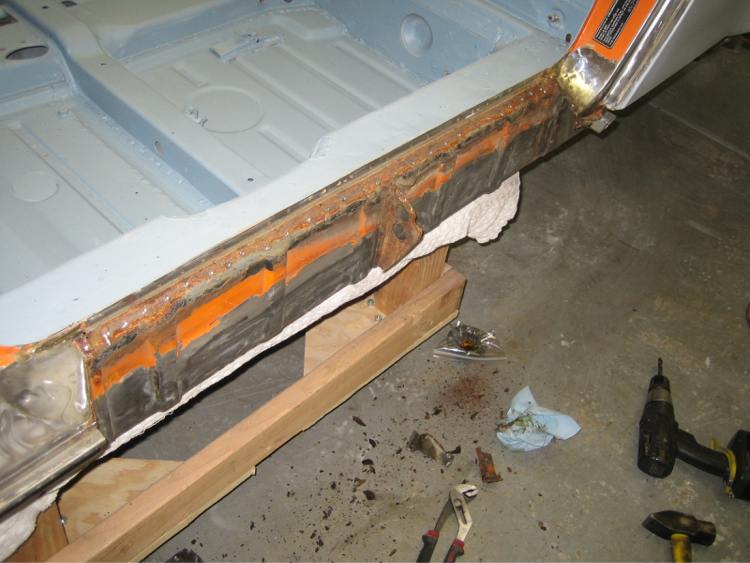 After some cleanup : 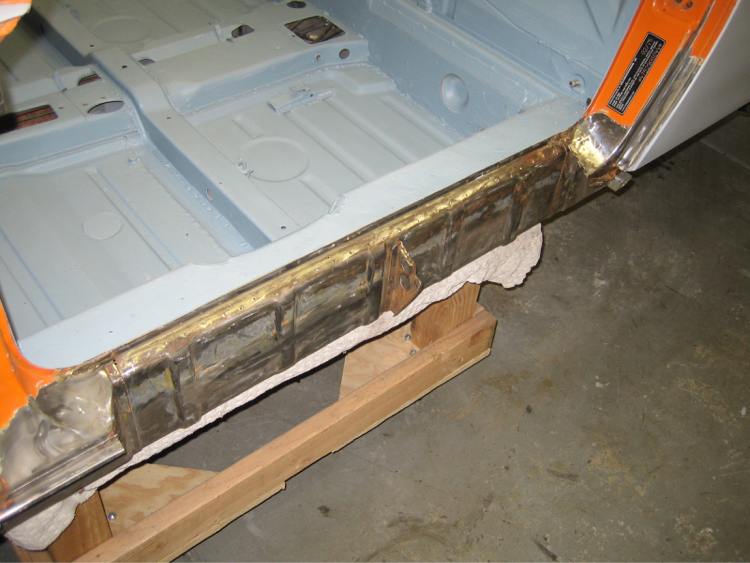 Note I also left the original angle support, just cleaned off the surface rust. Some weld thru primer: 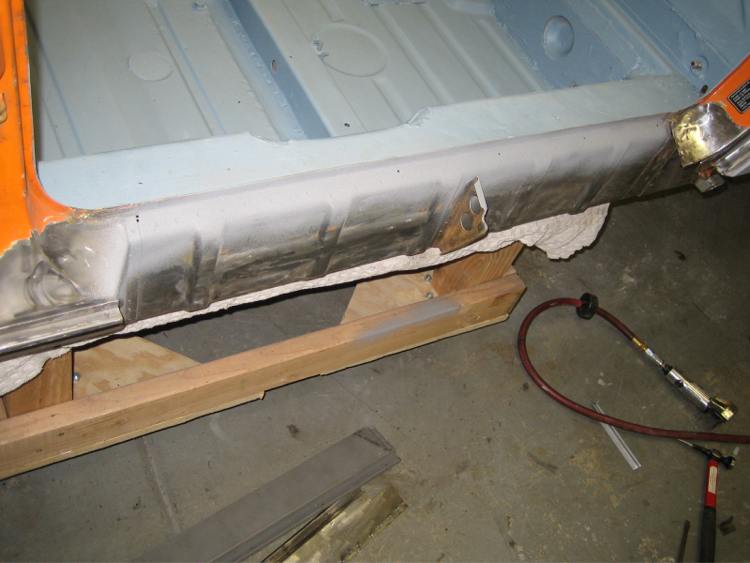 Here you can see where I had to remove some corrosion 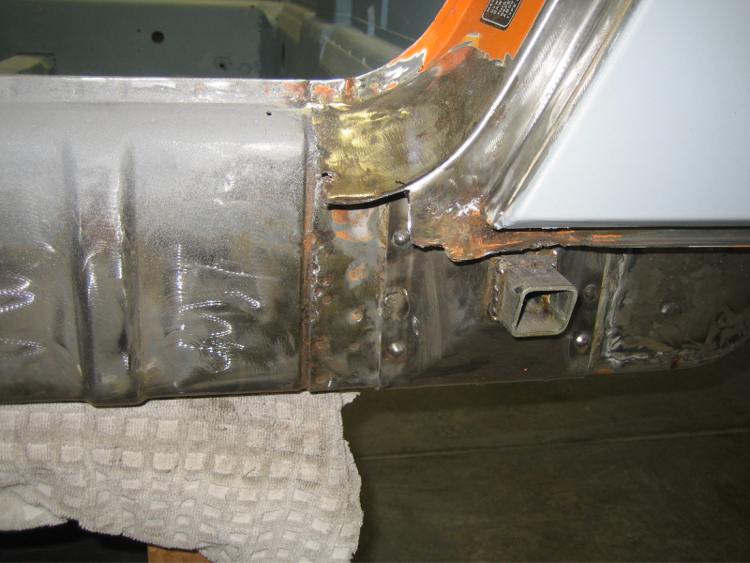 New sill welded on 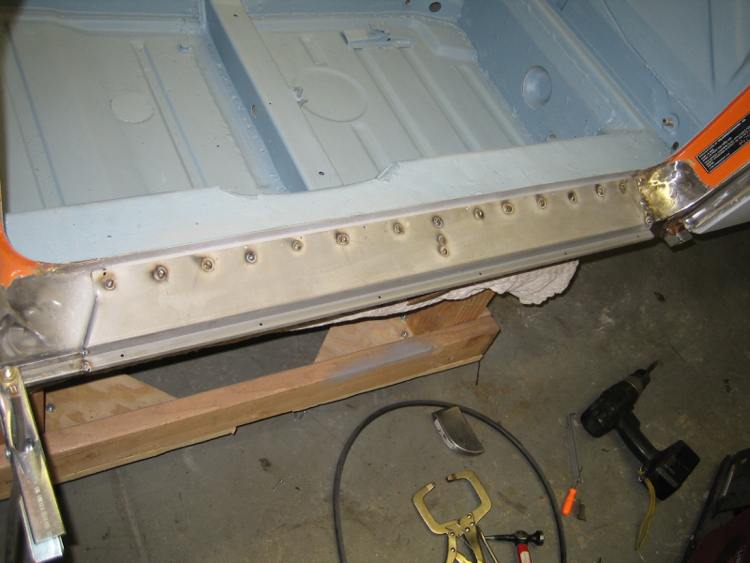 Patch tacked in 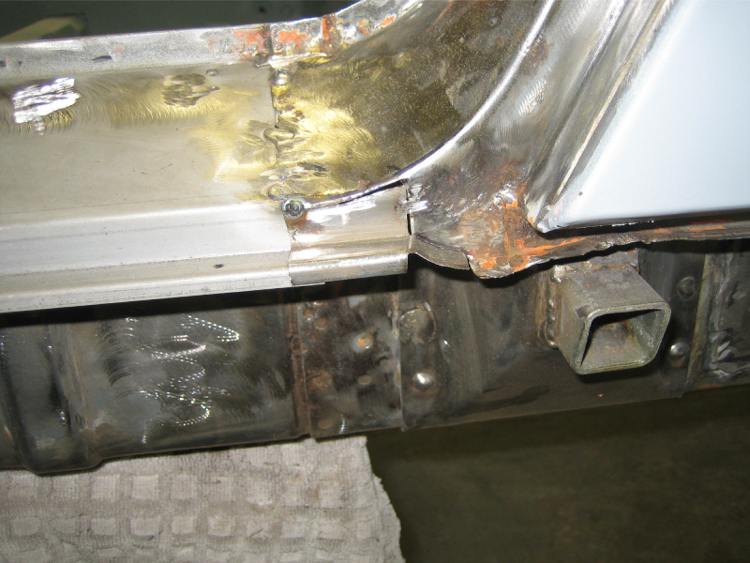 Complete, looks like I need to clean the cameral lens. 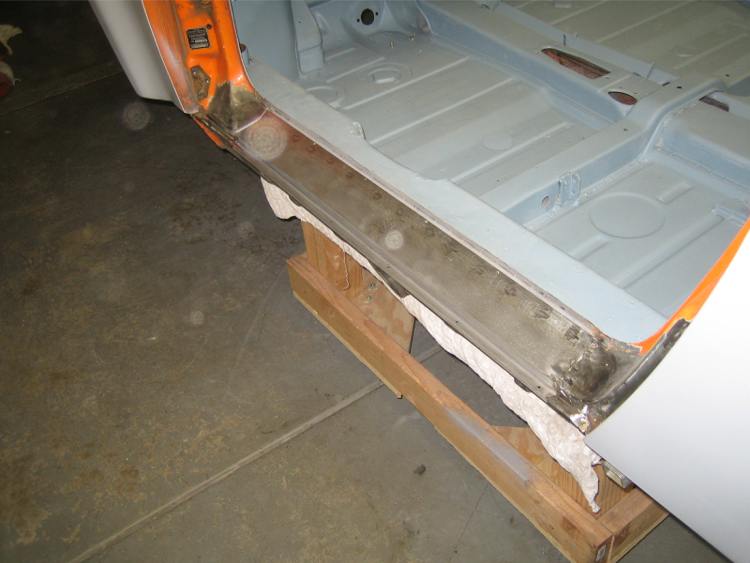 I have two small welding jobs to do, one in the engine compartment where the drivers side trunk mount used to be and one in the front in the u-channel for the hood seal. Once those are done time for some primer and paint on the interior sections. |
| my928s4 |
 Mar 28 2010, 11:51 AM Mar 28 2010, 11:51 AM
Post
#138
|
|
Member   Group: Members Posts: 349 Joined: 18-August 07 From: Spokane, WA Member No.: 8,018 Region Association: Pacific Northwest |
Here is the Epoxy and 2K primer I have been using, checked back and I don't think I listed them.
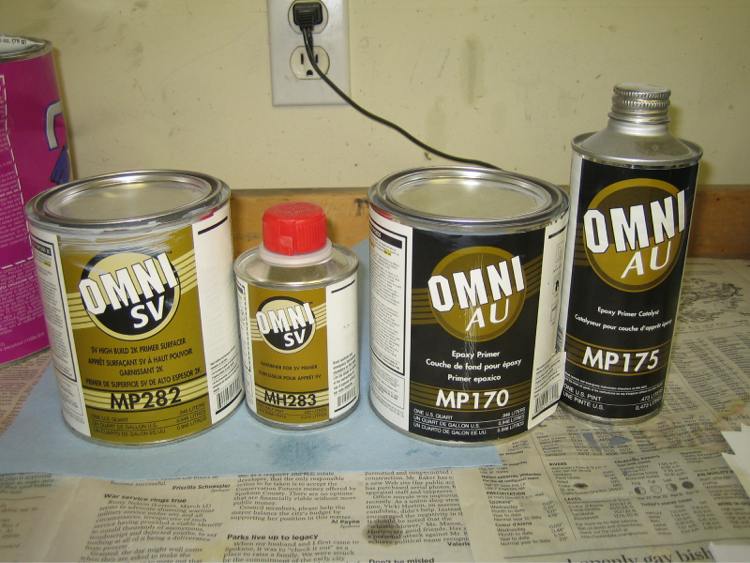 I want to get the front suspension hooked up but I need to finish the bulkhead area so I went to the supply store to buy some color. Evidently this is the last of the pigment they have in this color but hopefully this is enough for the interior and jambs. Also picked up a small gun for the color. 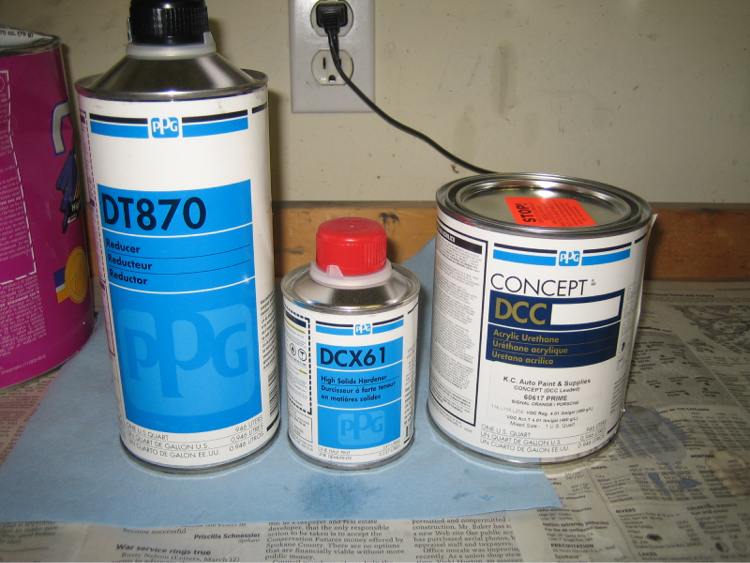 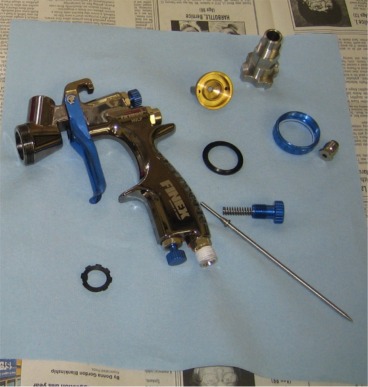 Used the same disposable cups as I did on the primer gun to assist with the small areas and help spray inverted. Well note to self, don't knock the cup against a surface while painting upside down ... it knocks the cup off. Luckily it spilt mainly on the bottom but it left a few drips. Not so much of a problem in this area, there was even a drip line from the factory. Just annoying, bn more careful next time. 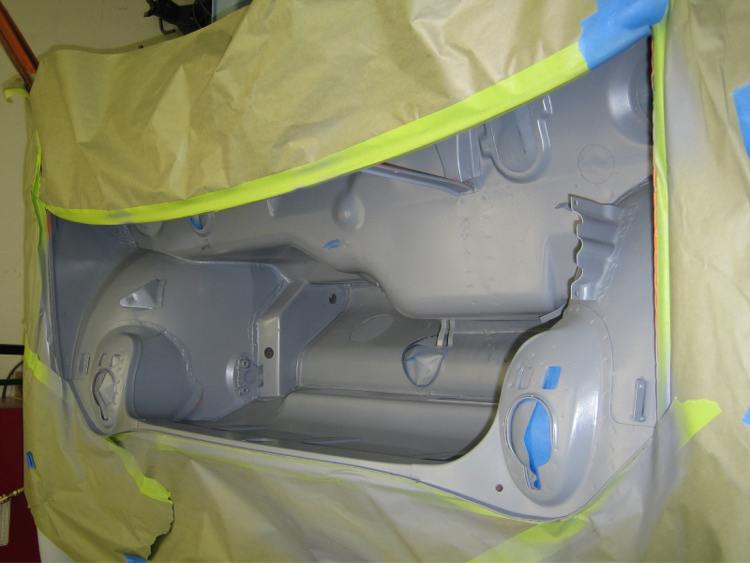 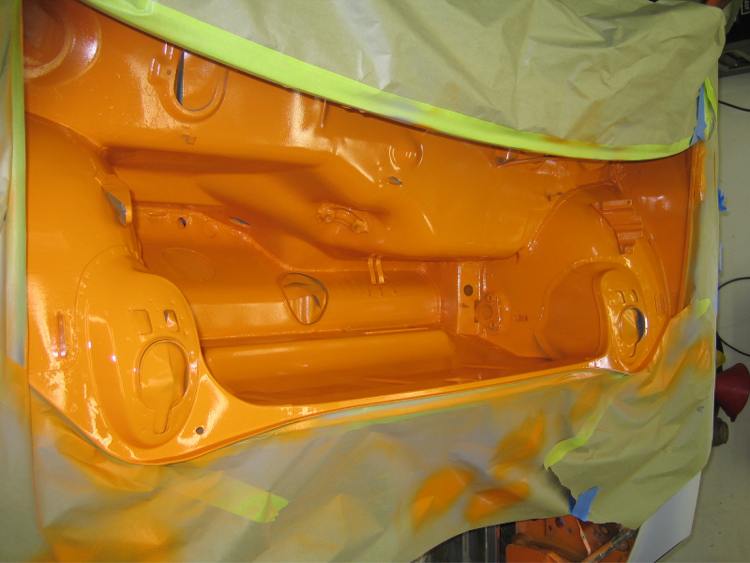 |
| jonferns |
 Mar 28 2010, 12:15 PM Mar 28 2010, 12:15 PM
Post
#139
|
|
Advanced Member     Group: Members Posts: 2,081 Joined: 29-March 07 From: New Jersey Member No.: 7,631 Region Association: North East States 
|
|
| Silverstreak |
 Apr 3 2010, 03:26 PM Apr 3 2010, 03:26 PM
Post
#140
|
|
Edmund J. Fournier #36   Group: Members Posts: 117 Joined: 2-April 10 From: Pensacola Member No.: 11,552 Region Association: South East States |
Fantastic work so far! You sir are a hero. An inspiration to me to just get out and get on with it! I like your systematic way of tackling jobs a little bit at a time making sure to do it right without getting worn out and frustrated i.e. taking breaks to watch F1. Can't wait to get one started myself and plan on using your posts for reference. Thanks for the confidence. (IMG:style_emoticons/default/smilie_pokal.gif)
|
  |
1 User(s) are reading this topic (1 Guests and 0 Anonymous Users)
0 Members:

|
Lo-Fi Version | Time is now: 3rd April 2025 - 06:36 PM |
Invision Power Board
v9.1.4 © 2025 IPS, Inc.


