|
|
|
Porsche, and the Porsche crest are registered trademarks of Dr. Ing. h.c. F. Porsche AG.
This site is not affiliated with Porsche in any way. Its only purpose is to provide an online forum for car enthusiasts. All other trademarks are property of their respective owners. |
|
|

  |

| Jake Raby |
 Mar 19 2008, 09:29 AM Mar 19 2008, 09:29 AM
Post
#21
|
|
Engine Surgeon  Group: Members Posts: 9,396 Joined: 31-August 03 From: Lost Member No.: 1,095 Region Association: South East States |
Excelent..
Stay away from shop rags filled with lint and rubber gloves that will hinder your ability to feel debris in the assembly lube used for the build up. I have saved myself many times by feeling "grit" in assembly lube. Lint free towels are a must as well as serious doses of denatured alcohol or carb cleaner and compressed air. |
   |

 
|
| VaccaRabite |
Mar 19 2008, 10:14 AM
Post
#22
|
|
En Garde! Group: Admin Posts: 13,479 Joined: 15-December 03 From: Dallastown, PA Member No.: 1,435 Region Association: MidAtlantic Region |
That crank bracket is brilliant. I wish that I had thought of it when I was playing with my crank last month.
Zach |
|
|
|
| MrKona |
Mar 22 2008, 01:15 AM
Post
#23
|
|
Senior Member Group: Members Posts: 597 Joined: 25-July 05 From: Santa Rosa, CA Member No.: 4,469 Region Association: None |
So tonight was a good night, after months of amassing and cleaning parts, I finally starting assembly! I fitted the case fasteners and plastic vibration dampeners last night, sealing the fastener heads and new washers with Permatex Ultra Black. Tonight I fastened the rods to the crank, torquing the rod nuts to a final torque of 24 ft/lb. I applied Permatex Threadlocker red to the rod bolt threads - not sure if that was necessary, but it's recommended in Wayne Dempsey's 911 engine rebuild book, so I went ahead and applied it for extra assurance. I had to stop the the other night as my socket was a little too fat to fit neatly between the rod nut and rod body. I didn't want to mangle new rod nuts. I had an extra 14mm el cheapo socket so I ground it down a hair around the perimeter and it fit fine.
Very conveniently had my laptop in the garage with Jake's video. Took it step by step, bearings into case after a final wipe down with alcohol and a lint-free wipe. Crank fell neatly into place after the bearings were lined up with the dowel pins. Made sure to run some oil into all the crank journal oil passages. Cam bearings in... and that was where I had to stop. The cam gear comes with 4.5mm hex head bolts. I have 4mm and 5mm hex drivers, but no 4.5. It was a good time to stop. Next step will be to pick up a 4.5 hex driver so that I can mount the 9550 cam onto the cam gear and install the assembly into the case. Attached thumbnail(s) 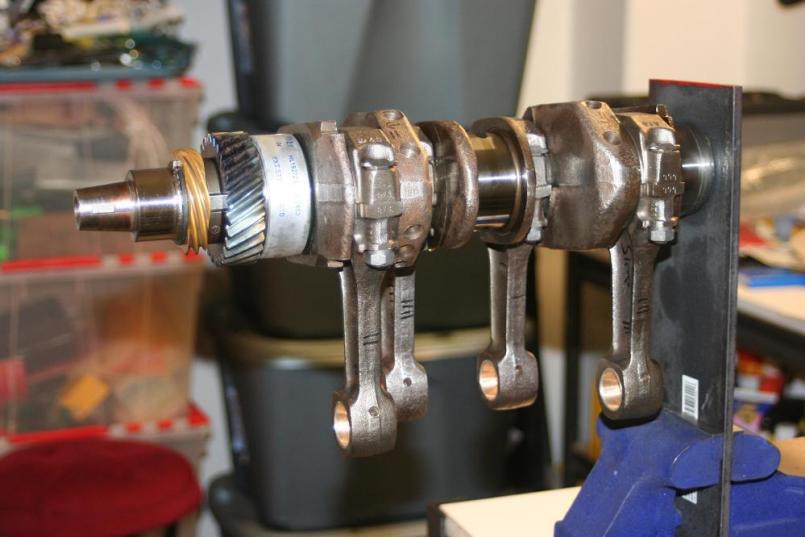 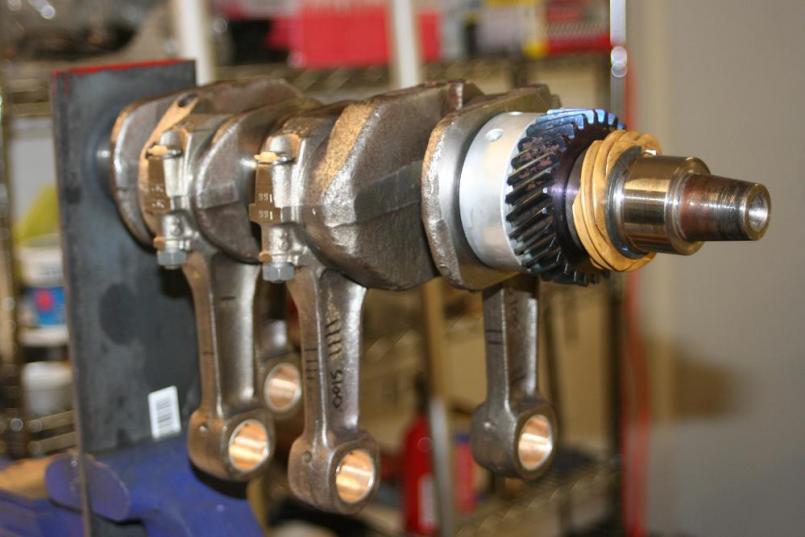 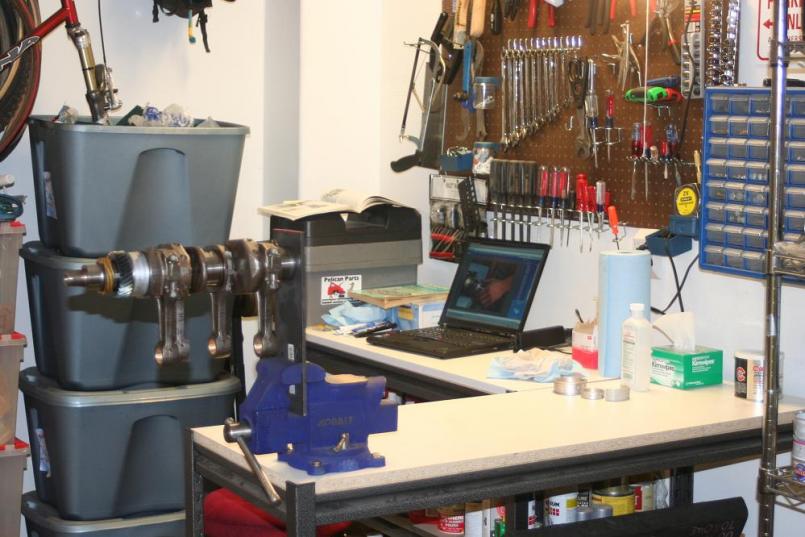
|
|
|
|
| MrKona |
Mar 22 2008, 01:16 AM
Post
#24
|
|
Senior Member Group: Members Posts: 597 Joined: 25-July 05 From: Santa Rosa, CA Member No.: 4,469 Region Association: None |
More...
Attached thumbnail(s) 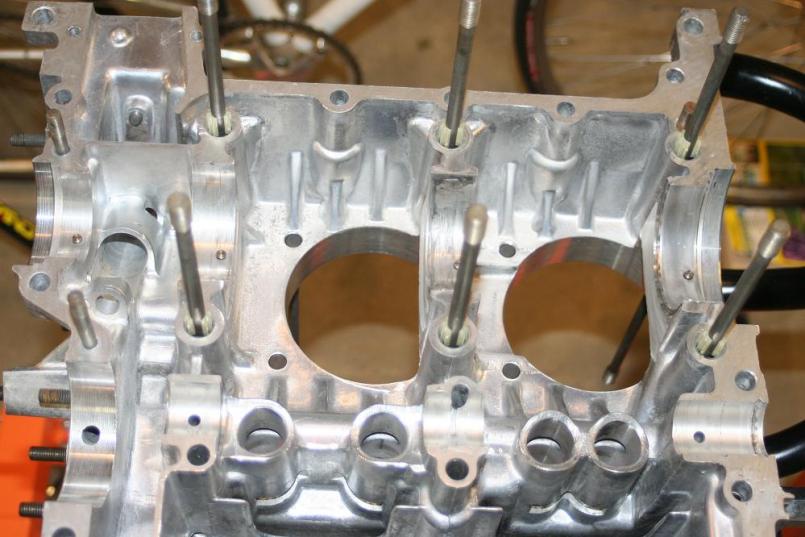 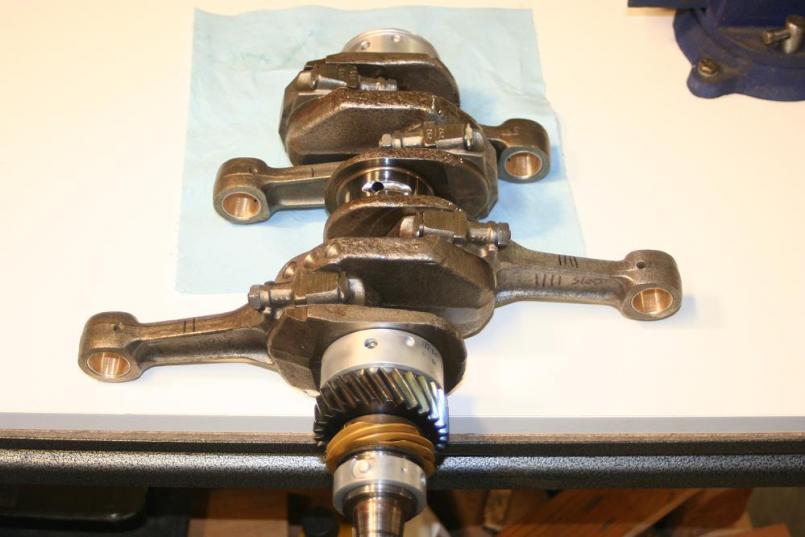 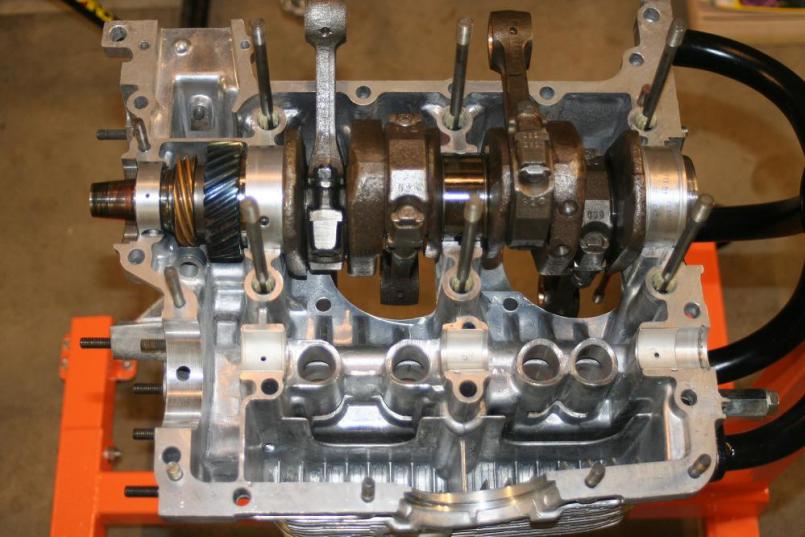
|
|
|
|
| Gint |
Mar 22 2008, 08:36 AM
Post
#25
|
|
Mike Ginter Group: Admin Posts: 16,086 Joined: 26-December 02 From: Denver CO. Member No.: 20 Region Association: Rocky Mountains |
Cool thread. Thanks for taking the time to post your progress and pics.
|
|
|
|
| MrKona |
Mar 23 2008, 12:34 AM
Post
#26
|
|
Senior Member Group: Members Posts: 597 Joined: 25-July 05 From: Santa Rosa, CA Member No.: 4,469 Region Association: None |
QUOTE(Gint @ Mar 22 2008, 07:36 AM)  Cool thread. Thanks for taking the time to post your progress and pics. No problem! Glad you're enjoying the thread. |
|
|
|
| MrKona |
Mar 23 2008, 12:47 AM
Post
#27
|
|
Senior Member Group: Members Posts: 597 Joined: 25-July 05 From: Santa Rosa, CA Member No.: 4,469 Region Association: None |
A little more progress tonight. I fastened the cam gear to the cam, applying Permatex red threadlocker to the bolts. Made sure to align the cam/gear properly with the gear notch at the 12:00 position and rear lobe at 6:00. cut and ground the exposed bolts on the reverse side, as specified in Jake's valvetrain presentation.
Placed the assembly in the case, mating up to the timing gear, locating the notch on the cam gear between the two on the timing gear. It's a great feeling to be putting this engine together, and I'm thoroughly enjoying the pre-build research, parts assembly, and now the build. I bought Tom Wilson's book back in 1997 when I first became interested in 914's. Got my 914 back in 2004, and now, after 10+ years, it's very satisfying to finally be building an engine with my own hands. Attached thumbnail(s)  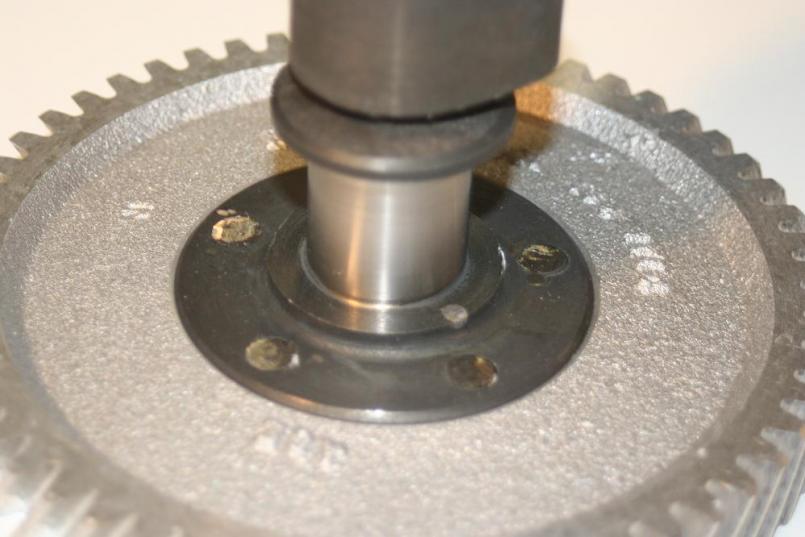 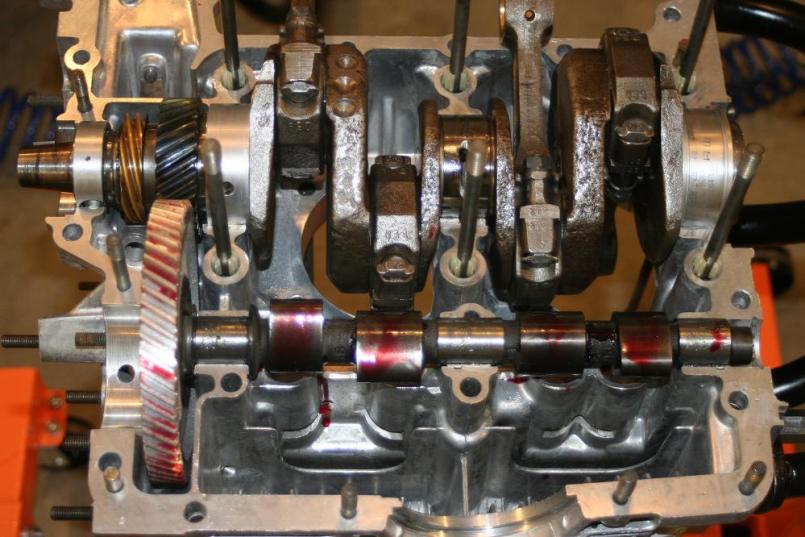
|
|
|
|
| Walter |
Mar 23 2008, 07:17 AM
Post
#28
|
|
Member Group: Members Posts: 70 Joined: 10-August 04 From: The Netherlands, Europe Member No.: 2,499 |
Cool! What cam did ou end up with?
I like the allen cam bolts. Where are those from? Cam gear seems to have been recessed as well. It almost suggests its from somebody who had given this some thought (IMG:style_emoticons/default/smile.gif) |
|
|
|
| MrKona |
Mar 23 2008, 11:46 AM
Post
#29
|
|
Senior Member Group: Members Posts: 597 Joined: 25-July 05 From: Santa Rosa, CA Member No.: 4,469 Region Association: None |
QUOTE(Walter @ Mar 23 2008, 06:17 AM) Cool! What cam did ou end up with? I like the allen cam bolts. Where are those from? Cam gear seems to have been recessed as well. It almost suggests its from somebody who had given this some thought (IMG:style_emoticons/default/smile.gif) Hi Walter. I ended up going with a 9550 cam and lifters from Aircooled Technology. |
|
|
|
| MrKona |
Apr 3 2008, 11:54 PM
Post
#30
|
|
Senior Member Group: Members Posts: 597 Joined: 25-July 05 From: Santa Rosa, CA Member No.: 4,469 Region Association: None |
Slowly, but surely, progress marches on, and it's starting to look more like engine now. Case halves joined, sealed with Curil K2, through-bolt threads sealed with Permatex Ultra Black, crank turns smoothly with case fasteners torqued to spec.
Attached thumbnail(s) 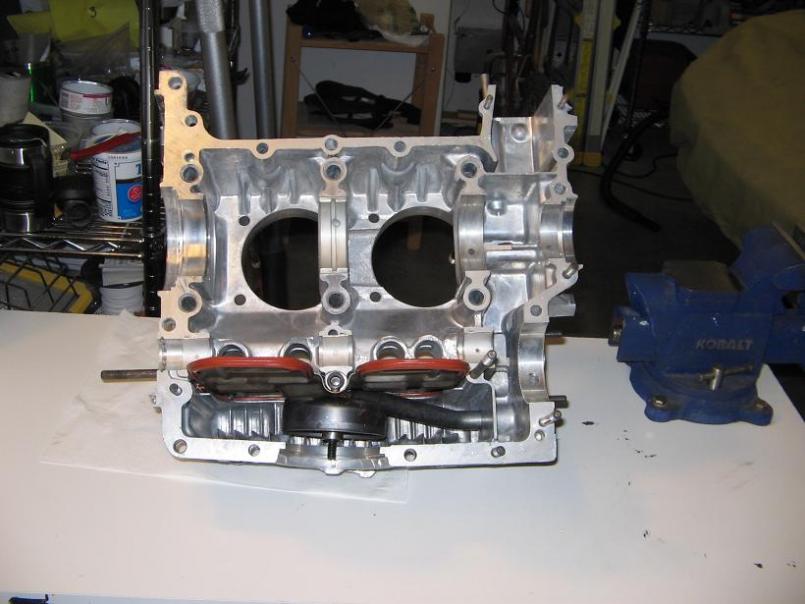  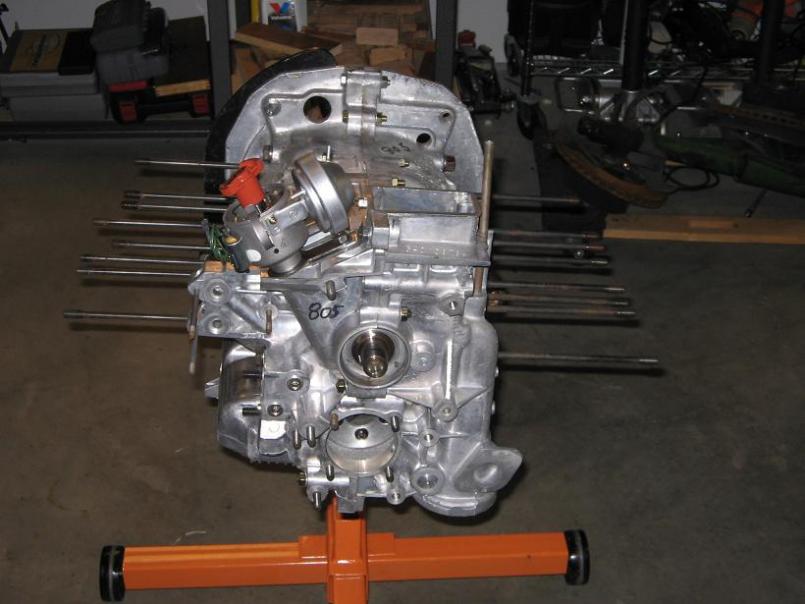
|
|
|
|
| Todd Enlund |
Apr 4 2008, 01:00 AM
Post
#31
|
|
Resident Photoshop Guru Group: Members Posts: 3,251 Joined: 24-August 07 From: Laurelhurst (Portland), Oregon Member No.: 8,032 Region Association: Pacific Northwest |
Looking killer, dude! (IMG:style_emoticons/default/aktion035.gif)
|
|
|
|
| MrKona |
Apr 6 2008, 01:08 AM
Post
#32
|
|
Senior Member Group: Members Posts: 597 Joined: 25-July 05 From: Santa Rosa, CA Member No.: 4,469 Region Association: None |
Today I installed the oil pump (modified type 1), fan hub, oil filter mount, oil strainer and cover, and taco plate. The old wire from the oil temp sender at the taco plate was in bad shape. I had some wire, heat shrink tubing, and terminals so I made a new lead, much cleaner that using the old one. I had a rubber grommet that fit the taco plate cover hole nicely, and I filled in the remaining space around the wire with some Permatex Ultra Black to seal it off.
Here's a couple shots showing the latest. The last one is a gratuitous beauty show because I just really enjoy staring at this nice clean engine. Next up is pistons and cylinders... Attached thumbnail(s) 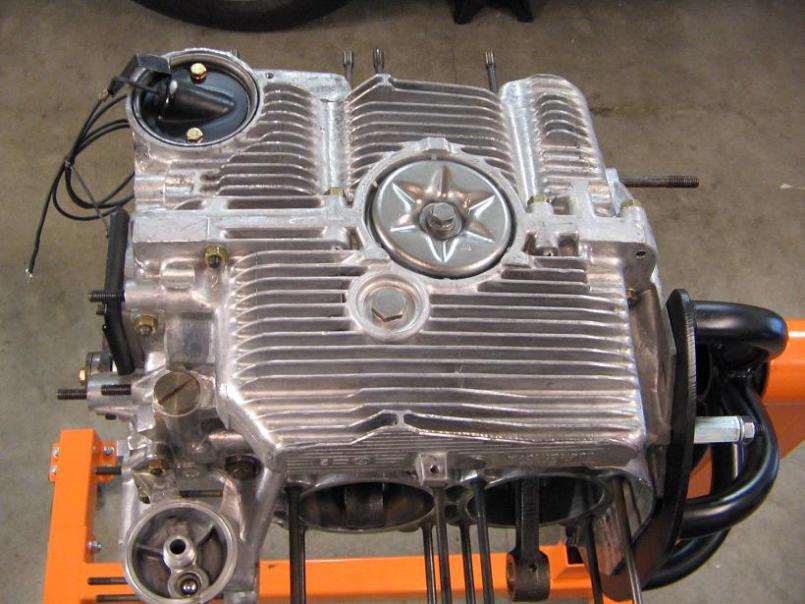 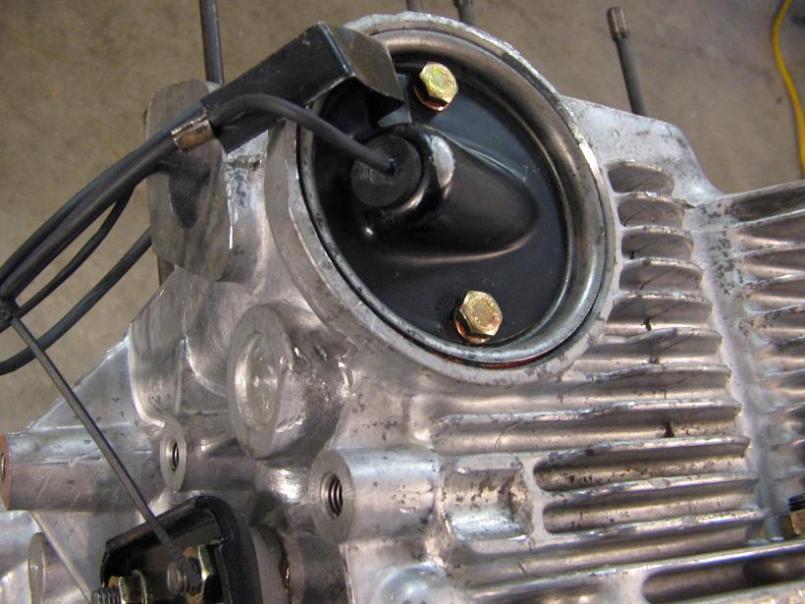 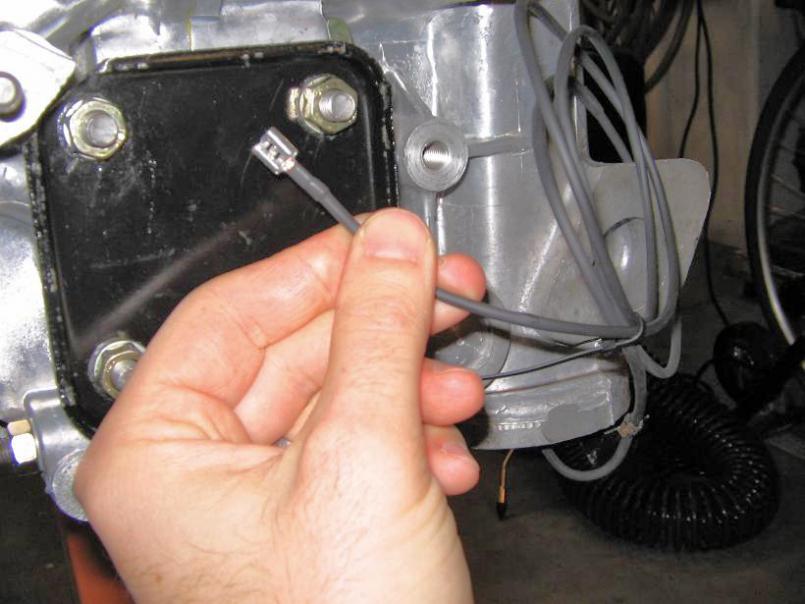
|
|
|
|
| MrKona |
Apr 6 2008, 01:10 AM
Post
#33
|
|
Senior Member Group: Members Posts: 597 Joined: 25-July 05 From: Santa Rosa, CA Member No.: 4,469 Region Association: None |
Beauty shots...
Attached thumbnail(s) 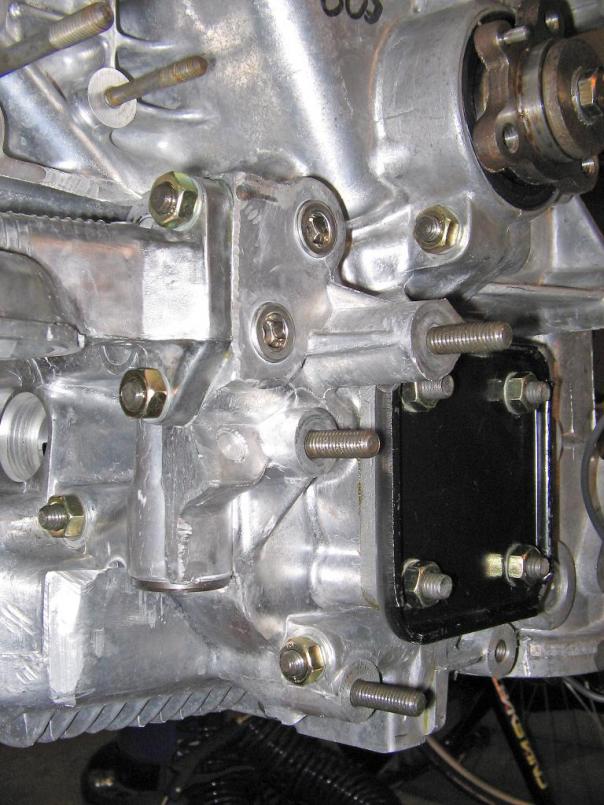 Attached image(s) 
|
|
|
|
| JRust |
Apr 19 2008, 06:23 AM
Post
#34
|
|
914 Guru Group: Members Posts: 6,309 Joined: 10-January 03 From: Corvallis Oregon Member No.: 129 Region Association: Pacific Northwest |
Hard to believe that was the engine I sold you. Impressive work Bryan! Keep it up
|
|
|
|
| powdercoater |
Apr 19 2008, 10:25 AM
Post
#35
|
|
Powder Coater Scott "The Purple Powder Coater" Group: Members Posts: 5 Joined: 17-April 08 From: Chatsworth CA, Los Angeles Member No.: 8,930 Region Association: Southern California |
Now that you will that killer rebuild, have you considered what to do with the engine tin and fan/housing? The exhaust can also be ceramic coated to clean it up. What a nice piece, way to go.
|
|
|
|
| MrKona |
Apr 19 2008, 10:33 AM
Post
#36
|
|
Senior Member Group: Members Posts: 597 Joined: 25-July 05 From: Santa Rosa, CA Member No.: 4,469 Region Association: None |
QUOTE(JRust @ Apr 19 2008, 05:23 AM) Hard to believe that was the engine I sold you. Impressive work Bryan! Keep it up Thanks Jamie, I appreciate that! |
|
|
|
| MrKona |
Apr 19 2008, 10:52 AM
Post
#37
|
|
Senior Member Group: Members Posts: 597 Joined: 25-July 05 From: Santa Rosa, CA Member No.: 4,469 Region Association: None |
QUOTE(powdercoater @ Apr 19 2008, 09:25 AM) Now that you will that killer rebuild, have you considered what to do with the engine tin and fan/housing? The exhaust can also be ceramic coated to clean it up. What a nice piece, way to go. Actually... now that you mention it, I'm planning on having the tin powder coated. It's in decent shape right now (see picture from a previous engine removal and cleaning), but considering all the effort that will have gone into this engine, I want the tin to look new. I'm thinking a satin black, not too far from the stock look, not too glossy. Before I take this all to the powder coater, I need to locate the tin cylinder covers, as well as the intake tubes for a 2.0 engine, as my current engine set up is a 1.8. I have a SS exhaust which is all polished up already (I'll post another gratuitous picture of it after I spent hours cleaning and hand polishing) but the J-tubes and exhaust elbows are rusted and look bad when paired with the SS exhaust. I was thinking of having the powder coater take care of those as well, but would ceramic coating be better for exhaust pieces? Will powder coating stand up to the high temps of the exhaust pieces? My local powder coater also does ceramic coating, I haven't yet spoken to him about this project. I also have rusted heater flapper boxes which look pretty bad, and I'm not sure how best to address those to make them look new... perhaps I need to buy them new, but I'd rather save some $$$ if they can be refinished for less than the price of new ones. At this rate, I'll be on the road by 2010. Attached image(s) 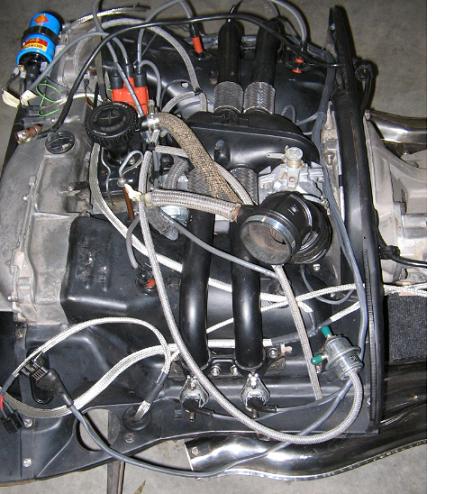 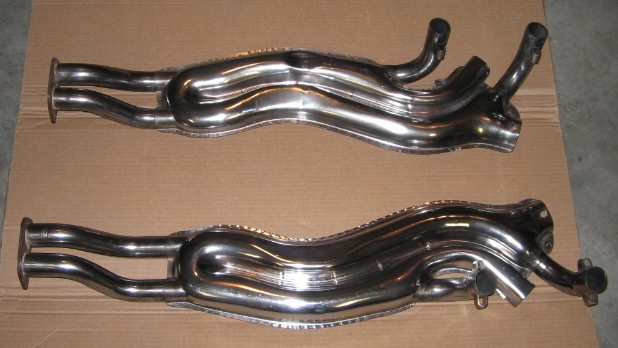
|
|
|
|
| powdercoater |
Apr 19 2008, 12:41 PM
Post
#38
|
|
Powder Coater Scott "The Purple Powder Coater" Group: Members Posts: 5 Joined: 17-April 08 From: Chatsworth CA, Los Angeles Member No.: 8,930 Region Association: Southern California |
For the tin if you want to have it factory looking then the choice of a semi gloss black is the color that is normally chosen. It looks clean without too much show. Some areas of note on the fan and shroud thare are places that need to be masked for the powder coating process. Powder coating will build between .003"-.005" this is thick enough to be considered an interference to bearing and torqued mating surfaces. The fan its self was a natural cast aluminum in most cases, but it is common to either coat them black or silver. Ther are some cool finishes that can replicate metals in semi gloss and matte finishes.
The ceramic coating if done correctly is the way to go, don't waste your time with the rattle can stuff. The correct look is to have them done in gray 1300F rated coating, gray looks killer if again you want a factory apperance. Other availabe colors are silver matte and polished, black matte or semi gloss, blue (nasty), white, copper and red (not too red). There are also coatings that will also go to 2000F but these are textured black, gray or blue only. Scott |
|
|
|
| MrKona |
Apr 19 2008, 01:50 PM
Post
#39
|
|
Senior Member Group: Members Posts: 597 Joined: 25-July 05 From: Santa Rosa, CA Member No.: 4,469 Region Association: None |
QUOTE(powdercoater @ Apr 19 2008, 11:41 AM) For the tin if you want to have it factory looking then the choice of a semi gloss black is the color that is normally chosen. It looks clean without too much show. Some areas of note on the fan and shroud thare are places that need to be masked for the powder coating process. Powder coating will build between .003"-.005" this is thick enough to be considered an interference to bearing and torqued mating surfaces. The fan its self was a natural cast aluminum in most cases, but it is common to either coat them black or silver. Ther are some cool finishes that can replicate metals in semi gloss and matte finishes. The ceramic coating if done correctly is the way to go, don't waste your time with the rattle can stuff. The correct look is to have them done in gray 1300F rated coating, gray looks killer if again you want a factory apperance. Other availabe colors are silver matte and polished, black matte or semi gloss, blue (nasty), white, copper and red (not too red). There are also coatings that will also go to 2000F but these are textured black, gray or blue only. Scott Scott, Thanks for the advice, this is really helpful. I'm imaging pretty close to what you describe... Satin or semi-gloss black for the tin, natural aluminum look for the fan and shroud, and probably gray for the stock exhaust pieces. I want this car to maintain a "classic" look. |
|
|
|
| MrKona |
May 23 2008, 06:32 PM
Post
#40
|
|
Senior Member Group: Members Posts: 597 Joined: 25-July 05 From: Santa Rosa, CA Member No.: 4,469 Region Association: None |
It's been just over a month since I've posted. Unfortunately, progress was halted by a combination of school, work, and some family medical issues. It's time to get started again...
I measured deck height on all four cylinders. I actually made a torque plate so that I could torque the cylinders to spec, and then measure deck height with a dial indicator. I tried that, but ended up giving up and resorting to the method used by Competition Engineering, and also used by Wayne Dempsey in his 911 rebuild book. Deck Height Link This method relies on using large diameter acid core solder. I cut two pieces per piston, removed the acid core from each piece with a small drill bit and a paper clip. At that point, I placed two pieces on the top of each piston, a little Curil-T to hold each piece in place on the piston head. Then torqued the head to spec. At that point, it takes a half turn of the fan to bring the pistons up to the cylinder head, compressing the solder. Remove the head, take the smallest measurement of each compressed solder piece. Average the two measurements for each piston to calculate deck height. I used a .010" and a .040" cylinder to case spacer for a total of .050" on each cylinder. This gave me the following deck deck heights: Cylinder 1: .053" Cylinder 2: .052" Cylinder 3: .050" Cylinder 4: .051" Combustion Chamber volume = 57.6cc Euro spec Mahle piston dish = 3cc Stroke = 71mm Bore = 94mm Using the CR calculator on aircooled.net this gives me a calculated CR: Cylinder 1: 8.0/1 Cylinder 2: 8.0/1 Cylinder 3: 8.1/1 Cylinder 4: 8.0/1 Pretty straight forward, and I'm happy with this combo that I've achieved stock Euro-spec CR. Attached thumbnail(s) 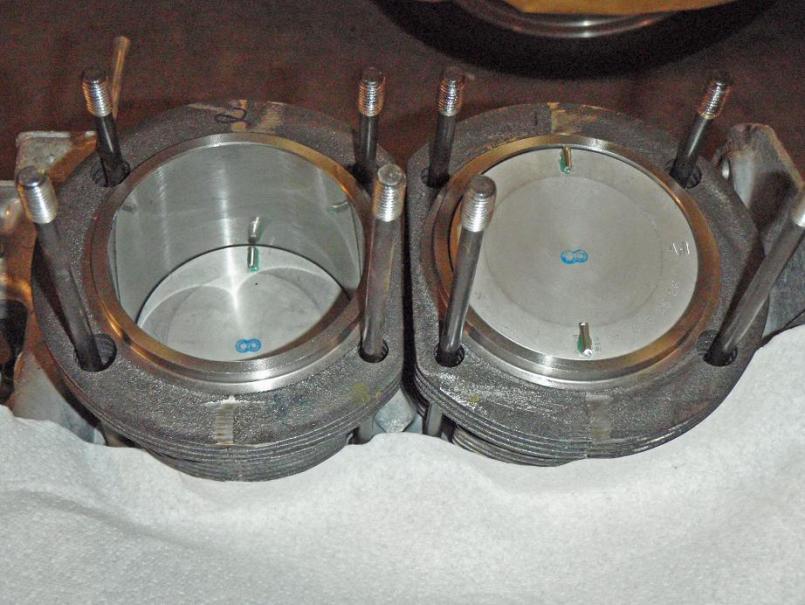 Attached image(s) 
|
|
|
|
|
2 User(s) are reading this topic (2 Guests and 0 Anonymous Users)
0 Members:

|
Lo-Fi Version | Time is now: 1st July 2024 - 06:48 AM |
Invision Power Board
v9.1.4 © 2024 IPS, Inc.