|
|

|
Porsche, and the Porsche crest are registered trademarks of Dr. Ing. h.c. F. Porsche AG.
This site is not affiliated with Porsche in any way. Its only purpose is to provide an online forum for car enthusiasts. All other trademarks are property of their respective owners. |
|
|
  |
| FourBlades |
 Aug 29 2009, 10:16 PM Aug 29 2009, 10:16 PM
Post
#257
|
|
From Wreck to Rockin     Group: Members Posts: 2,056 Joined: 3-December 07 From: Brevard, FL Member No.: 8,414 Region Association: South East States 
|
Welded in reinforcements for shoulder harnesses. I placed these an inch below
shoulder level according to the directions from G-force. I also looked at Schroth's excellent guide to installing harnesses (on their website). 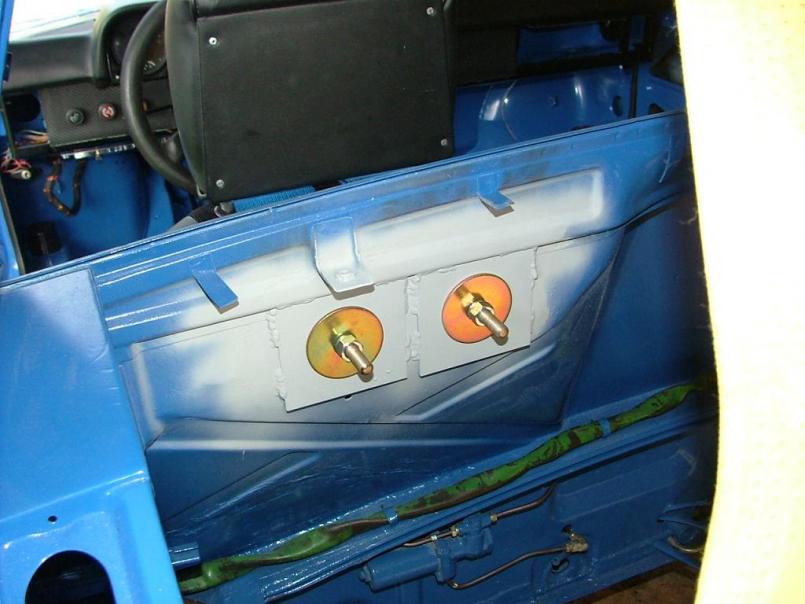 Not totally sure about running the belts through the head rest supports. They feel ok when belted up. I was worried they would pinch at the neck but they feel like they sit in the right place when worn. 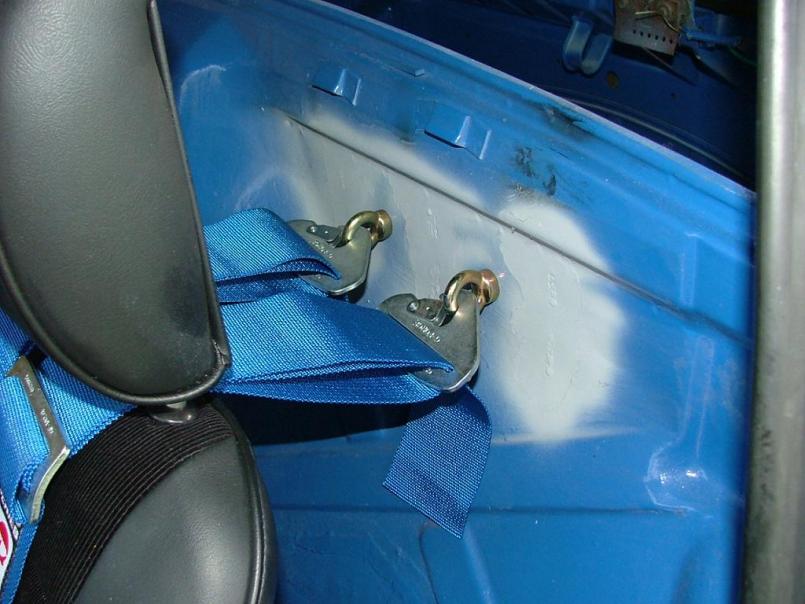 These seats came from Camp 914. They are very comfortable and well made and were cheaper than listed on their website. 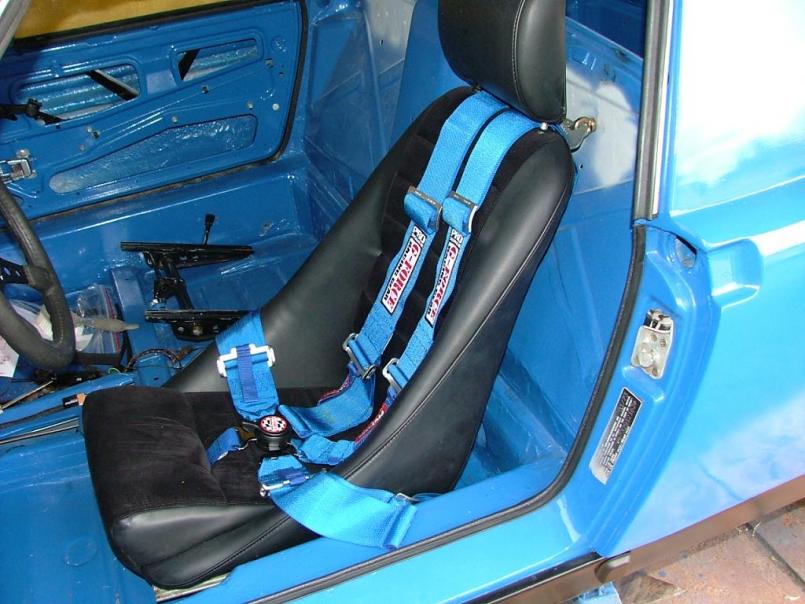 I am going to the Atlanta tranny clinic with Dr. Evil. You could really take that statement the wrong way if you did not know the context. (IMG:style_emoticons/default/smile.gif) John |
| FourBlades |
 Sep 5 2009, 07:22 PM Sep 5 2009, 07:22 PM
Post
#258
|
|
From Wreck to Rockin     Group: Members Posts: 2,056 Joined: 3-December 07 From: Brevard, FL Member No.: 8,414 Region Association: South East States 
|
So I was wondering if my fuel tank really needed to be refurbed or if it was good
enough as is. It looks pretty much cherry on the outside (not the one that came with my car, that one has rust through holes). Shaking it made sounds like rust flakes rattling around. Dumping out and vacuuming up the rust flakes yielded this pile: 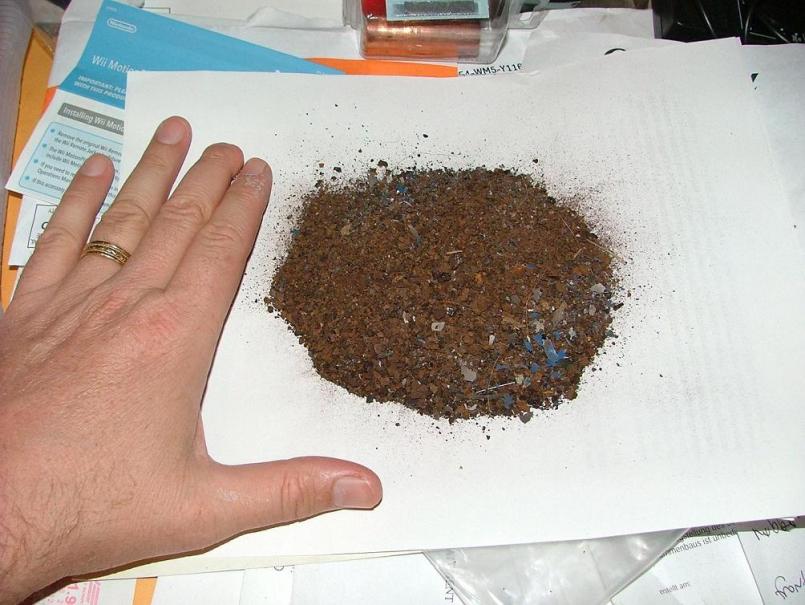 Hmmm, maybe I do need to redo it. Liberally sprayed freeze off on both nipples (yes this is 914 world and not THAT forum). Both nipple tubes were basically packed solid with rust. Some PO also used steel washers on the nipples. The filter sock was in place and not looking too bad. 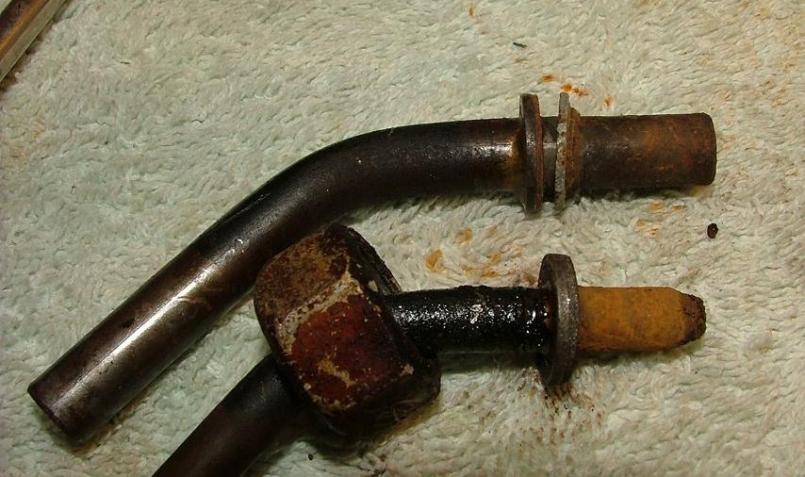 Hard to see it but the tube is full of packed in rust flakes and dust. I would not have gotten much fuel out or back into the tank through these. 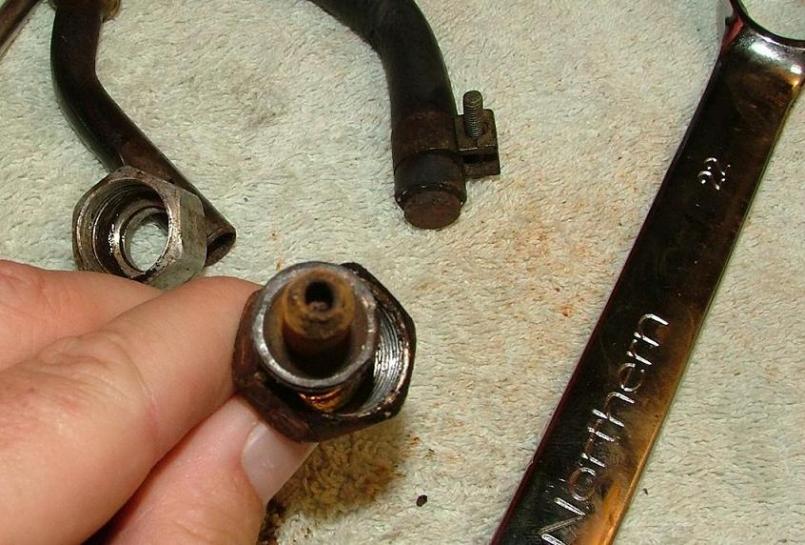 One nut did not want to come off easily, and left aluminum bonded to the steel threads. This ruined one of the nuts, but luckily I ordered new ones from AA. I would not be surprised if you ruin both nuts trying to remove them, so get new ones before you start. 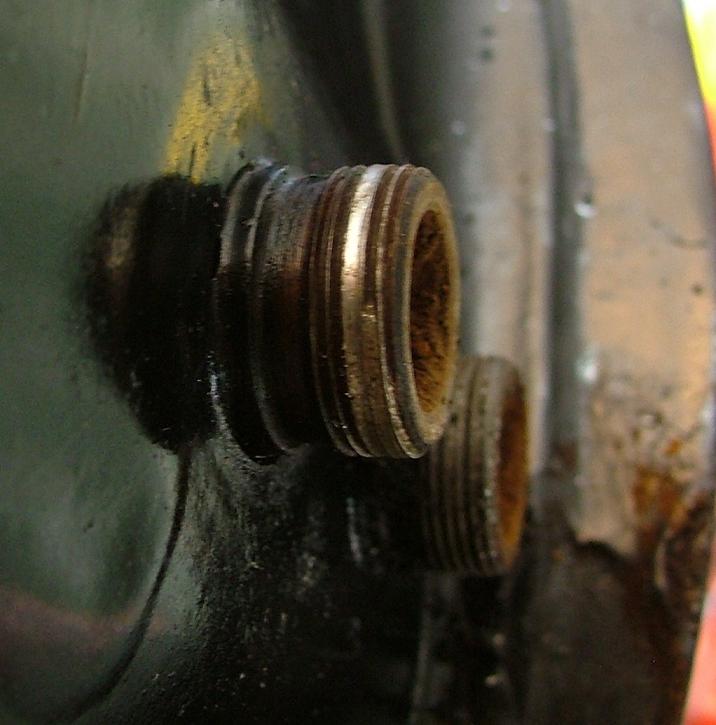 Not having a die this size, I rinsed the tank out with warm soapy water and then heated the offending threads with MAPP. I think the different expansion rates of aluminum and steel did the trick because I was able to pick all the aluminum out of the threads cleanly after that with an awl. I used the Eastwood fuel tank kit to derust and recoat the tank. Pretty easy but messy and involves lots of nasty chemicals. Pictures tomorrow once it dries. So to recap, I twisted off both nuts, and broke one in the process, then sprayed freeze off on both nipples, then burnt one nipple with a torch. And my wife complains that 914 work is boring... John |
| McMark |
 Sep 5 2009, 10:34 PM Sep 5 2009, 10:34 PM
Post
#259
|
|
914 Freak!                Group: Retired Admin Posts: 20,179 Joined: 13-March 03 From: Grand Rapids, MI Member No.: 419 Region Association: None |
Nice save! (IMG:style_emoticons/default/thumb3d.gif)
|
| FourBlades |
 Oct 24 2009, 09:14 PM Oct 24 2009, 09:14 PM
Post
#260
|
|
From Wreck to Rockin     Group: Members Posts: 2,056 Joined: 3-December 07 From: Brevard, FL Member No.: 8,414 Region Association: South East States 
|
Inside of gas tank after using Eastwood kit. The final coat is a thick, white
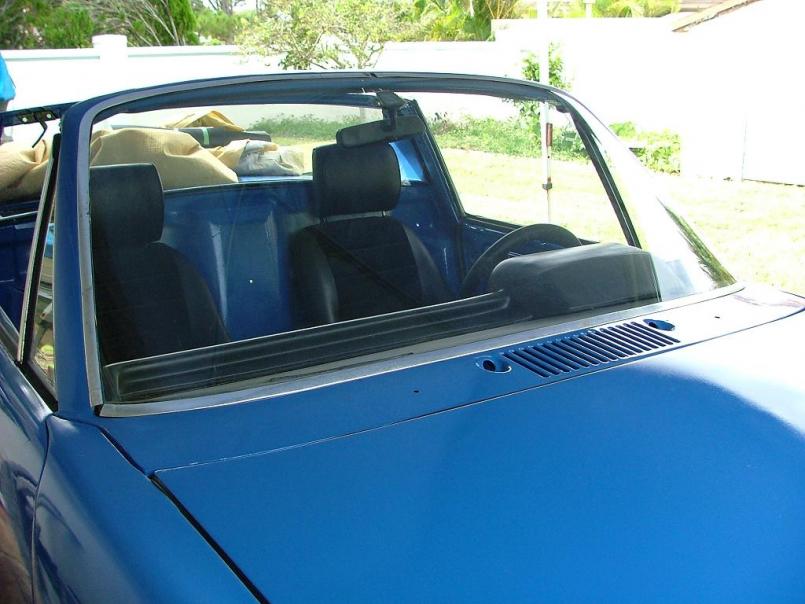
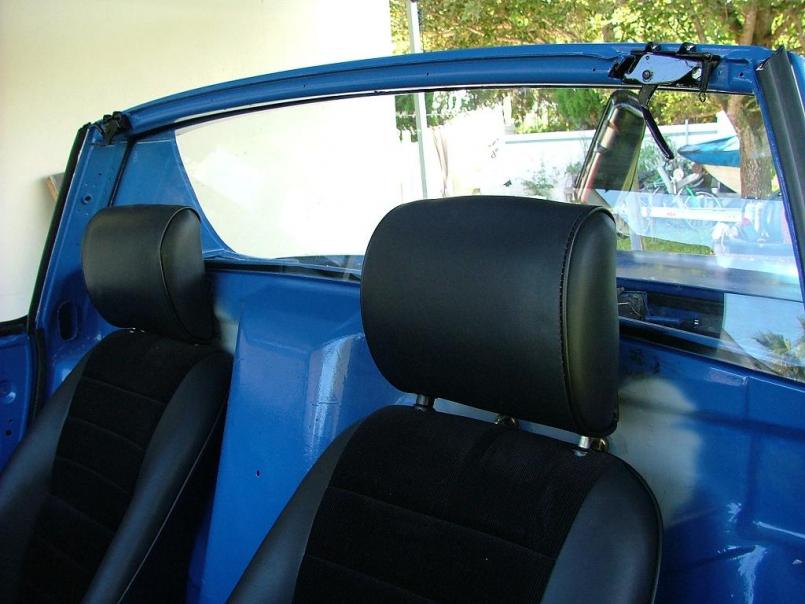
liquid that hardens to a rubbery consistency overnight. 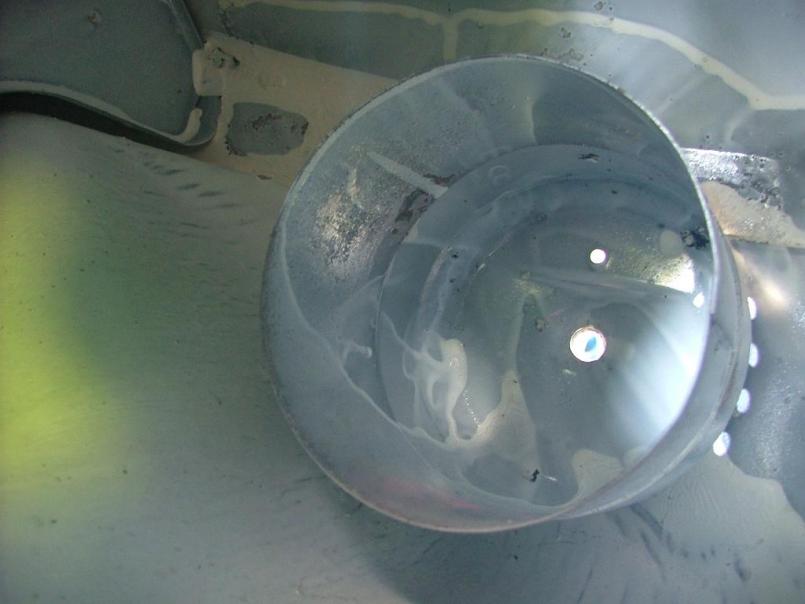 Putting in the windshield I must not have cleaned it enough or did not get a good suction on the glass with the gripper because the glass dropped off and broke. 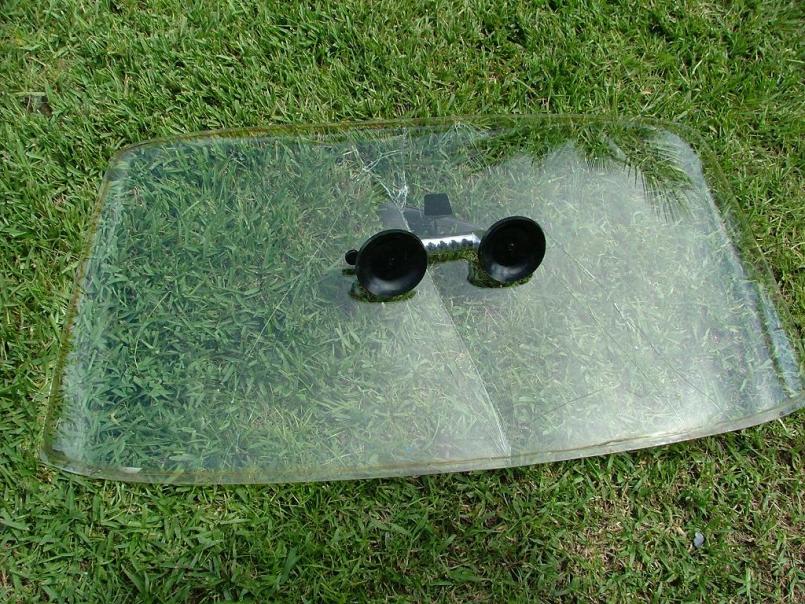 I had another windshield on hand, so being more careful the second time I lined it up using tape lines and stuck it into the butyl tape. Not too hard, but next time I would put the butyl tape right up to the inside edge of the windshield lip. Otherwise it squishes out around the edge of the windshield more than it probably should. 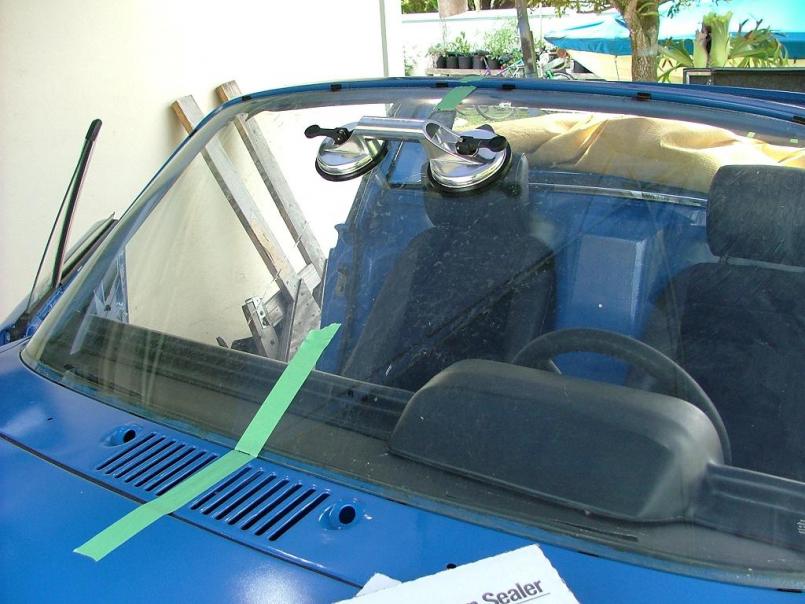 |
| FourBlades |
 Oct 24 2009, 09:17 PM Oct 24 2009, 09:17 PM
Post
#261
|
|
From Wreck to Rockin     Group: Members Posts: 2,056 Joined: 3-December 07 From: Brevard, FL Member No.: 8,414 Region Association: South East States 
|
|
| FourBlades |
 Oct 24 2009, 09:26 PM Oct 24 2009, 09:26 PM
Post
#262
|
|
From Wreck to Rockin     Group: Members Posts: 2,056 Joined: 3-December 07 From: Brevard, FL Member No.: 8,414 Region Association: South East States 
|
Went to the Evil Werks transmission clinic. Taking apart the 901 is surpisingly
easy, and of course, assembly is the reverse of disassembly. (IMG:style_emoticons/default/blink.gif) 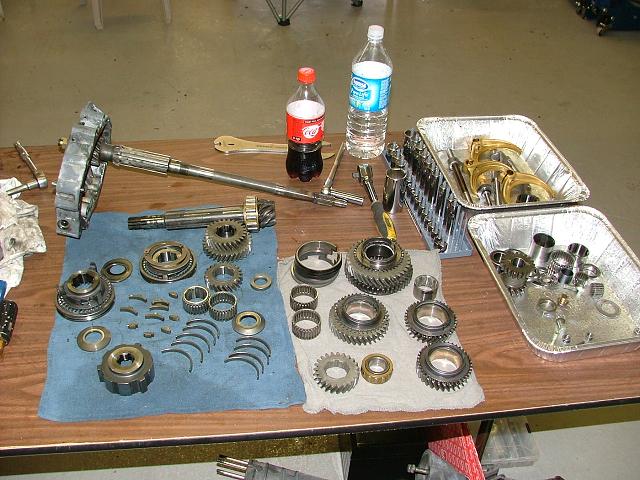 Start looking for pieces that fit and slide them on. 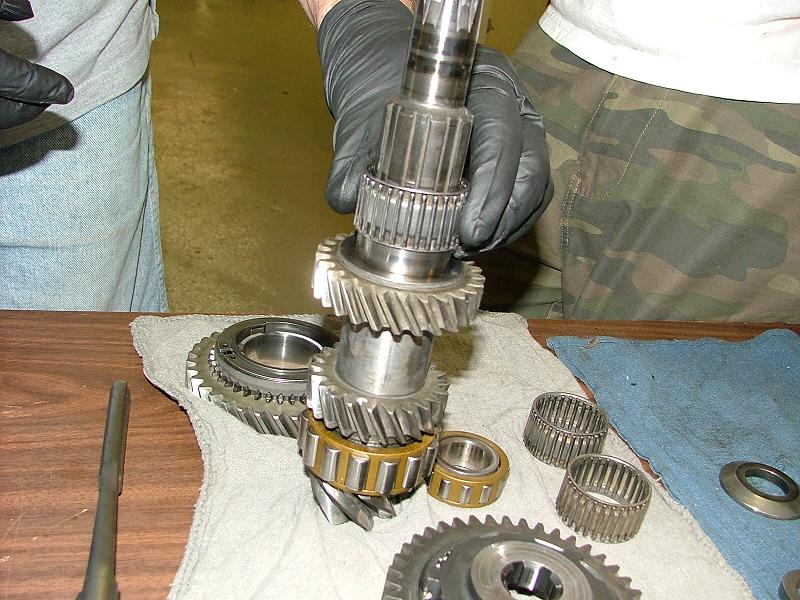 Keep going, this looks like it might belong here. 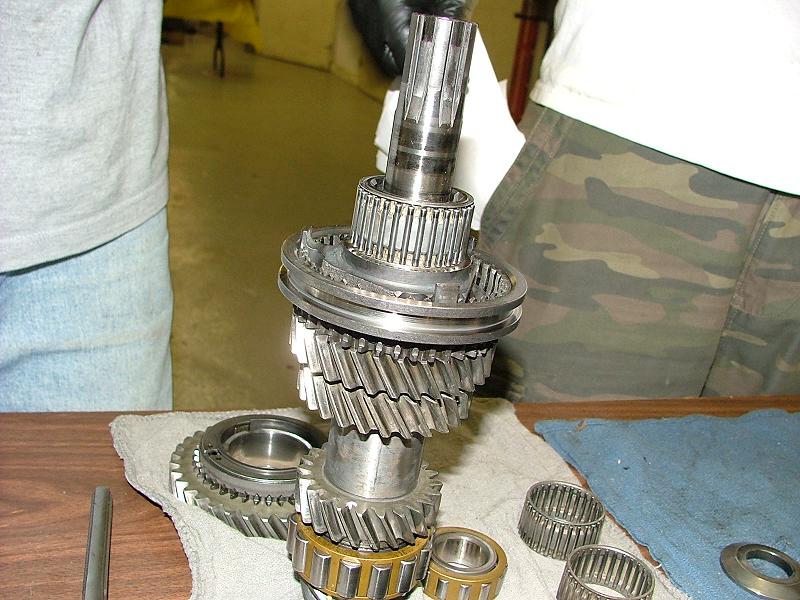 Only a few unimportant looking parts were left over. 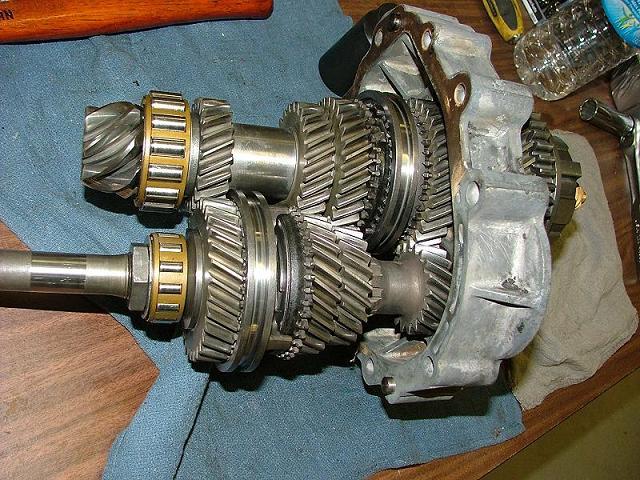 Nearly done, just need to add the cod piece. 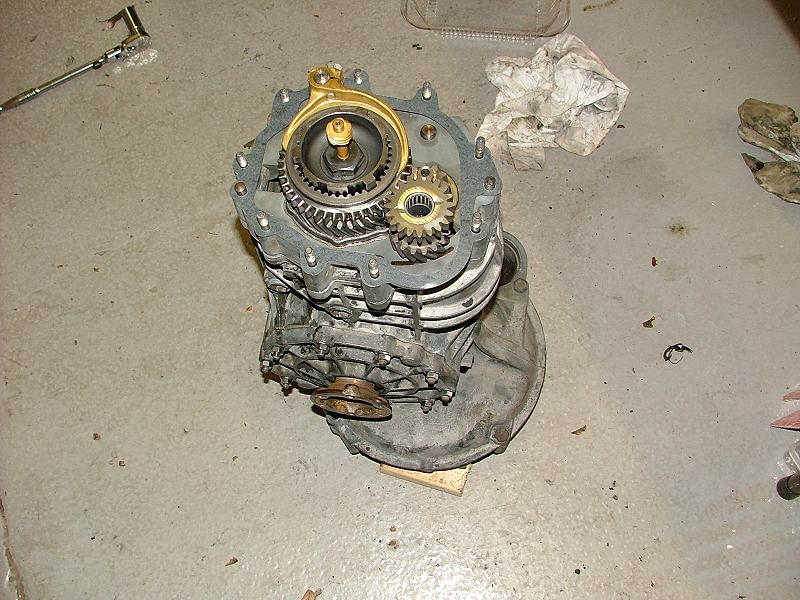 Sweet. Now it just needs an engine. John |
| FourBlades |
 Oct 24 2009, 09:33 PM Oct 24 2009, 09:33 PM
Post
#263
|
|
From Wreck to Rockin     Group: Members Posts: 2,056 Joined: 3-December 07 From: Brevard, FL Member No.: 8,414 Region Association: South East States 
|
There comes a time in every restoration when your engine must find a transmission to mate with and leave the security of the living room.
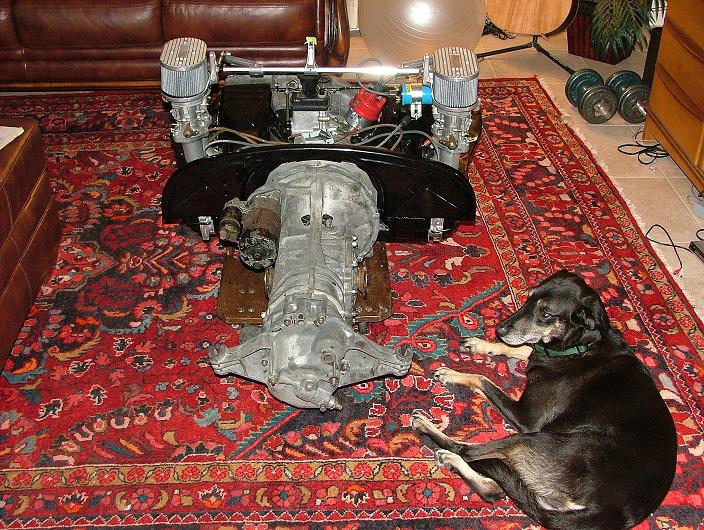 Now I just need to figure out how to wire it up, set timing, synch the carbs, and maybe attach a car to it. 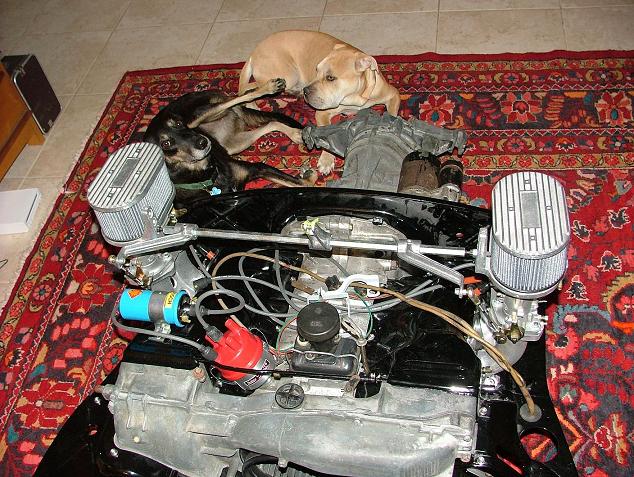 John |
| steveherman |
 Oct 24 2009, 10:24 PM Oct 24 2009, 10:24 PM
Post
#264
|
|
Member   Group: Members Posts: 380 Joined: 12-September 09 From: Kissimmee Florida Member No.: 10,799 Region Association: South East States |
HOLY CRAP!
I can wait to come up there. that is awesome and completely insane. there is no way i could fathom that amount of work. |
| 914Tom |
 Oct 25 2009, 05:02 AM Oct 25 2009, 05:02 AM
Post
#265
|
|
Member   Group: Members Posts: 122 Joined: 11-February 07 From: Germany Member No.: 7,526 |
hi john,
are this carbs dellorto or weber ? TOM (my wife will def. KILL me if i try to get the motor in the living room, or even the house) |
| FourBlades |
 Oct 25 2009, 09:19 AM Oct 25 2009, 09:19 AM
Post
#266
|
|
From Wreck to Rockin     Group: Members Posts: 2,056 Joined: 3-December 07 From: Brevard, FL Member No.: 8,414 Region Association: South East States 
|
Tom, Those are EMPI copies of Webers that I got from Jake Raby. They are really nicely made and supposed to fix some problems with the old Webers. Steve, Come on over and bring some wrenches, got a lot of work left to do. John |
| carr914 |
 Oct 25 2009, 10:11 AM Oct 25 2009, 10:11 AM
Post
#267
|
|
Racer from Birth                                                                                                     Group: Members Posts: 122,845 Joined: 2-February 04 From: Tampa,FL Member No.: 1,623 Region Association: South East States  |
John, I didn't know that you had a Raby/McMark, much less have it in the Living Room (IMG:style_emoticons/default/biggrin.gif)
T.C. |
| Gint |
 Oct 25 2009, 10:22 AM Oct 25 2009, 10:22 AM
Post
#268
|
|
Mike Ginter                Group: Admin Posts: 16,095 Joined: 26-December 02 From: Denver CO. Member No.: 20 Region Association: Rocky Mountains  |
(my wife will def. KILL me if i try to get the motor in the living room, or even the house) My wife is used to it! (IMG:style_emoticons/default/laugh.gif) Steve, Come on over and bring some wrenches, got a lot of work left to do. Careful, you'll scare the poor guy off. Killer progress. Getting closer all the time. Expect to be driving by Spring? Not that that matters in Florida. |
| FourBlades |
 Oct 25 2009, 06:39 PM Oct 25 2009, 06:39 PM
Post
#269
|
|
From Wreck to Rockin     Group: Members Posts: 2,056 Joined: 3-December 07 From: Brevard, FL Member No.: 8,414 Region Association: South East States 
|
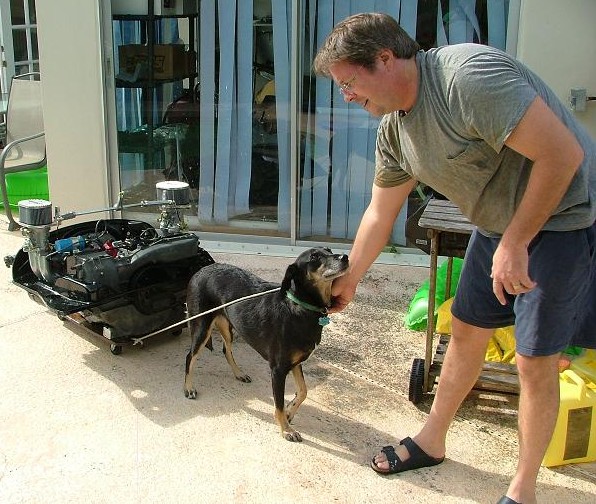
Hauling the engine out of the house.
 Getting ready to stuff it back in the car. 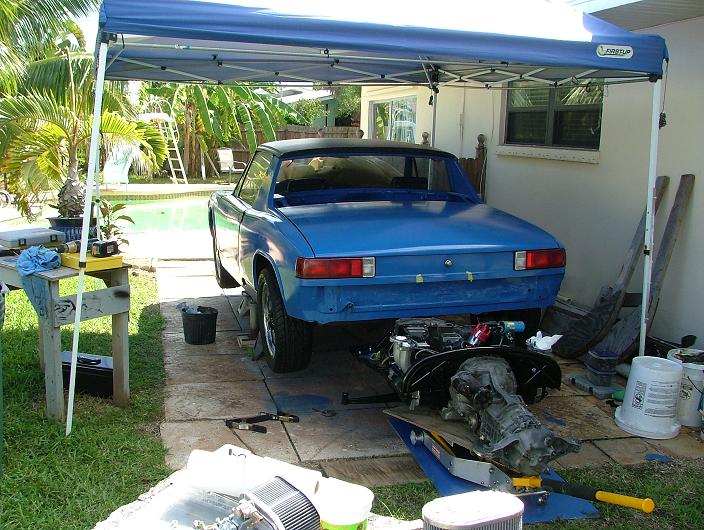 Using a motorcycle jack to lift it up. 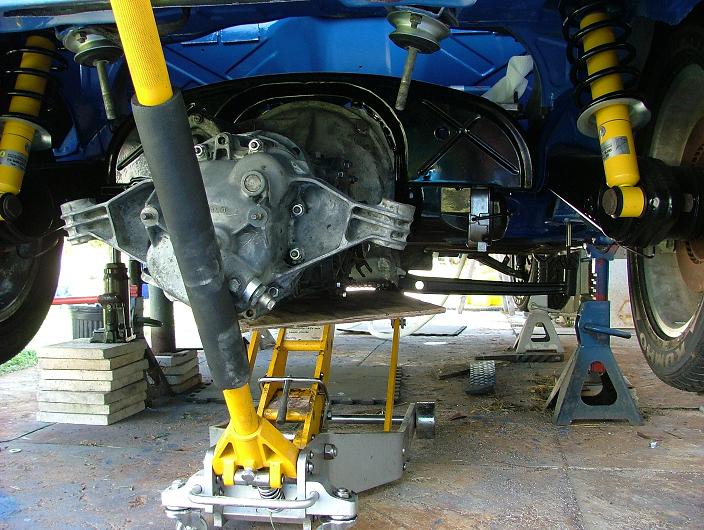 Using a second jack to lift the transmission. I ended up taking the transmission mounts off the car and put them on the transmission. Then lifted the transmission into place and bolted the mounts back onto the car. Because of the angle of the mounting bolts, I could not just lift the transmission straight up. 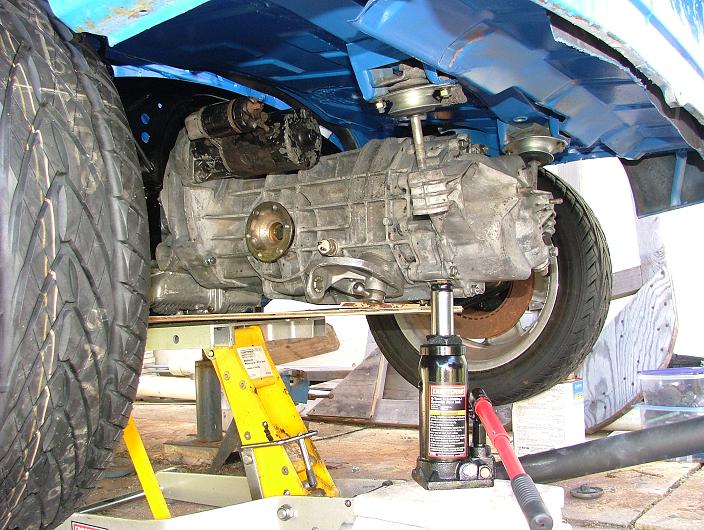 Not sure this is the concours way to do it, but it worked for me. |
| FourBlades |
 Oct 25 2009, 06:43 PM Oct 25 2009, 06:43 PM
Post
#270
|
|
From Wreck to Rockin     Group: Members Posts: 2,056 Joined: 3-December 07 From: Brevard, FL Member No.: 8,414 Region Association: South East States 
|
Engine is almost in there.
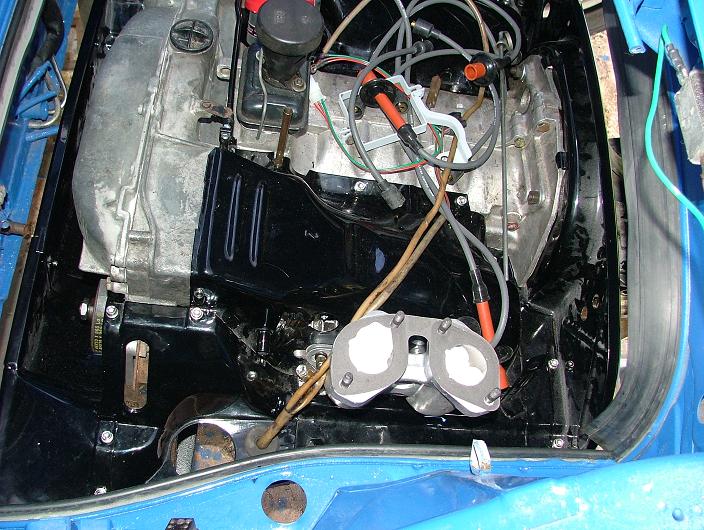 Engine is bolted in!!! (IMG:style_emoticons/default/piratenanner.gif) (IMG:style_emoticons/default/smilie_pokal.gif) (IMG:style_emoticons/default/piratenanner.gif) Hooked up the shift rods and gear shift lever. Also put in all new bushings. 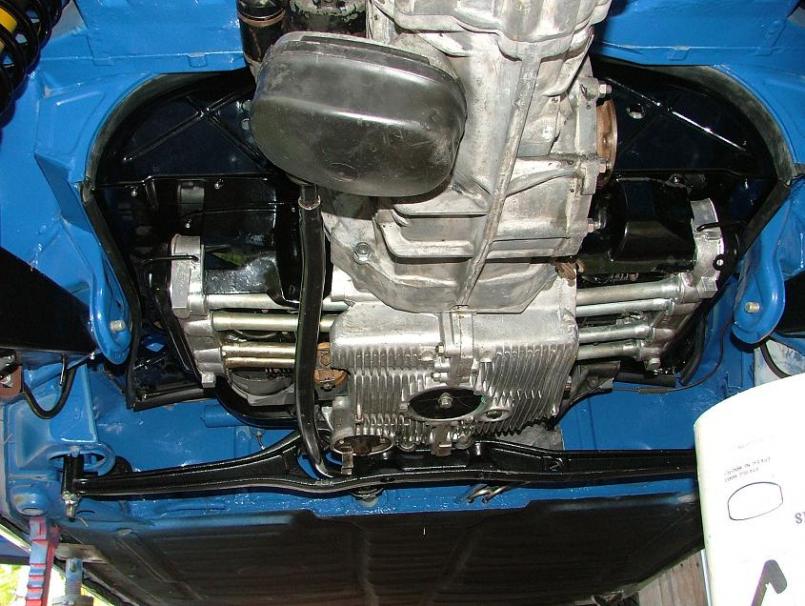 Still have to connect the fuel lines and the other controls. I think its time to stop milking this restoration and gitter done. John |
| carr914 |
 Oct 25 2009, 06:52 PM Oct 25 2009, 06:52 PM
Post
#271
|
|
Racer from Birth                                                                                                     Group: Members Posts: 122,845 Joined: 2-February 04 From: Tampa,FL Member No.: 1,623 Region Association: South East States  |
Damn John, you and that dog are quick workers. (IMG:style_emoticons/default/smash.gif)
It looks like the nuts are not on your control arm threads - I'd hate for you to lose your suspension the 1st trip around the block. T.C. |
| FourBlades |
 Oct 25 2009, 07:06 PM Oct 25 2009, 07:06 PM
Post
#272
|
|
From Wreck to Rockin     Group: Members Posts: 2,056 Joined: 3-December 07 From: Brevard, FL Member No.: 8,414 Region Association: South East States 
|
TC,
She is a special, German service dog, bred for the ability to read metric sizes. Thanks for pointing out the missing nuts. Those are a special, thin locking nut I believe, I must have them somewhere... Speaking of nuts, how much thread do you need to have sticking out of the wheel for your lug nuts to grip? I am worried by wheel studs are too short. I have some steel nuts and the thread only goes about half way into the nuts. John |
| sean_v8_914 |
 Oct 26 2009, 09:46 AM Oct 26 2009, 09:46 AM
Post
#273
|
|
Chingon 601     Group: Members Posts: 4,011 Joined: 1-February 05 From: San Diego Member No.: 3,541 |
1.5 x thread dia
|
| FourBlades |
 Nov 26 2009, 01:08 PM Nov 26 2009, 01:08 PM
Post
#274
|
|
From Wreck to Rockin     Group: Members Posts: 2,056 Joined: 3-December 07 From: Brevard, FL Member No.: 8,414 Region Association: South East States 
|
Front bumper with Auto Atlanta front fiberglass valence. This part comes with nice
gloss gel coat and fit perfectly right off the bat. George let me buy the first one they received when I was at the transmission clinic. The back of this valence is smoother than the front of the other fiberglass one I bought on ebay. It would probably fit even better if my front bumper had not been dented extensively and then straightened by me with a BFG. 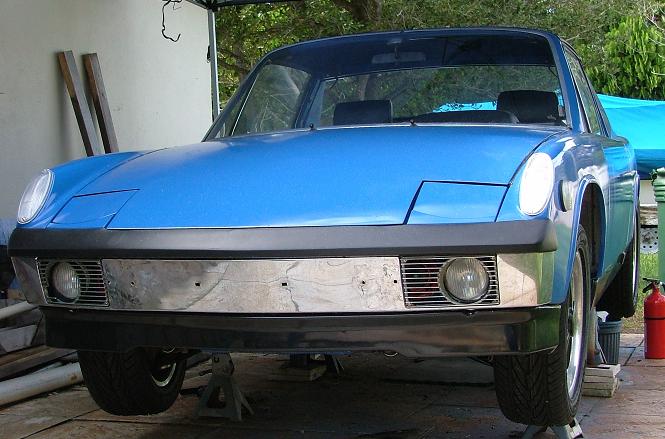 Rear bumper with my new license plate! Whoo hoo! It took me about 18 months to get a clear title and registration for this car. The DAPO lost the title and jerked me around about it for about 12 months, then moved out of state. What a freaking douche. I really need to go back and edit post #1 to tell the real story of this idiot and his BS lies. I'll tell ya how I took care of the title problem sometime, it is really not that hard, just cost about $500. 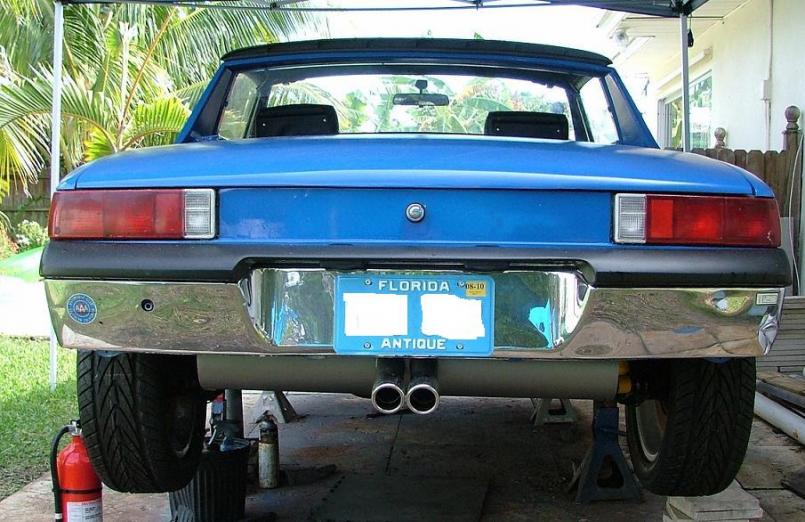 John |
| FourBlades |
 Nov 26 2009, 01:19 PM Nov 26 2009, 01:19 PM
Post
#275
|
|
From Wreck to Rockin     Group: Members Posts: 2,056 Joined: 3-December 07 From: Brevard, FL Member No.: 8,414 Region Association: South East States 
|
Put in the tangerine racing exhaust and headers. These parts are like a work of
art. I had them ceramic coated silver and they just look awesome. 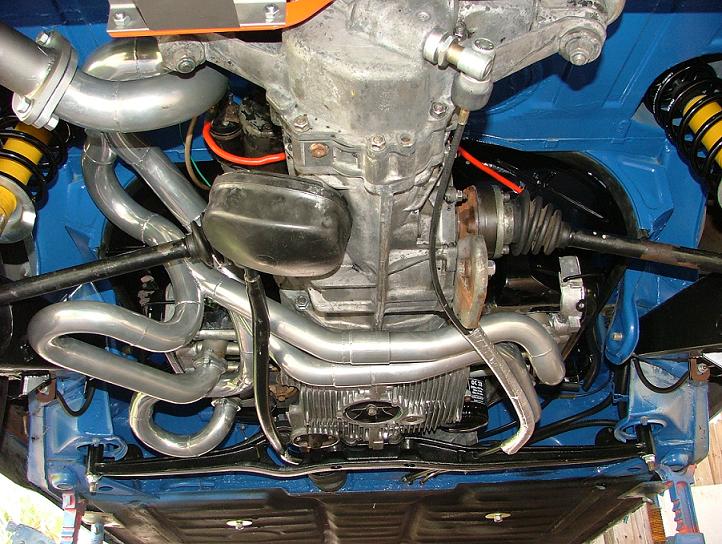 You can see the muffler in the previous post. I wanted the twin tips and will have to adjust my rear valence to fit them. I also put in my drive shafts. Here is a tip: put in the drive shafts before putting in the shift rod and exhaust. I did mine in the wrong order and had to pull them off and put them on again. 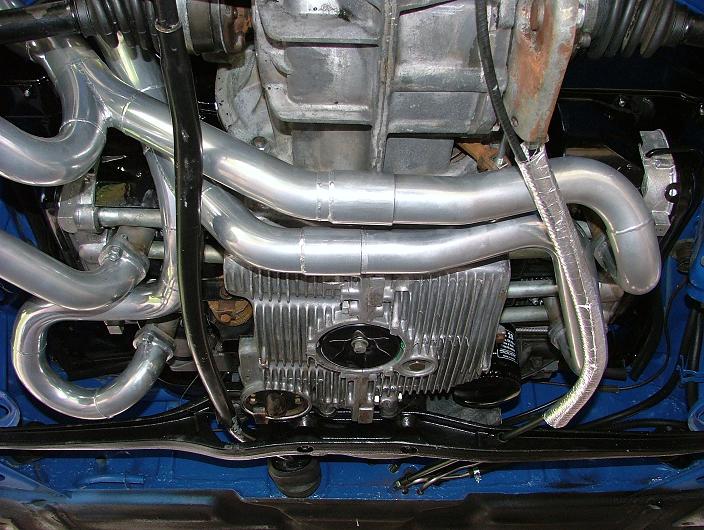 I could stare at those headers all day. Now I am on turkey duty because my wife works all day today. It is much easier to prepare a turkey than to rebuilt CV joints on your drive shafts. That must be the messiest job on a 914. I ended up throwing away the shirt I was wearing that day. I had to go to 4 autoparts stores before I found one with the proper moly grease, so don't assume it is easy to get. The parts geeks told me to just buy new axles assemblies because they are like $70 for most new cars. (IMG:style_emoticons/default/rolleyes.gif) Yeah, but how much is a new computer for your beemer i-drive system??? John |
| MDG |
 Nov 26 2009, 05:08 PM Nov 26 2009, 05:08 PM
Post
#276
|
|
Wolf in wolf's clothing.      Group: Members Posts: 8,652 Joined: 3-February 09 From: Toronto Member No.: 10,018 Region Association: None |
Excellent, John!!
Every time I look at this thread I'm reminded of how much I love Adriatic Blue. and Happy Thanksgiving! mike |
  |
1 User(s) are reading this topic (1 Guests and 0 Anonymous Users)
0 Members:

|
Lo-Fi Version | Time is now: 8th January 2025 - 06:13 AM |
Invision Power Board
v9.1.4 © 2025 IPS, Inc.


