|
|

|
Porsche, and the Porsche crest are registered trademarks of Dr. Ing. h.c. F. Porsche AG.
This site is not affiliated with Porsche in any way. Its only purpose is to provide an online forum for car enthusiasts. All other trademarks are property of their respective owners. |
|
|
  |
| FourBlades |
 Jun 14 2008, 10:58 AM Jun 14 2008, 10:58 AM
Post
#97
|
|
From Wreck to Rockin     Group: Members Posts: 2,056 Joined: 3-December 07 From: Brevard, FL Member No.: 8,414 Region Association: South East States 
|
Tom, Great work! Looks like you are making some good progress. Maybe someone has a door post from a wrecked car for you. Seems like it would be hard to repair that area otherwise. You should start your own progress thread so we can see what you are doing. Good luck...John |
| FourBlades |
 Jul 7 2008, 08:18 PM Jul 7 2008, 08:18 PM
Post
#98
|
|
From Wreck to Rockin     Group: Members Posts: 2,056 Joined: 3-December 07 From: Brevard, FL Member No.: 8,414 Region Association: South East States 
|
Got some rebuilt calipers recently from Eric Shea.
MMMM, tasty!!! 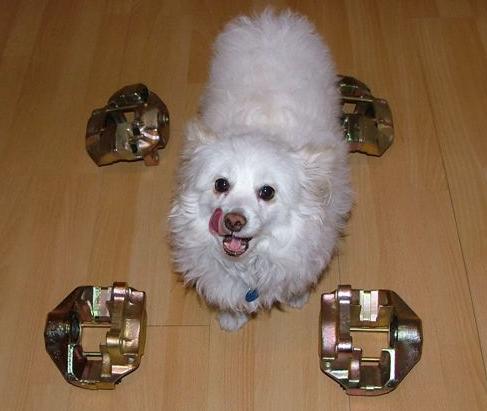 Eric's calipers are a thing of beauty and very reasonably priced, although there is a $100 core charge per foo foo dog. John |
| FourBlades |
 Jul 7 2008, 08:35 PM Jul 7 2008, 08:35 PM
Post
#99
|
|
From Wreck to Rockin     Group: Members Posts: 2,056 Joined: 3-December 07 From: Brevard, FL Member No.: 8,414 Region Association: South East States 
|
Closing up the firewall. I salvaged the e-brake tubes from an old firewall by
cutting out some sheet metal around them on the inside and outside walls. 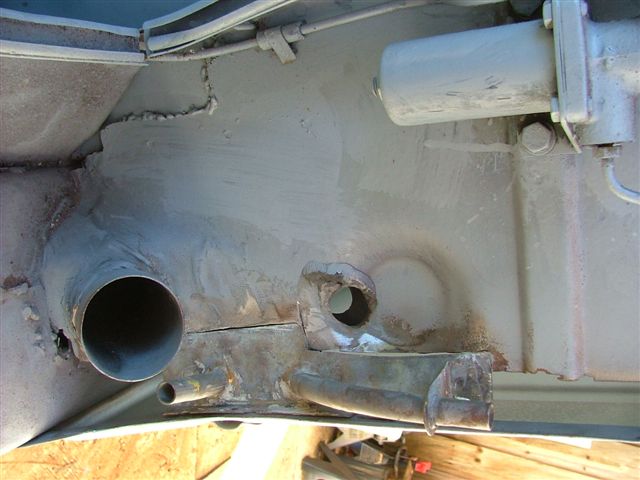 Here is the inside section. 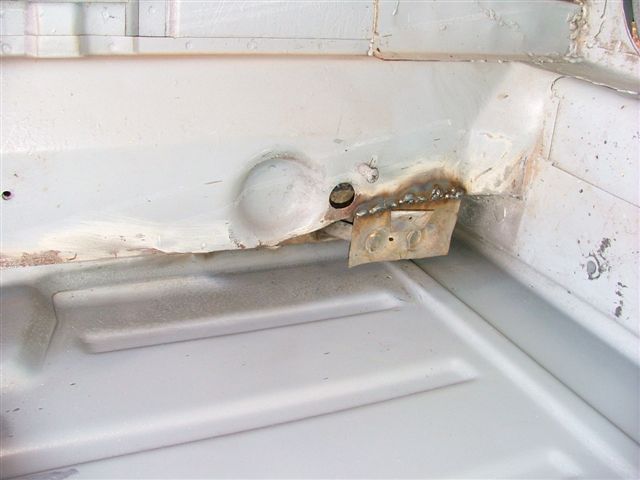 Did a hideous job of welding the outer piece in. Not sure why the welds came out so badly. Also made a small patch for the left side. 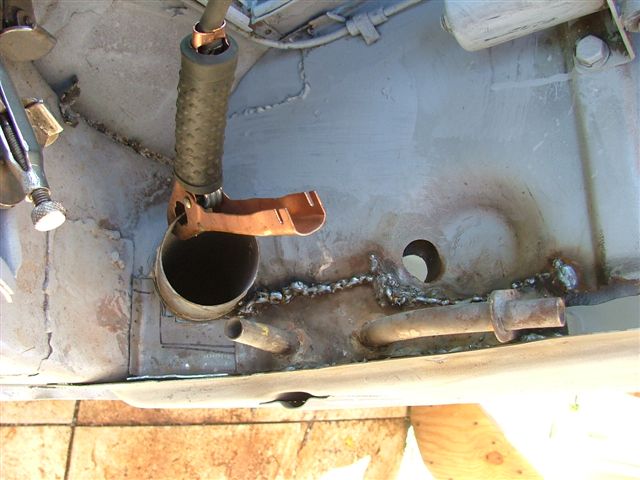 Made a patch for the passenger firewall section. 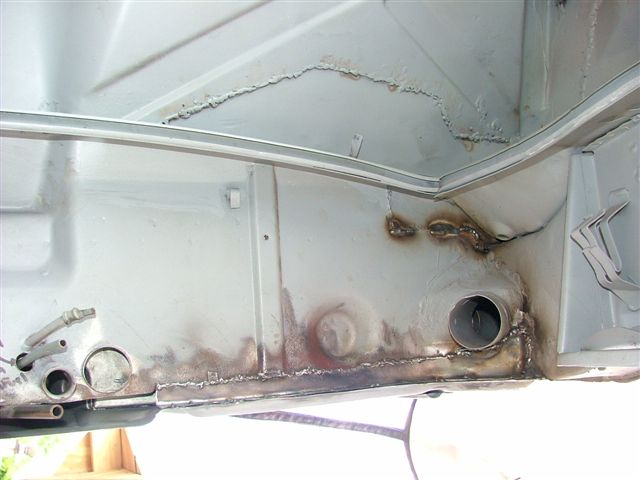 These welds turned out better. It ended up taking 9 separate patches to complete close up the inside and outside of the firewall and the result would make Mary Shelley proud. This is definitely a case where I would have been better off just buying the inner and outer repro pieces from Auto Atlanta. The hassle of drilling out all the spot welds to get the fragements of the old crap out would have been less than all the careful cutting and fitting I had to do for a look that will never pass for factory. The more I work on this, the more I want the sheet metal repairs to be close to original. |
| FourBlades |
 Jul 7 2008, 08:46 PM Jul 7 2008, 08:46 PM
Post
#100
|
|
From Wreck to Rockin     Group: Members Posts: 2,056 Joined: 3-December 07 From: Brevard, FL Member No.: 8,414 Region Association: South East States 
|
Inside of the firewall.
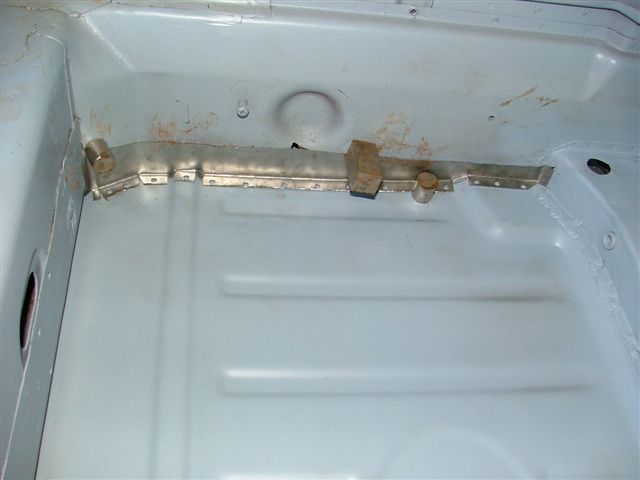 Firewall and tunnel sprayed with Eastwood silver rust encapsulator. 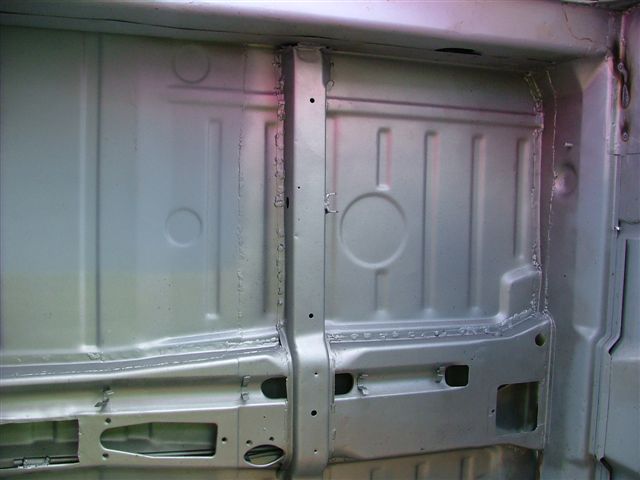 Almost done with the chassis work. Then its on to cosmetic sheet metal. (IMG:style_emoticons/default/mad.gif) The last post not withstanding I am tempted to make this thing into a rat rod and spray matte black primer over the rest of the rust and holes and be done with it... (IMG:style_emoticons/default/happy11.gif) John |
| FourBlades |
 Jul 17 2008, 02:21 PM Jul 17 2008, 02:21 PM
Post
#101
|
|
From Wreck to Rockin     Group: Members Posts: 2,056 Joined: 3-December 07 From: Brevard, FL Member No.: 8,414 Region Association: South East States 
|
I want to keep an eye on the tune and health of my engine so I am
thinking of running some additional gauges. I am getting a Raby 2270 built by McMark and want to keep it in good shape. I am thinking of using a wide band air fuel gauge, a cylinder head temperature gauge, an oil temperature gauge, and an oil pressure gauge. Because this will be a street/AX/DE car and I live in Florida I think the temperatures need watching. There is no VDO WB AF gauge, so I will probably buy autometer guages (or something) that are close to the VDO look. I will probably mount them on a home brewed center console. Any suggestions or ideas would help me out because I am just starting to work on my gauge approach. John |
| FourBlades |
 Aug 19 2008, 02:25 PM Aug 19 2008, 02:25 PM
Post
#102
|
|
From Wreck to Rockin     Group: Members Posts: 2,056 Joined: 3-December 07 From: Brevard, FL Member No.: 8,414 Region Association: South East States 
|
Its another beautiful day in the Sun Shine State. (IMG:style_emoticons/default/mad.gif)
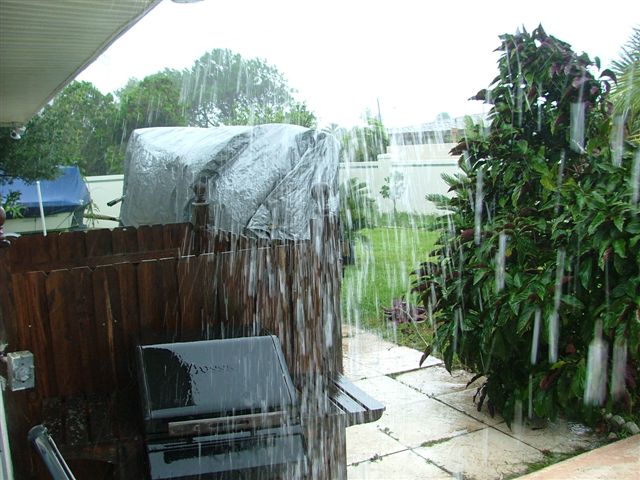 Just right for working on my 914 in my outdoor "garage". I hope my 914 rocker does not tip over, I have weighted the framework with bags of blasting media and some paving stones. The eye is forecast to pass right over my house with 65 mph winds. Maybe I will go to the beach instead of working on my car. (IMG:style_emoticons/default/rolleyes.gif) 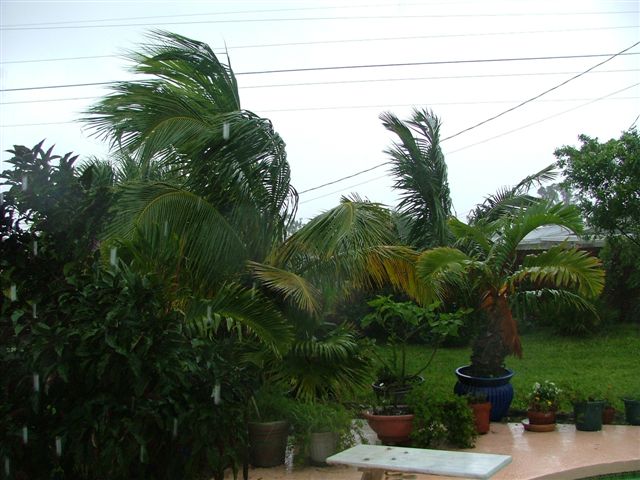 John |
| Eric_Shea |
 Aug 19 2008, 04:03 PM Aug 19 2008, 04:03 PM
Post
#103
|
|
PMB Performance                Group: Admin Posts: 19,289 Joined: 3-September 03 From: Salt Lake City, UT Member No.: 1,110 Region Association: Rocky Mountains  |
Stay dry and keep the wood side down! (IMG:style_emoticons/default/ohmy.gif)
Arms make it? 4 packages from thee arrived yesterday. (IMG:style_emoticons/default/wink.gif) |
| FourBlades |
 Aug 19 2008, 08:02 PM Aug 19 2008, 08:02 PM
Post
#104
|
|
From Wreck to Rockin     Group: Members Posts: 2,056 Joined: 3-December 07 From: Brevard, FL Member No.: 8,414 Region Association: South East States 
|
Eric, Yes, thanks I got the arms last week. They look fantastic. I have the cores boxed up and will send later this week. So far this storm has been no big deal here, just a lot of rain. John |
| 914rhatt |
 Aug 19 2008, 11:12 PM Aug 19 2008, 11:12 PM
Post
#105
|
|
Newbie  Group: Members Posts: 23 Joined: 7-July 08 From: Tonopah, Nevada Member No.: 9,263 Region Association: Intermountain Region |
WOW!!!! I just wanted to say thatwas remarkable....I have had two 914 for years one I drove for only a few years and the other I got as a donor car for the driver...I started to get my driver back on the road a few weeks ago and was kind of getting depressed with the rust...(Mind you nothing like what you were showing..) but still a bit...you have given me new energy to get mine back on the road...it has been setting for 18 years until a few weeks ago...Thanks for all the pic's and the inspirationto go on....
|
| FourBlades |
 Aug 20 2008, 10:59 AM Aug 20 2008, 10:59 AM
Post
#106
|
|
From Wreck to Rockin     Group: Members Posts: 2,056 Joined: 3-December 07 From: Brevard, FL Member No.: 8,414 Region Association: South East States 
|
Good luck! 90% of it is keeping your motivation going, that and: Everything I needed to know, I learned from 914World. (IMG:style_emoticons/default/piratenanner.gif) (IMG:style_emoticons/default/smilie_pokal.gif) John |
| FourBlades |
 Sep 17 2008, 05:58 PM Sep 17 2008, 05:58 PM
Post
#107
|
|
From Wreck to Rockin     Group: Members Posts: 2,056 Joined: 3-December 07 From: Brevard, FL Member No.: 8,414 Region Association: South East States 
|
OK, I'm back. I have made a buncha progress that I will be posting but lately
I have been busy with a lot of stuff that is no where near as important as my 914. I cut out some metal from the bottom of the long that was rusted very thin, made an 18 gauge patch and welded it in. 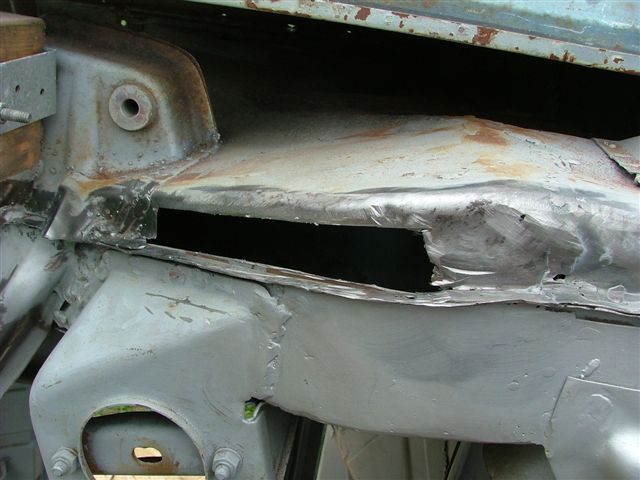 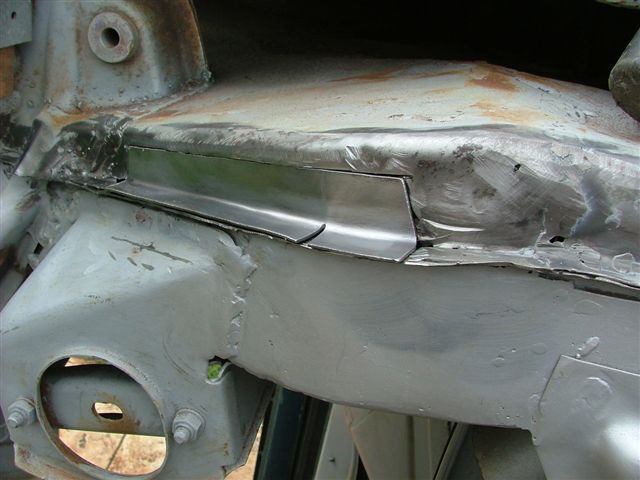 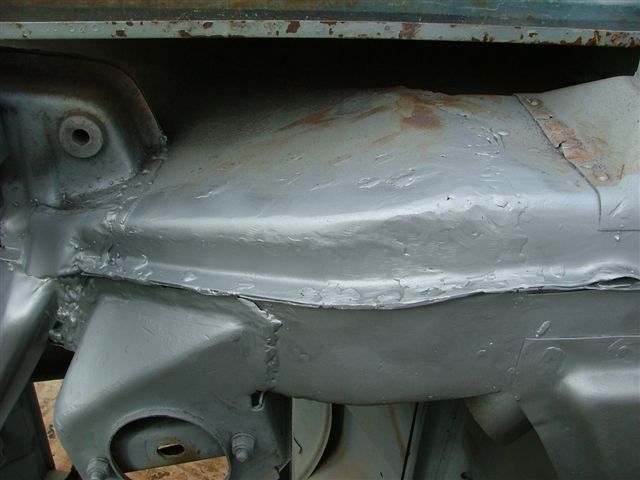 |
| FourBlades |
 Sep 17 2008, 06:04 PM Sep 17 2008, 06:04 PM
Post
#108
|
|
From Wreck to Rockin     Group: Members Posts: 2,056 Joined: 3-December 07 From: Brevard, FL Member No.: 8,414 Region Association: South East States 
|
I replaced one of the inner suspension consoles and finally got around to replacing
the 18 guage reinforcing plates that join the inner and outer sections. The inside and outside pieces of the pinch weld at the bottom of the long have gaps in between each spot weld. Like the forces on the suspension console halves have been trying to pull the long apart. You can see the gaps in the middle of the left side of the picture. (IMG:style_emoticons/default/idea.gif) (IMG:style_emoticons/default/idea.gif) (IMG:style_emoticons/default/idea.gif) 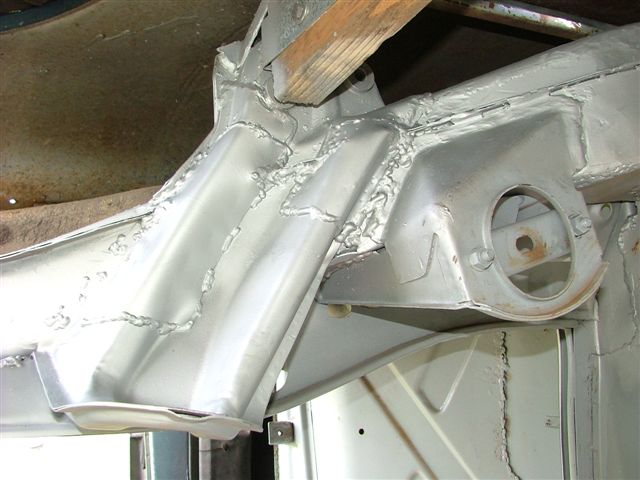 |
| FourBlades |
 Sep 17 2008, 06:18 PM Sep 17 2008, 06:18 PM
Post
#109
|
|
From Wreck to Rockin     Group: Members Posts: 2,056 Joined: 3-December 07 From: Brevard, FL Member No.: 8,414 Region Association: South East States 
|
The boxed reinforcement of the floor under my pedal area was cut off so I made
a reinforcing section from 18 guage and welded it on. Not sure if I over did it here but I think having a pedal box that does not flex is a Good Thing. 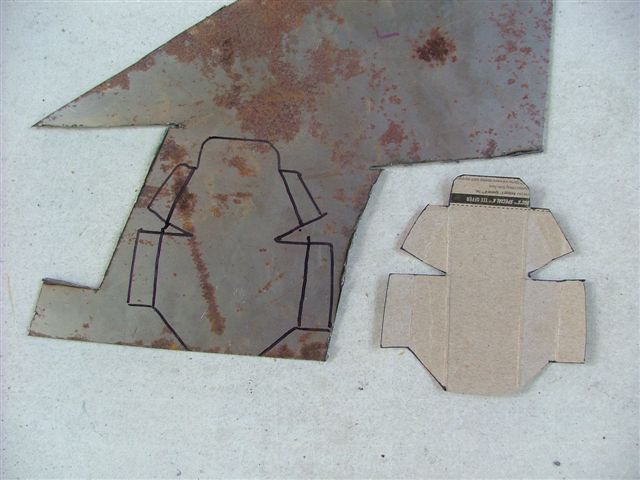 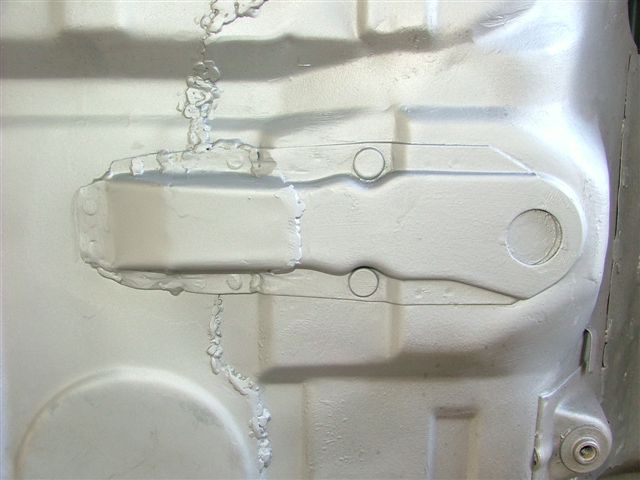 I also welded on the seat attachments. I determined where to put these pieces by temporarily screwing seat tracks onto them and installing the tilt adjustment combs. I could actually put seats in my 914 now and not have them fall through onto the ground. Not sure I can handle this... 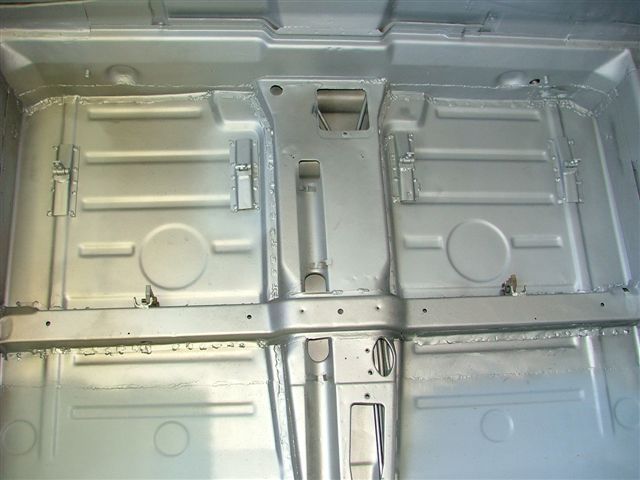 I'm trying to finish up everything that needs to get welded to the floor, so I can finish painting, seam sealing and undercoating it and turn my car back the way Porsche intended it to be. I need to do this before my "rotisserie" rots.... John |
| heavydriver |
 Sep 18 2008, 12:08 PM Sep 18 2008, 12:08 PM
Post
#110
|
|
Member   Group: Members Posts: 158 Joined: 7-August 04 From: Orlando, Fl. Member No.: 2,470 |
Will you be available for some consultationsin the near future ?????? (IMG:style_emoticons/default/driving.gif)
|
| FourBlades |
 Sep 18 2008, 12:29 PM Sep 18 2008, 12:29 PM
Post
#111
|
|
From Wreck to Rockin     Group: Members Posts: 2,056 Joined: 3-December 07 From: Brevard, FL Member No.: 8,414 Region Association: South East States 
|
Sure, what do you have in mind? Realize that I am no expert, just some guy
who learned a buncha stuff by reading about it and trying it out... John |
| carr914 |
 Sep 18 2008, 02:50 PM Sep 18 2008, 02:50 PM
Post
#112
|
|
Racer from Birth                                                                                                     Group: Members Posts: 122,568 Joined: 2-February 04 From: Tampa,FL Member No.: 1,623 Region Association: South East States  |
He wants to learn how to keep termites away. (IMG:style_emoticons/default/biggrin.gif)
Your projects looking good. T.C. |
| FourBlades |
 Sep 18 2008, 05:32 PM Sep 18 2008, 05:32 PM
Post
#113
|
|
From Wreck to Rockin     Group: Members Posts: 2,056 Joined: 3-December 07 From: Brevard, FL Member No.: 8,414 Region Association: South East States 
|
> He wants to learn how to keep termites away. (IMG:style_emoticons/default/biggrin.gif) (IMG:style_emoticons/default/biggrin.gif) (IMG:style_emoticons/default/biggrin.gif) I am seriously worried about the wood rotting soon. I should have painted it. If you are doing a big build thrash and BBQ I may be able to trek over and help out. I am sure I will learn some stuff... John |
| FourBlades |
 Sep 18 2008, 08:05 PM Sep 18 2008, 08:05 PM
Post
#114
|
|
From Wreck to Rockin     Group: Members Posts: 2,056 Joined: 3-December 07 From: Brevard, FL Member No.: 8,414 Region Association: South East States 
|
Time to replace the rusty rear trunk.
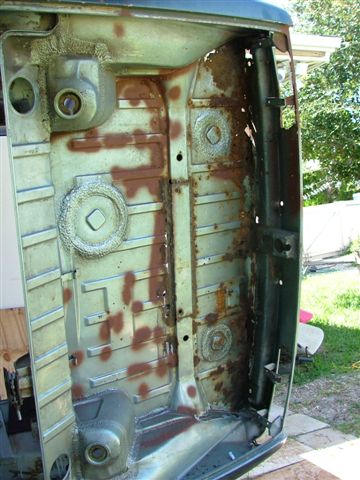 First I need to cure a painful case of 914 trunk inner tit rot. (IMG:style_emoticons/default/icon8.gif) 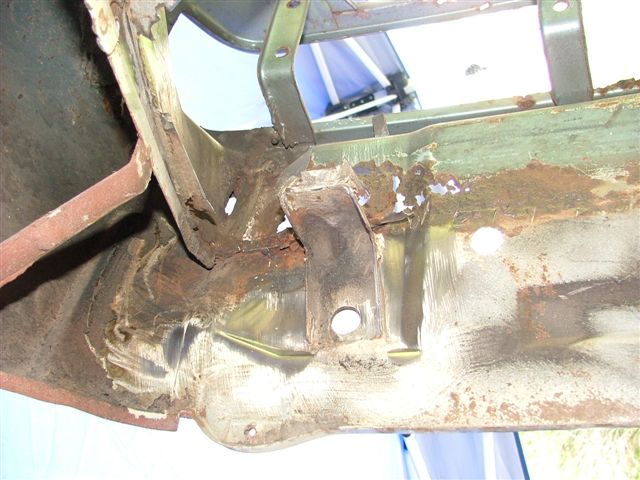 There are actually about six holes that need to be cut out and replaced on the rear whatever the ass panel of the car is called. 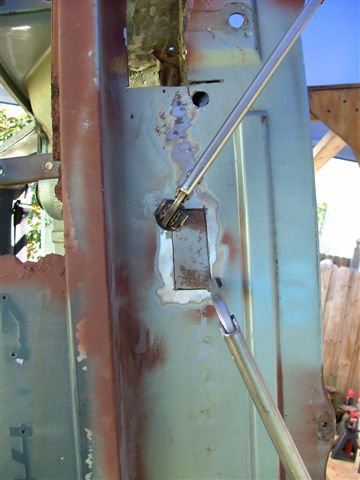 |
| FourBlades |
 Sep 18 2008, 08:13 PM Sep 18 2008, 08:13 PM
Post
#115
|
|
From Wreck to Rockin     Group: Members Posts: 2,056 Joined: 3-December 07 From: Brevard, FL Member No.: 8,414 Region Association: South East States 
|
Got five of the holes welded up and somewhat ground down.
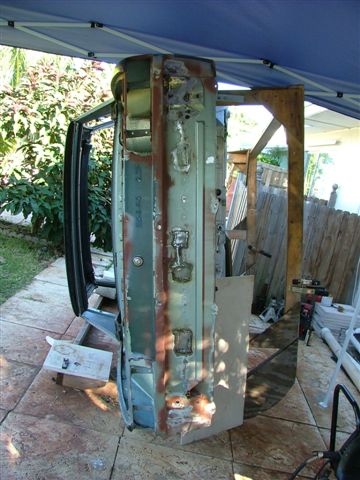 I decided to stop grinding when my neighbor started hurling good size coconuts in "support" of my project. While they make a good pina colada, they leave dents that I will have to pound out later... 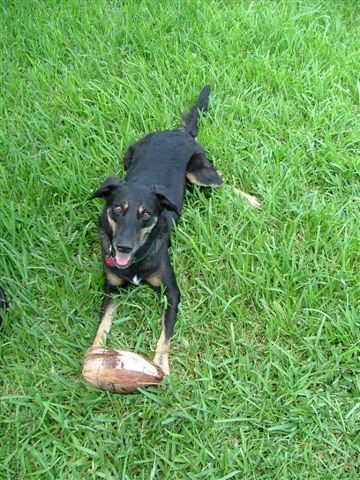 Test fit my replacement panel which should make a "nearly invisible repair" as they say. See if you can spot the new panel. 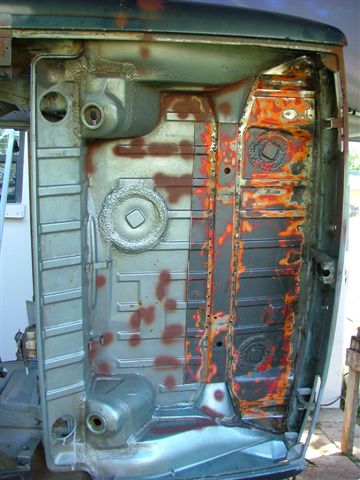 I really need to start drinking more... (IMG:style_emoticons/default/beer3.gif) (IMG:style_emoticons/default/beer.gif) (IMG:style_emoticons/default/beerchug.gif) John |
| FourBlades |
 Sep 19 2008, 05:39 PM Sep 19 2008, 05:39 PM
Post
#116
|
|
From Wreck to Rockin     Group: Members Posts: 2,056 Joined: 3-December 07 From: Brevard, FL Member No.: 8,414 Region Association: South East States 
|
Spare suspension mounts for ConeDodger. Threads look ok.
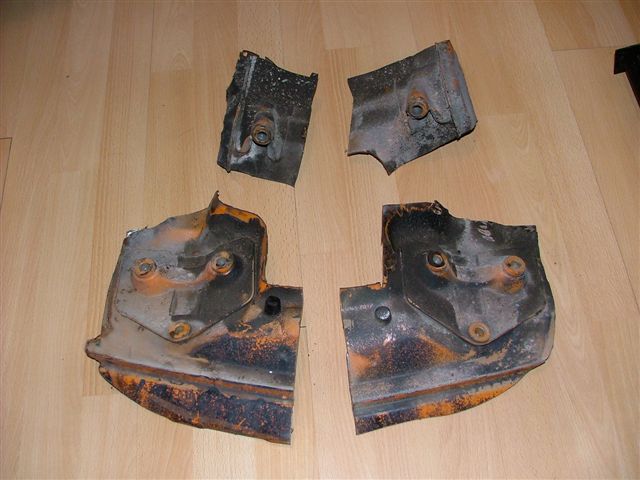 Is this what you are looking for? John |
  |
1 User(s) are reading this topic (1 Guests and 0 Anonymous Users)
0 Members:

|
Lo-Fi Version | Time is now: 27th December 2024 - 02:47 AM |
Invision Power Board
v9.1.4 © 2024 IPS, Inc.


