|
|
|
Porsche, and the Porsche crest are registered trademarks of Dr. Ing. h.c. F. Porsche AG.
This site is not affiliated with Porsche in any way. Its only purpose is to provide an online forum for car enthusiasts. All other trademarks are property of their respective owners. |
|
|

  |

| Spoke |
 Dec 8 2010, 08:02 PM Dec 8 2010, 08:02 PM
Post
#201
|
|
Jerry  Group: Members Posts: 7,084 Joined: 29-October 04 From: Allentown, PA Member No.: 3,031 Region Association: None |
After EZ Off...
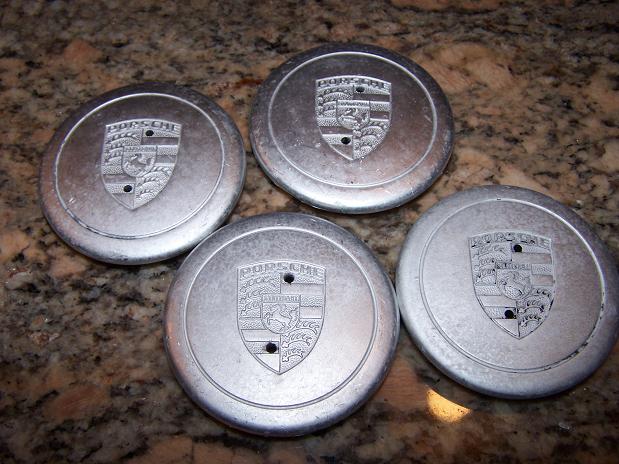 I quick polished one of them. Can you tell which one?  |
   |

 
|
| Spoke |
Dec 11 2010, 03:04 PM
Post
#202
|
|
Jerry Group: Members Posts: 7,084 Joined: 29-October 04 From: Allentown, PA Member No.: 3,031 Region Association: None |
Added the decel valve to the engine. I was getting backfiring on high rev (4K RPM) deceleration.
I read on pbanders rennlist FI site that the decel valve was designed to allow more air into the plenum on high vacuum conditions to get the fuel to burn more efficiently. It worked as the backfiring has stopped. I adjusted the opening to about 15psi vacuum which is a little low since the engine hangs sometimes at 1800 RPM instead of returning to idle. I've adjusted it up a little to allow return to idle speed. 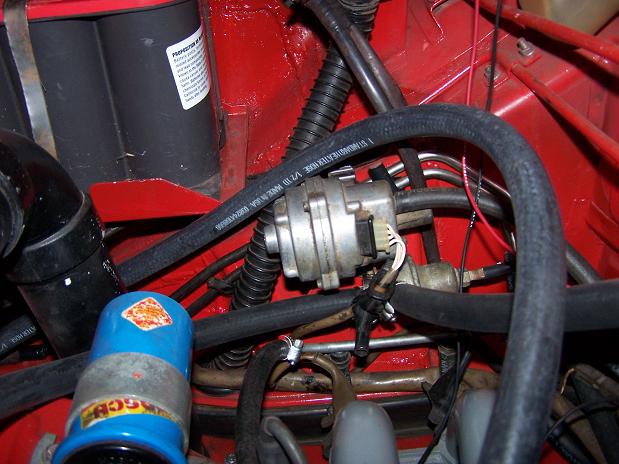 Installed the booster fan for the heater. Getting cold these days. Yep, that's PVC tubing for the warm air guides. 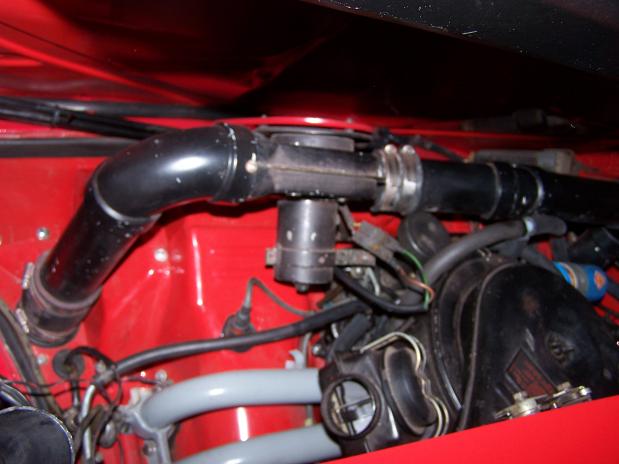 |
|
|
|
| Spoke |
Dec 20 2010, 11:47 PM
Post
#203
|
|
Jerry Group: Members Posts: 7,084 Joined: 29-October 04 From: Allentown, PA Member No.: 3,031 Region Association: None |
Got most of the grind marks off of the one 6x16 wheel. Had to use 80 grit sand paper to get the grind marks out. Damn PO used some sort of power tool to remove the paint/anodizing instead of using chemicals to do the work for him.
Now starting to polish by starting with 220 wet-o-dry sandpaper. Will use 400, 600, 1000, 1500, 2000, then rubbing compound, then polishing compound, then paint. Attached image(s) 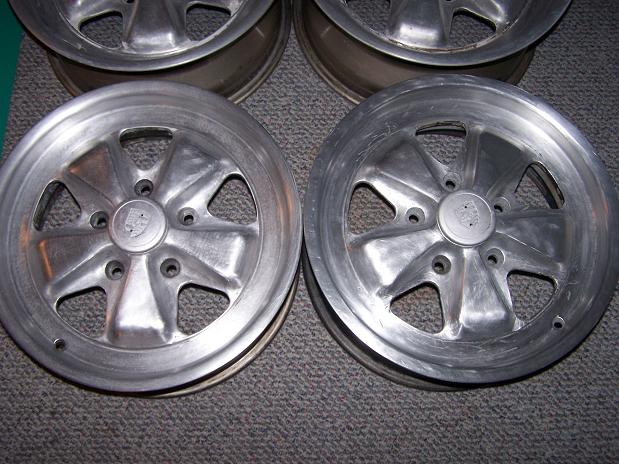
|
|
|
|
| Spoke |
Jan 16 2011, 08:06 PM
Post
#204
|
|
Jerry Group: Members Posts: 7,084 Joined: 29-October 04 From: Allentown, PA Member No.: 3,031 Region Association: None |
Finally got around to doing some more work on the longs. The bottom of the inner longs were completely gone and the PO spot-brazed some patches on connecting them to the top of the patch on the inner long and the rusty floor.
What I plan to do is remove the patches and securely patch the inner long then put on Engman's inner long support kit. I left the driver seat in the car and the center console so I used some 1/4 inch plywood to protect the interior from welding splatters. Attached image(s)  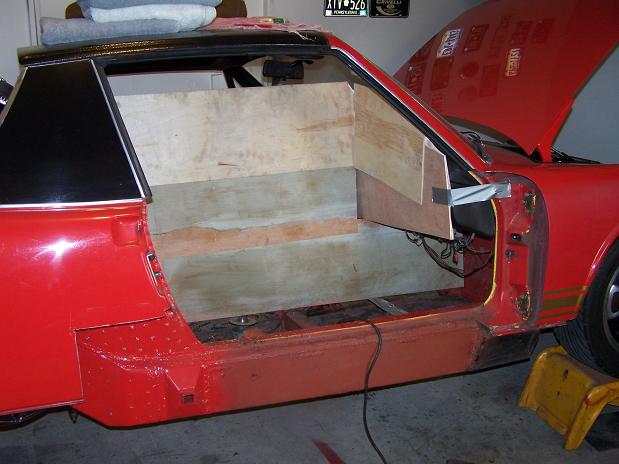 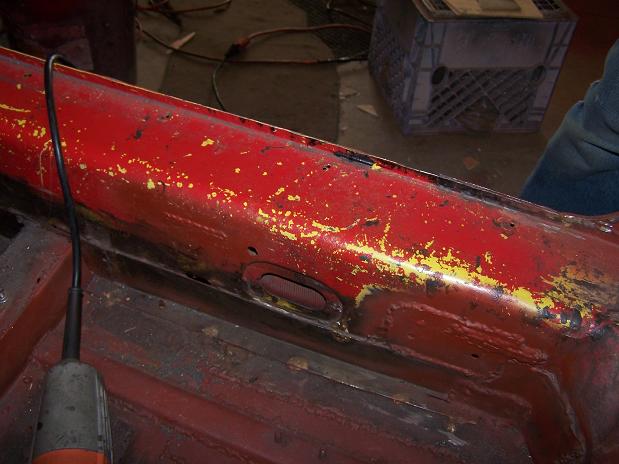 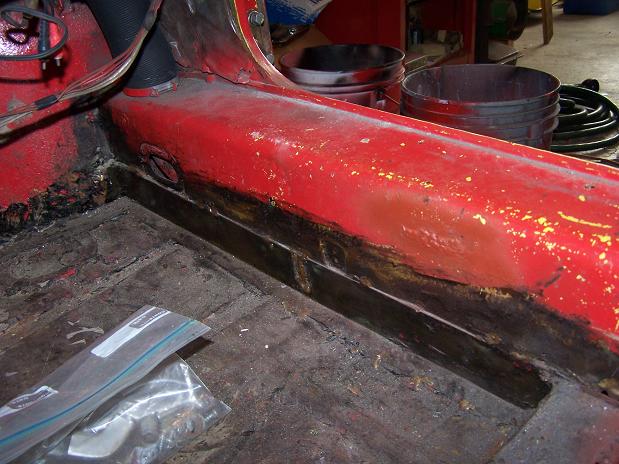
|
|
|
|
| Spoke |
Jan 16 2011, 08:22 PM
Post
#205
|
|
Jerry Group: Members Posts: 7,084 Joined: 29-October 04 From: Allentown, PA Member No.: 3,031 Region Association: None |
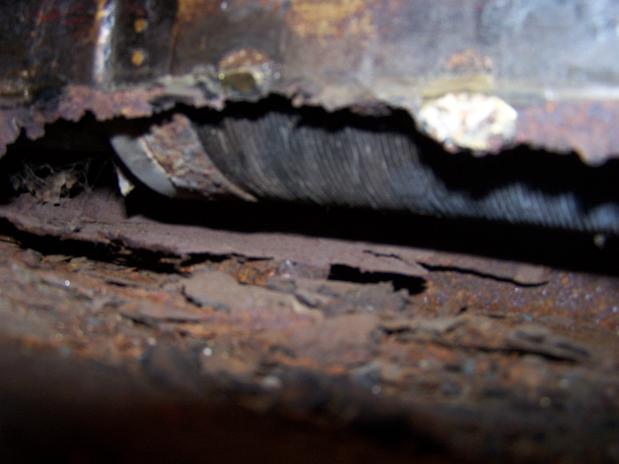
Got the first patch off. Lots of rust and rocks inside the longs. The top of the outer patch piece was never closed up so flying rocks were able to get inside the long along with water. I sprayed as best I could with stop-rust.
 Now it's all cleaned up and primed for the new, stronger patch. The new patch will be installed from below and will wrap around to the bottom of the long patch. I cut a slice in the bottom of the long patch. BTW, the entire bottom and outside of the long are one piece of 16-gauge steel the PO bent and welded where the totally gone part of the outer and bottom long went. 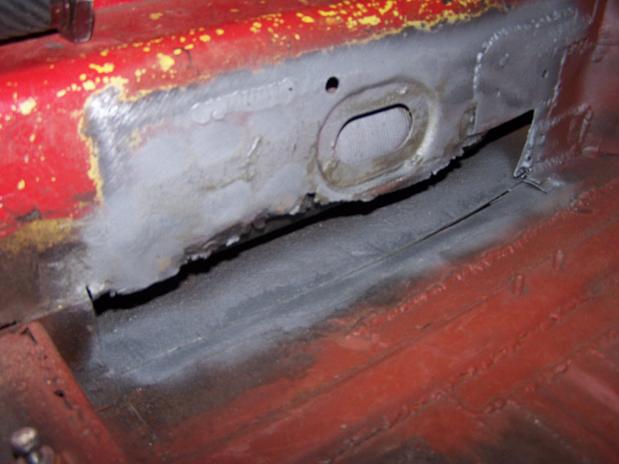 Here's the bottom of the long. This one piece is the entire bottom of the long and wraps up the outside of the long. Such is the fate of a PA 914 rust bucket. 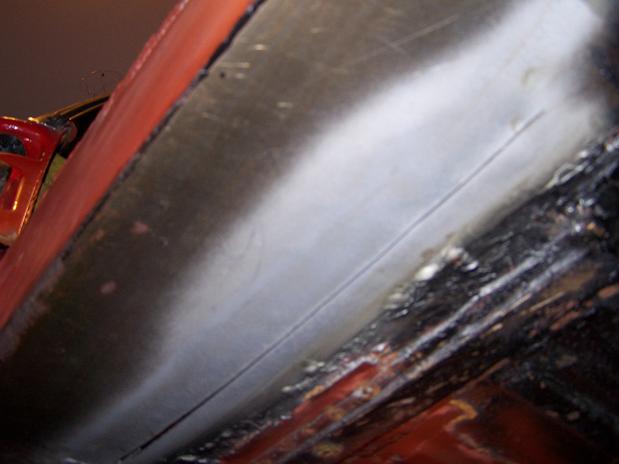 Here is the new patch cut, drilled and primed and ready to be welded in. Unlike a lot of guys who would've cut out all the PO's patches and put in new steel, I have no desire to start over from that point. With the PO's patches, the car was ok solid, not great. The work I've done has really solidified the chassis so far. I want to drive my 914, not work on it for years. I had it off the road for 2 years changing the engine and tranny. I couldn't fathom taking it off the road for another 2 years to put all new steel in the longs. I know it's not stock but it's getting pretty stiff (That's what she said - Michael Scott) with all the new patches. 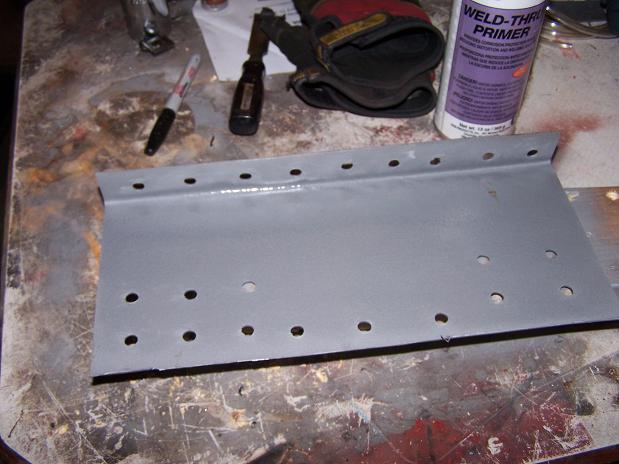 |
|
|
|
| Spoke |
Jan 23 2011, 11:17 AM
Post
#206
|
|
Jerry Group: Members Posts: 7,084 Joined: 29-October 04 From: Allentown, PA Member No.: 3,031 Region Association: None |
First patch is welded in.
Attached image(s) 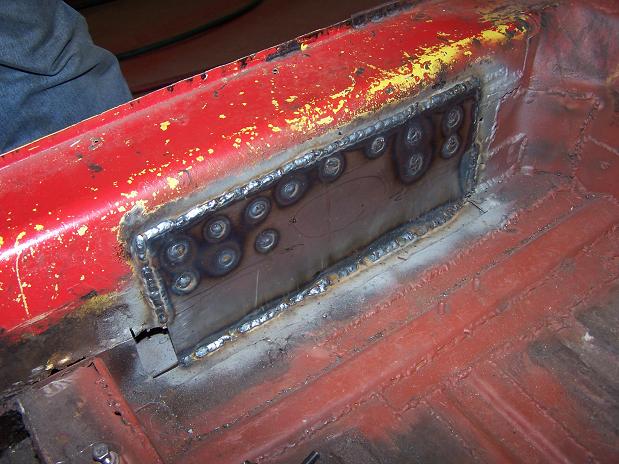 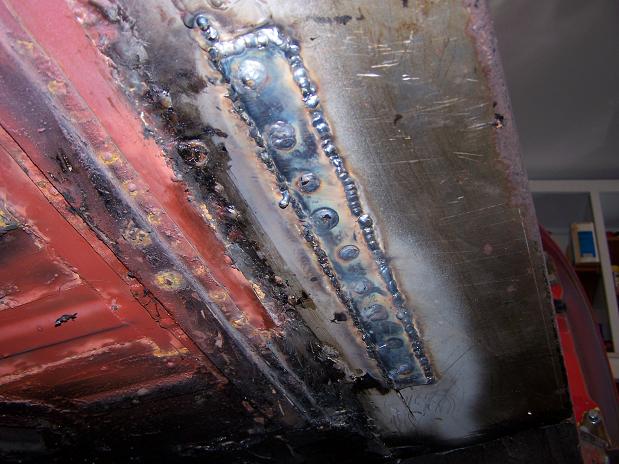
|
|
|
|
| Spoke |
Jan 23 2011, 10:13 PM
Post
#207
|
|
Jerry Group: Members Posts: 7,084 Joined: 29-October 04 From: Allentown, PA Member No.: 3,031 Region Association: None |
Finished polishing the new wheels. Not quite Ed Reed shiny but shiny enough for me. Will clean them up and paint the background.
Attached image(s) 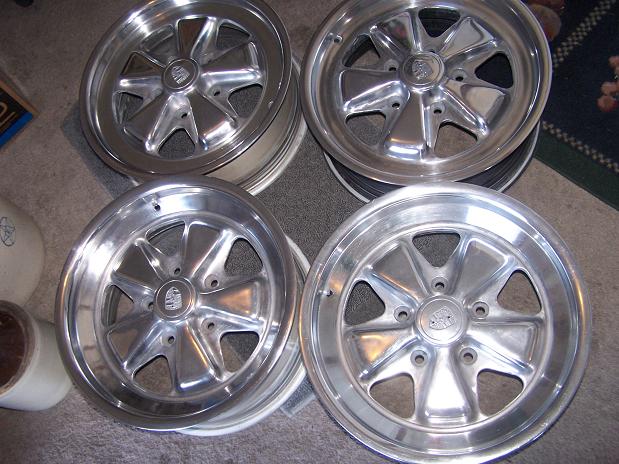 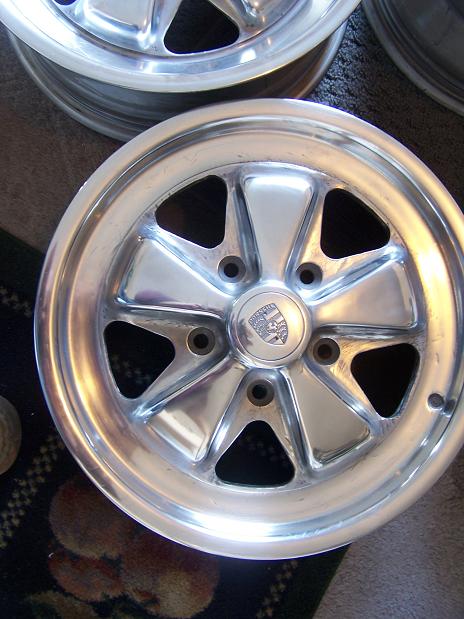 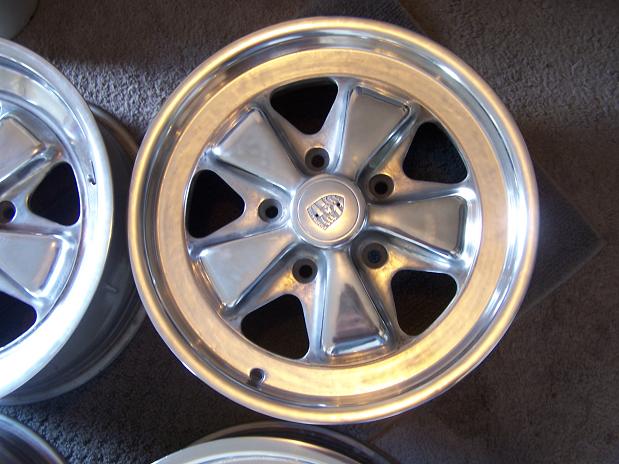 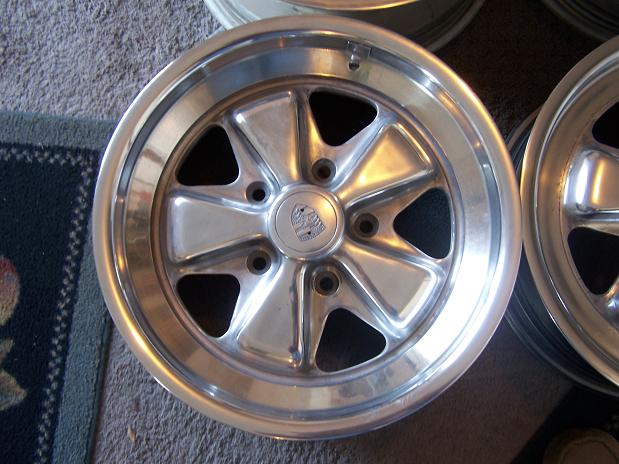
|
|
|
|
| Spoke |
Jan 31 2011, 09:57 PM
Post
#208
|
|
Jerry Group: Members Posts: 7,084 Joined: 29-October 04 From: Allentown, PA Member No.: 3,031 Region Association: None |
Continuing to reinforce the inner long on the passenger side. The entire long was rusted out on the bottom.
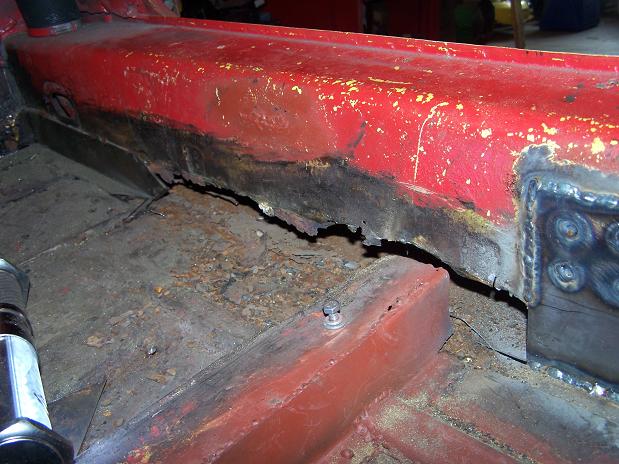   Here's the piece that was brazed on and went behind the center brace. 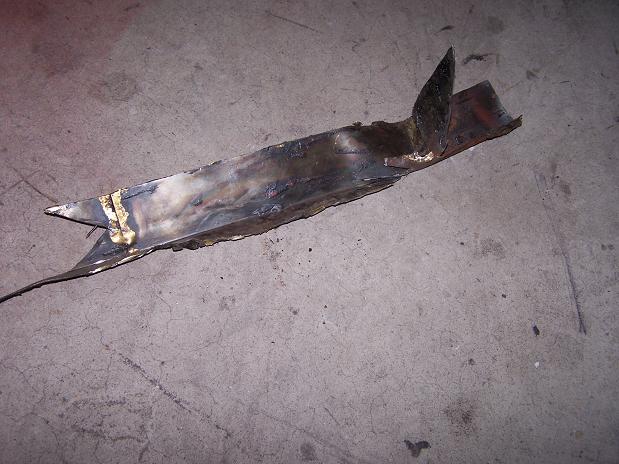 |
|
|
|
| Spoke |
Jan 31 2011, 10:13 PM
Post
#209
|
|
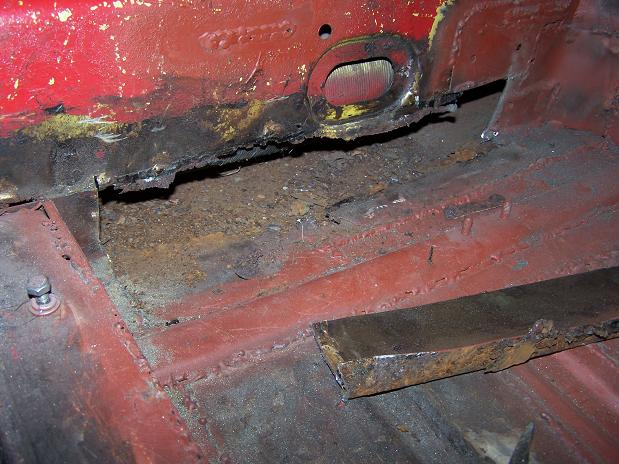
Jerry Group: Members Posts: 7,084 Joined: 29-October 04 From: Allentown, PA Member No.: 3,031 Region Association: None |
Got the center plate welded in. Now to work on the front plate. The long was rusted out all the way to the wheel well.
Attached image(s) 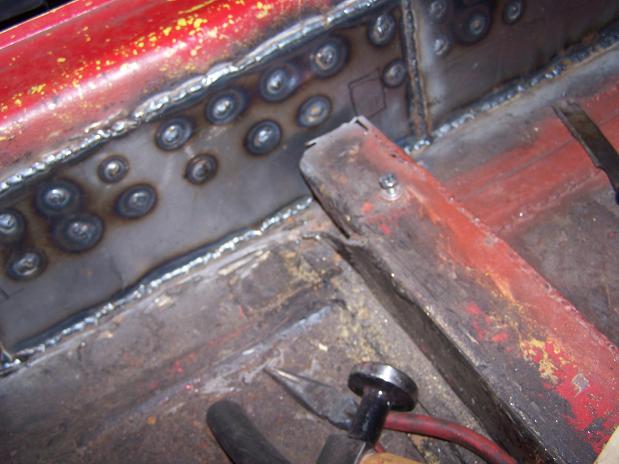 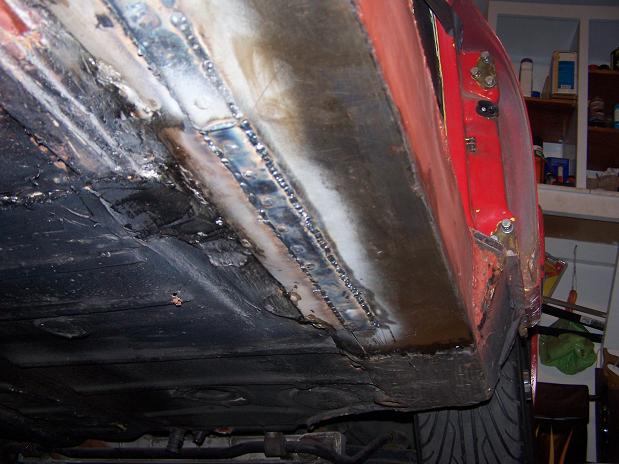 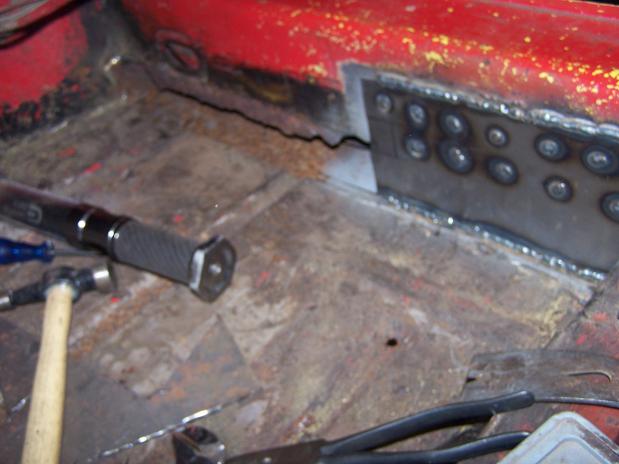
|
|
|
|
| Spoke |
Jan 31 2011, 10:16 PM
Post
#210
|
|
Jerry Group: Members Posts: 7,084 Joined: 29-October 04 From: Allentown, PA Member No.: 3,031 Region Association: None |
Got the front patch panel welded in. The inner long will be further strengthened by Engman's inner long kit. But I have to do the same thing to the driver side. (IMG:style_emoticons/default/dry.gif)
Attached image(s) 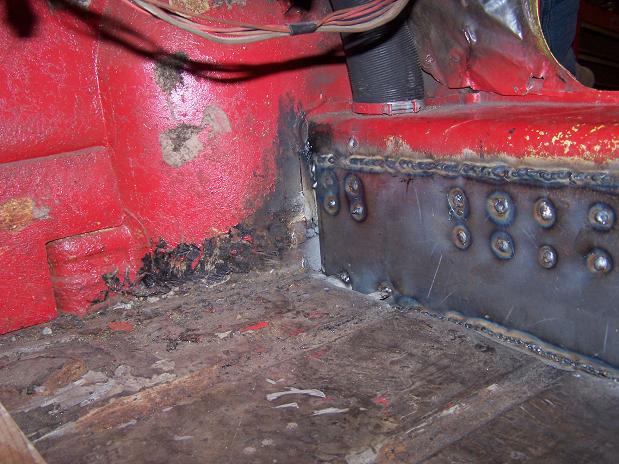 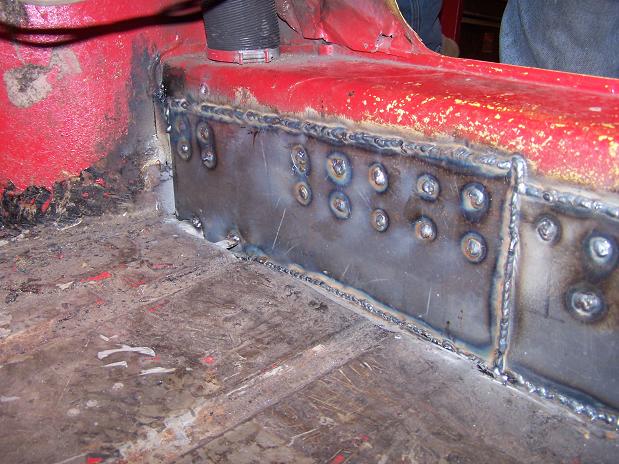 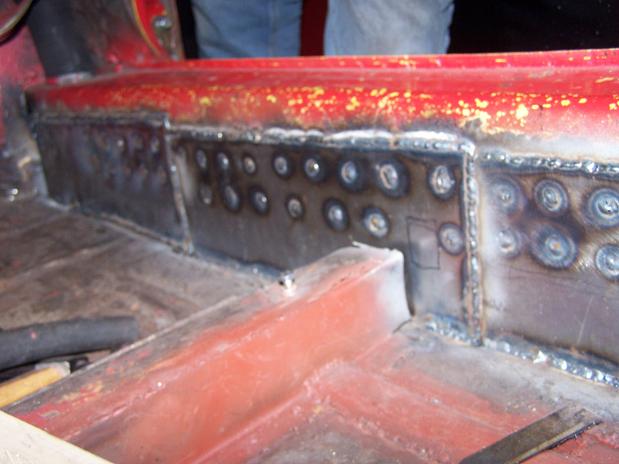
|
|
|
|
| Spoke |
Feb 18 2011, 10:15 PM
Post
#211
|
|
Jerry Group: Members Posts: 7,084 Joined: 29-October 04 From: Allentown, PA Member No.: 3,031 Region Association: None |
Added one piece on to tie the inner long patch to the wheel well.
Attached image(s) 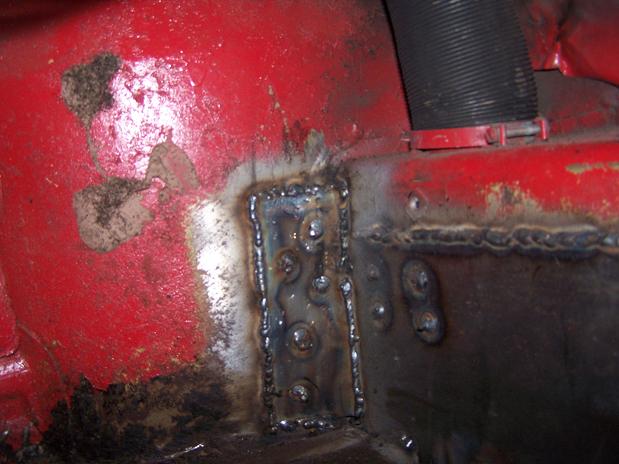
|
|
|
|
| Spoke |
Feb 18 2011, 10:20 PM
Post
#212
|
|
Jerry Group: Members Posts: 7,084 Joined: 29-October 04 From: Allentown, PA Member No.: 3,031 Region Association: None |
Had a couple of holes in the floor so I cut out most of the rust in that area.
 Made a new piece just like the old one (except with no rust).  And all welded in. 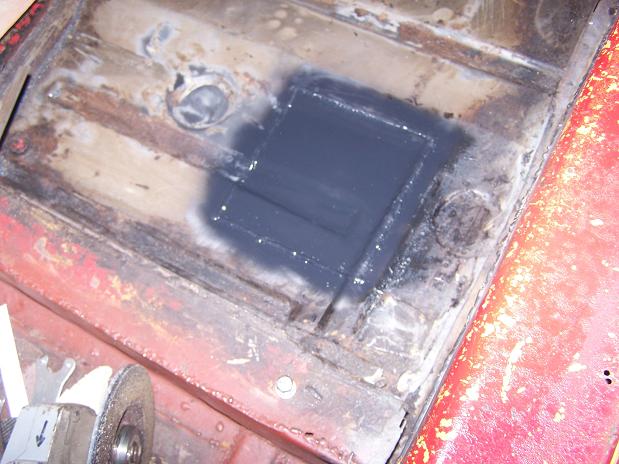  |
|
|
|
| Andyrew |
Feb 19 2011, 10:04 PM
Post
#213
|
|
Spooling.... Please wait Group: Members Posts: 13,377 Joined: 20-January 03 From: Riverbank, Ca Member No.: 172 Region Association: Northern California |
Nice patchwork! Good looking welds!
|
|
|
|
| Spoke |
Feb 21 2011, 11:23 PM
Post
#214
|
|
Jerry Group: Members Posts: 7,084 Joined: 29-October 04 From: Allentown, PA Member No.: 3,031 Region Association: None |
QUOTE(esses62 @ Feb 19 2011, 11:40 PM)  (IMG:style_emoticons/default/biggrin.gif) Very inspirational. What tools are you using to shape the metal? Tin Snips, Hands, hammer, Brake? Thanks, all the metal I'm adding will require me to put a bigger engine in it later. (IMG:style_emoticons/default/aktion035.gif) I've been using the angle grinder to cut the steel as to not deform it with snips. Then using various fender hammers and my vice to bend the steel in the right places. |
|
|
|
| Spoke |
Feb 21 2011, 11:26 PM
Post
#215
|
|
Jerry Group: Members Posts: 7,084 Joined: 29-October 04 From: Allentown, PA Member No.: 3,031 Region Association: None |
Got the Engman's inner long welded on the passenger side. Covers up all those patches on the longs.
Attached image(s) 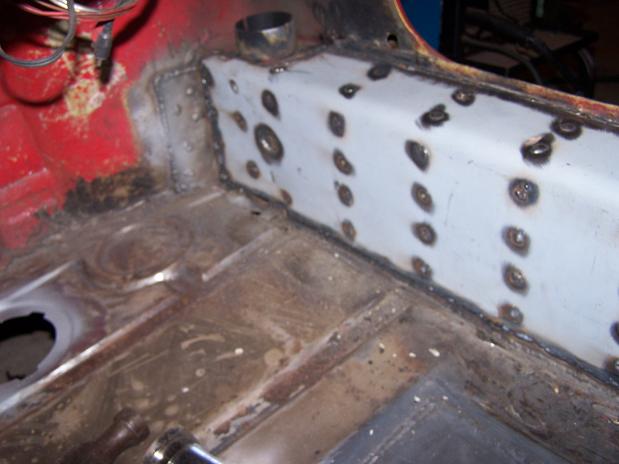 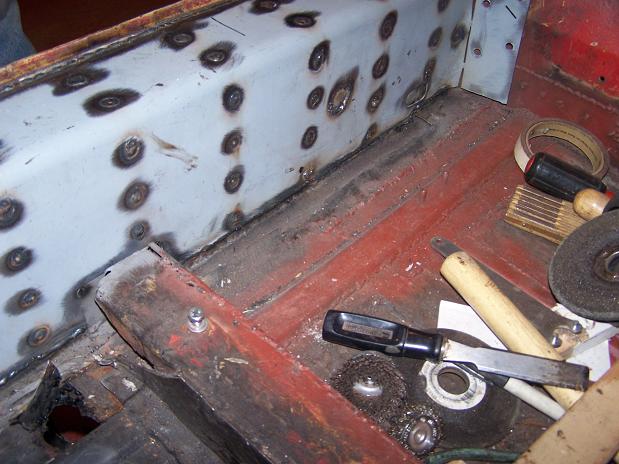
|
|
|
|
| Spoke |
Feb 21 2011, 11:28 PM
Post
#216
|
|
Jerry Group: Members Posts: 7,084 Joined: 29-October 04 From: Allentown, PA Member No.: 3,031 Region Association: None |
This access plug was all bent up and loose so I straightened the floor and plug and welded it on.
Attached image(s) 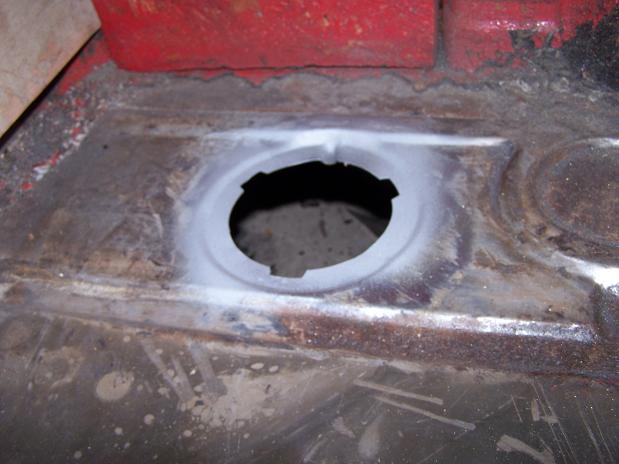 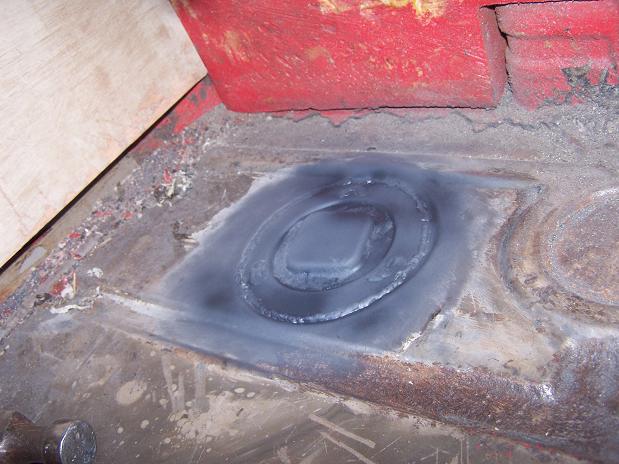
|
|
|
|
| Spoke |
Feb 21 2011, 11:31 PM
Post
#217
|
|
Jerry Group: Members Posts: 7,084 Joined: 29-October 04 From: Allentown, PA Member No.: 3,031 Region Association: None |
So I just noticed this patch that was brazed on. Off with the patch and will weld in a new piece. Also need to finish attaching the cross member to the inner long.
Attached image(s) 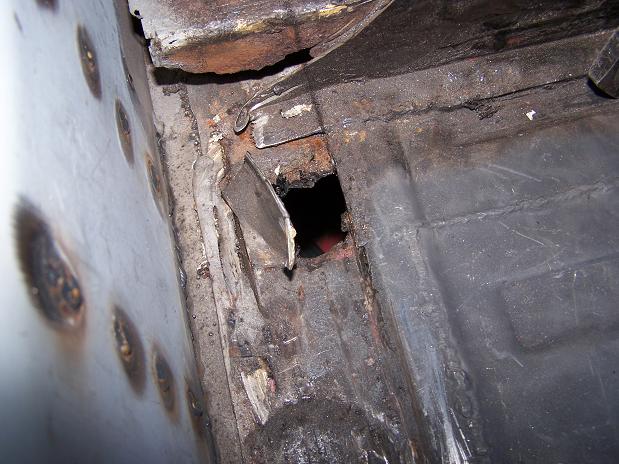 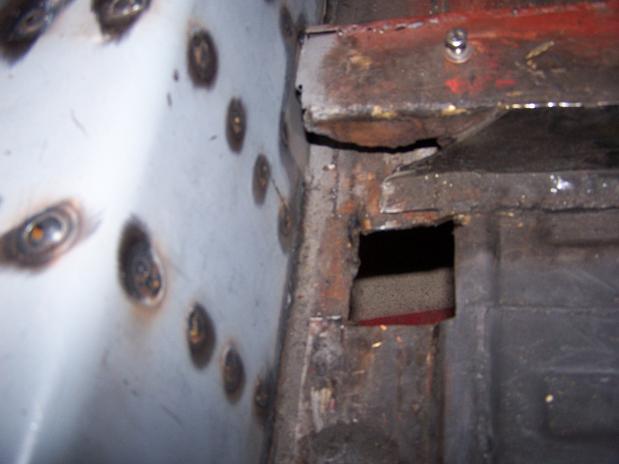
|
|
|
|
| Root_Werks |
Feb 22 2011, 02:30 PM
Post
#218
|
|
Village Idiot Group: Members Posts: 8,484 Joined: 25-May 04 From: About 5NM from Canada Member No.: 2,105 Region Association: Pacific Northwest |
Nice, you'll really like the inner long kit. It makes a big difference. (IMG:style_emoticons/default/welder.gif)
|
|
|
|
| Spoke |
Feb 25 2011, 08:25 AM
Post
#219
|
|
Jerry Group: Members Posts: 7,084 Joined: 29-October 04 From: Allentown, PA Member No.: 3,031 Region Association: None |
Got the wheels painted. Not really happy with the paint job but it will do for now.
For the rest of the 5-lug conversion, I need to: - Find late 80's 911 strut/hubs/rotors/calipers (have A-Arm & underbody swaybar) - Redrill rear rotors (have 5-lug hubs & new bearings) - 19mm master cylinder - Tires - Roll the rear fenders for the 7x16 wheels Attached image(s) 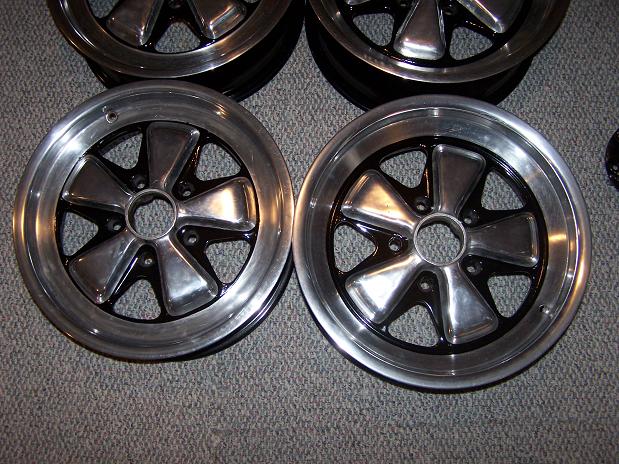 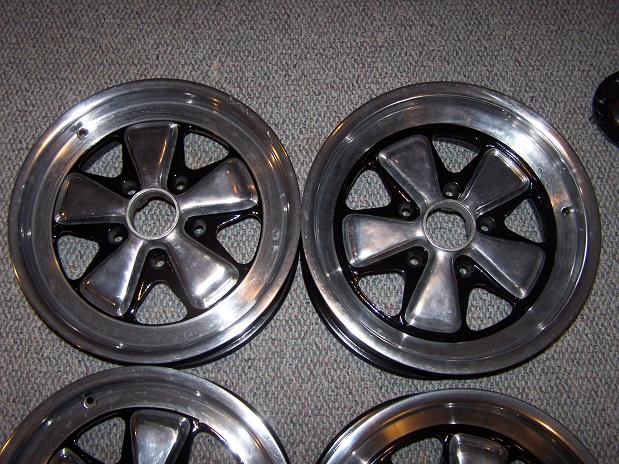 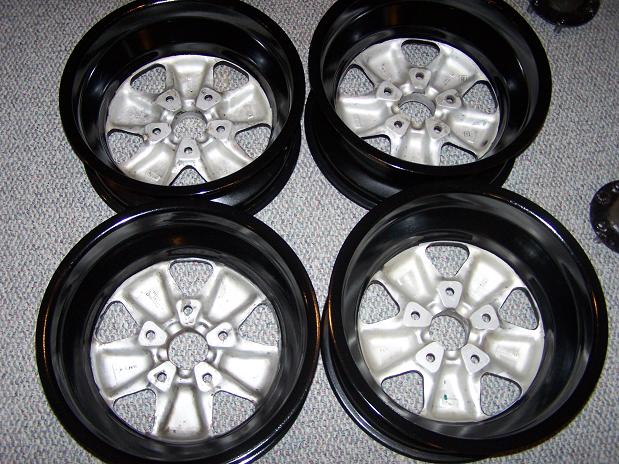
|
|
|
|
| Spoke |
Feb 28 2011, 10:14 PM
Post
#220
|
|
Jerry Group: Members Posts: 7,084 Joined: 29-October 04 From: Allentown, PA Member No.: 3,031 Region Association: None |
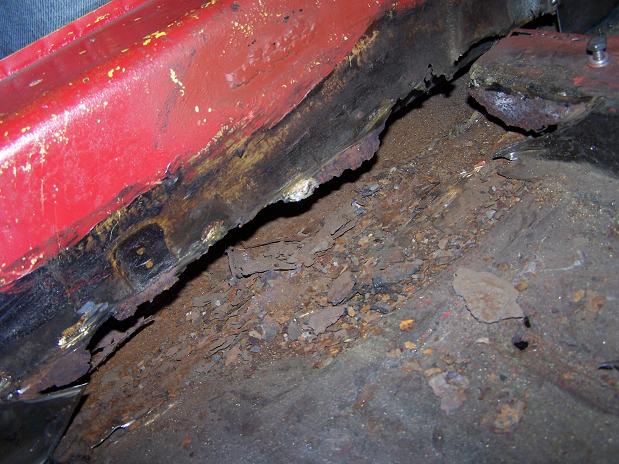
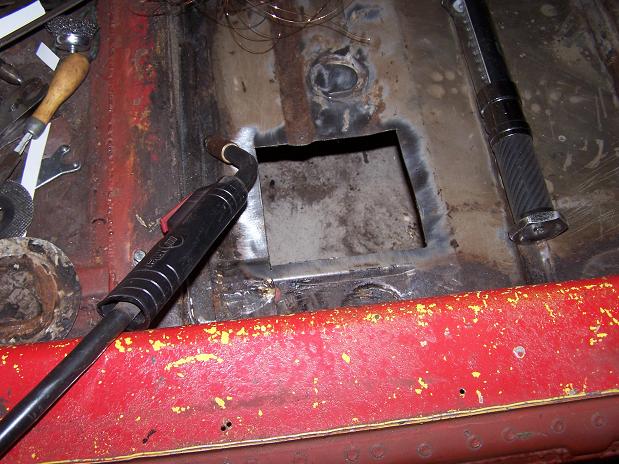
Found another weak spot in the floor and cut it out.
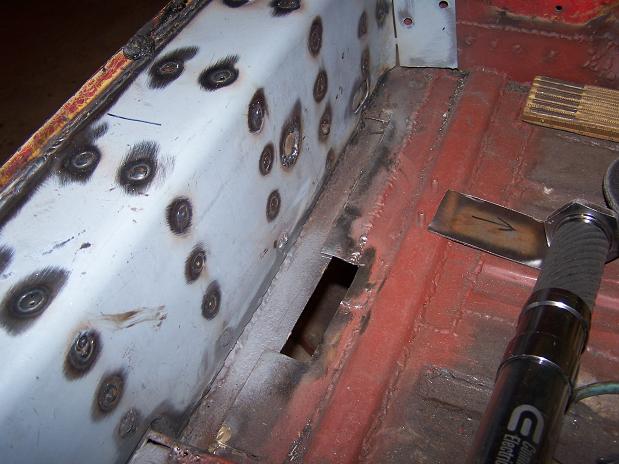 Patched the hole and the small strip of floor next to the long. 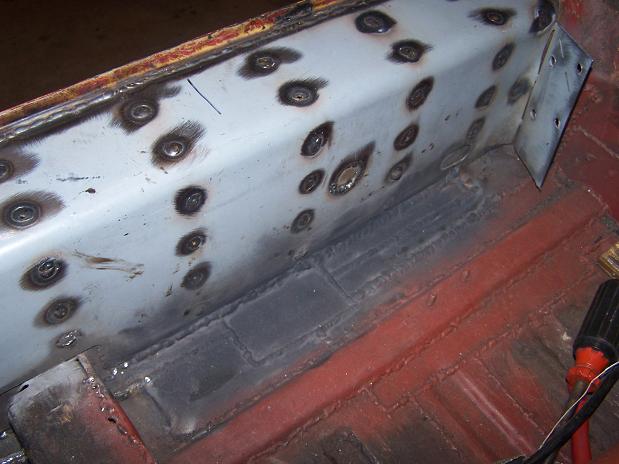 Also patched the hole in front of the crossmember. 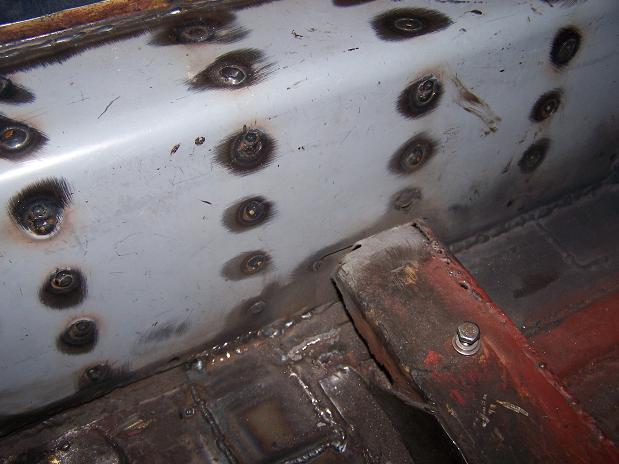 |
|
|
|
|
2 User(s) are reading this topic (2 Guests and 0 Anonymous Users)
0 Members:

|
Lo-Fi Version | Time is now: 22nd November 2024 - 07:02 PM |
Invision Power Board
v9.1.4 © 2024 IPS, Inc.