|
|
|
Porsche, and the Porsche crest are registered trademarks of Dr. Ing. h.c. F. Porsche AG.
This site is not affiliated with Porsche in any way. Its only purpose is to provide an online forum for car enthusiasts. All other trademarks are property of their respective owners. |
|
|

  |

| Andyrew |
 Mar 1 2011, 09:20 AM Mar 1 2011, 09:20 AM
Post
#221
|
|
Spooling.... Please wait  Group: Members Posts: 13,377 Joined: 20-January 03 From: Riverbank, Ca Member No.: 172 Region Association: Northern California |
The wheels look great!
Nice patch work! What ga steel are you using? 14ga? |
   |

 
|
| Spoke |
Mar 1 2011, 10:19 AM
Post
#222
|
|
Jerry Group: Members Posts: 7,084 Joined: 29-October 04 From: Allentown, PA Member No.: 3,031 Region Association: None |
QUOTE(Andyrew @ Mar 1 2011, 10:20 AM)  The wheels look great! Nice patch work! What ga steel are you using? 14ga? Thanks. Compared to what they looked like when I got them, they turned out fantastic. I can't wait to 5-lug the car and mount them. I'm using 18ga on the floor and body panels and 16ga on the longs. I have a big piece of 14ga that I will put on the outside of the long for further reinforcement. |
|
|
|
| Spoke |
Mar 2 2011, 11:29 PM
Post
#223
|
|
Jerry Group: Members Posts: 7,084 Joined: 29-October 04 From: Allentown, PA Member No.: 3,031 Region Association: None |
Finished up all the small pieces of the floor next to the inner long.
Also tied in the crossmember. The passenger side floor is now done unless some more rust-through holes show up. Attached image(s) 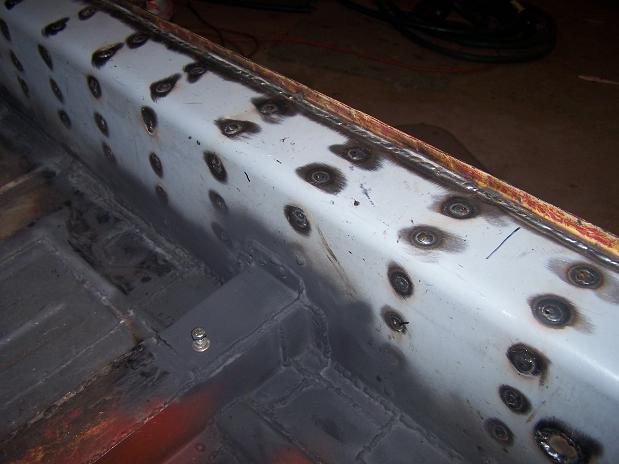 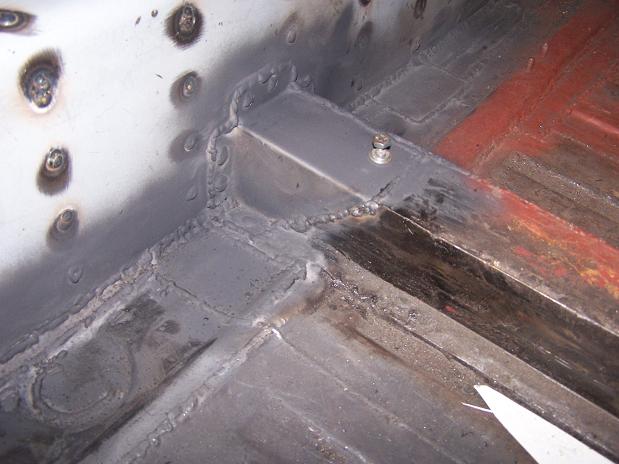 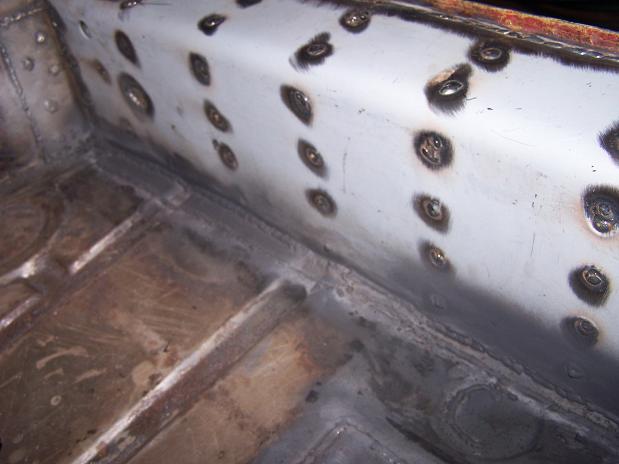
|
|
|
|
| Andyrew |
Mar 3 2011, 10:15 AM
Post
#224
|
|
Spooling.... Please wait Group: Members Posts: 13,377 Joined: 20-January 03 From: Riverbank, Ca Member No.: 172 Region Association: Northern California |
Wow 18ga really? I didnt realize the floors were so thin.
You really think you'll need another bit of reinforcement after the engman kit? I have the engman kit and it is pretty damn solid. The next step is tieing in the suspension points to the long IMHO |
|
|
|
| Spoke |
Mar 3 2011, 11:48 AM
Post
#225
|
|
Jerry Group: Members Posts: 7,084 Joined: 29-October 04 From: Allentown, PA Member No.: 3,031 Region Association: None |
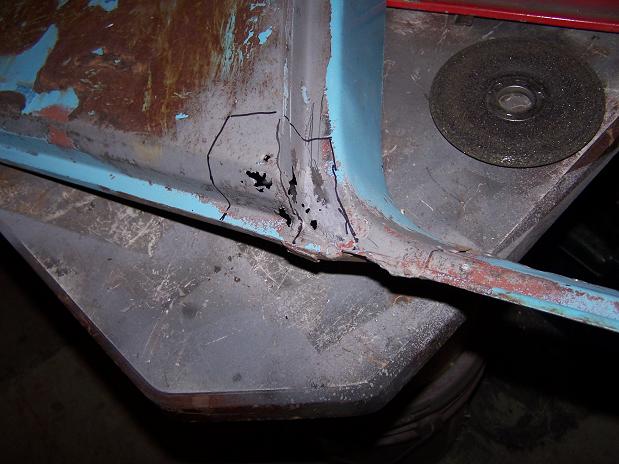
QUOTE(Andyrew @ Mar 3 2011, 11:15 AM) Wow 18ga really? I didnt realize the floors were so thin. You really think you'll need another bit of reinforcement after the engman kit? I have the engman kit and it is pretty damn solid. The next step is tieing in the suspension points to the long IMHO I don't know about what gauge the floors are. I guessed at 18ga since the longs are 16ga I think. I was thinking about how to better tie the front of the long to the door pillar. Any suggestions? |
|
|
|
| Andyrew |
Mar 3 2011, 02:23 PM
Post
#226
|
|
Spooling.... Please wait Group: Members Posts: 13,377 Joined: 20-January 03 From: Riverbank, Ca Member No.: 172 Region Association: Northern California |
Hmmm that is a good question, I havent looked at that piece in a while, you got any pics of the area?
|
|
|
|
| Spoke |
Mar 13 2011, 09:08 PM
Post
#227
|
|
Jerry Group: Members Posts: 7,084 Joined: 29-October 04 From: Allentown, PA Member No.: 3,031 Region Association: None |
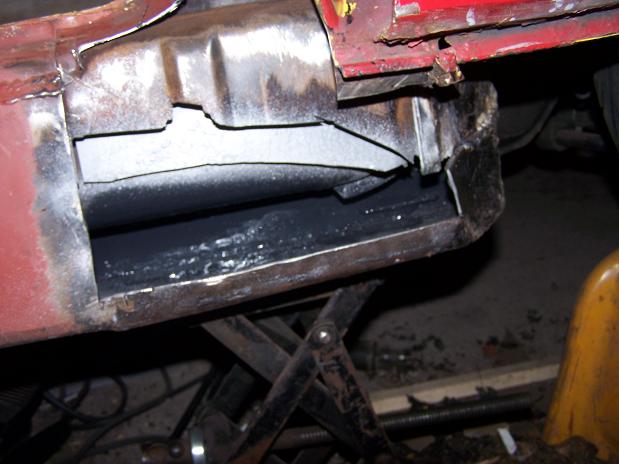
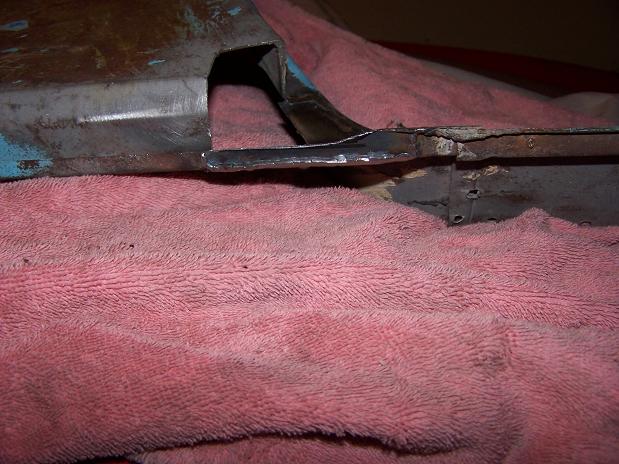
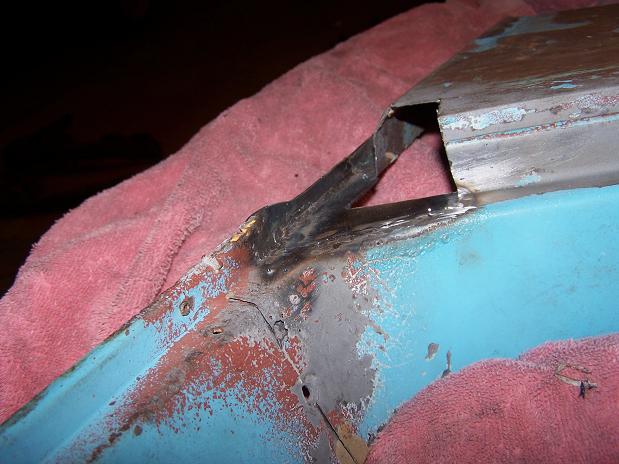
Cleaning up the front portion of the long. Found 2 holes so time to cut it open.
 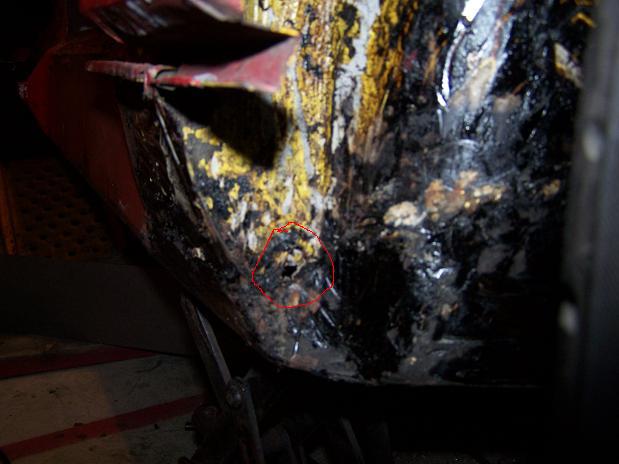   So this is what is left of the bottom of the long. 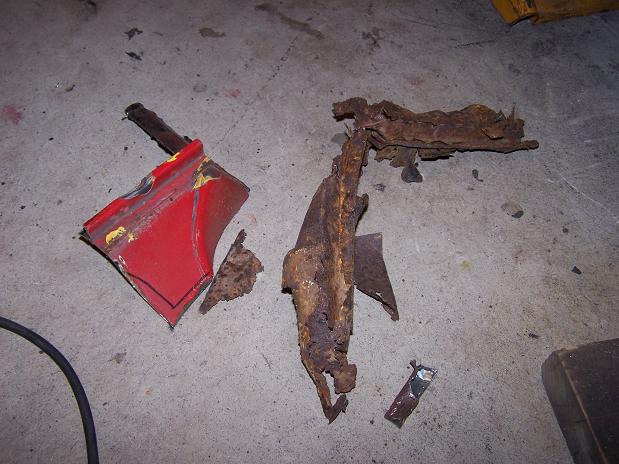 |
|
|
|
| Spoke |
Mar 13 2011, 09:10 PM
Post
#228
|
|
Jerry Group: Members Posts: 7,084 Joined: 29-October 04 From: Allentown, PA Member No.: 3,031 Region Association: None |
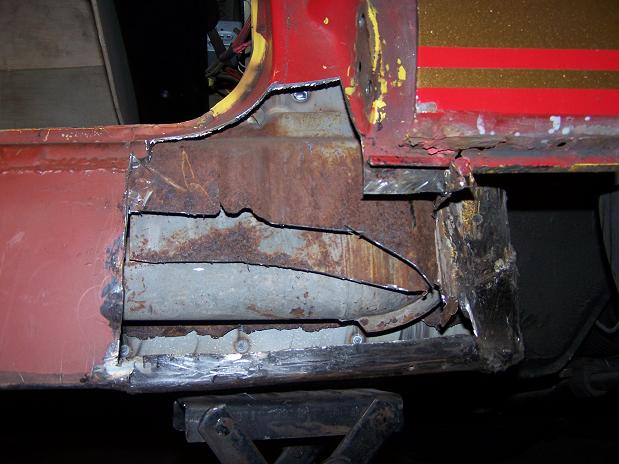
Prepped the area for new metal.
 Center support done. 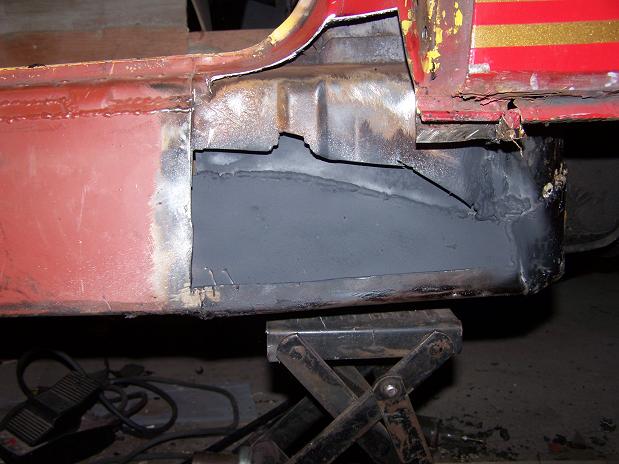 Outer long is much more solid now. 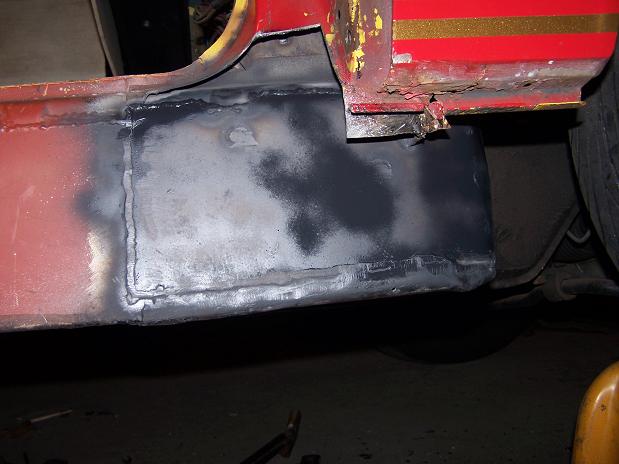 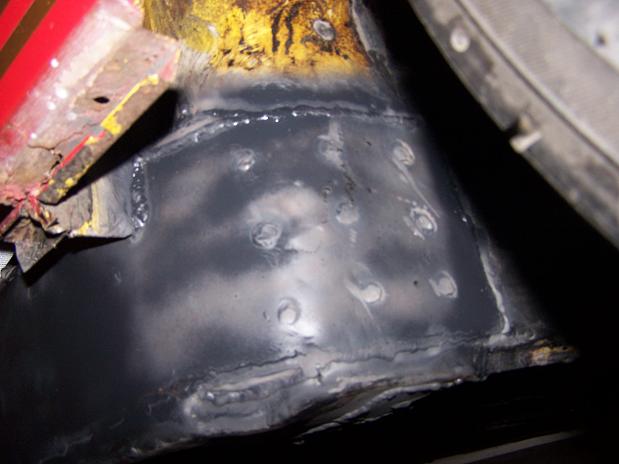 |
|
|
|
| Root_Werks |
Mar 14 2011, 09:55 AM
Post
#229
|
|
Village Idiot Group: Members Posts: 8,484 Joined: 25-May 04 From: About 5NM from Canada Member No.: 2,105 Region Association: Pacific Northwest |
|
|
|
|
| Spoke |
Apr 3 2011, 07:12 PM
Post
#230
|
|
Jerry Group: Members Posts: 7,084 Joined: 29-October 04 From: Allentown, PA Member No.: 3,031 Region Association: None |
Where's that home-made tool thread? Here's my temporary metal break. I scored this 14 gauge piece so it would bend easily.
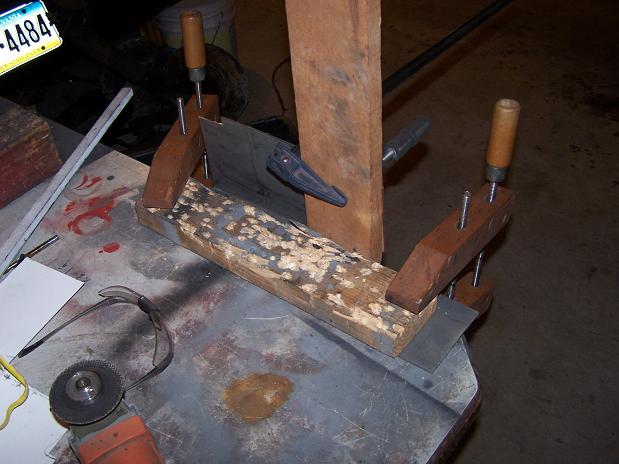  Finished piece ready for installation. 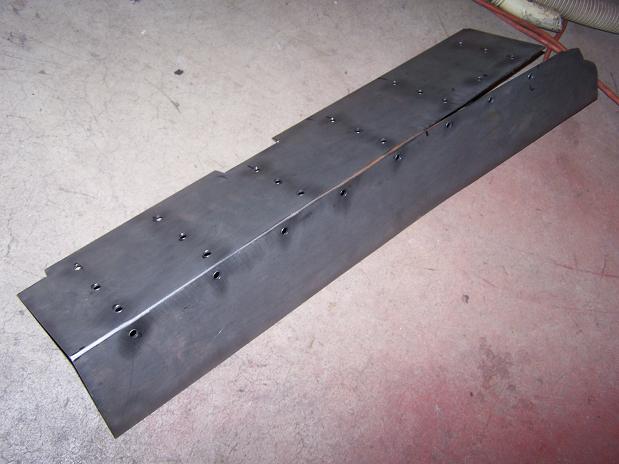 |
|
|
|
| Spoke |
Apr 3 2011, 09:05 PM
Post
#231
|
|
Jerry Group: Members Posts: 7,084 Joined: 29-October 04 From: Allentown, PA Member No.: 3,031 Region Association: None |
14 gauge outer clam shell all welded on.
Attached image(s) 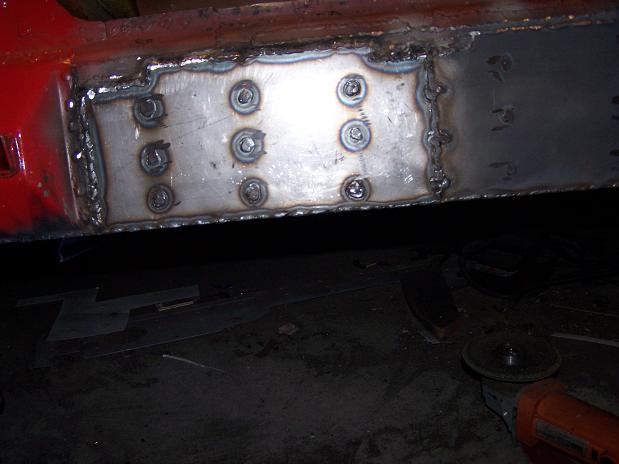 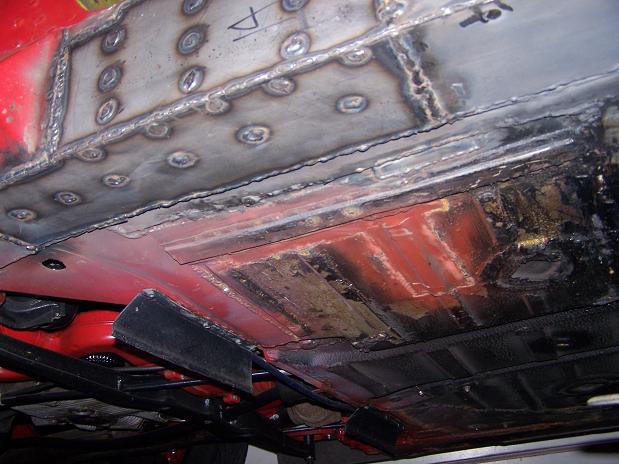 
|
|
|
|
| Spoke |
Apr 3 2011, 09:11 PM
Post
#232
|
|
Jerry Group: Members Posts: 7,084 Joined: 29-October 04 From: Allentown, PA Member No.: 3,031 Region Association: None |
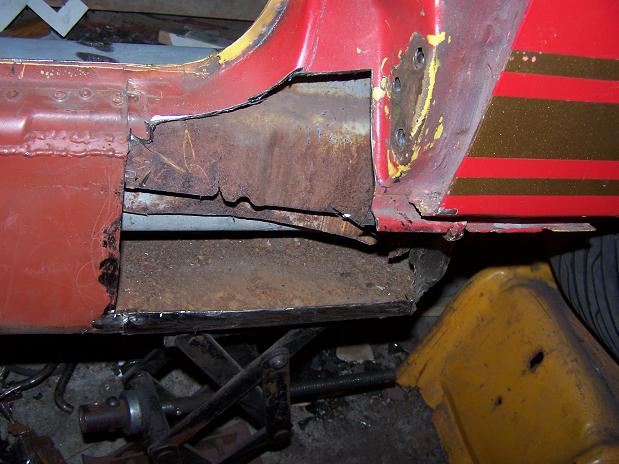
Putting the door support back together.
The support plates will help bind the support to the bottom piece. 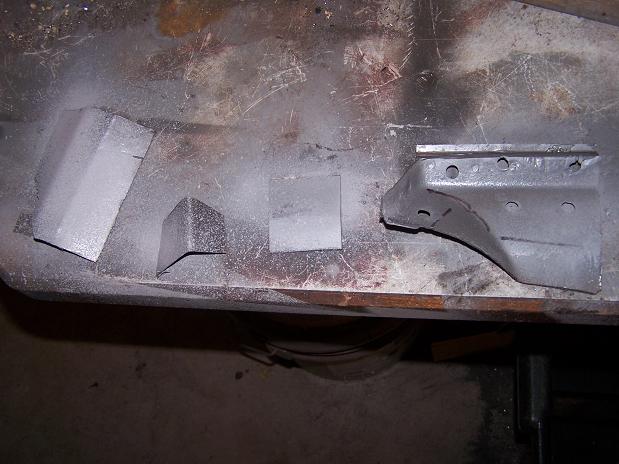 I put a support piece from the top of the long to the door support. 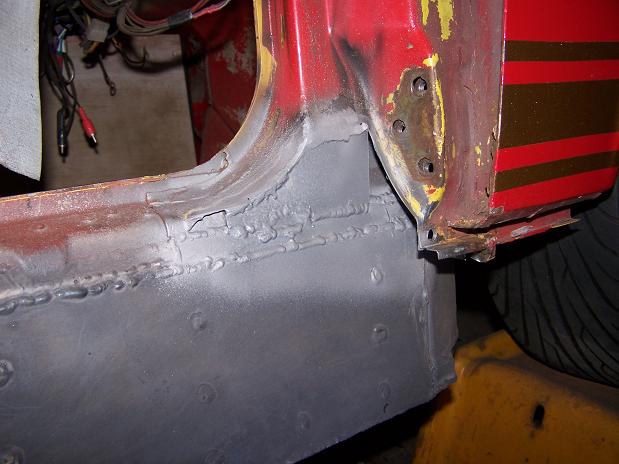 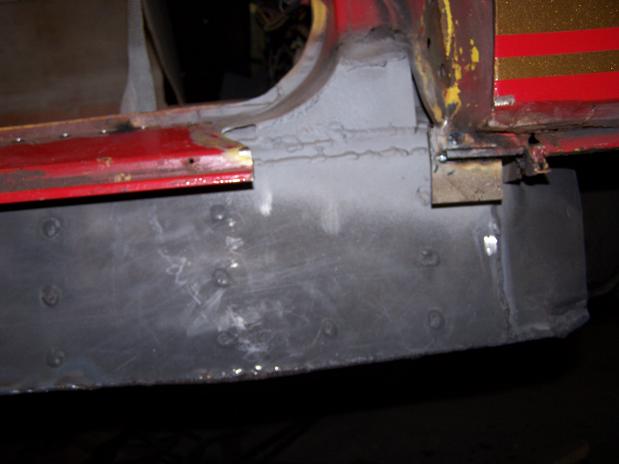 |
|
|
|
| Spoke |
Apr 3 2011, 09:14 PM
Post
#233
|
|
Jerry Group: Members Posts: 7,084 Joined: 29-October 04 From: Allentown, PA Member No.: 3,031 Region Association: None |
Finished the door support. Used 16 gauge for all new metal.
Attached image(s) 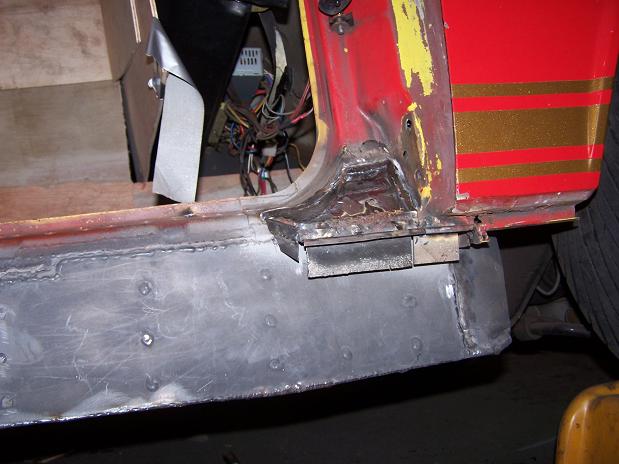 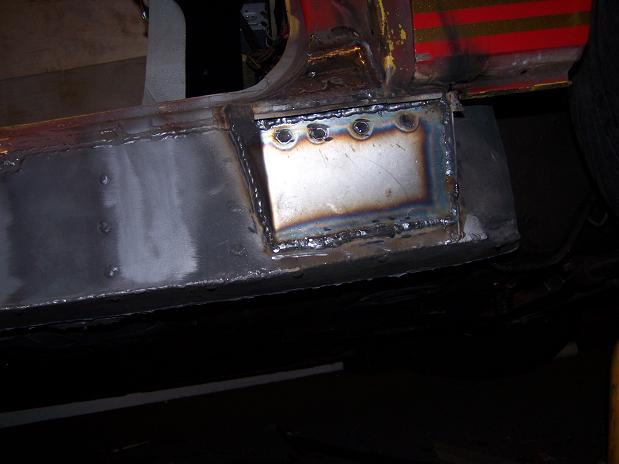 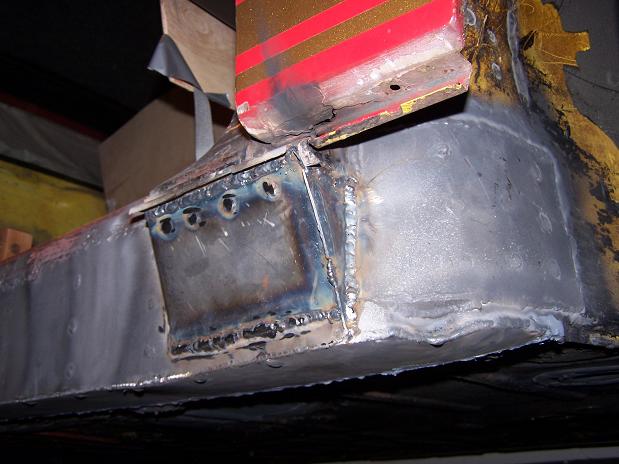 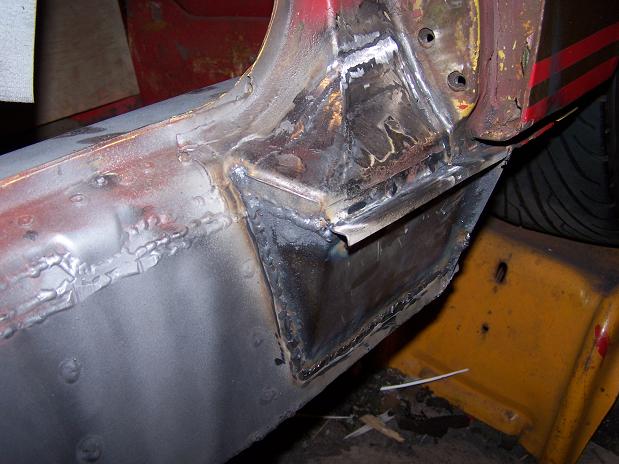
|
|
|
|
| Spoke |
Apr 3 2011, 09:23 PM
Post
#234
|
|
Jerry Group: Members Posts: 7,084 Joined: 29-October 04 From: Allentown, PA Member No.: 3,031 Region Association: None |
For the finishing touch, I put ribs on the outer long. For now I'm finished welding on the passenger long.
Next steps: o Clean up welds on long. o Sandblast the rear fender replacement. It will need some new metal. o Install fender replacement. o replace sill. o Paint outer long and door jamb. Attached image(s) 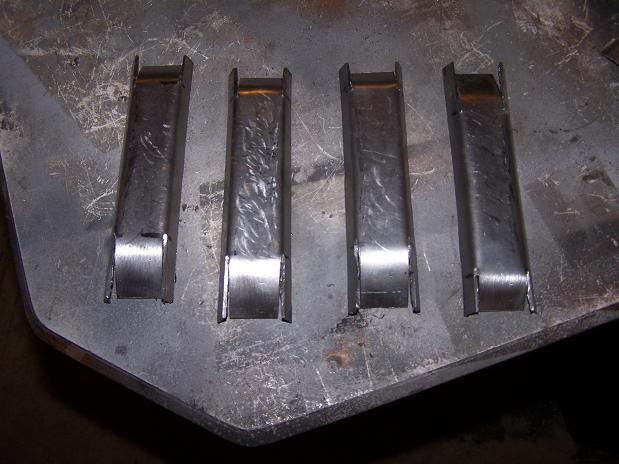 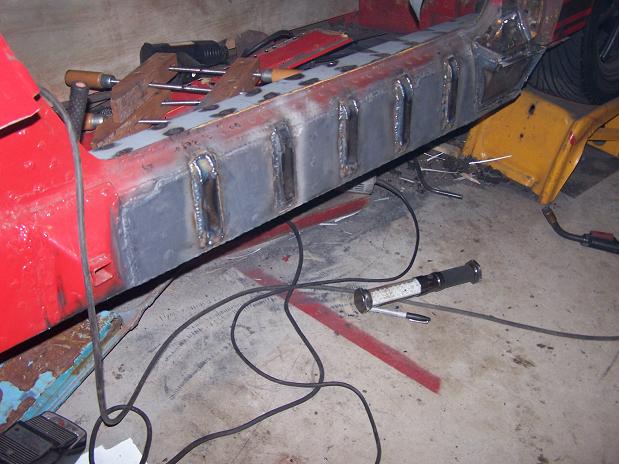 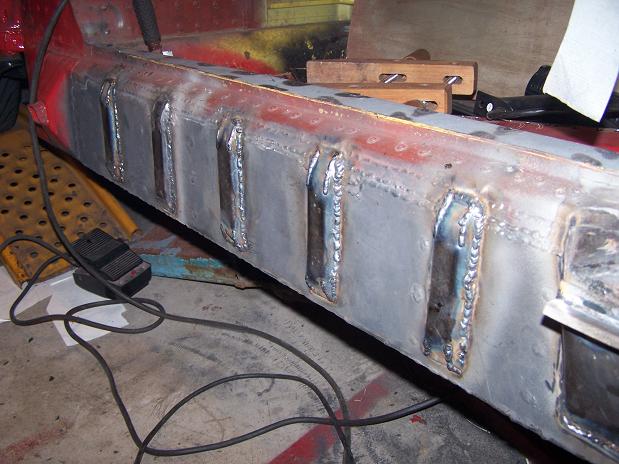
|
|
|
|
| Andyrew |
Apr 4 2011, 10:23 AM
Post
#235
|
|
Spooling.... Please wait Group: Members Posts: 13,377 Joined: 20-January 03 From: Riverbank, Ca Member No.: 172 Region Association: Northern California |
Thats a shitload of metal there!
The Ribs were an interesting idea! |
|
|
|
| FourBlades |
Apr 4 2011, 11:22 AM
Post
#236
|
|
From Wreck to Rockin Group: Members Posts: 2,056 Joined: 3-December 07 From: Brevard, FL Member No.: 8,414 Region Association: South East States |
Wow, that is a lot of welding! (IMG:style_emoticons/default/piratenanner.gif) (IMG:style_emoticons/default/piratenanner.gif) (IMG:style_emoticons/default/piratenanner.gif) Very nice work. John |
|
|
|
| Spoke |
Apr 4 2011, 09:21 PM
Post
#237
|
|
Jerry Group: Members Posts: 7,084 Joined: 29-October 04 From: Allentown, PA Member No.: 3,031 Region Association: None |
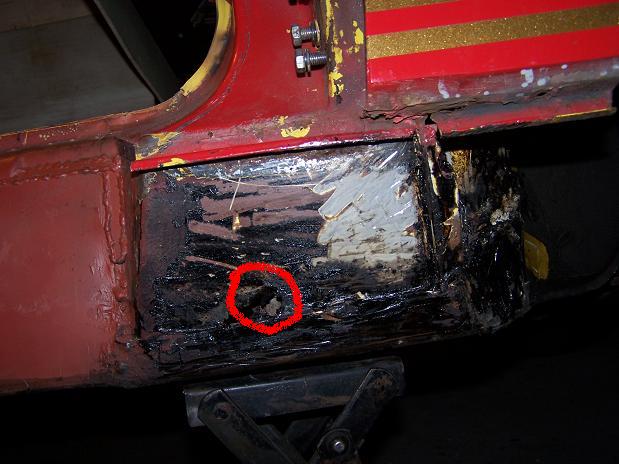
Sandblasted the fender replacement. I knew it was rusted through. Now the damage is obvious. The whole corner of the fender needs replacing.
 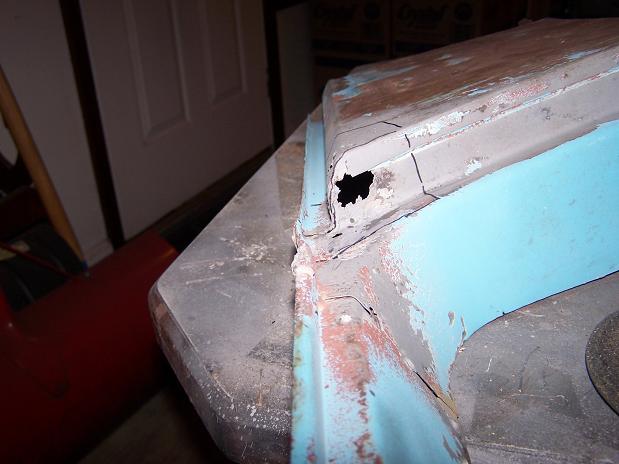  I will make 4 pieces to do the repair. This is the base plate. Next will be the bottom lip, then the door jamb, then the fender and underside wraparound. 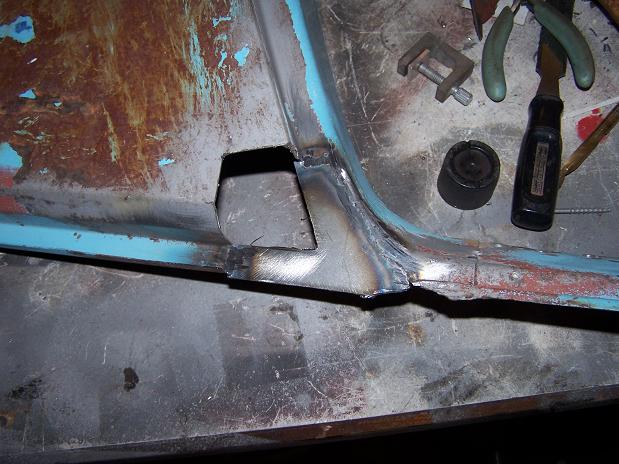 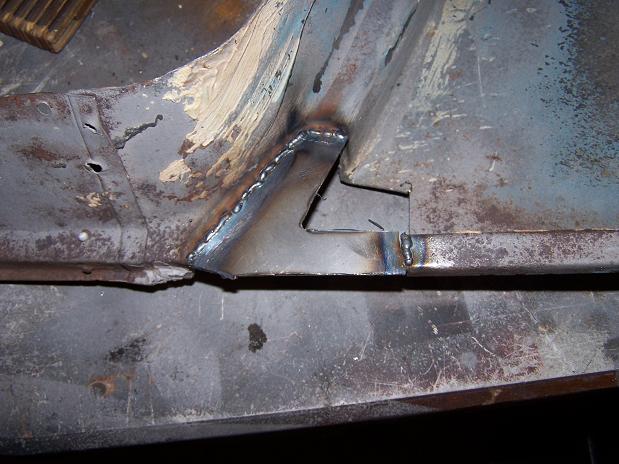 |
|
|
|
| Spoke |
Apr 5 2011, 10:21 PM
Post
#238
|
|
Jerry Group: Members Posts: 7,084 Joined: 29-October 04 From: Allentown, PA Member No.: 3,031 Region Association: None |
My latest purchase. Not bad for $150 delivered to my home.
This is from a 74 and has the 3-inch front calipers. Rotors will likely need replaced. Front calipers will need rebuilt. 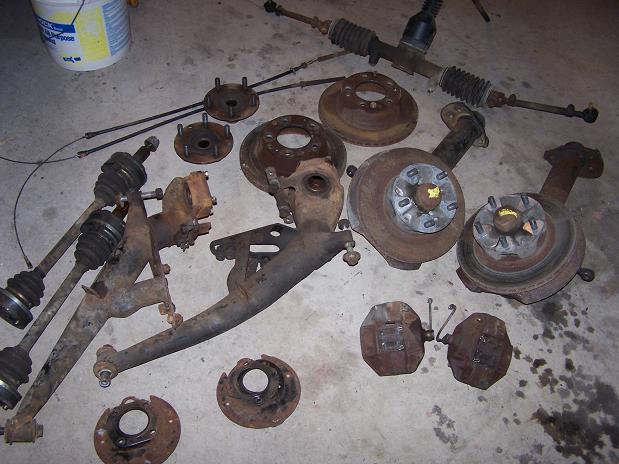 Separate purchase. Saves me from widening and rebuilding my existing calipers. These look too nice to use. 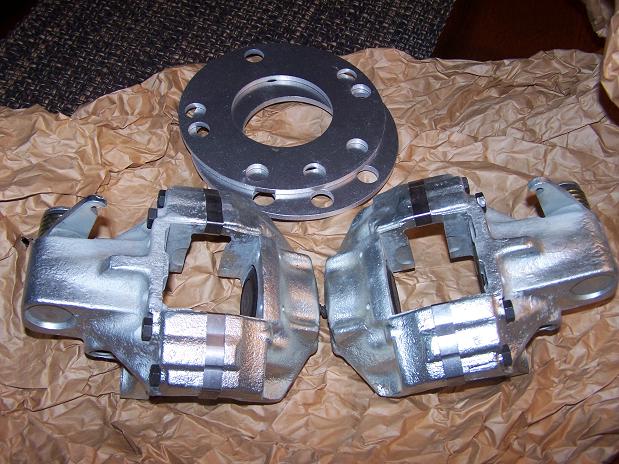 |
|
|
|
| Andyrew |
Apr 6 2011, 09:11 AM
Post
#239
|
|
Spooling.... Please wait Group: Members Posts: 13,377 Joined: 20-January 03 From: Riverbank, Ca Member No.: 172 Region Association: Northern California |
With the spacers for vented rotors? Nice!!
Talk about a score! |
|
|
|
| Spoke |
Apr 6 2011, 09:02 PM
Post
#240
|
|
Jerry Group: Members Posts: 7,084 Joined: 29-October 04 From: Allentown, PA Member No.: 3,031 Region Association: None |
Bottom lip is welded on.
  Now the door jamb piece. 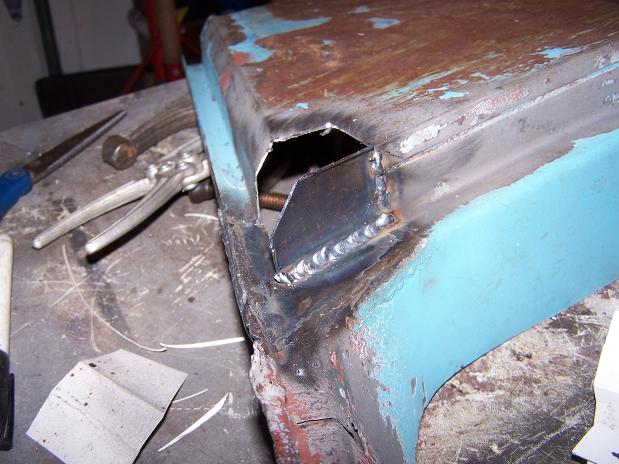 Finally the fender piece. Too late tonight to grind the welds down. Good as new. 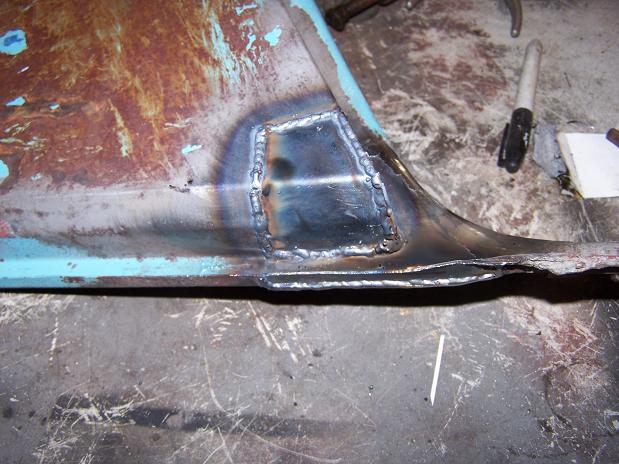 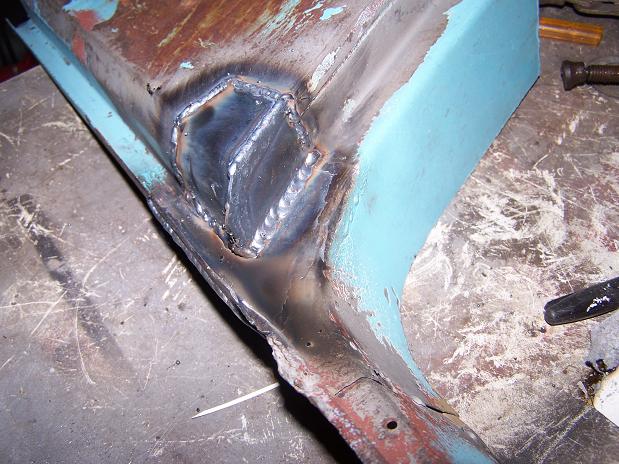 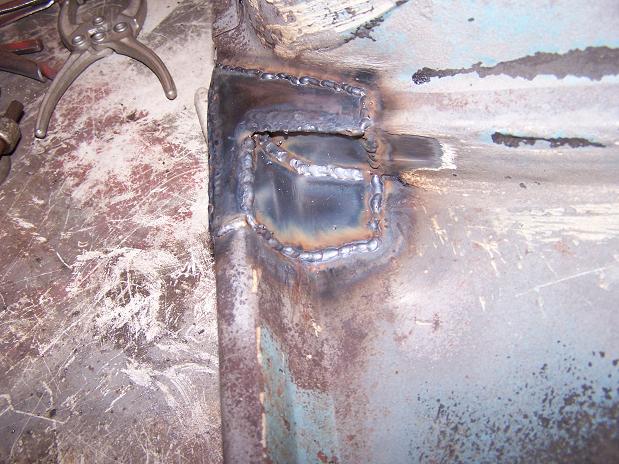 |
|
|
|
|
1 User(s) are reading this topic (1 Guests and 0 Anonymous Users)
0 Members:

|
Lo-Fi Version | Time is now: 22nd November 2024 - 06:54 PM |
Invision Power Board
v9.1.4 © 2024 IPS, Inc.