|
|
|
Porsche, and the Porsche crest are registered trademarks of Dr. Ing. h.c. F. Porsche AG.
This site is not affiliated with Porsche in any way. Its only purpose is to provide an online forum for car enthusiasts. All other trademarks are property of their respective owners. |
|
|

  |

| Spoke |
 Apr 8 2011, 09:02 PM Apr 8 2011, 09:02 PM
Post
#241
|
|
Jerry  Group: Members Posts: 7,145 Joined: 29-October 04 From: Allentown, PA Member No.: 3,031 Region Association: None |
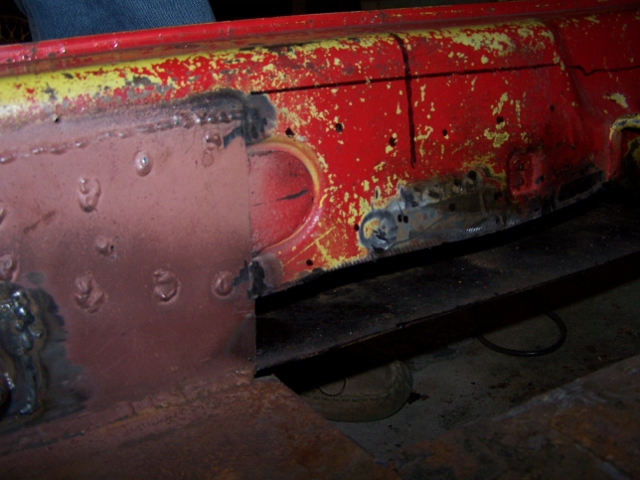
Got around to grinding down the welds on the fender. The repair came out very good.
Attached image(s) 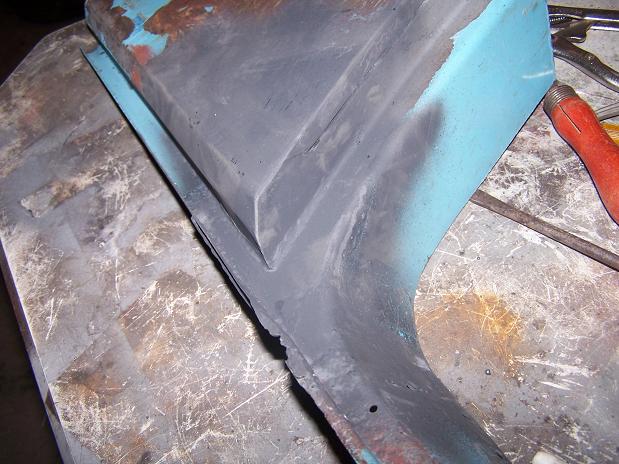
|
   |

 
|
| Spoke |
Apr 8 2011, 09:05 PM
Post
#242
|
|
Jerry Group: Members Posts: 7,145 Joined: 29-October 04 From: Allentown, PA Member No.: 3,031 Region Association: None |
WTF are these appendages? Any guesses?
Attached image(s) 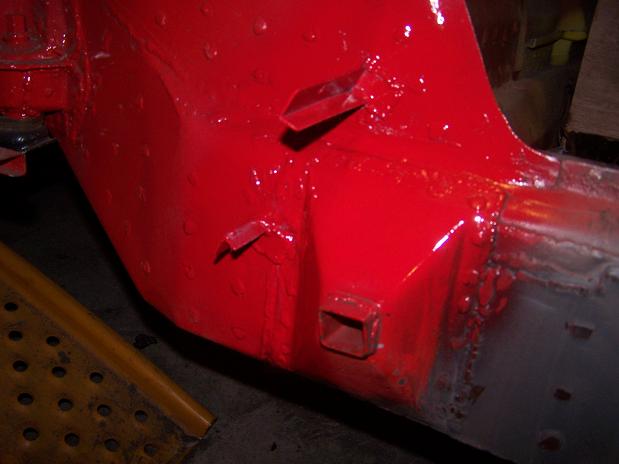 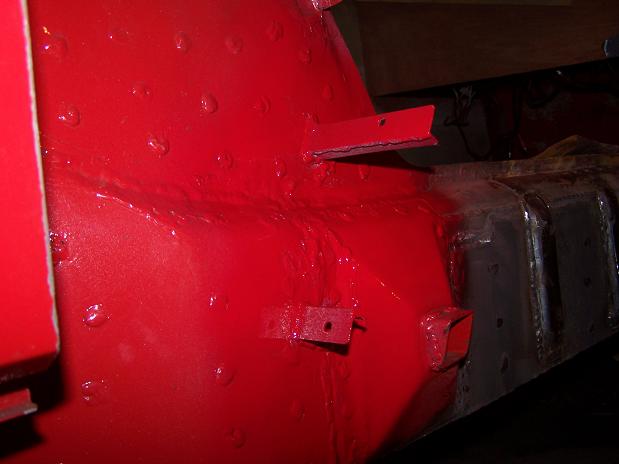
|
|
|
|
| Spoke |
Apr 9 2011, 07:02 PM
Post
#243
|
|
Jerry Group: Members Posts: 7,145 Joined: 29-October 04 From: Allentown, PA Member No.: 3,031 Region Association: None |
One shortcoming of the inner fender well is that all the rocks and debris kicked up by the tires can end up trapped between the rocker panel and the jack point.
With these brackets I'll attach a rock deflector to keep the jack point relatively clear of debris. I'm thinking of using a plastic-type mudflap for the material. Don't really want to use steel. Attached image(s) 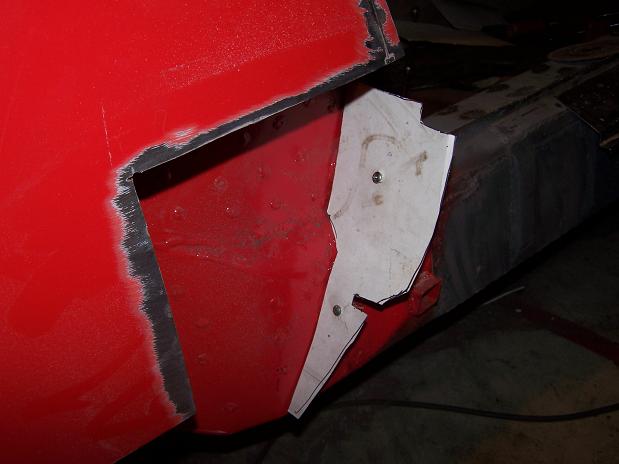 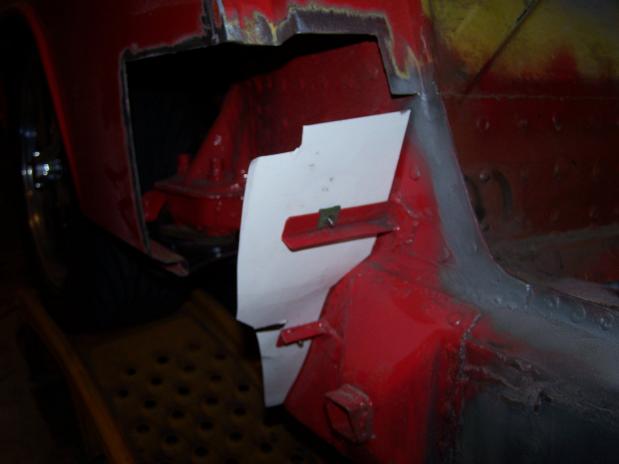
|
|
|
|
| Spoke |
Apr 9 2011, 07:10 PM
Post
#244
|
|
Jerry Group: Members Posts: 7,145 Joined: 29-October 04 From: Allentown, PA Member No.: 3,031 Region Association: None |
Well, with all the work I did to the inner and outer longs, I managed to shrink my car by about 1/8 inch such that the passenger door wouldn't close.
After the accident, the door gap was quite small but today when I mounted the door, it wouldn't close. So I had to shorten the rear fender a bit and push the door jamb back a bit. 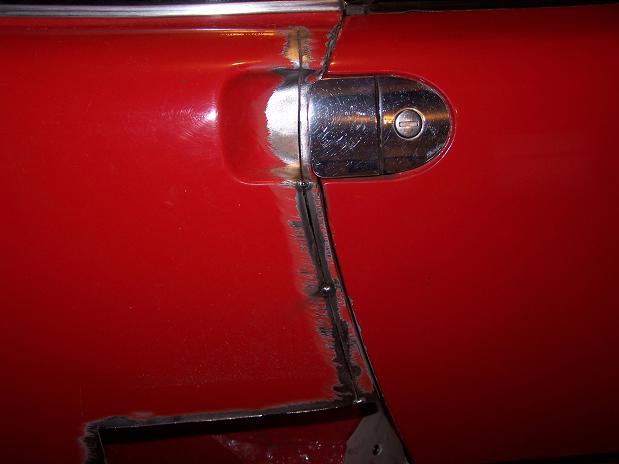 The last piece to attach on the passenger side. I cut the piece to near the right size then used the angle grinder to get it to fit nice. Looks good not to see the big hole in the fender. I bought this piece about 2 years ago. 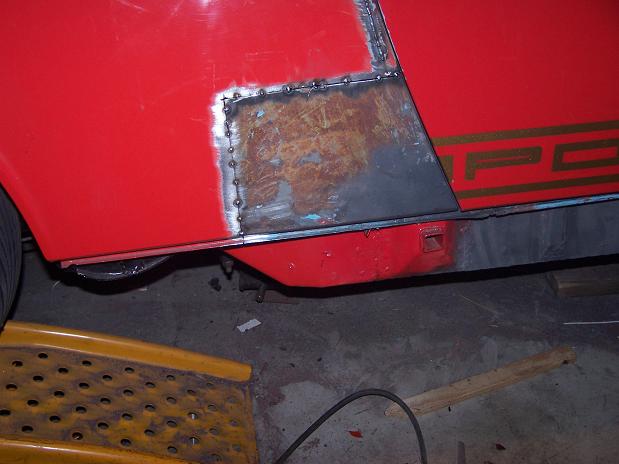 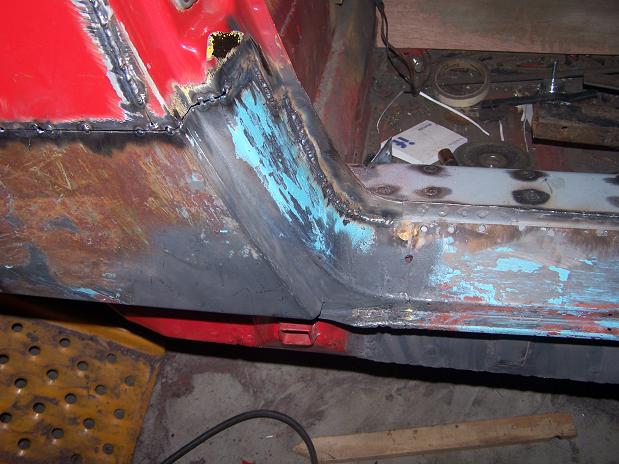 This is the original door sill. I cut off about 5 inches of the back part of this cause it was totally rusted out. 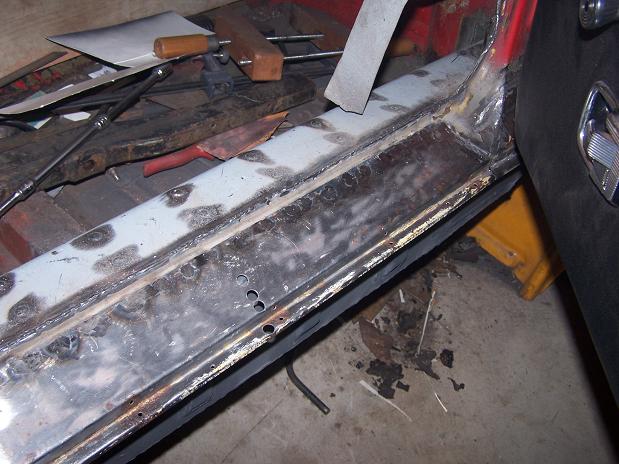 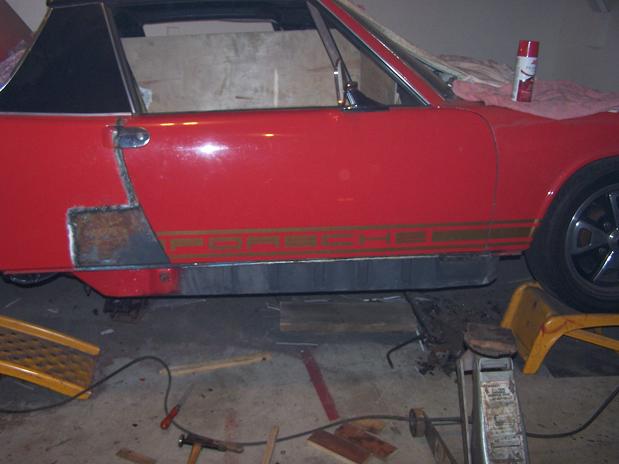 |
|
|
|
| Spoke |
Apr 10 2011, 08:23 PM
Post
#245
|
|
Jerry Group: Members Posts: 7,145 Joined: 29-October 04 From: Allentown, PA Member No.: 3,031 Region Association: None |
The last job for now. Finished attaching the door sill.
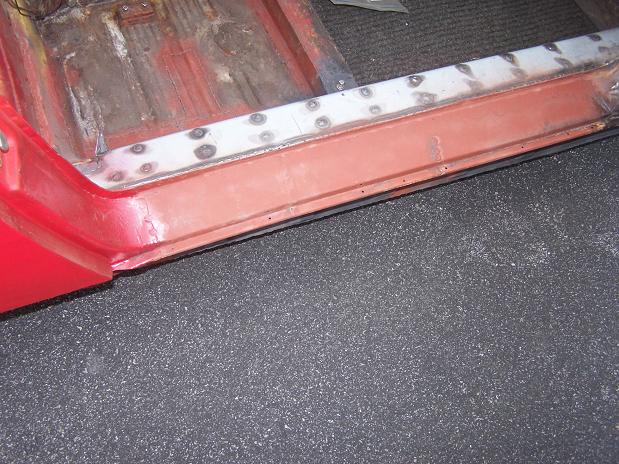 The sill supports are made from 16 gauge steel. 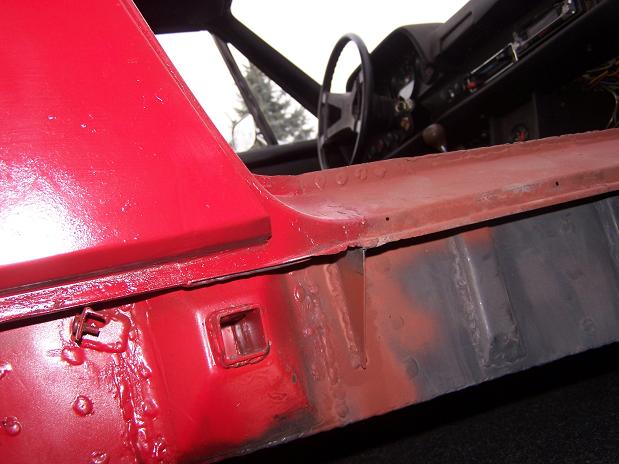  I may have added a lot of steel in my rustoration but I took off 26 pounds of steel, rust, and tar. 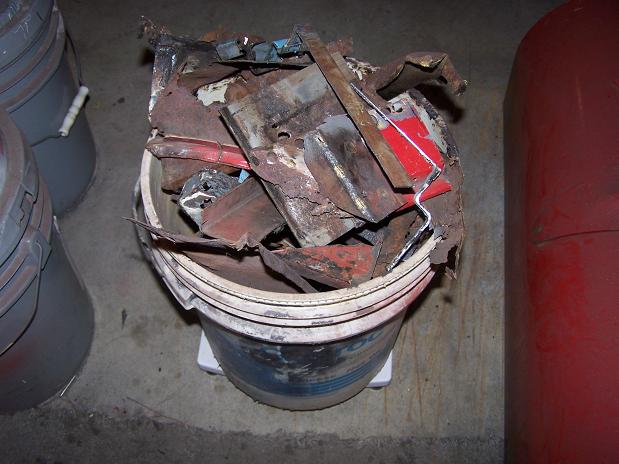 |
|
|
|
| Spoke |
Apr 10 2011, 08:32 PM
Post
#246
|
|
Jerry Group: Members Posts: 7,145 Joined: 29-October 04 From: Allentown, PA Member No.: 3,031 Region Association: None |
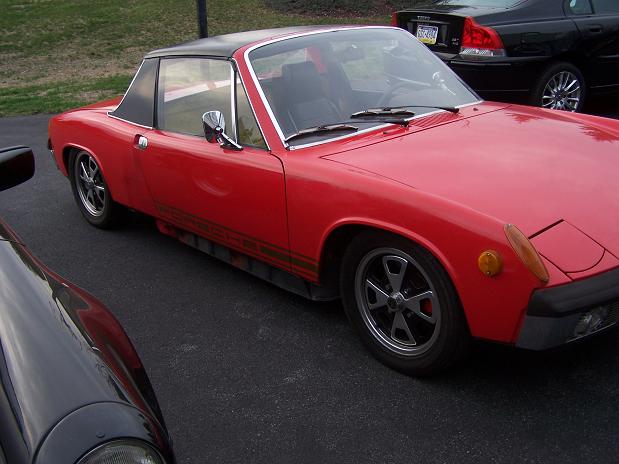
The 914 is out of the garage for the first time in 4 months. The metal work is done on the rear fender but bodywork is needed now. The 911 is going in the corner for now and I'll drive the 914 for the time being.
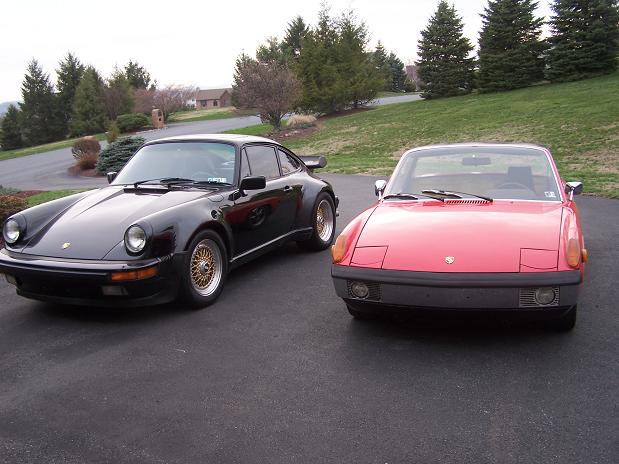   One fat ass and one narrow one.  |
|
|
|
| 9fourteen |
Jun 10 2011, 01:58 PM
Post
#247
|
|
Newbie Group: Members Posts: 42 Joined: 20-November 06 From: Cincinnati, OH Member No.: 7,239 Region Association: Upper MidWest |
I see you used weld-through primer on this. How well did that stuff work? Did you always get good welds with it or did you have to remove some of it? What type/brand did you use?
Great job btw. Your project is inspiring me to finally start cutting the rust out of mine. Thanks, Don |
|
|
|
| Spoke |
Jun 10 2011, 03:50 PM
Post
#248
|
|
Jerry Group: Members Posts: 7,145 Joined: 29-October 04 From: Allentown, PA Member No.: 3,031 Region Association: None |
QUOTE(9fourteen @ Jun 10 2011, 03:58 PM)  I see you used weld-through primer on this. How well did that stuff work? Did you always get good welds with it or did you have to remove some of it? What type/brand did you use? Great job btw. Your project is inspiring me to finally start cutting the rust out of mine. Thanks, Don Thanks, and BTW, (IMG:style_emoticons/default/welcome.png) I don't know what brand I used. The welding wasn't bad through the primer. It does smoke a bit but you do want primer between all the layers of steel or behind panels you can't paint after installation. |
|
|
|
| porsche_dreamer |
Jun 10 2011, 10:09 PM
Post
#249
|
|
Member Group: Members Posts: 147 Joined: 21-December 10 From: Harrison, OH Member No.: 12,505 Region Association: None |
Looks like some good progress. The turbo doesnt look to bad either!
|
|
|
|
| Spoke |
Jul 11 2011, 09:08 PM
Post
#250
|
|
Jerry Group: Members Posts: 7,145 Joined: 29-October 04 From: Allentown, PA Member No.: 3,031 Region Association: None |
Got my front M-calipers back from Eric Shea. Wow!
Brake calipers front and rear ready to go for 5-lug conversion. Just need to get new rotors, and sell my 911 rear hubs & half shafts. Attached image(s) 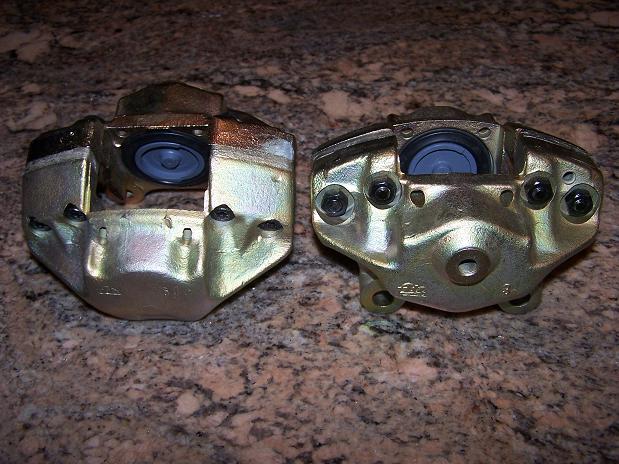 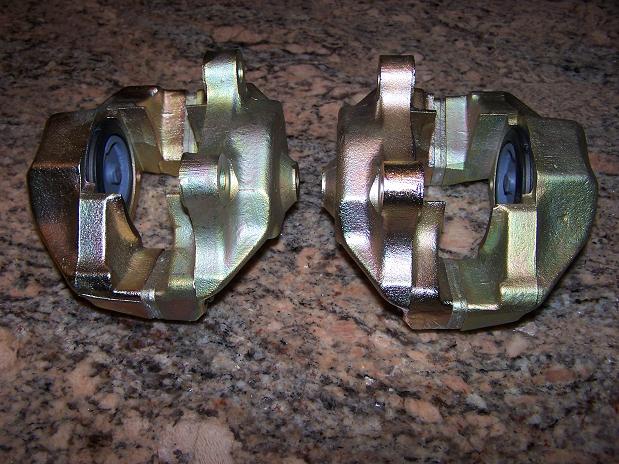 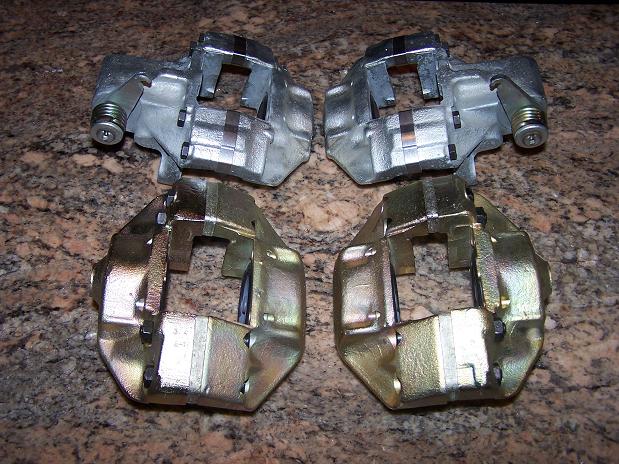 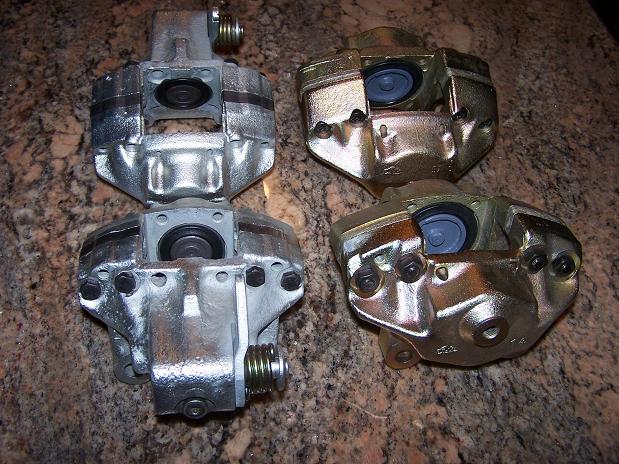
|
|
|
|
| fitsbain |
Jul 27 2011, 08:15 AM
Post
#251
|
|
Ask me if my car has rust!!! Group: Members Posts: 619 Joined: 25-February 06 From: Pittsburgh PA Member No.: 5,634 |
Glad to see that corner came to good use.
Sorry it was so rusty. |
|
|
|
| Spoke |
Feb 11 2012, 07:50 AM
Post
#252
|
|
Jerry Group: Members Posts: 7,145 Joined: 29-October 04 From: Allentown, PA Member No.: 3,031 Region Association: None |
QUOTE(fitsbain @ Jul 27 2011, 09:15 AM) Glad to see that corner came to good use. Sorry it was so rusty. The piece was still 100x better than what I took off. |
|
|
|
| Spoke |
Feb 11 2012, 07:52 AM
Post
#253
|
|
Jerry Group: Members Posts: 7,145 Joined: 29-October 04 From: Allentown, PA Member No.: 3,031 Region Association: None |
Any tips for dislodging the spline? It seems to be rusted on. I've been soaking it in Aero Croil.
Attached image(s) 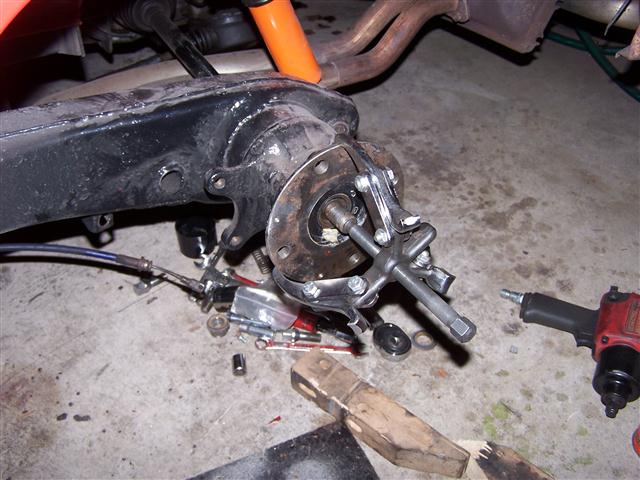
|
|
|
|
| okieflyr |
Feb 11 2012, 09:34 PM
Post
#254
|
|
9fauxteen Group: Members Posts: 816 Joined: 9-January 05 From: Phila PA Member No.: 3,426 Region Association: North East States |
I can't see that the axle is disconected on the trans side (it should be) but you can thread the axle nut back on upside down and flush with the end, and then use a BFH to break it loose back through the hub.
|
|
|
|
| Jeffs9146 |
Feb 11 2012, 09:58 PM
Post
#255
|
|
Ski Bum Group: Members Posts: 4,062 Joined: 10-January 03 From: Discovery Bay, Ca Member No.: 128 |
You have to remove the trailing arm to get it out any further!
I just did this last month. You wont be able to pull the hub out of the bearing that way. You can remove the axcel and then pound out the hub and bearing but I found it easier to just remove the trailing arm and do it on the bench. That way you can leave the axcel, CV's and stub still attached and slide it back into the hub when you put the arm back on! Here is the motivational photo!!! Attached thumbnail(s) 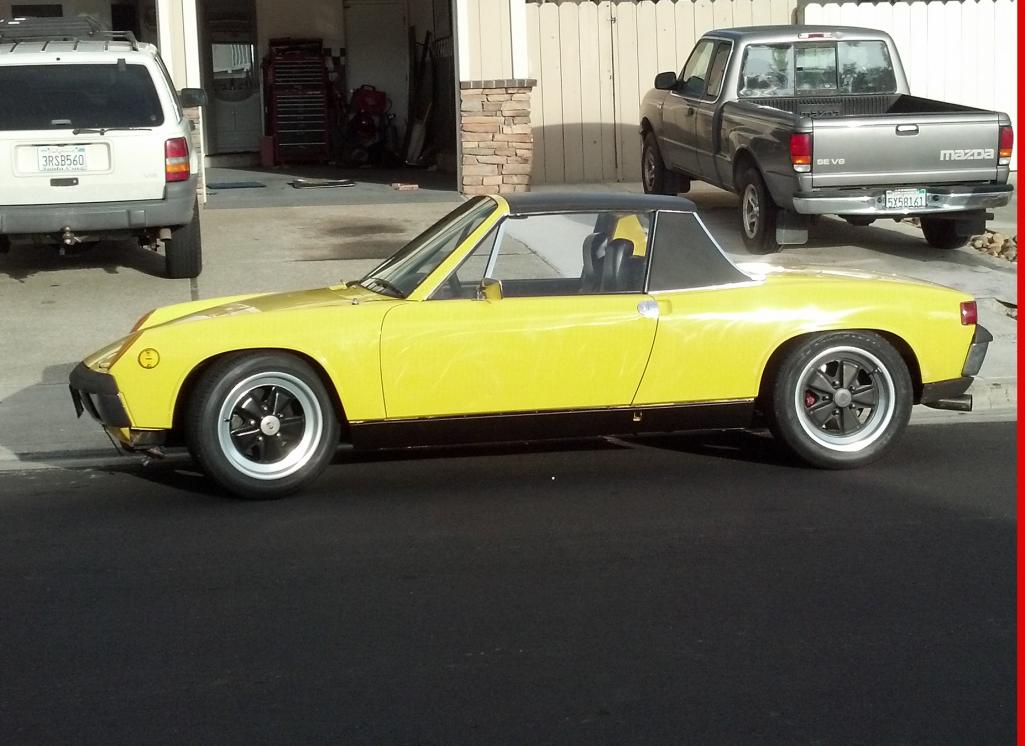
|
|
|
|
| Spoke |
Mar 1 2012, 08:05 PM
Post
#256
|
|
Jerry Group: Members Posts: 7,145 Joined: 29-October 04 From: Allentown, PA Member No.: 3,031 Region Association: None |
I finally dislodged the spline. Aerocroil, time, and a BFH did the trick.
Correct about the axle still connected to the trans; there was still plenty of play between the CVs to loosen the spline from the hub. With my newly unemployed status, I put the rear end back together again and will focus on some longitudinal rust repairs since I have plenty of metal, cutoff wheels, gas in the welder tank, and time on my hands. |
|
|
|
| Spoke |
Mar 1 2012, 08:19 PM
Post
#257
|
|
Jerry Group: Members Posts: 7,145 Joined: 29-October 04 From: Allentown, PA Member No.: 3,031 Region Association: None |
Time to repair the driver side interior floor and inner long. The goal is to make the car as tight as possible spending the least amount of money.
The car has a reconstructed title after the wreck (see post #1) and is questionably not worth a whole bunch. The floor and longs should be replaced in their entirety but I will cut out the bad and replace with new steel like I did on the passenger side. Note the trianglular replacement panel in the bottom. This was done by the PO. 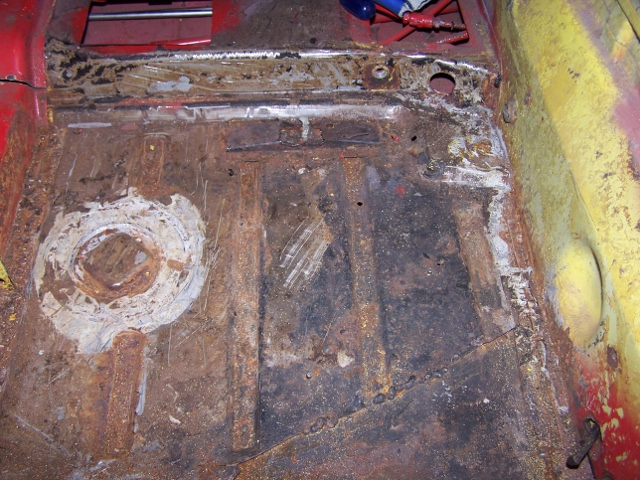 I will continue to rebuild the inner long with panels such as the one shown here in 16ga steel. The PO placed a 16ga panel under the rotted out long and up the outside of the long. I will tie into this with about 2 or 3 of these plates, then cover with an Engmans inner long kit. The gold flakes are from grinding some braising away. 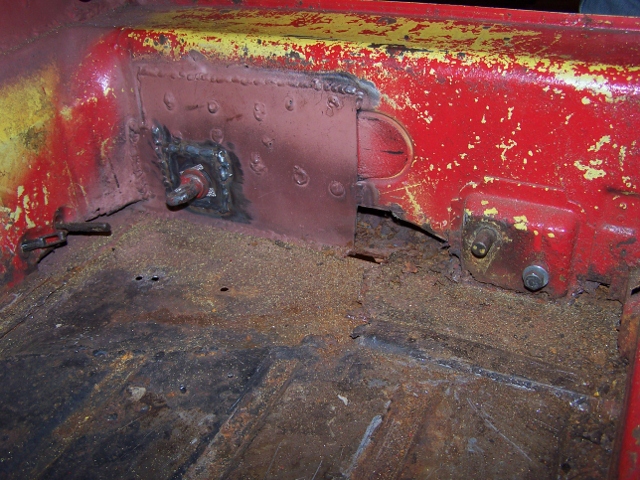 Not much left of the crossmember. It's going away too.  Note the tie plate on the inner long to the floor. This is braised in and will be removed. 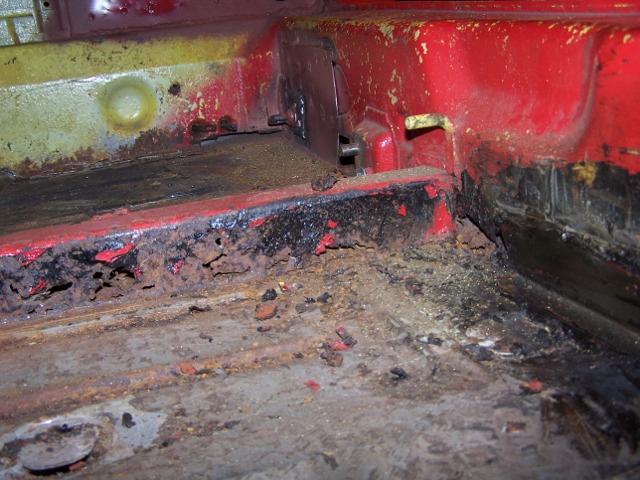 More of the braised plates. 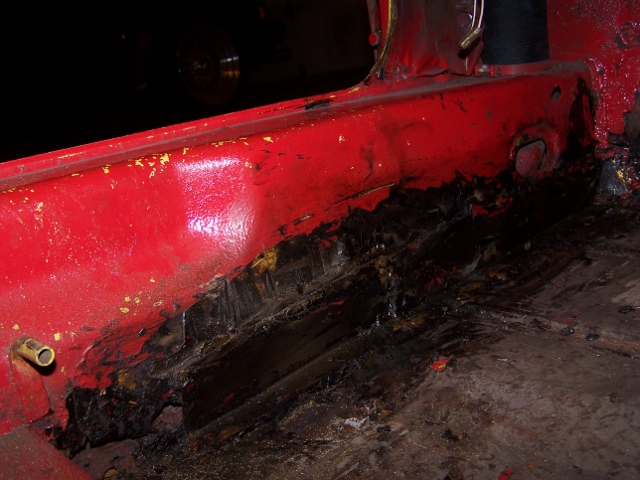 Notice the hole to in the wheel well to the right. 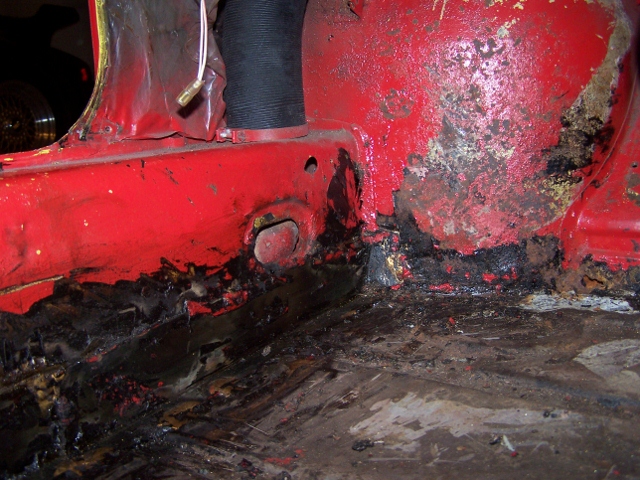 |
|
|
|
| Spoke |
Mar 1 2012, 08:25 PM
Post
#258
|
|
Jerry Group: Members Posts: 7,145 Joined: 29-October 04 From: Allentown, PA Member No.: 3,031 Region Association: None |
Like the passenger side, the inner long is completely gone all the way along the interior.
 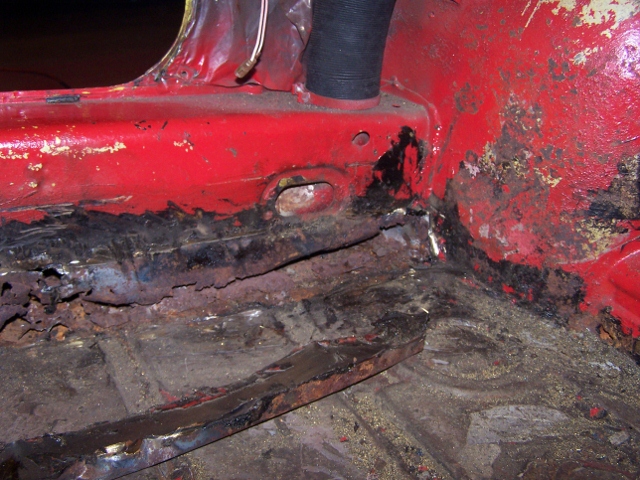 Had to remove the E-brake mount. 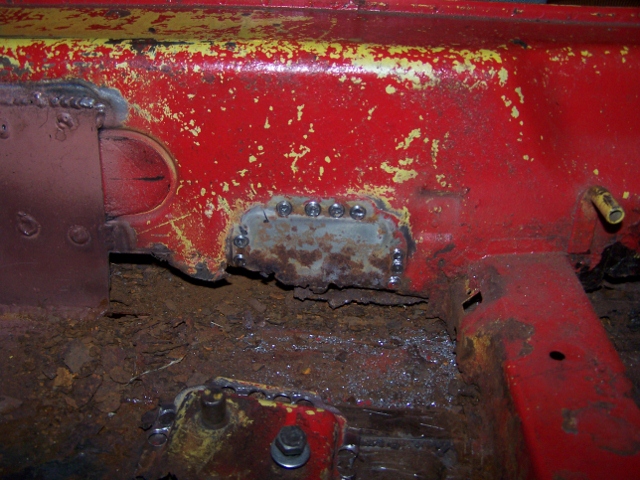 The E-brake mount is toast. I will cut off the bolt and sleeve and make a new bracket. 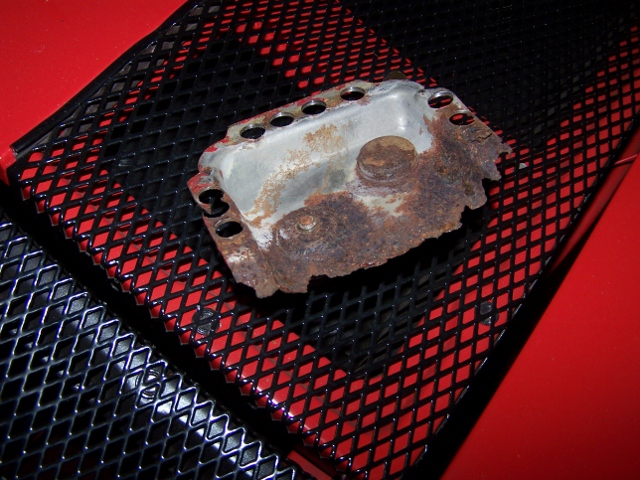 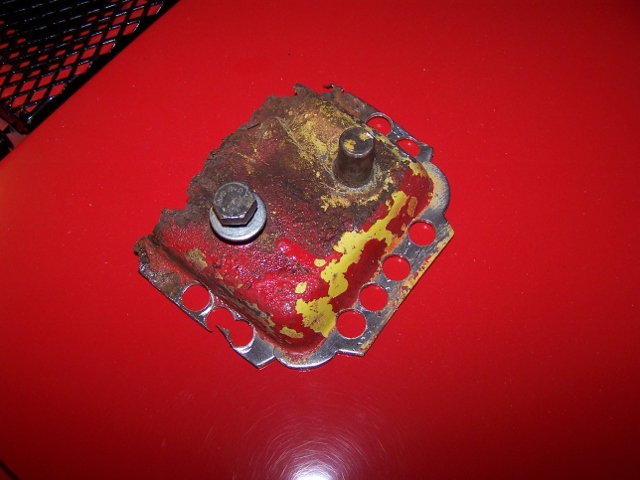 |
|
|
|
| Spoke |
Mar 3 2012, 04:11 PM
Post
#259
|
|
Jerry Group: Members Posts: 7,145 Joined: 29-October 04 From: Allentown, PA Member No.: 3,031 Region Association: None |
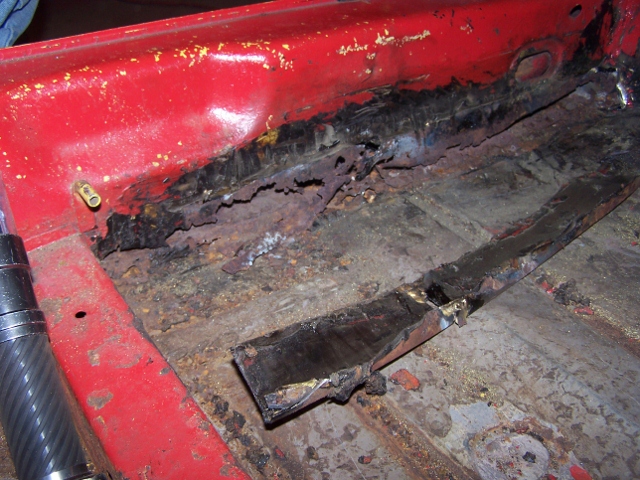
Cleaned out the bottom of the long. Prepping for the replacement pieces.
 Removed all the rusted pieces and rusted floor. 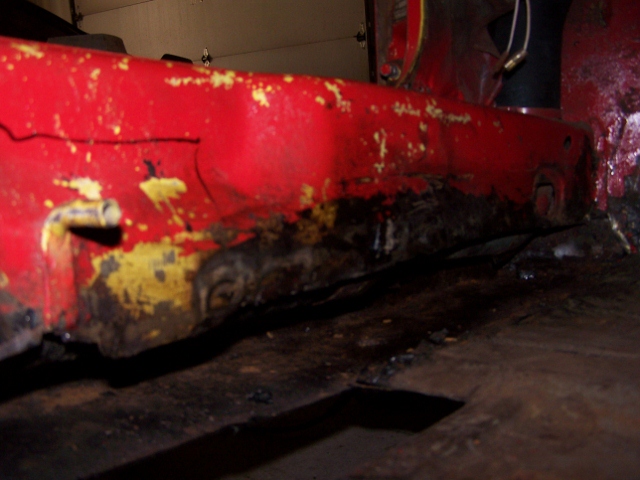 First replacement piece ready to be welding. 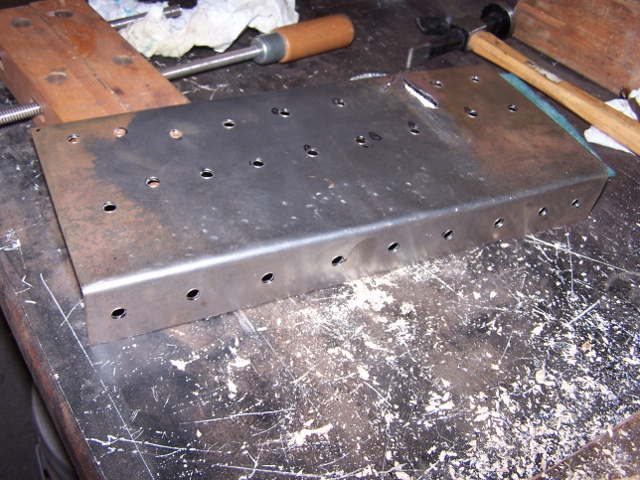 |
|
|
|
| Spoke |
Mar 5 2012, 11:02 PM
Post
#260
|
|
Jerry Group: Members Posts: 7,145 Joined: 29-October 04 From: Allentown, PA Member No.: 3,031 Region Association: None |
Rebuilding the inner long
Attached image(s) 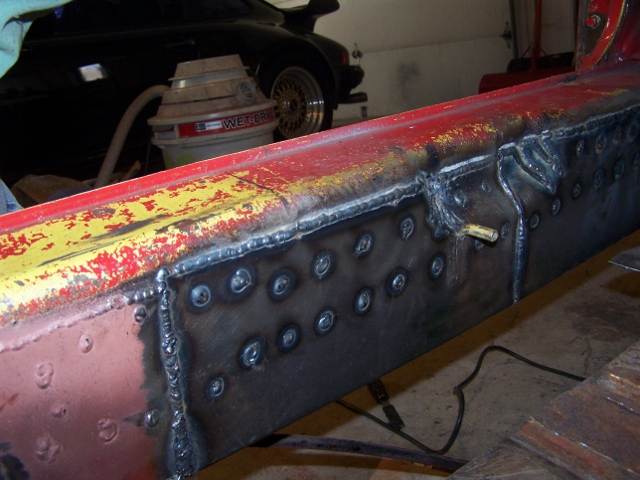 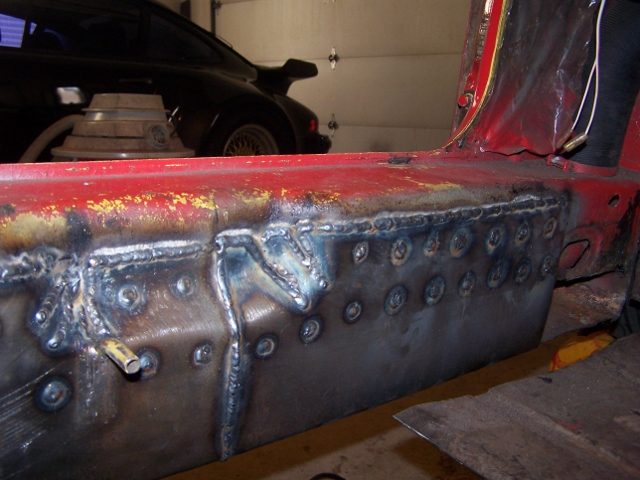 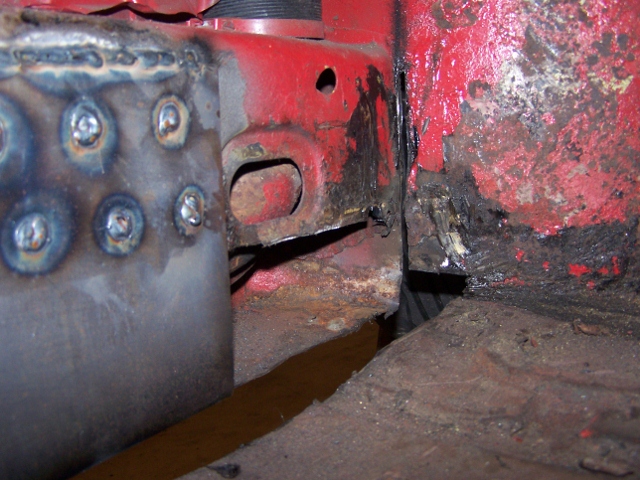
|
|
|
|
|
1 User(s) are reading this topic (1 Guests and 0 Anonymous Users)
0 Members:

|
Lo-Fi Version | Time is now: 3rd April 2025 - 06:06 PM |
Invision Power Board
v9.1.4 © 2025 IPS, Inc.