|
|
|
Porsche, and the Porsche crest are registered trademarks of Dr. Ing. h.c. F. Porsche AG.
This site is not affiliated with Porsche in any way. Its only purpose is to provide an online forum for car enthusiasts. All other trademarks are property of their respective owners. |
|
|

  |

| Spoke |
 Mar 16 2012, 06:20 AM Mar 16 2012, 06:20 AM
Post
#261
|
|
Jerry  Group: Members Posts: 7,145 Joined: 29-October 04 From: Allentown, PA Member No.: 3,031 Region Association: None |
Prep for adding the last inner long piece.
I cleaned up all the tar and rust proofing. The PO had braised the metal in. The new piece will come through the wheel well and attach to the existing 16ga long metal. 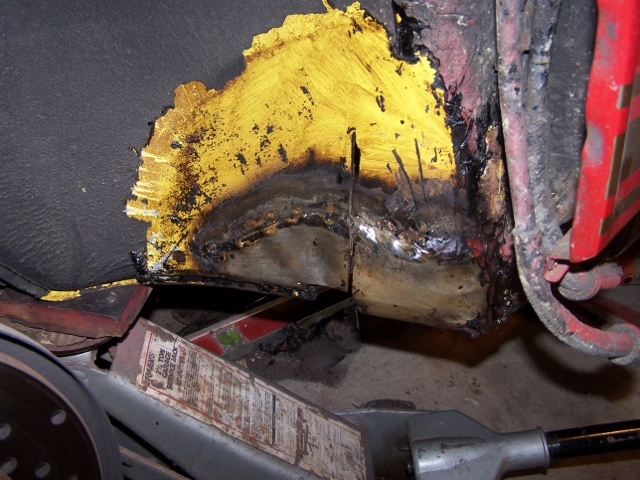 The part of the patch to the inside of the wheel well was hiding some ugly rust. How shocking! (IMG:style_emoticons/default/barf.gif) 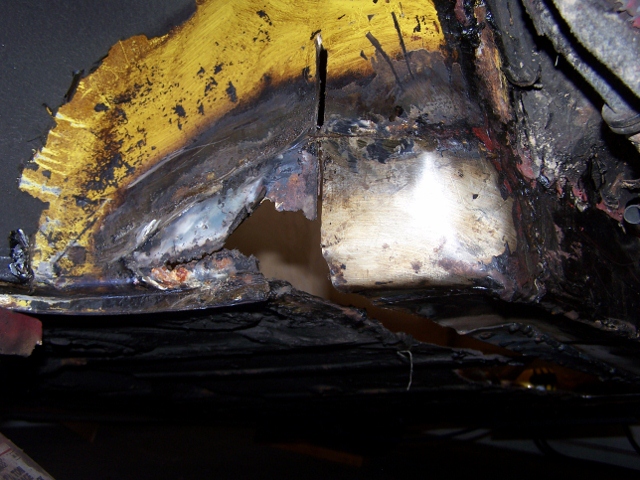 The new inner long material installed. I ground down as much of the braise on the existing long metal and welded. 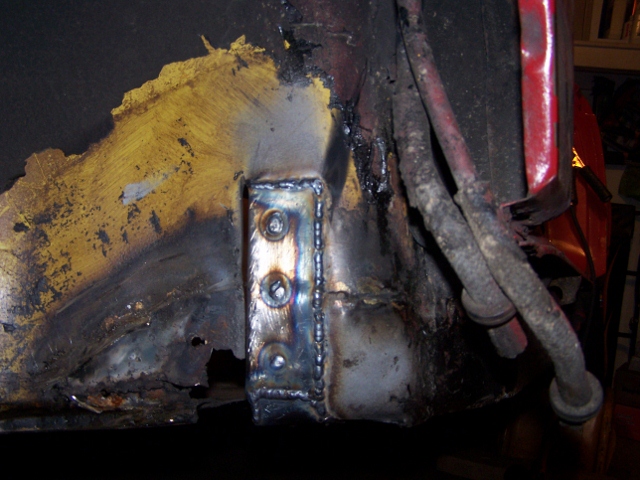 Inner long is now solid metal from front to rear. 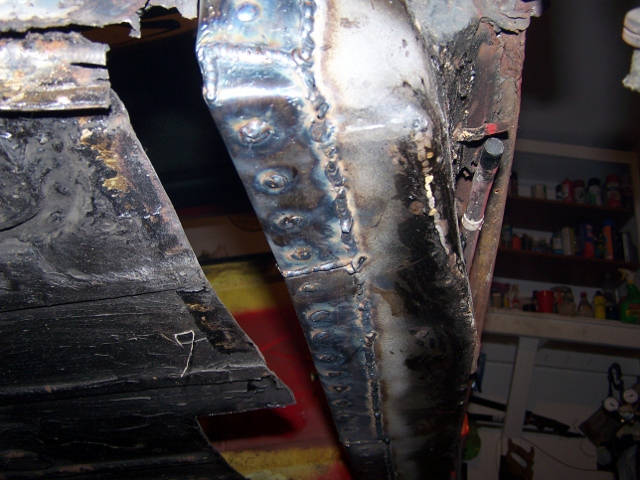 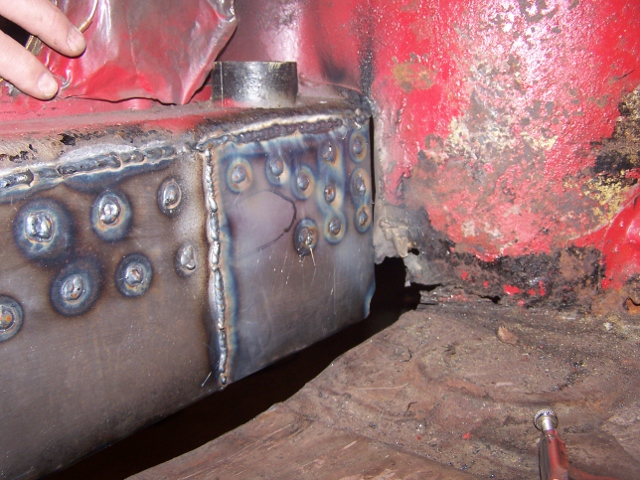 |
   |

 
|
| Spoke |
Mar 16 2012, 06:29 AM
Post
#262
|
|
Jerry Group: Members Posts: 7,145 Joined: 29-October 04 From: Allentown, PA Member No.: 3,031 Region Association: None |
Fabricated a patch for the drivers side floor.
 The channel is raised on the inside and has a piece under the car which is raise to the outside. I decided to weld this bottom piece on the entire length of the channel. I don't think the original bottom piece spanned the entire channel. 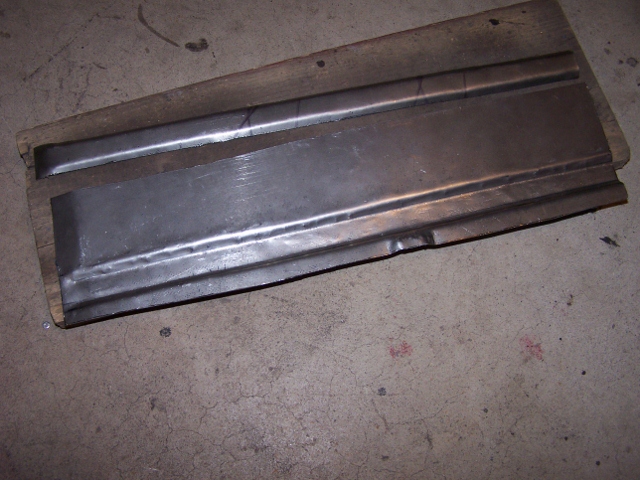 The 2 pieces welded together. To protect the inside of the channel brace, I poured cream-colored lacquer that I had laying around which of course overflowed and got on everything. 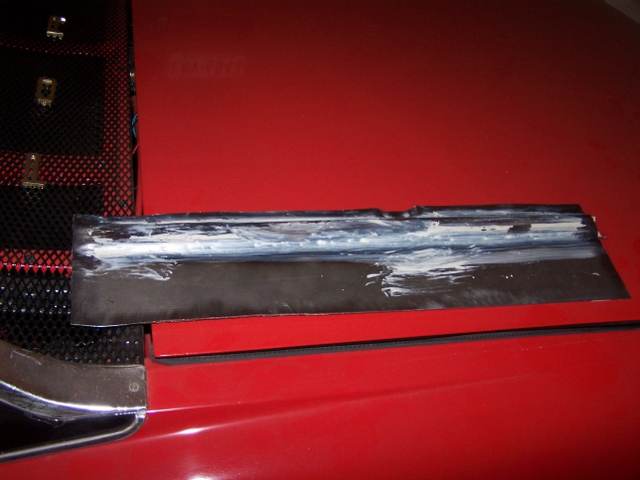 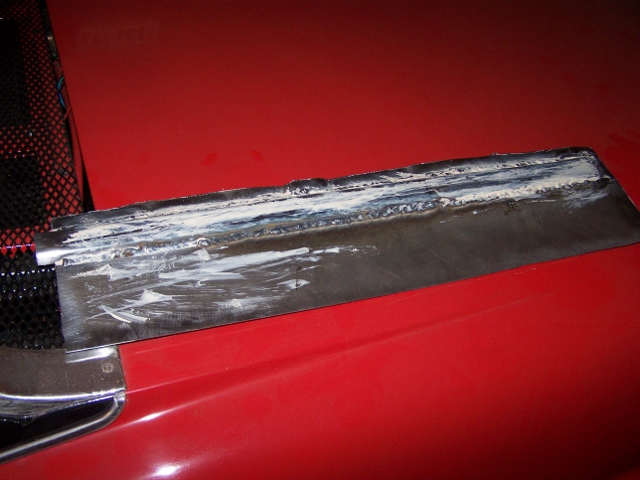 A pic of the inside of the channel 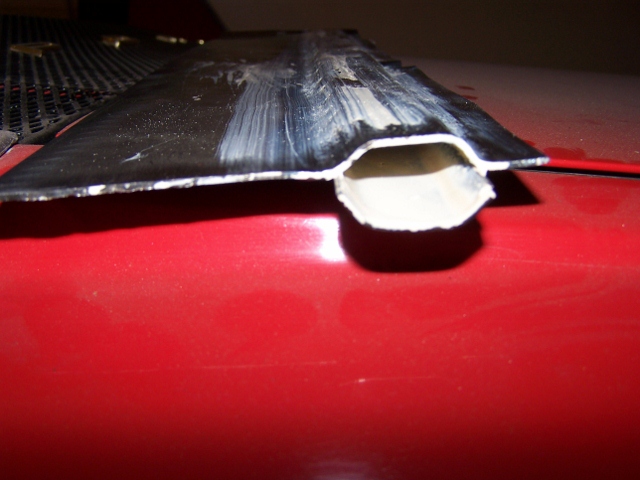 Welded in place. 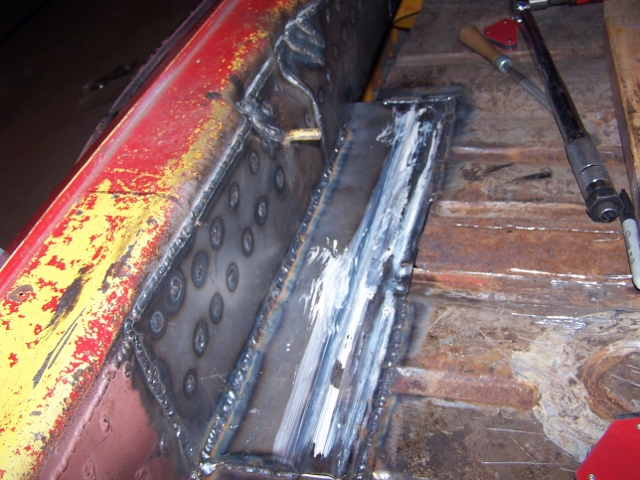 |
|
|
|
| Spoke |
Mar 17 2012, 09:30 PM
Post
#263
|
|
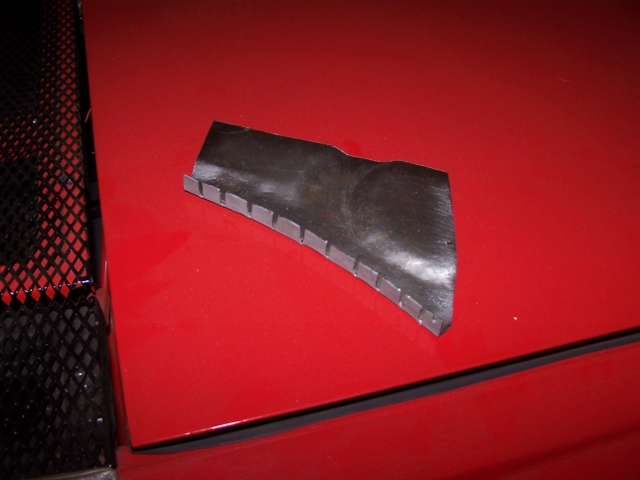
Jerry Group: Members Posts: 7,145 Joined: 29-October 04 From: Allentown, PA Member No.: 3,031 Region Association: None |
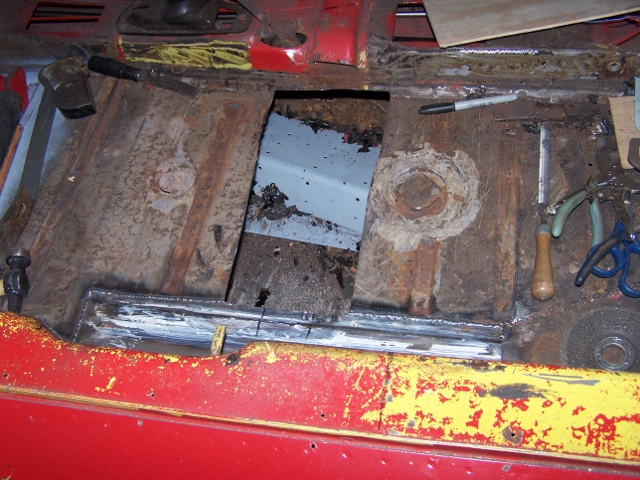
OK, so I cut out all the rusted material on the wheel well. The problem is the wheel well piece is a complex piece with several bends. So I will make this 2 pieces; one with the concave bends and tack weld surface with the floor, and the other with the simple flat concave
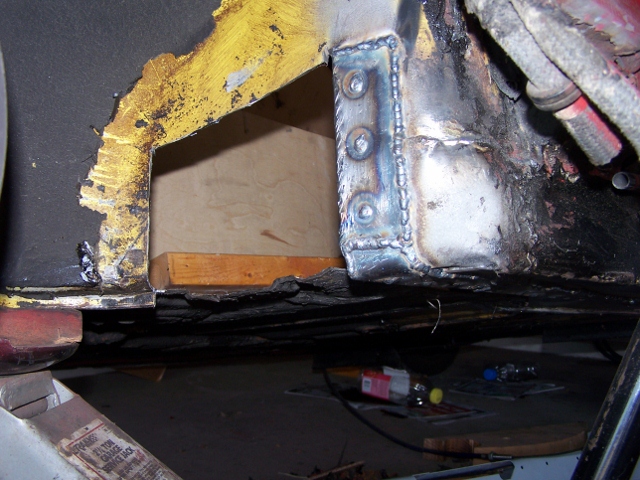 This is the first piece with the most complexity. I made the tack weld surface and curves then sliced the metal so to make the concave shape. 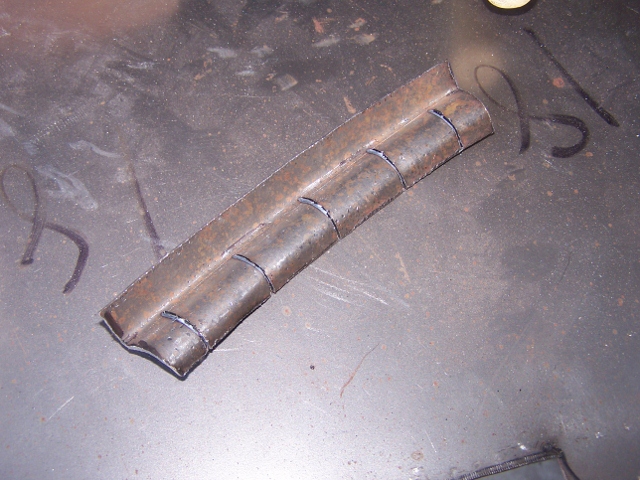 Ready for welding. 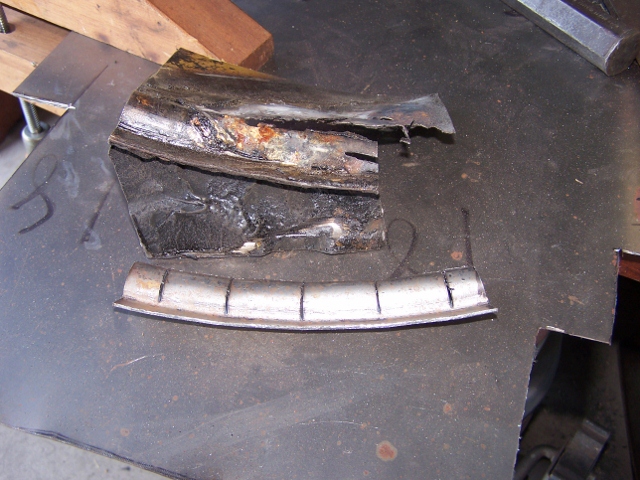 |
|
|
|
| Spoke |
Mar 17 2012, 09:37 PM
Post
#264
|
|
Jerry Group: Members Posts: 7,145 Joined: 29-October 04 From: Allentown, PA Member No.: 3,031 Region Association: None |
The bottom piece welded in place.
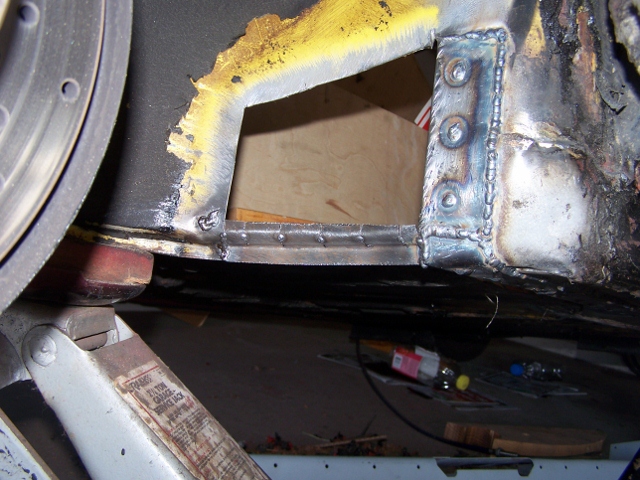  And the upper piece welded into place. Franken914 gets some more stitches and lives yet another day! (IMG:style_emoticons/default/beer.gif) 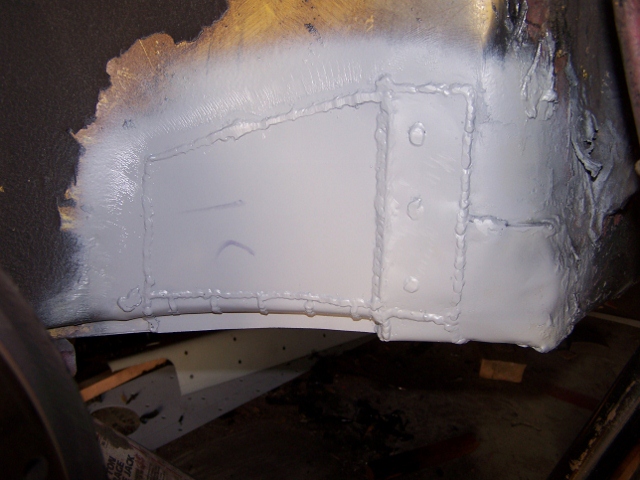 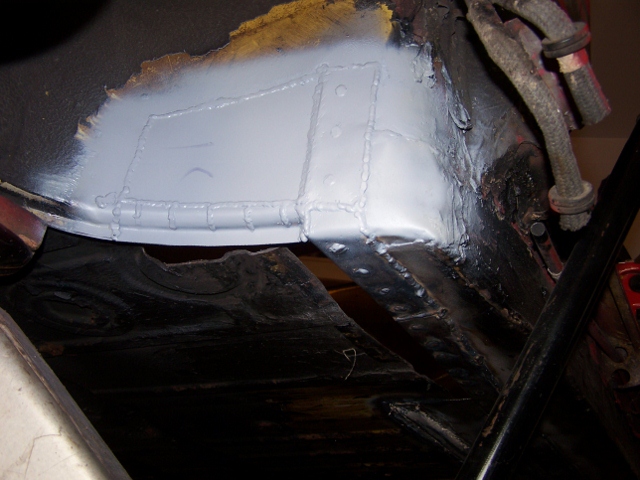 |
|
|
|
| jaxdream |
Mar 18 2012, 09:08 AM
Post
#265
|
|
Senior Member Group: Members Posts: 974 Joined: 8-July 08 From: North Central Tennessee Member No.: 9,270 Region Association: South East States |
Great work !!!! Keep going !!! (IMG:style_emoticons/default/piratenanner.gif) (IMG:style_emoticons/default/piratenanner.gif)
Jack |
|
|
|
| Spoke |
Mar 24 2012, 08:07 PM
Post
#266
|
|
Jerry Group: Members Posts: 7,145 Joined: 29-October 04 From: Allentown, PA Member No.: 3,031 Region Association: None |
Driver Floor corner piece.
 Instead of drilling holes to "spot" weld, I made slots to weld between. 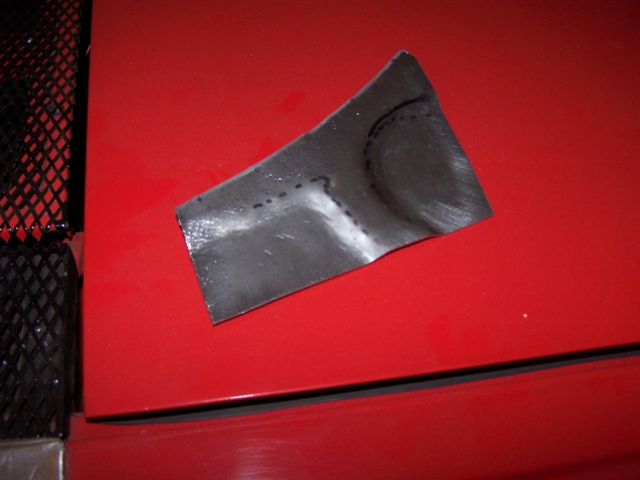 Installed 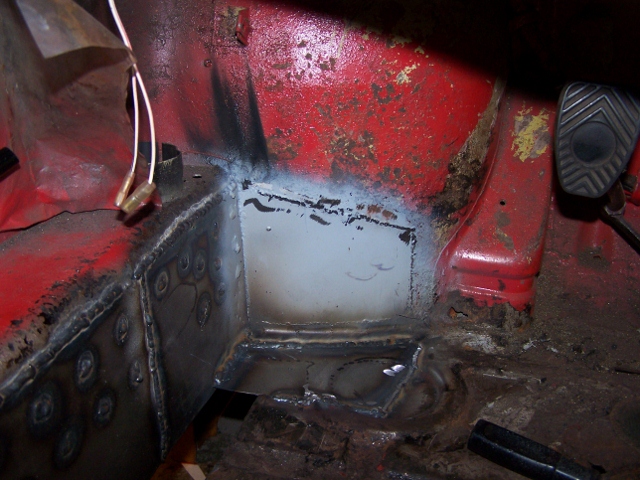 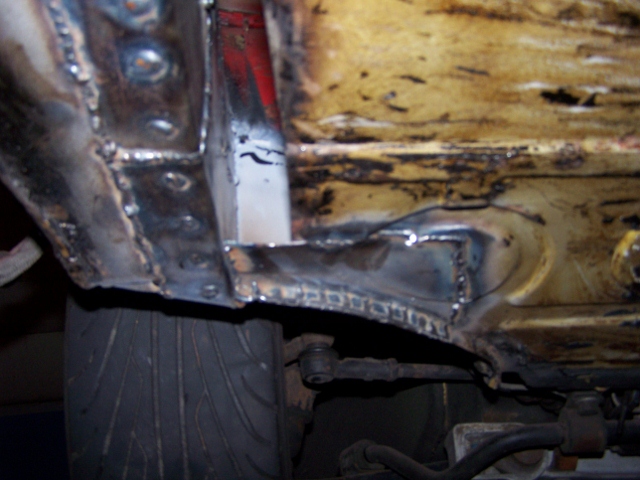 |
|
|
|
| Spoke |
Mar 24 2012, 08:20 PM
Post
#267
|
|
Jerry Group: Members Posts: 7,145 Joined: 29-October 04 From: Allentown, PA Member No.: 3,031 Region Association: None |
I need to replace some of the channels in the floor. I could (and should've) replace the entire floor pan. But then again, I'm a CSOB. I bought enough 18ga metal to do the entire floor for $5 from a local metal shop so I will continue to replace in pieces.
I made channels before by making all the bends one at a time. Quite time consuming. So I made a jig for making the channels. Right now there are 4 pieces: 2 pieces to set the channel width. These mount in a vice and can be adjusted for width. 1 piece to pound the metal into the channel 1 piece to make a channel end. 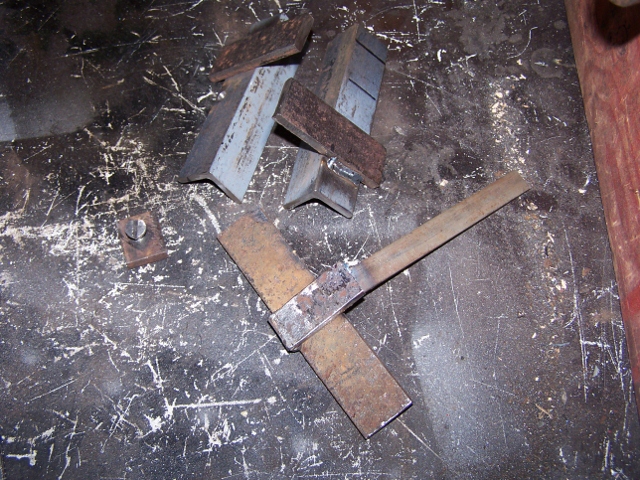 Here are the channel forms in place. 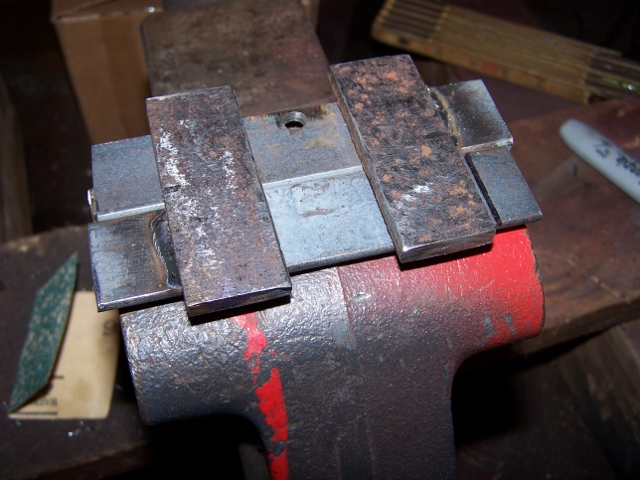 The channel is formed by pounding on the jig where needed. 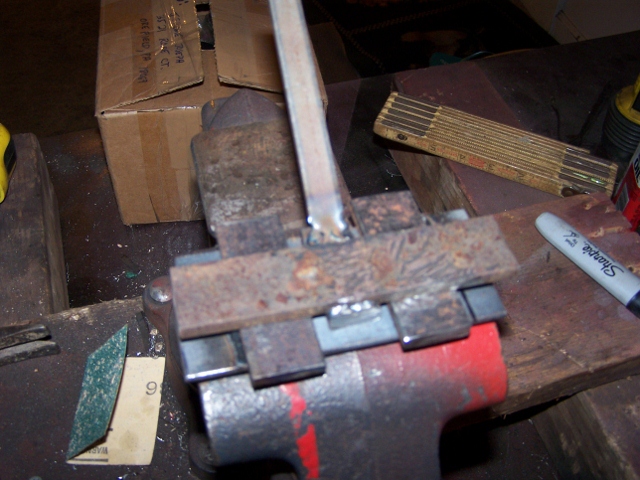 For making the channel ends, this piece can be screwed into the channel form. 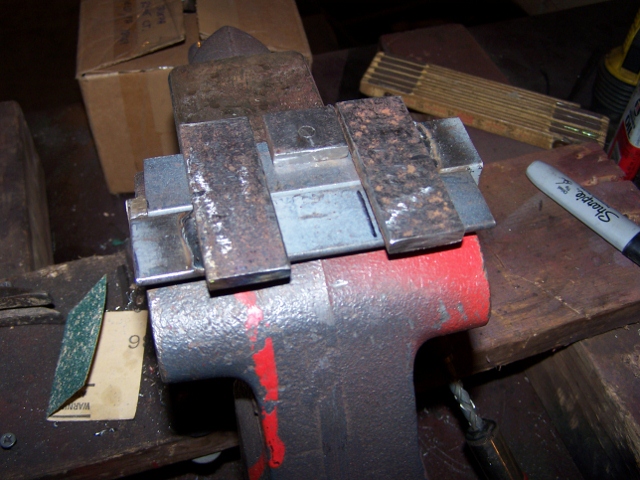 |
|
|
|
| Spoke |
Mar 24 2012, 08:24 PM
Post
#268
|
|
Jerry Group: Members Posts: 7,145 Joined: 29-October 04 From: Allentown, PA Member No.: 3,031 Region Association: None |
This piece will finish the floor next to the long. 2 channels terminate in this piece.
 Here the piece is ready to weld. 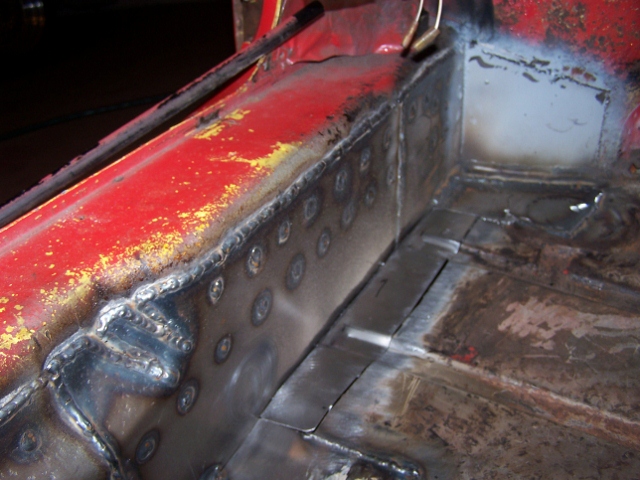 |
|
|
|
| jonferns |
Mar 24 2012, 10:02 PM
Post
#269
|
|
Advanced Member Group: Members Posts: 2,081 Joined: 29-March 07 From: New Jersey Member No.: 7,631 Region Association: North East States |
Great work! (IMG:style_emoticons/default/smilie_pokal.gif)
|
|
|
|
| abnrdo |
Mar 24 2012, 10:34 PM
Post
#270
|
|
Member Group: Members Posts: 399 Joined: 24-September 04 From: Panama City, FL Member No.: 2,820 Region Association: South East States |
Awesome work! Keep plugging away!! (IMG:style_emoticons/default/smash.gif)
(IMG:style_emoticons/default/welder.gif) |
|
|
|
| effutuo101 |
Mar 25 2012, 07:48 AM
Post
#271
|
|
Advanced Member Group: Members Posts: 2,735 Joined: 10-April 05 From: Lemon Grove Member No.: 3,914 Region Association: Southern California |
Very nice!
|
|
|
|
| Spoke |
Mar 26 2012, 03:14 PM
Post
#272
|
|
Jerry Group: Members Posts: 7,145 Joined: 29-October 04 From: Allentown, PA Member No.: 3,031 Region Association: None |
The front channel rusted through in a couple of places so I'll replace the entire channel.
Also rusted is the circular plug so I'll replace this with another smaller channel. 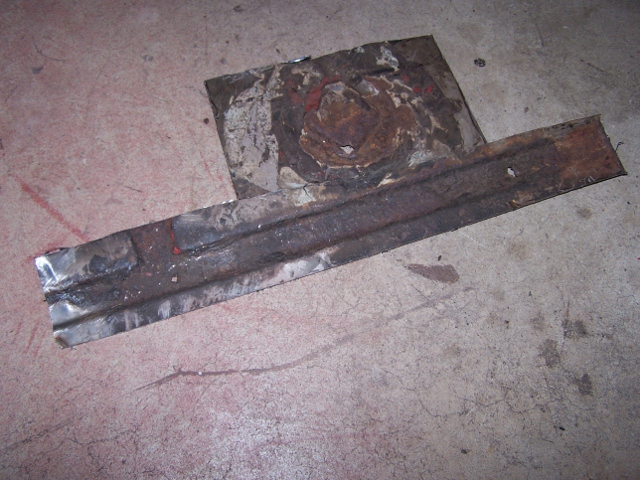 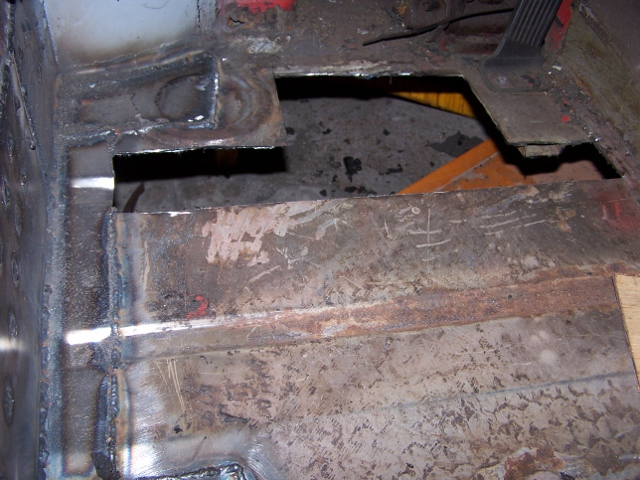 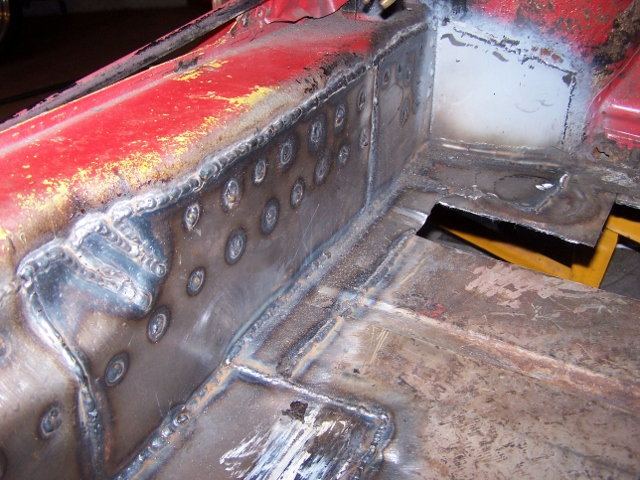 Looks like the original. 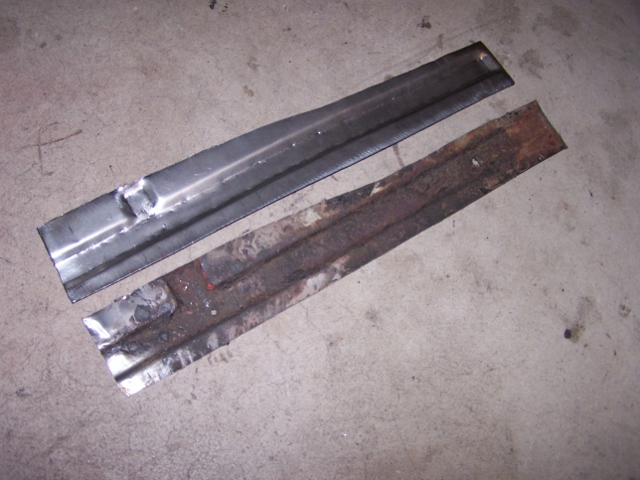 And welded in. 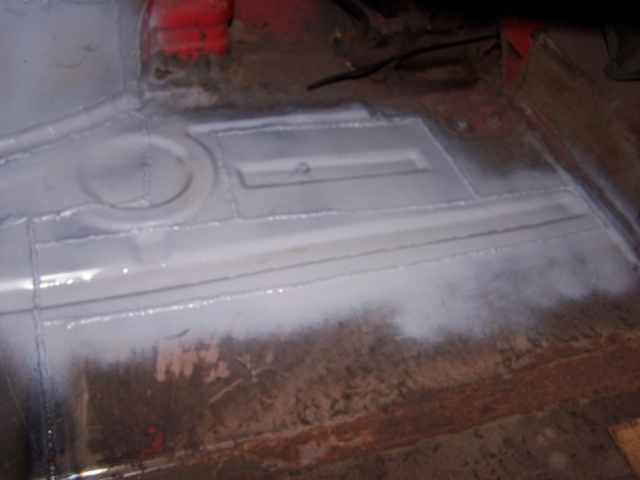 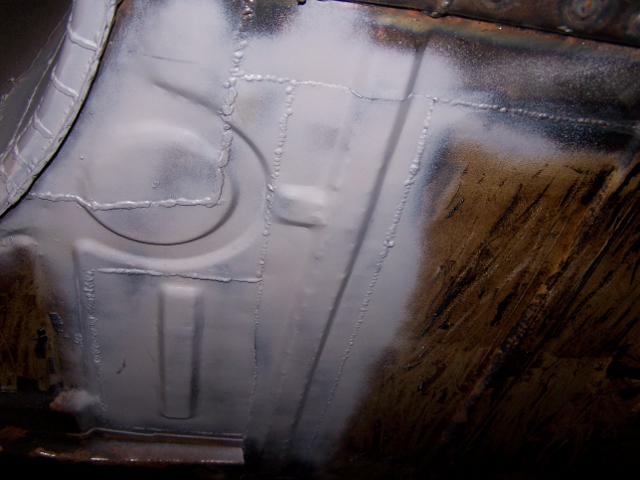 |
|
|
|
| Spoke |
Mar 31 2012, 08:49 AM
Post
#273
|
|
Jerry Group: Members Posts: 7,145 Joined: 29-October 04 From: Allentown, PA Member No.: 3,031 Region Association: None |
The floor under the cross brace wasn't rusted through but was thinned, so time to replace it.
 New piece ready to go. 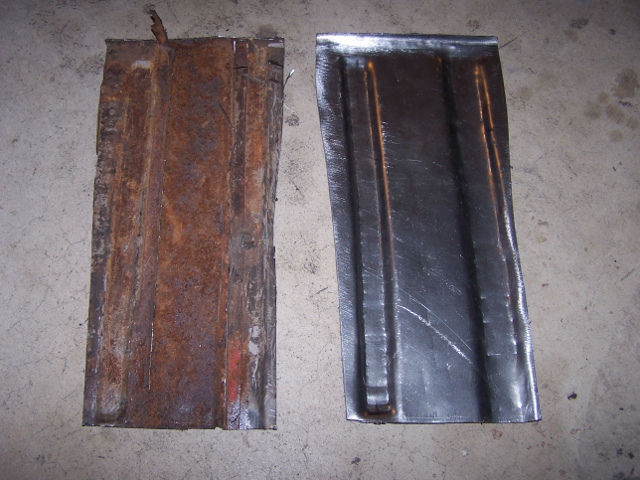 Done. More stitches to Franken914. 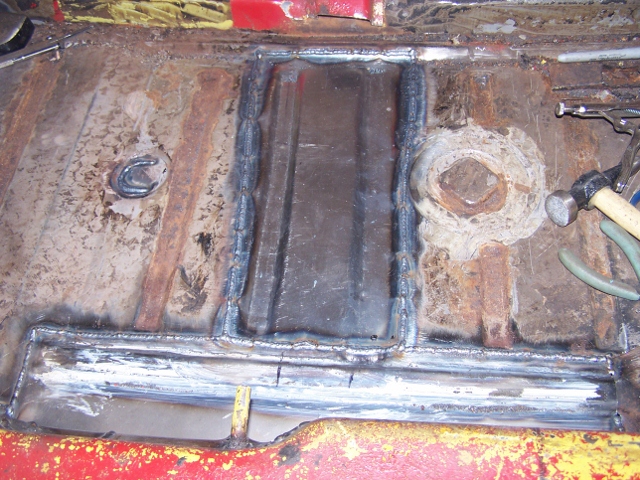 |
|
|
|
| FourBlades |
Mar 31 2012, 10:09 AM
Post
#274
|
|
From Wreck to Rockin Group: Members Posts: 2,056 Joined: 3-December 07 From: Brevard, FL Member No.: 8,414 Region Association: South East States |
Great work. (IMG:style_emoticons/default/smilie_pokal.gif)
Are you a plastic surgeon by any chance? You could make some money in Hollywood... (IMG:style_emoticons/default/smile.gif) John |
|
|
|
| Spoke |
Apr 3 2012, 03:06 PM
Post
#275
|
|
Jerry Group: Members Posts: 7,145 Joined: 29-October 04 From: Allentown, PA Member No.: 3,031 Region Association: None |
Making the driver side crossbrace. Used a 2x3 with an extra piece for the right width. An extra piece makes the bump-out for the parking brake switch.
 All trimmed up and ready for welding. 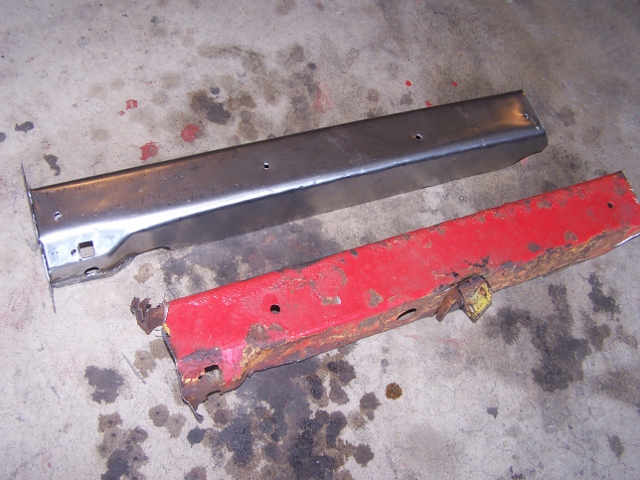 Done. 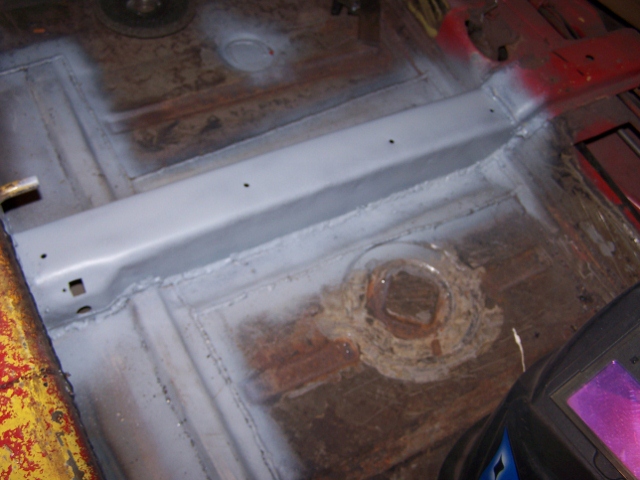 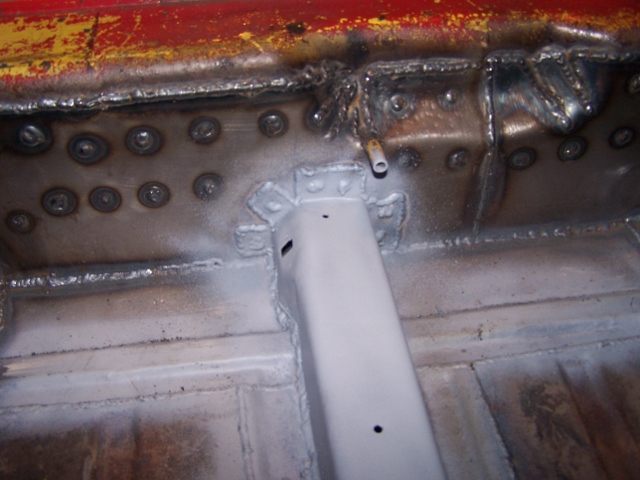 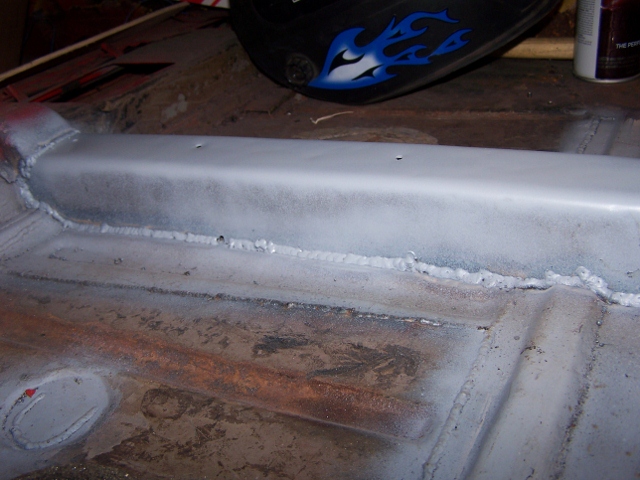 |
|
|
|
| trojanhorsepower |
Apr 3 2012, 06:23 PM
Post
#276
|
|
Senior Member Group: Members Posts: 867 Joined: 21-September 03 From: Marion, NC Member No.: 1,179 Region Association: None |
Great work!
|
|
|
|
| Spoke |
Apr 4 2012, 07:54 PM
Post
#277
|
|
Jerry Group: Members Posts: 7,145 Joined: 29-October 04 From: Allentown, PA Member No.: 3,031 Region Association: None |
Little patch on the footwell
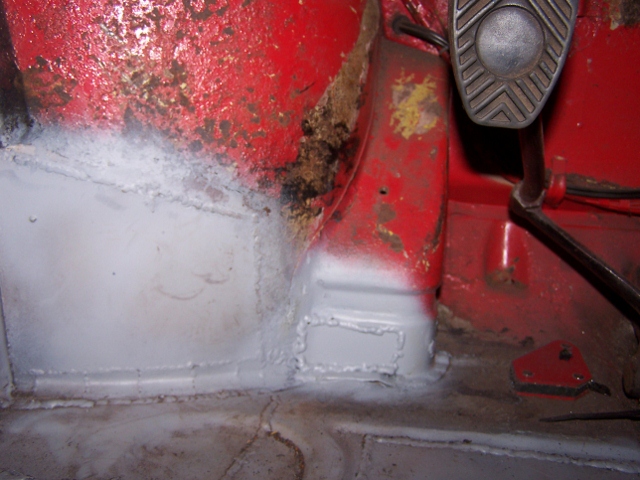 Patch on the inner firewall. This mess will be covered by Engmen's inner long kit. 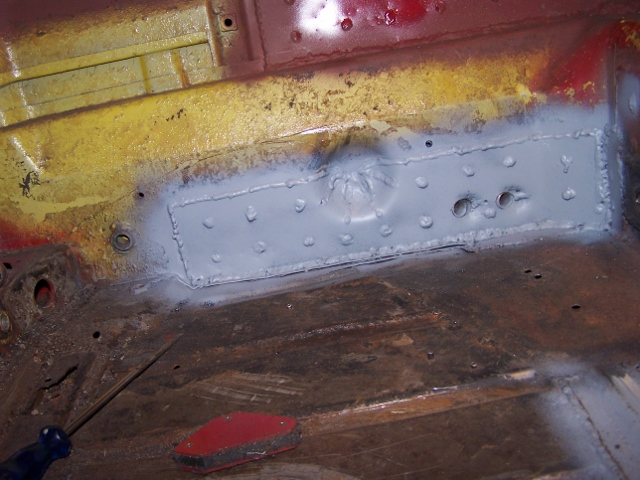 |
|
|
|
| Spoke |
Apr 8 2012, 07:16 PM
Post
#278
|
|
Jerry Group: Members Posts: 7,145 Joined: 29-October 04 From: Allentown, PA Member No.: 3,031 Region Association: None |
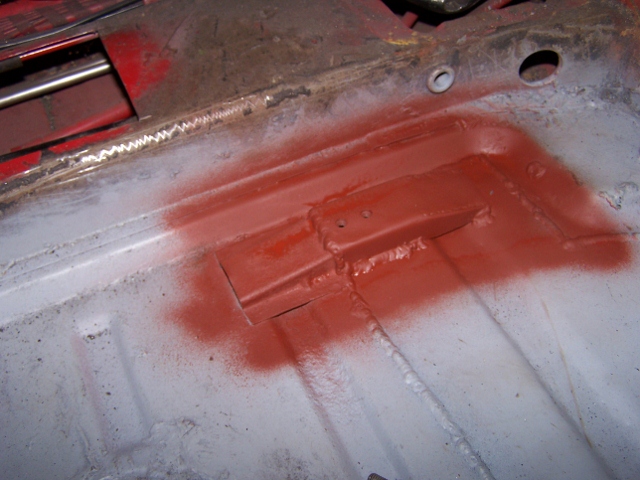
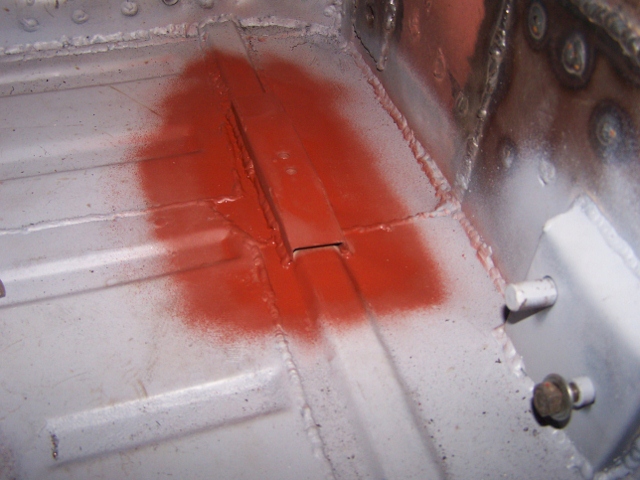
The back of the floor was pretty much a mess so I replaced the last 2 channels with a new piece. Also completed the brace parallel to the long.
 The original handbrake mount was really rusty so I cut off the post and bolt and made a new piece. This is 14ga steel like the original 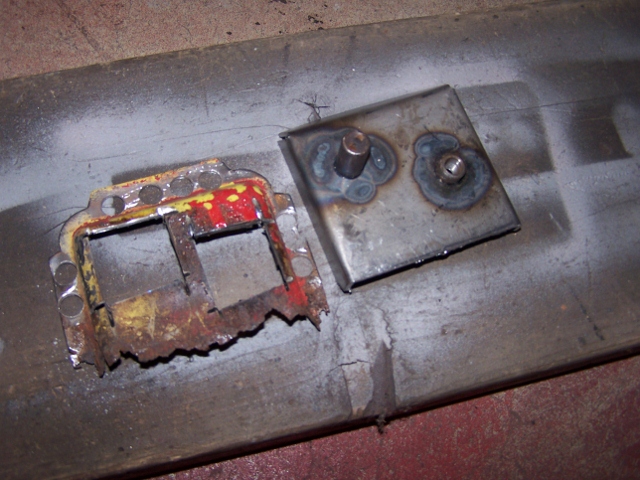 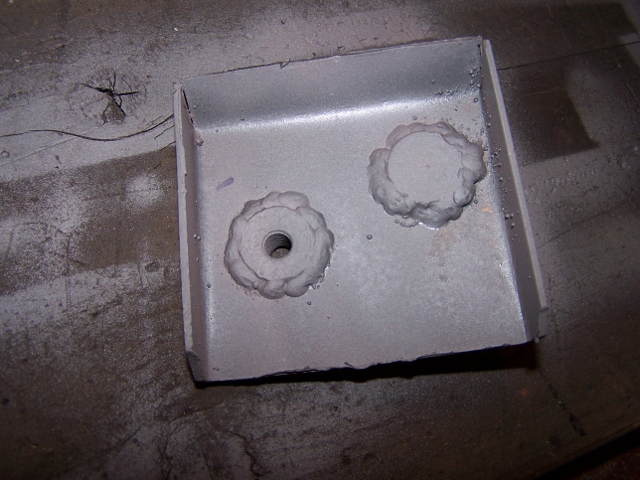 New handbrake mount welded in. 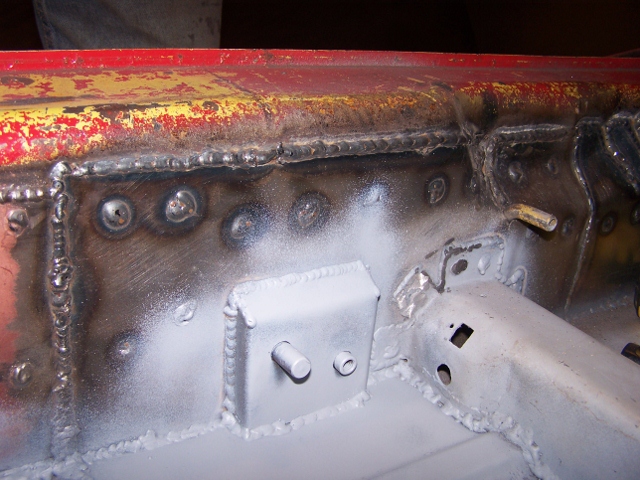 |
|
|
|
| uncle smokey |
Apr 8 2012, 08:18 PM
Post
#279
|
|
Newbie Group: Members Posts: 19 Joined: 4-June 11 From: PA Member No.: 13,157 Region Association: None |
That is some nice work.
|
|
|
|
| Spoke |
Apr 9 2012, 09:47 AM
Post
#280
|
|
Jerry Group: Members Posts: 7,145 Joined: 29-October 04 From: Allentown, PA Member No.: 3,031 Region Association: None |
Installed the driver seat mounts. Welded some nuts on the underside of the mounts so I can bolt on the hinges.
  For now, I'm using the same hinges that the PO used to support the seat. Welded 2 bolts onto the part attached to the seat runner and 2 bolts will attach the hinges to the mounts.  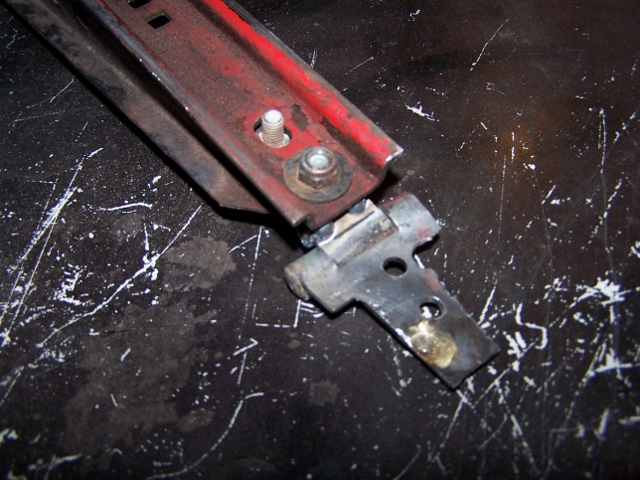 |
|
|
|
|
1 User(s) are reading this topic (1 Guests and 0 Anonymous Users)
0 Members:

|
Lo-Fi Version | Time is now: 3rd April 2025 - 06:06 PM |
Invision Power Board
v9.1.4 © 2025 IPS, Inc.