|
|

|
Porsche, and the Porsche crest are registered trademarks of Dr. Ing. h.c. F. Porsche AG.
This site is not affiliated with Porsche in any way. Its only purpose is to provide an online forum for car enthusiasts. All other trademarks are property of their respective owners. |
|
|
  |
| horizontally-opposed |
 Mar 6 2008, 01:23 PM Mar 6 2008, 01:23 PM
Post
#61
|
|
Advanced Member     Group: Members Posts: 3,456 Joined: 12-May 04 From: San Francisco Member No.: 2,058 Region Association: None 
|
|
| stevesc_us |
 Mar 6 2008, 03:46 PM Mar 6 2008, 03:46 PM
Post
#62
|
|
Member   Group: Members Posts: 71 Joined: 12-February 06 From: Redwood City, CA Member No.: 5,569 |
|
| dw914er |
 Mar 6 2008, 03:53 PM Mar 6 2008, 03:53 PM
Post
#63
|
|
Planning Cities     Group: Members Posts: 2,365 Joined: 1-March 08 From: Yucaipa, CA Member No.: 8,763 Region Association: Southern California |
gotta love old cars (any old car, doesnt exactly matter)
its not what you can always see that is the problem, it is what you cannot see that sometimes where the true issues lie well, good luck on the rust and in my opinion, whenever the rust issues are dealt with, i think the vw tornado red is a bitchin' color, and will probably add a bit more 'pop' to the look of the car over the bahia red anyways, good luck (rust is the enemy!!) |
| McMark |
 Mar 6 2008, 04:43 PM Mar 6 2008, 04:43 PM
Post
#64
|
|
914 Freak!                Group: Retired Admin Posts: 20,179 Joined: 13-March 03 From: Grand Rapids, MI Member No.: 419 Region Association: None |
I stopped using canned primer/paint over my metal work because I had a few experiences where the rattle can paint didn't interact well with the final paint and caused bubbling. So that's what must have happened on Olav's paint job. For sure. I've known that since it happened. |
| horizontally-opposed |
 Mar 6 2008, 05:35 PM Mar 6 2008, 05:35 PM
Post
#65
|
|
Advanced Member     Group: Members Posts: 3,456 Joined: 12-May 04 From: San Francisco Member No.: 2,058 Region Association: None 
|
|
| Krieger |
 Mar 6 2008, 09:33 PM Mar 6 2008, 09:33 PM
Post
#66
|
|
Advanced Member     Group: Members Posts: 4,800 Joined: 24-May 04 From: Santa Rosa CA Member No.: 2,104 Region Association: None 
|
You can do it man! Hang in there for pete's sake. Hey could this be a future Excellence article? (IMG:style_emoticons/default/biggrin.gif)
|
| McMark |
 Mar 6 2008, 09:40 PM Mar 6 2008, 09:40 PM
Post
#67
|
|
914 Freak!                Group: Retired Admin Posts: 20,179 Joined: 13-March 03 From: Grand Rapids, MI Member No.: 419 Region Association: None |
For sure. I've known that since it happened. If we sand those areas down prior to paint prep, it should be okay, right? pete Sand them down, and talk to your painter. Maybe a dose of brake cleaner, which eats rattle can for lunch, but doesn't usually do much to REAL paint. A wire brush can help too. You're going to have to try and get into the nooks and crannies. Your painter will know more about interactions. A good sealer might be all it takes (after sanding it off). |
| Engman |
 Mar 6 2008, 09:46 PM Mar 6 2008, 09:46 PM
Post
#68
|
|
Zoisite    Group: Benefactors Posts: 1,349 Joined: 25-March 03 From: New Albany, IN Member No.: 475  |
BTW, you saw you have The Crack®, right? Did notice it, didn't know it had a name.... tell me more! pete The crack - you need to weld it. Best if you open it up with a cutoff wheel and then weld it. Grind it flush, then install the Engman kit. (you want to open it so after it is welded you can grind it flush and still have a good strong weld). Love the lowering of the seats! Fantastic idea! Keep posting more pics! M |
| John |
 Mar 6 2008, 09:50 PM Mar 6 2008, 09:50 PM
Post
#69
|
|
member? what's a member?     Group: Members Posts: 3,393 Joined: 30-January 04 From: Evansville, IN (SIRPCA) Member No.: 1,615 Region Association: None |
BTW, you saw you have The Crack®, right? Did notice it, didn't know it had a name.... tell me more! pete That is a common area for cracks to develop. Once the crack is welded up and ground down, the engman kit will help prevent the crack from forming again. I have seen many cars with cracks right there including mine. |
| horizontally-opposed |
 Mar 6 2008, 10:43 PM Mar 6 2008, 10:43 PM
Post
#70
|
|
Advanced Member     Group: Members Posts: 3,456 Joined: 12-May 04 From: San Francisco Member No.: 2,058 Region Association: None 
|
Thanks, guys.
Longitudinals look and sound good -- exception to this is the obvious damage from jack points that failed long ago. I've had the fix-it pieces for those for a long time, just never had them put in. And I've had the rockers off lots o' times over the year to clean out all the crud that accumulates along the sides of the car from the backroads of Northern California. Well, this time the right jack "box" was fairly clear outside, and pretty clear when I cleaned out its drain hole. It also had good integrity. pete Attached thumbnail(s) 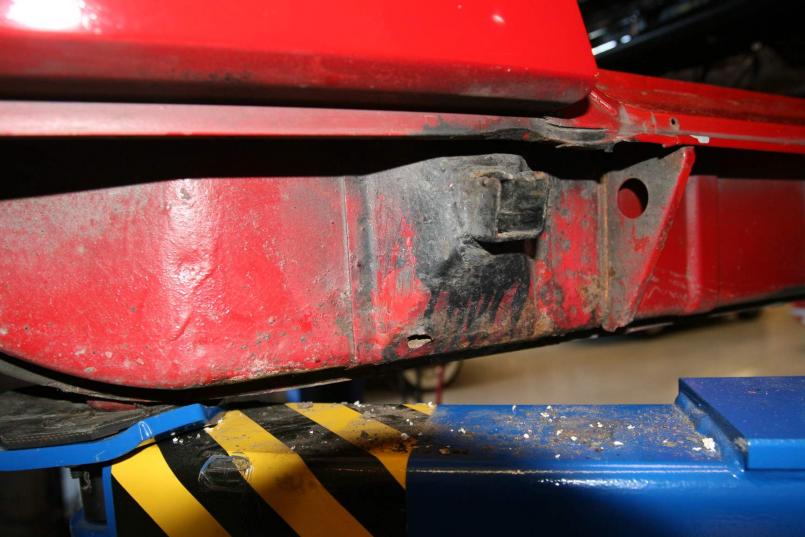
|
| horizontally-opposed |
 Mar 6 2008, 10:45 PM Mar 6 2008, 10:45 PM
Post
#71
|
|
Advanced Member     Group: Members Posts: 3,456 Joined: 12-May 04 From: San Francisco Member No.: 2,058 Region Association: None 
|
Unfortunately, the left box didn't appear to have a drain hole at all -- which didn't go with anything I remembered. Then I finally found it with the screwdriver.
Interestingly, the drain hole is towards the rear on the right side, where you'd think it would be, but it's towards the front on the driver's side, which isn't quite as smart (or maybe it doesn't matter...). Clearly, two stampings weren't in the cards. Anyway, the left box was PACKED with dirt, and the predictable result was rust on the front face of the box. The good news is that the left longitudinal itself seems completely solid, and as nice as the one on the right. Phew! I think I am going to go ahead and delete the jack-tube boxes entirely. This will give us a better look in there, and also rid the car of these now useless crud-catchers (which is what I will call these from now on) and I'm just not concerned with the concours aspect of this car. I'm much more interested in long-term preservation of utitlity... pete Attached thumbnail(s) 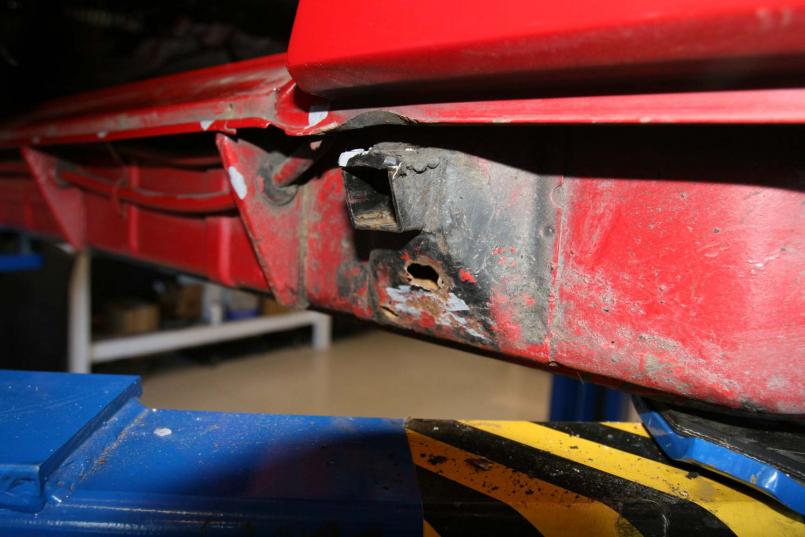
|
| horizontally-opposed |
 Apr 3 2008, 04:02 PM Apr 3 2008, 04:02 PM
Post
#72
|
|
Advanced Member     Group: Members Posts: 3,456 Joined: 12-May 04 From: San Francisco Member No.: 2,058 Region Association: None 
|
Moving along, here's what I took out of the voids above the taillights. The rust-darkened one from the left side where I had the rust bubble that inspired this odyssey, the light one is from the right side, which was still fine but on its way to a similar fate.
pete Attached thumbnail(s) 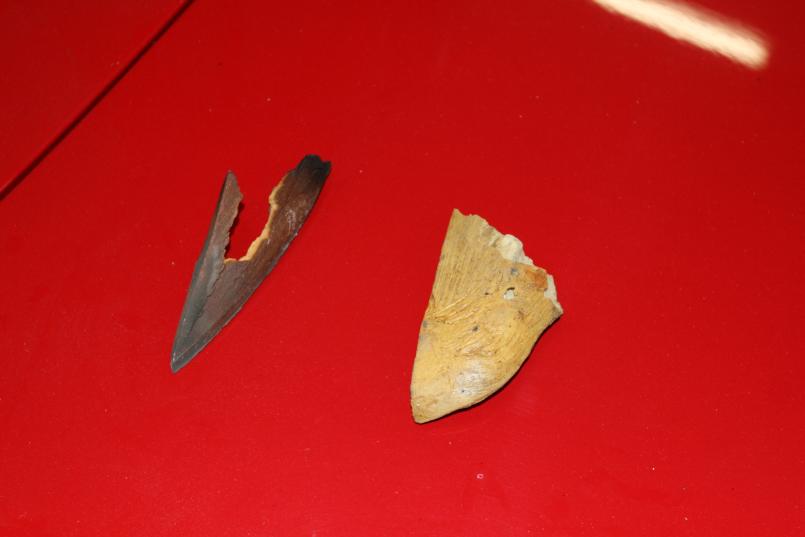
|
| horizontally-opposed |
 Apr 3 2008, 04:03 PM Apr 3 2008, 04:03 PM
Post
#73
|
|
Advanced Member     Group: Members Posts: 3,456 Joined: 12-May 04 From: San Francisco Member No.: 2,058 Region Association: None 
|
The good... (kinda)
Attached thumbnail(s) 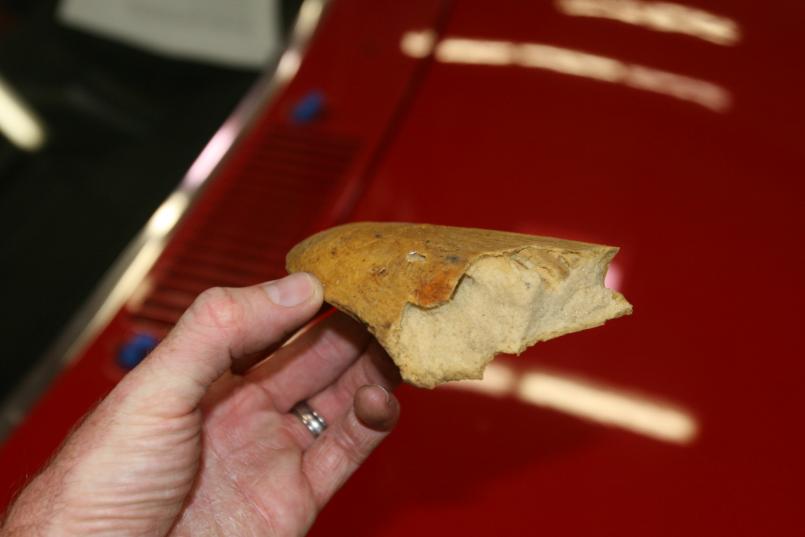
|
| horizontally-opposed |
 Apr 3 2008, 04:04 PM Apr 3 2008, 04:04 PM
Post
#74
|
|
Advanced Member     Group: Members Posts: 3,456 Joined: 12-May 04 From: San Francisco Member No.: 2,058 Region Association: None 
|
And the ugly...
Attached thumbnail(s) 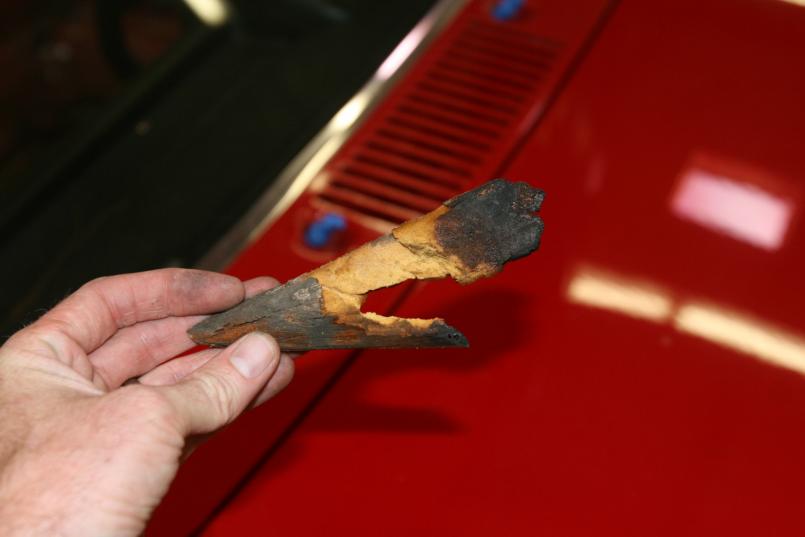
|
| horizontally-opposed |
 Apr 3 2008, 04:06 PM Apr 3 2008, 04:06 PM
Post
#75
|
|
Advanced Member     Group: Members Posts: 3,456 Joined: 12-May 04 From: San Francisco Member No.: 2,058 Region Association: None 
|
Now, onto the interior...
Attached thumbnail(s) 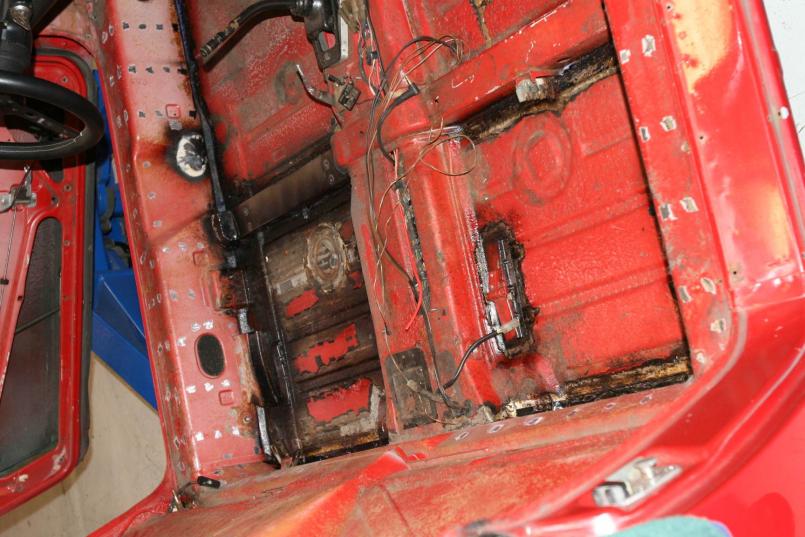
|
| horizontally-opposed |
 Apr 3 2008, 04:07 PM Apr 3 2008, 04:07 PM
Post
#76
|
|
Advanced Member     Group: Members Posts: 3,456 Joined: 12-May 04 From: San Francisco Member No.: 2,058 Region Association: None 
|
closer in on the lowered driver's seat...
Attached thumbnail(s) 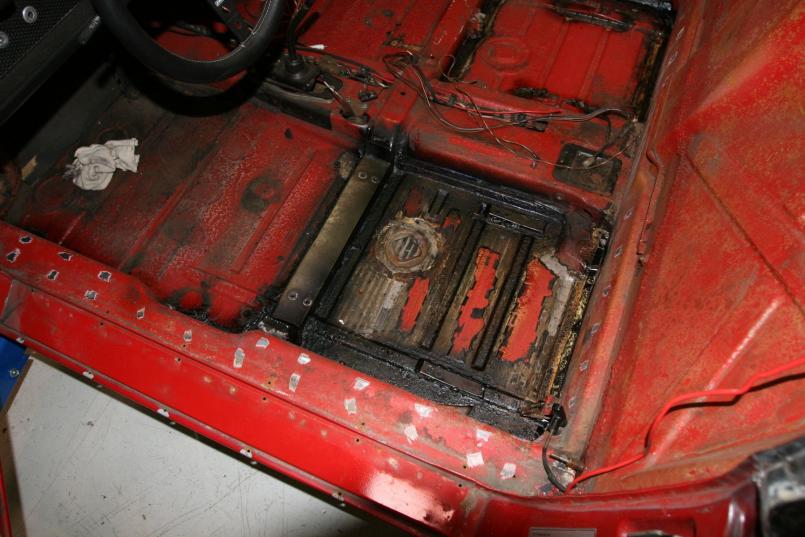
|
| horizontally-opposed |
 Apr 3 2008, 04:08 PM Apr 3 2008, 04:08 PM
Post
#77
|
|
Advanced Member     Group: Members Posts: 3,456 Joined: 12-May 04 From: San Francisco Member No.: 2,058 Region Association: None 
|
And closer still...
Attached thumbnail(s) 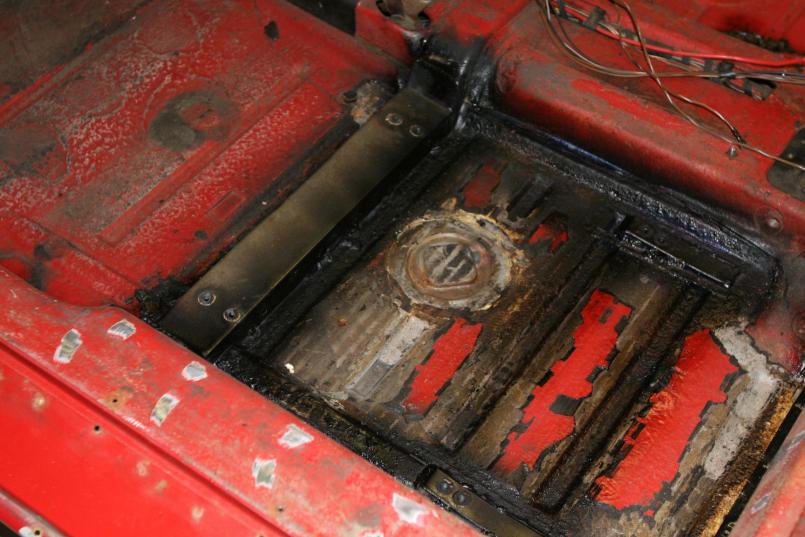
|
| horizontally-opposed |
 Apr 3 2008, 04:12 PM Apr 3 2008, 04:12 PM
Post
#78
|
|
Advanced Member     Group: Members Posts: 3,456 Joined: 12-May 04 From: San Francisco Member No.: 2,058 Region Association: None 
|
another angle...
Bolted the GTS seat in after this and I must say this may be one of the best mods I've ever made to my 914. I like to sit as low as possible and have a long torso, and I *finally* feel like I am sitting in the car low enough. I can see all of the tach through the Prototipo and I love the new position. The seat slides better than it did before, and if I want to change the rake (I don't think I will, but we'll see...), I can always shim it later. VERY happy with this mod. pete Attached thumbnail(s) 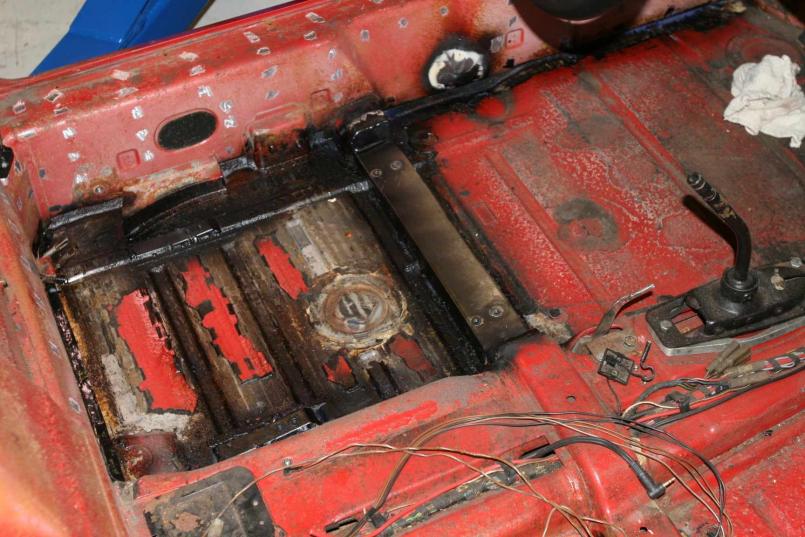
|
| horizontally-opposed |
 Apr 3 2008, 04:15 PM Apr 3 2008, 04:15 PM
Post
#79
|
|
Advanced Member     Group: Members Posts: 3,456 Joined: 12-May 04 From: San Francisco Member No.: 2,058 Region Association: None 
|
Now for the not so fun:
Attached thumbnail(s) 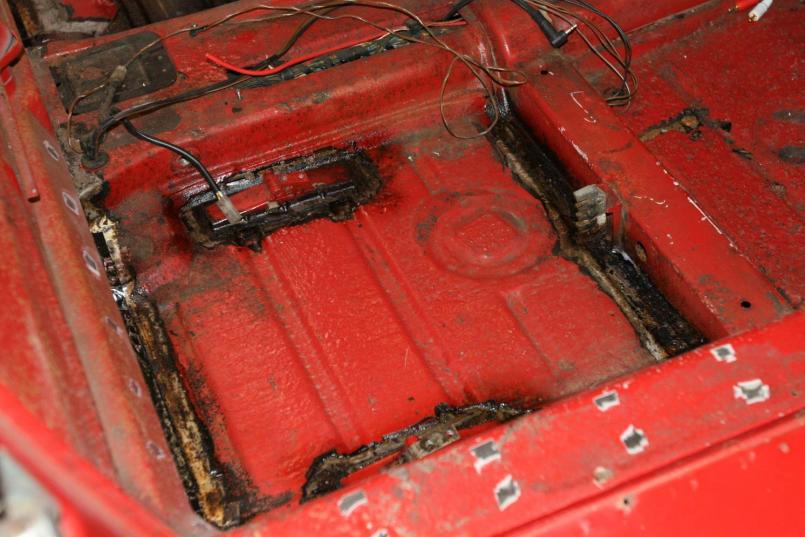
|
| horizontally-opposed |
 Apr 3 2008, 04:16 PM Apr 3 2008, 04:16 PM
Post
#80
|
|
Advanced Member     Group: Members Posts: 3,456 Joined: 12-May 04 From: San Francisco Member No.: 2,058 Region Association: None 
|
"My" hell hole...
Attached thumbnail(s) 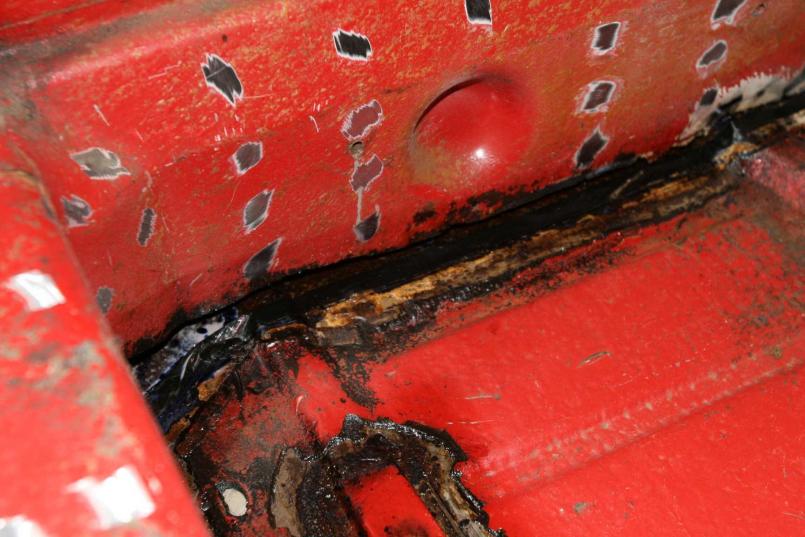
|
  |
1 User(s) are reading this topic (1 Guests and 0 Anonymous Users)
0 Members:

|
Lo-Fi Version | Time is now: 17th April 2025 - 10:36 PM |
Invision Power Board
v9.1.4 © 2025 IPS, Inc.


