|
|

|
Porsche, and the Porsche crest are registered trademarks of Dr. Ing. h.c. F. Porsche AG.
This site is not affiliated with Porsche in any way. Its only purpose is to provide an online forum for car enthusiasts. All other trademarks are property of their respective owners. |
|
|
  |
| 3d914 |
 Dec 21 2012, 05:59 PM Dec 21 2012, 05:59 PM
Post
#221
|
|
Senior Member    Group: Members Posts: 1,275 Joined: 24-September 03 From: Benson, AZ Member No.: 1,191 Region Association: Southwest Region |
Some good news today. I installed the 3-wire O2 sensors and worked on the MAF sensor today. The MAF was cleaned and passed the various tests, so I'm concluding its OK.
There were some good signs that the JX2 PCM is fine. The startup sequence was correct.
I was able to check codes and the sequence looked correct.
Now on to other issues. |
| AZ914 |
 Dec 21 2012, 11:01 PM Dec 21 2012, 11:01 PM
Post
#222
|
|
914 Dumbass    Group: Members Posts: 1,461 Joined: 6-January 03 From: Sunny Tucson Member No.: 98 Region Association: Southwest Region |
|
| 3d914 |
 Dec 27 2012, 04:50 PM Dec 27 2012, 04:50 PM
Post
#223
|
|
Senior Member    Group: Members Posts: 1,275 Joined: 24-September 03 From: Benson, AZ Member No.: 1,191 Region Association: Southwest Region |
Slow progress. Been chasing wiring issues for most of the last two weeks. Got some of the running/code issues addressed, still chasing the other two:
Located and ordered a FP Regulator. Took off the intake to remove the bad one. Took all of five minutes to get the intake off - this is why I decided to do all the testing on a stand. Soooo much easier. Looks kinda cool even without the intake. 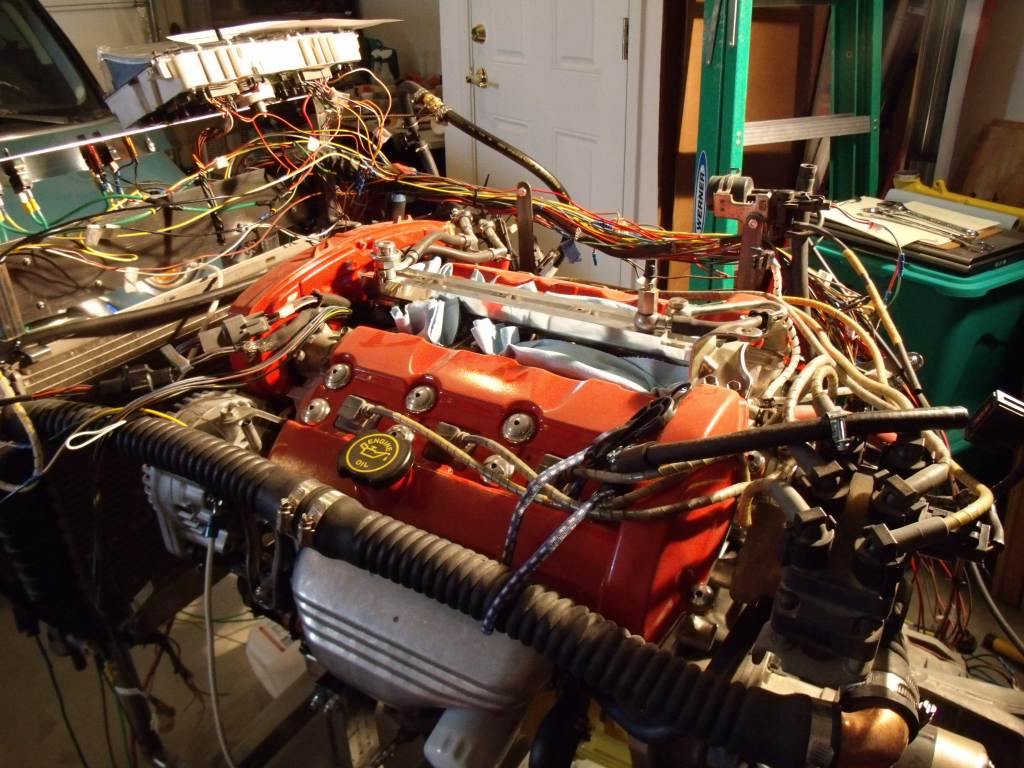 |
| 3d914 |
 Dec 30 2012, 05:35 PM Dec 30 2012, 05:35 PM
Post
#224
|
|
Senior Member    Group: Members Posts: 1,275 Joined: 24-September 03 From: Benson, AZ Member No.: 1,191 Region Association: Southwest Region |
Well, got around to doing test run #2. Unfortunately the results were the same. Even with the new FP regulator it still seemed to be flooding. Beginning to think the entire fuel system needs to be pressurized. I'm doing my test with an open can with fuel supply and return hoses into it.
Also got the same PCM codes as last time. I did get another code (81) earlier, but it has cleared since. Looks like I'll be wiring up a stock "D" ICRM/CCRM and trying that. Keep ya posted. |
| 3d914 |
 Jan 5 2013, 04:05 PM Jan 5 2013, 04:05 PM
Post
#225
|
|
Senior Member    Group: Members Posts: 1,275 Joined: 24-September 03 From: Benson, AZ Member No.: 1,191 Region Association: Southwest Region |
Spent last week getting the stock "D" type ICRM/CCRM (relay module) hooked up in place of my custom one. Reviewed all my ignition wiring. Ready for test run #3.
OK, got around to test run this morning. I still don't have a throttle cable hooked up, so I set the idle at 2000rpm so the motor can warm up. Here's the video. Also did another video with the idle set down to 1000 rpm. Looks like I got me a running SHO motor. |
| Mike Bellis |
 Jan 5 2013, 04:50 PM Jan 5 2013, 04:50 PM
Post
#226
|
|
Resident Electrician      Group: Members Posts: 8,347 Joined: 22-June 09 From: Midlothian TX Member No.: 10,496 Region Association: None 

|
|
| 914GT |
 Jan 5 2013, 06:51 PM Jan 5 2013, 06:51 PM
Post
#227
|
|
Senior Member    Group: Members Posts: 1,101 Joined: 11-October 04 From: Tucson Member No.: 2,923 Region Association: Southwest Region |
if you need some help putting that baby in, let me know!
|
| 3d914 |
 Jan 5 2013, 07:11 PM Jan 5 2013, 07:11 PM
Post
#228
|
|
Senior Member    Group: Members Posts: 1,275 Joined: 24-September 03 From: Benson, AZ Member No.: 1,191 Region Association: Southwest Region |
Thanks, but it will still be a while. Now that the motors running, I need to get all the wiring I have in place fully documented. In the meantime I'll get back to finishing up the engine bay so I can do a test fit. Will definitely need some help then.
|
| 3d914 |
 Jan 19 2013, 07:01 PM Jan 19 2013, 07:01 PM
Post
#229
|
|
Senior Member    Group: Members Posts: 1,275 Joined: 24-September 03 From: Benson, AZ Member No.: 1,191 Region Association: Southwest Region |
Found a stripped thread for one of the valve cover bolts. These heads are aluminum, so a time-sert will be needed. Since it wasn't 45 degrees today, I was actually able to get some work done in the garage. Shims came in so I finished up the valve adjustment. Some of the measurements I took previously were slightly different (+ .001 or .002). I was able to adjust my shim usage to get my desired gaps.
For anyone unfamiliar with the time-sert install process here are some pics. I went with a kit so I wouldn't have to chase around looking for the right drill bit, tap, etc. The kit is sized by the thread you're repairing - so for the cover bolts it was a M6-1.0x10mm. All the work can be done by hand - power tools would be complete overkill. First & easy step was to drill out the hole, then use the c-bore tool. These tools are nice quality, so even work by-hand goes quick. They suggest using compressed air to blow out material, but with the cover off I didn't think that was so wise, so I used my small vacuum instead. 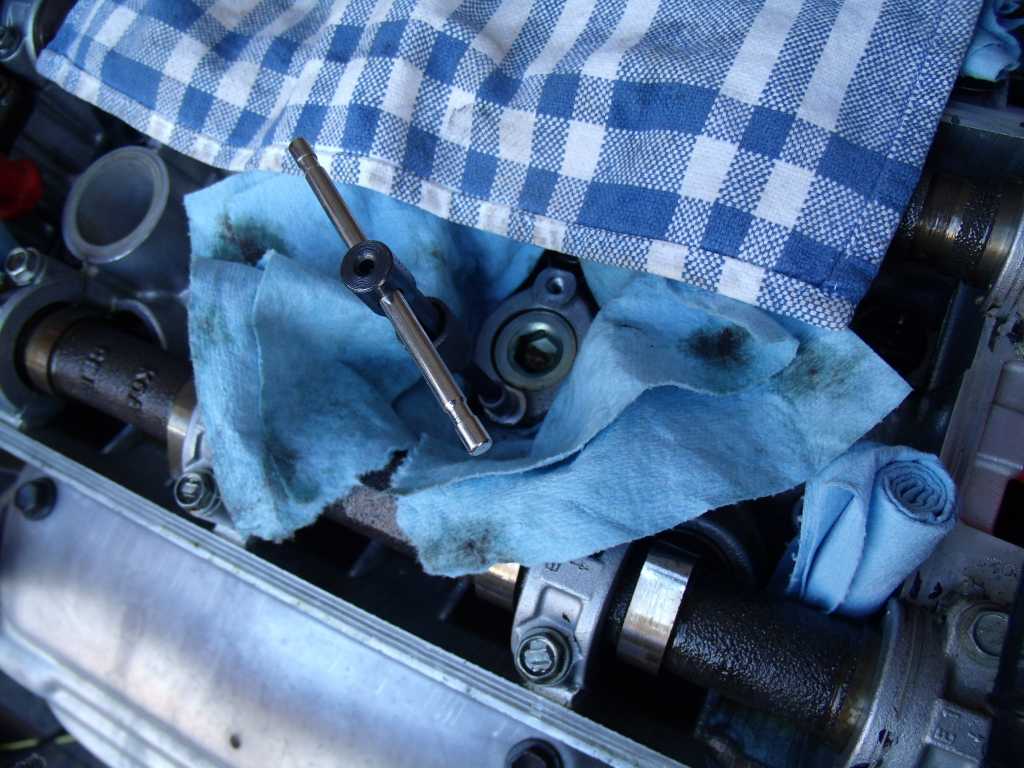 Result was a nice clean counter-bore. 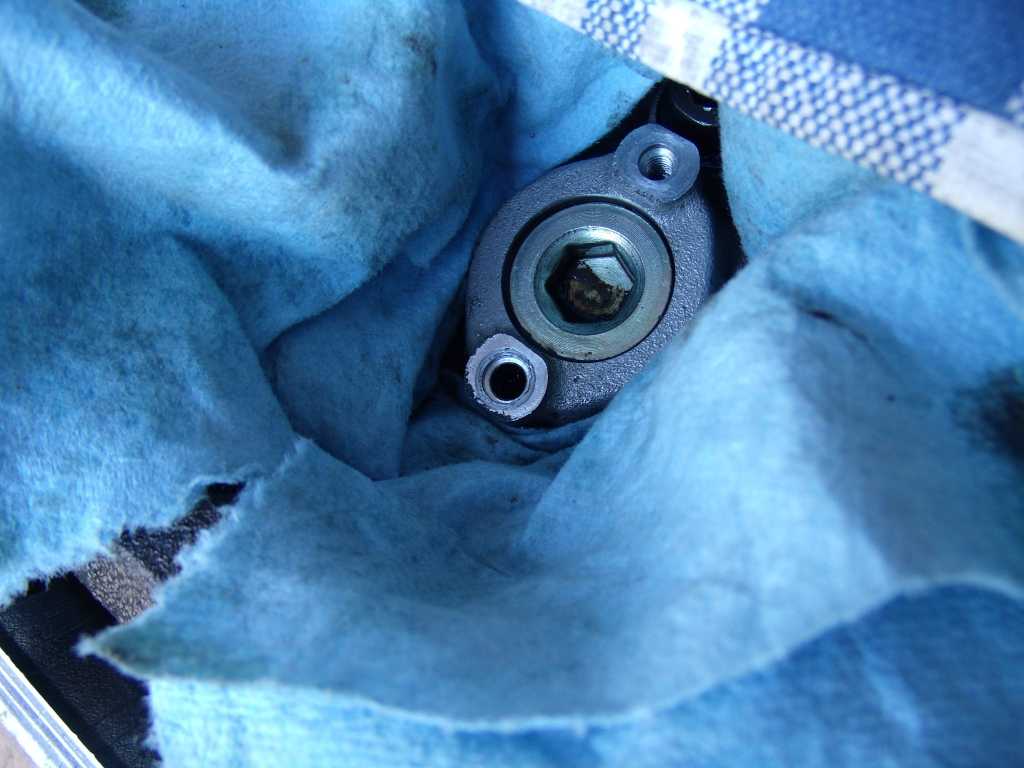 Next was the tap. Like the drilling, I used a 90deg allen wrench as an angle guide since there isn't much room. Oil was also needed to cut cleanly. Note for reference: the fitting for the tool on the tap was larger than the others so a #12 or larger T-handle is needed. 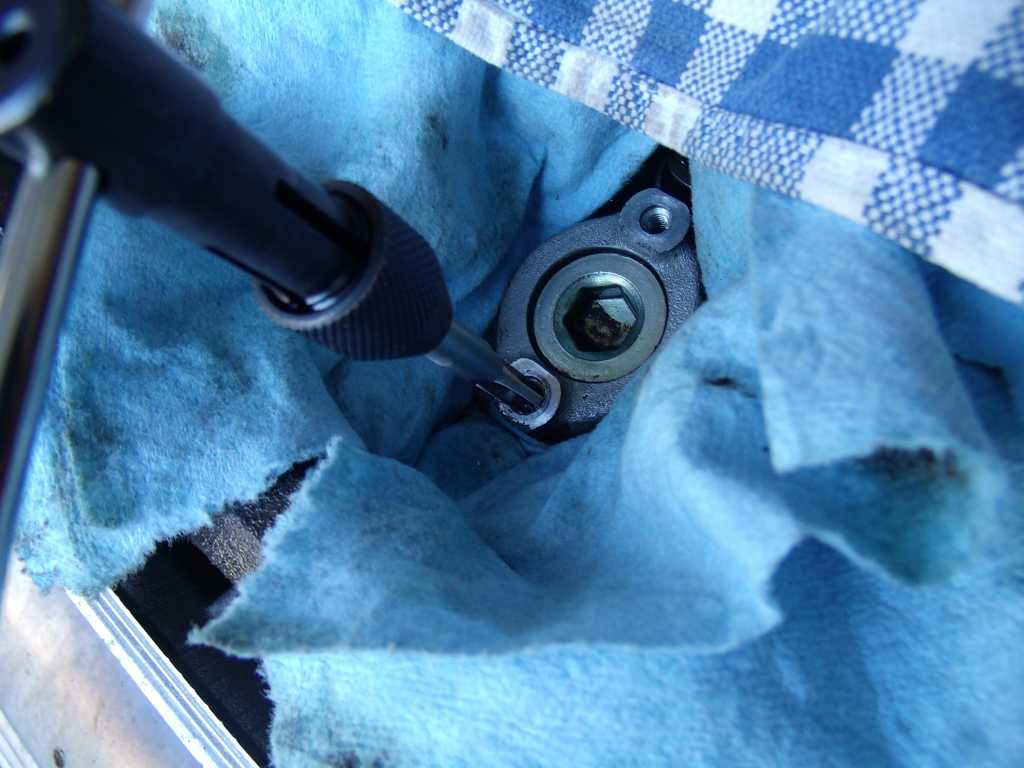 Finished result. Already got the cover back on, but will wait till morning to torque it down. 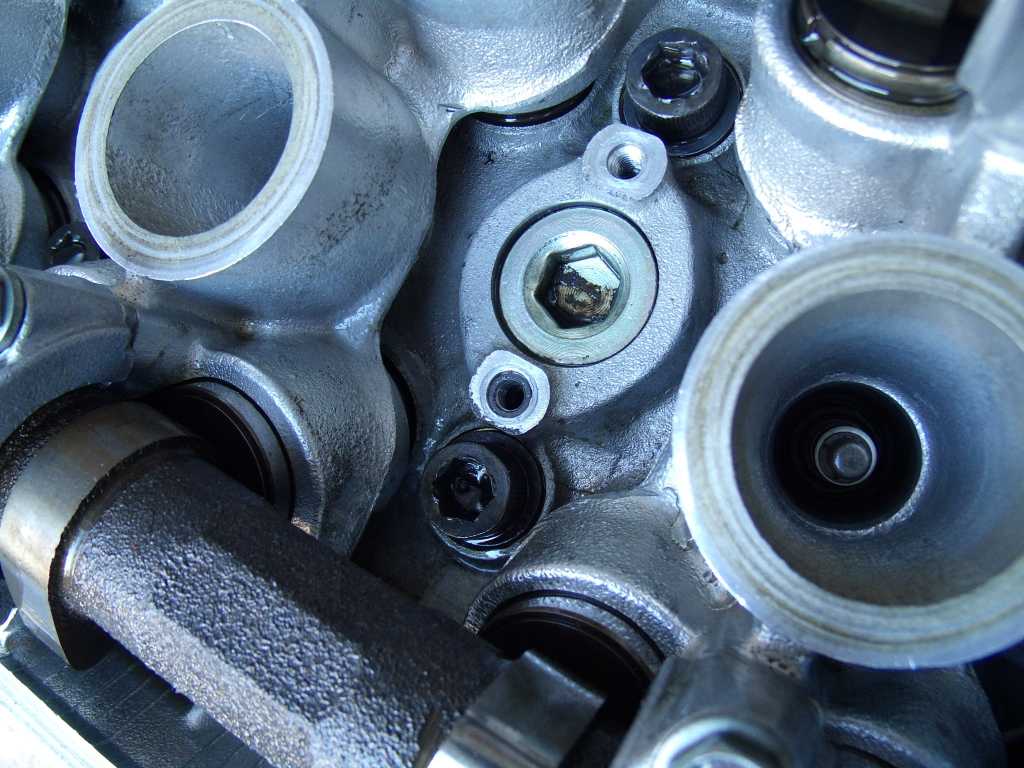 |
| 3d914 |
 Jan 24 2013, 07:15 PM Jan 24 2013, 07:15 PM
Post
#230
|
|
Senior Member    Group: Members Posts: 1,275 Joined: 24-September 03 From: Benson, AZ Member No.: 1,191 Region Association: Southwest Region |
Hoo-Ra! Motor is now CEL-free/No codes!
Just got in my new MAP/BP sensor (Standard Motor Products #AS13), plugged it in, fired up the motor, and no CEL lite. |
| 914GT |
 Jan 24 2013, 07:41 PM Jan 24 2013, 07:41 PM
Post
#231
|
|
Senior Member    Group: Members Posts: 1,101 Joined: 11-October 04 From: Tucson Member No.: 2,923 Region Association: Southwest Region |
Congratulations Gerard! Your persistence is paying off. Did your friend who swapped his ECM off his car to try to debug yours last month get back running OK?
|
| Mike Bellis |
 Jan 24 2013, 10:05 PM Jan 24 2013, 10:05 PM
Post
#232
|
|
Resident Electrician      Group: Members Posts: 8,347 Joined: 22-June 09 From: Midlothian TX Member No.: 10,496 Region Association: None 

|
Hoo-Ra! Motor is now CEL-free/No codes! Just got in my new MAP/BP sensor (Standard Motor Products #AS13), plugged it in, fired up the motor, and no CEL lite. Awesome! So why aren't you driving yet? (IMG:style_emoticons/default/poke.gif) |
| 3d914 |
 Jan 27 2013, 08:44 PM Jan 27 2013, 08:44 PM
Post
#233
|
|
Senior Member    Group: Members Posts: 1,275 Joined: 24-September 03 From: Benson, AZ Member No.: 1,191 Region Association: Southwest Region |
Congratulations Gerard! Your persistence is paying off. Did your friend who swapped his ECM off his car to try to debug yours last month get back running OK? Guy, no need to. I ran with my original PCM & another one I bought with no problems. He still couldn't run with his, so I swapped with him. His works for me, so I'm hoping mine works for him. Weird if it doesn't. |
| 3d914 |
 Jan 27 2013, 08:54 PM Jan 27 2013, 08:54 PM
Post
#234
|
|
Senior Member    Group: Members Posts: 1,275 Joined: 24-September 03 From: Benson, AZ Member No.: 1,191 Region Association: Southwest Region |
Hoo-Ra! Motor is now CEL-free/No codes! Just got in my new MAP/BP sensor (Standard Motor Products #AS13), plugged it in, fired up the motor, and no CEL lite. Awesome! So why aren't you driving yet? (IMG:style_emoticons/default/poke.gif) Mike, yea I know what you mean. Unfortunately the car is still in this condition. (IMG:http://www.914world.com/bbs2/uploads/post-1191-1347736523.jpg) I found the break-out box you mentioned for the EEC-IV version on the SHO. I'll need to do some homework before buying one to make sure I understand how I can use it. Last FI I worked with was the MegaSquirt II on a stock 914. Tuning and diagnostics was easy when you can plug it into a computer and monitor data. |
| Mike Bellis |
 Jan 27 2013, 09:43 PM Jan 27 2013, 09:43 PM
Post
#235
|
|
Resident Electrician      Group: Members Posts: 8,347 Joined: 22-June 09 From: Midlothian TX Member No.: 10,496 Region Association: None 

|
I found the break-out box you mentioned for the EEC-IV version on the SHO. I'll need to do some homework before buying one to make sure I understand how I can use it. Last FI I worked with was the MegaSquirt II on a stock 914. Tuning and diagnostics was easy when you can plug it into a computer and monitor data. Buy it. Learn later. You may never find another. In the manual it will tell you which test point to look at based on the trouble code. With a multi-meter, you just read the point. Based on the reading, it will recommend what the problem is. Sometimes you may have to look at multiple sensors. Pretty easy really... (IMG:style_emoticons/default/smile.gif) When I was stumped working on my first V8 914 (Ford), My dad lent me his. I had the problem solved in minutes... I was young then so finding the money for the new ignitor was the hard part... |
| 3d914 |
 Jan 30 2013, 08:51 PM Jan 30 2013, 08:51 PM
Post
#236
|
|
Senior Member    Group: Members Posts: 1,275 Joined: 24-September 03 From: Benson, AZ Member No.: 1,191 Region Association: Southwest Region |
Not much going on recently. Was out visiting family last weekend - had a real nice trip. Been cold all week and working late so not planning to run the motor until this weekend. Here's the breakdown on what I need to do:
|
| 3d914 |
 Feb 6 2013, 01:58 PM Feb 6 2013, 01:58 PM
Post
#237
|
|
Senior Member    Group: Members Posts: 1,275 Joined: 24-September 03 From: Benson, AZ Member No.: 1,191 Region Association: Southwest Region |
Well got throught the first few items in the list, but no improvement inthe running condition.
|
| 3d914 |
 Feb 8 2013, 05:43 PM Feb 8 2013, 05:43 PM
Post
#238
|
|
Senior Member    Group: Members Posts: 1,275 Joined: 24-September 03 From: Benson, AZ Member No.: 1,191 Region Association: Southwest Region |
Been inspecting things as I tear the motor down. Checked all the timing points. Everything looks good. Chains are under tension. Cam shaft flats are vertical and rear index marks all line up with the top face of the head. The crank sprocket index lines up with the mark on the case. all looks good. So I know the poor running condition wasn't due to timing.
Found answers to a few other things while tearing down.
Also gutted the PS pump. I hate PS fluid - what a f#!%@# mess. I noticed that the bearing doesn't appear to be lubricated by the fluid, so I gutted the pumping cam and put it back together. I'll just cap the threaded opening to keep crap out and be good to go. Next up is the heads. |
| 3d914 |
 Feb 10 2013, 07:06 PM Feb 10 2013, 07:06 PM
Post
#239
|
|
Senior Member    Group: Members Posts: 1,275 Joined: 24-September 03 From: Benson, AZ Member No.: 1,191 Region Association: Southwest Region |
OK, here's what I got done so far on the right head.
Here's some pics. Cyl#1 intake seals with valves - haven't pulled them yet. 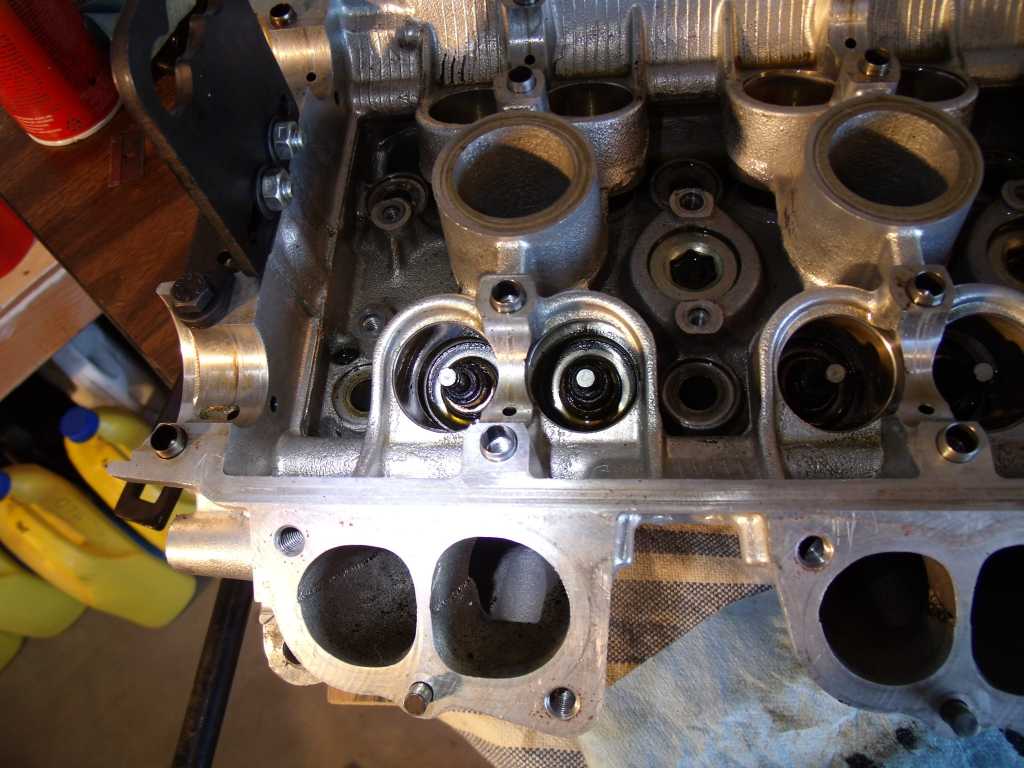 Cyl #1 & 2 Pistons 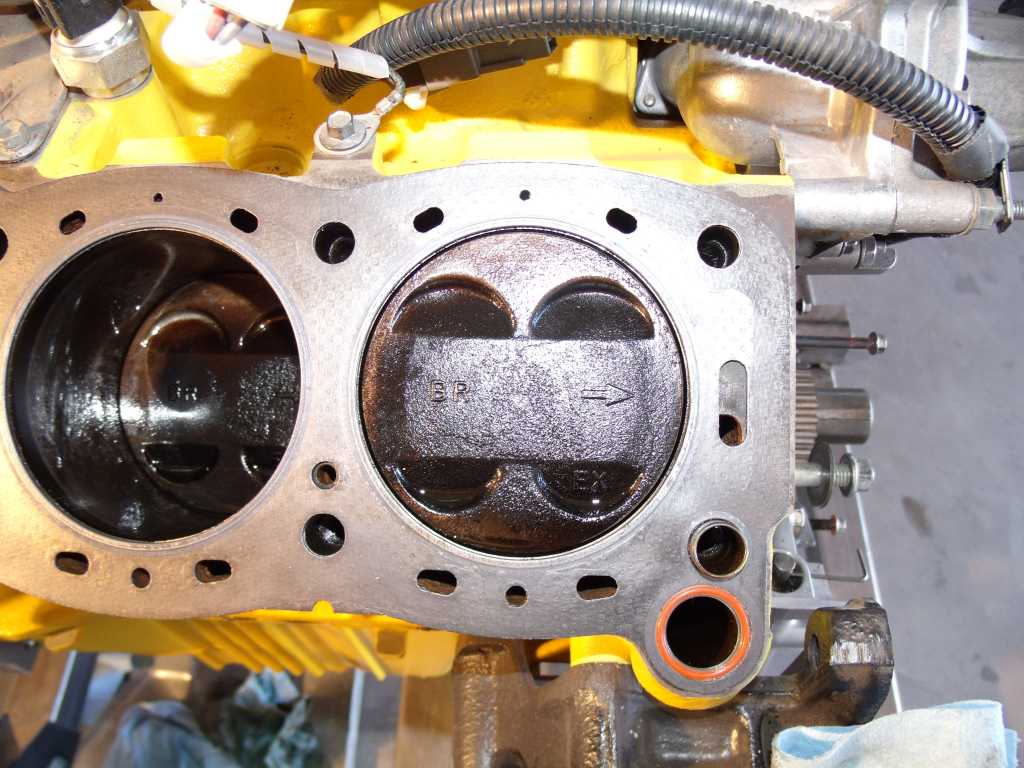 |
| 3d914 |
 Feb 13 2013, 01:02 PM Feb 13 2013, 01:02 PM
Post
#240
|
|
Senior Member    Group: Members Posts: 1,275 Joined: 24-September 03 From: Benson, AZ Member No.: 1,191 Region Association: Southwest Region |
Pulled all the seals on the right head and preparing to lap the valves. Once right head is done, will move on to the left one. Will get seals ordered shortly - so new seals all around.
Pics once the heads are refreshed. |
  |
1 User(s) are reading this topic (1 Guests and 0 Anonymous Users)
0 Members:

|
Lo-Fi Version | Time is now: 19th April 2025 - 05:45 PM |
Invision Power Board
v9.1.4 © 2025 IPS, Inc.


