|
|
|
Porsche, and the Porsche crest are registered trademarks of Dr. Ing. h.c. F. Porsche AG.
This site is not affiliated with Porsche in any way. Its only purpose is to provide an online forum for car enthusiasts. All other trademarks are property of their respective owners. |
|
|

  |

| 3d914 |
 Aug 9 2015, 03:53 PM Aug 9 2015, 03:53 PM
Post
#421
|
|
Senior Member  Group: Members Posts: 1,275 Joined: 24-September 03 From: Benson, AZ Member No.: 1,191 Region Association: Southwest Region |
Spent several hours today removing front struts and suspension. This is all original so I know it was going to be a bear. The only easy part was the nuts on the top of the struts - neither was torqued properly. Everything else took grunting and penetrating oil, and more grunting. No broken knuckles though.
The 914 suspension is actually well designed and easy to maintain. I haven't decided completely on what's going in to replace it. Soo many options. 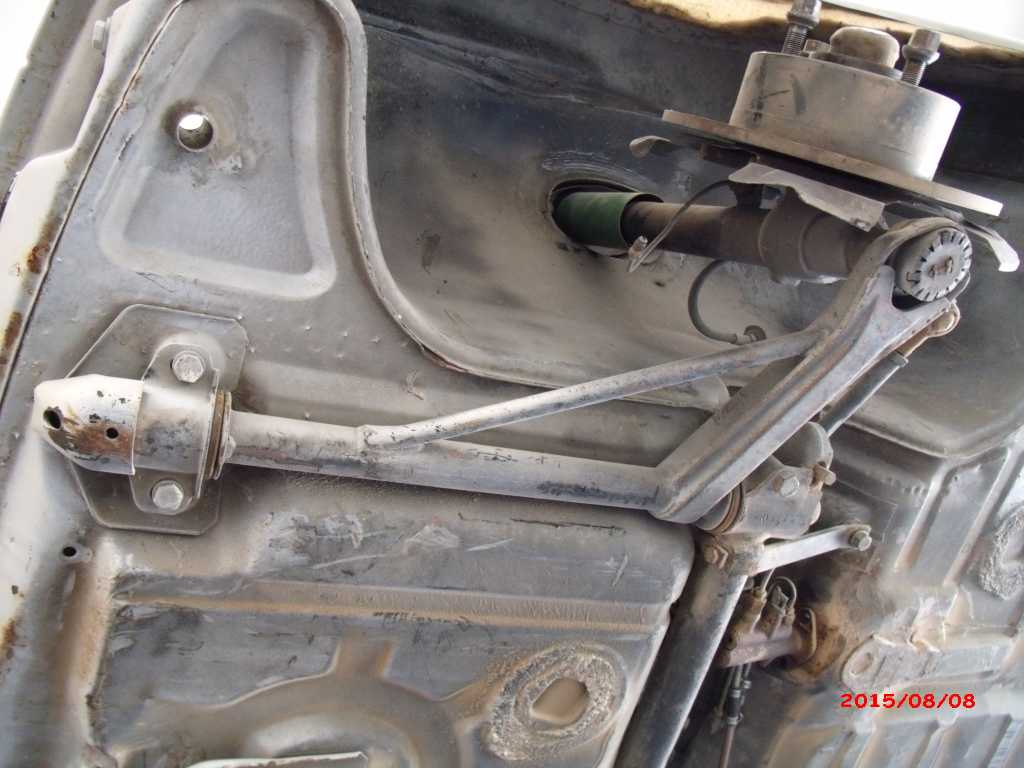 And one with it all off. Going to wait to remove the steering. Need to do a little more research.  |
   |

 
|
| 914forme |
Aug 15 2015, 07:45 PM
Post
#422
|
|
Times a wastin', get wrenchin'! Group: Members Posts: 3,896 Joined: 24-July 04 From: Dayton, Ohio Member No.: 2,388 Region Association: None |
Great build, and yes, I will be using some of your ideas. Like the rear trunk hinge setup, been trying to figure that one out for a while. With out using a Buick LaSabre piece.
|
|
|
|
| 3d914 |
Aug 15 2015, 10:48 PM
Post
#423
|
|
Senior Member Group: Members Posts: 1,275 Joined: 24-September 03 From: Benson, AZ Member No.: 1,191 Region Association: Southwest Region |
QUOTE(914forme @ Aug 15 2015, 06:45 PM)  Great build, and yes, I will be using some of your ideas. Like the rear trunk hinge setup, been trying to figure that one out for a while. With out using a Buick LaSabre piece. Stephen, My thoughts exactly on the LaSabre hinge. I found that the first gen Mini from early 2000s has the proper shape hinge & with an off-center mounting - it will rotate up & backward so the trunk lid clears the rear vertical body panel. Pic kinda illustrates - but poor image. (IMG:http://www.914world.com/bbs2/uploads/post-1191-1388685573.jpg) |
|
|
|
| 3d914 |
Aug 26 2015, 09:42 PM
Post
#424
|
|
Senior Member Group: Members Posts: 1,275 Joined: 24-September 03 From: Benson, AZ Member No.: 1,191 Region Association: Southwest Region |
Now that its up on dolly, I'm finishing up the welding on the reinforcements and grinding all the welds. It'll be a while before that's all done. Lots of welds!
|
|
|
|
| Cairo94507 |
Aug 26 2015, 09:54 PM
Post
#425
|
|
Michael Group: Members Posts: 10,295 Joined: 1-November 08 From: Auburn, CA Member No.: 9,712 Region Association: Northern California |
Nice to hear from you and know progress is being made. Remember your eye protection (IMG:style_emoticons/default/shades.gif)
|
|
|
|
| 3d914 |
Aug 28 2015, 10:01 PM
Post
#426
|
|
Senior Member Group: Members Posts: 1,275 Joined: 24-September 03 From: Benson, AZ Member No.: 1,191 Region Association: Southwest Region |
Making progress on the welding and grinding. Its much easier to do certain areas with the car on the rotisserie. Spent more than a couple of hours on this section. Lots of welding and I had to let things cool before continuing. Filled in the time gaps with grinding.
This is what it started out like. (IMG:http://www.914world.com/bbs2/uploads/post-1191-1433621303.jpg) Mostly finished except for the gaps along the top. There was no material there, but I'm thinking about cutting some pieces to fit and fill it in. 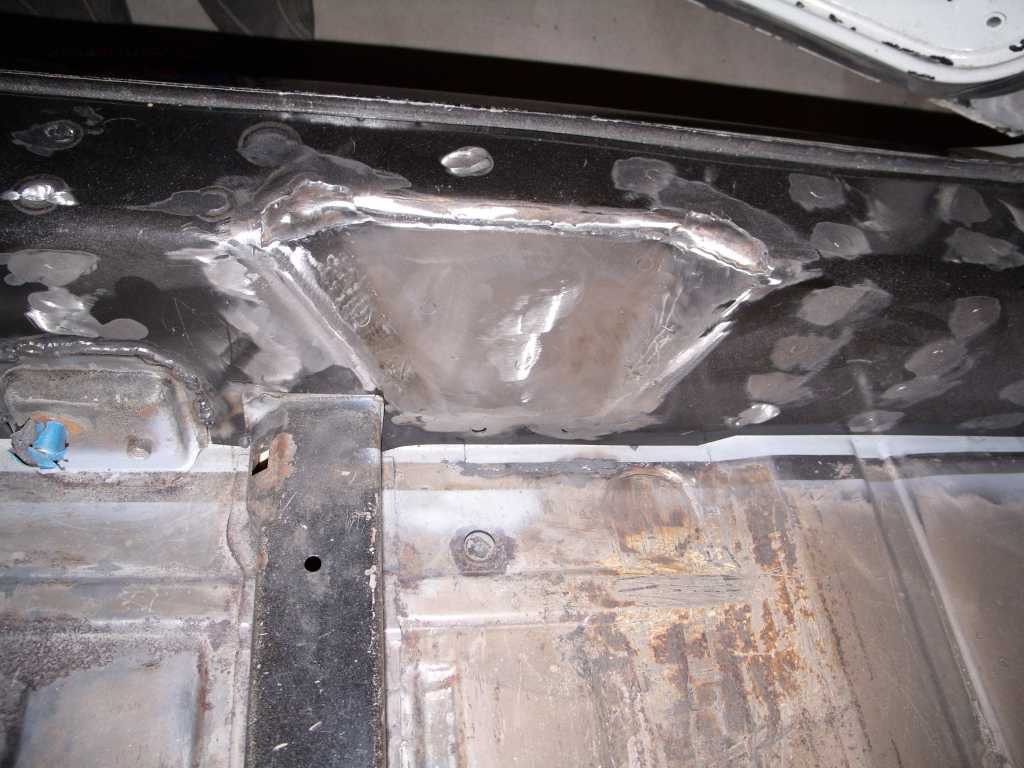 |
|
|
|
| 3d914 |
Aug 30 2015, 04:21 PM
Post
#427
|
|
Senior Member Group: Members Posts: 1,275 Joined: 24-September 03 From: Benson, AZ Member No.: 1,191 Region Association: Southwest Region |
Got this area finished along with rest of the grinding for this side. Got a couple of welds in areas near the floor where my 4" won't fit. Need to find something to get these few welds down.
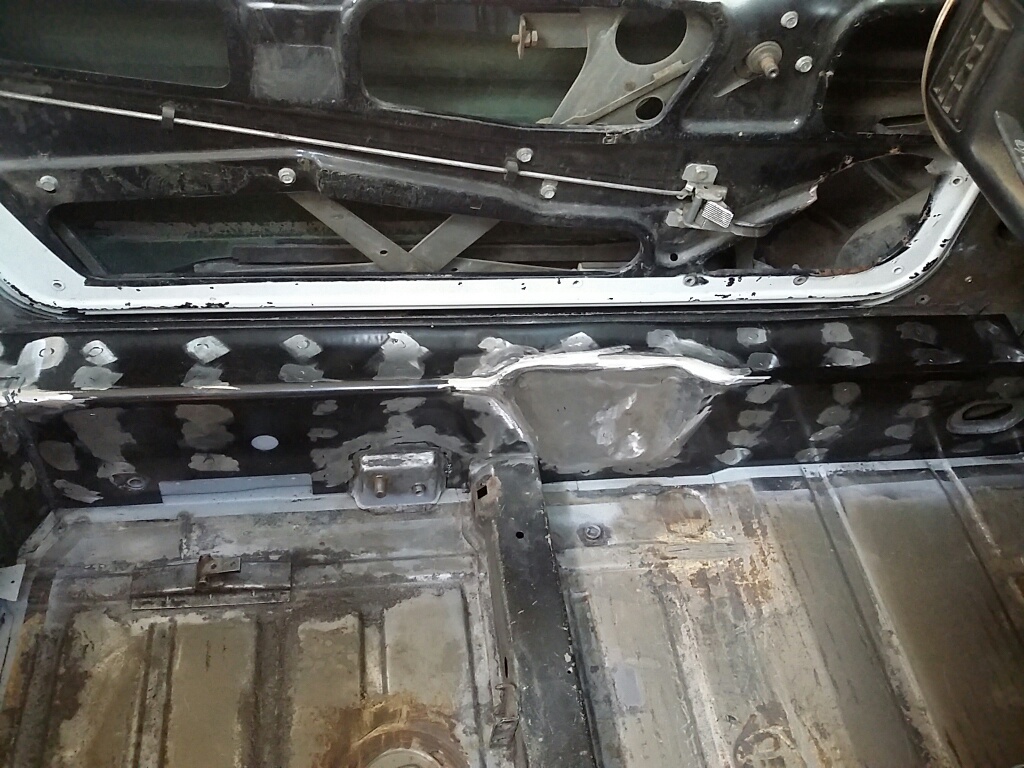 Also fixed the two plugs in the floor that were bent inward. Looks like the seam sealer was supposed to hold them in place - but these two were pushed in. So I cleaned off the seam sealer and welded instead. They'll get more seal sealer once the rest of the floor is done. 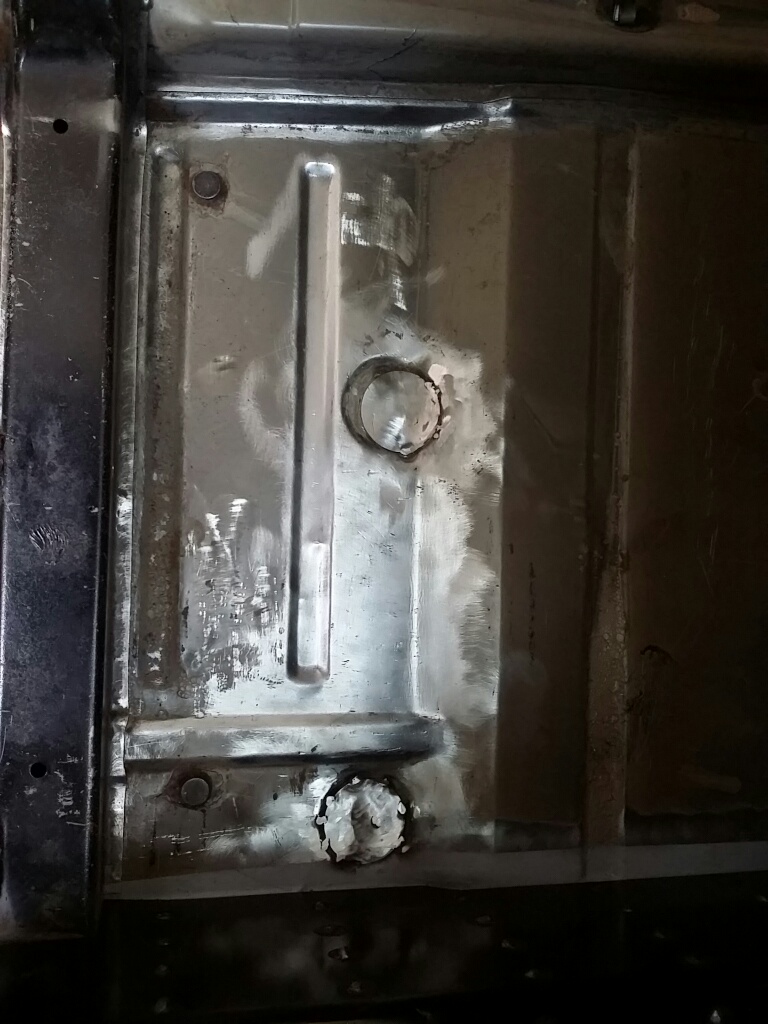 |
|
|
|
| 3d914 |
Sep 2 2015, 07:22 PM
Post
#428
|
|
Senior Member Group: Members Posts: 1,275 Joined: 24-September 03 From: Benson, AZ Member No.: 1,191 Region Association: Southwest Region |
Reinforcement kit is done and ready for primer - which I just happen to be out of. Now I just have to remember if seam sealer goes on after primer or before.
Edit: It can go on after primer. |
|
|
|
| 3d914 |
Sep 4 2015, 06:48 PM
Post
#429
|
|
Senior Member Group: Members Posts: 1,275 Joined: 24-September 03 From: Benson, AZ Member No.: 1,191 Region Association: Southwest Region |
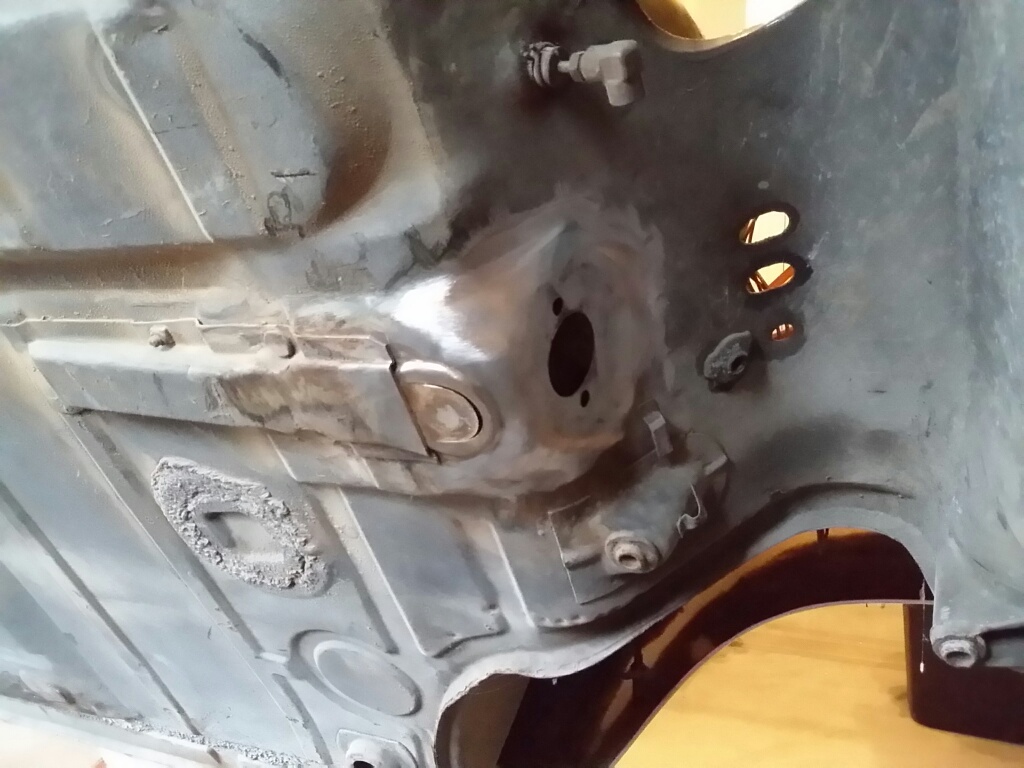
Got some time this afternoon to get the steering rack out and look closer at both sides of the floor-board under the pedal cluster.
Here's the outside before cleaning. 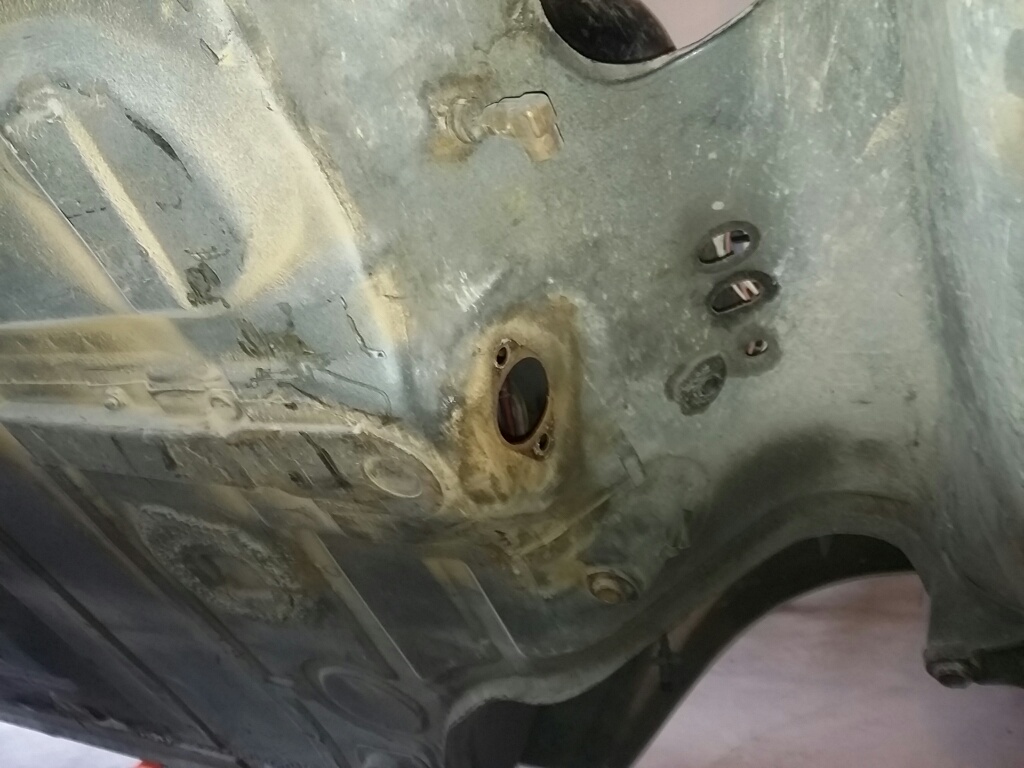 Here's the inside before cleaning. 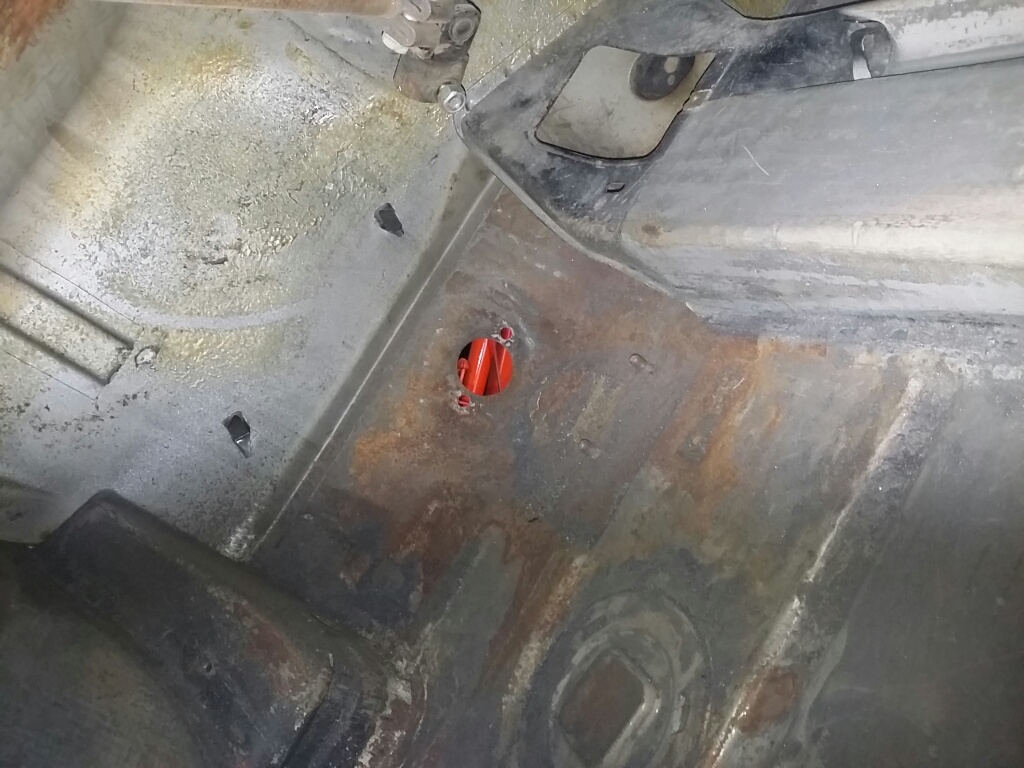 |
|
|
|
| 3d914 |
Sep 4 2015, 07:00 PM
Post
#430
|
|
Senior Member Group: Members Posts: 1,275 Joined: 24-September 03 From: Benson, AZ Member No.: 1,191 Region Association: Southwest Region |
Now to the cleaning. It looks like the outside was light surface rust - no pitting at all. I think I'll go ahead and re-enforce the portion I've cleaned. Even another layer of metal the same thickness will help a lot.
 Got far enough on the inside to see that its not as clean & there is some pitting, but it's not as bad as I thought. Definitely salvageable. Treatment with some rust inhibitor should do the job. 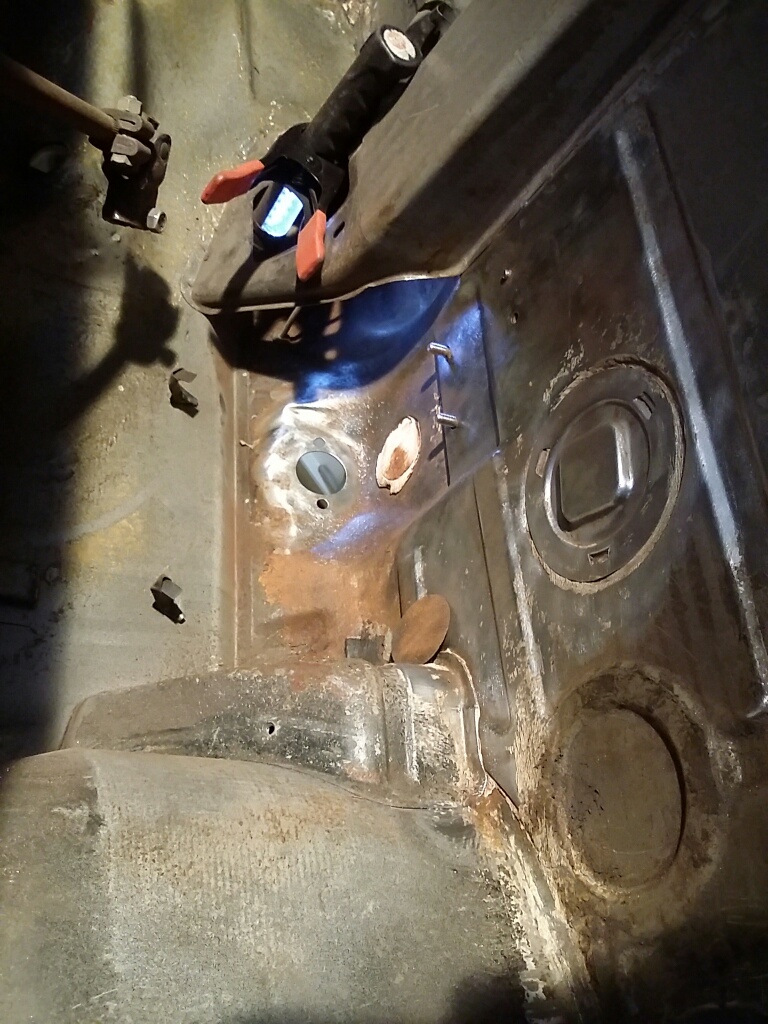 There is a circular plug (just sheet metal) that came off of the gob of seam sealer under it. I'll clean most that out so I can weld a new cover on it. Not sure why this one is different then the others. |
|
|
|
| 3d914 |
Sep 5 2015, 08:37 AM
Post
#431
|
|
Senior Member Group: Members Posts: 1,275 Joined: 24-September 03 From: Benson, AZ Member No.: 1,191 Region Association: Southwest Region |
I've cleaned out the sealer on both sides and cut the end off the support piece - now you can see the sheet metal tab. I'll cut a new support piece that covers this and extends up into the area where the master cylinder mounts.
 On the inside there's a shelf for the plug. I'll need to cut a new one out of slightly thicker material and weld it in. First will be rust treatment, then weld in a new plug on both sides, then finish off with seam sealer. 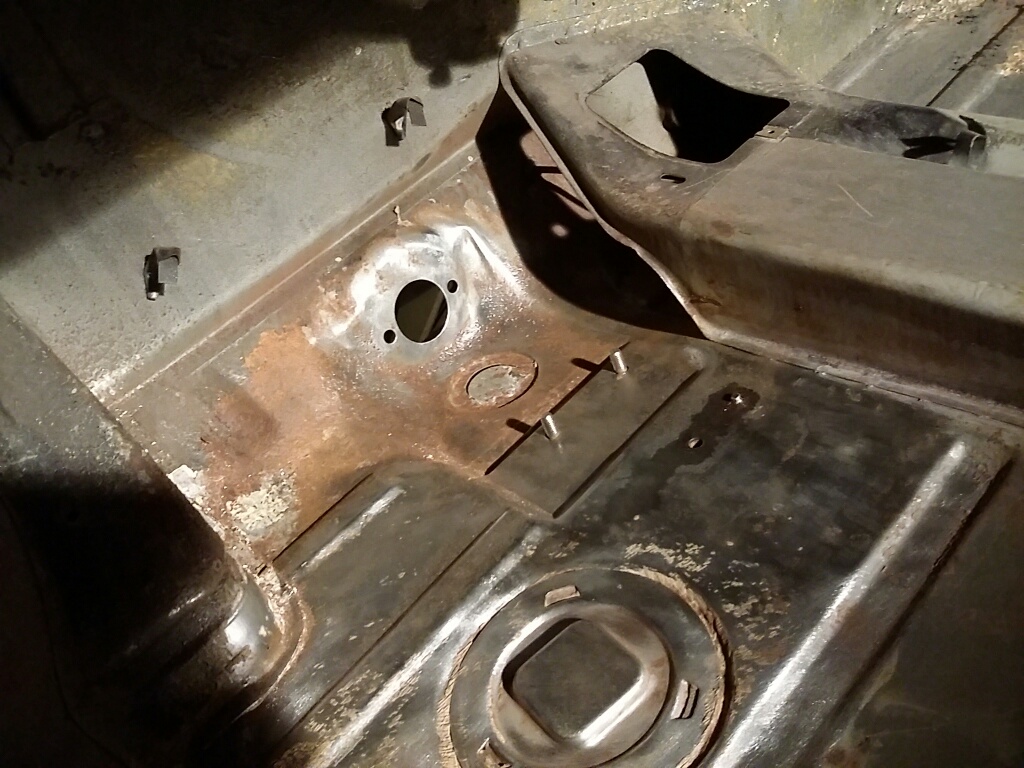 |
|
|
|
| 3d914 |
Sep 6 2015, 04:13 PM
Post
#432
|
|
Senior Member Group: Members Posts: 1,275 Joined: 24-September 03 From: Benson, AZ Member No.: 1,191 Region Association: Southwest Region |
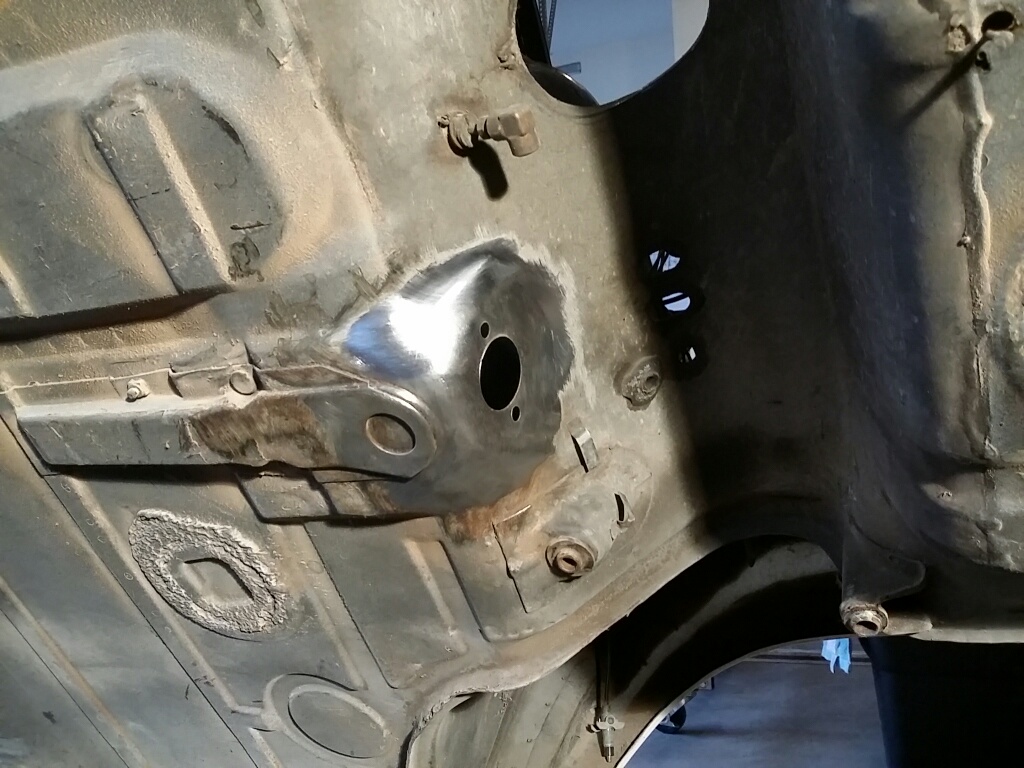
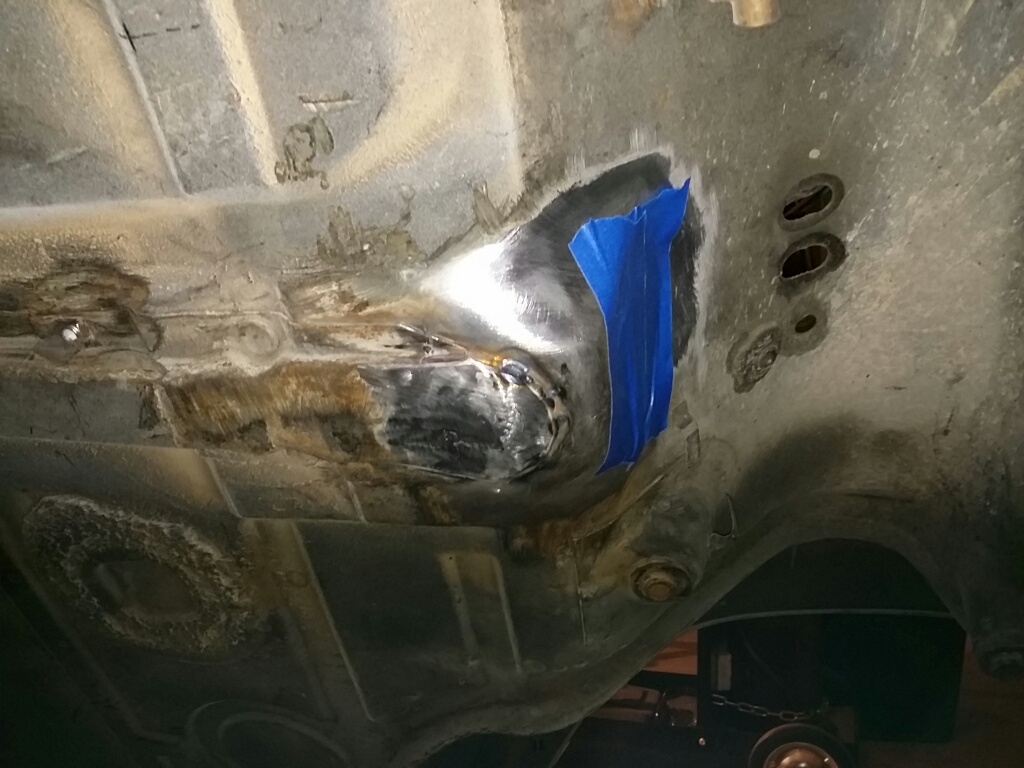
Working up front on the underside, here is something else I discovered. I know this car was beaten up when it was previously stolen - but I thought I had found all the damage - Not!
Gonna look to see if I can find a decent replacement section. If not I'll have to cut it out, repair it and weld it back in. Got a break with the floor - just to find more work under here. (IMG:style_emoticons/default/blink.gif) 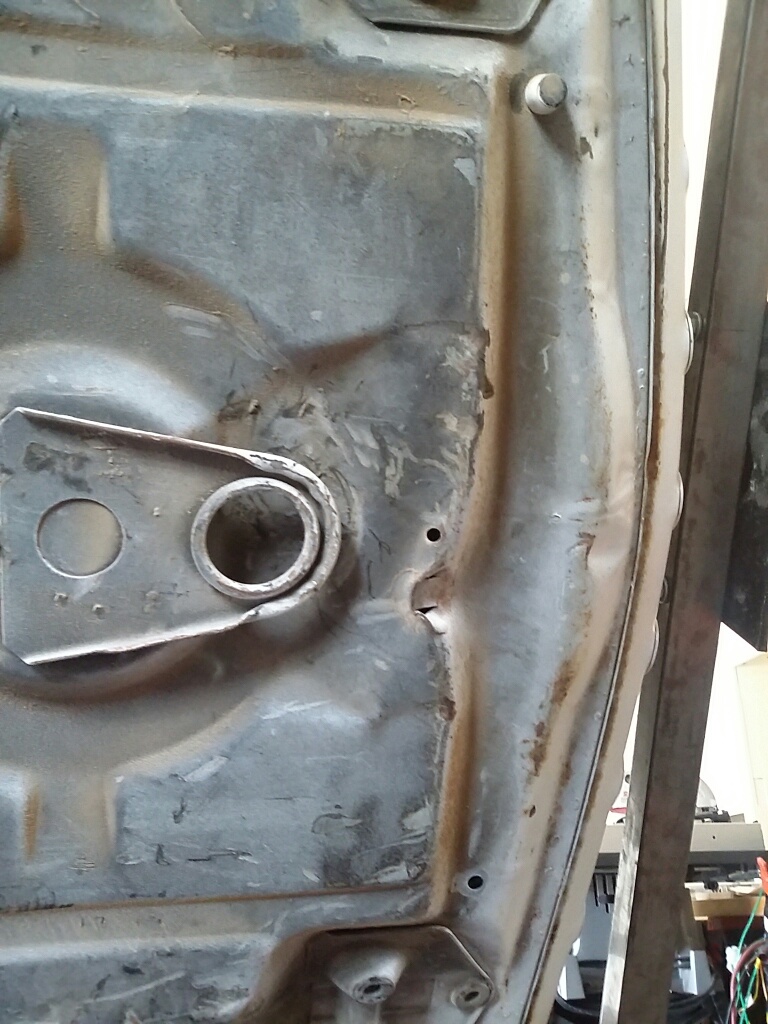 |
|
|
|
| 3d914 |
Sep 8 2015, 09:20 PM
Post
#433
|
|
Senior Member Group: Members Posts: 1,275 Joined: 24-September 03 From: Benson, AZ Member No.: 1,191 Region Association: Southwest Region |
Finished up the underside of plug by welding the piece I cut off back on. I filled in the hole and then drilled a couple of holes for spot welds to keep the plug in place.
 Welded in the plug cap on the inside, and with all the rust already treated, was able to get several coats of self-etching primer on. All that's left will be to fill this area with seam sealer. 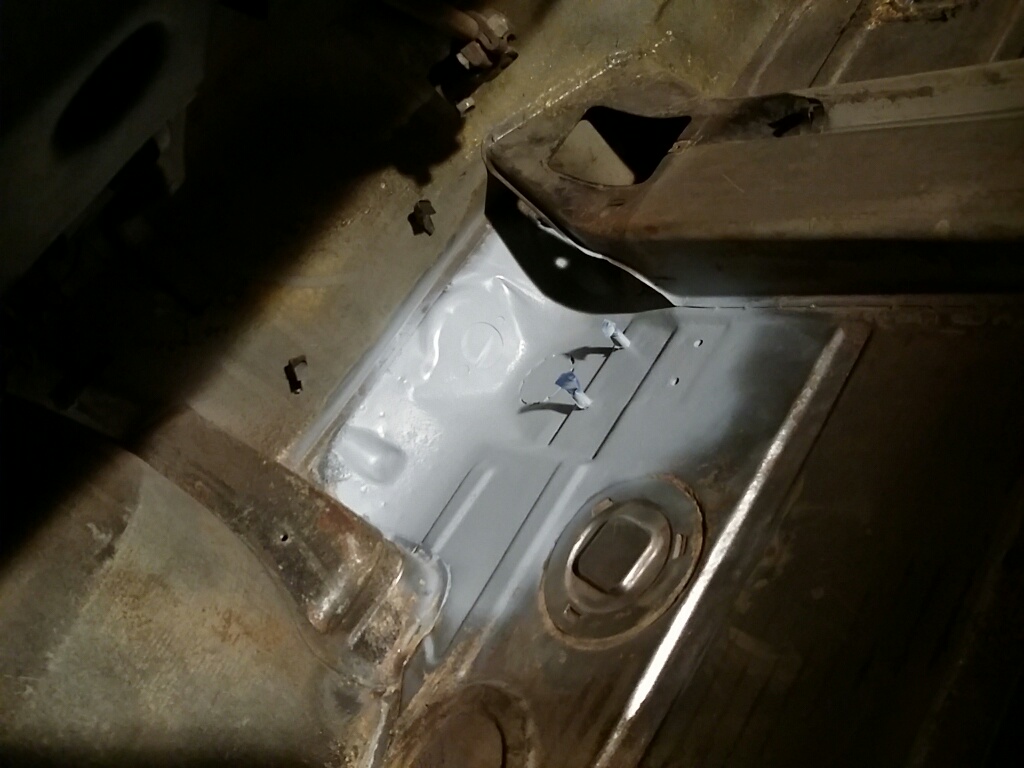 |
|
|
|
| 3d914 |
Sep 13 2015, 02:00 PM
Post
#434
|
|
Senior Member Group: Members Posts: 1,275 Joined: 24-September 03 From: Benson, AZ Member No.: 1,191 Region Association: Southwest Region |
Making more progress on the scope of metal work for the under body so I wanted to track what's getting done:
|
|
|
|
| 3d914 |
Sep 13 2015, 07:52 PM
Post
#435
|
|
Senior Member Group: Members Posts: 1,275 Joined: 24-September 03 From: Benson, AZ Member No.: 1,191 Region Association: Southwest Region |
Also finished up some welds on the dog ear reinforcements that I couldn't get to until now. Rotisserie sure helps.
|
|
|
|
| 3d914 |
Sep 18 2015, 01:13 PM
Post
#436
|
|
Senior Member Group: Members Posts: 1,275 Joined: 24-September 03 From: Benson, AZ Member No.: 1,191 Region Association: Southwest Region |
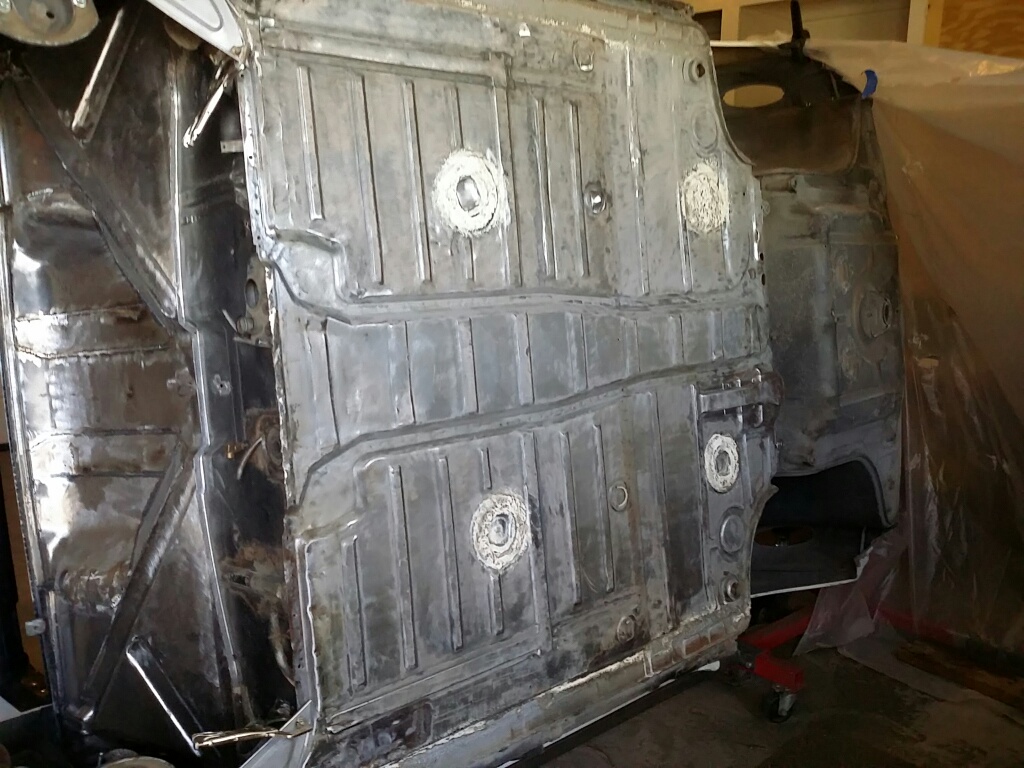
Got it up on its side now to work on the underbody. Trying to locate a replacement piece for the front trunk area. Started stripping the remaining underbody treatment. There's not much left after all these years, and I'm just taking it down to the factory primer. It'll get seam sealer in a view places, more primer and black paint, then finally some fresh underbody treatment. I'm only focusing on the cockpit area since there's still work to do fore & aft.
|
|
|
|
| 3d914 |
Sep 20 2015, 05:30 PM
Post
#437
|
|
Senior Member Group: Members Posts: 1,275 Joined: 24-September 03 From: Benson, AZ Member No.: 1,191 Region Association: Southwest Region |
Got the underbody coating off and mostly down to the factory primer. There are plenty of places where its fresh metal. I also treated any of the surface rust areas - so they'll be ready for primer tomorrow.
 |
|
|
|
| Chris H. |
Sep 20 2015, 05:38 PM
Post
#438
|
|
Senior Member Group: Members Posts: 4,054 Joined: 2-January 03 From: Chicago 'burbs Member No.: 73 Region Association: Upper MidWest |
|
|
|
|
| 3d914 |
Sep 20 2015, 05:46 PM
Post
#439
|
|
Senior Member Group: Members Posts: 1,275 Joined: 24-September 03 From: Benson, AZ Member No.: 1,191 Region Association: Southwest Region |
Also got some new parts in from Mark at Restoration Design - the left & right jack donuts for the rear. The parts are premium for sure.
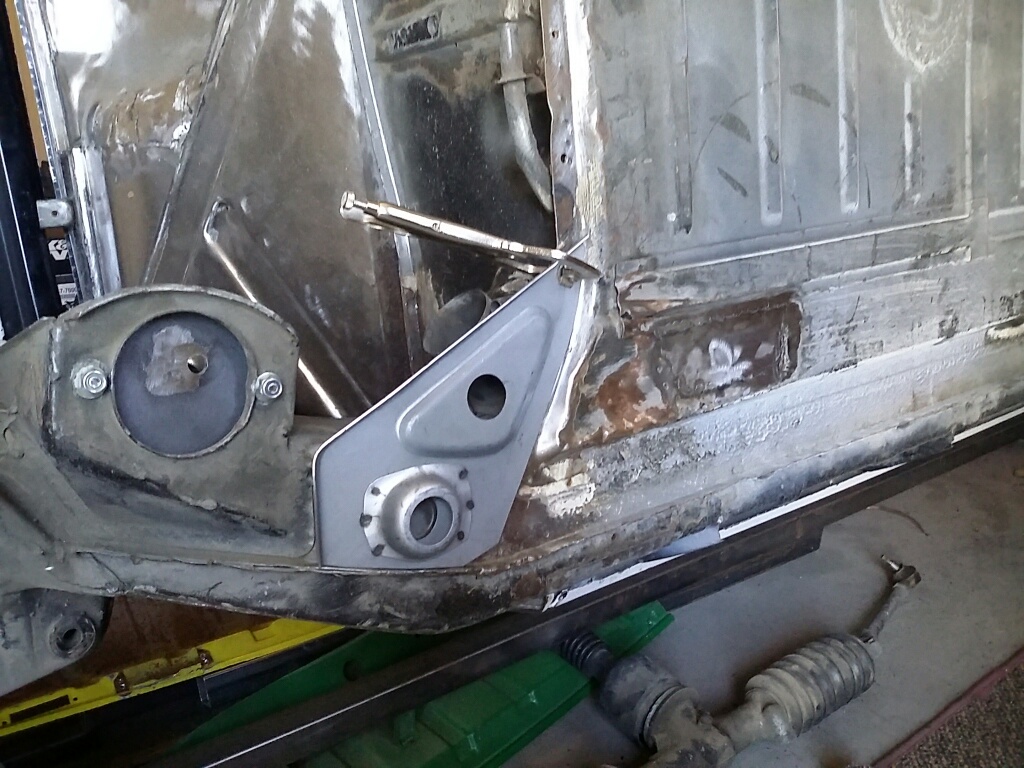 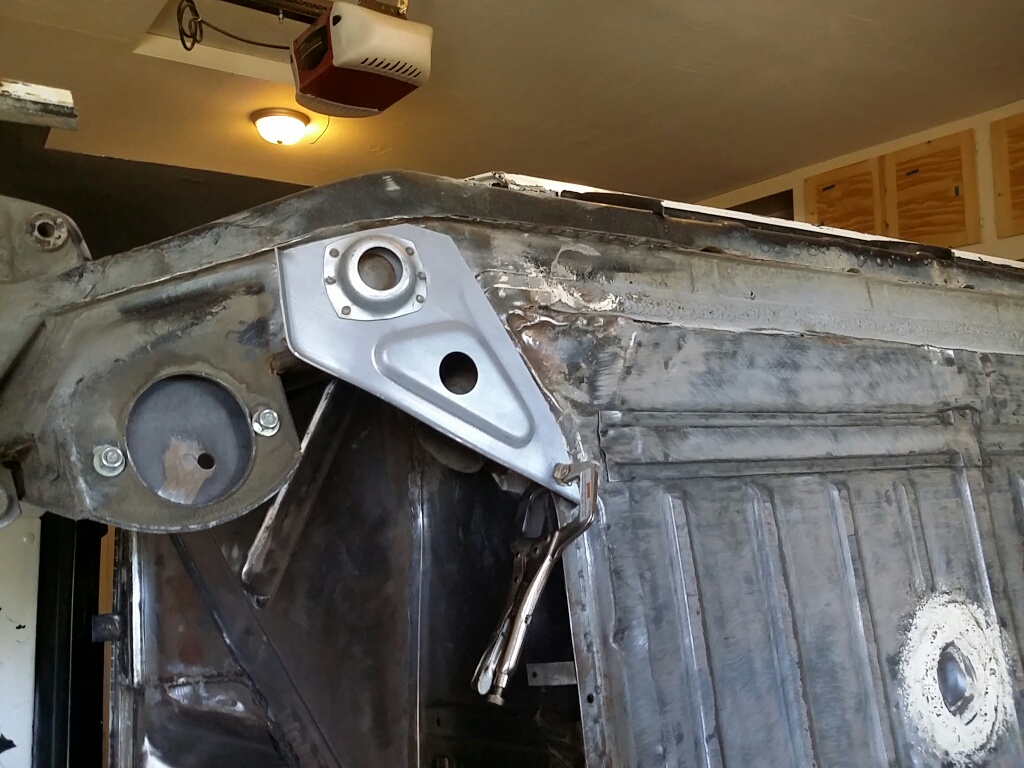 Unfortunately, the underbody on this 914 isn't. It's quite beat up. You'll notice in the corners ahead of these donut pieces, someone has jacked the car repeatedly - and deformed the metal. On the left side - this doesn't appear to be much of an issue. 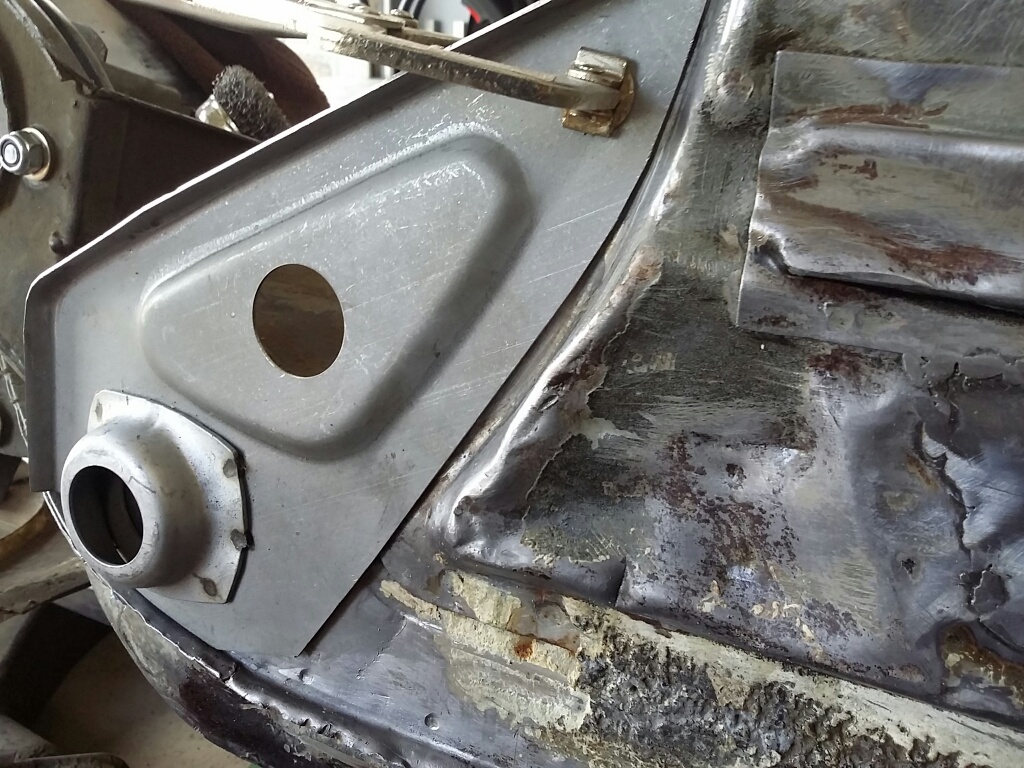 On the right side - it's a difference story. There's quite a gap between the double-wall shelf and the new piece. Also the angled ridge adjacent to the shelf is smashed in - also leaving a considerable gap. I'm gonna have to research a little to see if that corner piece is available. I don't think I have the tools to fab those small radius' and sharp angles. 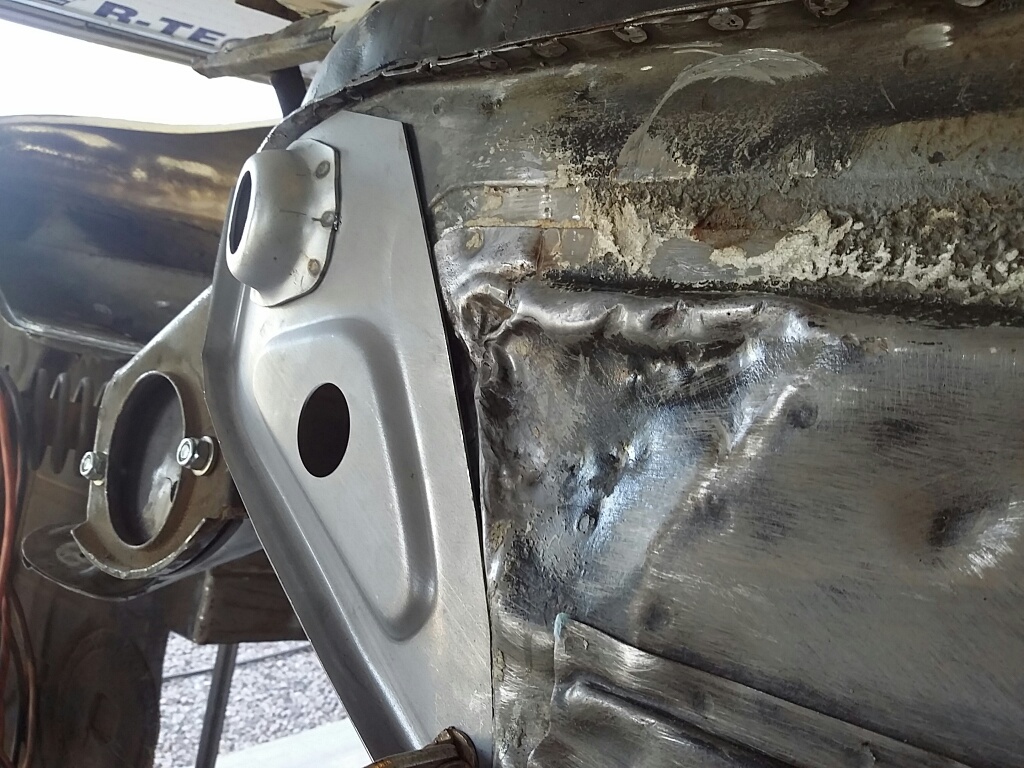 |
|
|
|
| 3d914 |
Sep 20 2015, 06:32 PM
Post
#440
|
|
Senior Member Group: Members Posts: 1,275 Joined: 24-September 03 From: Benson, AZ Member No.: 1,191 Region Association: Southwest Region |
Was reading trojanhorsepower's restoration thread and saw a couple of good images of the corners from his new rear floor panel.
So here's the corner I'd have to form up for each side. Seeing the finished form, I think I have a way of doing it right on the body. I won't be able to get to this for a while, so that'll give me some time to think more about it. 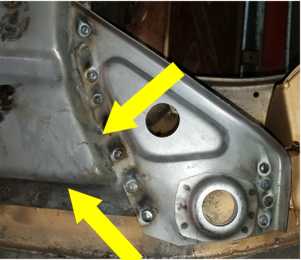 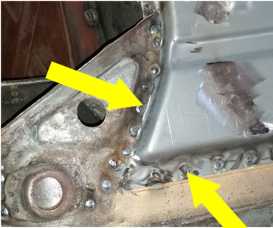 |
|
|
|
|
1 User(s) are reading this topic (1 Guests and 0 Anonymous Users)
0 Members:

|
Lo-Fi Version | Time is now: 19th April 2025 - 02:53 AM |
Invision Power Board
v9.1.4 © 2025 IPS, Inc.