|
|

|
Porsche, and the Porsche crest are registered trademarks of Dr. Ing. h.c. F. Porsche AG.
This site is not affiliated with Porsche in any way. Its only purpose is to provide an online forum for car enthusiasts. All other trademarks are property of their respective owners. |
|
|
  |
| 3d914 |
 Sep 8 2016, 08:17 PM Sep 8 2016, 08:17 PM
Post
#481
|
|
Senior Member    Group: Members Posts: 1,275 Joined: 24-September 03 From: Benson, AZ Member No.: 1,191 Region Association: Southwest Region |
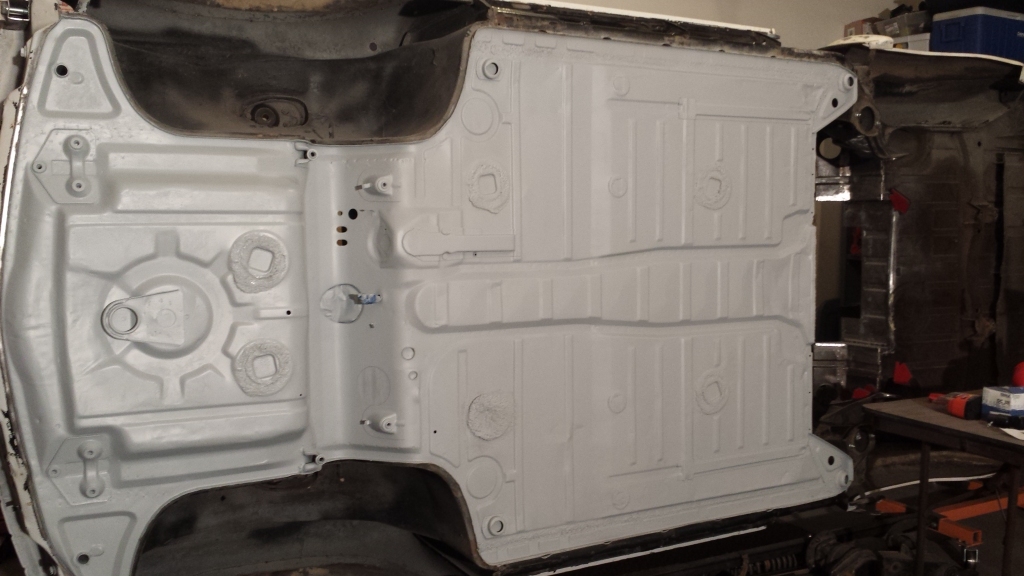
Got the front portion cleaned up and primered. Once I decide on the undercoating, I'll get a paint that contrasts in color so I can make sure I get the undercoating where it needs to go.
 |
| jmitro |
 Sep 9 2016, 08:06 PM Sep 9 2016, 08:06 PM
Post
#482
|
|
Senior Member    Group: Members Posts: 713 Joined: 23-July 15 From: Oklahoma Member No.: 18,986 Region Association: None 
|
|
| 3d914 |
 Sep 14 2016, 10:29 PM Sep 14 2016, 10:29 PM
Post
#483
|
|
Senior Member    Group: Members Posts: 1,275 Joined: 24-September 03 From: Benson, AZ Member No.: 1,191 Region Association: Southwest Region |
. I did however get around to getting part of the underside in primer. Now I feel a little bit better. Hope to finish up the front this week. Got some metal cleanup to finish before primer. nice work. Epoxy primer? Your custom metal fab skills are great! Thanks. I'm just using SEM high-build primer in a can. I can go directly to undercoating, but may decide to paint it before doing that. I've been using self-etching primer everywhere else. |
| 3d914 |
 Oct 4 2016, 08:32 PM Oct 4 2016, 08:32 PM
Post
#484
|
|
Senior Member    Group: Members Posts: 1,275 Joined: 24-September 03 From: Benson, AZ Member No.: 1,191 Region Association: Southwest Region |
Getting ready for the 2017 Build-Off Challenge, so I decided to put my outline of work here. It's more accessible and I can review and mark things off as I make progress.
Rear Trunk
|
| 3d914 |
 Oct 15 2016, 06:51 PM Oct 15 2016, 06:51 PM
Post
#485
|
|
Senior Member    Group: Members Posts: 1,275 Joined: 24-September 03 From: Benson, AZ Member No.: 1,191 Region Association: Southwest Region |
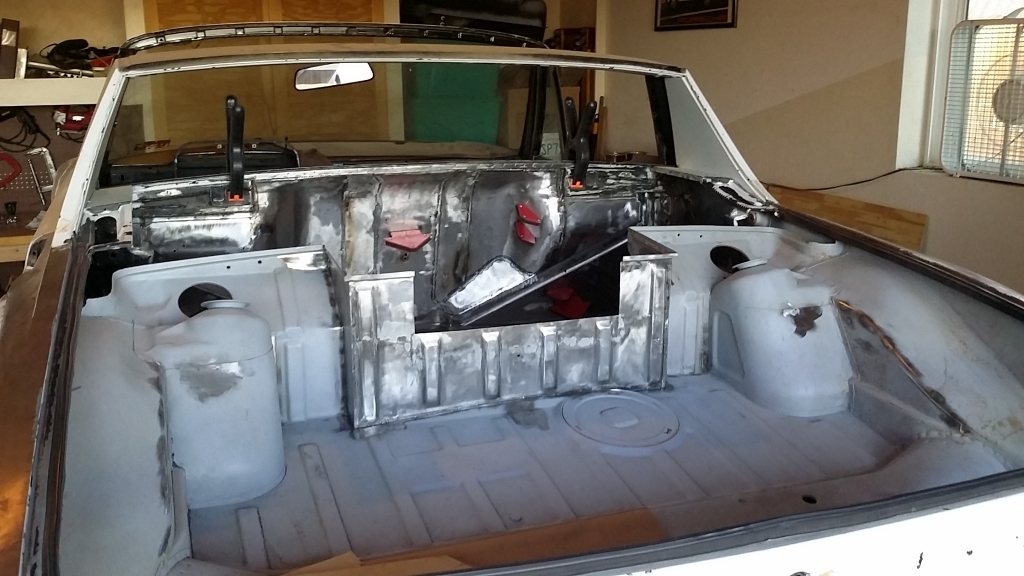
Finally got the rear firewall section welded in. It will get some finish work, primer, and seam-sealed - hopefully before the end of the month.
 |
| 3d914 |
 Oct 16 2016, 10:10 PM Oct 16 2016, 10:10 PM
Post
#486
|
|
Senior Member    Group: Members Posts: 1,275 Joined: 24-September 03 From: Benson, AZ Member No.: 1,191 Region Association: Southwest Region |
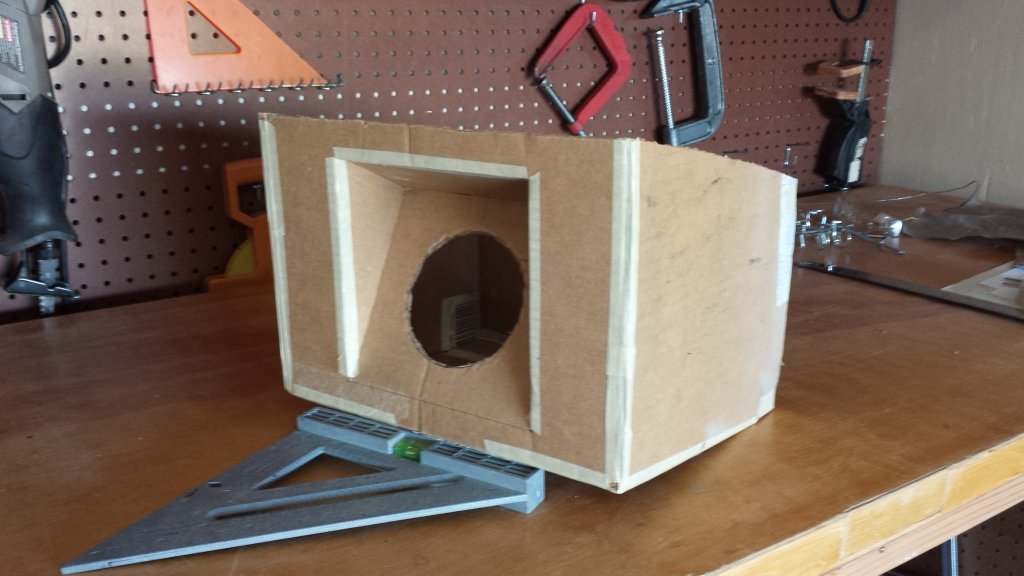
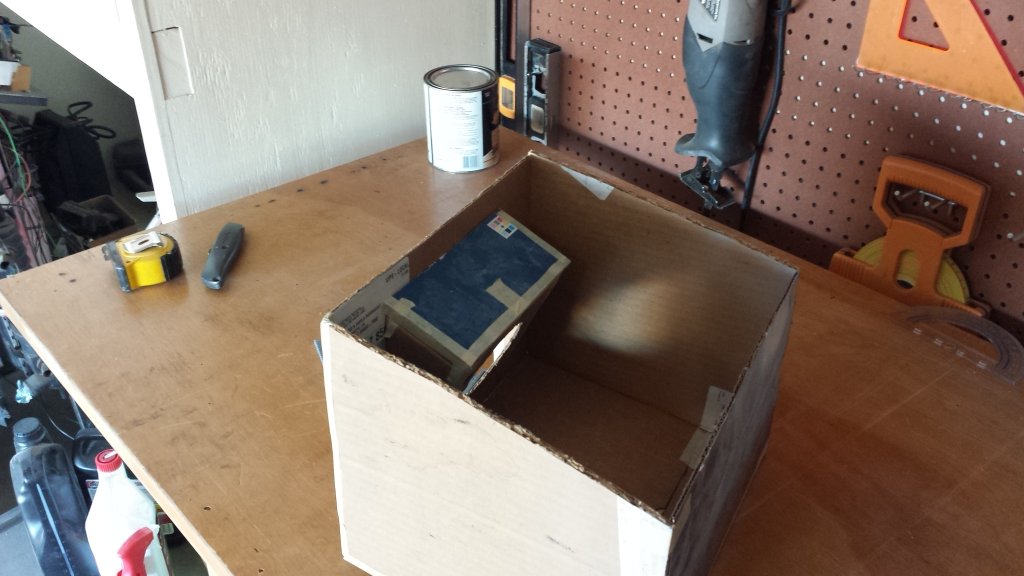
Got some time to mockup the air box based on my CAD data. I already have the plastic, so this just verifies dimensions and fit. I'll also use it to position pieces for cutting on the plastic sheets I bought.
  |
| 914forme |
 Oct 17 2016, 06:56 PM Oct 17 2016, 06:56 PM
Post
#487
|
|
Times a wastin', get wrenchin'!     Group: Members Posts: 3,896 Joined: 24-July 04 From: Dayton, Ohio Member No.: 2,388 Region Association: None 
|
Looking good, I love this build.
|
| 3d914 |
 Oct 17 2016, 07:51 PM Oct 17 2016, 07:51 PM
Post
#488
|
|
Senior Member    Group: Members Posts: 1,275 Joined: 24-September 03 From: Benson, AZ Member No.: 1,191 Region Association: Southwest Region |
Looking good, I love this build. Thanks, Stephen. It looks like yours is moving quicker than mine, despite your recent mishap. I sometimes think I should have gone the EG33 route, but hey - there's always the next one right! Keep up the great job you're doing on yours. |
| 3d914 |
 Oct 21 2016, 07:19 PM Oct 21 2016, 07:19 PM
Post
#489
|
|
Senior Member    Group: Members Posts: 1,275 Joined: 24-September 03 From: Benson, AZ Member No.: 1,191 Region Association: Southwest Region |
Spent the early afternoon doing ignition service on the LS400 - new wires, plugs, caps, etc. Even doing it with my short-cuts it still took longer than any car I've worked on before.
Spent the rest of the afternoon positioning the NACA ducts and filter box on the trunk lid. The ducts get quite a bit of trimming, but I wanted to make sure they would clear the filter as planned. I also need to fabricate the cradle that holds the filter box. I think I'm going to design it to act as the mounting point for the trunk lid hinges as well. So here's the NACA ducts positioned. They'll be trimmed up and formed slightly curved so they fit the curvature of the trunk lid. At final assy they get cemented in. 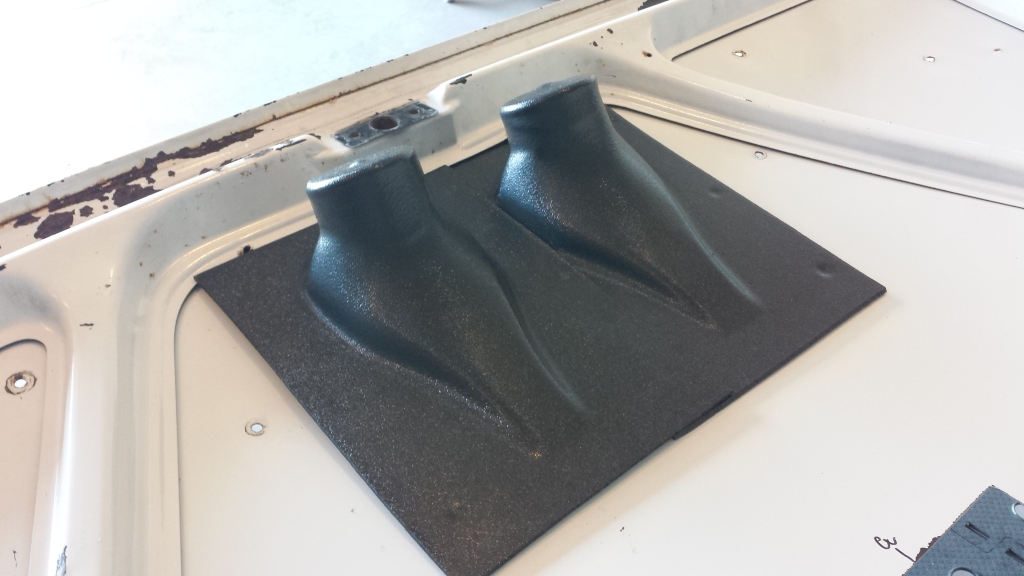 The filter is centered and angles toward the bottom of the box, and the ducts are to each side so there is no interference. Since the ends of the ducts get cut off - they just dump air into the box. 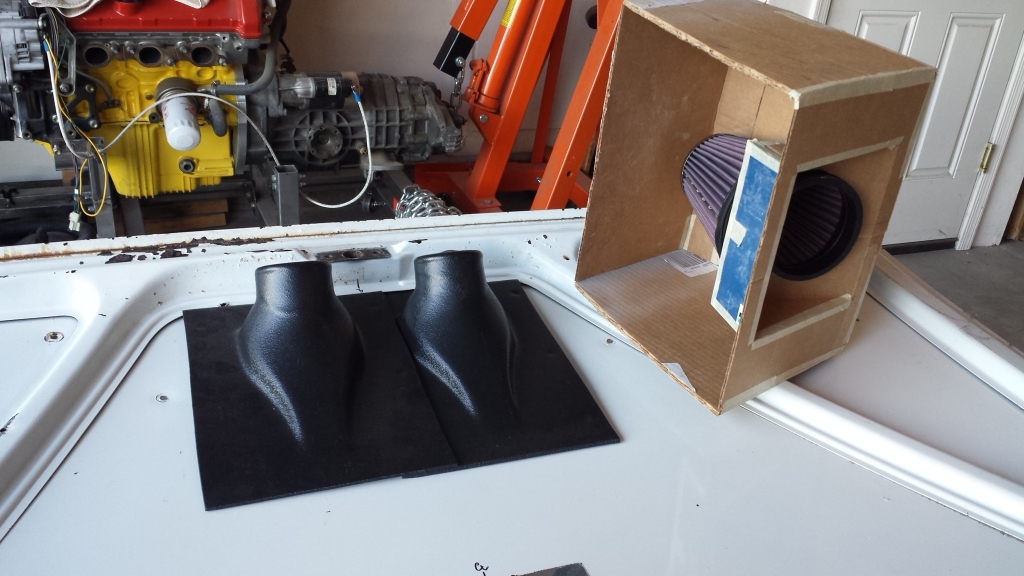 Here's the box as it sits on top the ducts. There will be rubber seals that seal the air box to the underside of the trunk lid. Part of the seal will likely end up mating to the back side of the ducts. 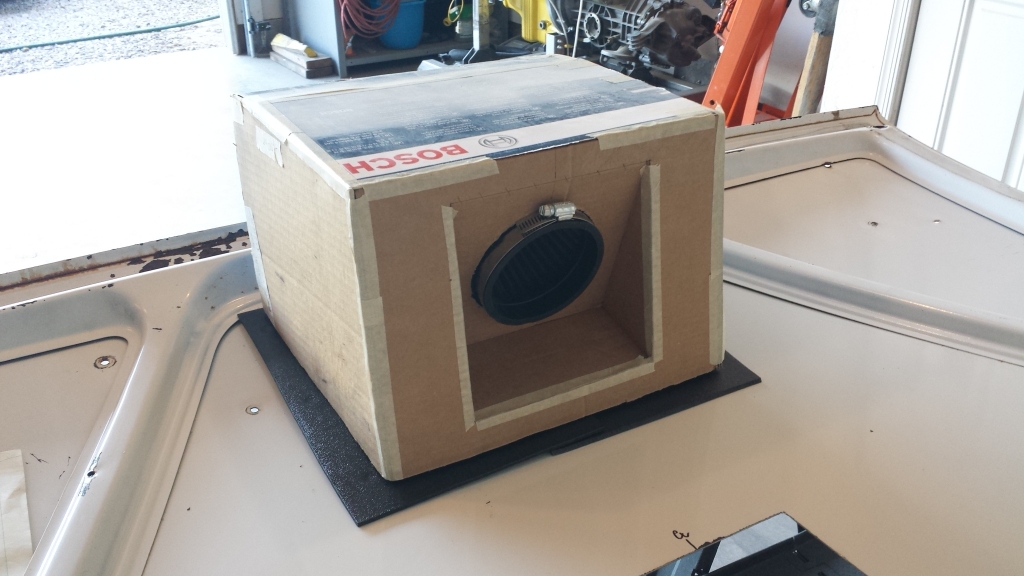 Finally, I've placed spacers under the air box mockup to represent the ducts and the seals. Tomorrow we'll put the trunk lid on and measure the remaining space to the floor of the trunk. From this I can fab the framework to hold the air box. 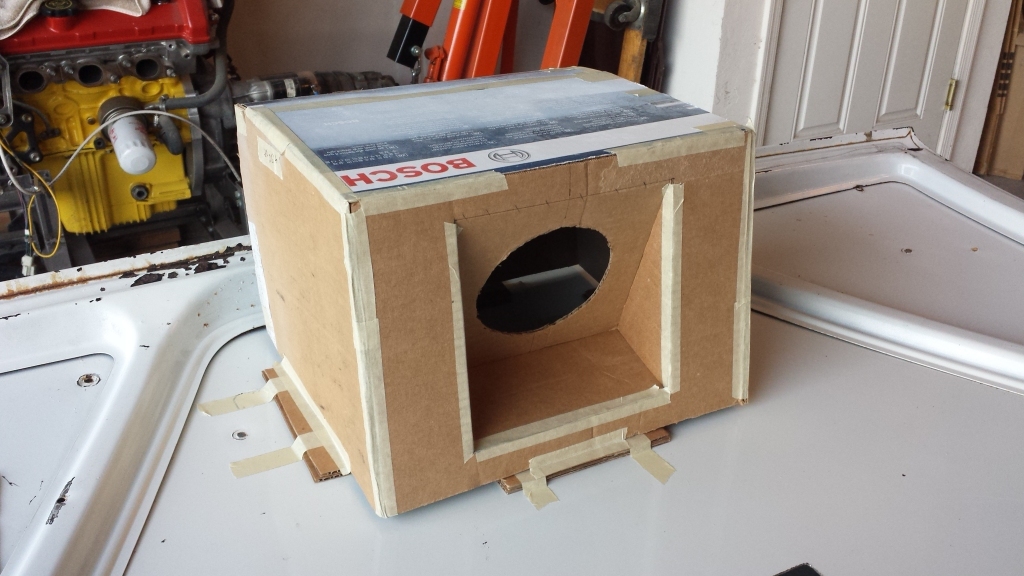 |
| 3d914 |
 Oct 22 2016, 01:21 PM Oct 22 2016, 01:21 PM
Post
#490
|
|
Senior Member    Group: Members Posts: 1,275 Joined: 24-September 03 From: Benson, AZ Member No.: 1,191 Region Association: Southwest Region |
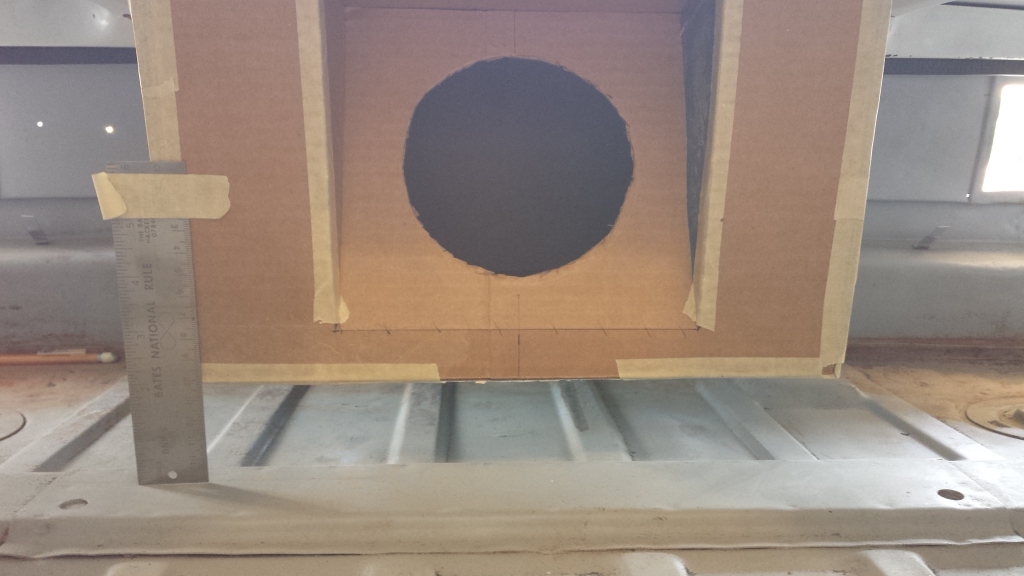
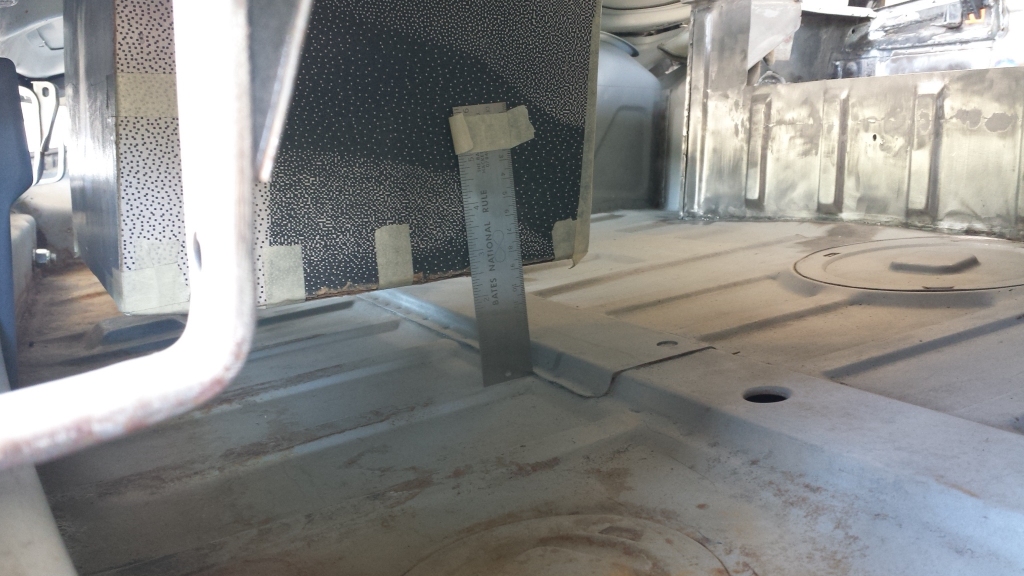
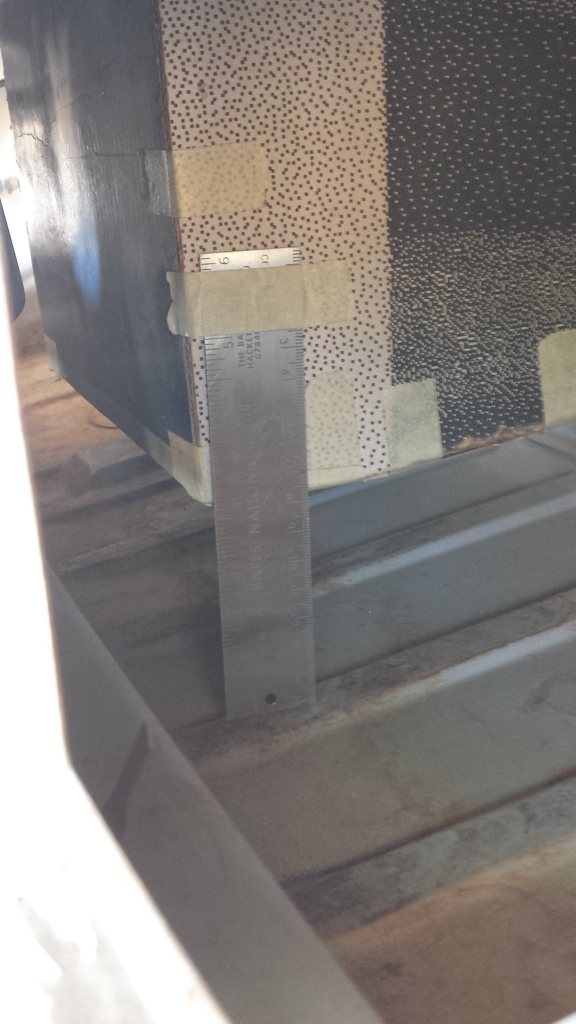
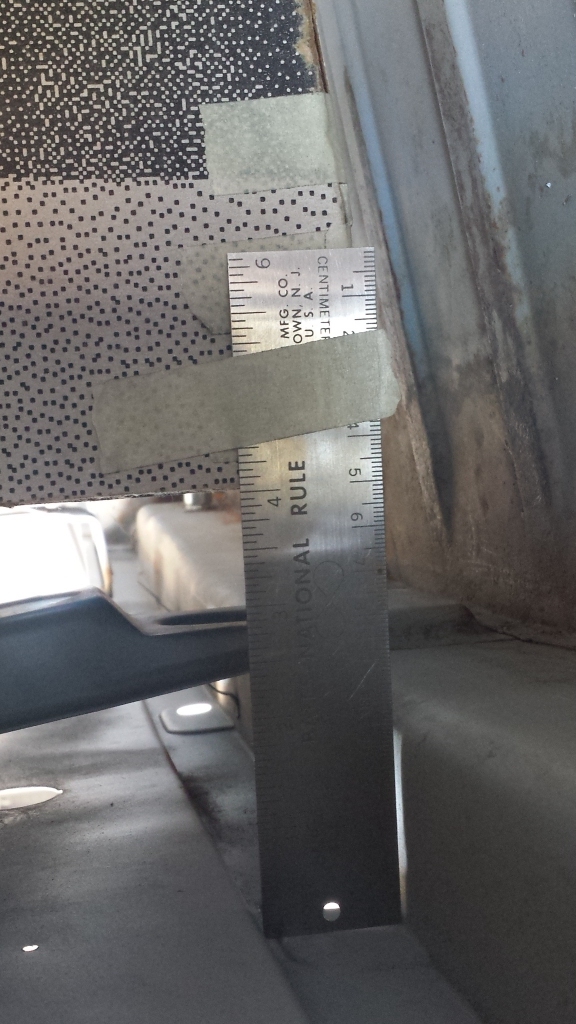
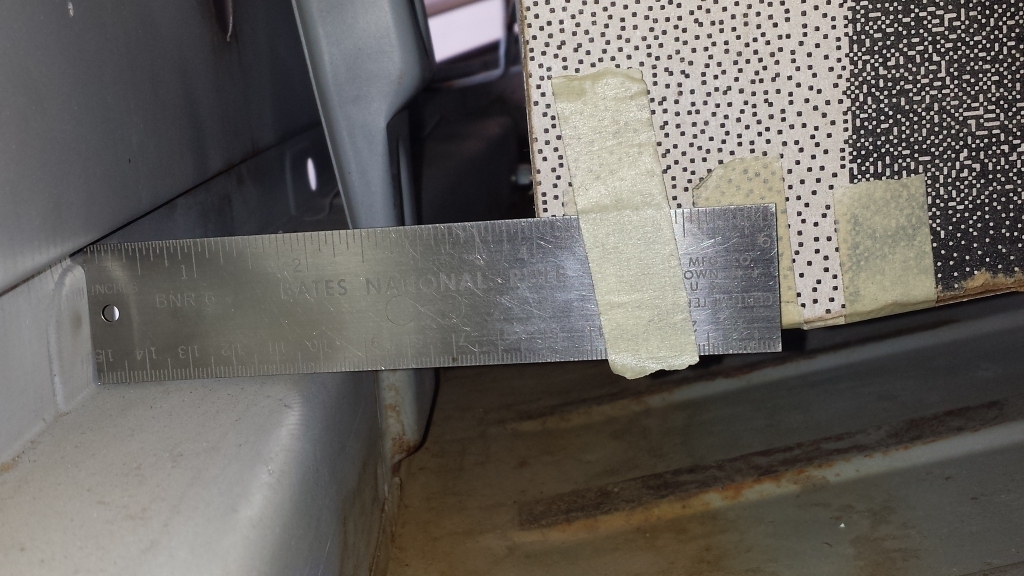
My son's home so we spent the morning replacing motor mounts on the 996. We did get the trunk lid on the 914 and I got some dimensions. Gonna post them here for reference.
     |
| 3d914 |
 Oct 31 2016, 07:49 PM Oct 31 2016, 07:49 PM
Post
#491
|
|
Senior Member    Group: Members Posts: 1,275 Joined: 24-September 03 From: Benson, AZ Member No.: 1,191 Region Association: Southwest Region |
Spent some time this weekend checking the design for the trunk lid opening in the opposite direction - hinged at the back. Now that I have the mini hinges I can verify dimensions and fit. I'll need to extend the end of the hinge by six inches and decrease the bend angle for the arm by a little more than 11 degrees.
Here's what it looks like in CAD with the modified Mini hinge. The thick portion under the sheet metal is the support webbing. I'll be adding additional webbing from spare trunks so the hinge can mount to that. 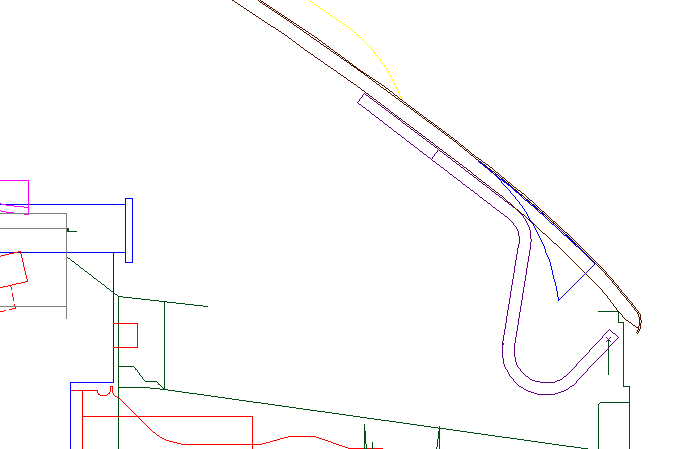 Also had some time to prep & fit the right side body panel to weld on. Should have some daylight Friday while I'm off to finish the welding. Have other things to prep for welding during the week. 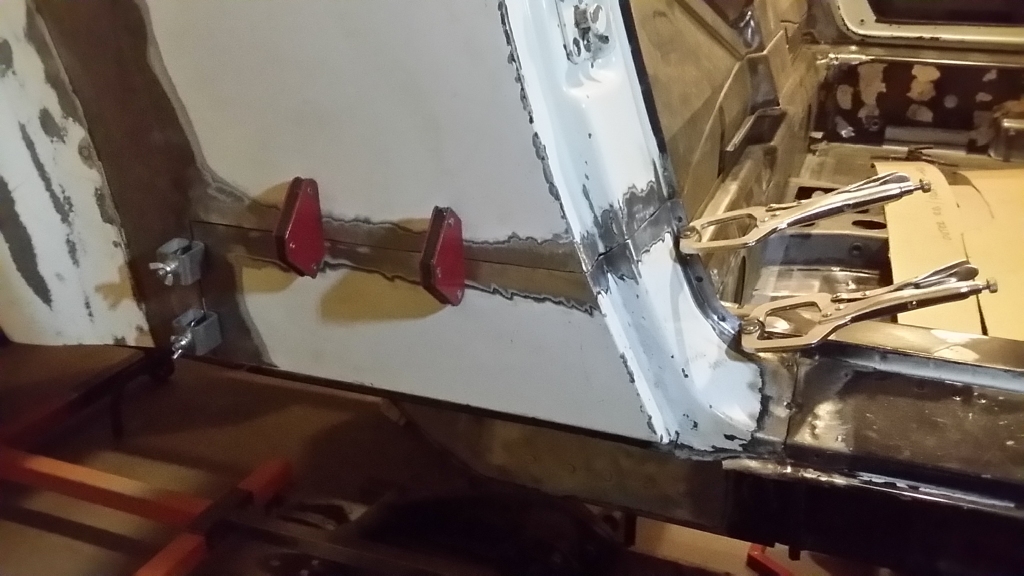 |
| 3d914 |
 Nov 4 2016, 06:38 PM Nov 4 2016, 06:38 PM
Post
#492
|
|
Senior Member    Group: Members Posts: 1,275 Joined: 24-September 03 From: Benson, AZ Member No.: 1,191 Region Association: Southwest Region |
Working on closing up the left quarter panel - right behind the driver's door. Started cleaning the used panel I bought and removing paint - only to find some damage in the lower-left corner. Aside from the damage in the corner the panel's in good shape.
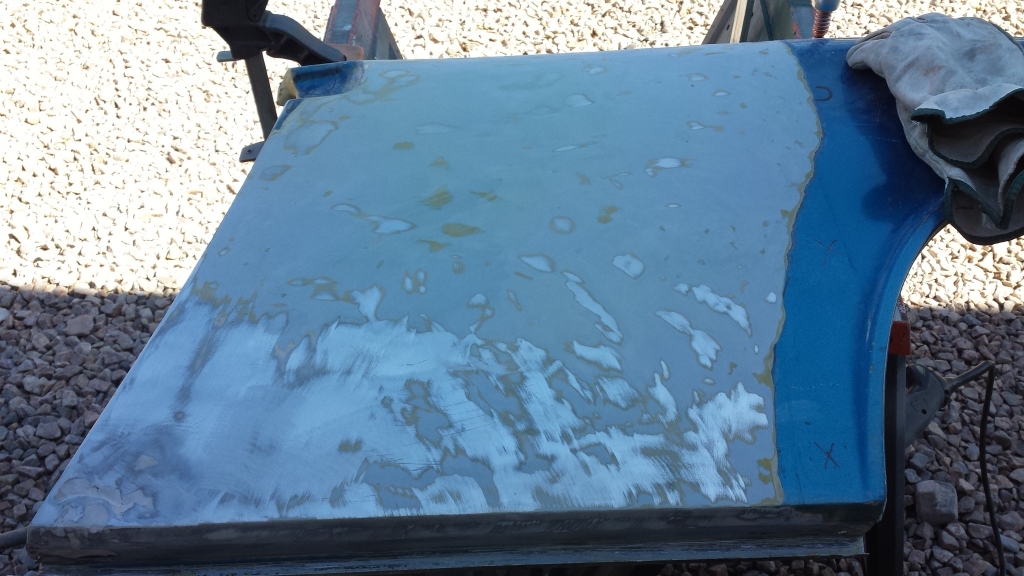 So this section will have to get cut out and I'll make a patch to go in its place. Then it will get cut with the rest of the panel to fit between the door and the flare. 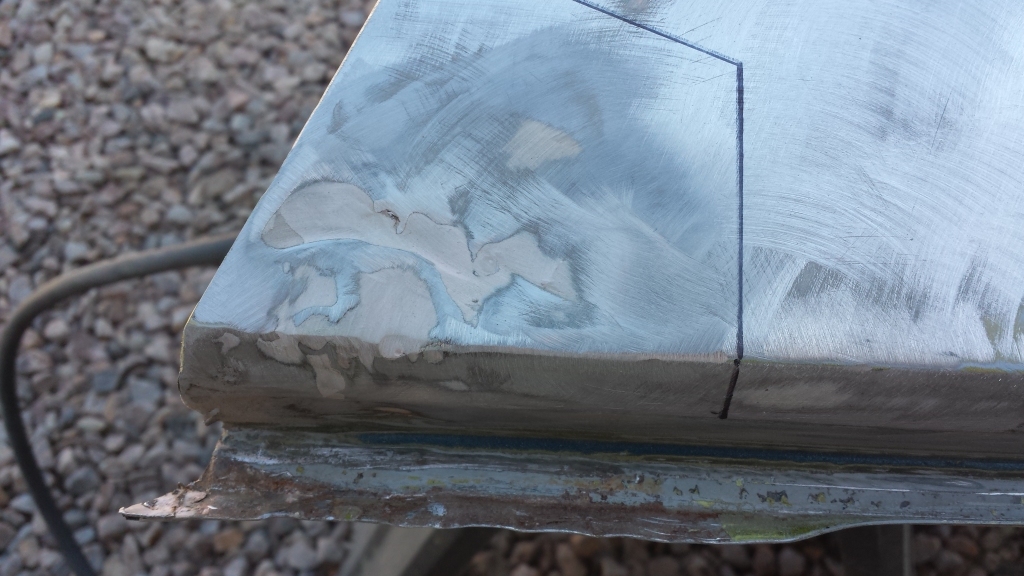 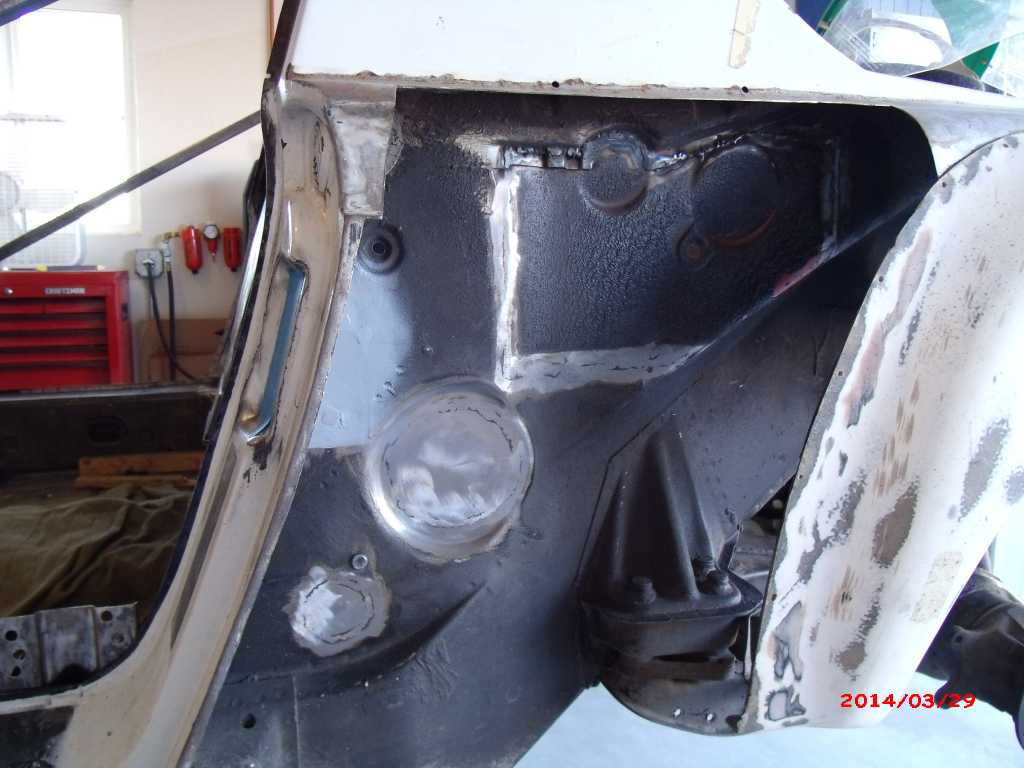 |
| 3d914 |
 Nov 6 2016, 05:26 PM Nov 6 2016, 05:26 PM
Post
#493
|
|
Senior Member    Group: Members Posts: 1,275 Joined: 24-September 03 From: Benson, AZ Member No.: 1,191 Region Association: Southwest Region |
OK, got the lower-left corner repaired and the panel pre-cut.
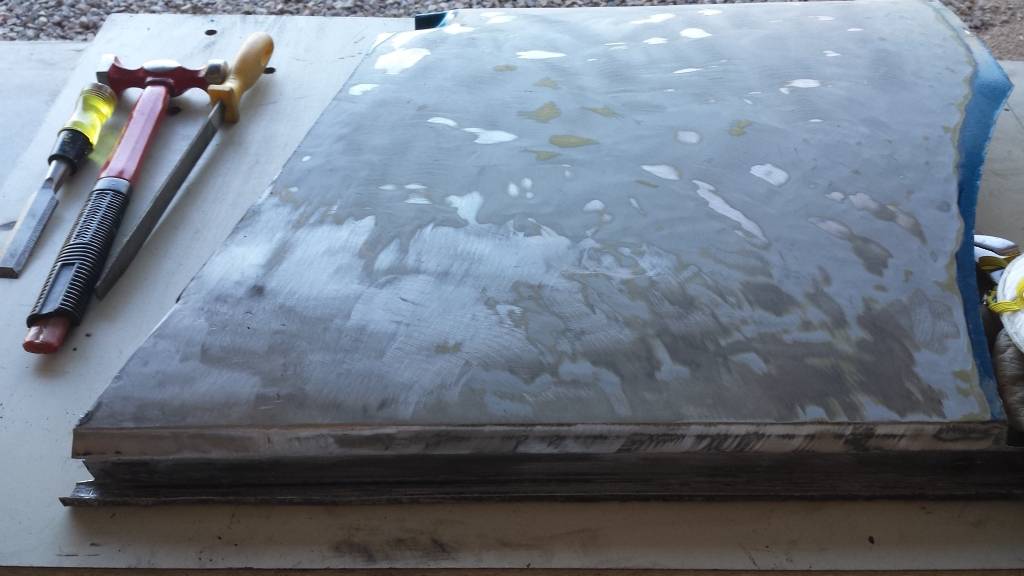 Then got it trimmed & test-fitted so I could mark it for cutting. Marks came out good on the back, but I'm going to refit it tomorrow and mark it again to see if they come out the same. 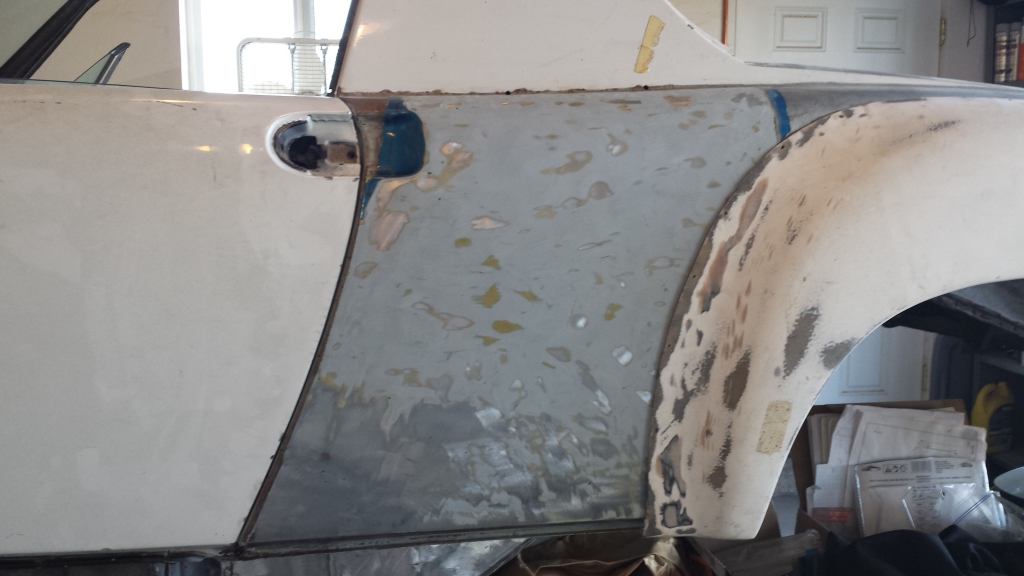 |
| Cairo94507 |
 Nov 7 2016, 07:22 AM Nov 7 2016, 07:22 AM
Post
#494
|
|
Michael           Group: Members Posts: 10,285 Joined: 1-November 08 From: Auburn, CA Member No.: 9,712 Region Association: Northern California 
|
Great progress. I like this build. (IMG:style_emoticons/default/beerchug.gif)
|
| mbseto |
 Nov 7 2016, 07:38 AM Nov 7 2016, 07:38 AM
Post
#495
|
|
Senior Member    Group: Members Posts: 1,257 Joined: 6-August 14 From: Cincy Member No.: 17,743 Region Association: North East States |
I think going with Bosch on the air box was a good decision.
|
| tygaboy |
 Nov 7 2016, 07:53 AM Nov 7 2016, 07:53 AM
Post
#496
|
|
914 Guru      Group: Members Posts: 5,543 Joined: 6-October 15 From: Petaluma, CA Member No.: 19,241 Region Association: Northern California 
|
To all you guys who cut large chunks off your cars as part of your build: (IMG:style_emoticons/default/pray.gif)
Great progress, keep it going! |
| 3d914 |
 Nov 11 2016, 09:46 AM Nov 11 2016, 09:46 AM
Post
#497
|
|
Senior Member    Group: Members Posts: 1,275 Joined: 24-September 03 From: Benson, AZ Member No.: 1,191 Region Association: Southwest Region |
Thanks guys, I appreciate the encouragement.
mbseto: Nice catch. (IMG:style_emoticons/default/biggrin.gif) tygaboy: Cutting good panels out to gain access was one of the most agonzing parts of my build. I'll be much relieved when they're back in and finished. |
| tygaboy |
 Nov 13 2016, 08:49 AM Nov 13 2016, 08:49 AM
Post
#498
|
|
914 Guru      Group: Members Posts: 5,543 Joined: 6-October 15 From: Petaluma, CA Member No.: 19,241 Region Association: Northern California 
|
Thanks guys, I appreciate the encouragement. mbseto: Nice catch. (IMG:style_emoticons/default/biggrin.gif) tygaboy: Cutting good panels out to gain access was one of the most agonzing parts of my build. I'll be much relieved when they're back in and finished. I'm with you on that. My panels are uber straight but I REALLY want to get better access for some of what I have planned. I just can't (yet) bring myself to put cutoff wheel to that nice steel... Please post in detail as you fit these panels: tips for panel alignment, welding process, etc. We're all watching closely - and rooting for your success! (IMG:style_emoticons/default/cheer.gif) |
| 3d914 |
 Nov 13 2016, 07:13 PM Nov 13 2016, 07:13 PM
Post
#499
|
|
Senior Member    Group: Members Posts: 1,275 Joined: 24-September 03 From: Benson, AZ Member No.: 1,191 Region Association: Southwest Region |
Thanks tygaboy,
I spent over six hours this weekend just working on the fit for this panel. That's on top of helping my daughter with her car, working with my wife on the pond, and getting a little chill time relaxing with my wife planning our bedroom renovation. I don't have a lot of experience with this other than what I've gained working on this car for the last (I'm embarrassed to say) eight years. I don't have all the time-saving tools a regular body-shop would have either. The typical challenge fitting panels on the 914 is all the curves and radii. In this case I had the door handle pocket to act as a guide at the upper left of the panel, and the alignment along the bottom of the door for another. There were two more alignment references needed; a dimension from the front quarter-panel seam (under the door) to the lower-rear edge of the fender; the other a dimension from the back side of the lower channel to one of the fixed suspension mounting points. Because my patch panel overlapped my cutout edges (see pic above), and with these four references, I was able to start at the front curved edge and mark it on the back of the patch - using the edge of the cutout as a guide. All marking occurred after checking each of the four positional references. I then would cut half the material off up to the mark. So if there was 1/4 inch of material, I took off an 1/8 inch. That allowed me to creep up on the mark. I didn't have another panel on hand - so I was careful not to botch this one. 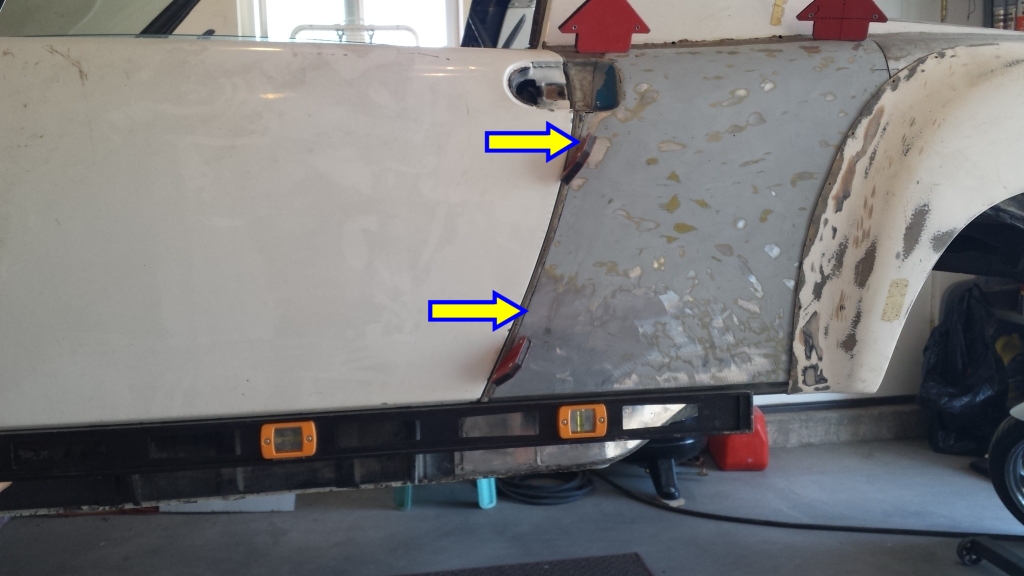 Next I worked on the door handle pocket. The patch was different than mine, so I had to spend some time reshaping and getting the two to line up properly. I continued to do this all the way up until the final fit. As I completed fitting each edge, I would re-verify the four reference positions. 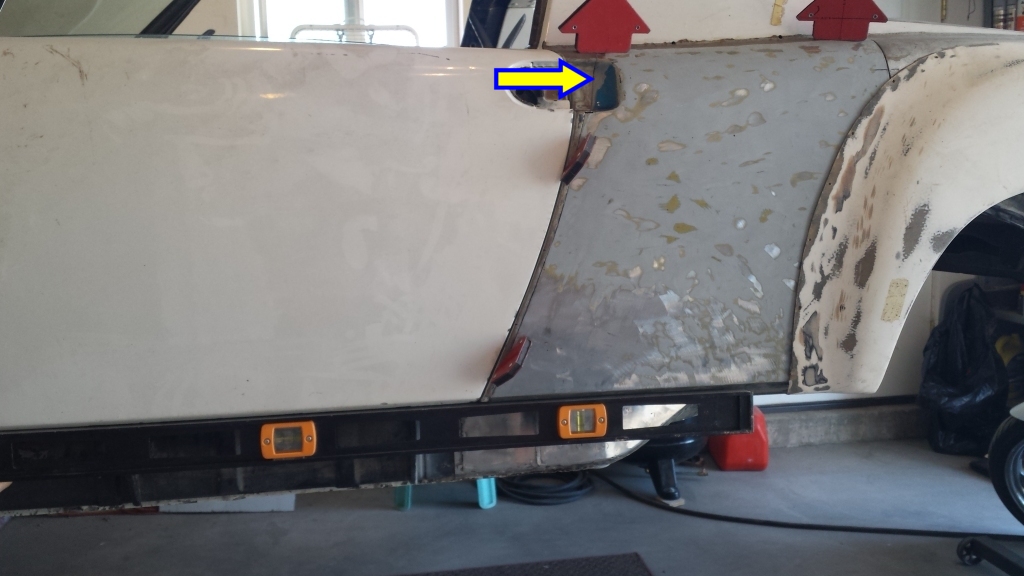 I then moved to the top edge. This was a little trick because I didn't have a good way to secure the bottom channel and every time I wanted to adjust the panel at the top, the bottom would move also. Finally I started using the support bracket that connects under the back channel to the inner body. Mine was pretty beat up, but I was able to reshape it and make it usable. 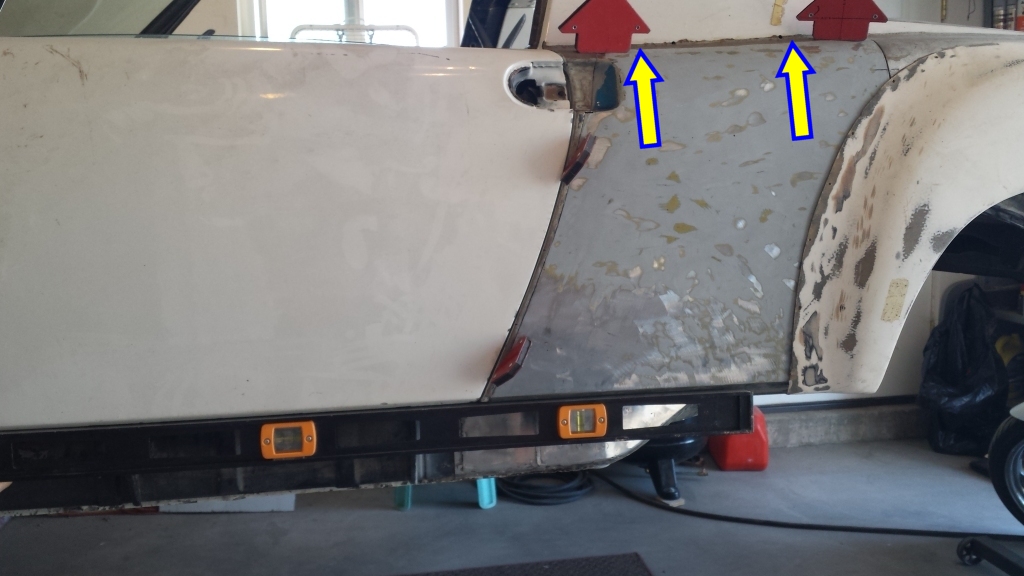 The next section to fit was the back edge along the hip of the fender. I left this as an overlap because it gave me one less loose corner to have to deal with when fitting the panel. Now with the others fit and the four positions verified, I was able to mark this on the back and cut. 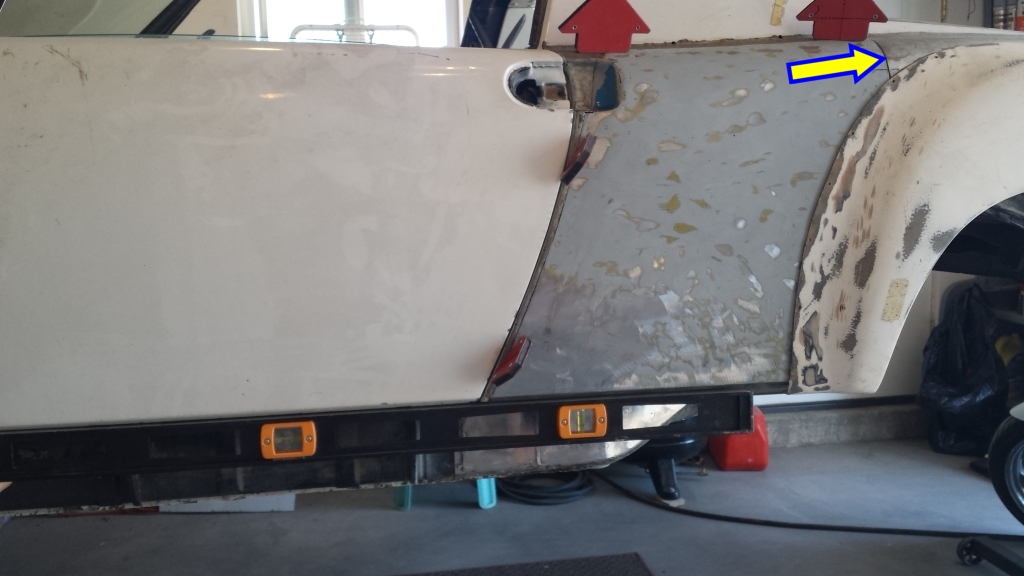 Then I was able to use a couple welding clips to fasten things and verify the fit and all dimensions. This is also when I did additional sanding of the patch edges to provide a small gap for welding. I generally use a black marker to mark the front of the panel where the edge needs to be sanded/filed. The final cutting needing to be done was behind the FG flare. I've already cleaned it so it will be ready for panel bonding cement - which I'll do after all the welding is finished. Here's the final fit with the level as a straight edge - carrying the line from the door backward along the panel. 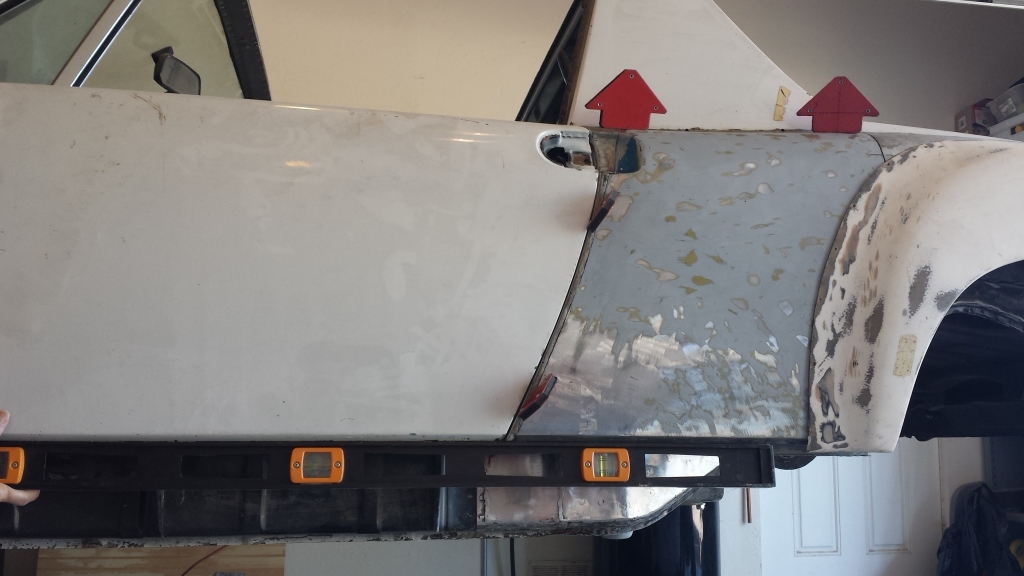 |
| 3d914 |
 Nov 13 2016, 07:21 PM Nov 13 2016, 07:21 PM
Post
#500
|
|
Senior Member    Group: Members Posts: 1,275 Joined: 24-September 03 From: Benson, AZ Member No.: 1,191 Region Association: Southwest Region |
In addition to getting the left panel fit, I was able to get it tack-welded in and had time to tack the right patch in also.
Left side 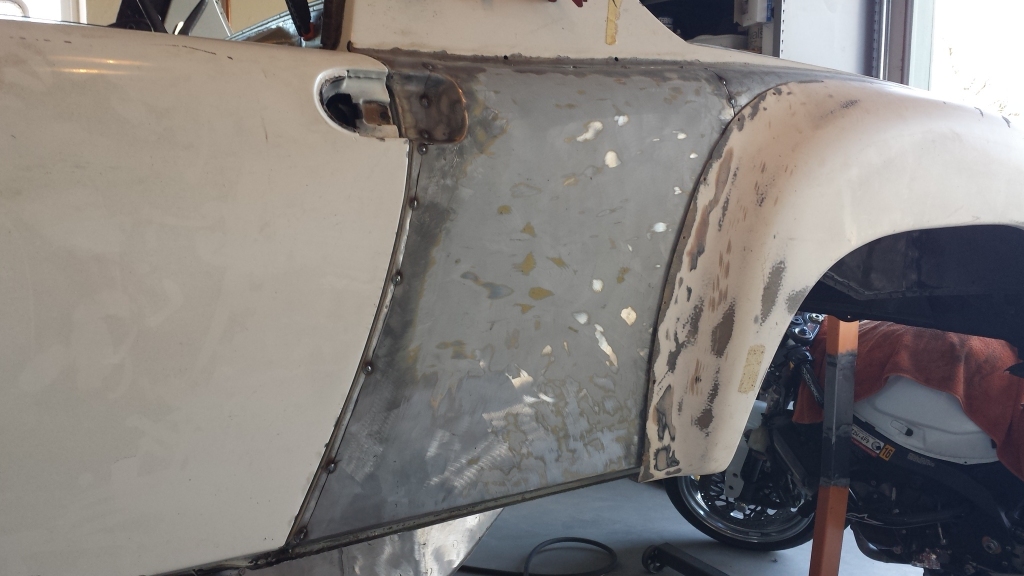 Right side 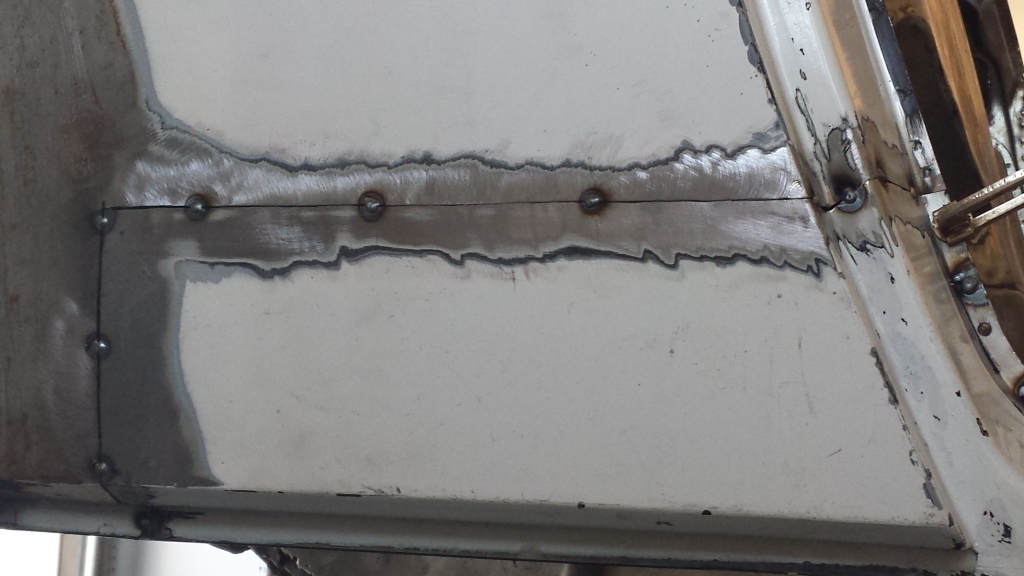 |
  |
1 User(s) are reading this topic (1 Guests and 0 Anonymous Users)
0 Members:

|
Lo-Fi Version | Time is now: 10th April 2025 - 04:22 PM |
Invision Power Board
v9.1.4 © 2025 IPS, Inc.


