|
|
|
Porsche, and the Porsche crest are registered trademarks of Dr. Ing. h.c. F. Porsche AG.
This site is not affiliated with Porsche in any way. Its only purpose is to provide an online forum for car enthusiasts. All other trademarks are property of their respective owners. |
|
|

  |

| 3d914 |
 Jun 23 2008, 08:55 PM Jun 23 2008, 08:55 PM
Post
#61
|
|
Senior Member  Group: Members Posts: 1,275 Joined: 24-September 03 From: Benson, AZ Member No.: 1,191 Region Association: Southwest Region |
Today I was able to complete the remaining steel support that connects the two engine stands. Once I got the measurements right & cut it, I needed to grind it to fit the two angles used to bolt it to the stands.
It was then welded to the the angle pieces. The angles can then be removed along with the support until the car is up on the stands, then re-attached.  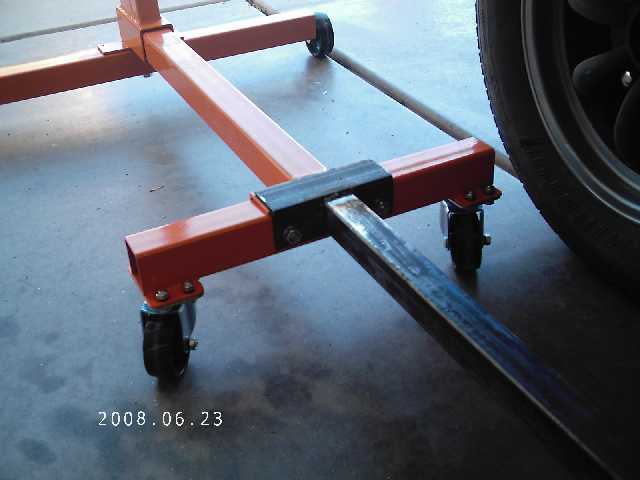 It was too hot to do much else. I spend all day in the sun working, so I can only last a few more hours in the garage with no cooling. Then its a cold refreshing shower and I've got my second wind. Wednesday I hope to get the car up on the rotisserie. Can't wait. (IMG:style_emoticons/default/piratenanner.gif) |
   |

 
|
| bryanc |
Jun 24 2008, 12:19 AM
Post
#62
|
|
Member Group: Members Posts: 322 Joined: 9-August 04 From: San Antonio, Tx Member No.: 2,495 Region Association: Southwest Region |
QUOTE(3d914 @ Jun 23 2008, 07:55 PM)  It was too hot to do much else. I spend all day in the sun working, so I can only last a few more hours in the garage with no cooling. Then its a cold refreshing shower and I've got my second wind. Wednesday I hope to get the car up on the rotisserie. Can't wait. (IMG:style_emoticons/default/piratenanner.gif) I got a large fan for my garage. It's about 3 ft in diameter and moves a lot of air, but doesn't blow you out of the garage. Well worth the money. |
|
|
|
| 3d914 |
Jun 25 2008, 05:16 PM
Post
#63
|
|
Senior Member Group: Members Posts: 1,275 Joined: 24-September 03 From: Benson, AZ Member No.: 1,191 Region Association: Southwest Region |
Bryan,
Where did you get it? |
|
|
|
| jd74914 |
Jun 25 2008, 09:10 PM
Post
#64
|
|
Its alive Group: Members Posts: 4,841 Joined: 16-February 04 From: CT Member No.: 1,659 Region Association: North East States |
You can get high CFM fans like that at Home Depot. They are not too expensive. I'm going to buy one to use for ventilation on the next car I paint.
|
|
|
|
| bryanc |
Jun 25 2008, 10:07 PM
Post
#65
|
|
Member Group: Members Posts: 322 Joined: 9-August 04 From: San Antonio, Tx Member No.: 2,495 Region Association: Southwest Region |
QUOTE(3d914 @ Jun 25 2008, 04:16 PM) Bryan, Where did you get it? I bought it used from my neighbour. It's basically like This. Home depot has some pedestal fans, but I don't think they are as robust as this one--it's pretty hefty. |
|
|
|
| 3d914 |
Jun 25 2008, 10:07 PM
Post
#66
|
|
Senior Member Group: Members Posts: 1,275 Joined: 24-September 03 From: Benson, AZ Member No.: 1,191 Region Association: Southwest Region |
Thanks Jim & Bryan,
That explains why I haven't seen them - I rarely frequent the Home Depot. I'm more of an Ace Hardware kinda guy. I'll have to check them both out. Well I got the car up on the rotisserie tonight. A friend of mine came over and helped. It went pretty well except that I need to build a small (12-18" high) extension for my ATV lift so that I can jack a greater distance. I'm not fond of using wood blocking - so it will give me chance to develop my welding skills a little further. 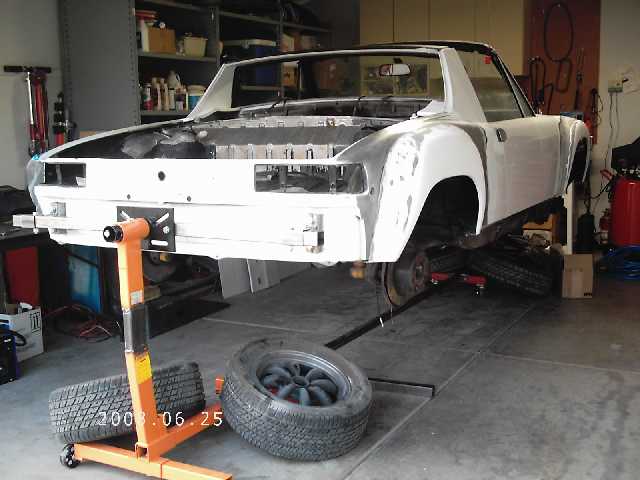 SOo now I'm ready to get back on the body work and get the flares finished and the rear trunk stripped and primed. May have some exciting news tomorrow regarding power-train. Stay tuned! |
|
|
|
| 3d914 |
Jun 28 2008, 03:04 PM
Post
#67
|
|
Senior Member Group: Members Posts: 1,275 Joined: 24-September 03 From: Benson, AZ Member No.: 1,191 Region Association: Southwest Region |
Today I drained the brake fluid and inspected the disks & calipers. Three of the four disks are under-sized, so I'll be replacing them.
The front calipers are getting replaced with BMW 2002 4-piston calipers, and the backs I'll rebuild and reuse. I'm continuing to strip paint in the rear trunk. I had no idea this would be such a slow process. It takes several applications with 15-20 minute wait between apps. And of course you all know how flat and smooth the trunk is in a 914 - NOT! (IMG:style_emoticons/default/biggrin.gif) (IMG:style_emoticons/default/biggrin.gif) DID I MENTION . . . I found a 3.2L V6 SHO motor to rebuild for $200.00. That's complete from exhaust headers to intake. All I'll need to add is the ECM. The gentlemen that let me come over to measure the SHO engine had one he had pulled from a local junk yard. I'll start with an inspection of the crank and mains, water pump, and rod bearings. If all that looks good I'll proceed with cleanup and the rebuild. I'll get some pics next week when I'm over there. |
|
|
|
| bryanc |
Jun 28 2008, 08:05 PM
Post
#68
|
|
Member Group: Members Posts: 322 Joined: 9-August 04 From: San Antonio, Tx Member No.: 2,495 Region Association: Southwest Region |
Sweet!!!! SHOpics please!
|
|
|
|
| 3d914 |
Jun 29 2008, 03:46 PM
Post
#69
|
|
Senior Member Group: Members Posts: 1,275 Joined: 24-September 03 From: Benson, AZ Member No.: 1,191 Region Association: Southwest Region |
Hey Bryan - I can hardly wait to get started on this engine. Should make some basic progress next week. And I'll get pics also.
Well I spent MORE time in the trunk stripping paint - and I'm still not finished. In between applications of paint remover I was working on the engine bay. I removed a metal plate that someone installed as a band-aid for the "hell-hole". SO it looks like I'll be hunting for the pieces to fix this. Battery tray was garbage, and I knew there was some work to do there since the rust was obvious in spite of the band-aid. 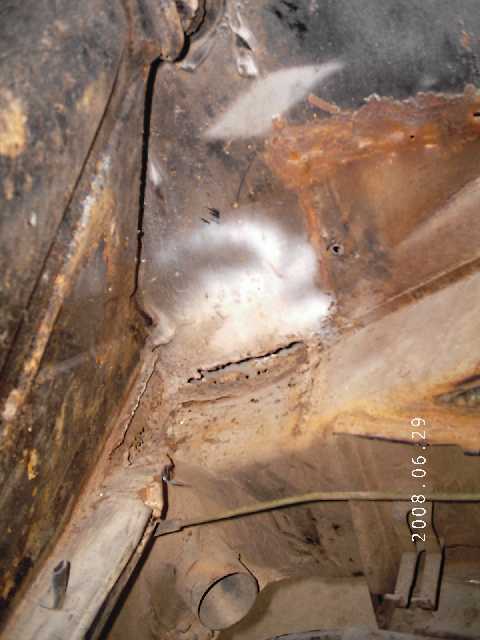 I'll likely relocate the battery, but I may end up with more room in the engine bay than any where else. And if it stays in the engine bay, it may still get relocated to a lower, more stable location. I also removed the rubber liner behind the back-pad. If you're interested in saving this liner, the best way to remove it is with a chisel or stout paint scraper. That way you can get behind the pad everytime you encounter cement, and free it before it tears the pad. Everything else looks clean except for the lower right corner where the "hell-hole" came through the firewall. 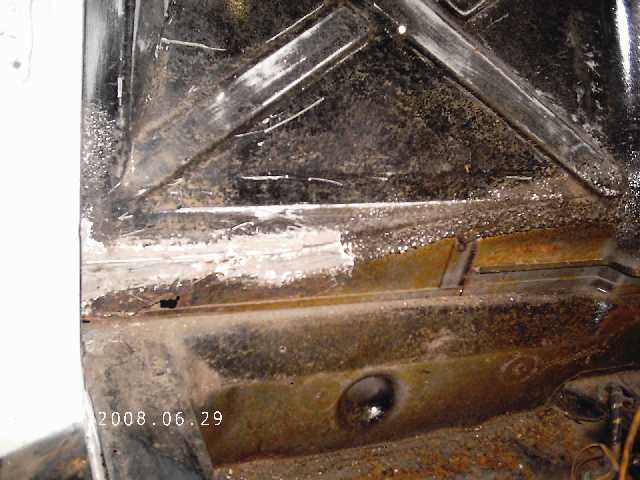 |
|
|
|
| 3d914 |
Jul 2 2008, 12:46 PM
Post
#70
|
|
Senior Member Group: Members Posts: 1,275 Joined: 24-September 03 From: Benson, AZ Member No.: 1,191 Region Association: Southwest Region |
Well, the pretty pics of the engine will have to wait a while. I got the engine torn down, but found that the crank was broken just behind the front connecting rod. I've got a replacement crank and rod, but that means a complete tear-down of the engine to replace the one rod, inspect/replace rings, etc, . . .
I'll get some staged pics as soon as possible. |
|
|
|
| 3d914 |
Jul 8 2008, 08:39 PM
Post
#71
|
|
Senior Member Group: Members Posts: 1,275 Joined: 24-September 03 From: Benson, AZ Member No.: 1,191 Region Association: Southwest Region |
Well the fun continues . . .
Engine - Had the block magna-fluxed and found a crack by one of the upper core plug holes. Fortunately Tom had another block, so progress is continuing. I'll get some pics once I get the heads back on. Body - Took some extra time off over the holiday, but I didn't get to use all of it working on the body since I had a side project that came up. I did manage to get the right rear inner part of the fender/flare glassed. I used three layers of material. I'll clean up the edges and cover the whole inner wheel well with some under-body sealer. Pic inside the wheel well. THe black behind the FG is the factory paint. I stripped a couple inches down to metal, but ran into the painted area a little. 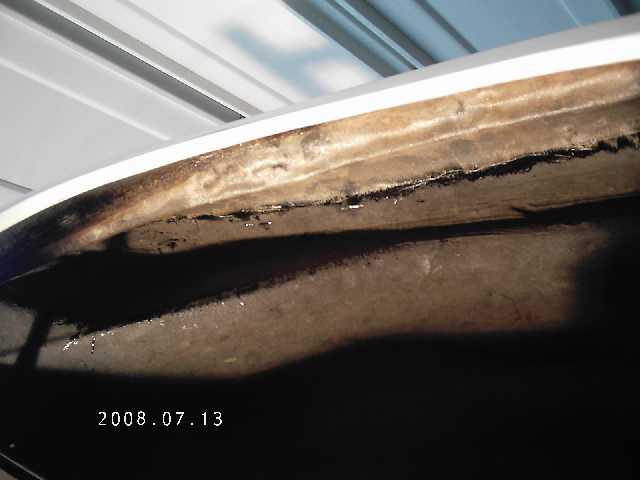 I also got most of the rubberized seam sealer off in the rear trunk. I tried the torch method, but it still required as much scraping. I found that a good chisel was an excellent way to get under the sealer so I could remove it in bigger chunks. It actually turned out to be faster also. A wire wheel came in handy for some of the small corners - but I found that unlike the scraping (with chisel or paint scraper), which left the factory primer, the wire wheel stripped clear down to the bear metal. Even though this will all get primer, I like the idea of putting new seam sealer on top of the old primer - as the factory did. I'll get some more pics when I get the trunk completely stripped and get some new batteries for the camera. |
|
|
|
| 3d914 |
Jul 13 2008, 03:53 PM
Post
#72
|
|
Senior Member Group: Members Posts: 1,275 Joined: 24-September 03 From: Benson, AZ Member No.: 1,191 Region Association: Southwest Region |
This week I've been working on the engine. It works out better to spend time on the engine for a few hours in the late afternoon and save the body work for the weekend.
The engine is coming along. Tom's been a big help getting things squared away. We've got a good block, crank, rods, pistons, heads, intake, etc. I've started cleaning and some assembly. I'll begin prepping for paint next week. There are two complimentary colors on the car in addition to the Orange. When racing the GT's the factory would color code the bumpers so that each car could be identified easier when viewed head-on. I plan to apply this to my car and use yellow and red for the two halve-colors on the front & rear bumpers. These are the same colors I'll use for the engine. Here's a quick image my son modified for me to illustrate. The block and oil pan will also be yellow to match the intake. I wanted to avoid black since the engine cover is a black mesh. This way the colors will be more apparent behind the black grill. 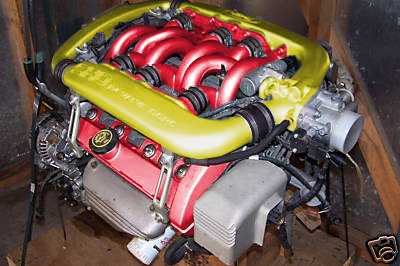 Can't wait to get the engine painted and together. |
|
|
|
| 3d914 |
Jul 13 2008, 04:07 PM
Post
#73
|
|
Senior Member Group: Members Posts: 1,275 Joined: 24-September 03 From: Benson, AZ Member No.: 1,191 Region Association: Southwest Region |
I worked on the left rear quarter today. I needed to get the access metal behind the flares trimmed out. To do this I went ahead and trimmed the adjacent area where the new body panel goes in.
I used my 4in cutter to rough-cut the area. 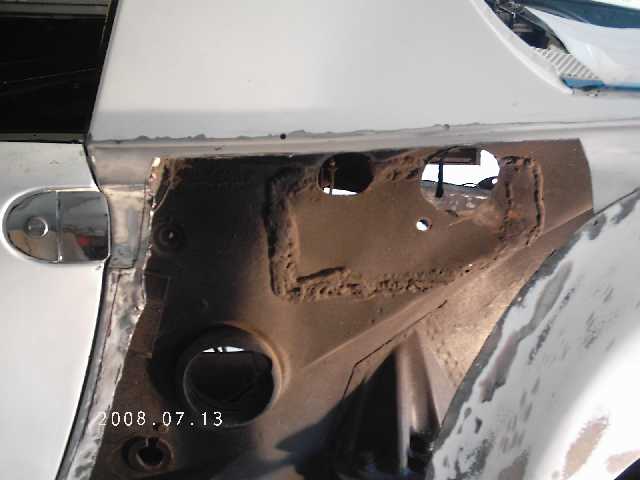 then followed with my Dremel tool to get a nice clean cut. 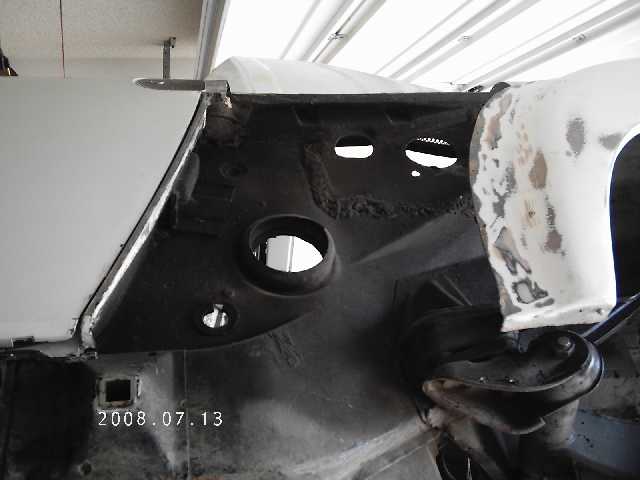 I was able to pry off the sheet metal under the flare without damaging the flare at all. Since the sheet metal was a thin strip a couple inches wide, it flexed quite easily and there was no real pressure on the FG flare. Here's a shot from behind the flare. Now I just have to grind off the adhesive on the back side of the flare before applying new adhesive. 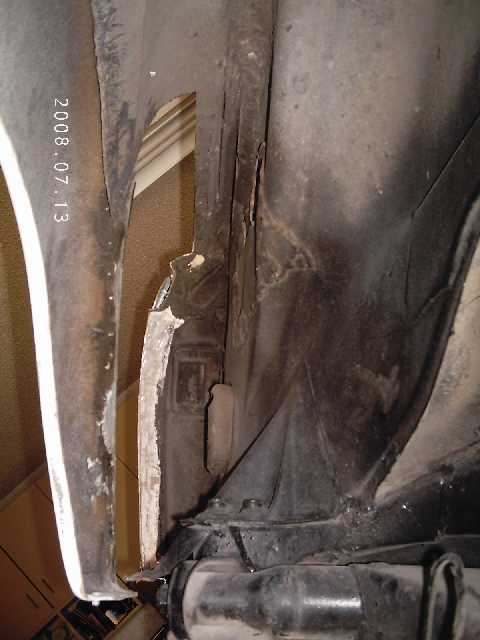 All that was left was to trim the access sheet metal behind the flare. I use my Dremel tool for this since it provides good control and I don't have to worry about damaging the flare. I use the big cutter to remove the strip of sheet metal once it reaches 18in or so. Here's the trimmed underside ready to be prepped for fiberglass. 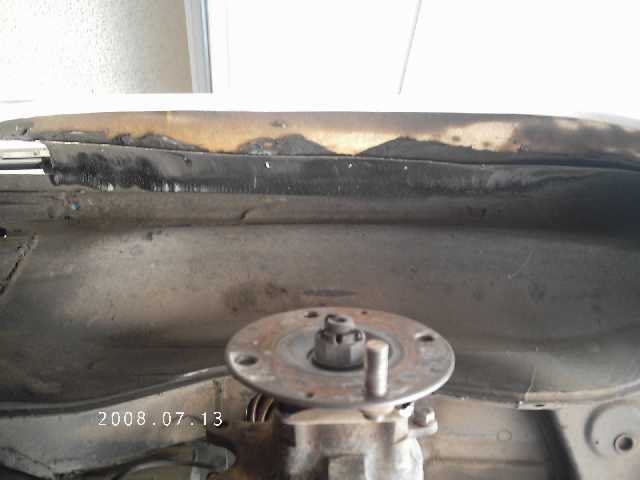 It's getting there - slowly but surely. |
|
|
|
| 3d914 |
Jul 22 2008, 07:31 PM
Post
#74
|
|
Senior Member Group: Members Posts: 1,275 Joined: 24-September 03 From: Benson, AZ Member No.: 1,191 Region Association: Southwest Region |
Currently I'm working on three things at the same time.
The Body work - getting ready to attempt the butt-weld of the new piece, but I have several things to complete before then . . .
This should keep me busy for the rest of the summer. Stay tuned boys & girls - photos are on their way . . . |
|
|
|
| 3d914 |
Jul 24 2008, 10:21 PM
Post
#75
|
|
Senior Member Group: Members Posts: 1,275 Joined: 24-September 03 From: Benson, AZ Member No.: 1,191 Region Association: Southwest Region |
Well I've managed to get the transaxle completely cleaned. I used POR-15's Marine Clean. At a 1:1 dilution with water it does an amazing job. I use both nylon & soft-metal brushes to loosen the grease and grime, then just rinse with water. Too easy.
Here's a before and after. 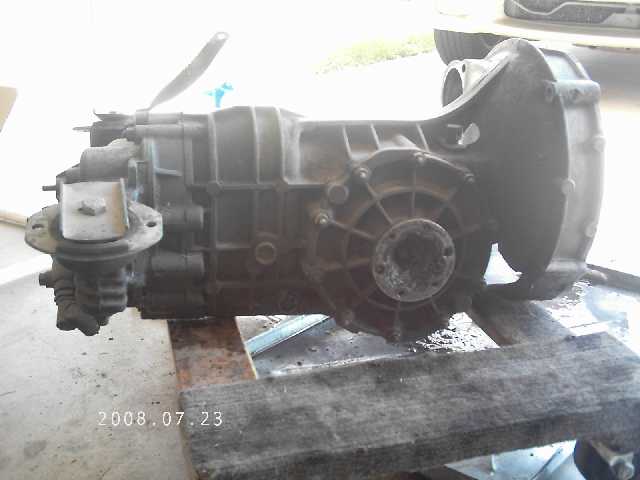 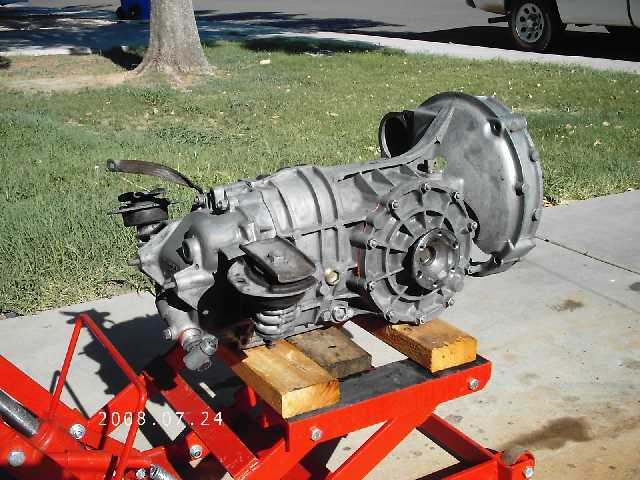 I ran out of POR Paint Stripper and Marine Clean, so I think I'll work on painting the valve covers and modifying the intake manifolds this weekend. The tranny inspection can wait till next week. Stay cool (IMG:style_emoticons/default/cool_shades.gif) |
|
|
|
| ClayPerrine |
Jul 25 2008, 07:52 AM
Post
#76
|
|
Life's been good to me so far..... Group: Admin Posts: 16,269 Joined: 11-September 03 From: Hurst, TX. Member No.: 1,143 Region Association: NineFourteenerVille |
Did anyone else notice that this car has holes for the factory six oil tank???
(IMG:http://www.914world.com/bbs2/uploads/post-1191-1215986339.jpg) Are you sure this car is not a lost six???? This is a cool project.. I like watching the unconventional done. |
|
|
|
| 3d914 |
Jul 25 2008, 03:49 PM
Post
#77
|
|
Senior Member Group: Members Posts: 1,275 Joined: 24-September 03 From: Benson, AZ Member No.: 1,191 Region Association: Southwest Region |
Clay,
The previous owner converted this original 1.8 to a six - then it was stolen and the thieves removed the six and left the rest. PO put the 1.8 back in and later sold it to me. |
|
|
|
| ClayPerrine |
Jul 25 2008, 03:55 PM
Post
#78
|
|
Life's been good to me so far..... Group: Admin Posts: 16,269 Joined: 11-September 03 From: Hurst, TX. Member No.: 1,143 Region Association: NineFourteenerVille |
QUOTE(3d914 @ Jul 25 2008, 04:49 PM) Clay, The previous owner converted this original 1.8 to a six - then it was stolen and the thieves removed the six and left the rest. PO put the 1.8 back in and later sold it to me. If all the holes for the tank and the motor mounts are there, why not make it a six? Not critizing your work, just asking. It would be a hell of a lot simpler. |
|
|
|
| 3d914 |
Jul 26 2008, 04:51 PM
Post
#79
|
|
Senior Member Group: Members Posts: 1,275 Joined: 24-September 03 From: Benson, AZ Member No.: 1,191 Region Association: Southwest Region |
Clay,
I just wanted to do something unusual & non-Porsche. I had three nice cars already that were kept Porsche, but this time I wanted to try something different - hence my choice to go SHO. Speaking of which - I worked on the valve covers & intake manifold today. The valve covers just needed minor cleaning and light sanding. They have a coating on them (I don't think it anodizing), so I need to find out if this can be painted on or not. Started to disassemble the intake manifold. Here's the beast with most attachments. 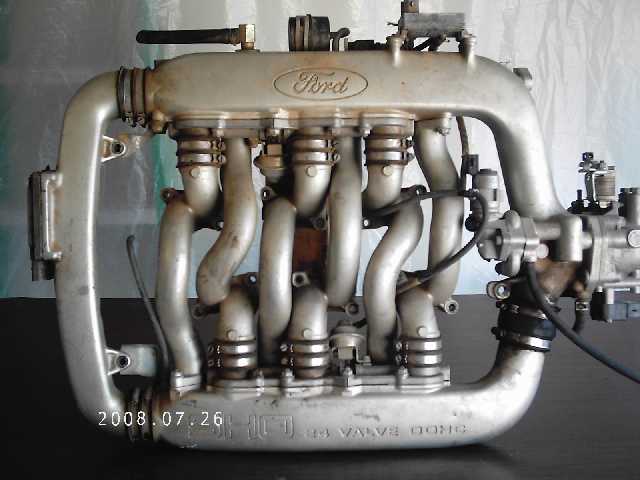 I need to remove several bosses that I will not be using and will help reduce the length for a better fit. The first to go is the DIS flange. 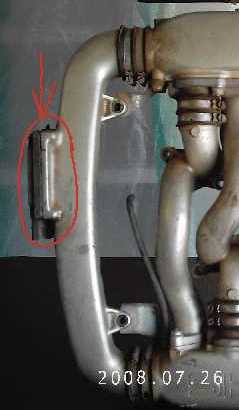 To remove it I first cut off large sections top & bottom, then started to grind and file down close to the desired shape. I continued to rough the shape with a file, then did some sanding with 60 & 100 grit. The hole will get welded in and then I will finish it all off. But there are several other smaller flanges that need to come off also. 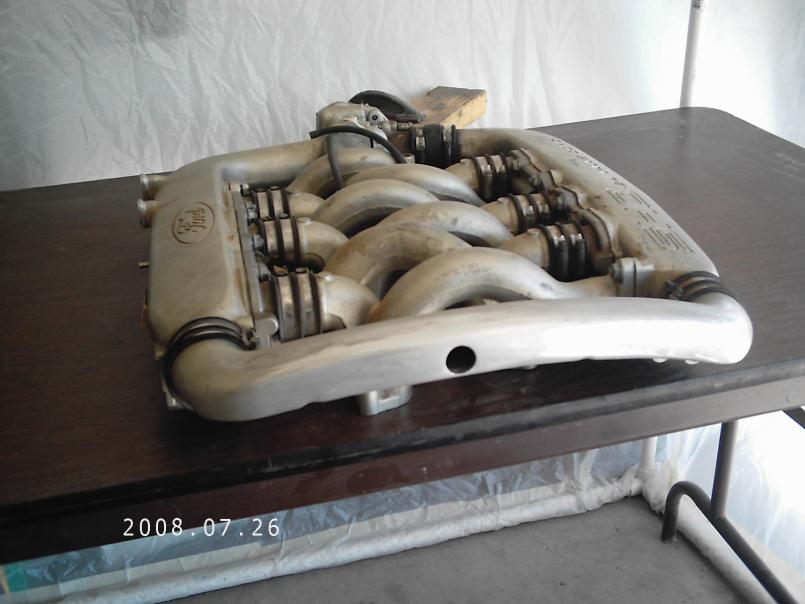 I like aluminum . . . |
|
|
|
| 3d914 |
Jul 28 2008, 07:03 PM
Post
#80
|
|
Senior Member Group: Members Posts: 1,275 Joined: 24-September 03 From: Benson, AZ Member No.: 1,191 Region Association: Southwest Region |
Now that the Valve covers are dry, here's how they look in Ford Red (Duplicolor 500deg paint)
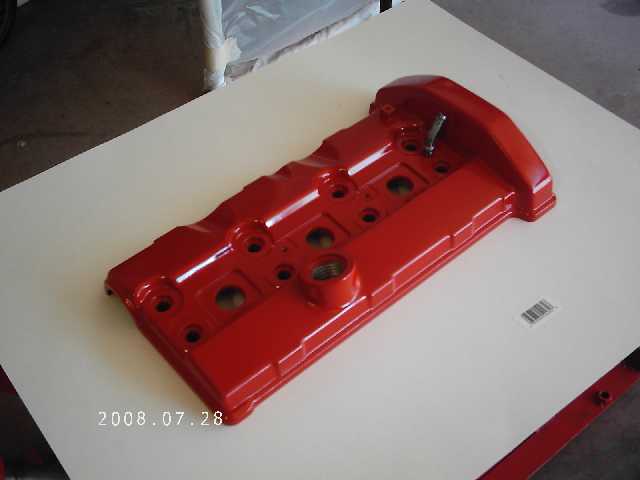 and 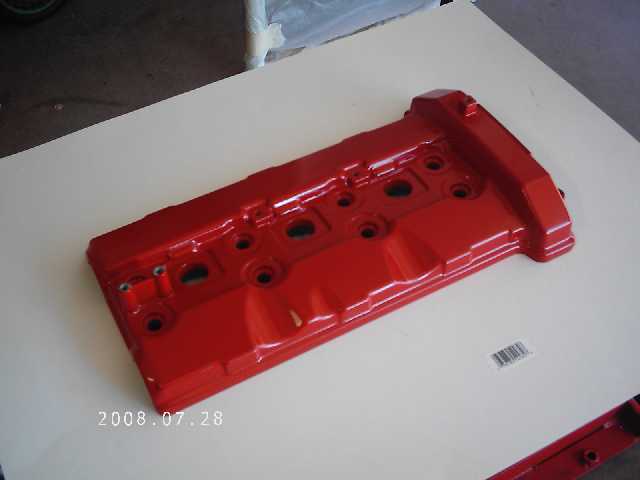 purty . . . (but not the best JPEGs) |
|
|
|
|
1 User(s) are reading this topic (1 Guests and 0 Anonymous Users)
0 Members:

|
Lo-Fi Version | Time is now: 20th April 2025 - 05:35 AM |
Invision Power Board
v9.1.4 © 2025 IPS, Inc.