|
|

|
Porsche, and the Porsche crest are registered trademarks of Dr. Ing. h.c. F. Porsche AG.
This site is not affiliated with Porsche in any way. Its only purpose is to provide an online forum for car enthusiasts. All other trademarks are property of their respective owners. |
|
|
  |
| TC 914-8 |
 Jun 11 2008, 01:18 AM Jun 11 2008, 01:18 AM
Post
#41
|
|
Senior Member    Group: Members Posts: 827 Joined: 23-May 08 From: Sequim, WA Member No.: 9,090 Region Association: Pacific Northwest 
|
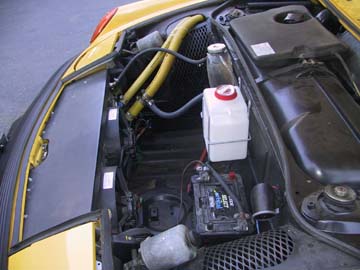
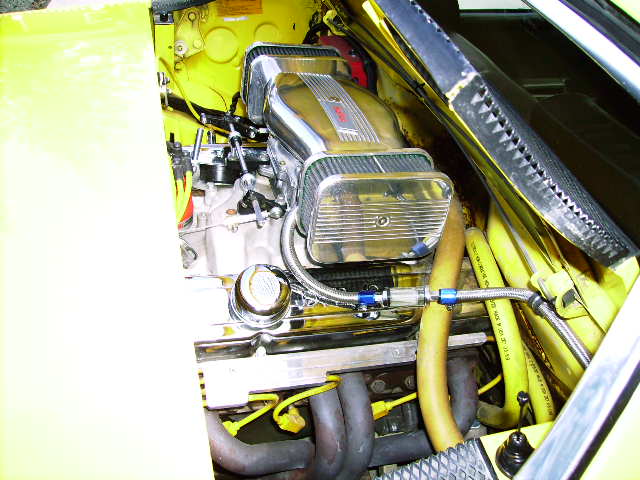
Lots of great pictures, I have a Rod Simpsin kit and the Cooling lines are run thru the rocker panels. When you mount the lines under the car, and come across a speed bump, the first thing to hit is the lines. Yes, with the battery in the front trunk you will have a solid source of voltage for the fans. Your engine compartment and battery tray looks solid, if you keep the battery in the engine compartment I would run no less than #10 and possibly #8 stranded copper.
  |
| TC 914-8 |
 Jun 11 2008, 01:31 AM Jun 11 2008, 01:31 AM
Post
#42
|
|
Senior Member    Group: Members Posts: 827 Joined: 23-May 08 From: Sequim, WA Member No.: 9,090 Region Association: Pacific Northwest 
|
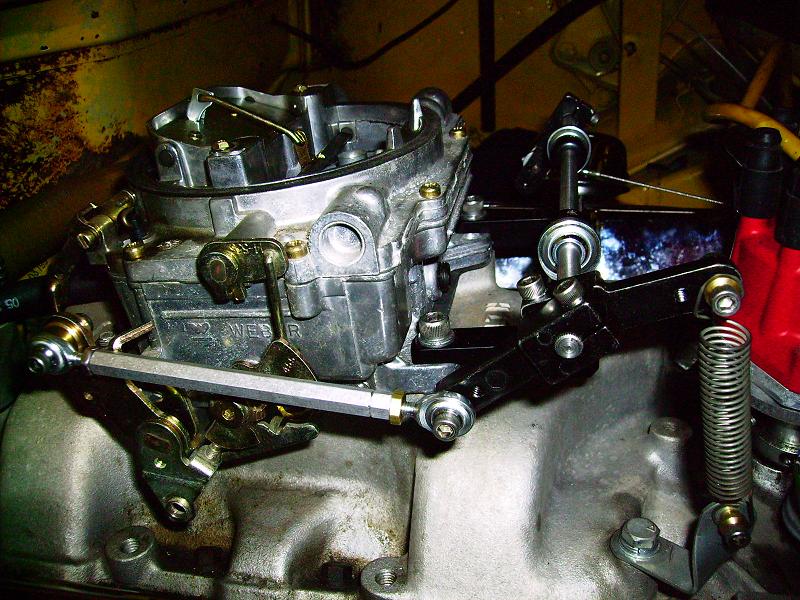
I re-ran the factory cable from two tight turns in front of the engine to sweep under the passenger side header and come up behind the engine. I ordered a linkage kit from Dale Witch on Ebay to make a custon linkage. take a look at the picts. The cable pulls from the passengerside and connects to the drivers side thru the rod and Heim joints.
 |
| Jeffs9146 |
 Jun 11 2008, 07:41 AM Jun 11 2008, 07:41 AM
Post
#43
|
|
Ski Bum     Group: Members Posts: 4,062 Joined: 10-January 03 From: Discovery Bay, Ca Member No.: 128 |
QUOTE I mean, I understand if it comes outta the factory w/ a v8; but to actually swap a 4 cyl for a v8... how it's even possible is beyond me. There's barely room in the engine compartment w/ a 4 cyl... cramming in a v8 has got to be a squeeze! This is my favorite V8 conversion and it shows that anything is possible! Alien Build |
| computers4kids |
 Jun 11 2008, 08:33 AM Jun 11 2008, 08:33 AM
Post
#44
|
|
Love these little cars!     Group: Members Posts: 2,443 Joined: 11-June 05 From: Port Townsend, WA Member No.: 4,253 Region Association: None |
I re-ran the factory cable from two tight turns in front of the engine to sweep under the passenger side header and come up behind the engine. I ordered a linkage kit from Dale Witch on Ebay to make a custon linkage. take a look at the picts. The cable pulls from the passengerside and connects to the drivers side thru the rod and Heim joints. Tony, thanks for chiming-in...I love fresh ideas. Appreciate the tips on wiring and that's quite an amazing linkage setup you have going. I am going to leave the battery in the engine compartment. After looking at a lot of conversions, I went ahead and ran the lines under the car...if you have a picture of your rockers with the lines running through them I would love to take a gander. As far as the carb linkage, Renegade sold me a bracket...which didn't fit my manifold for some reason (holes on bracket a tad narrower...too much to slot). Anyway, I came-up the driver's firewall, fabbed the bracket, and used the cable set off a FI throttle body and it seems to work real well...will see. Attached image(s) 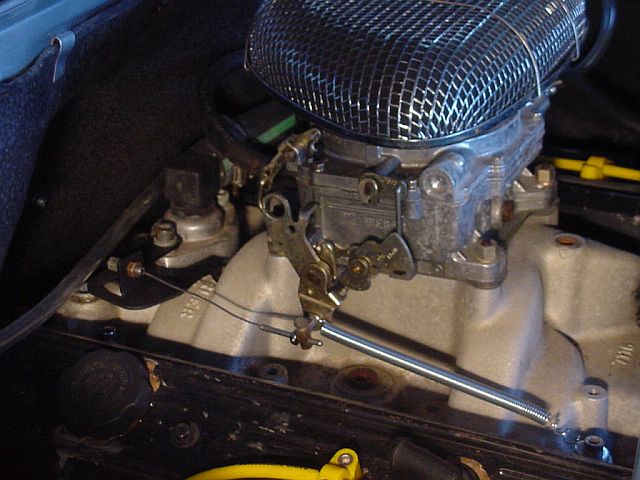
|
| computers4kids |
 Jun 11 2008, 10:23 PM Jun 11 2008, 10:23 PM
Post
#45
|
|
Love these little cars!     Group: Members Posts: 2,443 Joined: 11-June 05 From: Port Townsend, WA Member No.: 4,253 Region Association: None |
Today I started installing the Renegade wiring harness that came with the kit. Wiring is not my strong suit and I have four questons. The firs picture is an overview of the wiring harness and where the questions are located. The following four pictures each represent one of the questions. Hopefully this makes sense...
Attached thumbnail(s) 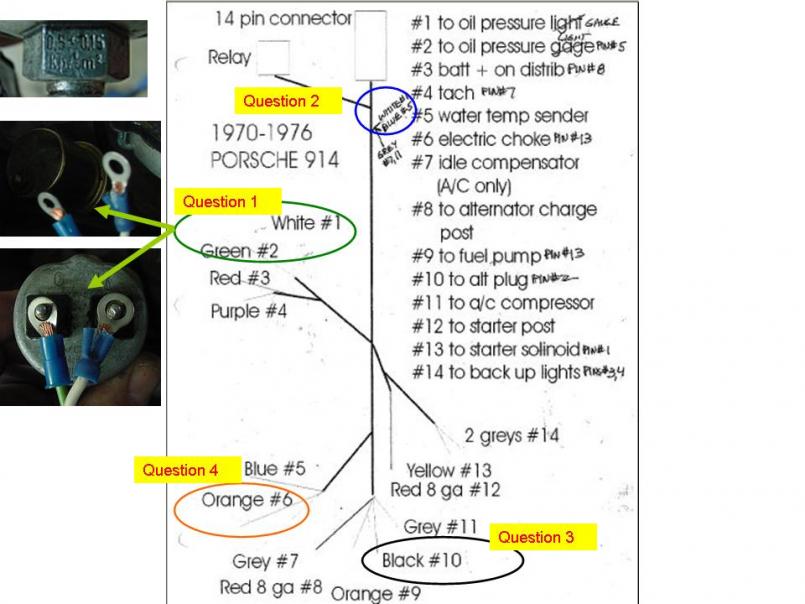 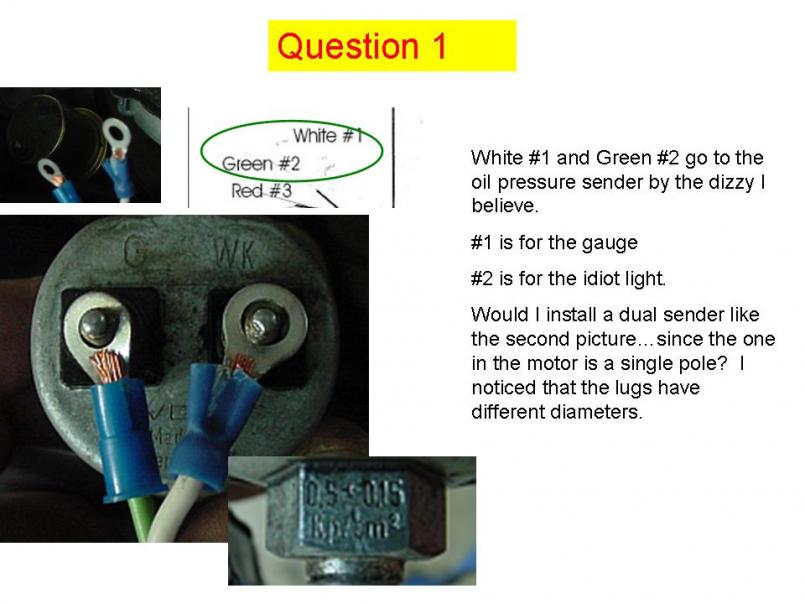 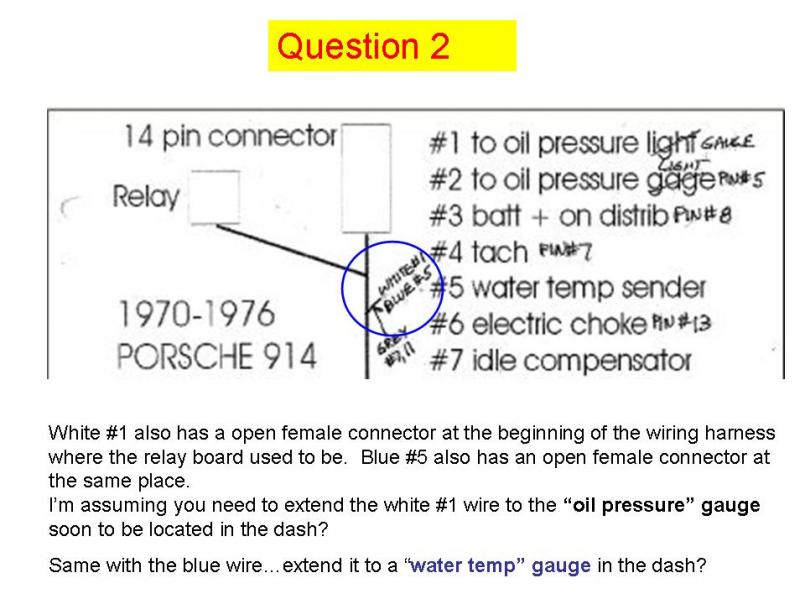 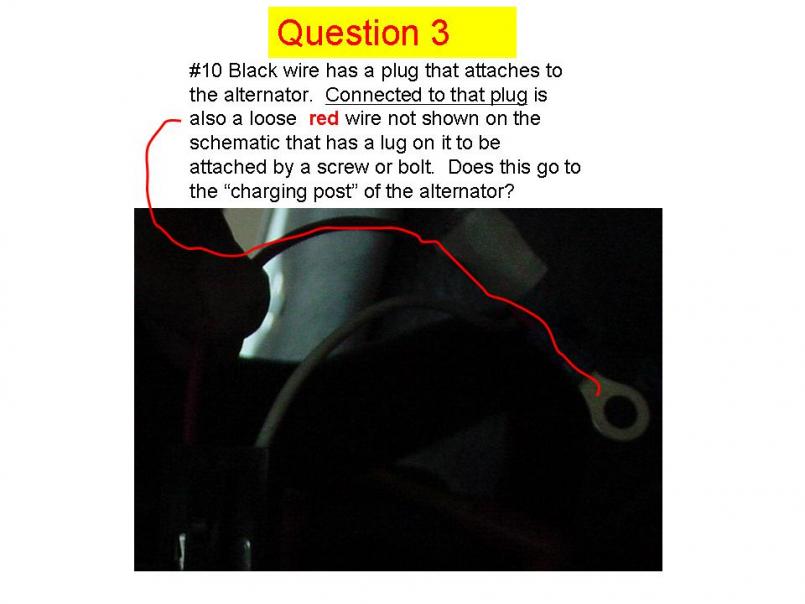
|
| computers4kids |
 Jun 11 2008, 10:23 PM Jun 11 2008, 10:23 PM
Post
#46
|
|
Love these little cars!     Group: Members Posts: 2,443 Joined: 11-June 05 From: Port Townsend, WA Member No.: 4,253 Region Association: None |
last question
Attached thumbnail(s) 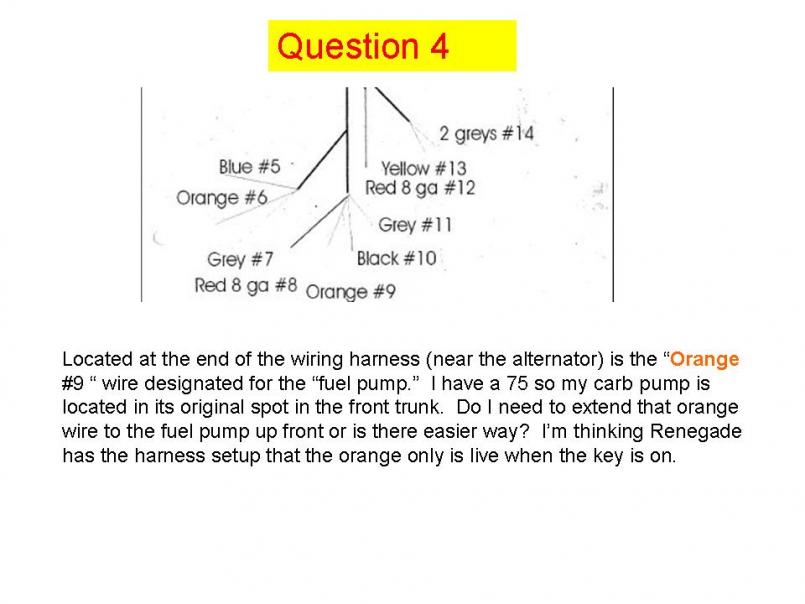
|
| turboman808 |
 Jun 12 2008, 12:24 AM Jun 12 2008, 12:24 AM
Post
#47
|
|
Advanced Member     Group: Members Posts: 2,718 Joined: 31-January 06 From: North Jersey Member No.: 5,505 Region Association: North East States |
|
| cobra94563 |
 Jun 12 2008, 01:05 AM Jun 12 2008, 01:05 AM
Post
#48
|
|
Chris   Group: Members Posts: 341 Joined: 1-March 05 From: San Francisco Member No.: 3,696 |
your progress is much faster That I ever got things done. (IMG:style_emoticons/default/smilie_pokal.gif) :
comment on your throttle cable setup... The cable pivot pulls from the 6 oclock position and ends at approximately the 8:30 position. I noticed when I had that, my cable did not pull the all the way open. The begining and ending position was not in line with the cable path. I'm not sure you will have that problem, but if you do, 2 (of several possible) solutions - angle the cable up, like the picture of big kat's setup, or add plate on the throttle lever to move the cable attachment to the 4-5 o'clock position, and it will pull level to full open at the 7 o'clock position Sorry,no pics on my setup (I when back to holley setup.) Thanks for keeping up the progress updates! (IMG:style_emoticons/default/popcorn[1].gif) |
| JRust |
 Jun 12 2008, 02:34 PM Jun 12 2008, 02:34 PM
Post
#49
|
|
914 Guru      Group: Members Posts: 6,316 Joined: 10-January 03 From: Albany Oregon Member No.: 129 Region Association: Pacific Northwest 
|
Mark is kind of like diaria with his car. You hold off working on it then it all kind of explodes (IMG:style_emoticons/default/av-943.gif) SO it sits there for a few days & then boom! He gets a bunch done
|
| jimkelly |
 Jun 12 2008, 03:20 PM Jun 12 2008, 03:20 PM
Post
#50
|
|
Delaware USA     Group: Members Posts: 4,969 Joined: 5-August 04 From: Delaware, USA Member No.: 2,460 Region Association: MidAtlantic Region |
got a custom cable from terry cable - 18 inches longer than stock - got almost all my throttle range now - still need to install a swivel type linkage at the carb.
Attached image(s) 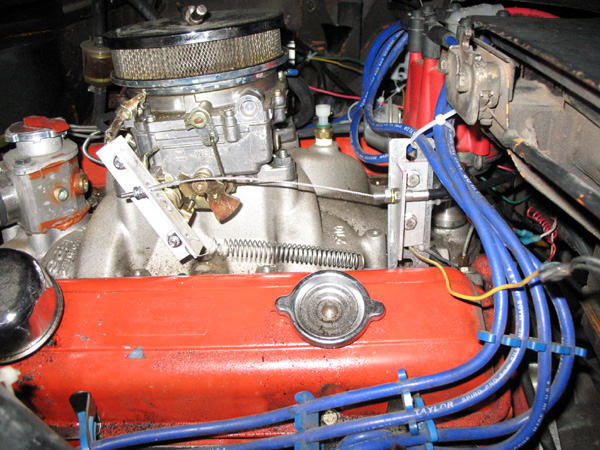
|
| computers4kids |
 Jun 18 2008, 08:53 AM Jun 18 2008, 08:53 AM
Post
#51
|
|
Love these little cars!     Group: Members Posts: 2,443 Joined: 11-June 05 From: Port Townsend, WA Member No.: 4,253 Region Association: None |
The latest...
I removed the support brace from the engine lid and slotted the brackets for easy on/off installation. I also had to trim the ring part of the air cleaner to bring the air cleaner down just a tad. It all fits nicely when I close the lid. Attached thumbnail(s) 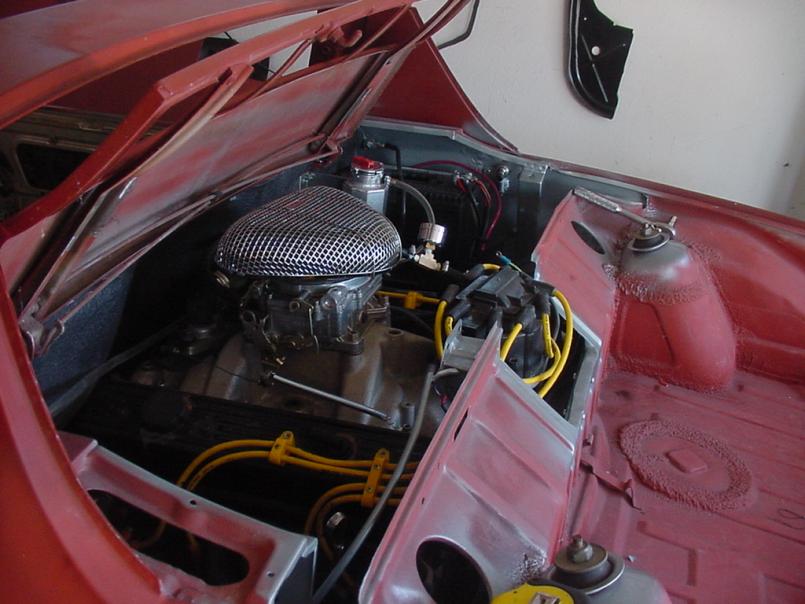
|
| computers4kids |
 Jun 18 2008, 08:55 AM Jun 18 2008, 08:55 AM
Post
#52
|
|
Love these little cars!     Group: Members Posts: 2,443 Joined: 11-June 05 From: Port Townsend, WA Member No.: 4,253 Region Association: None |
In the engine compartment I added a wide mesh steel grate over the exhaust ports...not really necessary, but to me it looks more finished. Also re-installed all the headight stuff.
Attached image(s) 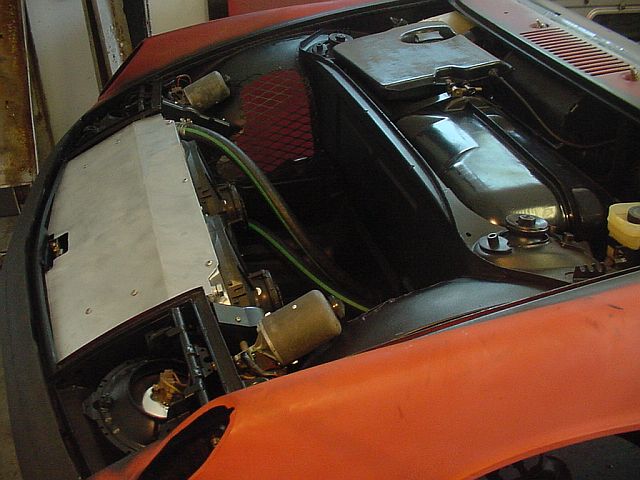
|
| computers4kids |
 Jun 18 2008, 08:59 AM Jun 18 2008, 08:59 AM
Post
#53
|
|
Love these little cars!     Group: Members Posts: 2,443 Joined: 11-June 05 From: Port Townsend, WA Member No.: 4,253 Region Association: None |
The steel bumpers were off my 74, so I went ahead and welded all the holes for the bumper tits. I also cut the front bumper and installed a grate....it will do for now, I'm not sure what my final product will look like once the car is painted.
Attached image(s) 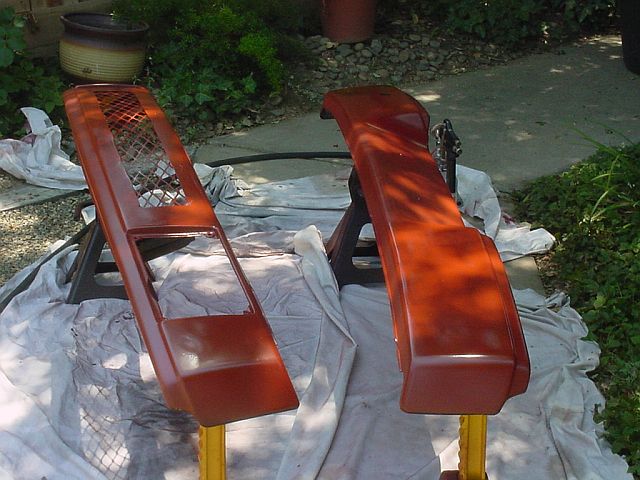
|
| rhodyguy |
 Jun 18 2008, 09:06 AM Jun 18 2008, 09:06 AM
Post
#54
|
|
Chimp Sanctuary NW. Check it out.                Group: Members Posts: 22,236 Joined: 2-March 03 From: Orion's Bell. The BELL! Member No.: 378 Region Association: Galt's Gulch |
it'll look swell. that's one slick carb throttle linkage.
k |
| computers4kids |
 Jun 20 2008, 08:26 AM Jun 20 2008, 08:26 AM
Post
#55
|
|
Love these little cars!     Group: Members Posts: 2,443 Joined: 11-June 05 From: Port Townsend, WA Member No.: 4,253 Region Association: None |
Well, the saga continues...
Brakes are all bled and hard as a rock..had to swap out one of the calipers because it had a pinhole in the piston boot. I'm very close to starting the engine for the first time. I went ahead and added two mechanical gauges to the engine (water and oil) since my Ghetty dash gauges are getting a v-8 tuneup from Mark914. The motor cranked for the first time yesterday. Fuel pump isn't turning on so I have to chase that issue down and I've got to figure out how to at least static time the engine...you can't see the timing marks. I've heard there is a trick to adding a hole in the trunk somewhere above the tranny inspection hole and being able to find TDC from there. There is something very un-natural about adding coolant in the engine bay of a 914...just as wierd to see you have a water dripping from your Porsche.. (IMG:style_emoticons/default/laugh.gif) Easily fixed, but still very wierd!! Attached image(s) 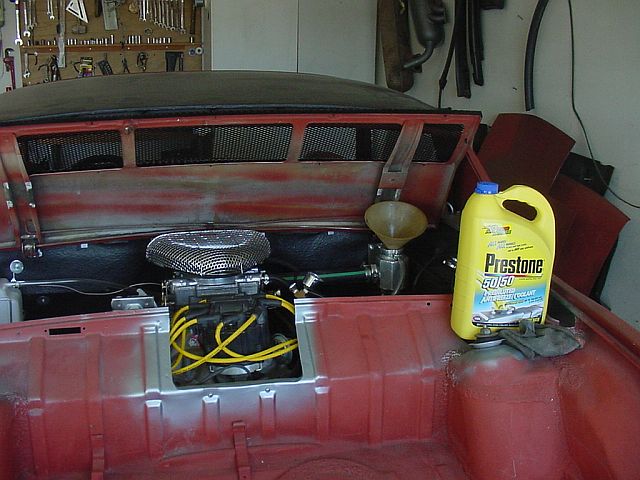 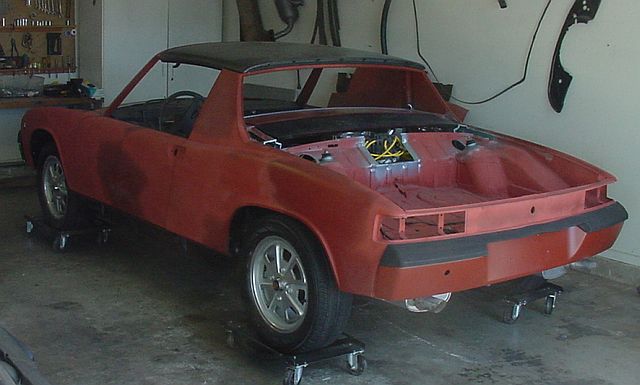 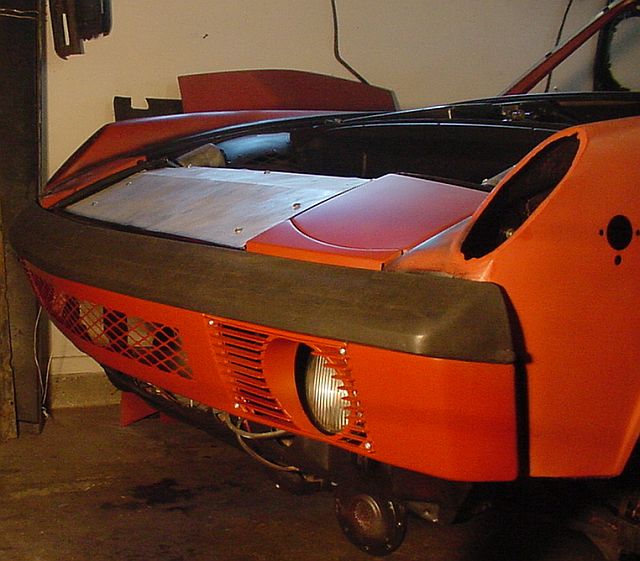
|
| computers4kids |
 Jun 21 2008, 11:47 AM Jun 21 2008, 11:47 AM
Post
#56
|
|
Love these little cars!     Group: Members Posts: 2,443 Joined: 11-June 05 From: Port Townsend, WA Member No.: 4,253 Region Association: None |
The previous owner of my project car is/was a bit crafty. After chasing down the wires trying to see why the fuel pump was powering up, I discovered where the PO had installed a hidden sswitch under the dash that breaks the fuel pump circuit...I hadn't recognized it before becuase the switch part hadn't been installed yet...the wire had been cut and connectors had been added. (IMG:style_emoticons/default/w00t.gif)
It lives....after some small diversions, the 305 V-8 roared to life for the first time. The first thought that came to me was "OH MY...., What have I created?" (IMG:style_emoticons/default/post-2-1117899824.gif) This should be a kick to drive. Timing: I have to set the timing and I'm stuck. I don't want to just set the timing by ear...no timing marks visible that I can see. Any suggestions? I can figure out when I'm close to TDC via rockers and compression stroke, but that still doesn't help when there are no marks visible. Looking for ideas? |
| jimkelly |
 Jun 21 2008, 02:17 PM Jun 21 2008, 02:17 PM
Post
#57
|
|
Delaware USA     Group: Members Posts: 4,969 Joined: 5-August 04 From: Delaware, USA Member No.: 2,460 Region Association: MidAtlantic Region |
make sure your brakes work - stock or 911 - make sure they work well - good pads, good rotors, no dragging, no air in lines - as you are gonna want that thing to stop. jim
|
| JRust |
 Jun 21 2008, 02:32 PM Jun 21 2008, 02:32 PM
Post
#58
|
|
914 Guru      Group: Members Posts: 6,316 Joined: 10-January 03 From: Albany Oregon Member No.: 129 Region Association: Pacific Northwest 
|
Just pull the drivtrain & time it out of the car! You got the skills & you can figure out the timing marks for next time. A bit of work but heck your used to pulling motors (IMG:style_emoticons/default/happy11.gif)
|
| LvSteveH |
 Jun 21 2008, 03:41 PM Jun 21 2008, 03:41 PM
Post
#59
|
|
I put the Poor in Porsche    Group: Members Posts: 1,080 Joined: 22-April 03 From: Las Vegas, Nevada Member No.: 600 |
I agree, don't time it by ear.
If you use a piston stop you can establish perfect TDC and mark it under the car. I've marked the balancer (on the bottom) and the flywheel via the hole in the bottom of the trans and either works fine. A timing light with an advance dial makes it easier. It's annoying to time it under the car, but it works. To make a piston stop you can take the center out of a spark plug and weld in a bolt with the head cut off. Then round the end so it doesn't damage the piston. You can determine the length with the engine close to TDC then check the depth of the piston through the hole. It will get you pretty close. Basically you want the length to be just long enough to mark a spot on one side of TDC where the engine won't turn any more. Then spin the engine all the way around and mark the other side of TDC. The center between those two marks will be TDC. Just be careful not to slam the piston into the stop, rotate it slowly. |
| computers4kids |
 Jun 21 2008, 05:48 PM Jun 21 2008, 05:48 PM
Post
#60
|
|
Love these little cars!     Group: Members Posts: 2,443 Joined: 11-June 05 From: Port Townsend, WA Member No.: 4,253 Region Association: None |
make sure your brakes work - stock or 911 - make sure they work well - good pads, good rotors, no dragging, no air in lines - as you are gonna want that thing to stop. jim Absolutely. New rotors, bearings, new pads, new fluid, and stainless lines. Brakes have been adjusted and pedal is good and hard. The calipers appear to be in good working order and the piston seals look good...as well as the MC. I figued I'd get it on the road to see how well things work, then decide what upgrades to the braking system will be needed. Stopping is important (IMG:style_emoticons/default/aktion035.gif) |
  |
2 User(s) are reading this topic (2 Guests and 0 Anonymous Users)
0 Members:

|
Lo-Fi Version | Time is now: 2nd April 2025 - 01:38 AM |
Invision Power Board
v9.1.4 © 2025 IPS, Inc.


