|
|

|
Porsche, and the Porsche crest are registered trademarks of Dr. Ing. h.c. F. Porsche AG.
This site is not affiliated with Porsche in any way. Its only purpose is to provide an online forum for car enthusiasts. All other trademarks are property of their respective owners. |
|
|
  |
| plymouth37 |
 Dec 19 2022, 11:59 AM Dec 19 2022, 11:59 AM
Post
#1561
|
|
Senior Member    Group: Members Posts: 1,825 Joined: 24-May 05 From: Snoqualmie, WA Member No.: 4,138 Region Association: Pacific Northwest 
|
This is the best build that I’ve ever seen. The fact that it’s a 916 is just icing. Anyhow, I was lurking and then I registered because I saw these great pics in an Amazon book preview. The book is, 50 Years Porsche 914 by Jurgen Lewendowski and costs $268.89! As you can see, these are preliminary topless 914 designs that thankfully never quite made it. Project Anklebiter may share the dna, but is far more refined. Thanks for the kind words, the early 914 design exercises are super interesting, thanks for sharing! |
| plymouth37 |
 Dec 19 2022, 12:18 PM Dec 19 2022, 12:18 PM
Post
#1562
|
|
Senior Member    Group: Members Posts: 1,825 Joined: 24-May 05 From: Snoqualmie, WA Member No.: 4,138 Region Association: Pacific Northwest 
|
Time to start filling the side grill areas, I am loosely following the organization of the WRX grills, a horizontal division, with a radiator opening on the top, and a Foglight and brake duct on the bottom.
 I lined up the horizontal division with the upper center opening edge to continue that line across the front of the bumper. 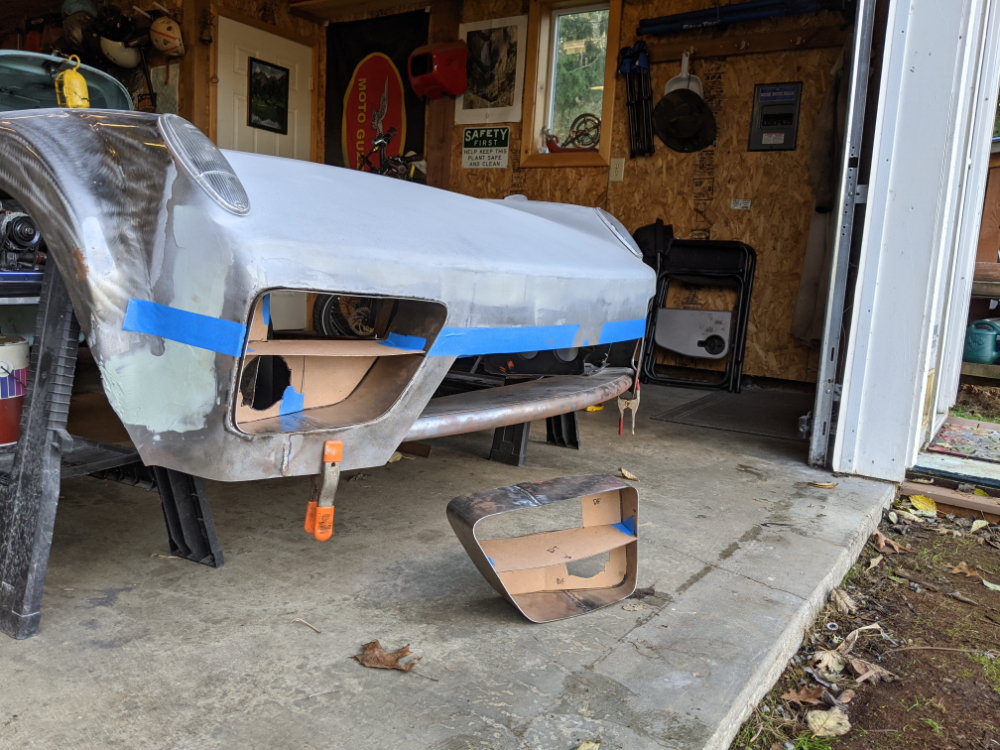 I made the dividers teardrop shaped in profile so they would be rounded and thick in the front by welding in a rod. 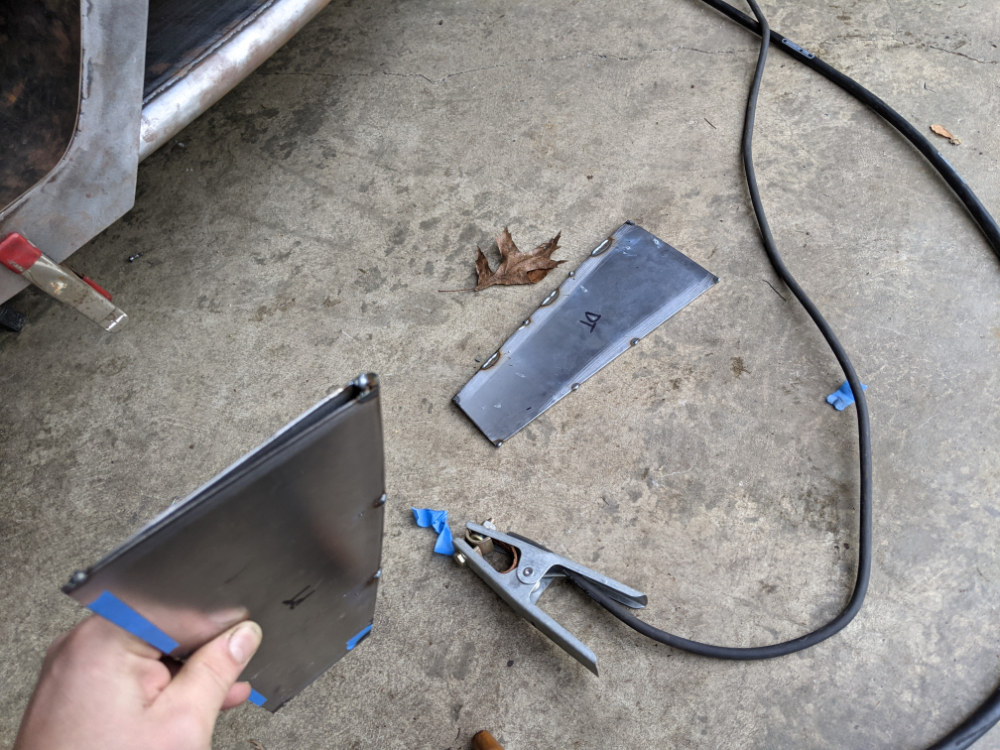 Then tacked them into the pods. 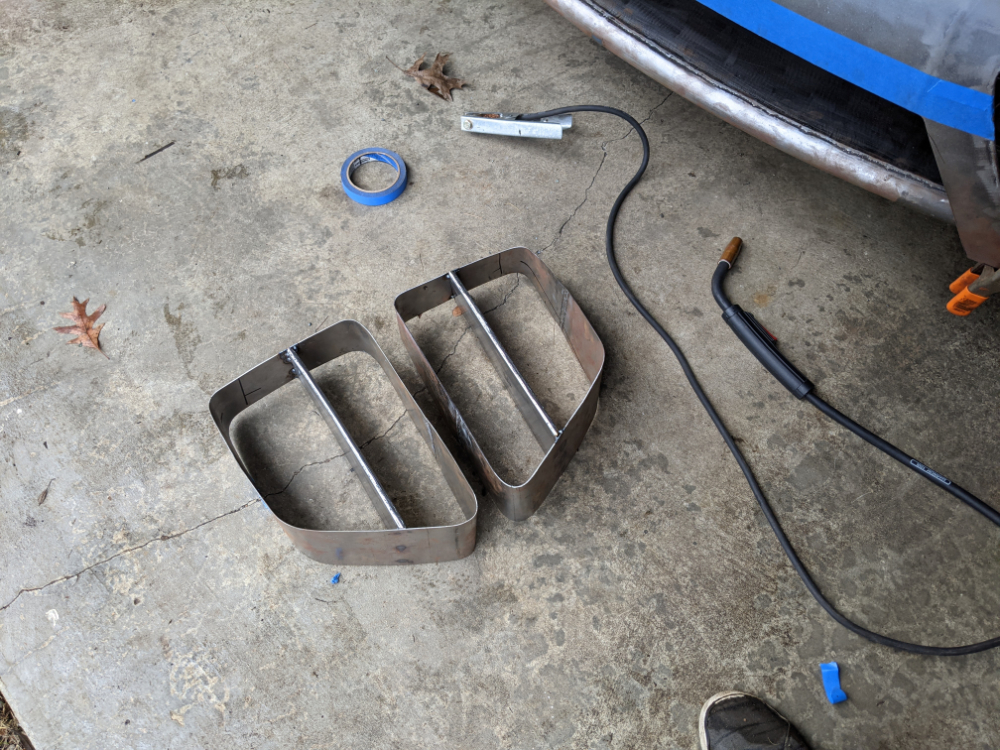 |
| plymouth37 |
 Dec 19 2022, 12:18 PM Dec 19 2022, 12:18 PM
Post
#1563
|
|
Senior Member    Group: Members Posts: 1,825 Joined: 24-May 05 From: Snoqualmie, WA Member No.: 4,138 Region Association: Pacific Northwest 
|
Here they are fitted in place.
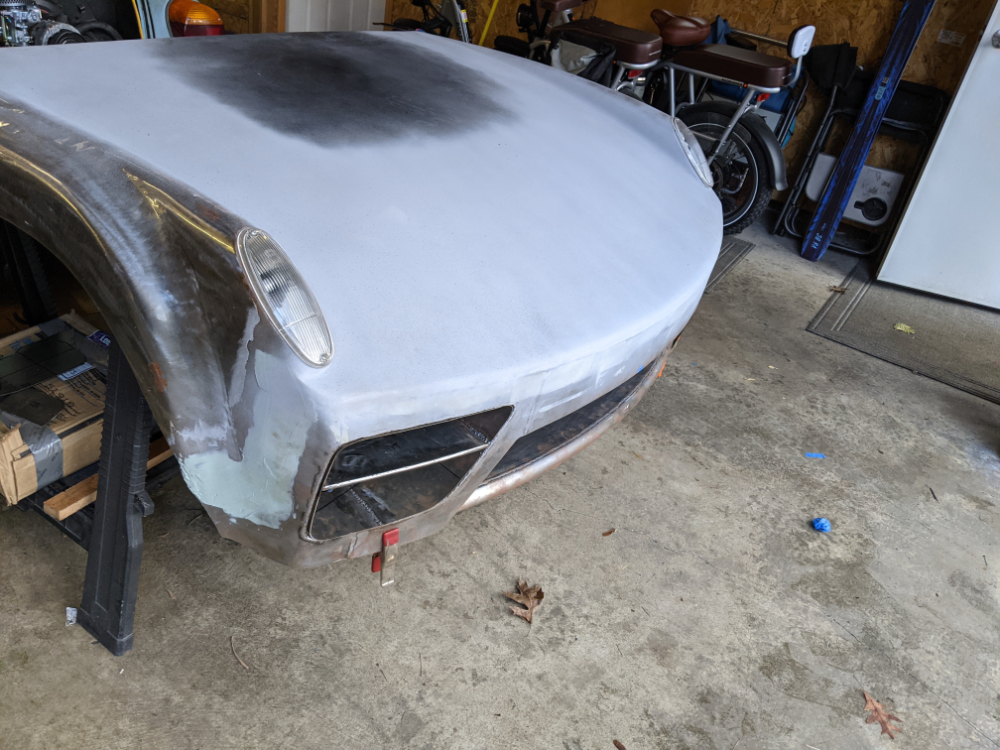 Next I will make and weld in the rest of the elements that hold the fog light and ducts. 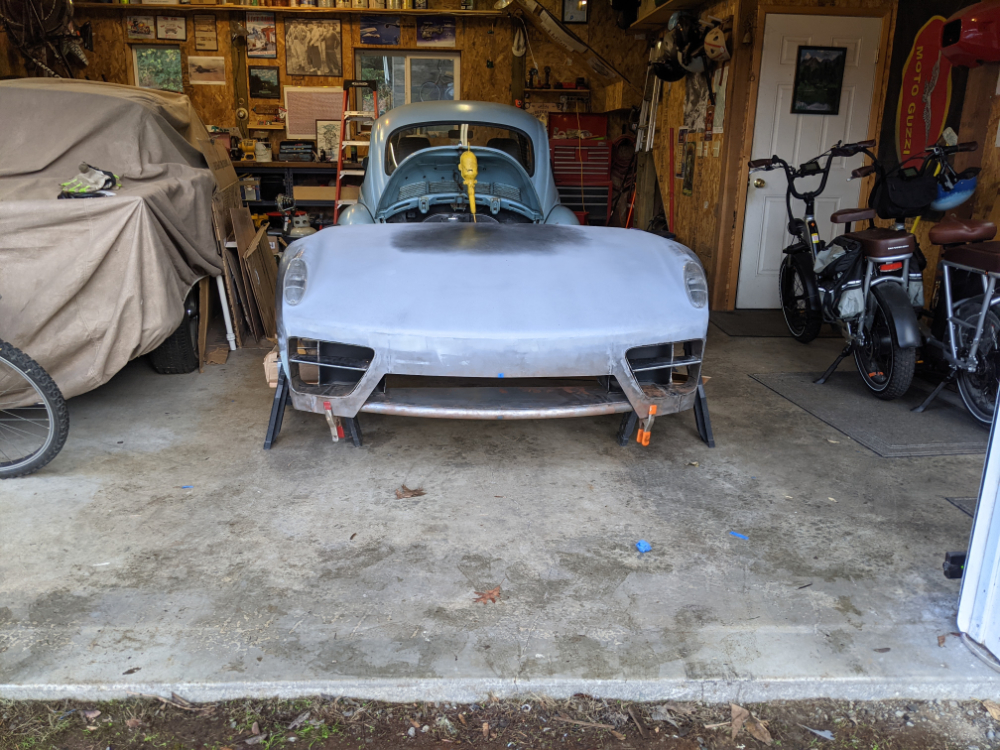 |
| tygaboy |
 Dec 19 2022, 05:48 PM Dec 19 2022, 05:48 PM
Post
#1564
|
|
914 Guru      Group: Members Posts: 5,541 Joined: 6-October 15 From: Petaluma, CA Member No.: 19,241 Region Association: Northern California 
|
Simply no words, only:
(IMG:style_emoticons/default/aktion035.gif) (IMG:style_emoticons/default/smilie_pokal.gif) (IMG:style_emoticons/default/pray.gif) (IMG:style_emoticons/default/wub.gif) |
| bkrantz |
 Dec 19 2022, 08:03 PM Dec 19 2022, 08:03 PM
Post
#1565
|
|
914 Guru      Group: Members Posts: 8,311 Joined: 3-August 19 From: SW Colorado Member No.: 23,343 Region Association: Rocky Mountains 
|
Yup, über-cool.
|
| East coaster |
 Dec 19 2022, 08:07 PM Dec 19 2022, 08:07 PM
Post
#1566
|
|
Senior Member    Group: Members Posts: 1,828 Joined: 28-March 03 From: Millville, NJ Member No.: 487 Region Association: None 
|
Great work and good eye for design!
|
| mgp4591 |
 Dec 19 2022, 09:37 PM Dec 19 2022, 09:37 PM
Post
#1567
|
|
914 Guru      Group: Members Posts: 5,594 Joined: 1-August 12 From: Salt Lake City Ut Member No.: 14,748 Region Association: Intermountain Region 
|
LOVE the new/old combo touches...I believe you've NAILED it! (IMG:style_emoticons/default/aktion035.gif)
|
| KELTY360 |
 Dec 19 2022, 11:37 PM Dec 19 2022, 11:37 PM
Post
#1568
|
|
914 Neferati      Group: Members Posts: 5,119 Joined: 31-December 05 From: Pt. Townsend, WA Member No.: 5,344 Region Association: Pacific Northwest 
|
I like the way you’ve angled the dividers up at the outside edges. Follows the curvature of the bumper.
|
| badcatt |
 Jan 30 2023, 12:35 AM Jan 30 2023, 12:35 AM
Post
#1569
|
|
Newbie  Group: Members Posts: 3 Joined: 29-August 18 From: Camano Island WA Member No.: 22,442 Region Association: None |
It's nice to log in and see all the updates. Top tier work.
|
| tubegeek |
 Feb 3 2023, 07:21 AM Feb 3 2023, 07:21 AM
Post
#1570
|
|
Newbie  Group: Members Posts: 3 Joined: 6-December 22 From: Brooklyn NY Member No.: 27,012 Region Association: North East States |
The first time I saw this thread I started way towards the end somehow, and I only saw the recent nose fabrication. So I had no idea all that had gone into this build over a decade plus. Now that I have seen 79 pages of its amazing development I fully agree with all the compliments to your design and fabrication skills, Dana - you've got quite the car factory running there! But I also want to say how impressed I am with the sheer patience and determination it has taken to keep this project moving forward, bit bit bit, year by year, while clearly "having a life" all along. Quite a ride, so to speak.
My favorite part so far has been the test drive through the woods after you fixed the turbo boost, and you first realized what a rocket monster you've unleashed! "Adequate power" as Rolls-Royce would say. Add me to the list of would-be designers rooting you on and getting inspiration from your fearsome Anklebiter. Little Miss Anklebiter is clearly enjoying growing up with a tube framed sibling. The other day I had just absorbed one of the long rustoration patch-welding threads and wondered, "at what point do you just start building sections from scratch?" Then I came across your thread which is an answer to that question - even though you started with a rust-free car! |
| plymouth37 |
 Feb 13 2023, 11:57 AM Feb 13 2023, 11:57 AM
Post
#1571
|
|
Senior Member    Group: Members Posts: 1,825 Joined: 24-May 05 From: Snoqualmie, WA Member No.: 4,138 Region Association: Pacific Northwest 
|
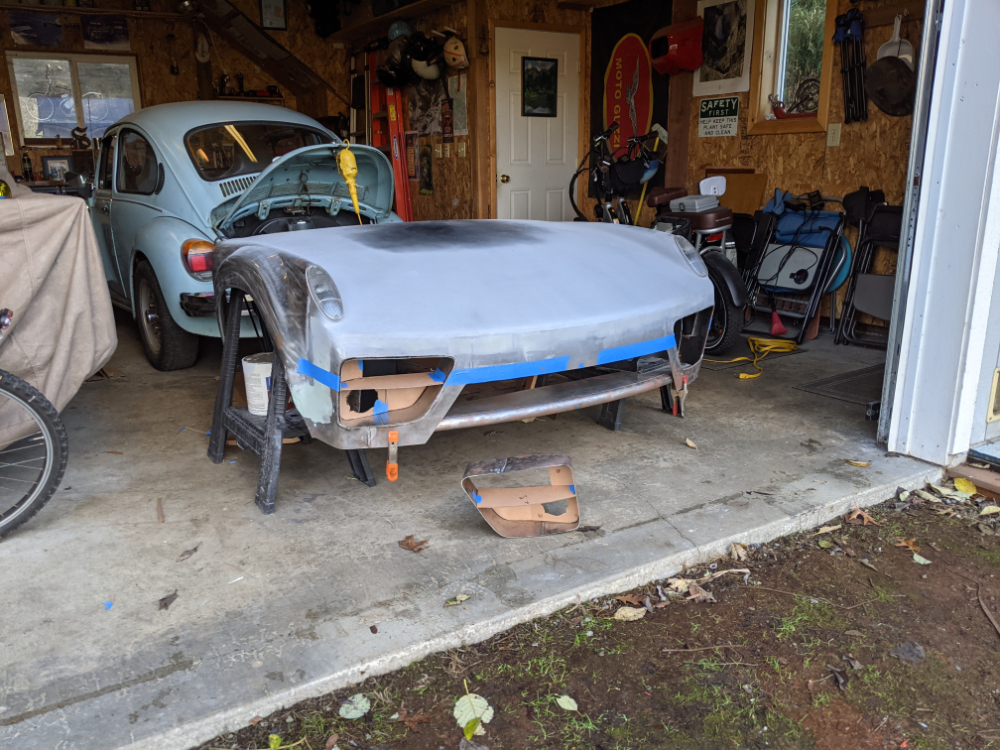
I started building out the fog light buckets, The top half is radiator inlet, the bottom is divided between fog light and brake duct inlet, I am taking advantage of NAPA exhaust bits to make nice, flared inlets for the brake ducts.
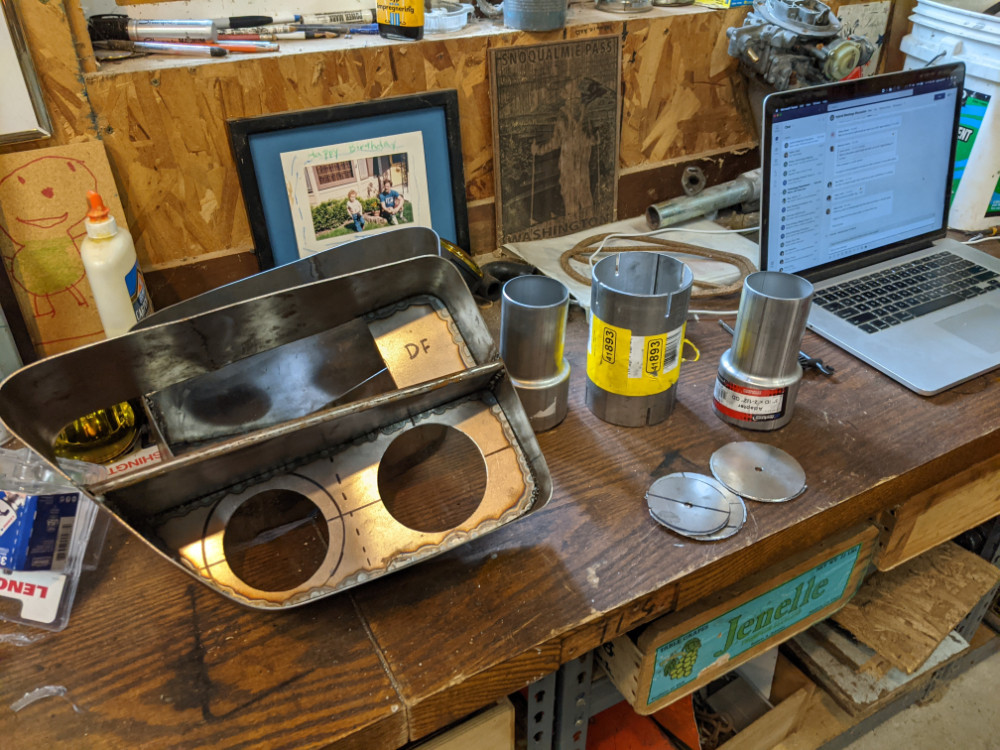 I quickly discovered that after welding the buckets together they were no longer flexible enough to fin in the bumper openings so I had to temporarily chop off the bumper bottoms. 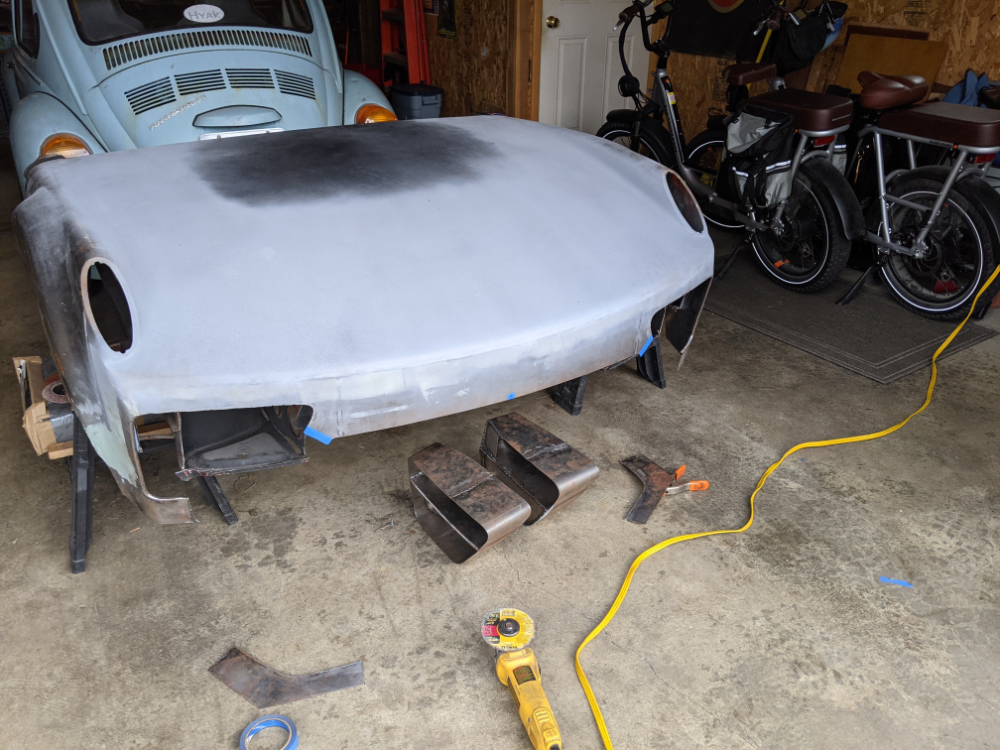 Here they are just sitting in place, the fog lights came along with the WRX grill set I used as a template, there will be a grill near the front of these bumper openings so the fog light lenses will be more flush than they appear now. 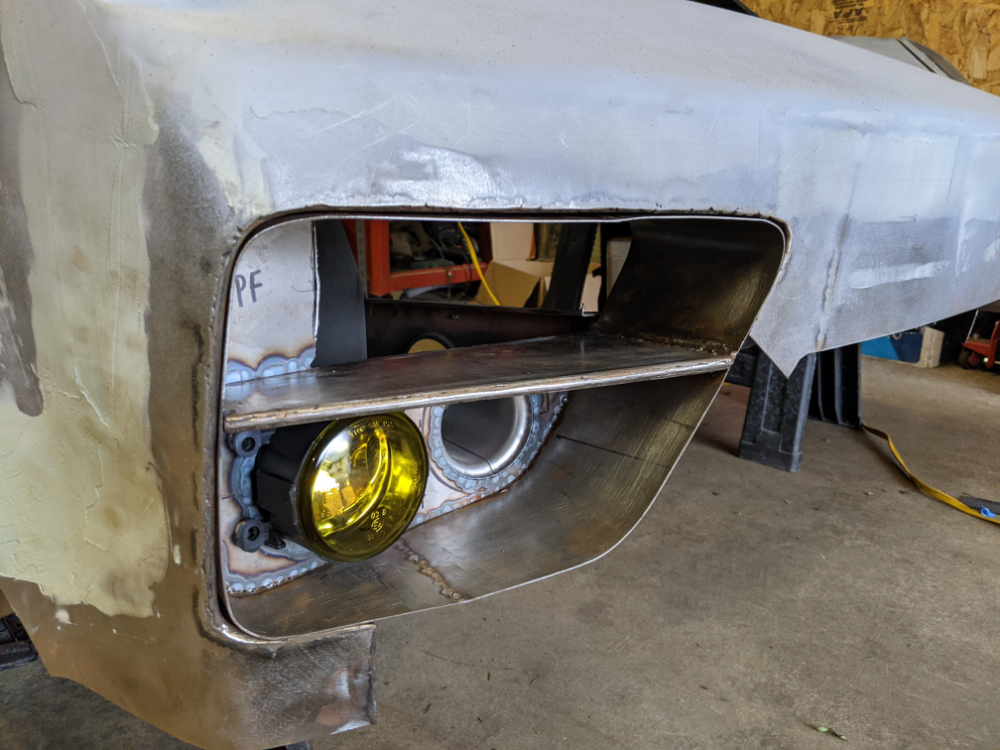 Rest of bumper duct taped into place. 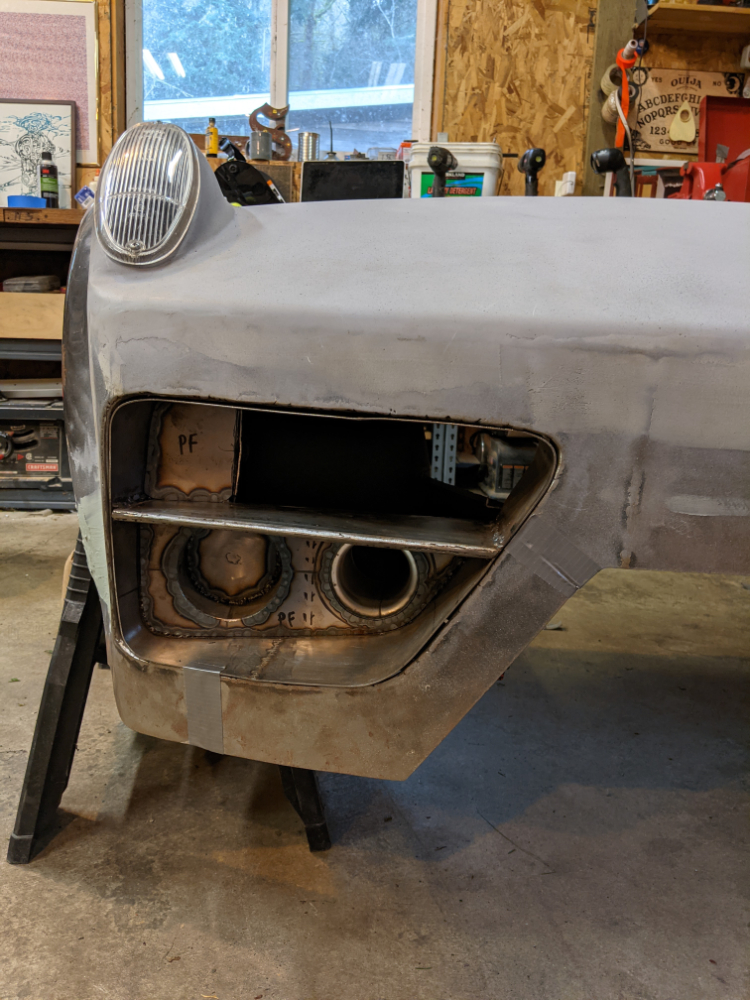 |
| plymouth37 |
 Feb 13 2023, 11:58 AM Feb 13 2023, 11:58 AM
Post
#1572
|
|
Senior Member    Group: Members Posts: 1,825 Joined: 24-May 05 From: Snoqualmie, WA Member No.: 4,138 Region Association: Pacific Northwest 
|
Tack welding has begun.
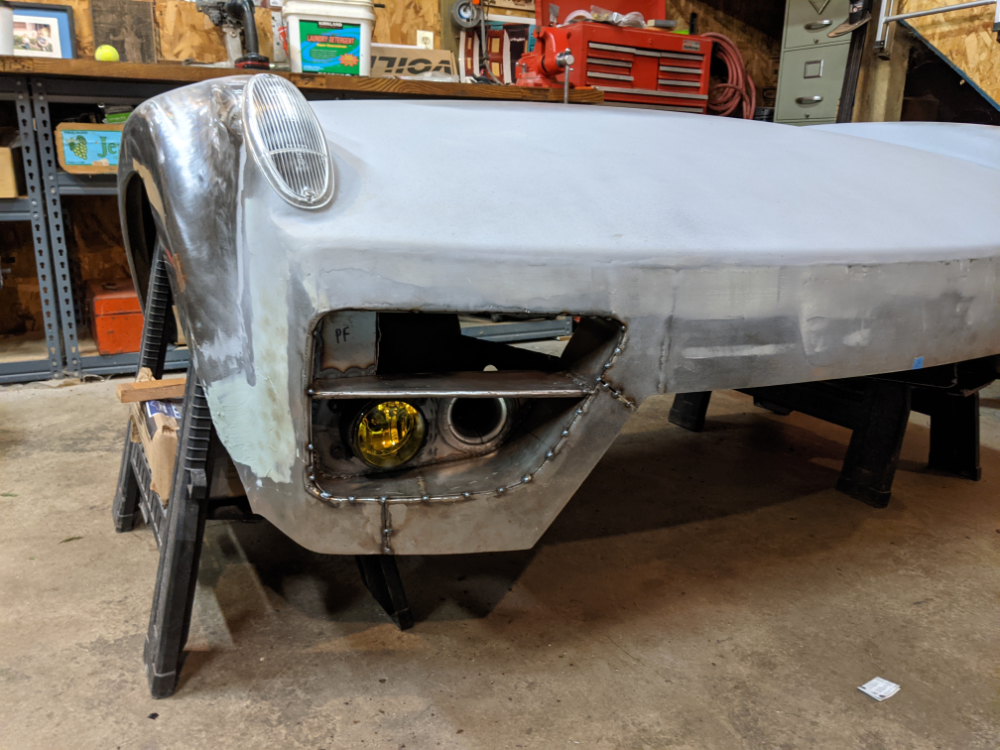 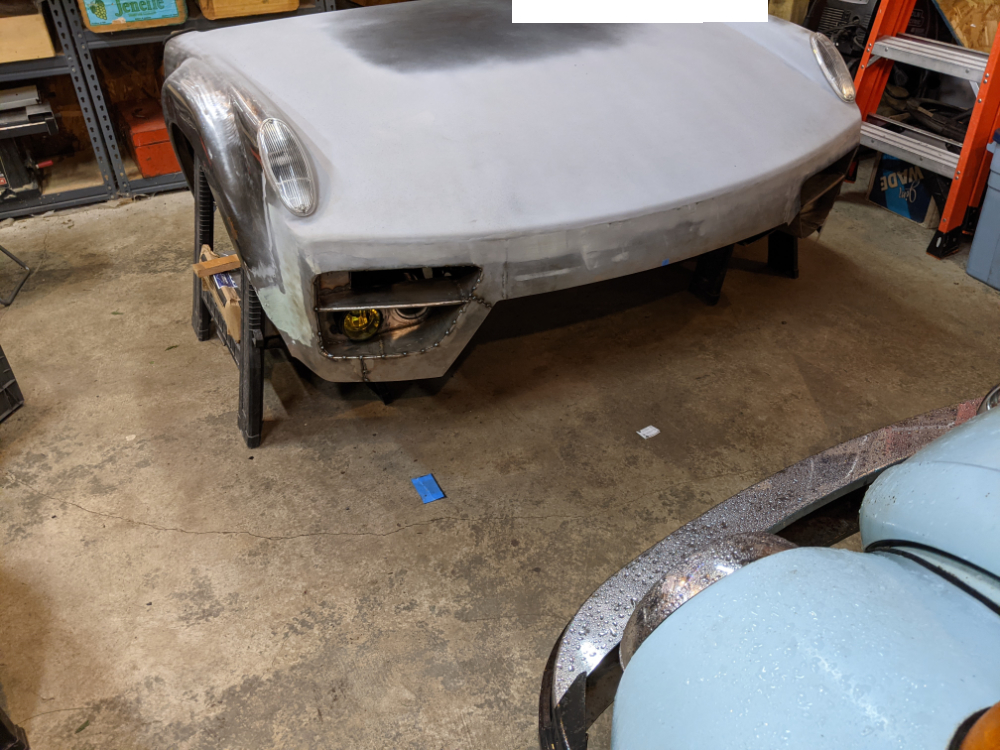 Fully welded in ready for finishing. I had to pie cut and reweld the seam that attached the center section of the bumper, the contour of the center opening was a hair too far out to match the contour of the top of the bumper, all good now! Next I will flip the nose over and work on underside and interior. 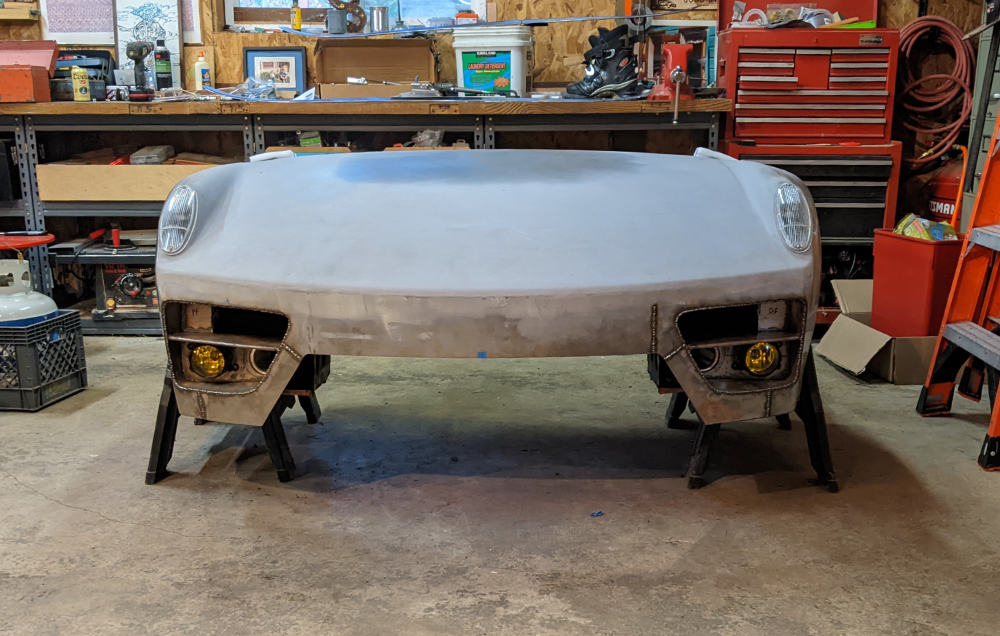 |
| plymouth37 |
 Feb 13 2023, 11:59 AM Feb 13 2023, 11:59 AM
Post
#1573
|
|
Senior Member    Group: Members Posts: 1,825 Joined: 24-May 05 From: Snoqualmie, WA Member No.: 4,138 Region Association: Pacific Northwest 
|
The first time I saw this thread I started way towards the end somehow, and I only saw the recent nose fabrication. So I had no idea all that had gone into this build over a decade plus. Now that I have seen 79 pages of its amazing development I fully agree with all the compliments to your design and fabrication skills, Dana - you've got quite the car factory running there! But I also want to say how impressed I am with the sheer patience and determination it has taken to keep this project moving forward, bit bit bit, year by year, while clearly "having a life" all along. Quite a ride, so to speak. My favorite part so far has been the test drive through the woods after you fixed the turbo boost, and you first realized what a rocket monster you've unleashed! "Adequate power" as Rolls-Royce would say. Add me to the list of would-be designers rooting you on and getting inspiration from your fearsome Anklebiter. Little Miss Anklebiter is clearly enjoying growing up with a tube framed sibling. The other day I had just absorbed one of the long rustoration patch-welding threads and wondered, "at what point do you just start building sections from scratch?" Then I came across your thread which is an answer to that question - even though you started with a rust-free car! Thanks for the kind words, I am not great at finishing projects but I refuse to give up on this one! |
| flipb |
 Feb 13 2023, 12:29 PM Feb 13 2023, 12:29 PM
Post
#1574
|
|
Senior Member    Group: Members Posts: 1,799 Joined: 2-September 09 From: Fairfax, VA Member No.: 10,752 Region Association: MidAtlantic Region 
|
Every time @plymouth37 posts an update to this thread, it's a little like Christmas morning. Can't wait to open it up and see the latest. (IMG:style_emoticons/default/santa_smiley.gif)
|
| tubegeek |
 Feb 13 2023, 05:14 PM Feb 13 2023, 05:14 PM
Post
#1575
|
|
Newbie  Group: Members Posts: 3 Joined: 6-December 22 From: Brooklyn NY Member No.: 27,012 Region Association: North East States |
The first time I saw this thread I started way towards the end somehow, <snip> But I also want to say how impressed I am with the sheer patience and determination it has taken to keep this project moving forward, bit bit bit, year by year, while clearly "having a life" all along. <snip> Thanks for the kind words, I am not great at finishing projects but I refuse to give up on this one! I've tried my best to live up to my motto from grad school: "Too stubborn to fail!" "When your only head is a hammerhead, every problem looks like an endurance test..." or something like that. |
| plymouth37 |
 Mar 10 2023, 06:19 PM Mar 10 2023, 06:19 PM
Post
#1576
|
|
Senior Member    Group: Members Posts: 1,825 Joined: 24-May 05 From: Snoqualmie, WA Member No.: 4,138 Region Association: Pacific Northwest 
|
I flipped the nose over and started patching the holes between the original structure and the new bumper.
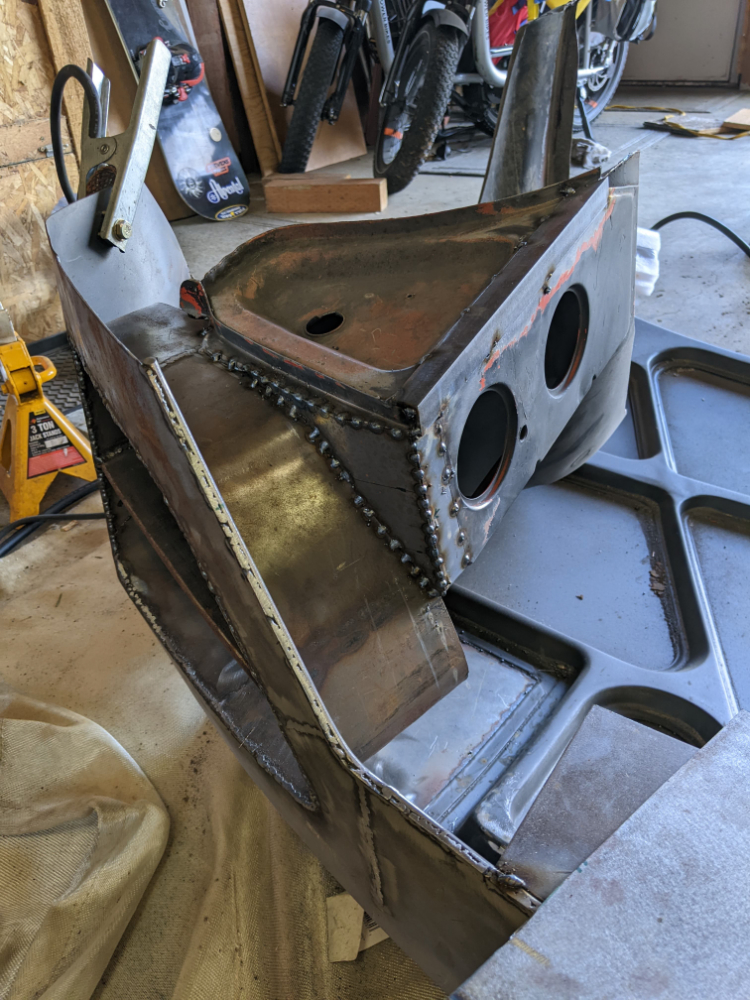 Made some templates for the inner surround of the main grill opening. 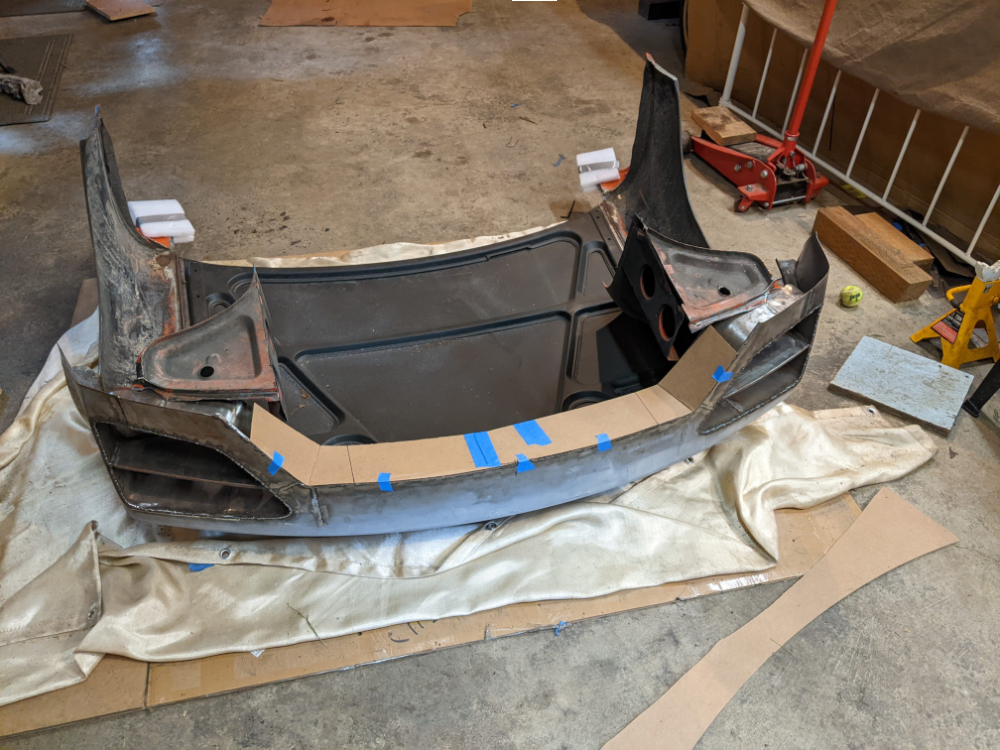 Welded in Steel for the intake surround. 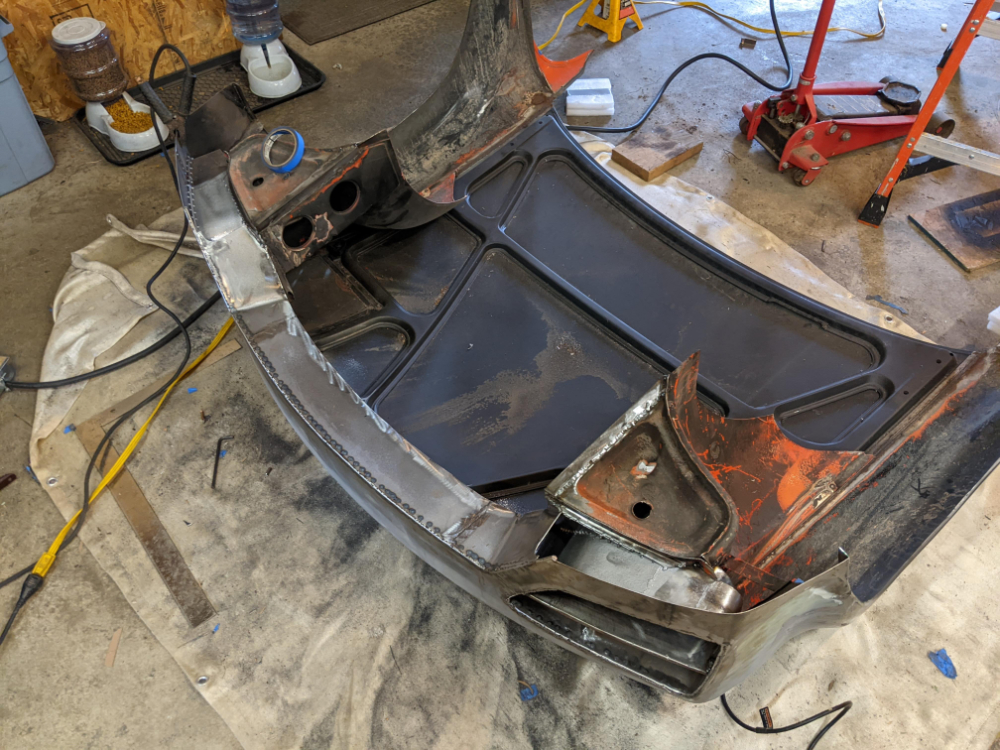 Then finished the welds. 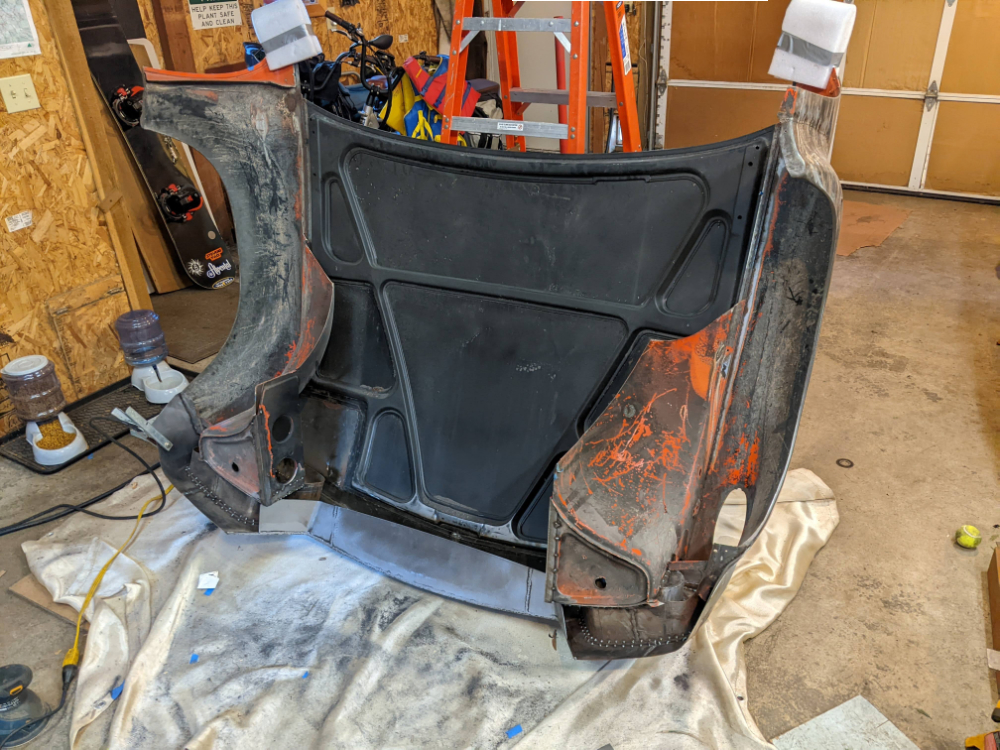 While the nose was upsidedown I also added some welds to the back side of the bumper seams and boxed in part of the back of the radiator opening. 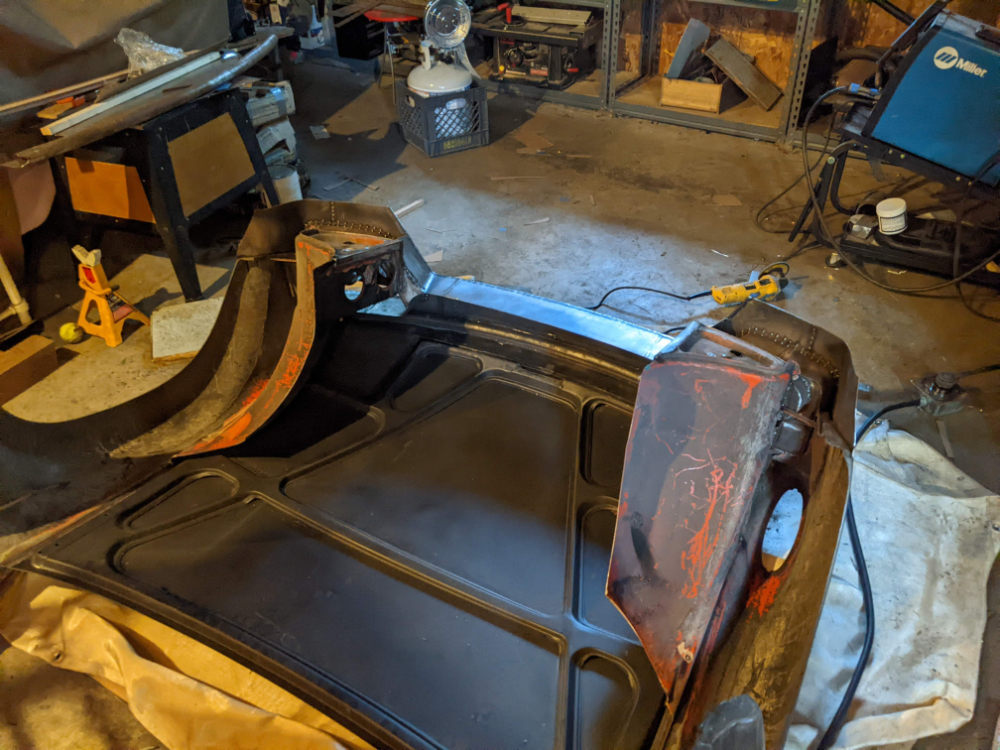 |
| plymouth37 |
 Mar 10 2023, 06:19 PM Mar 10 2023, 06:19 PM
Post
#1577
|
|
Senior Member    Group: Members Posts: 1,825 Joined: 24-May 05 From: Snoqualmie, WA Member No.: 4,138 Region Association: Pacific Northwest 
|
Did you know finger sanders are awesome? There were a ton of tight spaces I had to clean before I welded them up and it did a great job of getting into the tightest spots, definitely recommend.
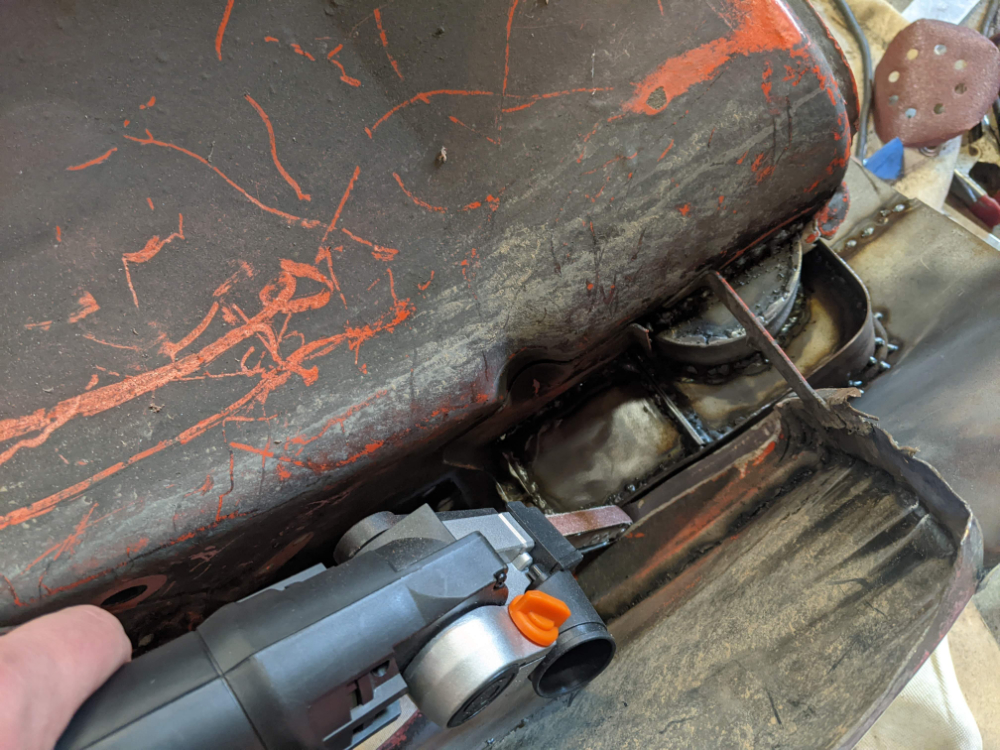 I trimmed and fit the lower lip bar into place. 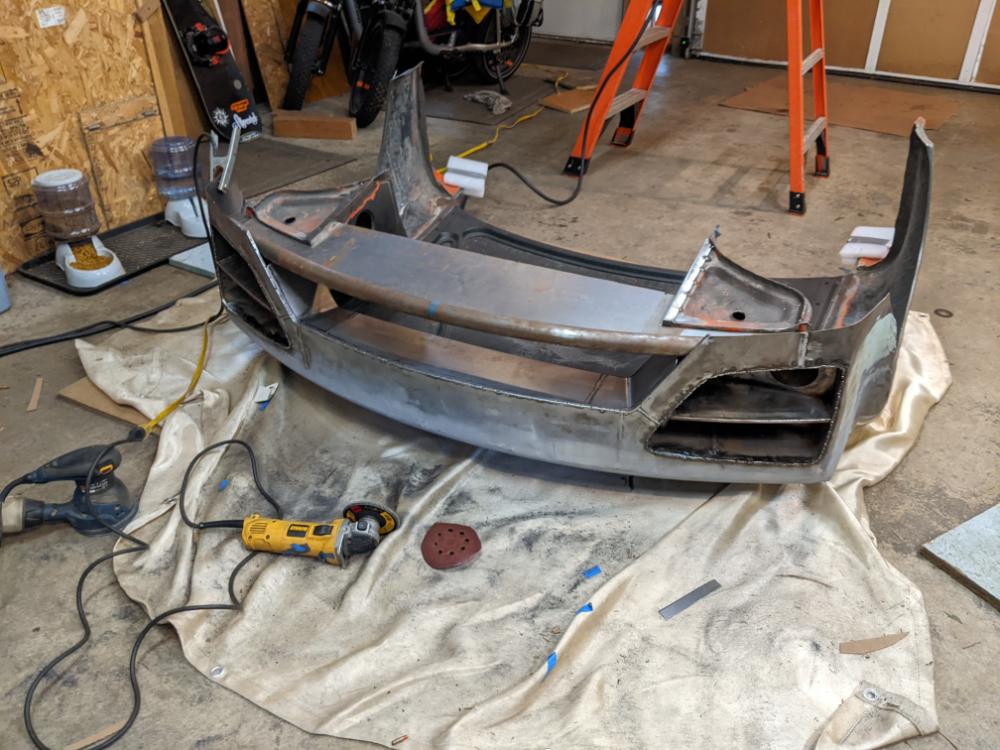 I had to add some metal in the corner of the wheel opening to get that to look correct. 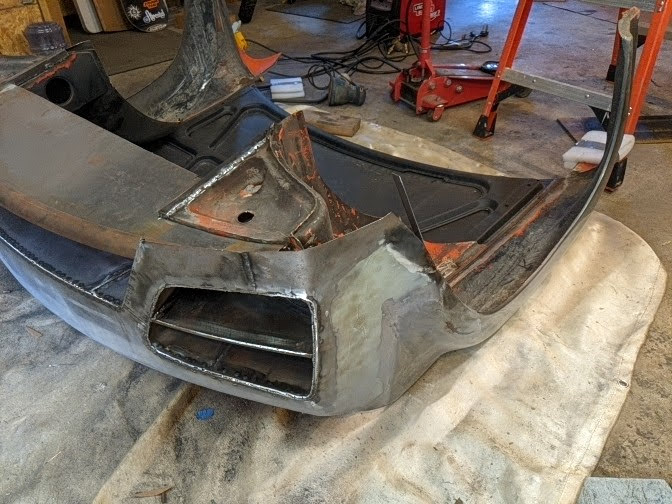 Then welded the lip in and boxed in the edges where it met the bumper. 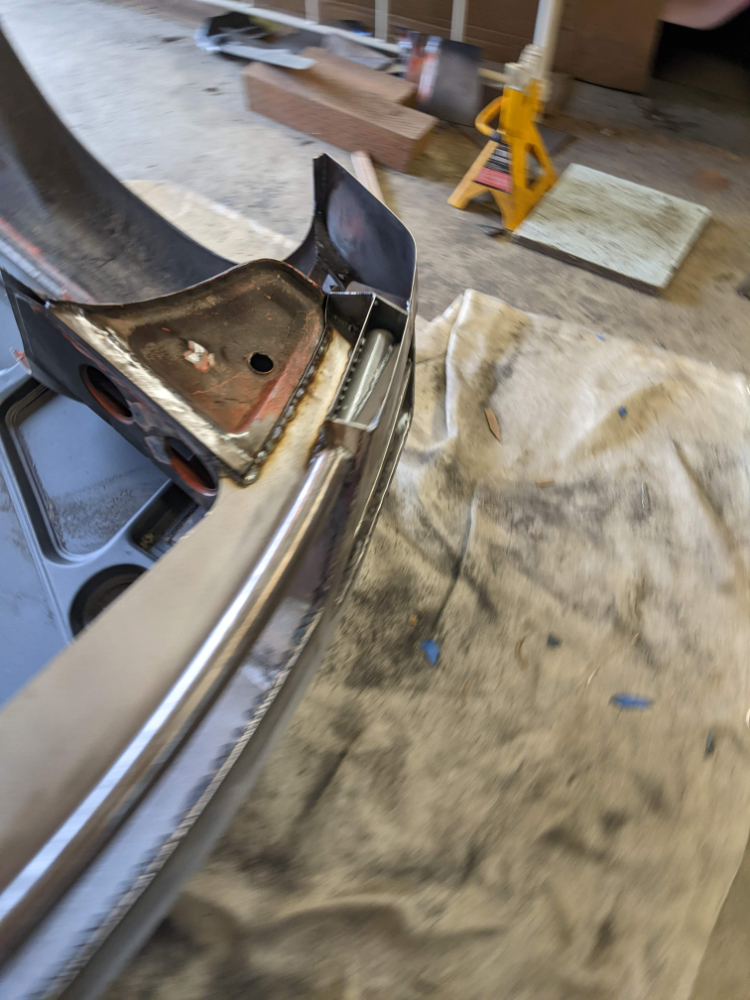 Then made some templates to box in the bottom of the bumper. 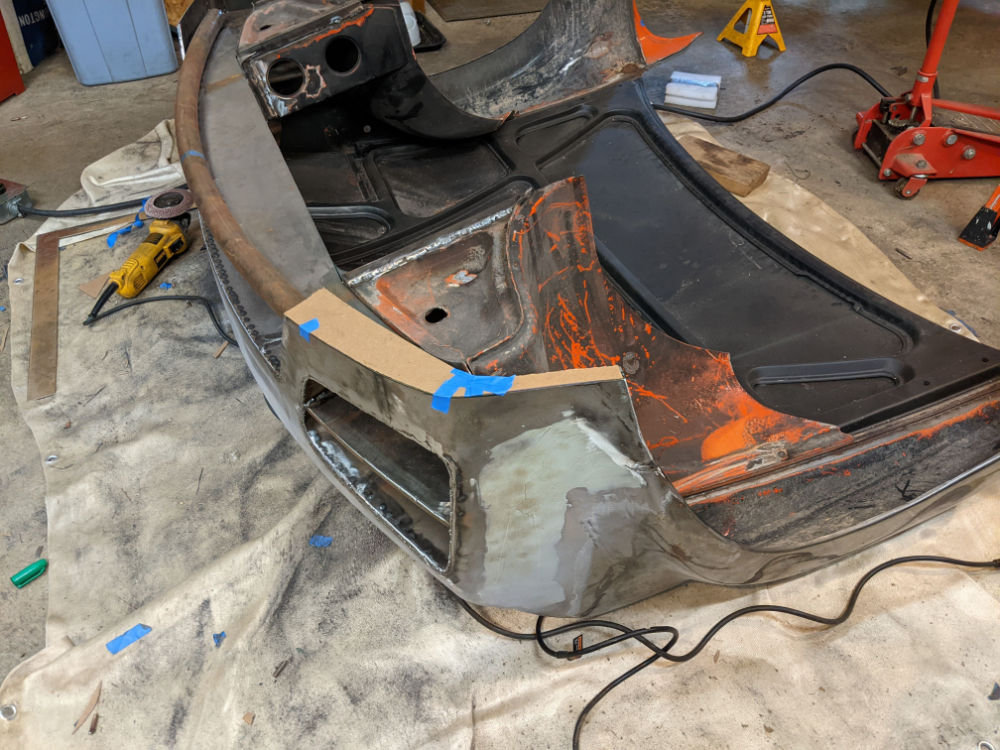 |
| plymouth37 |
 Mar 10 2023, 06:19 PM Mar 10 2023, 06:19 PM
Post
#1578
|
|
Senior Member    Group: Members Posts: 1,825 Joined: 24-May 05 From: Snoqualmie, WA Member No.: 4,138 Region Association: Pacific Northwest 
|
I capped the bottom of the bumper.
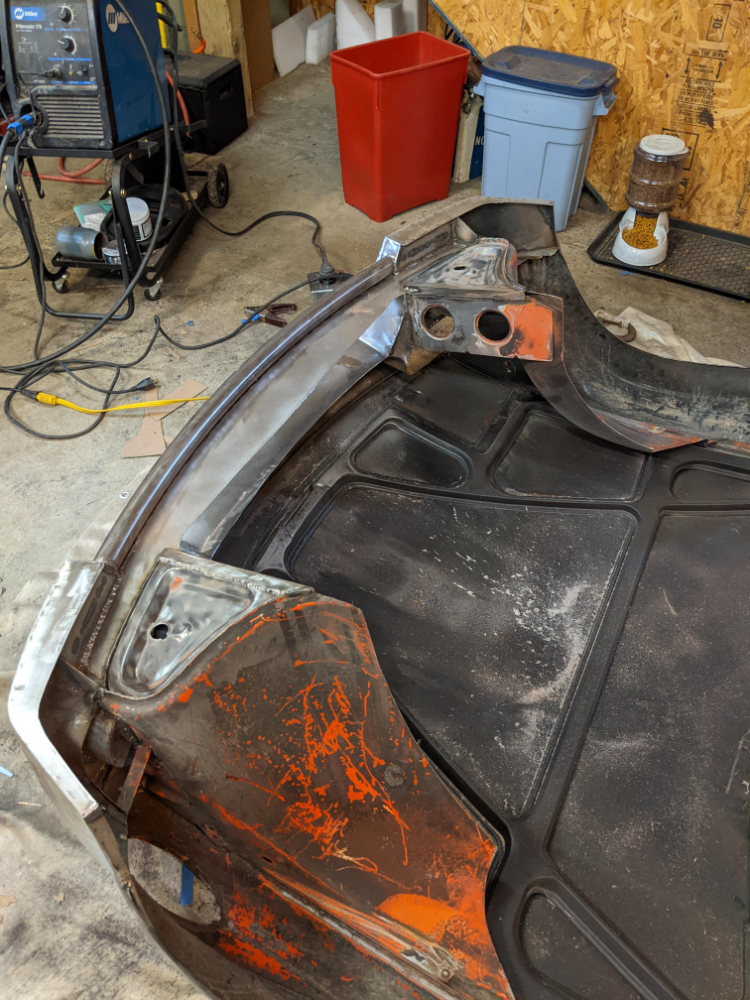 here is everything welded up. 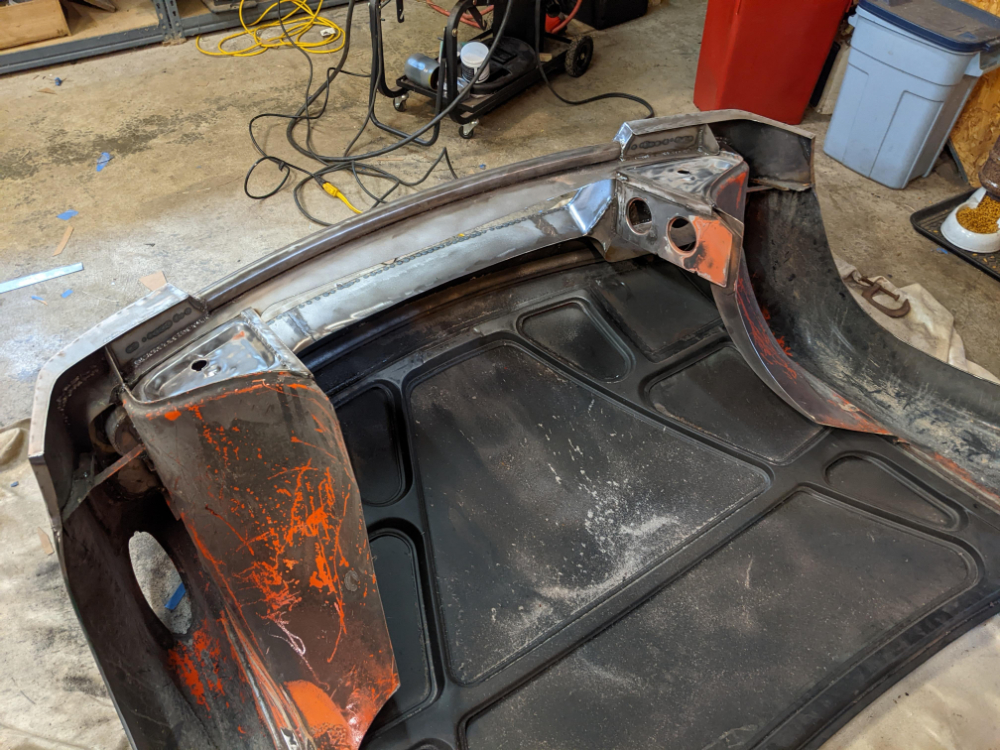 Last step is to weld in mounting tabs for the front opening hinges. 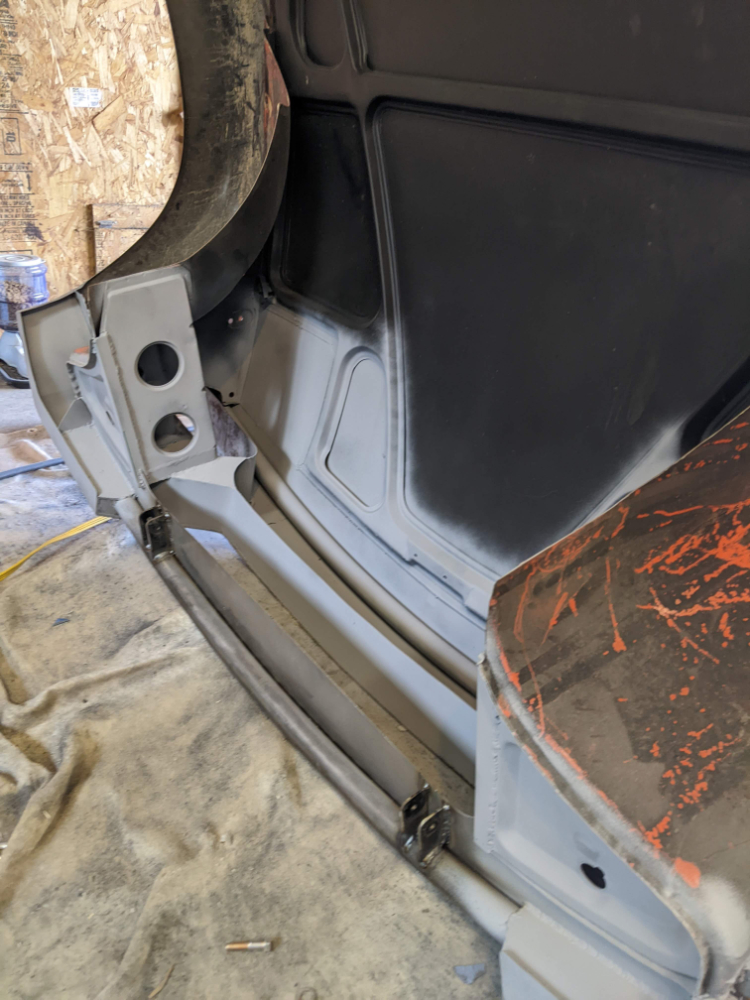 Tune in next time where I flip it over and we see how it looks! 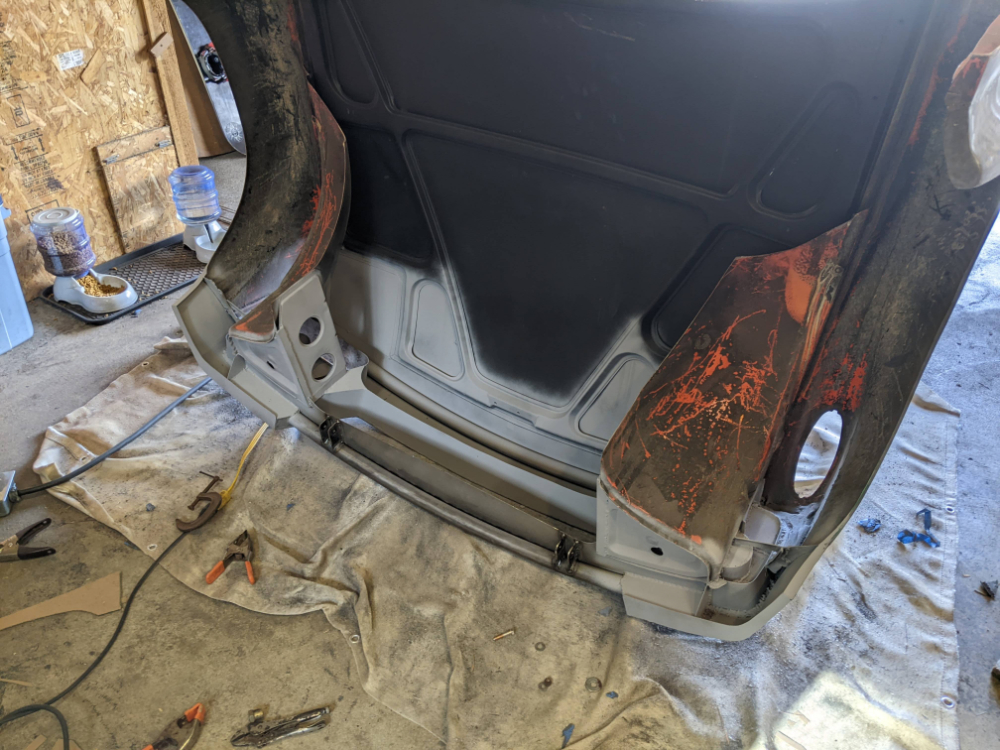 |
| 76-914 |
 Mar 10 2023, 08:00 PM Mar 10 2023, 08:00 PM
Post
#1579
|
|
Repeat Offender & Resident Subaru Antagonist           Group: Members Posts: 13,694 Joined: 23-January 09 From: Temecula, CA Member No.: 9,964 Region Association: Southern California 
|
I never heard them called finger sanders but you're right about their usefulness. Don't buy anything but 3M Cubitron belts. Pricey bastards but they last. Especially if you flip them over. Seems like one side always wears faster than the other. (IMG:style_emoticons/default/confused24.gif) I look forward to your updates. You're a Metal Michelangelo. (IMG:style_emoticons/default/beerchug.gif)
|
| tygaboy |
 Mar 11 2023, 09:22 AM Mar 11 2023, 09:22 AM
Post
#1580
|
|
914 Guru      Group: Members Posts: 5,541 Joined: 6-October 15 From: Petaluma, CA Member No.: 19,241 Region Association: Northern California 
|
World's Best Modified 914
(IMG:style_emoticons/default/pray.gif) (IMG:style_emoticons/default/w00t.gif) (IMG:style_emoticons/default/aktion035.gif) |
  |
6 User(s) are reading this topic (5 Guests and 0 Anonymous Users)
1 Members: Vicious

|
Lo-Fi Version | Time is now: 1st April 2025 - 01:32 PM |
Invision Power Board
v9.1.4 © 2025 IPS, Inc.


