|
|

|
Porsche, and the Porsche crest are registered trademarks of Dr. Ing. h.c. F. Porsche AG.
This site is not affiliated with Porsche in any way. Its only purpose is to provide an online forum for car enthusiasts. All other trademarks are property of their respective owners. |
|
|
  |
| BKLA |
 Jan 20 2010, 04:00 PM Jan 20 2010, 04:00 PM
Post
#421
|
|
Really old member    Group: Members Posts: 1,253 Joined: 14-August 05 From: OR Member No.: 4,590 Region Association: Pacific Northwest 
|
I'm soo happy now!!!! (IMG:style_emoticons/default/biggrin.gif) I look forward to seeing your posts and pictures of your work.
I hope its not too presumptuous of me to ask, (but I am going to anyway) what are your plans here? (See pic) I'm very interested to see how you resolve how the trunk meets the fender and the cover... Thanks!!!!!!! 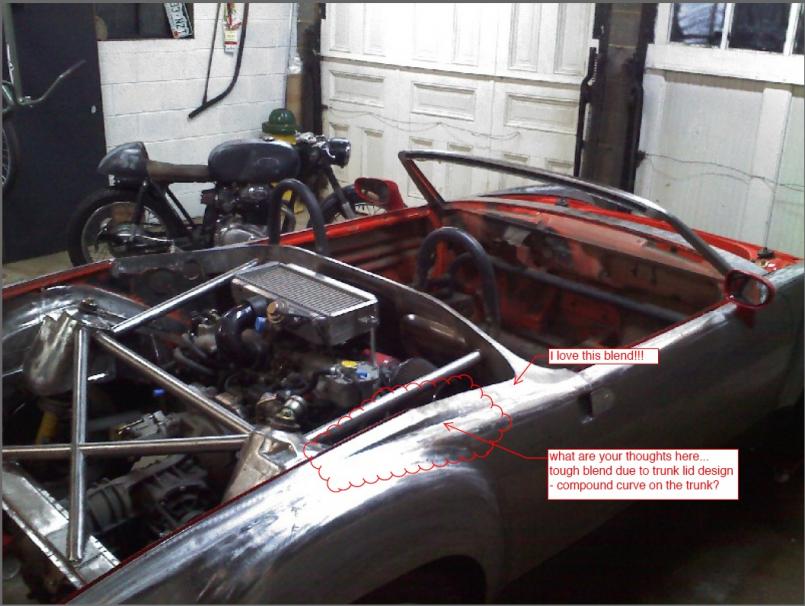 |
| Gint |
 Jan 20 2010, 05:07 PM Jan 20 2010, 05:07 PM
Post
#422
|
|
Mike Ginter                Group: Admin Posts: 16,096 Joined: 26-December 02 From: Denver CO. Member No.: 20 Region Association: Rocky Mountains  |
Hey Dana... when do I get to see this car in person? I could bring over a real camera. (IMG:style_emoticons/default/poke.gif) (IMG:style_emoticons/default/wink.gif)
|
| Rand |
 Jan 20 2010, 05:19 PM Jan 20 2010, 05:19 PM
Post
#423
|
|
Cross Member      Group: Members Posts: 7,410 Joined: 8-February 05 From: OR Member No.: 3,573 Region Association: None |
I hope its not too presumptuous of me to ask, (but I am going to anyway) what are your plans here? (See pic) I'm very interested to see how you resolve how the trunk meets the fender and the cover... This may shed some light on that: (IMG:http://www.914world.com/bbs2/uploads/post-4138-1229471891.jpg) |
| plymouth37 |
 Jan 20 2010, 06:23 PM Jan 20 2010, 06:23 PM
Post
#424
|
|
Senior Member    Group: Members Posts: 1,825 Joined: 24-May 05 From: Snoqualmie, WA Member No.: 4,138 Region Association: Pacific Northwest 
|
What kind of color scheme do yo have in mind for the engine? I am going to keep it looking pretty factory, only real dress up will brushed aluminum, black powder coat and stainless fasteners. I hope its not too presumptuous of me to ask, (but I am going to anyway) what are your plans here? (See pic) I'm very interested to see how you resolve how the trunk meets the fender and the cover... That area still needs a little work, you can see a point where the old meets the new that I need to smooth out into a much softer curve. Hey Dana... when do I get to see this car in person? I could bring over a real camera. (IMG:style_emoticons/default/poke.gif) (IMG:style_emoticons/default/wink.gif) You are welcome to come over any time, I am over in old town Longmont now and have a pretty open schedule. And yes the pics suck, my camera died on me and I am making due with my phone for now, I keep spending my money on the car instead of a new camera. (IMG:style_emoticons/default/biggrin.gif) I also need to find a better mac program to shrink the photos to 800X600 the program I am using makes them even blurrier and the files are way too big for their size. |
| rick 918-S |
 Jan 20 2010, 07:02 PM Jan 20 2010, 07:02 PM
Post
#425
|
|
Hey nice rack! -Celette                Group: Members Posts: 20,925 Joined: 30-December 02 From: Now in Superior WI Member No.: 43 Region Association: Northstar Region 

|
I'm soo happy now!!!! (IMG:style_emoticons/default/biggrin.gif) I look forward to seeing your posts and pictures of your work. I hope its not too presumptuous of me to ask, (but I am going to anyway) what are your plans here? (See pic) I'm very interested to see how you resolve how the trunk meets the fender and the cover... Thanks!!!!!!!  I'd cut the sharp edge off (outer edge of the remaining sail panel) and taper it out to the roll of the quarter panel. Take out the step |
| g911 |
 Jan 20 2010, 07:05 PM Jan 20 2010, 07:05 PM
Post
#426
|
|
Member   Group: Members Posts: 224 Joined: 13-January 06 From: Not Tellin' Member No.: 5,413 Region Association: None 
|
glad to see you're back at it. very sweet indeed.
|
| plymouth37 |
 Jan 20 2010, 07:18 PM Jan 20 2010, 07:18 PM
Post
#427
|
|
Senior Member    Group: Members Posts: 1,825 Joined: 24-May 05 From: Snoqualmie, WA Member No.: 4,138 Region Association: Pacific Northwest 
|
I'd cut the sharp edge off (outer edge of the remaining sail panel) and taper it out to the roll of the quarter panel. Take out the step That is pretty much what I was thinking, that spot has bugged me ever since I welded it up, it looks unnatural when compared to the metal around it. My welder is coming down in a week or two and I am going to make up for lost time with it. (IMG:style_emoticons/default/welder.gif) |
| BKLA |
 Jan 20 2010, 07:28 PM Jan 20 2010, 07:28 PM
Post
#428
|
|
Really old member    Group: Members Posts: 1,253 Joined: 14-August 05 From: OR Member No.: 4,590 Region Association: Pacific Northwest 
|
I'd cut the sharp edge off (outer edge of the remaining sail panel) and taper it out to the roll of the quarter panel. Take out the step That is pretty much what I was thinking, that spot has bugged me ever since I welded it up, it looks unnatural when compared to the metal around it. My welder is coming down in a week or two and I am going to make up for lost time with it. (IMG:style_emoticons/default/welder.gif) That's what I wanted to hear!!! (IMG:style_emoticons/default/smilie_pokal.gif) (IMG:style_emoticons/default/chowtime.gif) |
| Zundfolge |
 Jan 20 2010, 08:35 PM Jan 20 2010, 08:35 PM
Post
#429
|
|
Senior Member    Group: Members Posts: 847 Joined: 12-August 07 From: Colorado Springs Member No.: 7,994 Region Association: Rocky Mountains |
I also need to find a better mac program to shrink the photos to 800X600 the program I am using makes them even blurrier and the files are way too big for their size. I use Photoshop, but I'm also a professional so I can justify the expense. If you have X11 installed there's The Gimp If you don't want to go to the trouble of installing X11 for The Gimp, there's Seashore (based on Gimp but built on the Cocoa Framework). I run Seashore on my Hackintosh Netbook (since Adobe software won't install on a machine running less than 1024x768 resolution, and I really didn't need something that powerful for the very little image editing I do on the netbook) |
| JJ914GT |
 Jan 21 2010, 11:50 AM Jan 21 2010, 11:50 AM
Post
#430
|
|
Member   Group: Members Posts: 171 Joined: 21-May 09 From: Amsterdam Member No.: 10,386 Region Association: Europe |
Love this build, it's actually the car that inspired me to go for the subaru conversion.
Here's a nice online "photoshop-like" program: http://www.pixlr.com/editor |
| plymouth37 |
 Feb 5 2010, 10:43 AM Feb 5 2010, 10:43 AM
Post
#431
|
|
Senior Member    Group: Members Posts: 1,825 Joined: 24-May 05 From: Snoqualmie, WA Member No.: 4,138 Region Association: Pacific Northwest 
|
After pulling the drivetrain I stripped the engine down to almost a long block. There is a ton of weight that can be removed from the engine and a couple small power adders that are easier to do with the engine out of the car.
Now I need to take this opportunity to clean things up a bit. 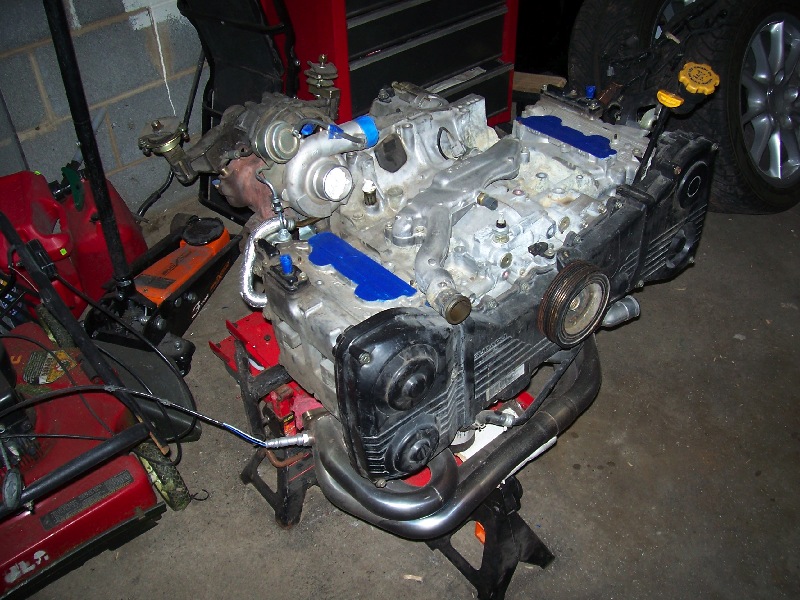 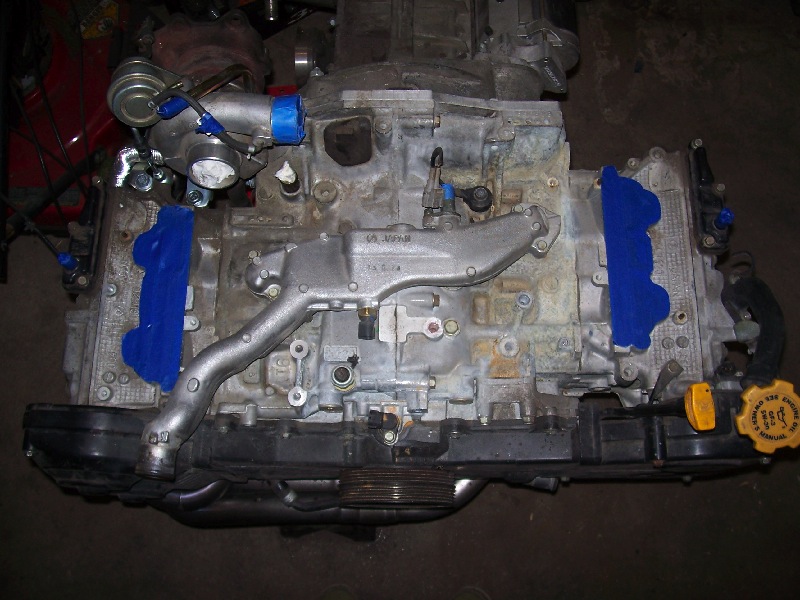 |
| plymouth37 |
 Feb 5 2010, 11:19 AM Feb 5 2010, 11:19 AM
Post
#432
|
|
Senior Member    Group: Members Posts: 1,825 Joined: 24-May 05 From: Snoqualmie, WA Member No.: 4,138 Region Association: Pacific Northwest 
|
Next I pulled the Tumble Generator Valves off of the intake. For those of you who are not familiar with these little bastards, they are located between the intake and the heads, during cold start ups they close to improve emissions. The problem is that when the valves open during normal driving they still block a ton of air flow and rob mid range power.
Here are the stock TGVs: 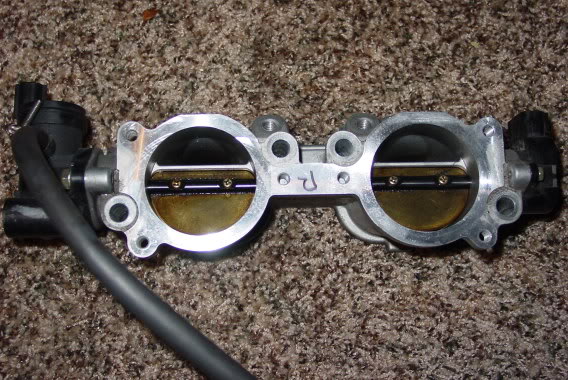 I removed the butterflies and the motors and sensors related to them, this procedure does trigger a check engine light but I am going to have the car tuned anyway and this code can be eliminated from the ecu. Here you can see the casting that directs air around the closed butterflies so the engine doesn't stall. 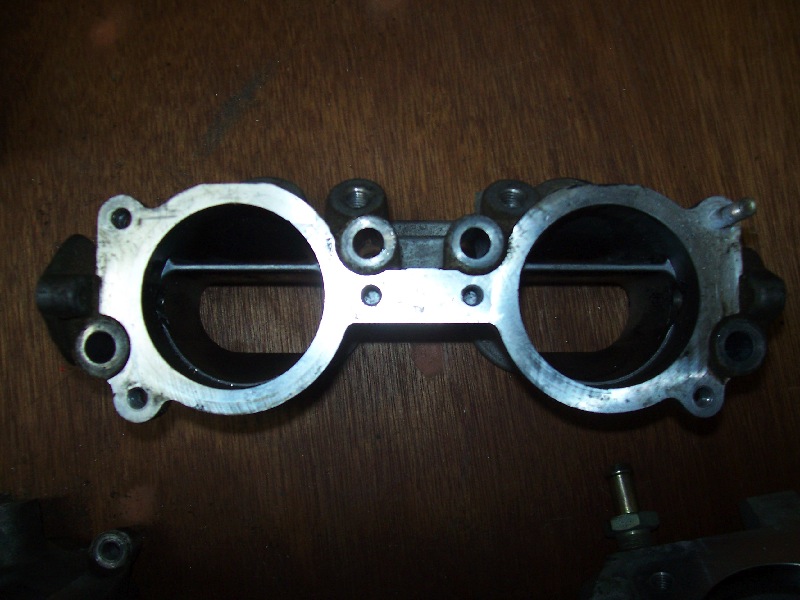 I bored out the cast partitions and ported out the TGV bodies Here is a shot half way through porting: 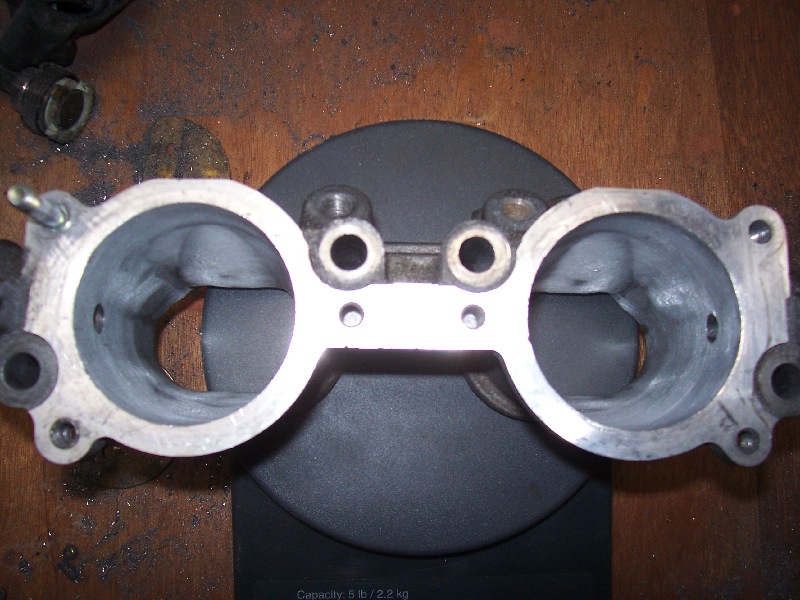 |
| plymouth37 |
 Feb 5 2010, 11:20 AM Feb 5 2010, 11:20 AM
Post
#433
|
|
Senior Member    Group: Members Posts: 1,825 Joined: 24-May 05 From: Snoqualmie, WA Member No.: 4,138 Region Association: Pacific Northwest 
|
Lastly I finished porting the bodies then ground off any unnecessary mounts or brackets on the exterior of the TGVs then hit them with a wire wheel. The holes you see where the rods used to go will be filled as soon as I get my tig down here.
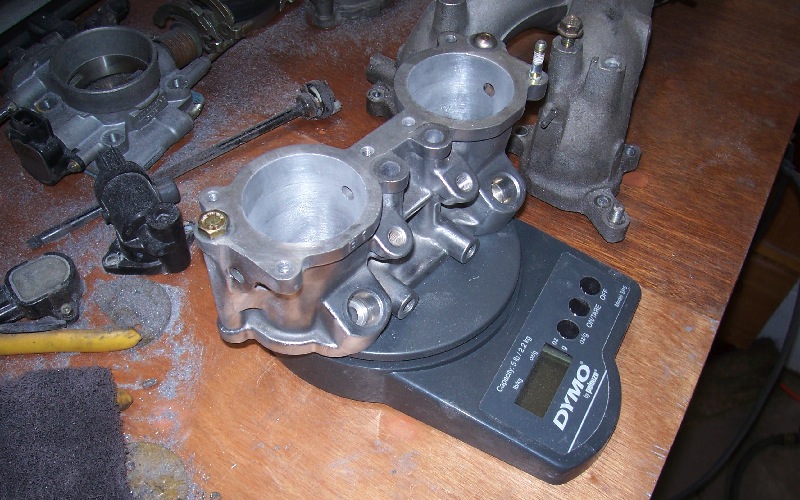 And now for the Bonuses: I lost a total of 2.2 pounds by removing the motors, sensors, butterflies, driveshafts, and extra aluminum. Here is a TGV mod before and after chassis dyno sheet from a guy who has almost exactly the same mods on his engine as mine: Check out the gains at 3000 rpm, and this is at the wheels! 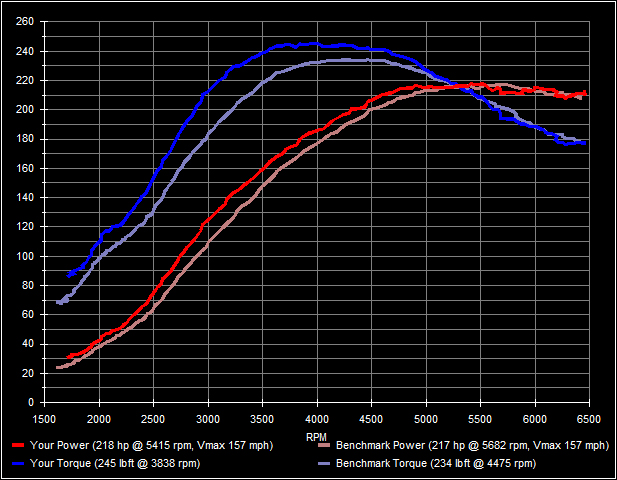 Not a bad gain for a days work! |
| Kirmizi |
 Feb 5 2010, 11:28 AM Feb 5 2010, 11:28 AM
Post
#434
|
|
Senior Member    Group: Members Posts: 836 Joined: 12-February 06 From: Wyoming, US Member No.: 5,568 Region Association: None |
Hey Dana,
You gonna have it back together and running for Cars and Coffee tomorrow? (IMG:style_emoticons/default/poke.gif) Mike |
| plymouth37 |
 Feb 5 2010, 11:30 AM Feb 5 2010, 11:30 AM
Post
#435
|
|
Senior Member    Group: Members Posts: 1,825 Joined: 24-May 05 From: Snoqualmie, WA Member No.: 4,138 Region Association: Pacific Northwest 
|
Hey Dana, You gonna have it back together and running for Cars and Coffee tomorrow? (IMG:style_emoticons/default/poke.gif) Mike (IMG:style_emoticons/default/av-943.gif) Sure, no problem... |
| fat73 |
 Feb 5 2010, 11:40 AM Feb 5 2010, 11:40 AM
Post
#436
|
|
W9R1   Group: Members Posts: 244 Joined: 7-May 05 From: tampa,fl Member No.: 4,043 Region Association: South East States |
Hey Dana, You gonna have it back together and running for Cars and Coffee tomorrow? (IMG:style_emoticons/default/poke.gif) Mike (IMG:style_emoticons/default/av-943.gif) Sure, no problem... Dana...Does this mod have any effect on the ECU? I'm asuming the sensors that previouly controlled the throttle body butterflies stay attached to the harness, or can they be removed? Ed |
| plymouth37 |
 Feb 5 2010, 11:47 AM Feb 5 2010, 11:47 AM
Post
#437
|
|
Senior Member    Group: Members Posts: 1,825 Joined: 24-May 05 From: Snoqualmie, WA Member No.: 4,138 Region Association: Pacific Northwest 
|
Dana...Does this mod have any effect on the ECU? I'm asuming the sensors previously attached to the throttle body butterflies stay attached to the harness, or can they be removed? Ed The sensors measure the butterflies movement which varies depending on the engines running conditions so it is impossible to just plug in a resistor to trick the ECU like I have done with other sensor deletes. It is an all or nothing kind of deal, messing with the TGVs will give you a check engine light and a possible limp mode situation unless you get the code programmed out. Since it will trigger a problem weather you remove the sensors or not I am removing the sensors and the wires for them from my wiring harness. To fully optimize the TGV delete procedure you need to have the ECU programmed for a freer flowing intake but since I am getting my car tuned anyway it wasn't really an issue. |
| Crazyhippy |
 Feb 5 2010, 01:40 PM Feb 5 2010, 01:40 PM
Post
#438
|
|
Insert witty comment here...    Group: Members Posts: 1,659 Joined: 28-July 05 From: Home of the Coyotes, AZ Member No.: 4,493 Region Association: None |
There are alos companies that make an emulator for the TGV sensors... just the TGV motor on one side, a short shaft and the sensor on the other...
Re-programming is a better choice. There are decent gains to be had gasket matching everything, and cleaning up the heads (requires removal though) The Exhaust ports have lots of room for improvement. Look at the throttle body inlet, and where it meets the intake... lots of areas to clean up, and decent gains for some time and lil money. |
| plymouth37 |
 Feb 10 2010, 08:57 PM Feb 10 2010, 08:57 PM
Post
#439
|
|
Senior Member    Group: Members Posts: 1,825 Joined: 24-May 05 From: Snoqualmie, WA Member No.: 4,138 Region Association: Pacific Northwest 
|
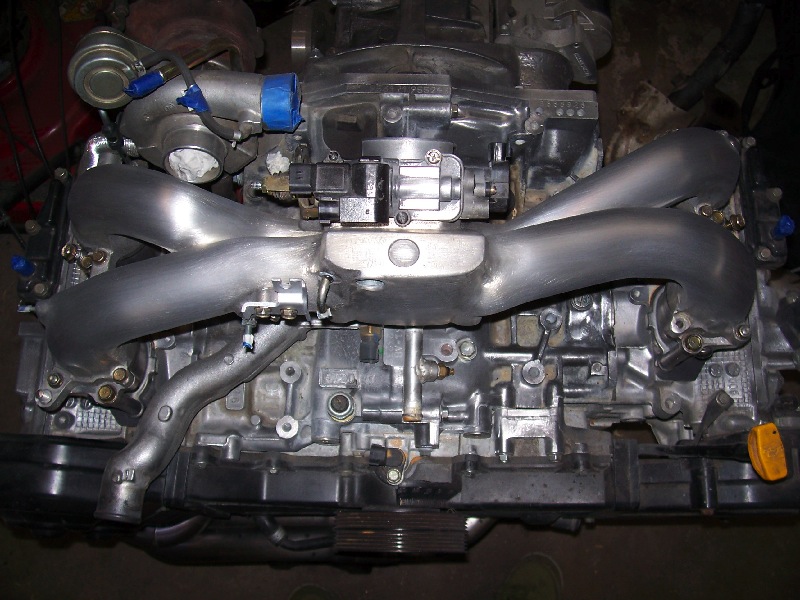
I was looking at the stock intake manifold and realized that I have eliminated the need for any mounting brackets on the manifold.
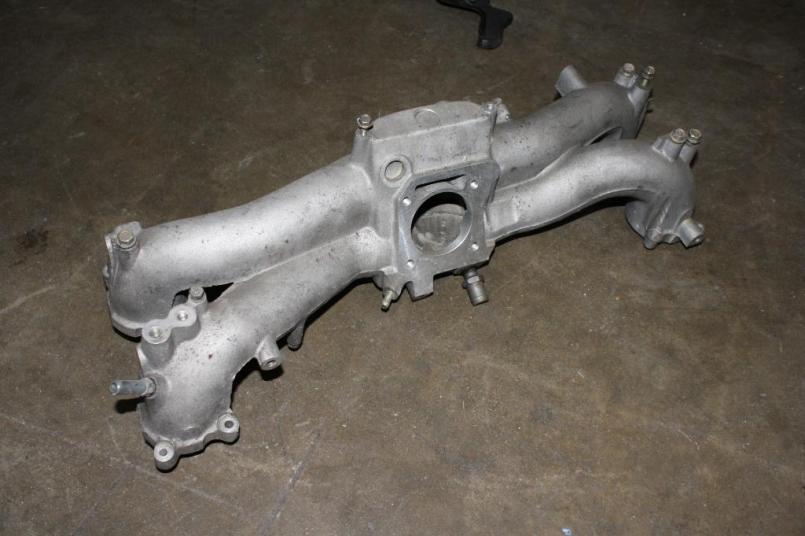 I gasket matched the TGVs to the manifold. I have wanted to go with a little more of a stock look so I decided to put a brushed finish on the manifold rather than full out polishing it. I took a grinder to the mounts and casting marks on the manifold then hand sanded it down with 60 grit, 100 grit, and then a scotch brite pad. It is so nice to have a wife that doesn't bat an eye when you pull an intake manifold out of the dish washer... 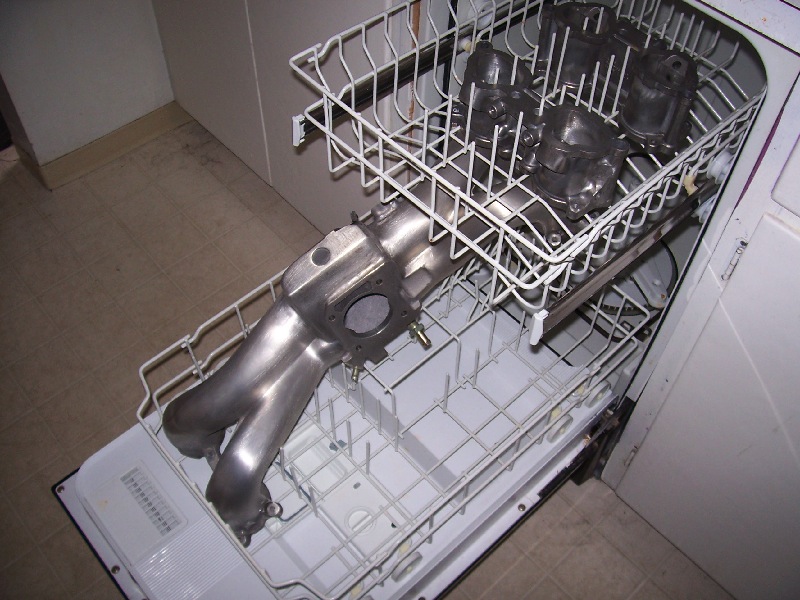 Then I bolted the gutted TGV bodies and manifold up the the engine with new gaskets all around. The process of shaving and polishing the manifold dropped an additional 1/2 pound. 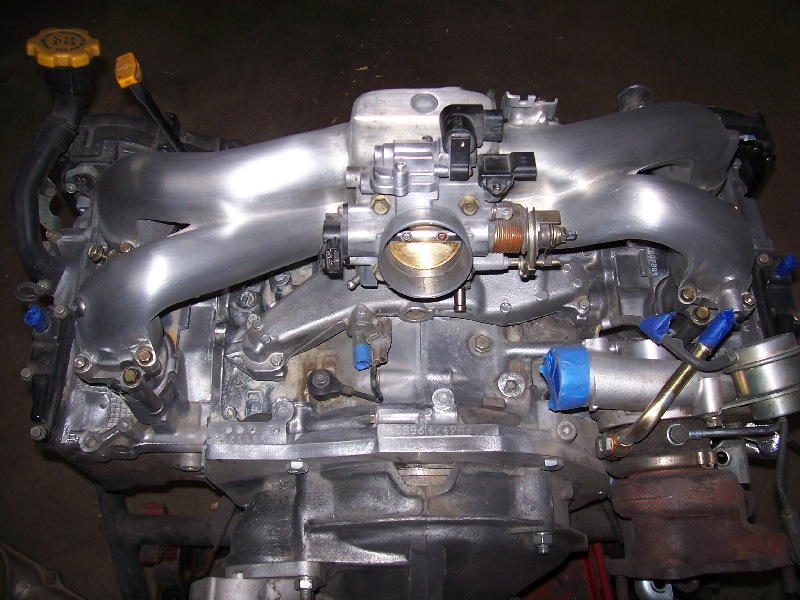 |
| plymouth37 |
 Feb 10 2010, 09:01 PM Feb 10 2010, 09:01 PM
Post
#440
|
|
Senior Member    Group: Members Posts: 1,825 Joined: 24-May 05 From: Snoqualmie, WA Member No.: 4,138 Region Association: Pacific Northwest 
|
Here are another couple shots.
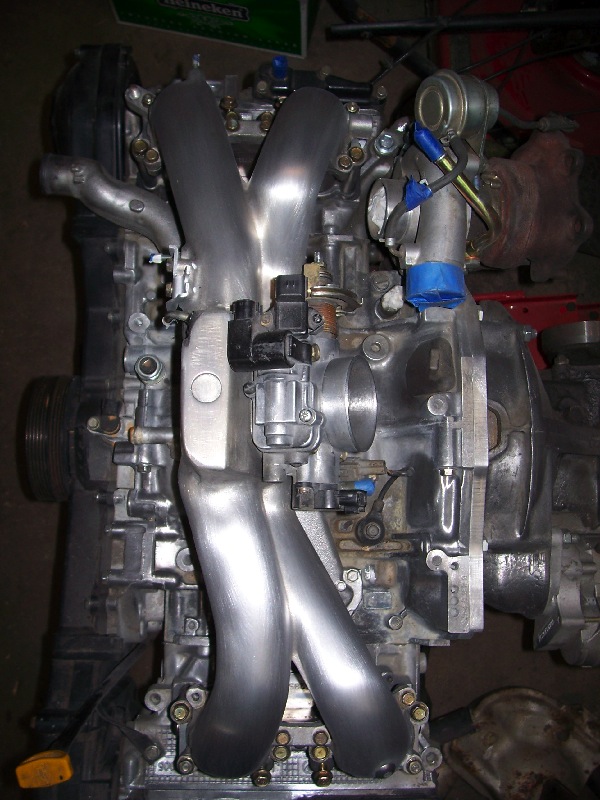  |
  |
1 User(s) are reading this topic (1 Guests and 0 Anonymous Users)
0 Members:

|
Lo-Fi Version | Time is now: 19th April 2025 - 02:49 PM |
Invision Power Board
v9.1.4 © 2025 IPS, Inc.


