|
|

|
Porsche, and the Porsche crest are registered trademarks of Dr. Ing. h.c. F. Porsche AG.
This site is not affiliated with Porsche in any way. Its only purpose is to provide an online forum for car enthusiasts. All other trademarks are property of their respective owners. |
|
|
  |
| RJMII |
 Jan 25 2011, 03:22 PM Jan 25 2011, 03:22 PM
Post
#781
|
|
Jim McIntosh     Group: Members Posts: 3,125 Joined: 11-September 07 From: Sandy, Utah Member No.: 8,112 Region Association: None |
What size of wheels are those? (IMG:style_emoticons/default/biggrin.gif) We could use the wheel diameter and a little bit of math and get some dimmensions for the a-arms. I'm liking the way those a-arms look like they mount, too.
|
| db9146 |
 Jan 25 2011, 03:30 PM Jan 25 2011, 03:30 PM
Post
#782
|
|
Senior Member    Group: Members Posts: 953 Joined: 21-December 04 From: Atlanta, GA Member No.: 3,315 Region Association: None 
|
QUOTE I am making the back half fairly independent, you could just bolt it to the front half of anything that had matching connection points, hook up a fuel line and have a self sufficient rear suspension and drive train. 350hp 3 wheelers could be fun, how about a home built Atom? So let's see....you've got the sports car covered. If you found a VW bus and did the same to it, you'd have a family hauler or a camper. You could add a VW squareback or notchback for an estate wagon or family sedan, all using the same power plant. Kinda like swapping a battery pack into one of those multi-tool Dewalt kits. There you go!!! (IMG:style_emoticons/default/shades.gif) |
| Hontec |
 Jan 25 2011, 03:30 PM Jan 25 2011, 03:30 PM
Post
#783
|
|
I see things.....   Group: Members Posts: 261 Joined: 23-September 10 From: Netherlands Member No.: 12,210 Region Association: Europe |
Dana, you used to work for Renegade right?
I have a question regarding the tacho; is the stock 914 unit compatible with the Subie output? (probably not) How are you going to run this? I bet you have experience with this. Thanks Randall |
| plymouth37 |
 Jan 25 2011, 06:19 PM Jan 25 2011, 06:19 PM
Post
#784
|
|
Senior Member    Group: Members Posts: 1,825 Joined: 24-May 05 From: Snoqualmie, WA Member No.: 4,138 Region Association: Pacific Northwest 
|
Dana, you used to work for Renegade right? I have a question regarding the tacho; is the stock 914 unit compatible with the Subie output? (probably not) How are you going to run this? I bet you have experience with this. Thanks Randall I had mine refinished and re-calibrated by North Hollywood Speedometer, they also added the boost gauge, LED lighting, and changed the redline to match the subie's. 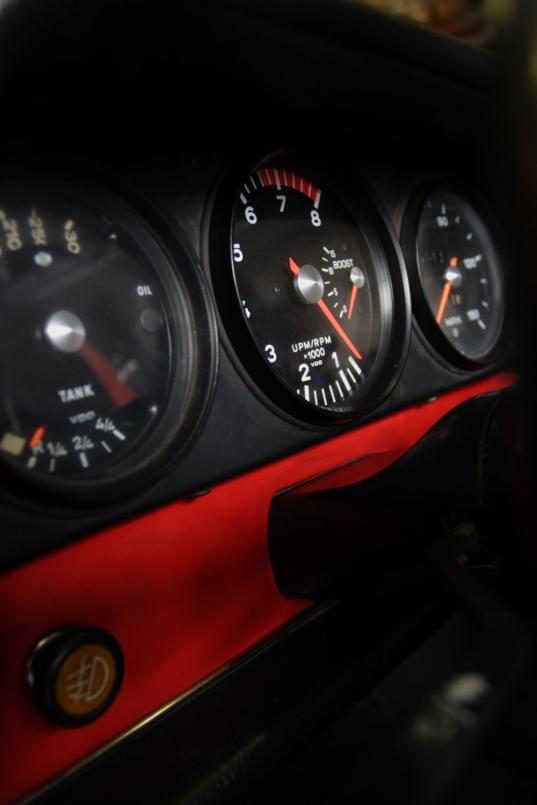 |
| Hontec |
 Jan 26 2011, 02:25 AM Jan 26 2011, 02:25 AM
Post
#785
|
|
I see things.....   Group: Members Posts: 261 Joined: 23-September 10 From: Netherlands Member No.: 12,210 Region Association: Europe |
Thanks! (IMG:style_emoticons/default/cheer.gif)
|
| plymouth37 |
 Jan 30 2011, 12:22 PM Jan 30 2011, 12:22 PM
Post
#786
|
|
Senior Member    Group: Members Posts: 1,825 Joined: 24-May 05 From: Snoqualmie, WA Member No.: 4,138 Region Association: Pacific Northwest 
|
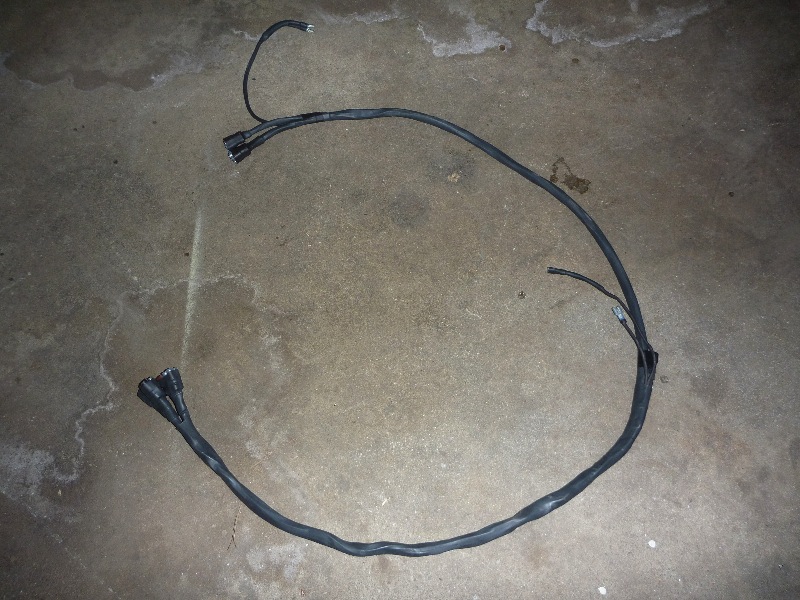
I did a little wiring yesterday. I started out by building a harness for the car's rear lights and rear mounted sensors. The harness will plug into the main harness at the firewall and at the other end the rear clamshell will plug into it for the taillights, this way it is still possible to break the car into components easily.
 Then I pulled the subaru engine harness, ran any extra wires I needed to, and combined it with the car harness I had just built. Within the harness I ran a few extra wires to various parts of the car, this way any extra sensors or electronics I want to run in the future are already wired and ready to go. Remember when it only took about 4 wires to hook up an engine? Well those days are gone! 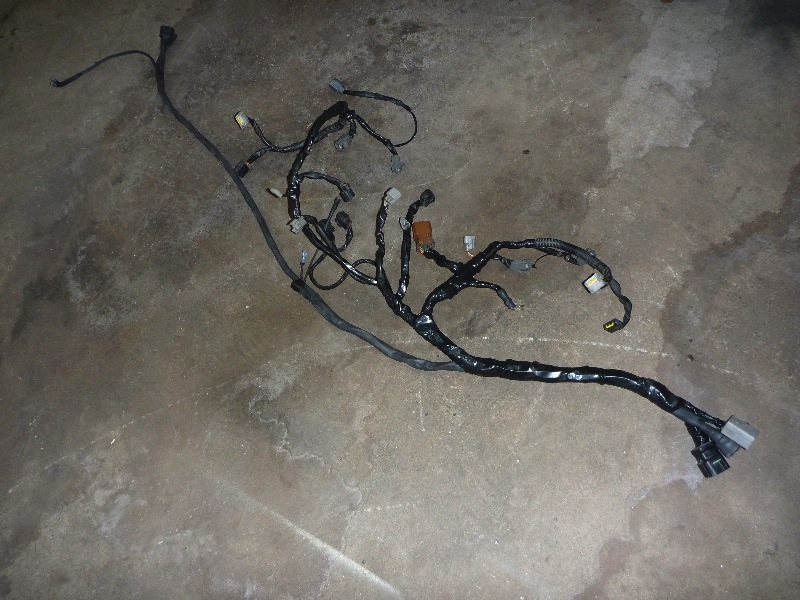 |
| plymouth37 |
 Jan 30 2011, 12:23 PM Jan 30 2011, 12:23 PM
Post
#787
|
|
Senior Member    Group: Members Posts: 1,825 Joined: 24-May 05 From: Snoqualmie, WA Member No.: 4,138 Region Association: Pacific Northwest 
|
And here is the harness installed, I still need to run the battery cables but other than that the entire rear of the chassis is wired.
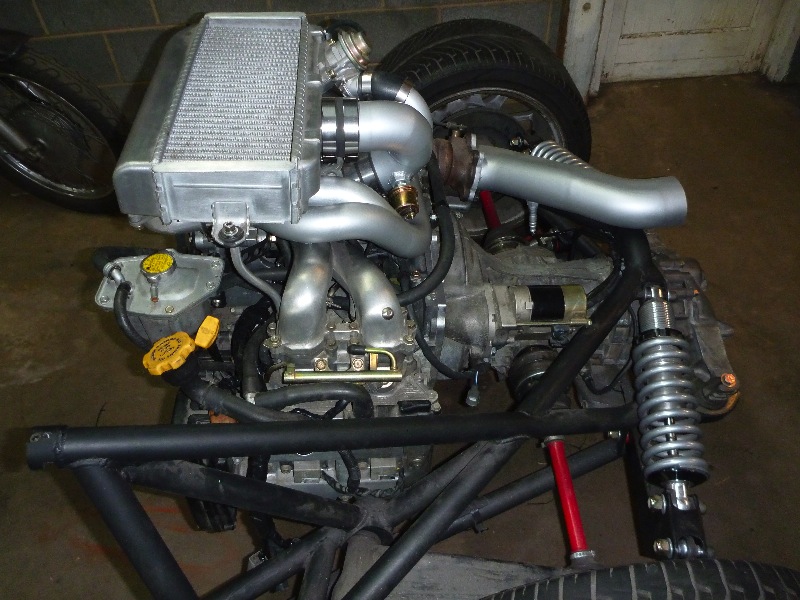 Since it was readily accessible, here is a shot of the front of the engine. Also notice that the engine is lacking a Perrin lightweight pulley, gonna have to fix that problem soon! 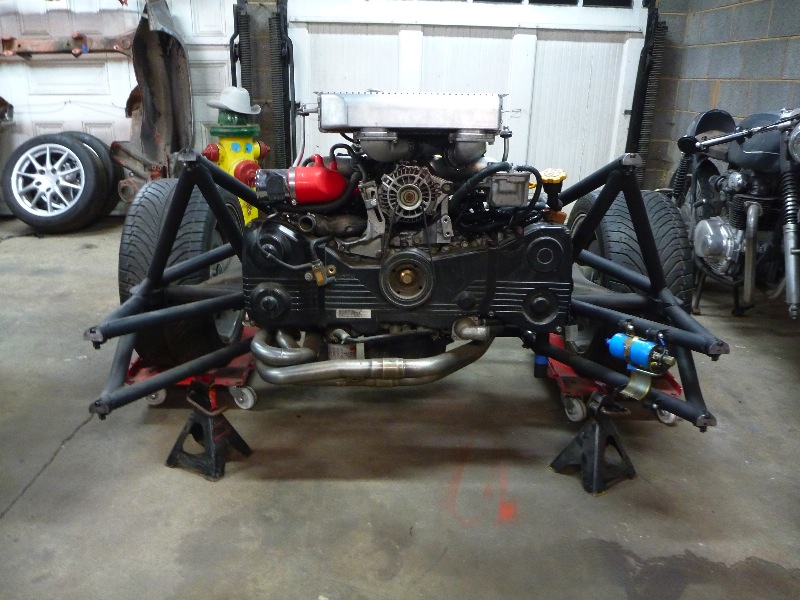 |
| plymouth37 |
 Feb 11 2011, 02:01 PM Feb 11 2011, 02:01 PM
Post
#788
|
|
Senior Member    Group: Members Posts: 1,825 Joined: 24-May 05 From: Snoqualmie, WA Member No.: 4,138 Region Association: Pacific Northwest 
|
I did a lot of trimming and wire wheeling on the firewall today. I have stripped the entire rear of the tub and trimmed it down to a point where I can start rebuilding the fire wall and longs.
I also decided that if I am going to build a high quality fiberglass or carbon body I need a perfect steel body to take a mold off of. Because of this I have decided to trade my lightweight lids for stock steel lids, If you want to trade click here. I think by starting with steel, I material that I am much more competent working with, I can end up with a much better final product. And then once I make a carbon body, one of you can have the steel one (IMG:style_emoticons/default/wink.gif) 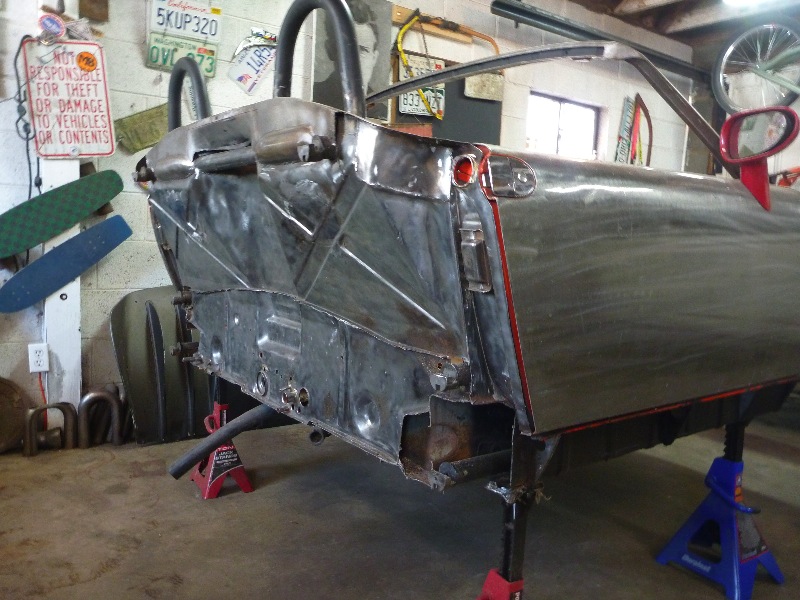 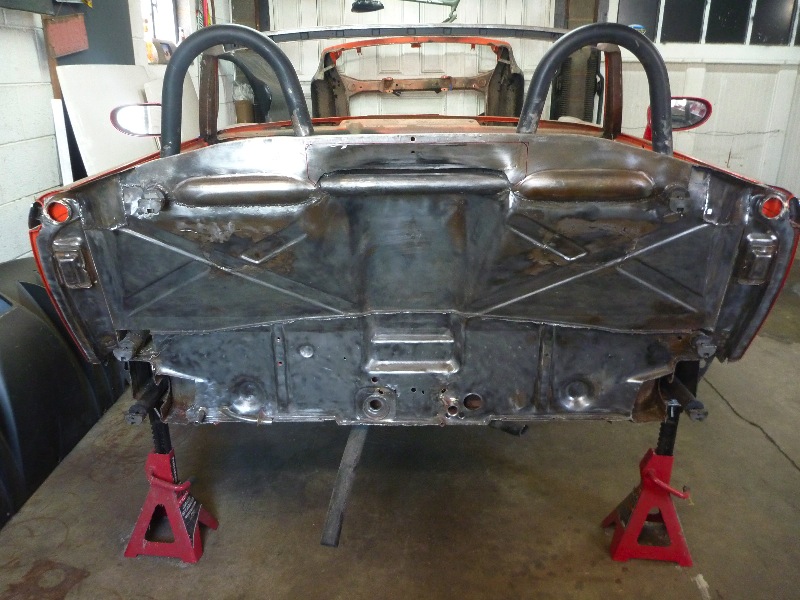 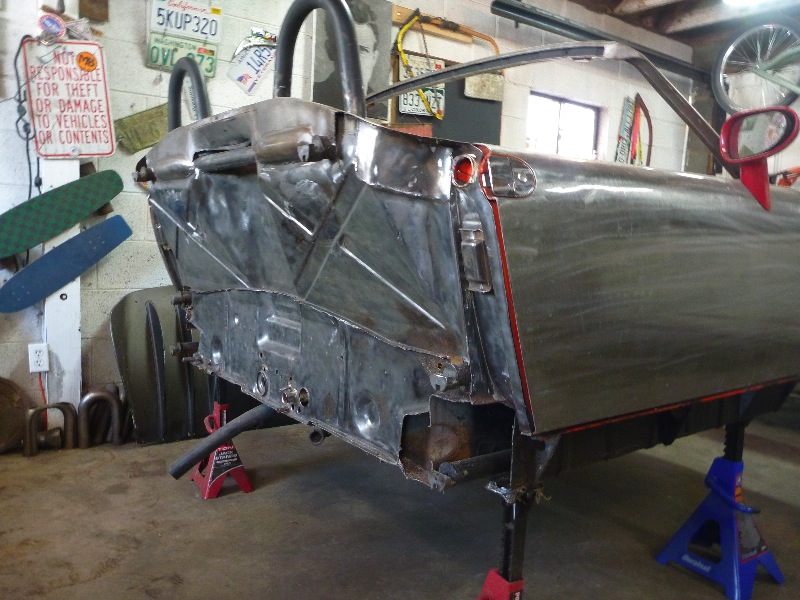 |
| Hontec |
 Feb 11 2011, 02:11 PM Feb 11 2011, 02:11 PM
Post
#789
|
|
I see things.....   Group: Members Posts: 261 Joined: 23-September 10 From: Netherlands Member No.: 12,210 Region Association: Europe |
Nice work! Are you excited to start building up again? Can't wait to reach that stage..
|
| fat73 |
 Feb 11 2011, 02:30 PM Feb 11 2011, 02:30 PM
Post
#790
|
|
W9R1   Group: Members Posts: 244 Joined: 7-May 05 From: tampa,fl Member No.: 4,043 Region Association: South East States |
Dana, you used to work for Renegade right? I have a question regarding the tacho; is the stock 914 unit compatible with the Subie output? (probably not) How are you going to run this? I bet you have experience with this. Thanks Randall I had mine refinished and re-calibrated by North Hollywood Speedometer, they also added the boost gauge, LED lighting, and changed the redline to match the subie's.  Hey Dana, What boost sensor are you using? My boost guage stays pegged all the time. I thought I put a 930 sensor on there. Is that right? Ed |
| BKLA |
 Feb 11 2011, 08:04 PM Feb 11 2011, 08:04 PM
Post
#791
|
|
Really old member    Group: Members Posts: 1,253 Joined: 14-August 05 From: OR Member No.: 4,590 Region Association: Pacific Northwest 
|
I can see a bidding war on the steel shell already!
Looks great! |
| plymouth37 |
 Feb 16 2011, 09:36 PM Feb 16 2011, 09:36 PM
Post
#792
|
|
Senior Member    Group: Members Posts: 1,825 Joined: 24-May 05 From: Snoqualmie, WA Member No.: 4,138 Region Association: Pacific Northwest 
|
I got some welding done today, I reconfigured the upper portion to eliminate the stock dip and added about a foot of weld between the cage and the tub in the process. I also seam welded the firewall and ground down the pinch weld that splits the firewall in half.
Before: 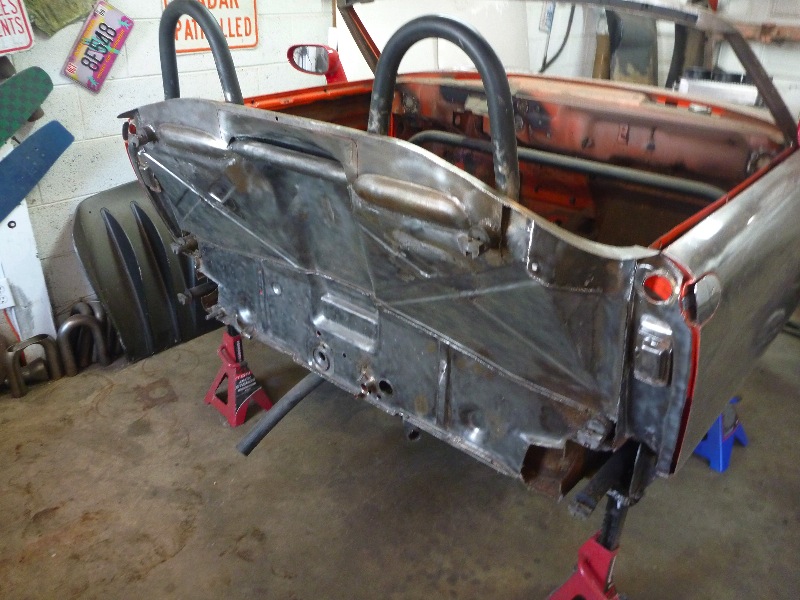 |
| plymouth37 |
 Feb 16 2011, 09:36 PM Feb 16 2011, 09:36 PM
Post
#793
|
|
Senior Member    Group: Members Posts: 1,825 Joined: 24-May 05 From: Snoqualmie, WA Member No.: 4,138 Region Association: Pacific Northwest 
|
After:
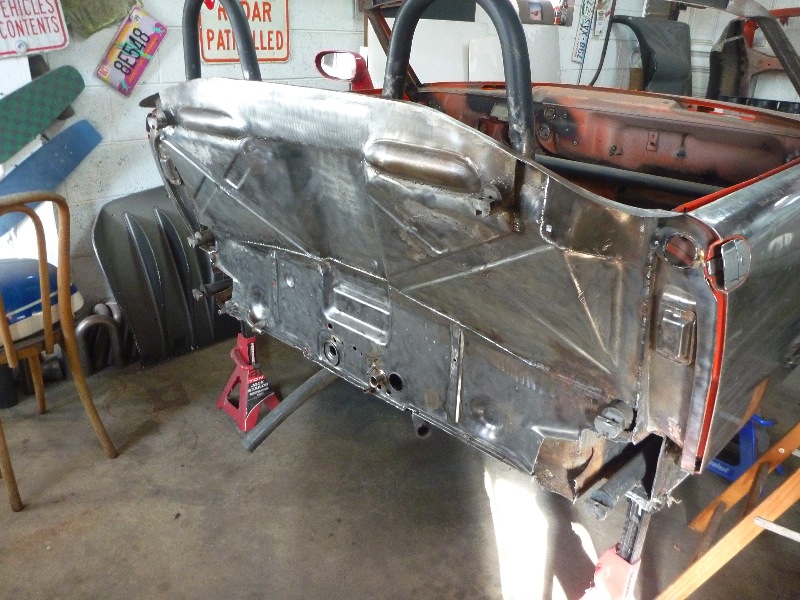 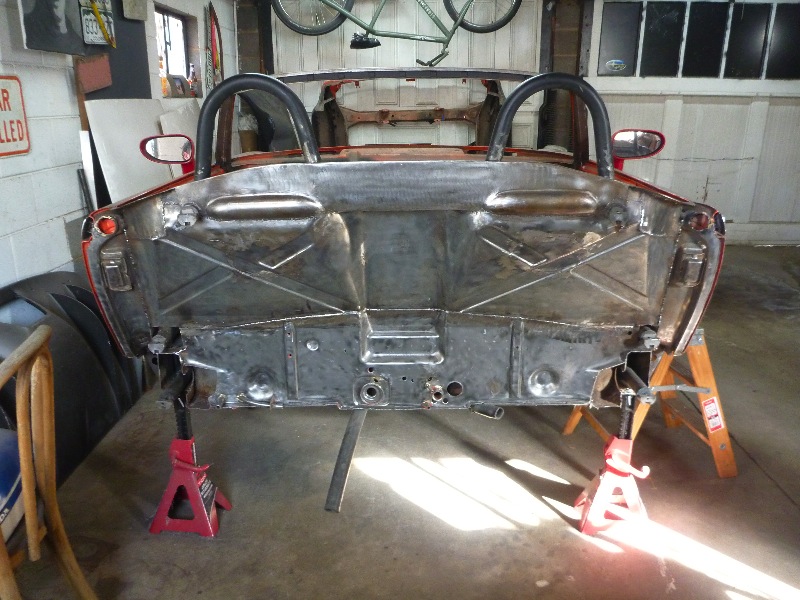 |
| majkos |
 Feb 17 2011, 08:56 AM Feb 17 2011, 08:56 AM
Post
#794
|
|
Senior Member    Group: Members Posts: 1,370 Joined: 29-February 04 From: Mile High 914 Member No.: 1,729 Region Association: Rocky Mountains |
Very nice Dana!
I like how you made it so smooth..... Care to help me with the Kar-B-Q ? (IMG:style_emoticons/default/av-943.gif) |
| KELTY360 |
 Feb 17 2011, 09:25 AM Feb 17 2011, 09:25 AM
Post
#795
|
|
914 Neferati      Group: Members Posts: 5,121 Joined: 31-December 05 From: Pt. Townsend, WA Member No.: 5,344 Region Association: Pacific Northwest 
|
Looks heavy. You must have added at least 8 oz. (IMG:style_emoticons/default/poke.gif)
|
| plymouth37 |
 Feb 21 2011, 08:53 AM Feb 21 2011, 08:53 AM
Post
#796
|
|
Senior Member    Group: Members Posts: 1,825 Joined: 24-May 05 From: Snoqualmie, WA Member No.: 4,138 Region Association: Pacific Northwest 
|
I started rebuilding the frame rail area of the firewall. Since the tub will end at the firewall I had to amputate the frame rails.
Here is how much I needed to remove to get to flat, rust free metal. 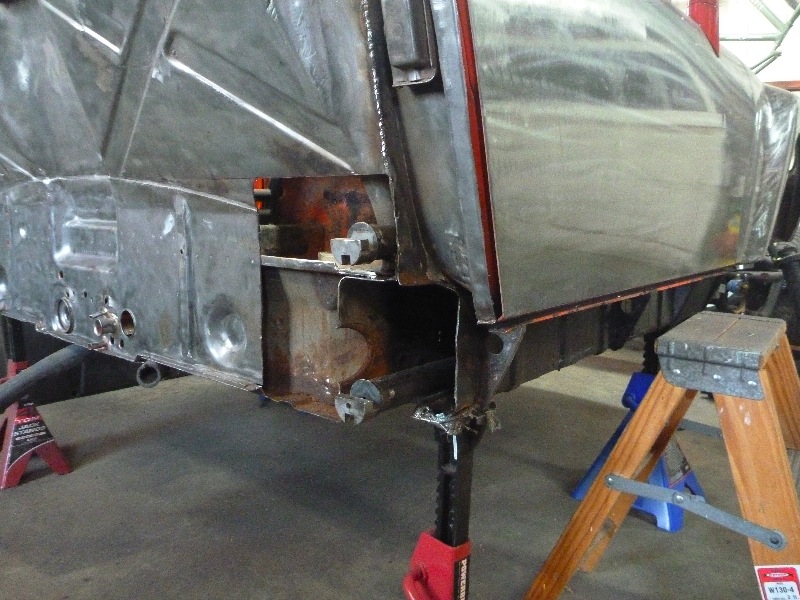 I welded in a filler plate, the frame rails, cage, and inner structure are all welded to the filler piece, hopefully this should tie all of the inner structure together. 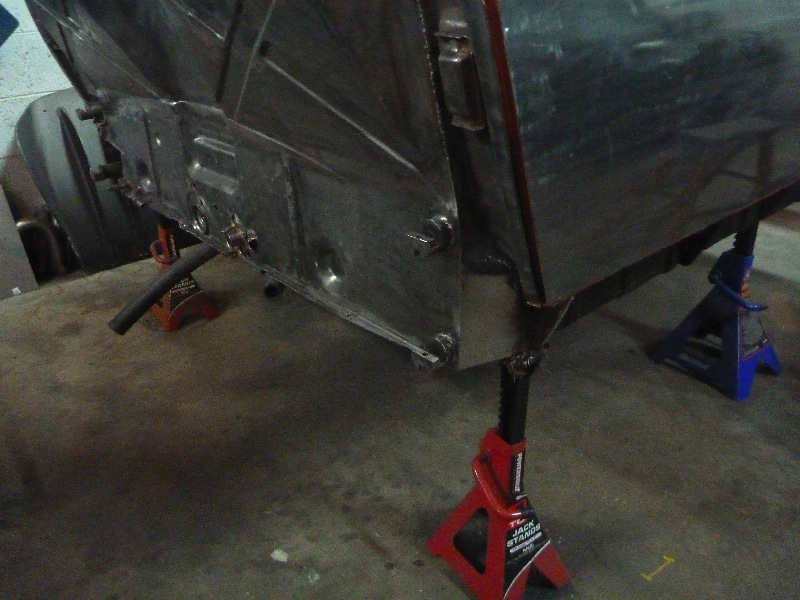 |
| plymouth37 |
 Feb 21 2011, 08:57 AM Feb 21 2011, 08:57 AM
Post
#797
|
|
Senior Member    Group: Members Posts: 1,825 Joined: 24-May 05 From: Snoqualmie, WA Member No.: 4,138 Region Association: Pacific Northwest 
|
Here is a before and after shot, after I finish welding up the drivers side I will start fabbing up the outer structure that will tie the door jambs into the rest of the firewall
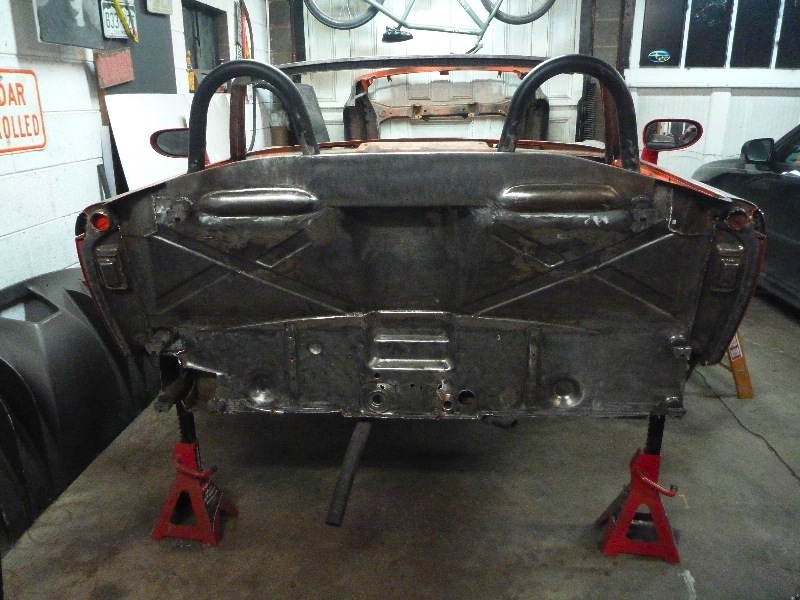 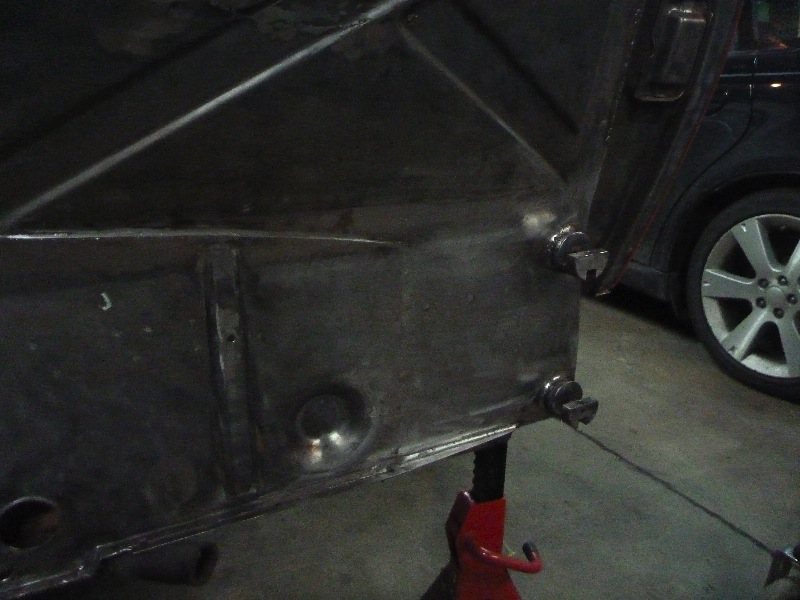 |
| KaptKaos |
 Feb 21 2011, 10:40 AM Feb 21 2011, 10:40 AM
Post
#798
|
|
Family     Group: Members Posts: 4,009 Joined: 23-April 03 From: Near Wausau Member No.: 607 Region Association: Upper MidWest |
|
| plymouth37 |
 Feb 21 2011, 07:44 PM Feb 21 2011, 07:44 PM
Post
#799
|
|
Senior Member    Group: Members Posts: 1,825 Joined: 24-May 05 From: Snoqualmie, WA Member No.: 4,138 Region Association: Pacific Northwest 
|
Have you seen this??? http://www.autoblog.com/2011/02/18/you-can...powered-kit-ca/ http://www.factoryfive.com/whatsnew/update...nouncement.html (IMG:style_emoticons/default/smilie_pokal.gif) Very cool! The WRX engine really is a perfect power plant for a sub 2000 pound sports car. I am surprised it took them this long to come out with a good kit with Subie power. Nice find! |
| plymouth37 |
 Feb 21 2011, 09:14 PM Feb 21 2011, 09:14 PM
Post
#800
|
|
Senior Member    Group: Members Posts: 1,825 Joined: 24-May 05 From: Snoqualmie, WA Member No.: 4,138 Region Association: Pacific Northwest 
|
|
  |
2 User(s) are reading this topic (2 Guests and 0 Anonymous Users)
0 Members:

|
Lo-Fi Version | Time is now: 20th April 2025 - 12:47 PM |
Invision Power Board
v9.1.4 © 2025 IPS, Inc.


