|
|

|
Porsche, and the Porsche crest are registered trademarks of Dr. Ing. h.c. F. Porsche AG.
This site is not affiliated with Porsche in any way. Its only purpose is to provide an online forum for car enthusiasts. All other trademarks are property of their respective owners. |
|
|
  |
| plymouth37 |
 Mar 26 2011, 10:10 PM Mar 26 2011, 10:10 PM
Post
#841
|
|
Senior Member    Group: Members Posts: 1,825 Joined: 24-May 05 From: Snoqualmie, WA Member No.: 4,138 Region Association: Pacific Northwest 
|
So I assume front shocktower to hoop in the cab is eminent? Yep, I need to start figuring out the best way to beef up that area next, it is going to be a little tricky to route the tubing around the gas tank but I should be able to get a good amount of tube in there to connect the nose to the rest of the cage. |
| wes |
 Mar 27 2011, 12:09 PM Mar 27 2011, 12:09 PM
Post
#842
|
|
wes    Group: Members Posts: 1,591 Joined: 8-December 07 From: Ukiah Ca Member No.: 8,436 Region Association: Northern California 
|
I must say simply amazing work, it has inspired me to work on my own wich is nothing in comparison, thanks and keep up the great work! (IMG:style_emoticons/default/piratenanner.gif)
|
| plymouth37 |
 Mar 27 2011, 12:54 PM Mar 27 2011, 12:54 PM
Post
#843
|
|
Senior Member    Group: Members Posts: 1,825 Joined: 24-May 05 From: Snoqualmie, WA Member No.: 4,138 Region Association: Pacific Northwest 
|
Spring break is drawing to a close, back to school tomorrow.
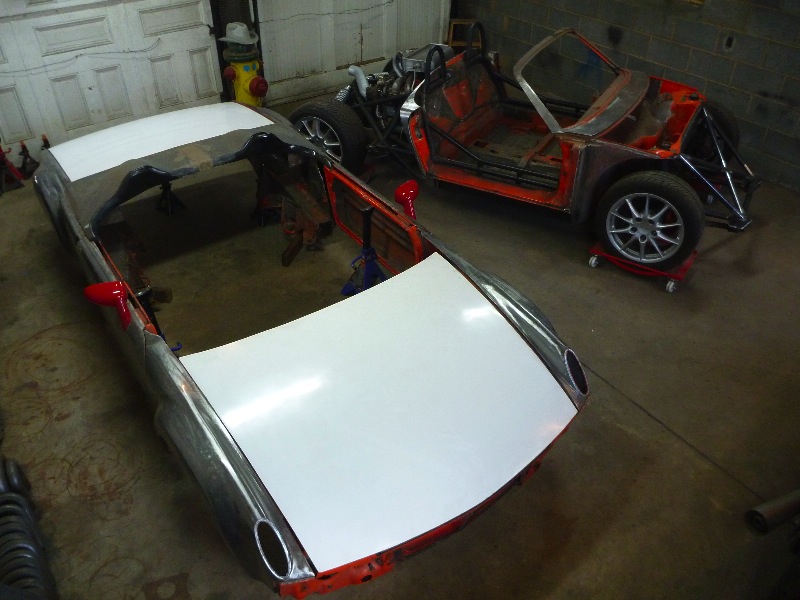
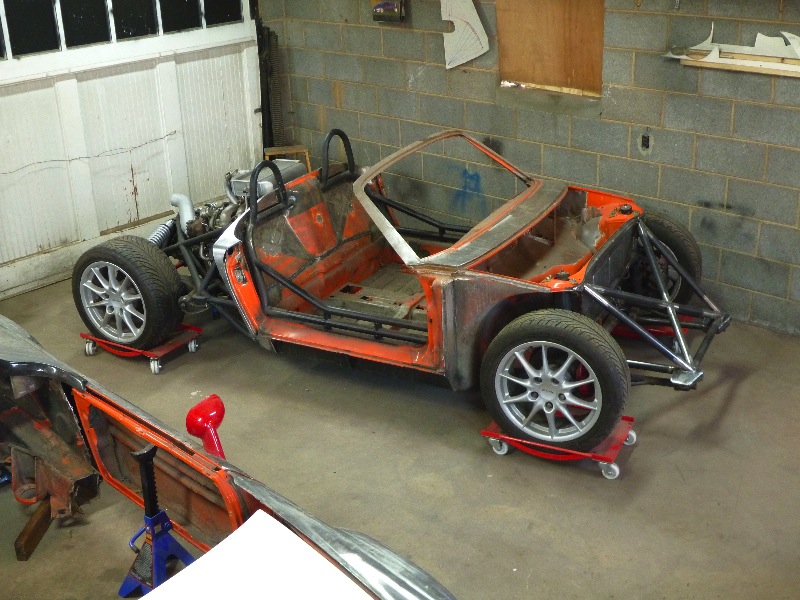
I bolted the chassis back together and mocked up the body next to it, I have 2 914s now! 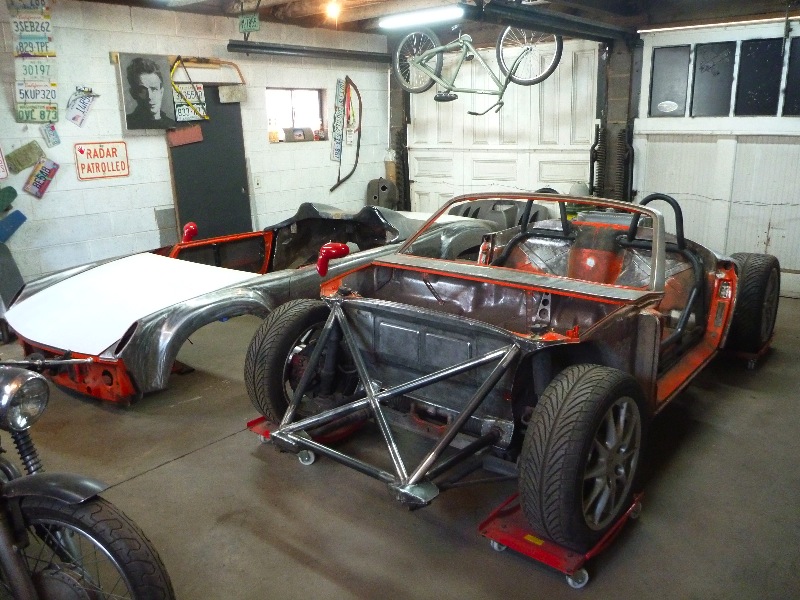 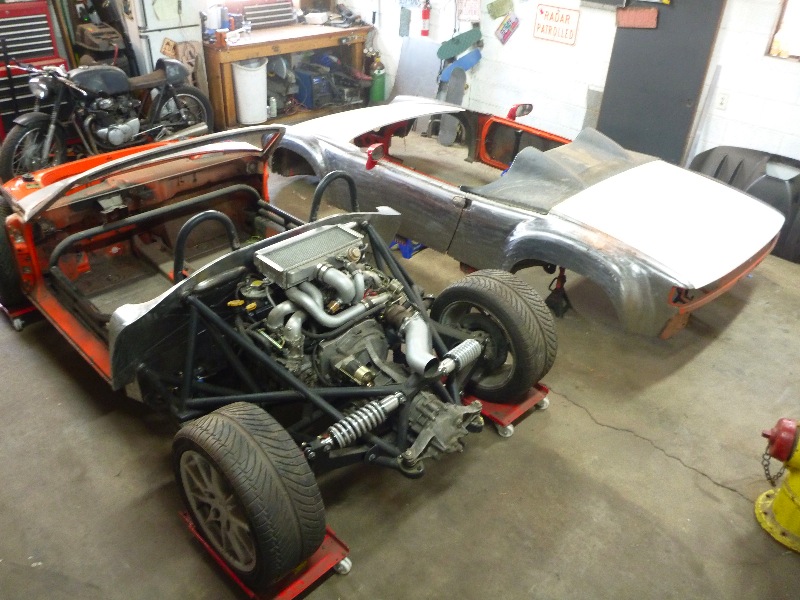 |
| plymouth37 |
 Mar 27 2011, 12:54 PM Mar 27 2011, 12:54 PM
Post
#844
|
|
Senior Member    Group: Members Posts: 1,825 Joined: 24-May 05 From: Snoqualmie, WA Member No.: 4,138 Region Association: Pacific Northwest 
|
  |
| Mike Bellis |
 Mar 27 2011, 01:41 PM Mar 27 2011, 01:41 PM
Post
#845
|
|
Resident Electrician      Group: Members Posts: 8,347 Joined: 22-June 09 From: Midlothian TX Member No.: 10,496 Region Association: None 

|
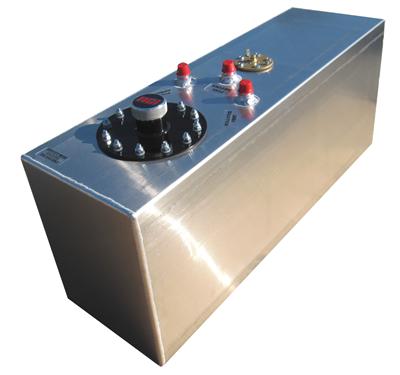
I think you should look into this fuel cell. It will fit in the stock location with minor mods and give you clearance for the tubing. http://www.summitracing.com/parts/RCI-2161A/
 |
| plymouth37 |
 Mar 27 2011, 02:02 PM Mar 27 2011, 02:02 PM
Post
#846
|
|
Senior Member    Group: Members Posts: 1,825 Joined: 24-May 05 From: Snoqualmie, WA Member No.: 4,138 Region Association: Pacific Northwest 
|
I think you should look into this fuel cell. It will fit in the stock location with minor mods and give you clearance for the tubing. http://www.summitracing.com/parts/RCI-2161A/ Nice find, that could be perfect, anybody have a pic of one like this installed? |
| plymouth37 |
 Apr 16 2011, 03:14 PM Apr 16 2011, 03:14 PM
Post
#847
|
|
Senior Member    Group: Members Posts: 1,825 Joined: 24-May 05 From: Snoqualmie, WA Member No.: 4,138 Region Association: Pacific Northwest 
|
I did some sidework for my neighbor who is restoring a victorian house next to us and earned enough dough to buy some shiny bits for the car.
If I am going to insist on keeping the antiquated 914 box I figured I had better make it shift as well as possible. After a call to JWest a Rennshifter and their stage 1 shift linkage showed up. They are discontinuing the 914 shift linkage and only have the stage one left so if you want one now is the time to order. 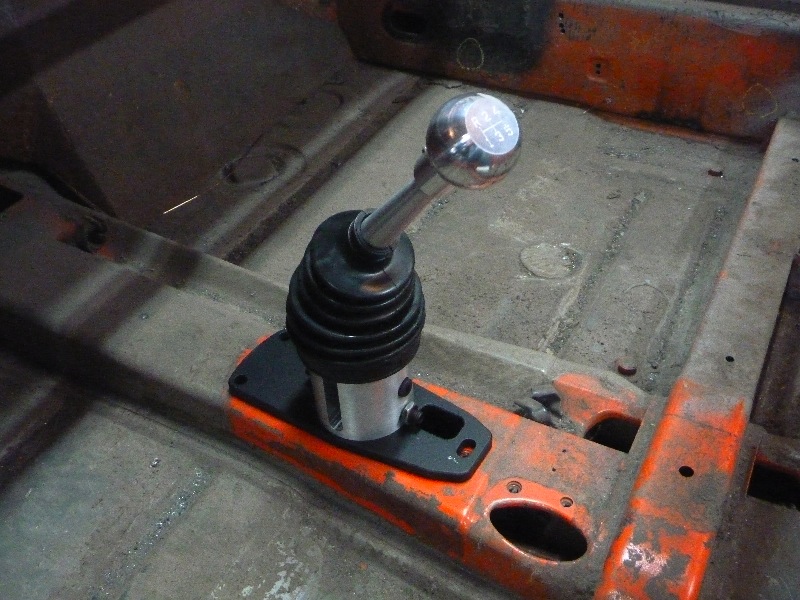 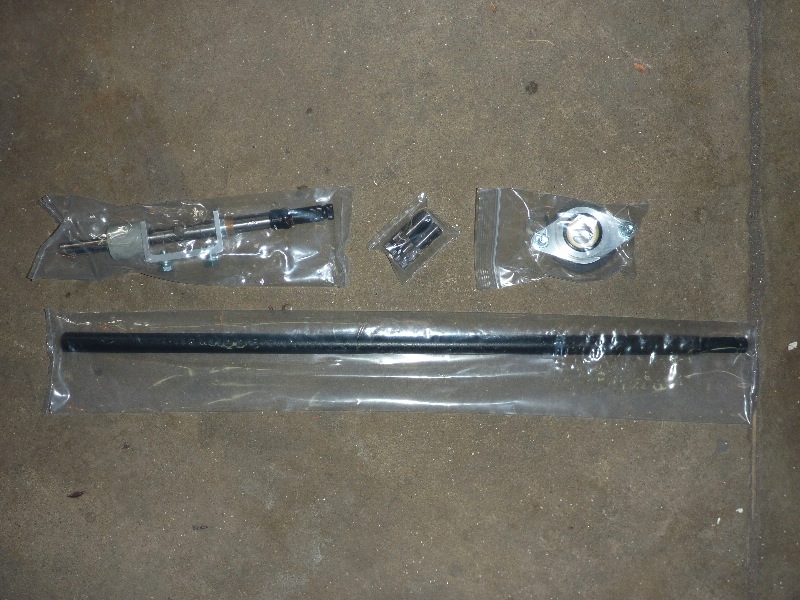 |
| 0396 |
 Apr 16 2011, 03:52 PM Apr 16 2011, 03:52 PM
Post
#848
|
|
Advanced Member     Group: Members Posts: 2,046 Joined: 13-October 03 From: L.A. Calif Member No.: 1,245 Region Association: Southern California |
|
| smontanaro |
 Apr 16 2011, 05:00 PM Apr 16 2011, 05:00 PM
Post
#849
|
|
Senior Member    Group: Members Posts: 1,190 Joined: 3-June 05 From: Evanston, IL Member No.: 4,197 Region Association: Upper MidWest |
You should talk with Mark in Bartlett, IL (screen name "Bartlett 914") about his new shifter setup.
Skip |
| fat73 |
 Apr 16 2011, 07:48 PM Apr 16 2011, 07:48 PM
Post
#850
|
|
W9R1   Group: Members Posts: 244 Joined: 7-May 05 From: tampa,fl Member No.: 4,043 Region Association: South East States |
I did some sidework for my neighbor who is restoring a victorian house next to us and earned enough dough to buy some shiny bits for the car. If I am going to insist on keeping the antiquated 914 box I figured I had better make it shift as well as possible. After a call to JWest a Rennshifter and their stage 1 shift linkage showed up. They are discontinuing the 914 shift linkage and only have the stage one left so if want one now is the time to order.   You won't regret that shifter. Let me know how the other parts work out with the Renegade setup. (clearance wise) |
| banksyinoz |
 May 14 2011, 05:12 PM May 14 2011, 05:12 PM
Post
#851
|
|
finally getting back into it   Group: Members Posts: 223 Joined: 17-June 05 From: queensland, aus Member No.: 4,293 Region Association: Australia and New Zealand |
(IMG:style_emoticons/default/pray.gif)
OMFG i am inspired, i love this, cant wait to see the final result |
| tscrihfield |
 May 14 2011, 05:31 PM May 14 2011, 05:31 PM
Post
#852
|
|
Drive Fast and Take Chances    Group: Members Posts: 643 Joined: 8-September 10 From: Amelia Ohio Member No.: 12,156 Region Association: None 
|
(IMG:style_emoticons/default/pray.gif) OMFG i am inspired, i love this, cant wait to see the final result (IMG:style_emoticons/default/agree.gif) This is one of those threads you hope that has been finished already from years ago.... So you can read it from start to finish without waiting! Impaitience takes over when watching a Thread like this one! Great work! You are quite a fabricator! (IMG:style_emoticons/default/popcorn[1].gif) Thomas |
| 513mugsy |
 Jun 3 2011, 08:27 AM Jun 3 2011, 08:27 AM
Post
#853
|
|
Newbie  Group: Members Posts: 17 Joined: 1-June 11 From: Cincinnati Member No.: 13,143 Region Association: Upper MidWest |
This has to be the most mind blowing buildup that I have ever come across. Dana you have to be the most productive fab'er that I have seen. I have a couple of questions... how much of this just comes out of your head and how much have you designed out on paper that we don't see? And how much weight could be saved if you redesigned the rear trailing arms to a chromoly tubing setup...maybe 20-25 lbs a pc? It took me 12 hours to read it all from the start. Very impressed and looking forward to seeing the finished product.
|
| plymouth37 |
 Jun 3 2011, 08:48 PM Jun 3 2011, 08:48 PM
Post
#854
|
|
Senior Member    Group: Members Posts: 1,825 Joined: 24-May 05 From: Snoqualmie, WA Member No.: 4,138 Region Association: Pacific Northwest 
|
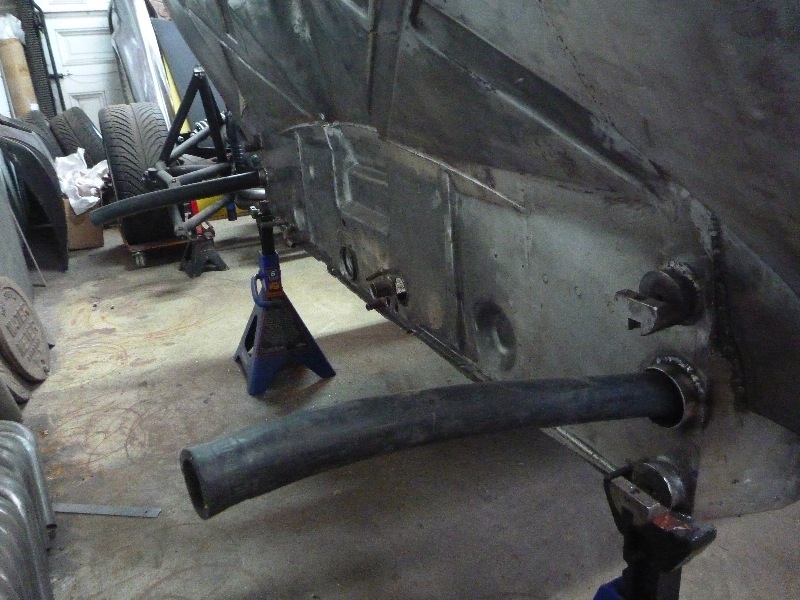
I ran the coolant lines today. There are a few ways to run them through a 914, I used to have rubber lines running below the floor but wanted to integrate them into the car a little better so I decided to try a different route. I poked around the site and really liked the way Britain Smith ran them in his subie conversion and decided to follow a similar path.
First I welded in tubing that led through the front firewall into the passages that pass beneath the gas tank, 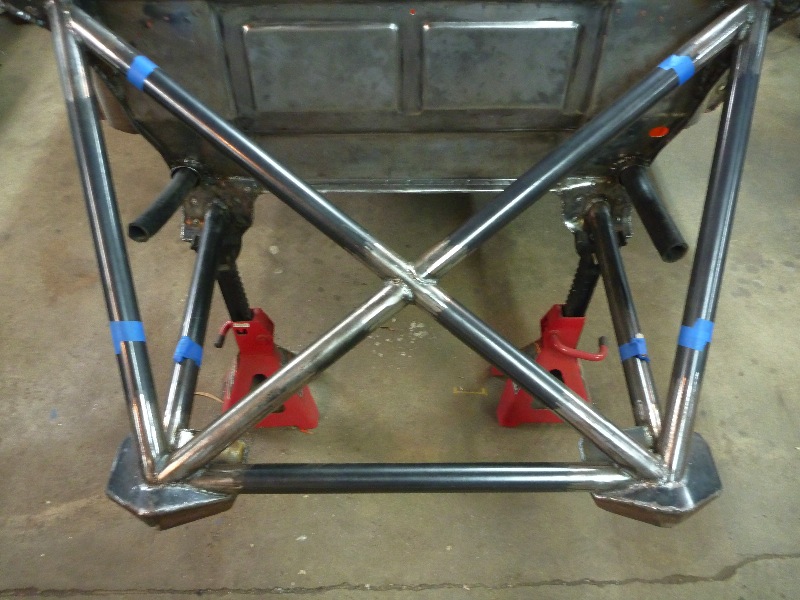 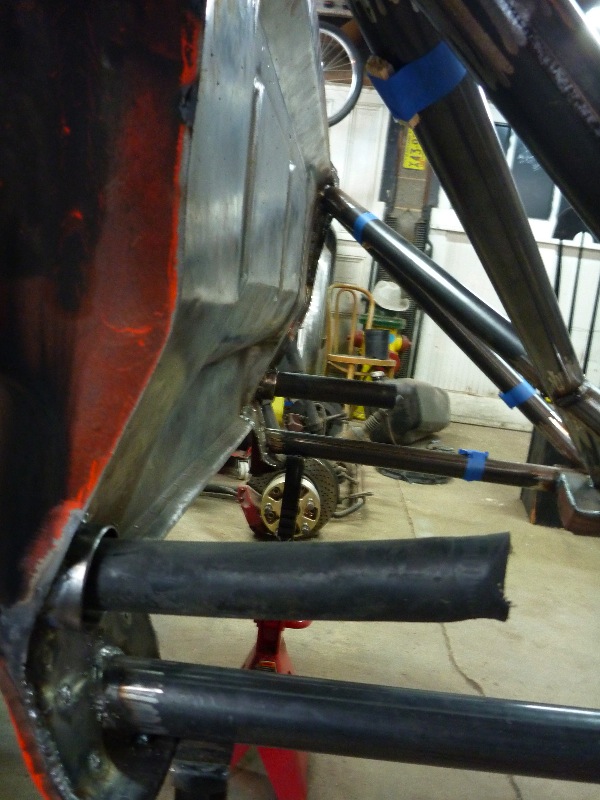 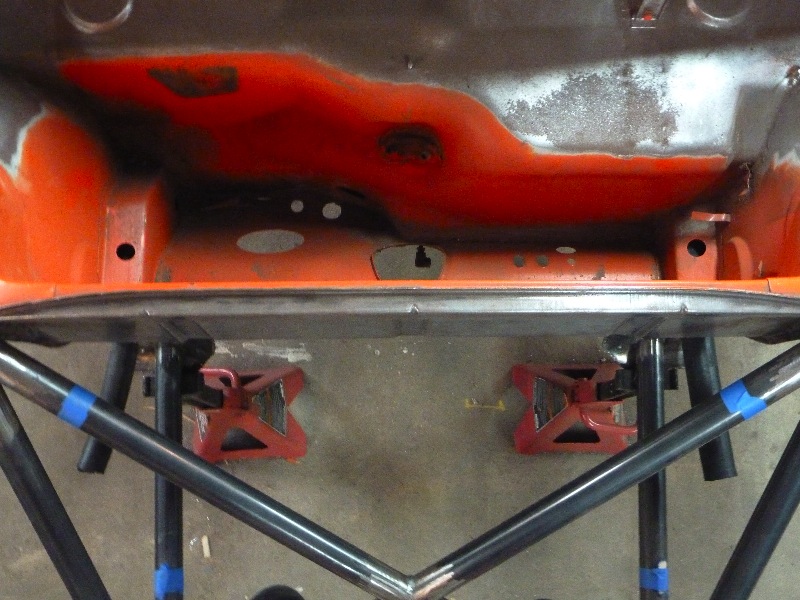 |
| plymouth37 |
 Jun 3 2011, 08:51 PM Jun 3 2011, 08:51 PM
Post
#855
|
|
Senior Member    Group: Members Posts: 1,825 Joined: 24-May 05 From: Snoqualmie, WA Member No.: 4,138 Region Association: Pacific Northwest 
|
Then I opened up the other end of the passage and the end of the long and welded in tubing to protect the hose from sharp edges.
Next step is to make some nice covers to seal off the area where the hose passes through the cabin. 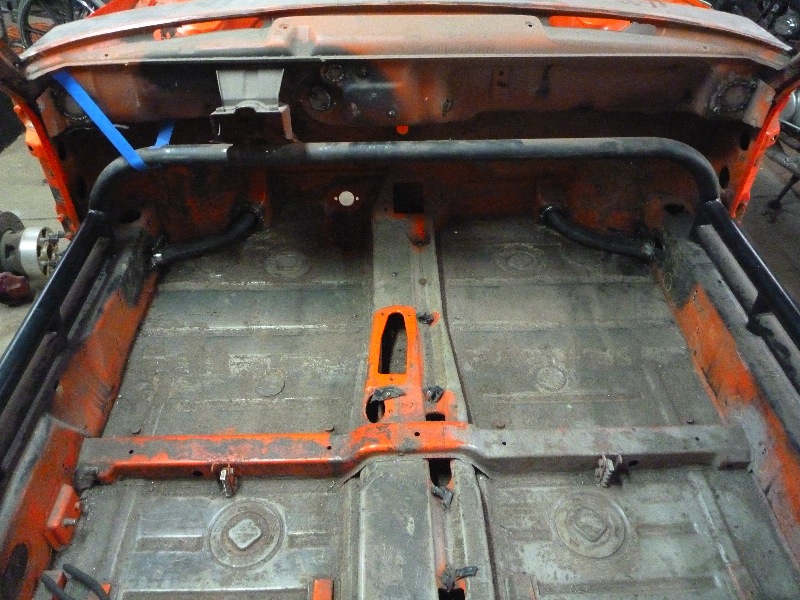 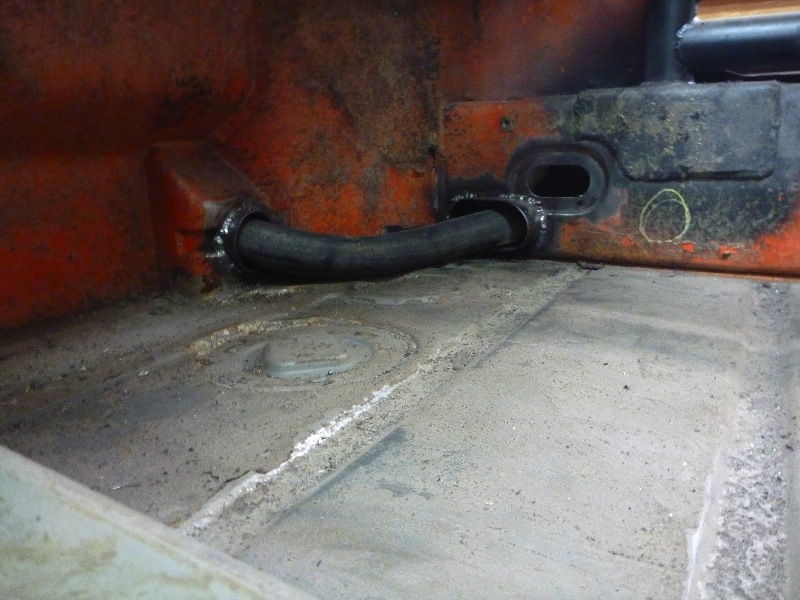 |
| plymouth37 |
 Jun 3 2011, 08:53 PM Jun 3 2011, 08:53 PM
Post
#856
|
|
Senior Member    Group: Members Posts: 1,825 Joined: 24-May 05 From: Snoqualmie, WA Member No.: 4,138 Region Association: Pacific Northwest 
|
Finally I opened up the back of the long and welded in a tube that passes through the firewall.
 |
| majkos |
 Jun 3 2011, 09:18 PM Jun 3 2011, 09:18 PM
Post
#857
|
|
Senior Member    Group: Members Posts: 1,370 Joined: 29-February 04 From: Mile High 914 Member No.: 1,729 Region Association: Rocky Mountains |
Hmmm........ (IMG:style_emoticons/default/idea.gif)
I like it. Glad you done your homework,Dana! (IMG:style_emoticons/default/thumb3d.gif) |
| Britain Smith |
 Jun 3 2011, 10:48 PM Jun 3 2011, 10:48 PM
Post
#858
|
|
Nano Member     Group: Members Posts: 2,354 Joined: 27-February 03 From: Hillsboro, OR Member No.: 364 |
Looking good. I want to see what you come up with to cover the lines inside the cabin...I might want you to make an extra set (IMG:style_emoticons/default/smile.gif) Needs to be lightweight!
-Britain |
| plymouth37 |
 Jun 13 2011, 05:59 PM Jun 13 2011, 05:59 PM
Post
#859
|
|
Senior Member    Group: Members Posts: 1,825 Joined: 24-May 05 From: Snoqualmie, WA Member No.: 4,138 Region Association: Pacific Northwest 
|
I mounted the radiator today, I am running the standard Renegade unit, due to the new position I had to change the outlet tube's angle and the location of the bleeder. Luckily there is a helicopter repair place close to my house that can weld anything to anything so they could handle welding the aluminum radiator easily.
Keeping with my tradition of mounting everything as low and inboard as possible, the radiator is mounted far inside the trunk, it is at a pretty steep angle but with proper shrouding I believe it will cool the engine just fine. 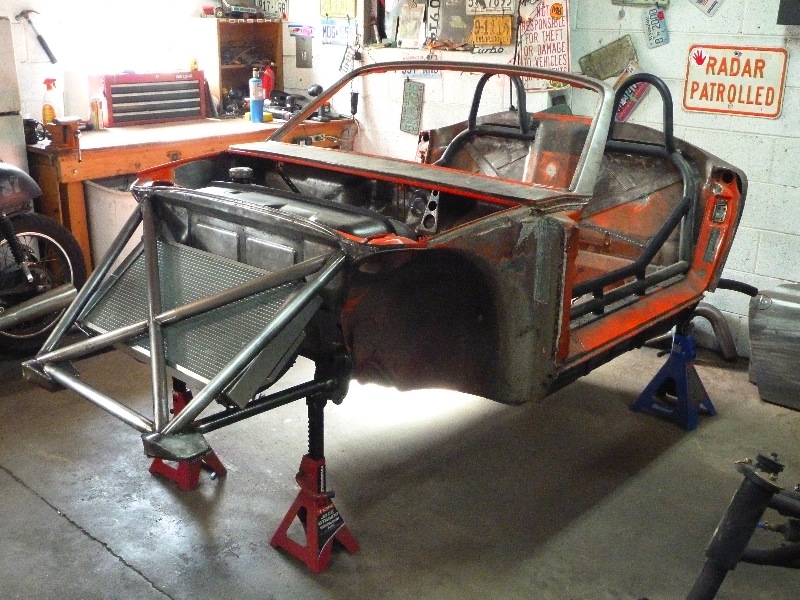 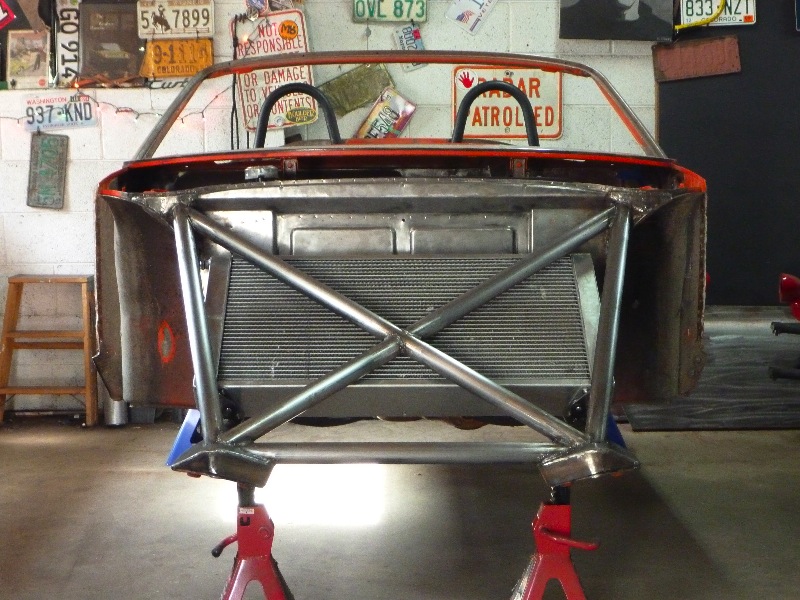 |
| plymouth37 |
 Jun 13 2011, 06:00 PM Jun 13 2011, 06:00 PM
Post
#860
|
|
Senior Member    Group: Members Posts: 1,825 Joined: 24-May 05 From: Snoqualmie, WA Member No.: 4,138 Region Association: Pacific Northwest 
|
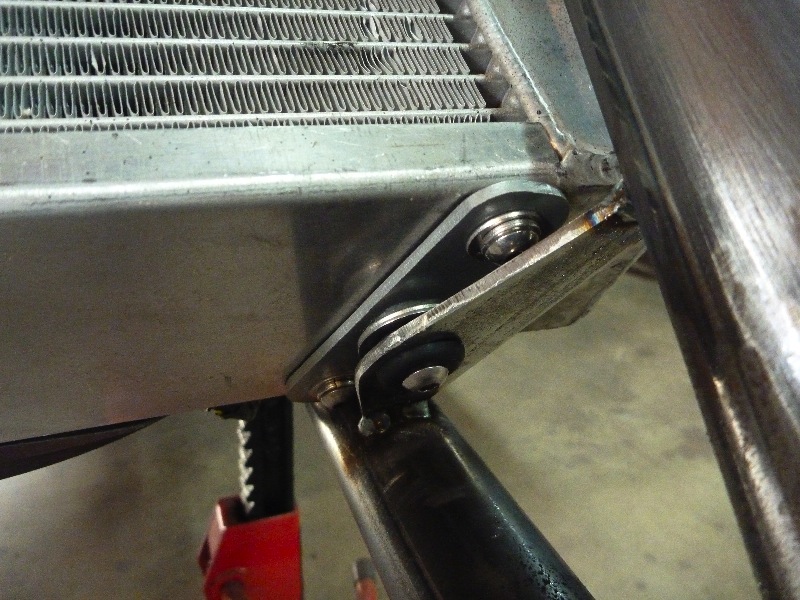
Here is a close up of the mounts, the radiator is rubber insulated at all 4 corners.
 |
  |
2 User(s) are reading this topic (2 Guests and 0 Anonymous Users)
0 Members:

|
Lo-Fi Version | Time is now: 20th April 2025 - 11:19 AM |
Invision Power Board
v9.1.4 © 2025 IPS, Inc.


