|
|
|
Porsche, and the Porsche crest are registered trademarks of Dr. Ing. h.c. F. Porsche AG.
This site is not affiliated with Porsche in any way. Its only purpose is to provide an online forum for car enthusiasts. All other trademarks are property of their respective owners. |
|
|

  |

| echocanyons |
 Feb 13 2004, 01:51 PM Feb 13 2004, 01:51 PM
Post
#21
|
|
Advanced Member  Group: Benefactors Posts: 2,096 Joined: 24-December 02 From: Bay Area, CA Member No.: 7 Region Association: Central California |
So what did it take to pull your hubs, I am quite stuck at this point(but harvesting them from a 911)
Is there a tool or what? |
   |

 
|
| Jeffs9146 |
Feb 13 2004, 02:23 PM
Post
#22
|
|
Ski Bum Group: Members Posts: 4,062 Joined: 10-January 03 From: Discovery Bay, Ca Member No.: 128 |
I remove the bearing retainer plate, set the arms on the edge of the table and start pounding with the following tools!!
Jeff Attached image(s) 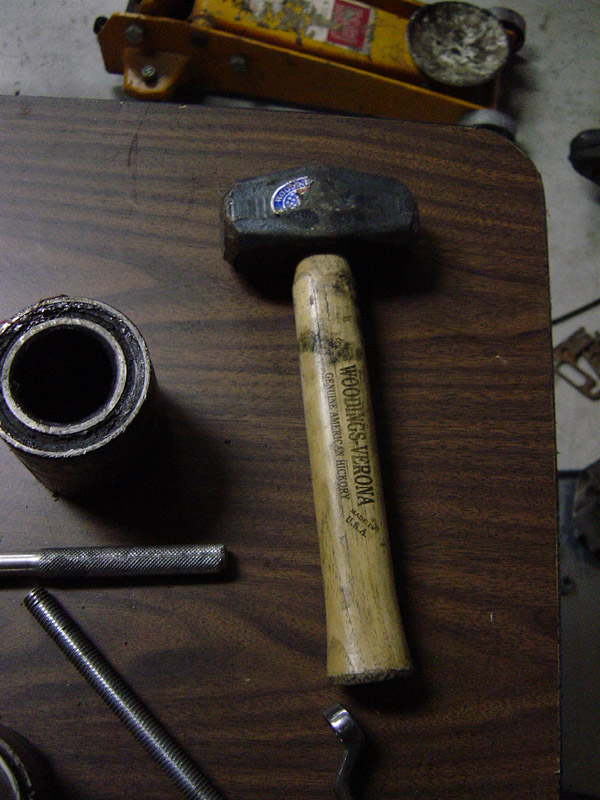
|
|
|
|
| Jeffs9146 |
Feb 13 2004, 02:24 PM
Post
#23
|
|
Ski Bum Group: Members Posts: 4,062 Joined: 10-January 03 From: Discovery Bay, Ca Member No.: 128 |
Tool #2
Attached image(s) 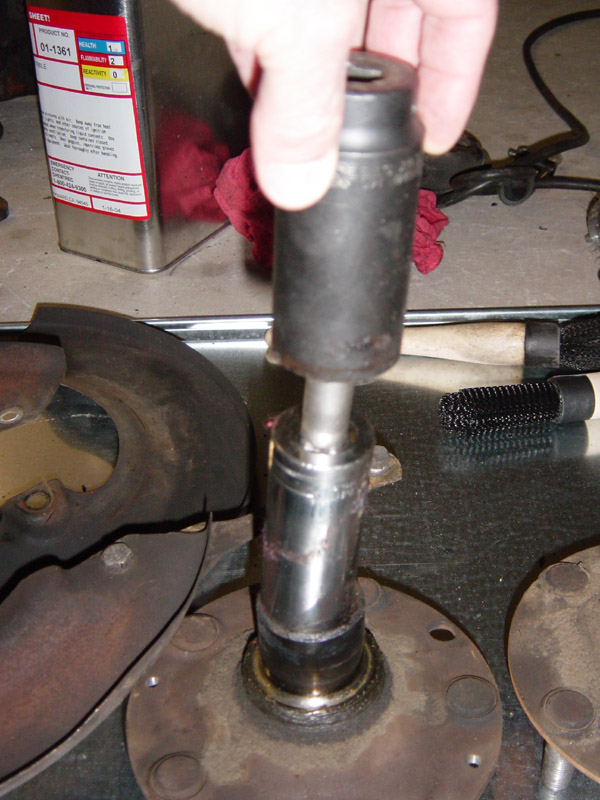
|
|
|
|
| Jeffs9146 |
Feb 13 2004, 02:24 PM
Post
#24
|
|
Ski Bum Group: Members Posts: 4,062 Joined: 10-January 03 From: Discovery Bay, Ca Member No.: 128 |
Tool #3
Attached image(s) 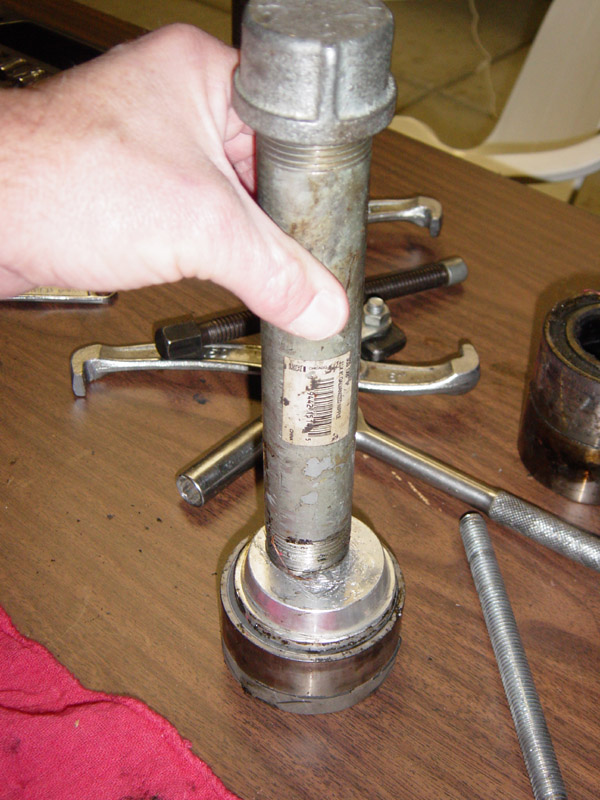
|
|
|
|
| Jeffs9146 |
Feb 13 2004, 02:27 PM
Post
#25
|
|
Ski Bum Group: Members Posts: 4,062 Joined: 10-January 03 From: Discovery Bay, Ca Member No.: 128 |
I realize this is the Mickey Mouse way to do it but I couldn't find my Bearing tap extension so I had to improvise!! I wouldn't want to use the bearings after removal anyway! (IMG:style_emoticons/default/smash.gif) (IMG:style_emoticons/default/smash.gif) (IMG:style_emoticons/default/smash.gif) (IMG:style_emoticons/default/smash.gif) (IMG:style_emoticons/default/smash.gif) (IMG:style_emoticons/default/smash.gif)
Jeff |
|
|
|
| Jeffs9146 |
Feb 13 2004, 02:52 PM
Post
#26
|
|
Ski Bum Group: Members Posts: 4,062 Joined: 10-January 03 From: Discovery Bay, Ca Member No.: 128 |
Just in case you are trying to do this while it is still in the car, there is a certain order you need to remove things!
After removing the Wheels, brakes and rotor then: 1. Remove the Axels 2. Tap hub out 3. Remove Bearing retainer plate 4. Tap out bearing out Jeff |
|
|
|
| Jeff Bonanno |
Feb 13 2004, 02:55 PM
Post
#27
|
|
il dottore Group: Members Posts: 421 Joined: 30-April 03 From: San Diego, CA Member No.: 636 |
-- tap --
taptaptap thwap! SMACK! SMA...CLANK - awfuck. |
|
|
|
| Jeffs9146 |
Feb 13 2004, 03:02 PM
Post
#28
|
|
Ski Bum Group: Members Posts: 4,062 Joined: 10-January 03 From: Discovery Bay, Ca Member No.: 128 |
QUOTE awfuck That comes when it finaly falls out and on your foot!! Jeff Attached thumbnail(s) 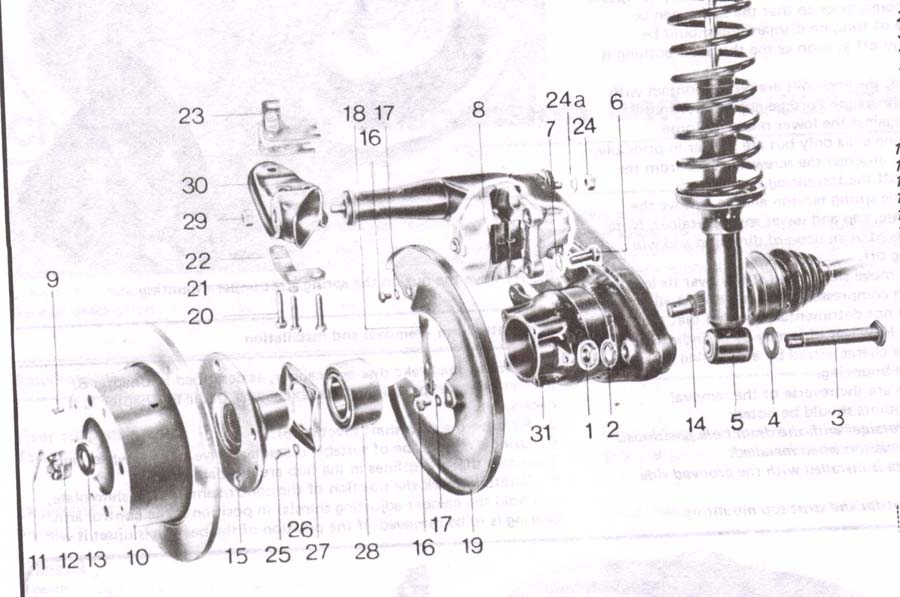
|
|
|
|
| fiid |
Feb 13 2004, 03:32 PM
Post
#29
|
|
Turbo Megasquirted Subaru Member Group: Members Posts: 2,827 Joined: 7-April 03 From: San Francisco, CA Member No.: 530 Region Association: Northern California |
QUOTE(Jeff Bonanno @ Feb 13 2004, 12:55 PM) -- tap -- taptaptap thwap! SMACK! SMA...CLANK - awfuck. (IMG:style_emoticons/default/chairfall.gif) (IMG:style_emoticons/default/chairfall.gif) (IMG:style_emoticons/default/chairfall.gif) (IMG:style_emoticons/default/lol2.gif) (IMG:style_emoticons/default/lol2.gif) ROTFLMAO |
|
|
|
| echocanyons |
Feb 13 2004, 03:55 PM
Post
#30
|
|
Advanced Member Group: Benefactors Posts: 2,096 Joined: 24-December 02 From: Bay Area, CA Member No.: 7 Region Association: Central California |
|
|
|
|
| Jeffs9146 |
Feb 13 2004, 03:59 PM
Post
#31
|
|
Ski Bum Group: Members Posts: 4,062 Joined: 10-January 03 From: Discovery Bay, Ca Member No.: 128 |
5 lb minimum!!
QUOTE -- tap -- taptaptap thwap! SMACK! SMA...CLANK - awfuck. What he means is hit it harddddddddd!! with a 5 pounder! Jeff |
|
|
|
| Jeffs9146 |
Feb 28 2004, 03:11 PM
Post
#32
|
|
Ski Bum Group: Members Posts: 4,062 Joined: 10-January 03 From: Discovery Bay, Ca Member No.: 128 |
OK, I did it all by my self!!!! Filled the ovaled hole and reamed it! OUCH! (IMG:style_emoticons/default/ohmy.gif)
Jeff Attached image(s) 
|
|
|
|
| Jeffs9146 |
Mar 24 2004, 05:36 PM
Post
#33
|
|
Ski Bum Group: Members Posts: 4,062 Joined: 10-January 03 From: Discovery Bay, Ca Member No.: 128 |
Things are still progressing! I have most of the parts powder coated and ready to reasemble! I am still cleaning the motor and I just found out my alternator was bad so I guess I wont make it for the 27th breakfast!! Oh well, maybe the next one!!
Jeff Attached image(s) 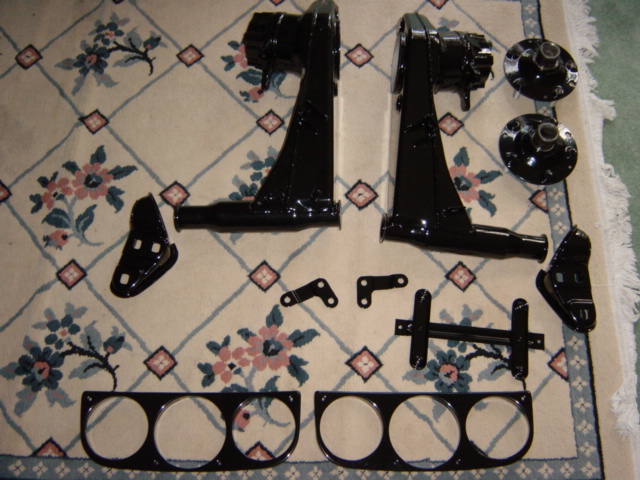
|
|
|
|
| Jeffs9146 |
May 17 2004, 04:32 PM
Post
#34
|
|
Ski Bum Group: Members Posts: 4,062 Joined: 10-January 03 From: Discovery Bay, Ca Member No.: 128 |
OK I am making some progress! I am not going to be able to attend the WCC because I have to get this going and then move to the new home in Discovery Bay!!
The suspension is done and just needs some detailing and reassembling. Attached thumbnail(s) 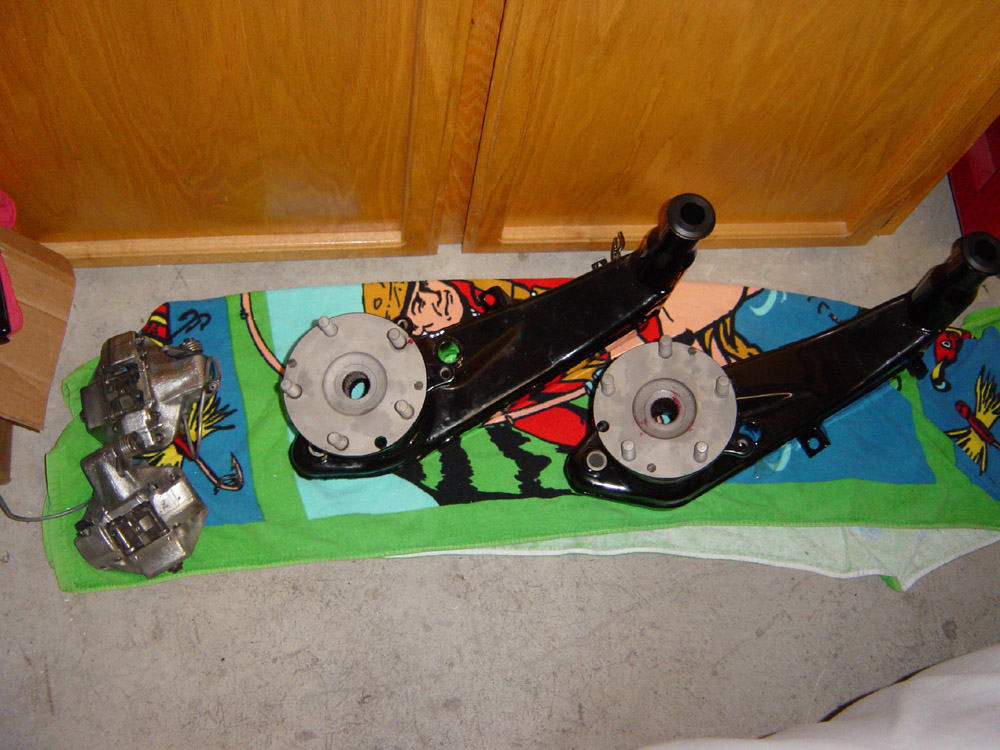
|
|
|
|
| Jeffs9146 |
May 17 2004, 04:34 PM
Post
#35
|
|
Ski Bum Group: Members Posts: 4,062 Joined: 10-January 03 From: Discovery Bay, Ca Member No.: 128 |
Now the engine just needs to be cleaned and reassembled!! Look at the intake ports!! They look new!!
Jeff Attached thumbnail(s) 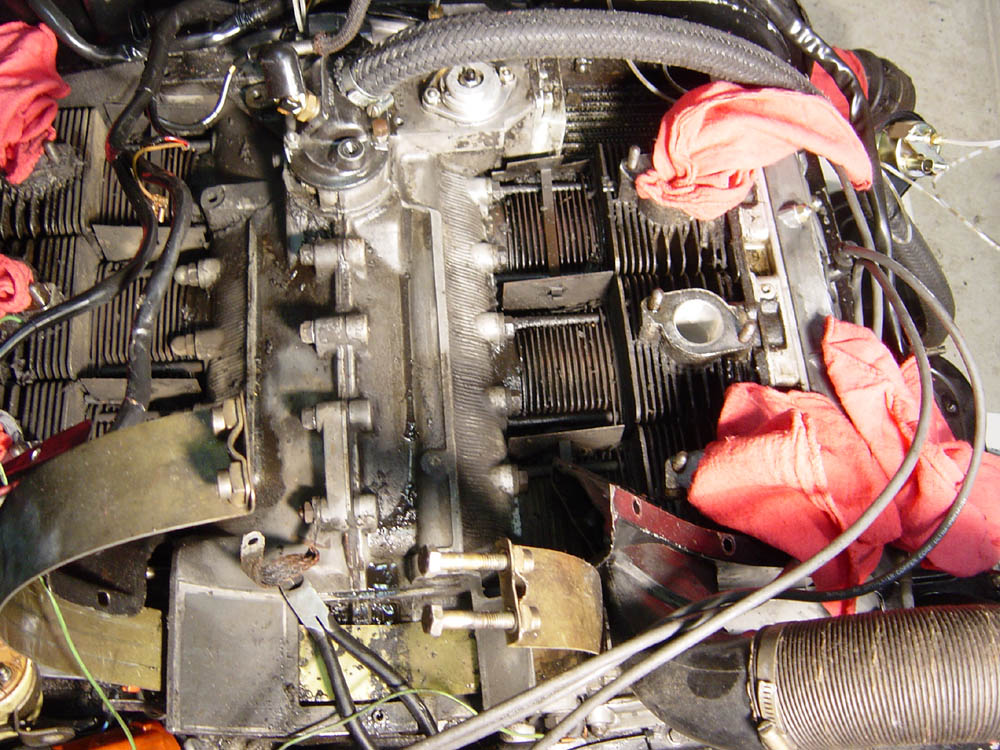
|
|
|
|
| Jeffs9146 |
May 17 2004, 04:34 PM
Post
#36
|
|
Ski Bum Group: Members Posts: 4,062 Joined: 10-January 03 From: Discovery Bay, Ca Member No.: 128 |
lskj
Attached thumbnail(s) 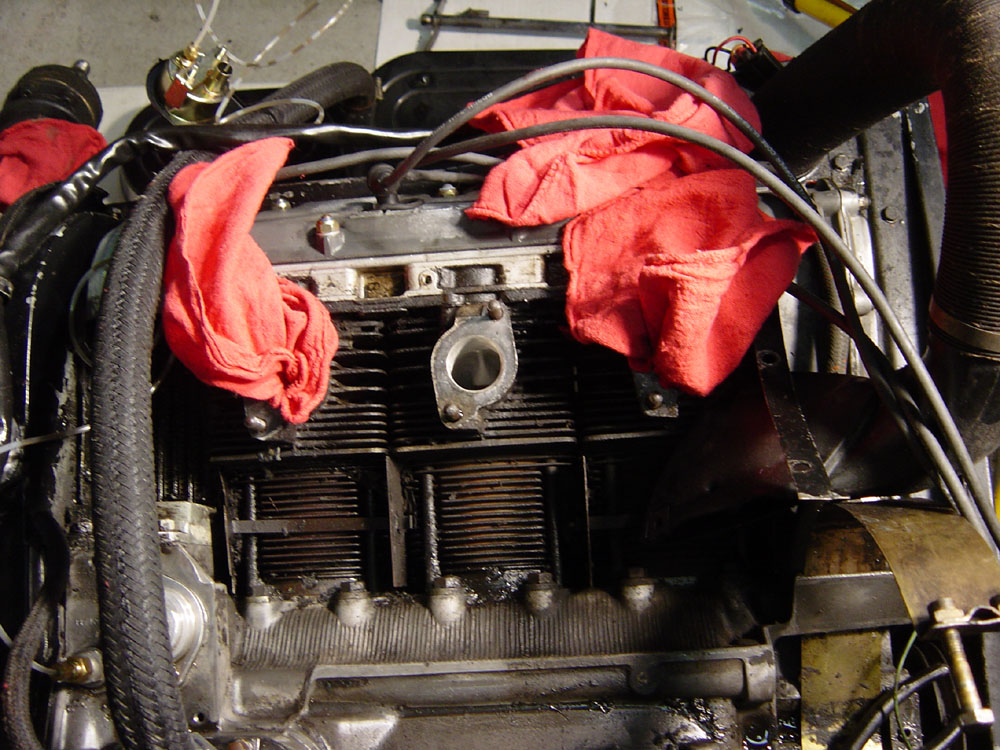
|
|
|
|
| Jeffs9146 |
May 17 2004, 04:35 PM
Post
#37
|
|
Ski Bum Group: Members Posts: 4,062 Joined: 10-January 03 From: Discovery Bay, Ca Member No.: 128 |
lskjlk Last one!
Attached thumbnail(s) 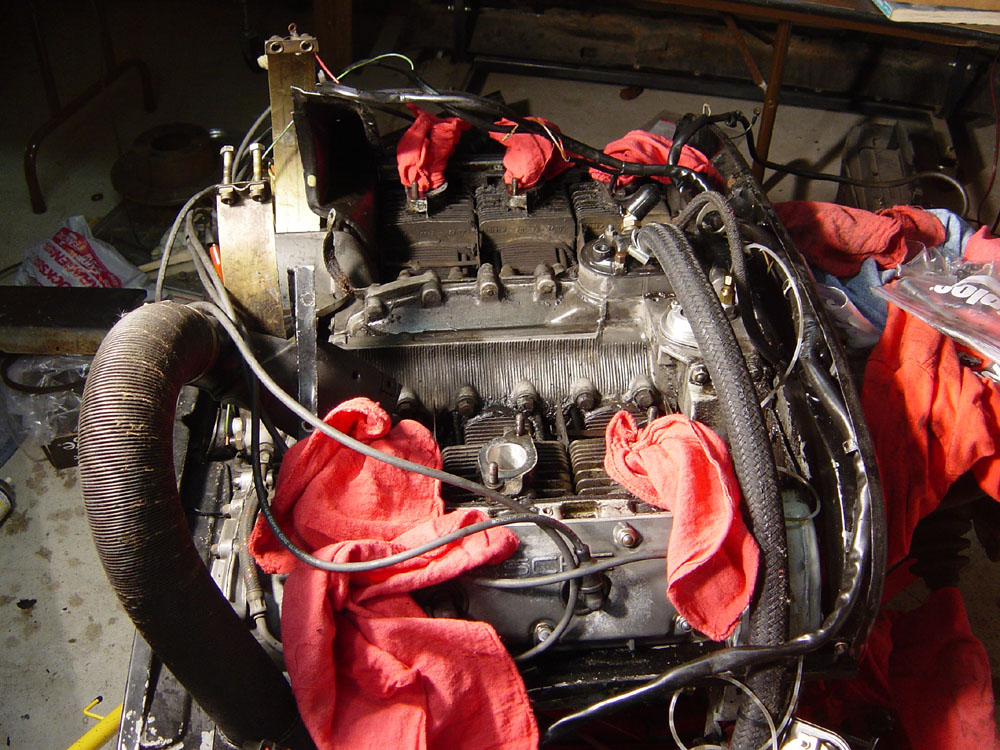
|
|
|
|
| Mueller |
May 17 2004, 04:38 PM
Post
#38
|
|
914 Freak! Group: Members Posts: 17,150 Joined: 4-January 03 From: Antioch, CA Member No.: 87 Region Association: None |
looks good Jeff.....are you selling the /6 or keeping it?
not that I have personal experiance......but you might be interested to know that out on Vasco Rd they installed some automatic speed limit signs that tell you what your current speed is......I "heard" that they flip out and flash 0 and 70 when passed while going a little over 130 (IMG:style_emoticons/default/smile.gif) |
|
|
|
| SirAndy |
May 17 2004, 04:41 PM
Post
#39
|
|
Resident German Group: Admin Posts: 41,945 Joined: 21-January 03 From: Oakland, Kalifornia Member No.: 179 Region Association: Northern California |
QUOTE(Mueller @ May 17 2004, 03:38 PM) I "heard" that they flip out and flash 0 and 70 when passed while going a little over 130 (IMG:style_emoticons/default/smile.gif) the "flash" is the camera taking a picture of your license plate (IMG:style_emoticons/default/wink.gif) |
 |
|
| Jeffs9146 |
May 17 2004, 04:45 PM
Post
#40
|
|
Ski Bum Group: Members Posts: 4,062 Joined: 10-January 03 From: Discovery Bay, Ca Member No.: 128 |
Yep, I saw those last week when I was doing the inspection on my new place!! I didn't test the 130 mph thing though....every time I go up there I see at least 3 Highway Patrol pulling someone over!! That is one hell of a fun road at top speed though!!
QUOTE are you selling the /6 or keeping it? I plan on keeping it unless I find one already done well and I can make a quick buck selling this one! The house is my focus right now!! You'll have to come out and hang on the dock some time Mueller, we are almost neighbors! Jeff |
|
|
|
|
9 User(s) are reading this topic (9 Guests and 0 Anonymous Users)
0 Members:

|
Lo-Fi Version | Time is now: 26th December 2024 - 09:35 PM |
Invision Power Board
v9.1.4 © 2024 IPS, Inc.