|
|

|
Porsche, and the Porsche crest are registered trademarks of Dr. Ing. h.c. F. Porsche AG.
This site is not affiliated with Porsche in any way. Its only purpose is to provide an online forum for car enthusiasts. All other trademarks are property of their respective owners. |
|
|
  |
| RiqueMar |
 Oct 12 2021, 07:18 PM Oct 12 2021, 07:18 PM
Post
#1021
|
|
Enrique Allen Mar     Group: Members Posts: 2,208 Joined: 28-August 08 From: San Diego, CA Member No.: 9,478 Region Association: Southern California 
|
That's looking like a 914 again, nice! Headlight adjustments are a PITA. Most 914's I can get gaps pretty even, but some there seems to be nothing you can do and some gaps are just off a bit. Takes time, opening and closing the hood a hundred times, tiny adjustments repeat... @Root_Werks - Thanks for the heads-up, I guess I'll just continue on. Frustrating, especially since the Driver-side headlight was perfect on the first-try. (IMG:style_emoticons/default/headbang.gif) |
| bahnzai |
 Oct 13 2021, 07:31 AM Oct 13 2021, 07:31 AM
Post
#1022
|
|
Member   Group: Members Posts: 335 Joined: 26-July 06 From: Columbia, SC Member No.: 6,509 Region Association: South East States 
|
Enrique, You have the the oil breather system plumbed wrong. The oil breather is an integral part of the intake system. If you leave it like this, you are going to have oil leaks. (IMG:http://www.914world.com/bbs2/uploads/post-9478-1617726247_thumb.jpg) The one on the filler neck goes to the fitting on the top of the engine case. The one directly on the tank goes to the intake elbow that is between the air flow meter and the throttle body. That makes the oil system part of the air intake system, lowers emissions and prevents oil leaks. However, the 964 used a way different oil tank from the 911 or the 914-6. So to make a 3.6 work with the 914-6, you have to add a restrictor in the line from the throttle body elbow and the oil tank. The restrictor is from a 3.2 Carrera motor, Part number 930-107-289-00. If you don't put the restrictor in, you won't be able to check the oil. Pelican LInk on the restrictor If you need pictures, let me know. Clay Clay, Thanks for the heads up on this...I had never seen that info, especially the restriction. I have my 3.6 plumbed up as you noted, but backwards on which hose was on the intake vs. the crankcase. It was a 993 vs. 964, not sure if that matters... Enrique, thanks for all the incredible details in your thread (sorry step in the middle of it, maybe it will help another 3.6 conversion do the road?) |
| RiqueMar |
 Oct 15 2021, 04:43 PM Oct 15 2021, 04:43 PM
Post
#1023
|
|
Enrique Allen Mar     Group: Members Posts: 2,208 Joined: 28-August 08 From: San Diego, CA Member No.: 9,478 Region Association: Southern California 
|
This post is ALL about locks and hardware. For years, I've been looking forward to posting assembly photos (assembly-porn). While I might be nerd-ing out a bit, I'm happy the time has come for my car to shine! First-off, locks. For those of you that are having problems with your keys, locks, ignition, etc. - look no-further than @TheCabinetmaker . Curt does excellent work, flawless really. I received these a little while back, and finally have the chance to install everything. Very satisfied with the work as all the parts have been retreated, rebuilt, and assembled to my new matching key-set (IMG:style_emoticons/default/smilie_pokal.gif)
Further, to compliment my 'shiny-new' locks I purchased 'shiny-new' hardware from @bdstone914 . Loving the look of the re-plated and finished pieces, from the trunk-latches, to my tow-hook, and everything in-between. (IMG:style_emoticons/default/w00t.gif) (IMG:style_emoticons/default/bye1.gif) 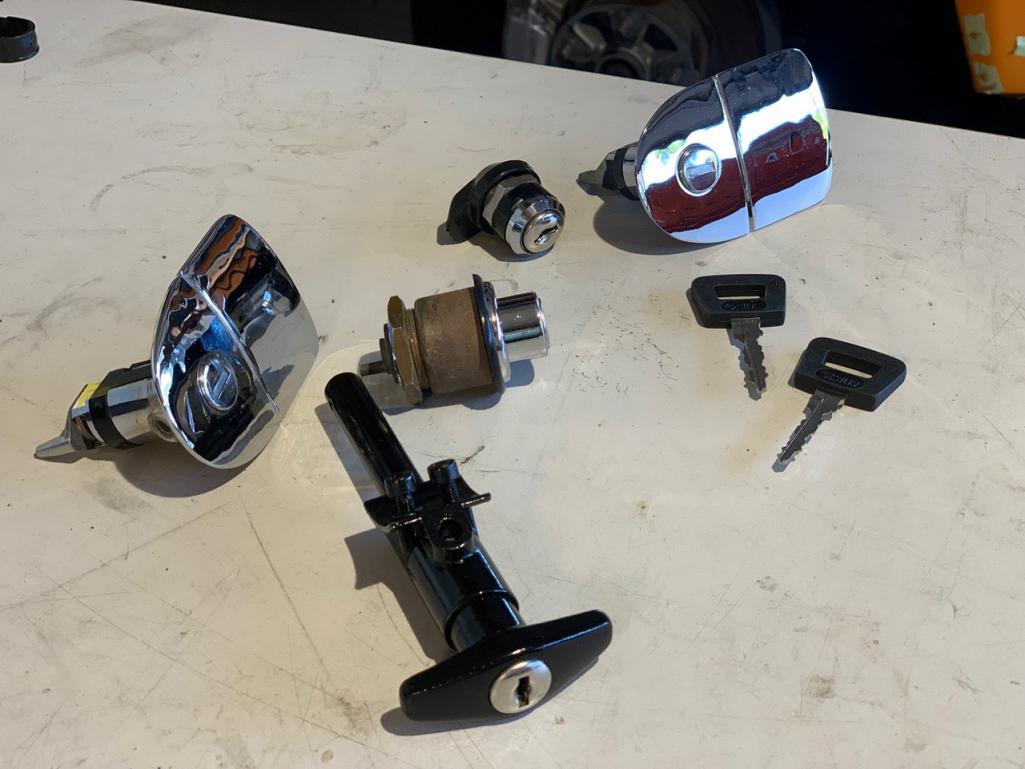 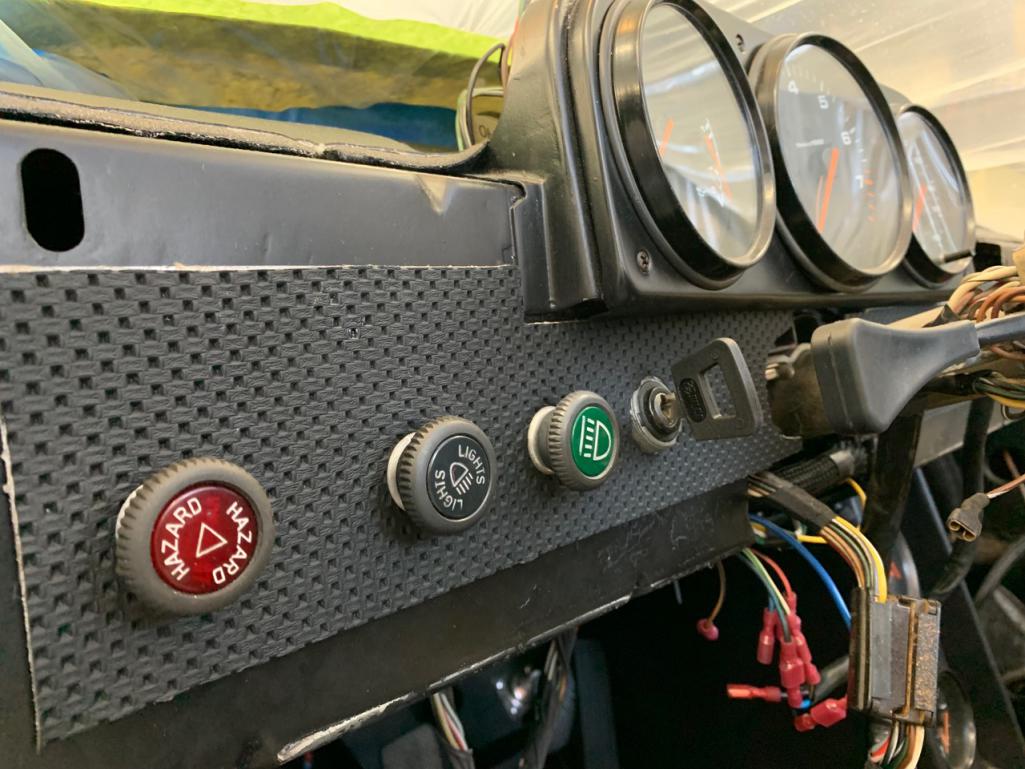 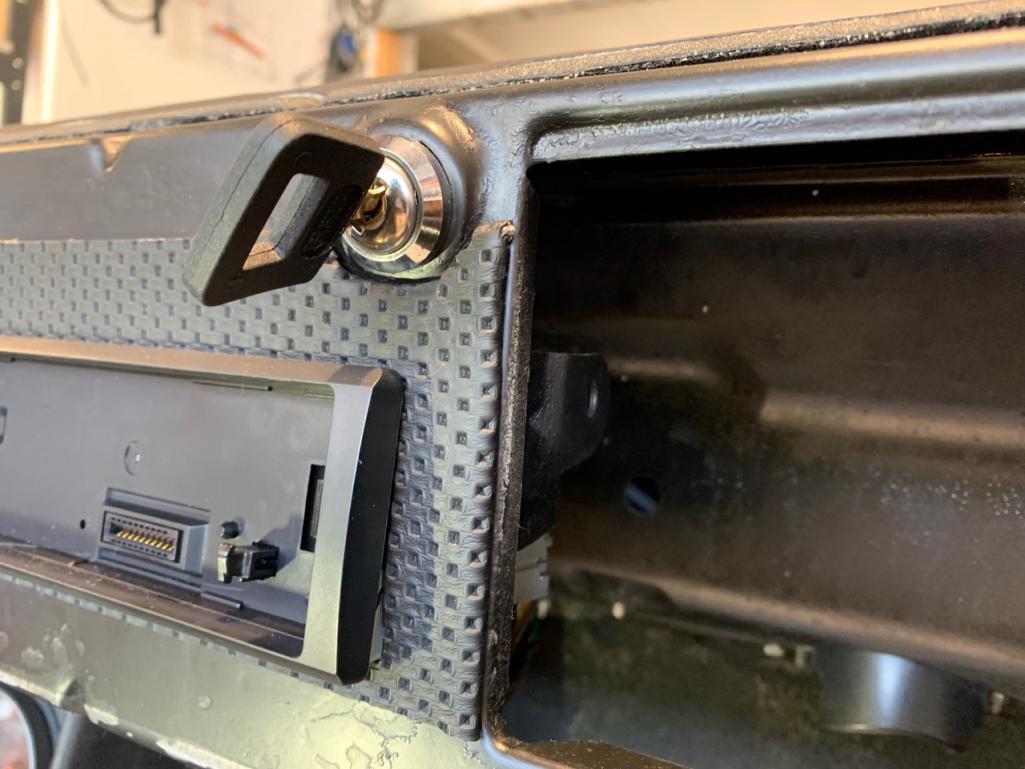 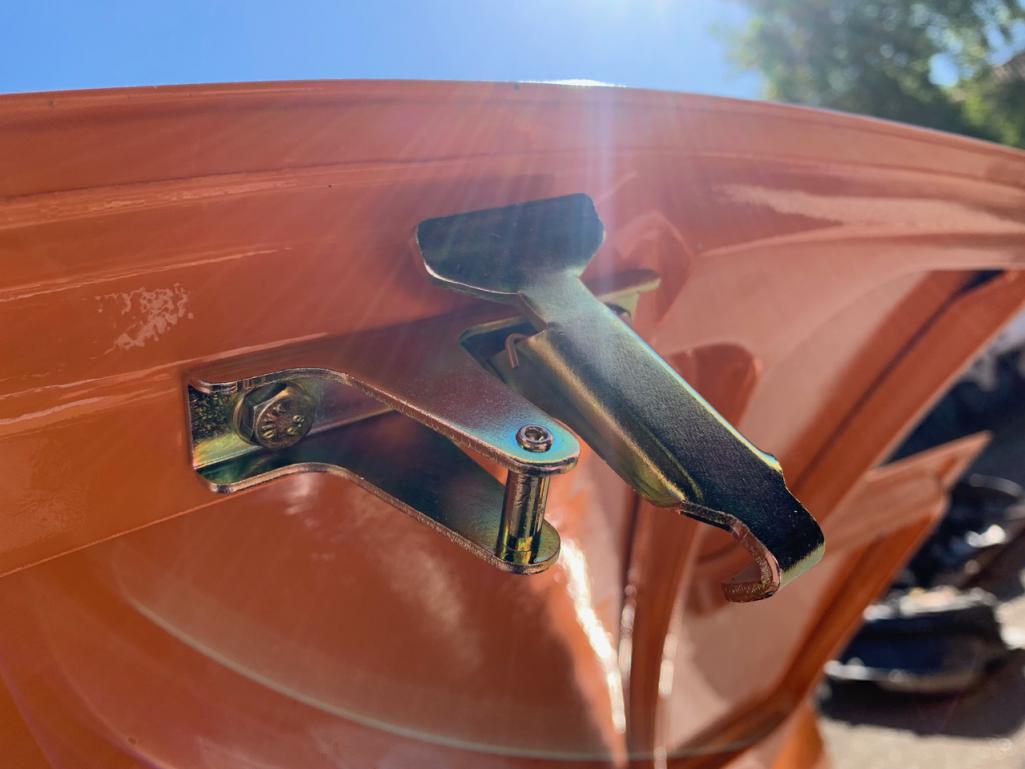 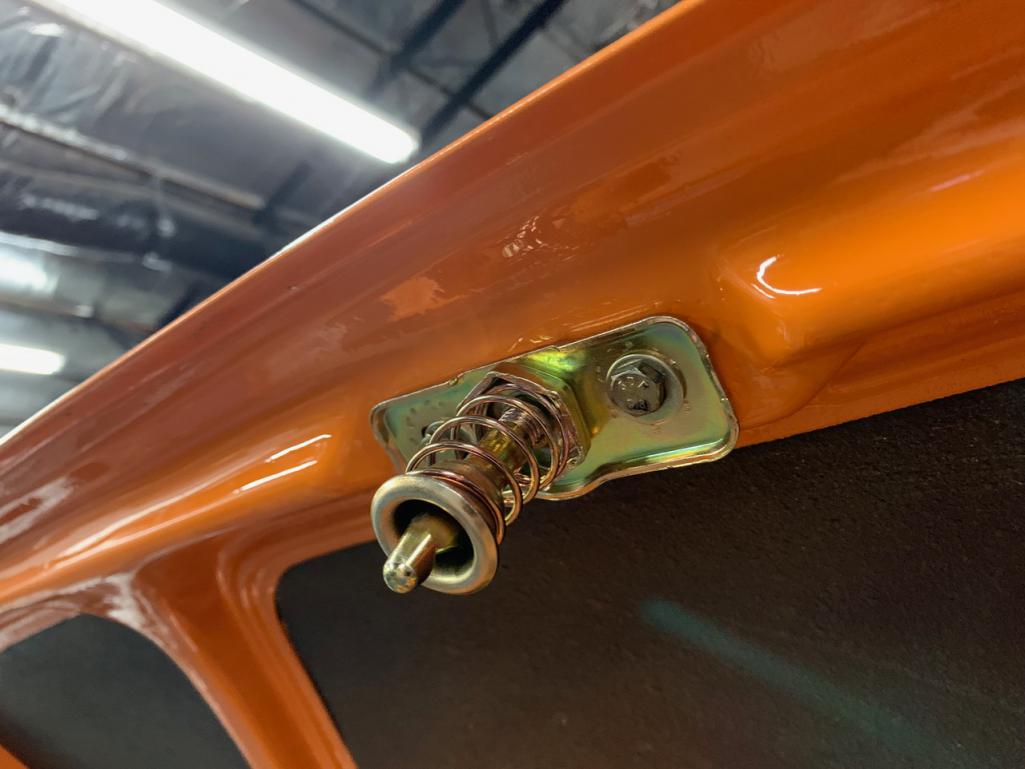 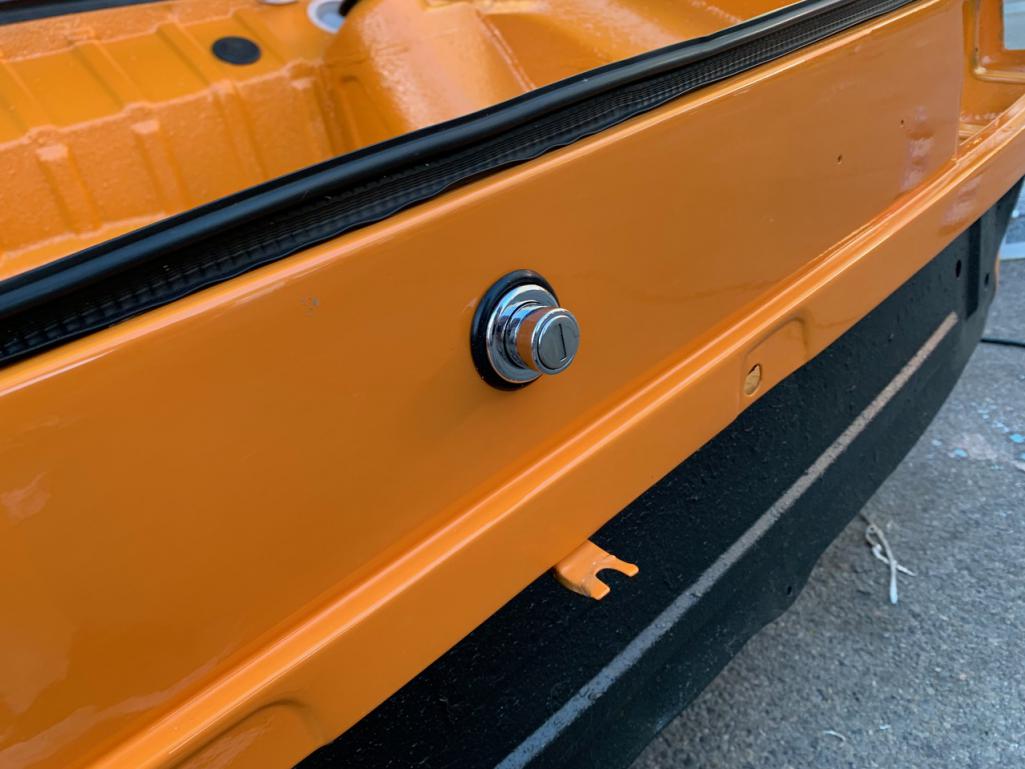 |
| RiqueMar |
 Oct 17 2021, 10:36 AM Oct 17 2021, 10:36 AM
Post
#1024
|
|
Enrique Allen Mar     Group: Members Posts: 2,208 Joined: 28-August 08 From: San Diego, CA Member No.: 9,478 Region Association: Southern California 
|
Small but significant progress early-on this weekend, I spent the majority of Friday night adjusting the ‘gaps’ on the headlights and eye-brows. I’ve come to realize there’s really no ‘trick’ to this, other than making sure the ‘eye-brows’ are secure and aligned first, then making very-small adjustments to the headlight mechanism and hood. With that done, we can finally finish the ‘cut and buff’ in this area, and place the rest of the hardware, covers, and turn-signal lenses.
One thing I did different: I replaced the rubber-grommets holding on the eye-brows with standard M6 bolts; Much easier to install, align, and keep them in place. Originally, from my research, the factory used the rubber-solution to avoid injury, as when One is adjusting the headlight alignment and position, it’s very common that the motor will cycle and ‘Bite’ Ones hand. If this where to happen, the rubber pieces would ‘give way’ and the hand would be unharmed. I’ll wager that the factory anticipated this with new or inexperienced owners. Knowing my way around these cars, I disconnect the battery when doing this type of work and assume the risk. The result? A slightly easier process, and no-risk of loosing these pieces on the highway or after bumps (it happens, believe me). (IMG:style_emoticons/default/bye1.gif) 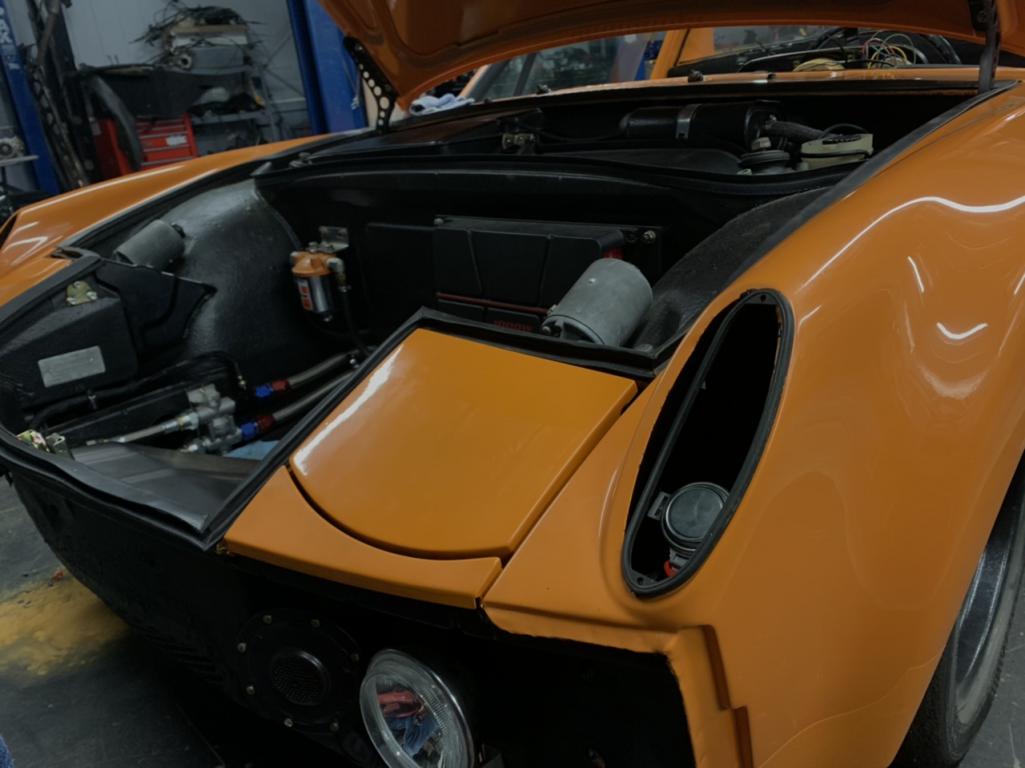 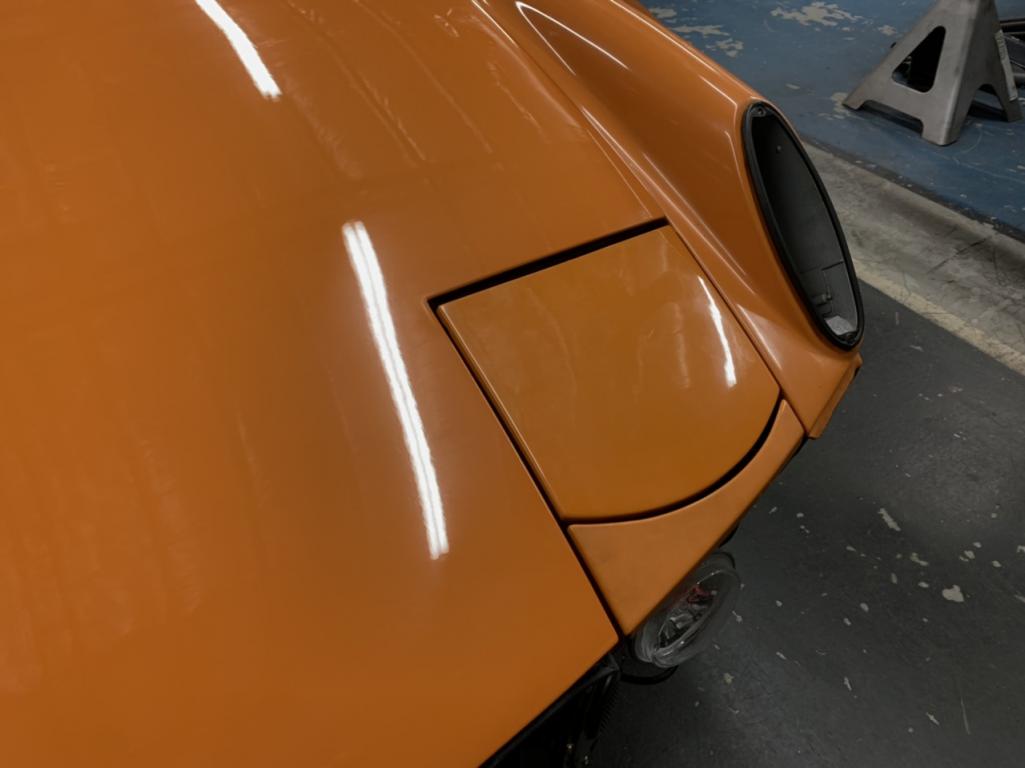 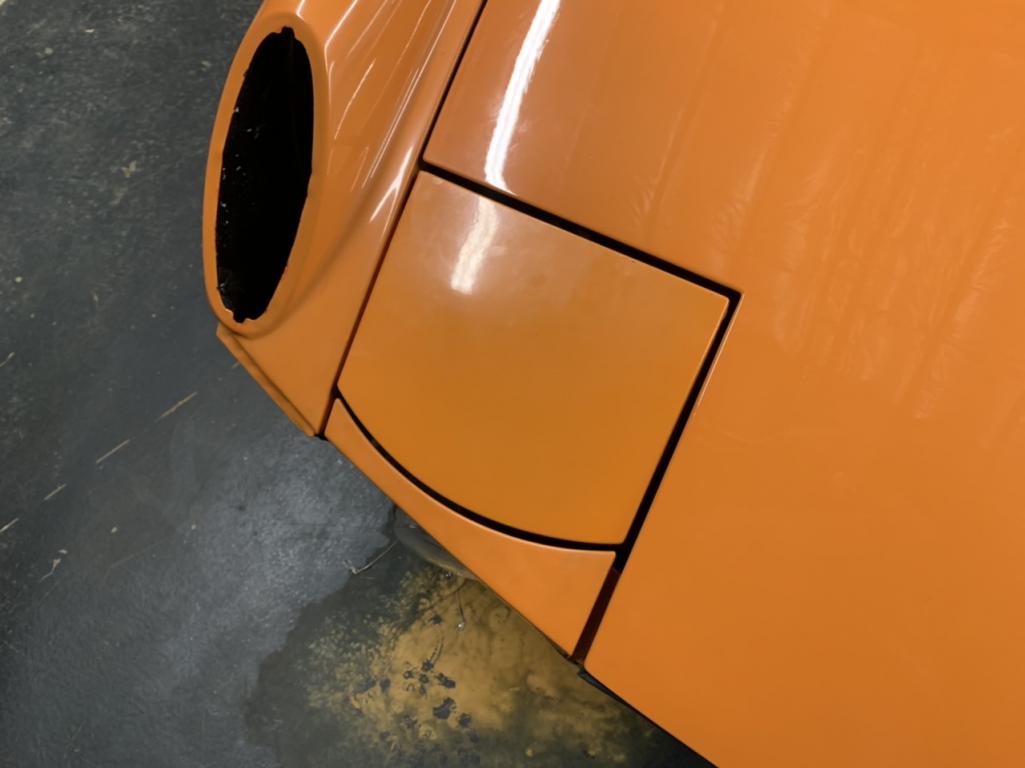 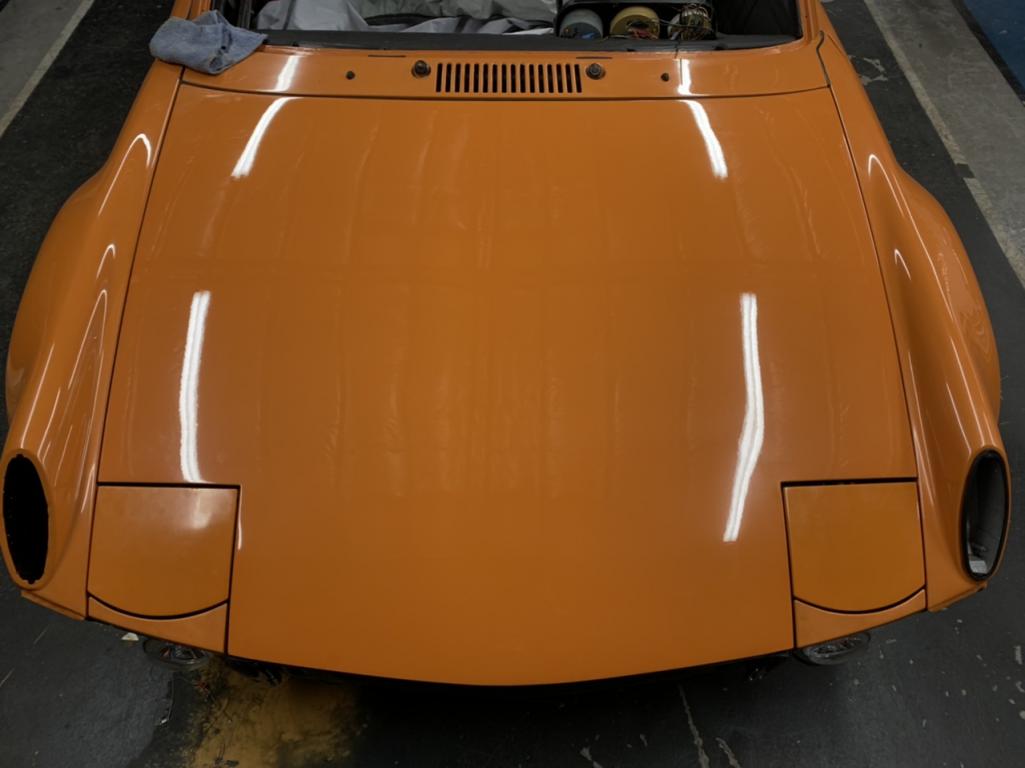 |
| RiqueMar |
 Oct 18 2021, 10:56 AM Oct 18 2021, 10:56 AM
Post
#1025
|
|
Enrique Allen Mar     Group: Members Posts: 2,208 Joined: 28-August 08 From: San Diego, CA Member No.: 9,478 Region Association: Southern California 
|
@bahnzai
@ClayPerrine Hi Guys, carved out time on the weekend to mock-up (and share for anyone with a similar conversion) the oil/intake system. Granted, I'll clean this up and sort correctly, but wanted to share here and 'check' with Clay. Is this the right-setup? 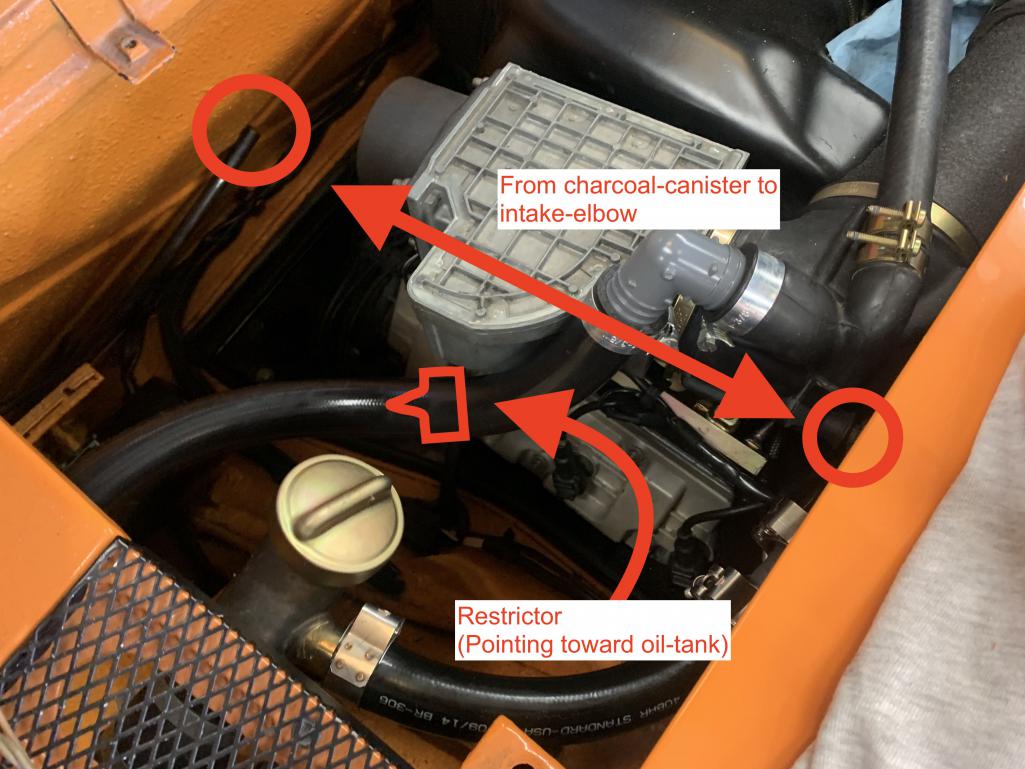 |
| ClayPerrine |
 Oct 18 2021, 01:22 PM Oct 18 2021, 01:22 PM
Post
#1026
|
|
Life's been good to me so far.....                Group: Admin Posts: 16,225 Joined: 11-September 03 From: Hurst, TX. Member No.: 1,143 Region Association: NineFourteenerVille 
|
@bahnzai @ClayPerrine Hi Guys, carved out time on the weekend to mock-up (and share for anyone with a similar conversion) the oil/intake system. Granted, I'll clean this up and sort correctly, but wanted to share here and 'check' with Clay. Is this the right-setup?  That's exactly the right plumbing. I left the factory elbow attached to the throttlle body, and put the aftermarket elbow out next to the air flow meter, but otherwise it is identical. I didn't have to add plumbing to the idle air motor. I suspect it can affect the idle response. Clay |
| RiqueMar |
 Oct 18 2021, 03:05 PM Oct 18 2021, 03:05 PM
Post
#1027
|
|
Enrique Allen Mar     Group: Members Posts: 2,208 Joined: 28-August 08 From: San Diego, CA Member No.: 9,478 Region Association: Southern California 
|
That's exactly the right plumbing. I left the factory elbow attached to the throttlle body, and put the aftermarket elbow out next to the air flow meter, but otherwise it is identical. I didn't have to add plumbing to the idle air motor. I suspect it can affect the idle response. Clay @ClayPerrine - Gracias Señor Clay, your feedback is always invaluable! Attaching photos from Clays progress thread (as well as mine) to show the engine-bay and connect for those following along. I think it may be helpful, it sure is to me. While his intake is 'flipped', we are referencing the hose connections. My next step is connecting the lines from the charcoal canister located above the fuel-tank. While not 'vital', I do think it will help the engine run more similar to its original design. My anticipated setup is as follows: Connect 1-line to the intake manifold elbow, and the other-line to the a port on the passenger-side plastic intake structure. If I'm correct, the port on the plastic manifold should 'blow' air from the engine into the charcoal canister, and the line connected to the rubber-intake elbow should 'suck' vapor / air / etc into the engine. (IMG:style_emoticons/default/bye1.gif) 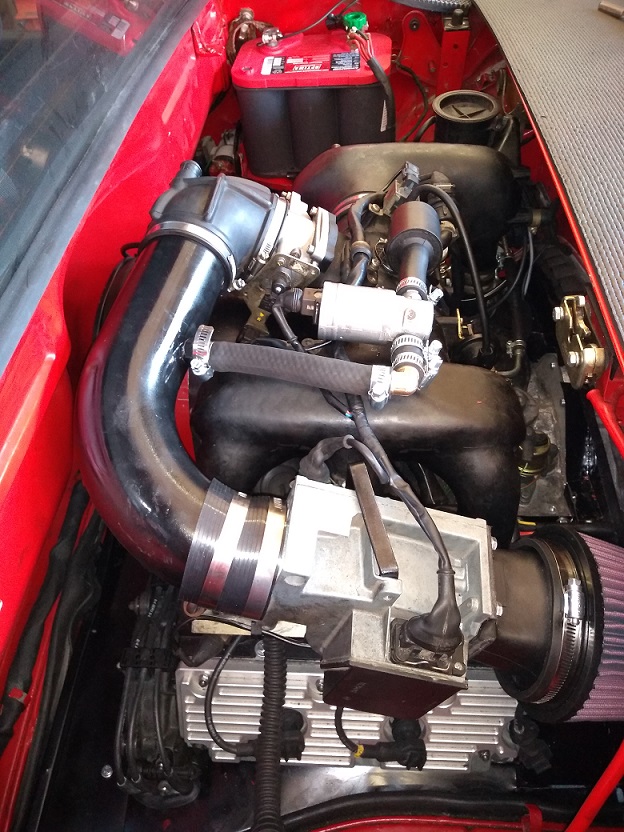 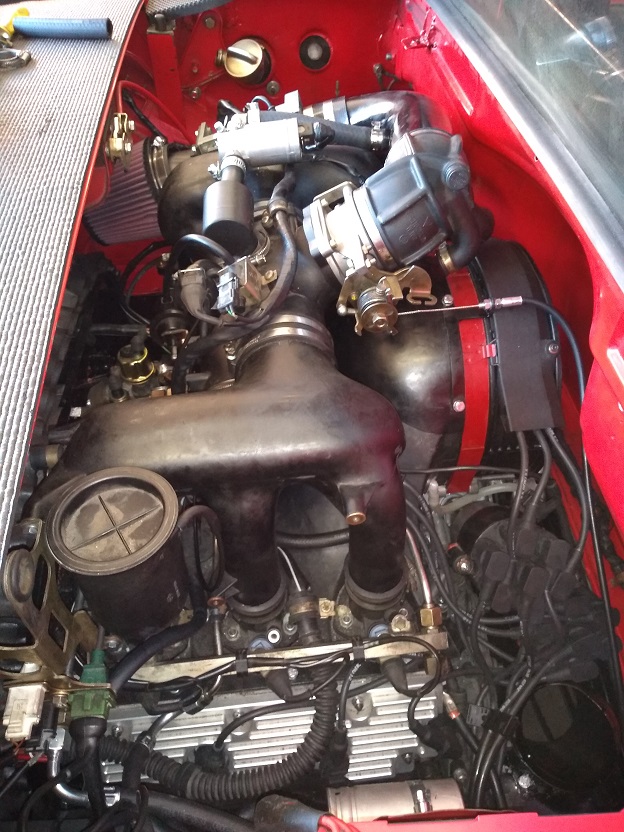 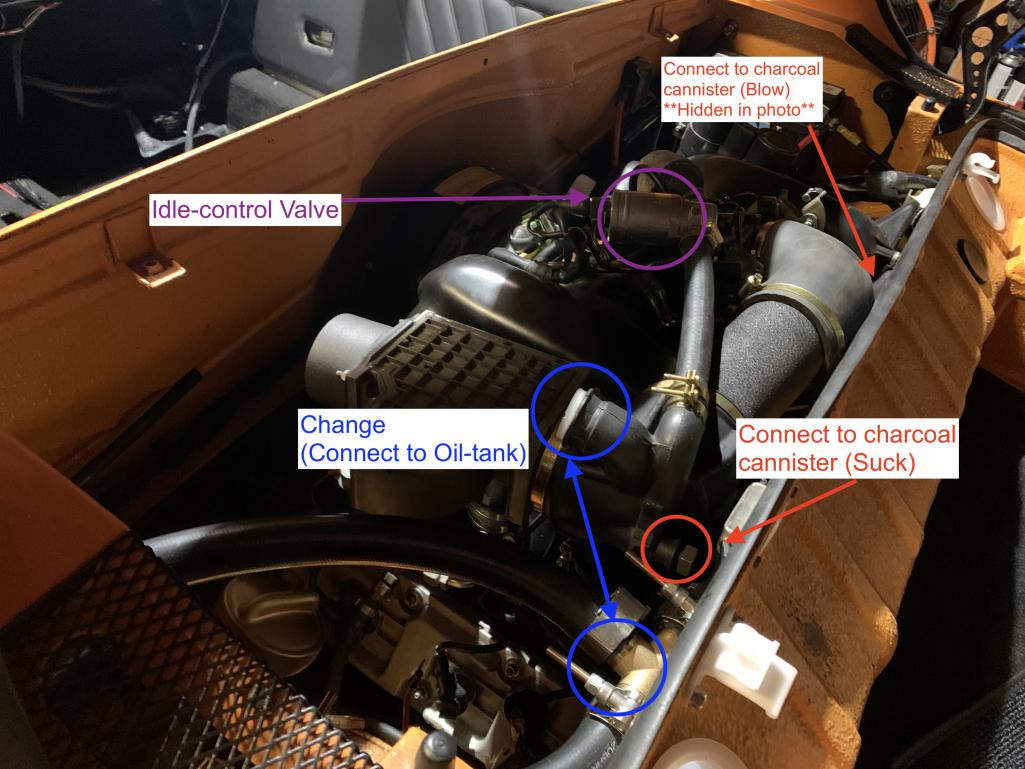 |
| RiqueMar |
 Oct 25 2021, 03:17 PM Oct 25 2021, 03:17 PM
Post
#1028
|
|
Enrique Allen Mar     Group: Members Posts: 2,208 Joined: 28-August 08 From: San Diego, CA Member No.: 9,478 Region Association: Southern California 
|
Things are a bit 'slow-go' right now. Ever since moving the car out to my parents house to get the final body-work addressed, I've lost the 'rhythm' I had of working 1-2 hours every day. To try to get back into a significant stride I figured I would start tackling interior items. So, this Saturday was all about carpet as the car continues to get buffed out... Under the supervision of my dog Apollo, of course.
For those with similar projects, see the the 914Rubber website. While I originally wanted to go with the '701 Early Charcoal German Loop' because I didn't like the previous black-kit I installed - this wasn't available, so I settled for the 'Domestic Jet-Black'. At $180 it is hard to beat. Though there are a few odd-things about the kit that I need to research (the passenger side seatbelt-hole, no gut for the e-brake 'stop', etc) I'm generally satisfied with the kit. After having it installed, I definitely like the pattern alot more than the previous black. Pro-Tip: Installation is pretty easy and, as usual, it's all about the prep-work. For those doing a similar replacement, make sure to use plenty of plastic as you grind away at the old-carpet and adhesive... The debris will get everywhere from inside your doors to underneath your dash. A $15 investment in plastic and masking will save you a world of trouble. Also, using masking tape, layout the carpet and give yourself some registration marks to make everything easy to line-up once the adhesive is applied. This is a good time to make sure all your trim and interior components 'fit'; Speaker-pods, Door-trim, etc. Also, this will help you understand the 'sequence' of applying the pieces - For me, it was Passenger-side long, then Driver-side wheel-well, Driver-side Long, Center console, and Passenger-side foot area. I started off on the top of the entry of the passenger-side, applying adhesive (about 3-coats) to both the carpet and the car and then massaged that piece on. Once set (5-min or so) I took the remainder of the carpet and 'flipped' it up to spray the vertical surface and chassis and massaged that in-place. I stayed in that area for about 10-min, just rubbing down the carpet. Weird thing I noticed here was that the hole on the carpet-piece didn't match up with my 1970' chassis - maybe the model-years are different. With the passenger-side longs complete, I moved the the Driver-side wheel-well. Perhaps the most complicated piece, theres really only one-way to register it. On the left-side of the piece, if you're using he 914-rubber carpet kit, you will find a 'slit' that can be placed over the bracket that holds the speaker. From there, I just lined up my registration marks. Make sure to remove and wrap your wiring harness, so you don't get any glue on it. As the Driver-side long 'lays' over the wheel-well, that's next. This was one of the more difficult portions of the project, because you have the small 'indent' next to the handle for the e-brake, as well as the 'posts' that stick-out for the e-brake. Oddly, my carpet piece was marked, but there was no-hole. Take your time with this piece and line everything up, it will be the most difficult part of the job, and should take you the most amount of time. The center-console area is pretty easy, so long as you remember that this piece isn't exactly 'permanent'. You should consider that you'll need to access the center-console from time-to-time to check the wiring or make shifter adjustments, so it's really your choice whether yo use adhesive or not. In my case, I'm running two-additional gauges, so I'll have to 'slice' that piece in the middle to pass through all my new wiring - I don't think I'll be using adhesive. Finally, the passenger-side foot area. While my car is a 70' and also has oil-lines in this area, I took a footrest from a 75' and placed it at the bulkhead. The top-portion has adhesive, but only 'lays' on the footrest. The bottom of the piece will be covered by the passenger-side mat. One last note - Do not cut the excess of the carpet. The kit is meant to be long and 'lay' on the floor, so that when you put the floor-mats and seats in, it looks seamless. Also, because we're on the subject of carpeting, including a shot of my snazzy-new trunk carpeting from 914 rubber... I wonder if I can get the same-pattern as the interior, paging @Mikey914 (IMG:style_emoticons/default/idea.gif) Edit : Don't know why most of my pictures displayed upside down... Maybe a thoughtful moderator can help me out... (IMG:style_emoticons/default/pray.gif) 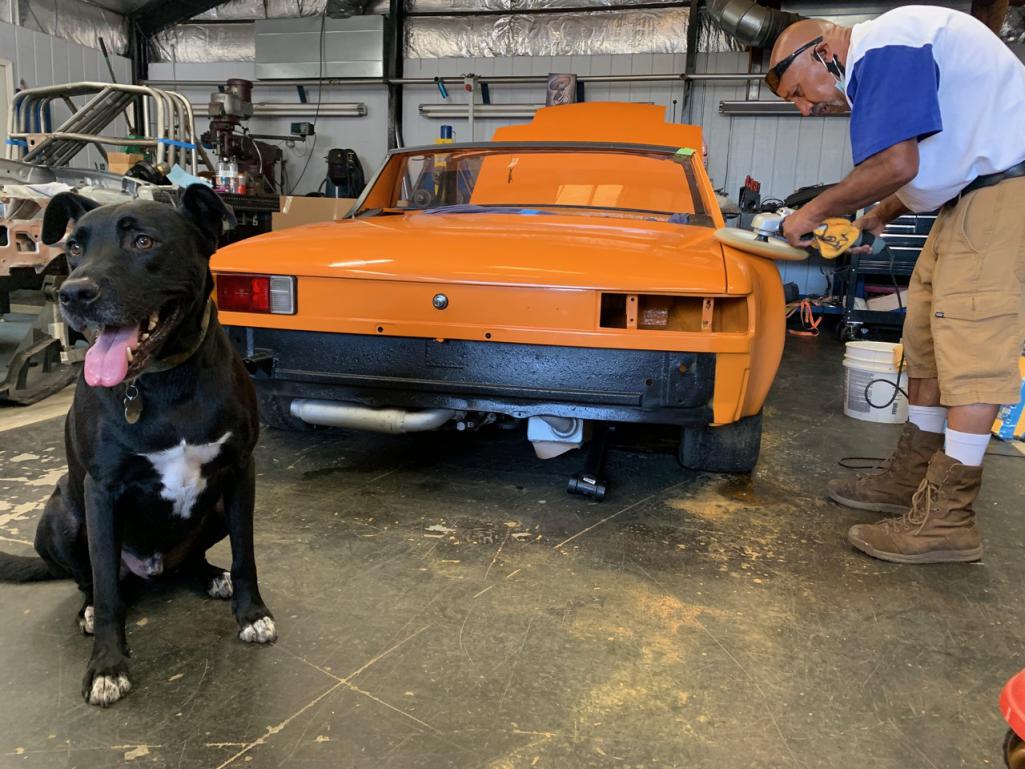 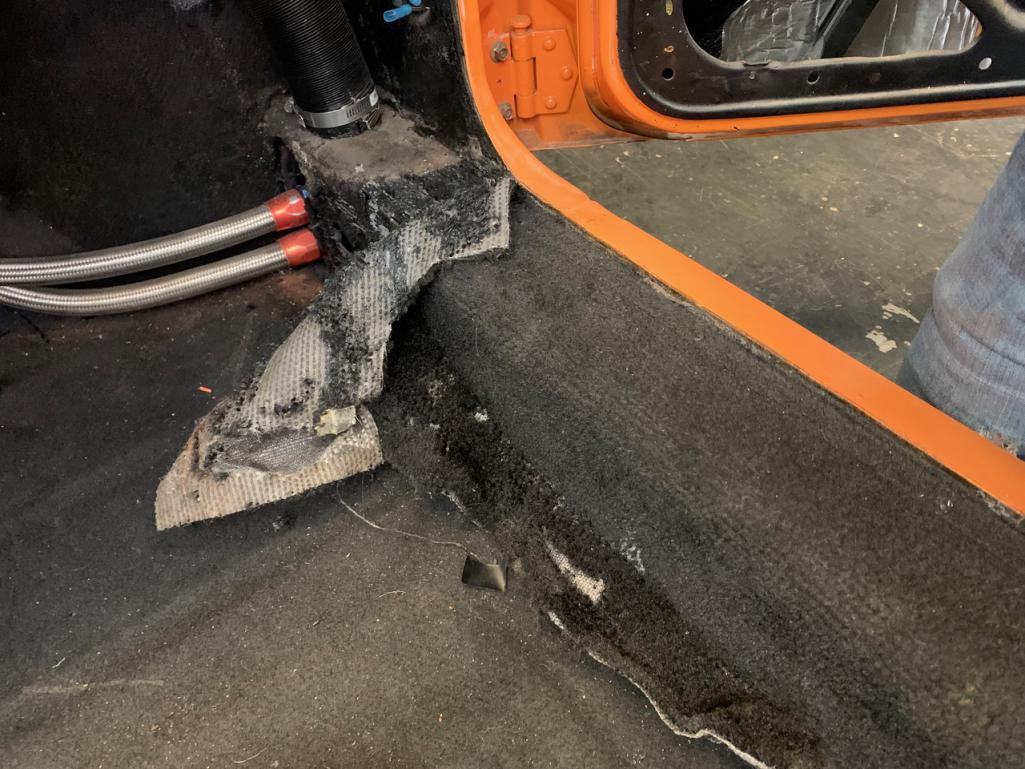 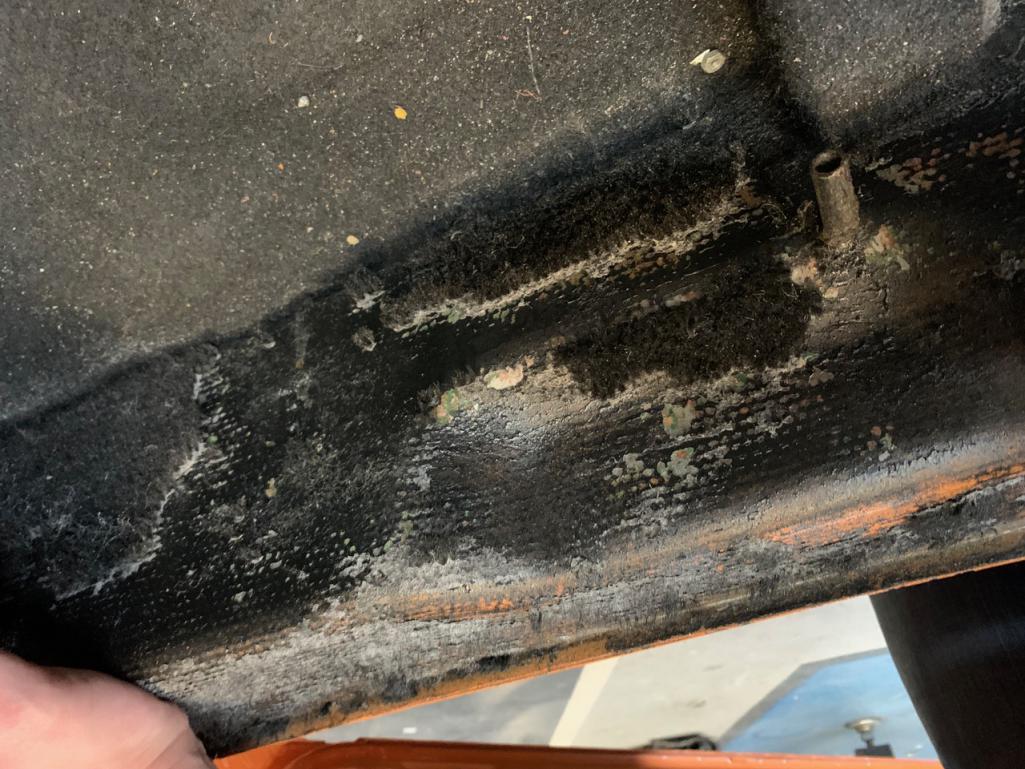 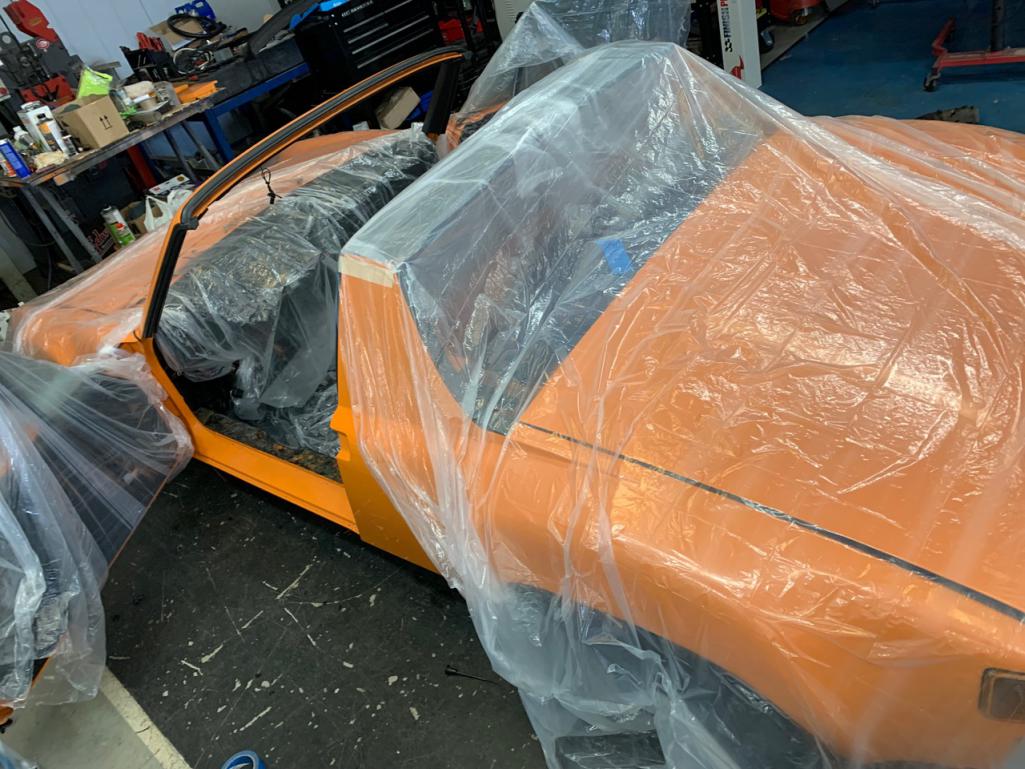 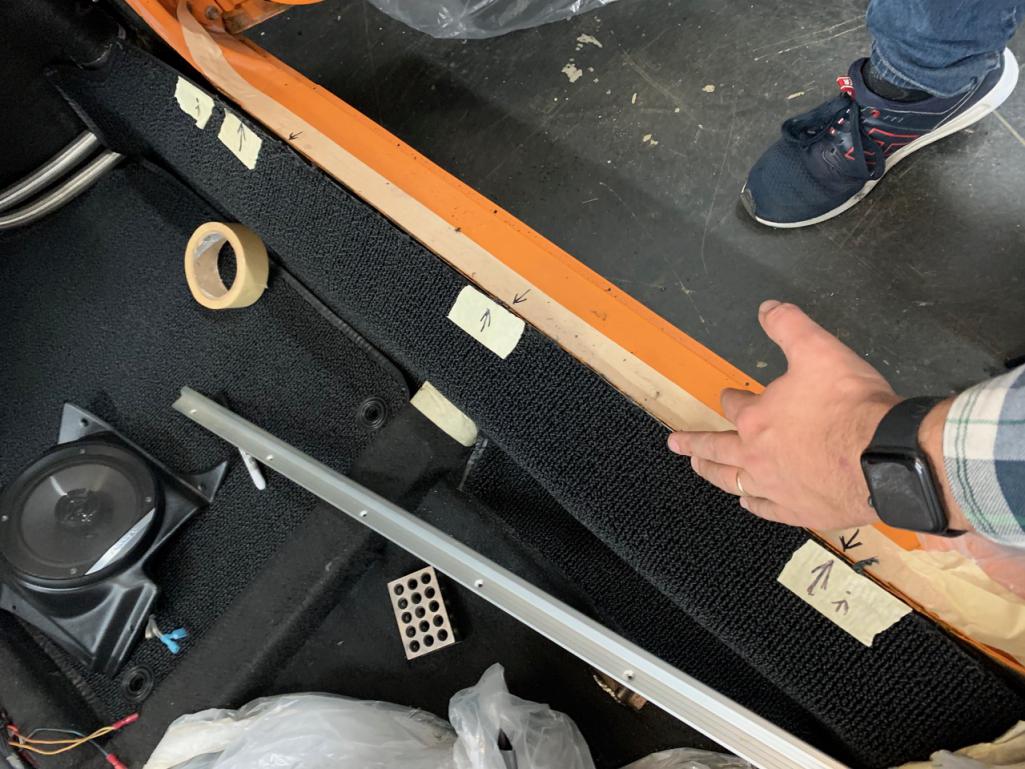 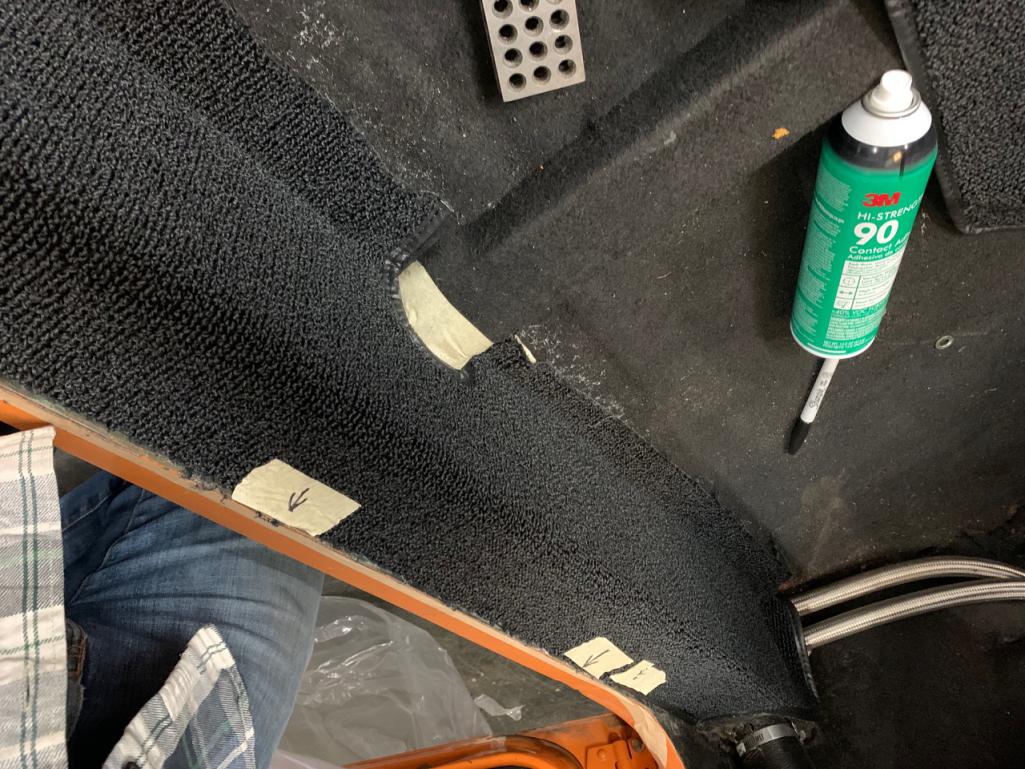  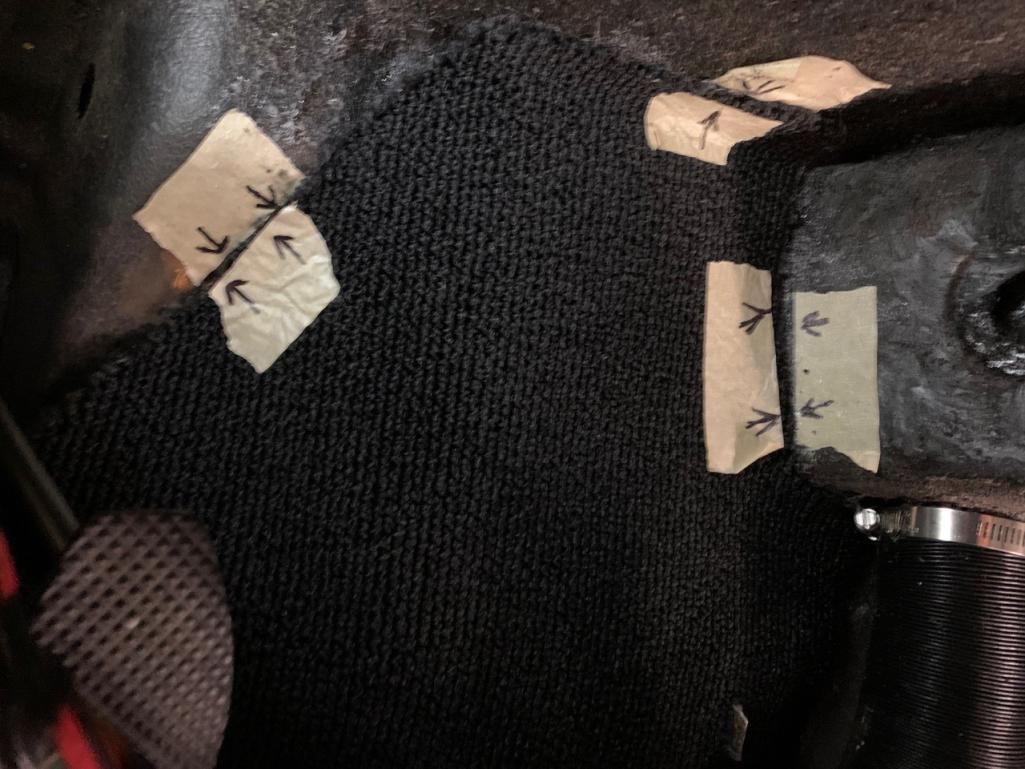 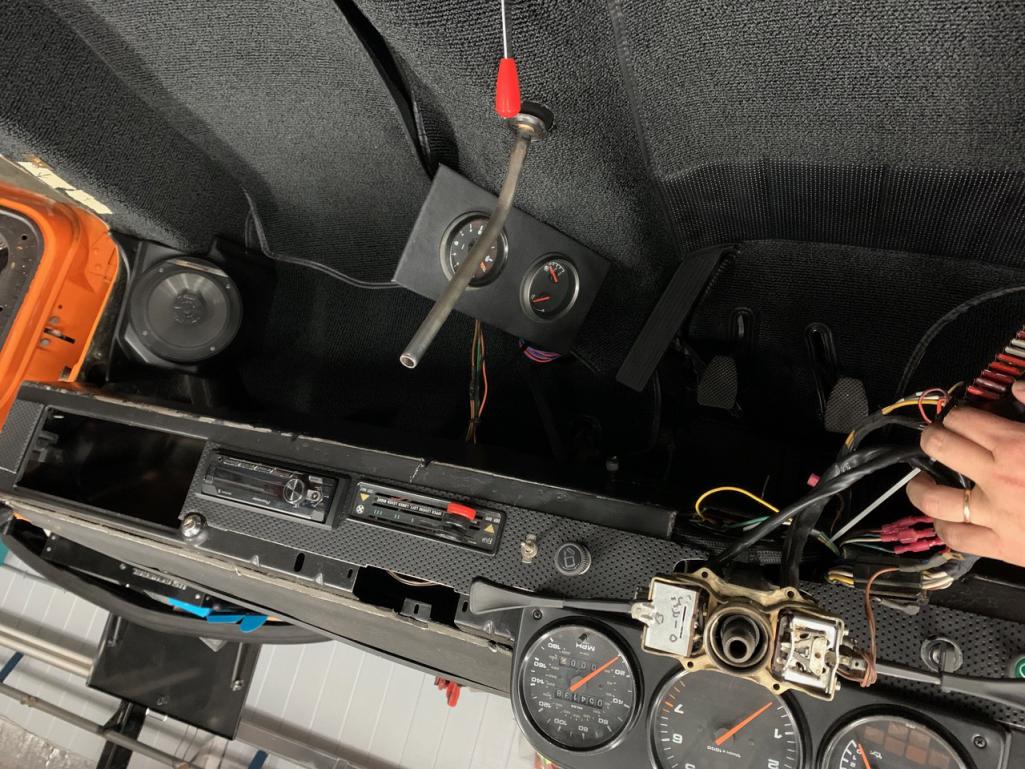 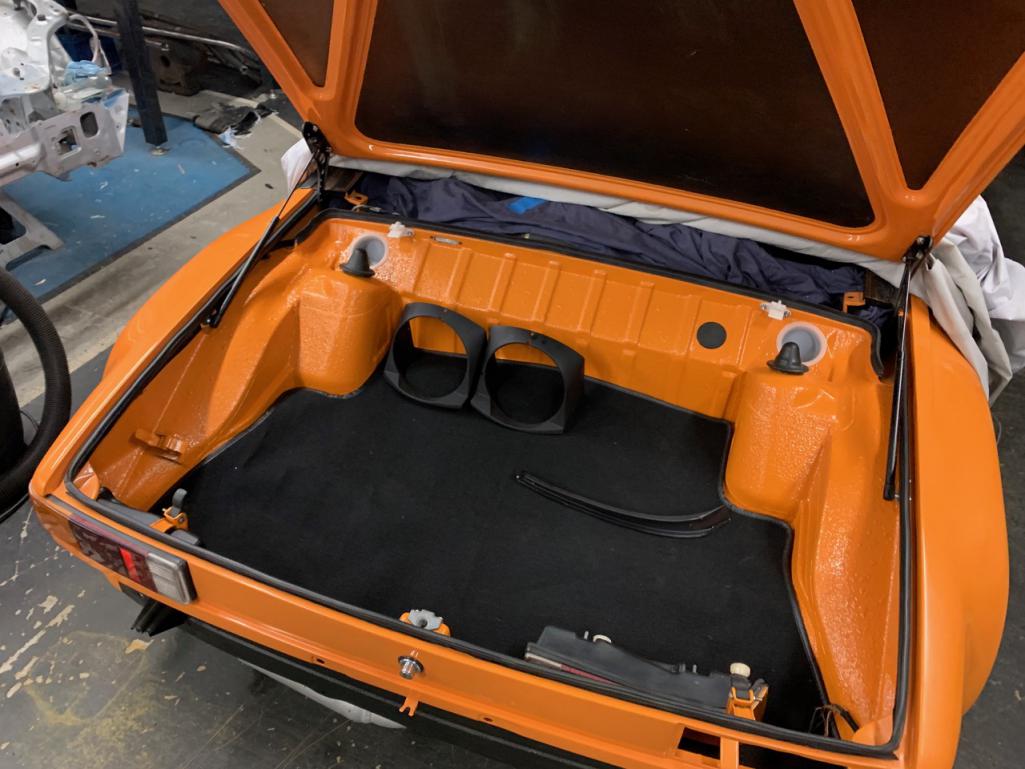 |
| Mikey914 |
 Oct 26 2021, 02:11 AM Oct 26 2021, 02:11 AM
Post
#1029
|
|
The rubber man           Group: Members Posts: 12,761 Joined: 27-December 04 From: Hillsboro, OR Member No.: 3,348 Region Association: None 
|
Yes we can. You are lucky. The German is getting harder to get so we can match the domestic up for you easily. PM me your number I'll call you and work out details.
Mark |
| Cairo94507 |
 Oct 26 2021, 07:23 AM Oct 26 2021, 07:23 AM
Post
#1030
|
|
Michael           Group: Members Posts: 10,268 Joined: 1-November 08 From: Auburn, CA Member No.: 9,712 Region Association: Northern California 
|
Nice job Enrique. It really is coming together nicely. (IMG:style_emoticons/default/beerchug.gif)
|
| autopro |
 Oct 26 2021, 09:13 AM Oct 26 2021, 09:13 AM
Post
#1031
|
|
Member   Group: Members Posts: 306 Joined: 14-January 18 From: San Diego / Tijuana Member No.: 21,797 Region Association: Southern California |
Another great job and tutorial, thanks!
|
| RiqueMar |
 Nov 8 2021, 05:11 PM Nov 8 2021, 05:11 PM
Post
#1032
|
|
Enrique Allen Mar     Group: Members Posts: 2,208 Joined: 28-August 08 From: San Diego, CA Member No.: 9,478 Region Association: Southern California 
|
Yes we can. You are lucky. The German is getting harder to get so we can match the domestic up for you easily. PM me your number I'll call you and work out details. Mark @Mikey914 - I've been away on a trip and am just getting back to my thread. Thanks and will do! |
| RiqueMar |
 Nov 8 2021, 06:28 PM Nov 8 2021, 06:28 PM
Post
#1033
|
|
Enrique Allen Mar     Group: Members Posts: 2,208 Joined: 28-August 08 From: San Diego, CA Member No.: 9,478 Region Association: Southern California 
|
A bit of a 'zoom' in on the carpet-job...
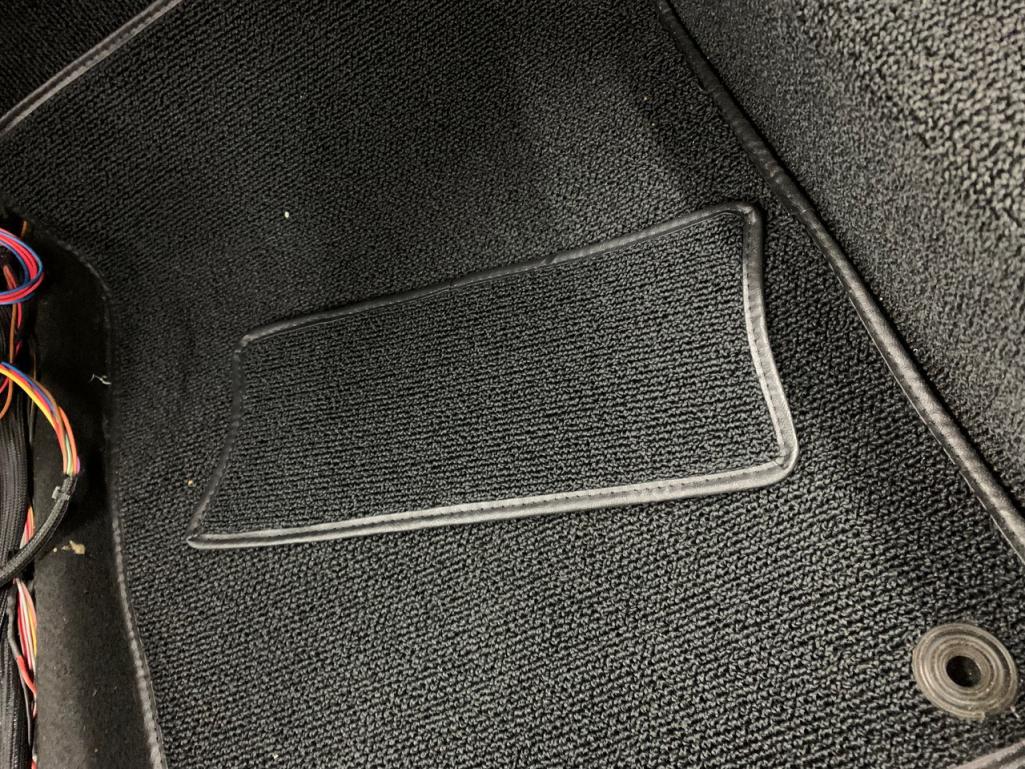
Following along on this thread, you might remember that I ran my oil-lines along the passenger-side of longs and then created a bulkhead mount that briefly brings them into the cabin before going into the front-trunk to connect to the cooler. Main reason for this being that I didn't like the oil-line setup on the black-car, and that my foot would often rest on the lines while driving (awkward). Using this method, I could cover the lines with a 'late' footrest and not have to deal with the heat or appearance of the lines. Starting off, I grabbed a footrest from a 75' car that was in rough shape and after making a few 'marker' notes, began grinding away. While its really dusty, the piece is pretty easy to cut, and you only run the risk of cutting too-much too-quick. After a few trips back and fourth, I eventually had the piece with the right-fit, and could 'sand it' so it didn't look too hacked-up. Once it was ready to be installed, most of the glue went on the chassis 'above' the footrest piece, with only a little bit 'tacking' onto the rest in case I need to take it out. I think the factory did the same, in order to access the cutout that you can see in some of the pictures. From there, it's just more massaging to get the carpet in-place and then laying it all out. This piece marks the last in the set so after, I was also able to start installing the speakers, rubber door-lining and trim that separate the door-step to the interior. This is easy enough, though it might take some 'probing' to see where the holes line up. Pro-tip: The holes for the trim will line-up with the holes for the door-step, maybe 3/4' to 1" from the door-seam. Looking back on this portion of the project, I now wonder how I can best use that 'access panel' in the foot-rest.... Maybe a small-form subwoofer or access for electronics... (IMG:style_emoticons/default/idea.gif) 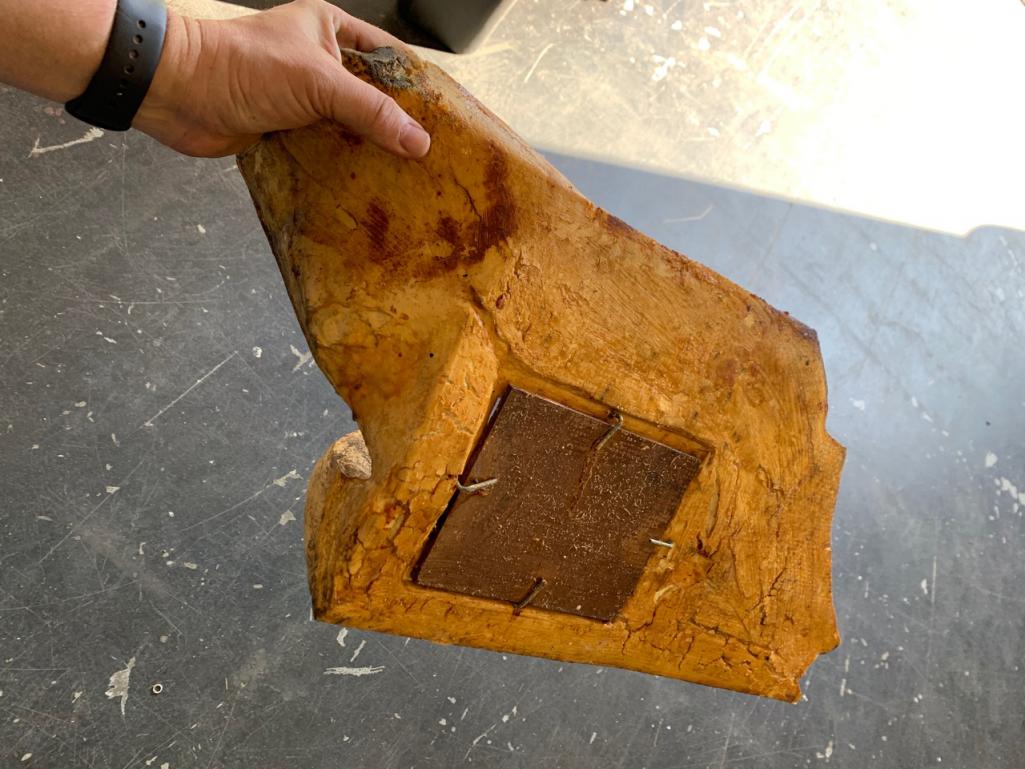 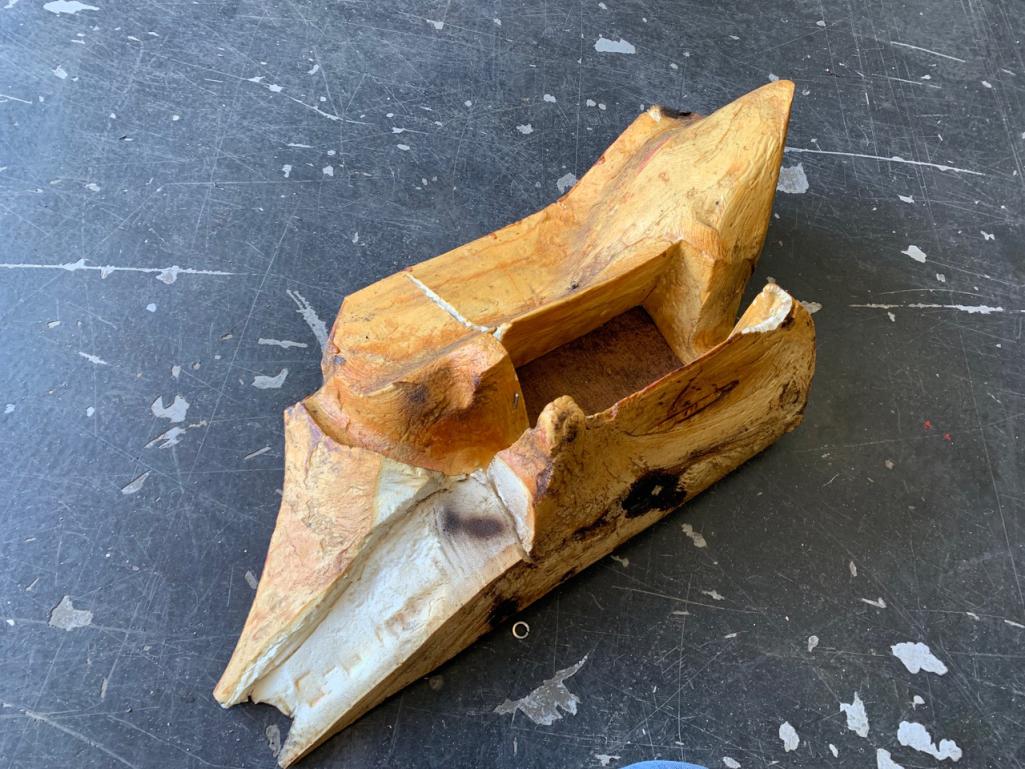 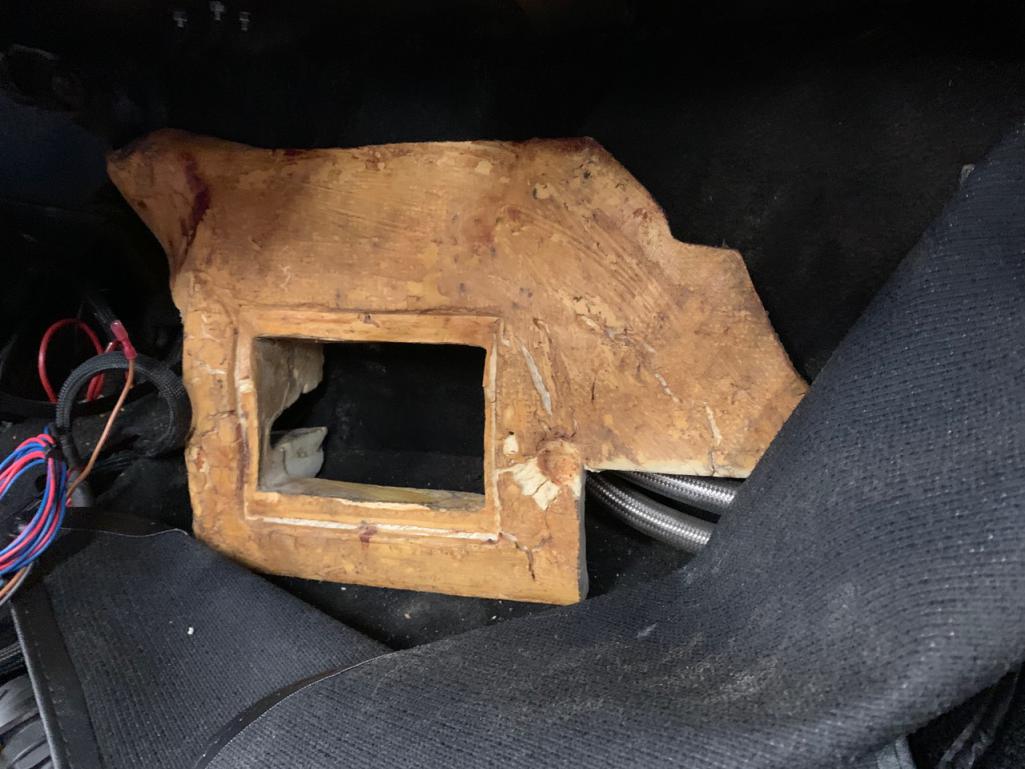 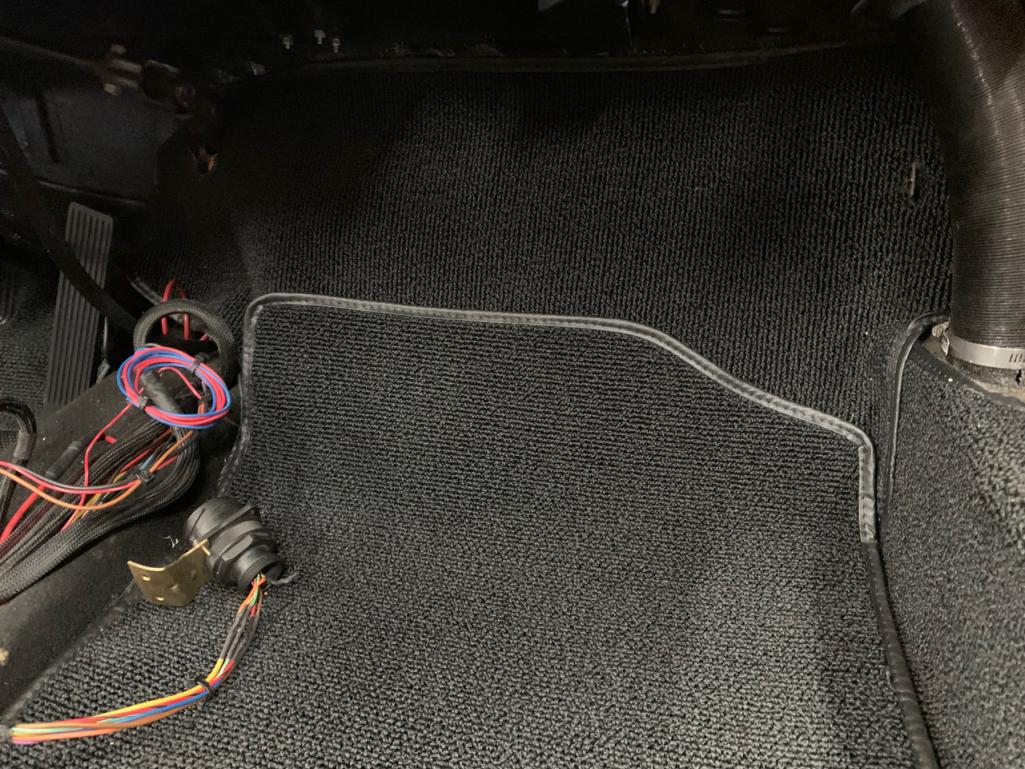 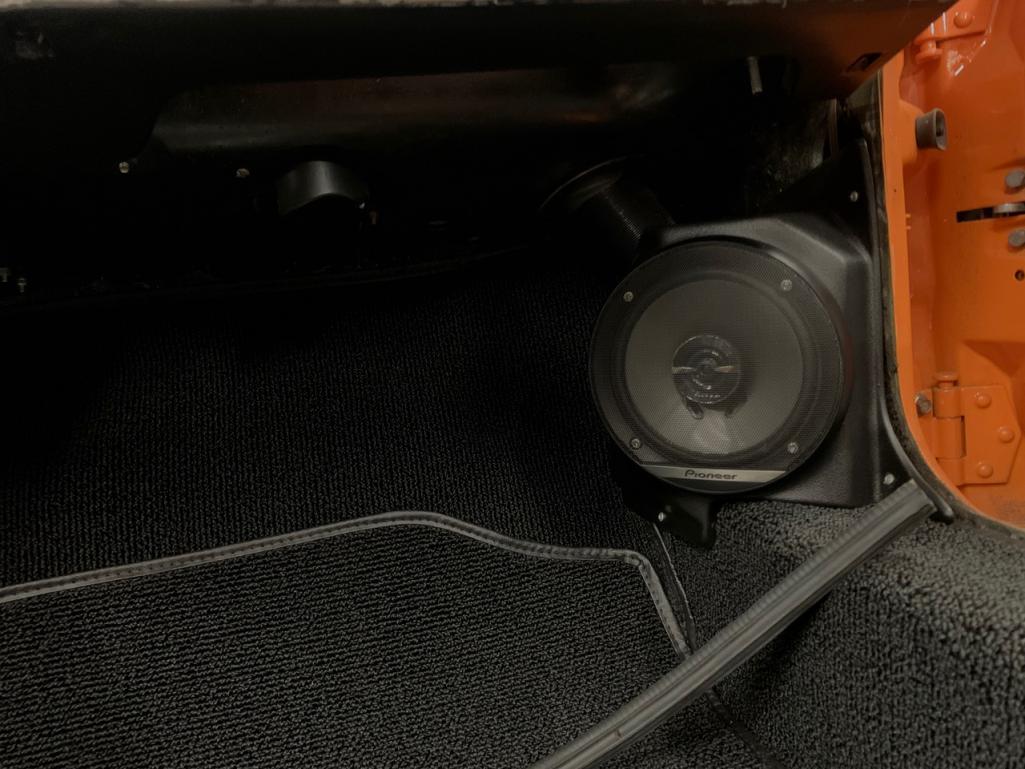 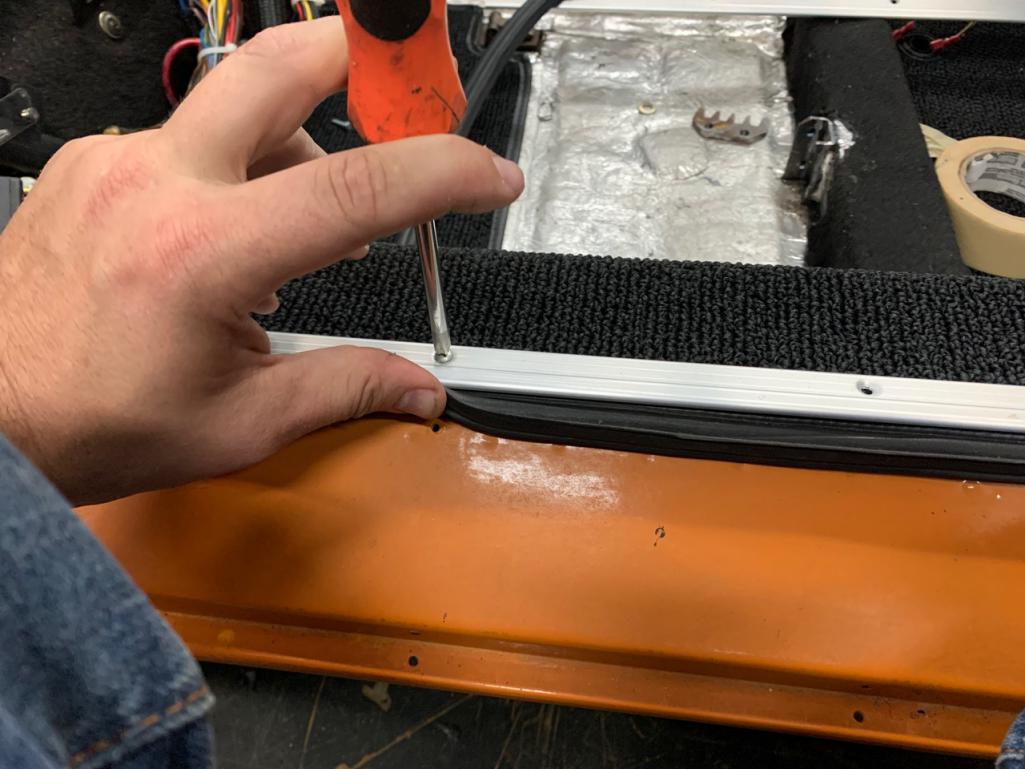 |
| RiqueMar |
 Nov 8 2021, 06:30 PM Nov 8 2021, 06:30 PM
Post
#1034
|
|
Enrique Allen Mar     Group: Members Posts: 2,208 Joined: 28-August 08 From: San Diego, CA Member No.: 9,478 Region Association: Southern California 
|
|
| Van914 |
 Nov 9 2021, 06:32 AM Nov 9 2021, 06:32 AM
Post
#1035
|
|
Van914    Group: Members Posts: 702 Joined: 5-January 03 From: Cincinnati, Ohio Member No.: 90 Region Association: Upper MidWest 
|
Behind the seats
|
| RiqueMar |
 Nov 9 2021, 12:18 PM Nov 9 2021, 12:18 PM
Post
#1036
|
|
Enrique Allen Mar     Group: Members Posts: 2,208 Joined: 28-August 08 From: San Diego, CA Member No.: 9,478 Region Association: Southern California 
|
|
| mepstein |
 Nov 9 2021, 12:31 PM Nov 9 2021, 12:31 PM
Post
#1037
|
|
914-6 GT in waiting                Group: Members Posts: 19,811 Joined: 19-September 09 From: Landenberg, PA/Wilmington, DE Member No.: 10,825 Region Association: MidAtlantic Region 
|
Enrique, I think it’s the carpet on the front of the pedal box, under the dash. The carpet pieces behind the seats are shaped, not rectangular.
Attached image(s) 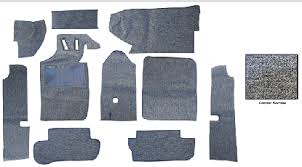
|
| RiqueMar |
 Nov 9 2021, 01:08 PM Nov 9 2021, 01:08 PM
Post
#1038
|
|
Enrique Allen Mar     Group: Members Posts: 2,208 Joined: 28-August 08 From: San Diego, CA Member No.: 9,478 Region Association: Southern California 
|
Enrique, I think it’s the carpet on the front of the pedal box, under the dash. The carpet pieces behind the seats are shaped, not rectangular. Hey Mark - Yeah, thats what I was thinking, and I think I even saw the same photo you shared. I'll be back with the car tonight and try to figure it out (IMG:style_emoticons/default/beerchug.gif) |
| mepstein |
 Nov 9 2021, 01:24 PM Nov 9 2021, 01:24 PM
Post
#1039
|
|
914-6 GT in waiting                Group: Members Posts: 19,811 Joined: 19-September 09 From: Landenberg, PA/Wilmington, DE Member No.: 10,825 Region Association: MidAtlantic Region 
|
Enrique, I think it’s the carpet on the front of the pedal box, under the dash. The carpet pieces behind the seats are shaped, not rectangular. Hey Mark - Yeah, thats what I was thinking, and I think I even saw the same photo you shared. I'll be back with the car tonight and try to figure it out (IMG:style_emoticons/default/beerchug.gif) I think it gets glued to the bulkhead and is mostly cosmetic. |
| Mikey914 |
 Nov 11 2021, 07:30 AM Nov 11 2021, 07:30 AM
Post
#1040
|
|
The rubber man           Group: Members Posts: 12,761 Joined: 27-December 04 From: Hillsboro, OR Member No.: 3,348 Region Association: None 
|
You are correct the small piece goes above tge drivets pedals.
On the passenger carpet, It lays flat on the floor and the upper foot rest piece goes over it so you don't have excess carpet going up it. |
  |
2 User(s) are reading this topic (2 Guests and 0 Anonymous Users)
0 Members:

|
Lo-Fi Version | Time is now: 3rd April 2025 - 12:25 PM |
Invision Power Board
v9.1.4 © 2025 IPS, Inc.


