|
|

|
Porsche, and the Porsche crest are registered trademarks of Dr. Ing. h.c. F. Porsche AG.
This site is not affiliated with Porsche in any way. Its only purpose is to provide an online forum for car enthusiasts. All other trademarks are property of their respective owners. |
|
|
  |
| RiqueMar |
 May 18 2020, 05:36 PM May 18 2020, 05:36 PM
Post
#841
|
|
Enrique Allen Mar     Group: Members Posts: 2,220 Joined: 28-August 08 From: San Diego, CA Member No.: 9,478 Region Association: Southern California 
|
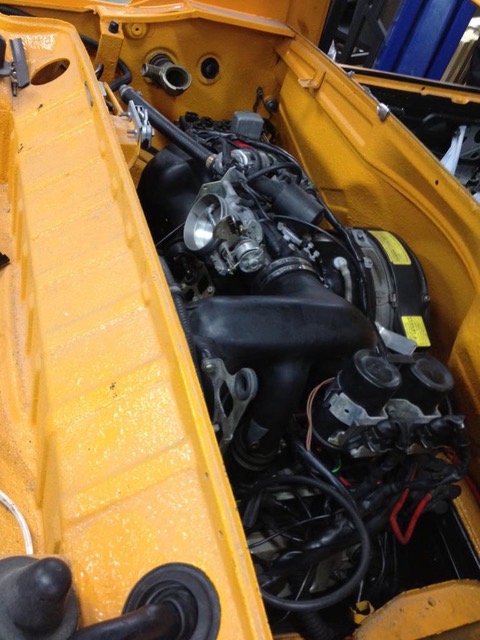
@SirAndy - This is my setup as it currently sits, but I think I will (need to) eventually relocate them. IIRC, the free-floating bracket isn't good for the components long term, eager to heard the 'experts' thoughts on the matter.
 |
| RiqueMar |
 May 18 2020, 06:10 PM May 18 2020, 06:10 PM
Post
#842
|
|
Enrique Allen Mar     Group: Members Posts: 2,220 Joined: 28-August 08 From: San Diego, CA Member No.: 9,478 Region Association: Southern California 
|
Before my next update, wanted to take a moment to highlight' a product that I purchased through another member, and see if anyone else has feedback on some of the things I'm struggling with.
I purchased the Auto-Atlanta 'Body Hardware Kit' and am really struggling with 'what-is-what' in the kit, and I'm someone that's pretty familiar with hardware organization. To be sure, it's a marked improvement preferable to running off to the hardware store everytime I find something lacking, however, I think the organization is very vague and would need to significantly improve before recommending this to anyone else. The Pros: (IMG:style_emoticons/default/clap56.gif) - Looks like or close to original hardware - The 3-piece set comes with a small .pdf inventory The Cons: (IMG:style_emoticons/default/WTF.gif) - Limited to the 'interior' of the car (title states 'body', a bit confusing) - Not very organized. Though it comes with a doc showing an inventory, it's difficult and tedious to determine which bin corresponds to which item on the inventory. This would be much easier if there were some sort of number designation (Bin 1... 2... 3... etc.) or a dedicated sheet to each bin. Even a small card in each bin would suffice and take away a lot of my guesswork. - I wish there where more to it. Reading deeper into AA's site, I see there are separate kits for different areas; Dashboard mounting, Seat rails, etc. But, aren't both of these part of the interior? Summary (IMG:style_emoticons/default/type.gif) It's an 'OK' start, but I feel like this product needs work. An 'easy-win' for Auto Atlanta would be a clearer way of product designation and description. I'm not a fan of criticizing 'the one who is doing', however after buying this product, even from someone who didn't end up using it, I don't feel that 'warm and fuzzy' feeling that comes along with a good-purchase. .... But hey, what do I know? 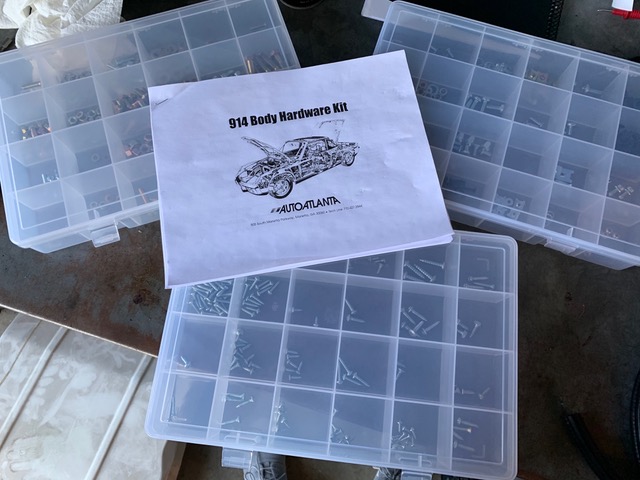 |
| RiqueMar |
 May 18 2020, 06:28 PM May 18 2020, 06:28 PM
Post
#843
|
|
Enrique Allen Mar     Group: Members Posts: 2,220 Joined: 28-August 08 From: San Diego, CA Member No.: 9,478 Region Association: Southern California 
|
Moving on, taking just a small break from wiring, I decided to focus on some of the new items coming in from vendors and private sellers. You know who you are, thanks to you all!
First up, doors, trim and 'skid-plates'. These were fairly easy to get in, really well made from 914rubber.com. Small tip: Use a rubber mallet for the door panel inner rubber (IMG:style_emoticons/default/smash.gif) . The pieces from 914rubber.com are high-quality, and the interior support is a little tricky to get on. My only issue seems to be with the absolute last screw on the drivers-side entry. For some reason, I cannot get that last guy in. The only thing I can think of is that the bolt-head broke off at some point, and not the body is sitting inside. Next, the outer door seals and the front and rear bulkhead seals. Same technique used here, gently massaging it on and when needed, bashing it with a rubber mallet. Thats it for now, going to get on more nice pieces and convince myself this is more important than my gauges at the moment. (IMG:style_emoticons/default/smash.gif) (IMG:style_emoticons/default/smash.gif) (IMG:style_emoticons/default/smash.gif) (IMG:style_emoticons/default/smash.gif) 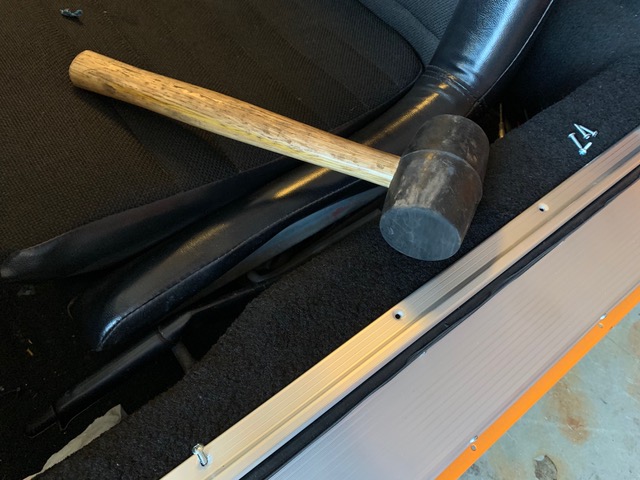 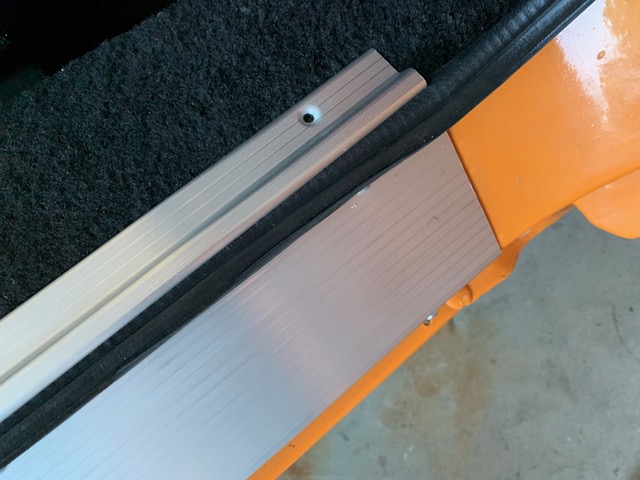 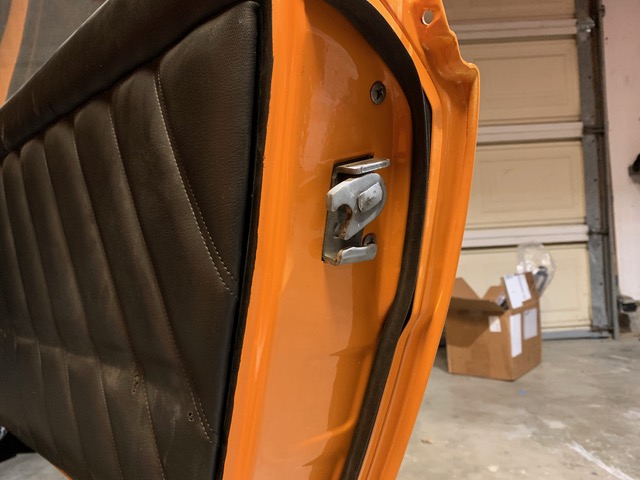 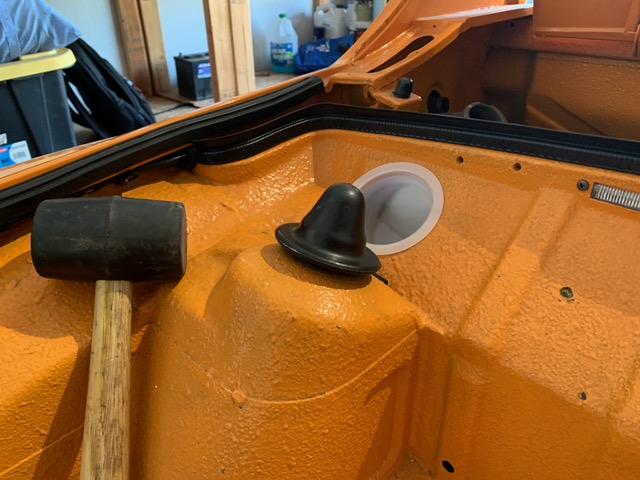 |
| SirAndy |
 May 18 2020, 06:49 PM May 18 2020, 06:49 PM
Post
#844
|
|
Resident German                          Group: Admin Posts: 42,190 Joined: 21-January 03 From: Oakland, Kalifornia Member No.: 179 Region Association: Northern California |
@SirAndy - This is my setup as it currently sits, but I think I will (need to) eventually relocate them. IIRC, the free-floating bracket isn't good for the components long term, eager to heard the 'experts' thoughts on the matter. If i remember correctly, my mounting bracket came from PMS. It's been on there for 10+ years without any issues. (IMG:style_emoticons/default/beerchug.gif) |
| SirAndy |
 May 18 2020, 06:52 PM May 18 2020, 06:52 PM
Post
#845
|
|
Resident German                          Group: Admin Posts: 42,190 Joined: 21-January 03 From: Oakland, Kalifornia Member No.: 179 Region Association: Northern California |
@SirAndy - This is my setup as it currently sits, but I think I will (need to) eventually relocate them. IIRC, the free-floating bracket isn't good for the components long term, eager to heard the 'experts' thoughts on the matter. If i remember correctly, my mounting bracket came from PMS. It's been on there for 10+ years without any issues. (IMG:style_emoticons/default/beerchug.gif) https://patrickmotorsports.com/products/eng-993-602-cam-pmp (IMG:style_emoticons/default/smile.gif) |
| RiqueMar |
 May 18 2020, 10:43 PM May 18 2020, 10:43 PM
Post
#846
|
|
Enrique Allen Mar     Group: Members Posts: 2,220 Joined: 28-August 08 From: San Diego, CA Member No.: 9,478 Region Association: Southern California 
|
@racerx9146 question for you.... On your conversion, did you by any chance use the Patrick Motorsport conv. harnesses?
|
| RiqueMar |
 May 18 2020, 11:24 PM May 18 2020, 11:24 PM
Post
#847
|
|
Enrique Allen Mar     Group: Members Posts: 2,220 Joined: 28-August 08 From: San Diego, CA Member No.: 9,478 Region Association: Southern California 
|
On todays episode of 'Completely Overdoing it with Enrique' - Electrical work continues! The front trunk and all the stock equipment (Headlights, Turn-signals, Horns, etc.) are done. Wherever I could, I harvested elements of my old harness, and tied them into the new, making sure the wire colors and designations match. Wherever the connections exit the body, such as with the fog-lights and horns, I've wrapped the new connections in safety sheathing, and soldered them into the existing harness.
A bit more work than I expected, as I had to partially un-wrap the harnesss along the front-trunk wall, but very happy with the result, and the fact that everything is soldered, wrapped, has new grommets/fittings, and is color-correct. Now, save for the oil-cooler and fuel-pump, the front trunk wiring is complete. Need to verify cable connections on the blower motor and air-vents, and reassemble. 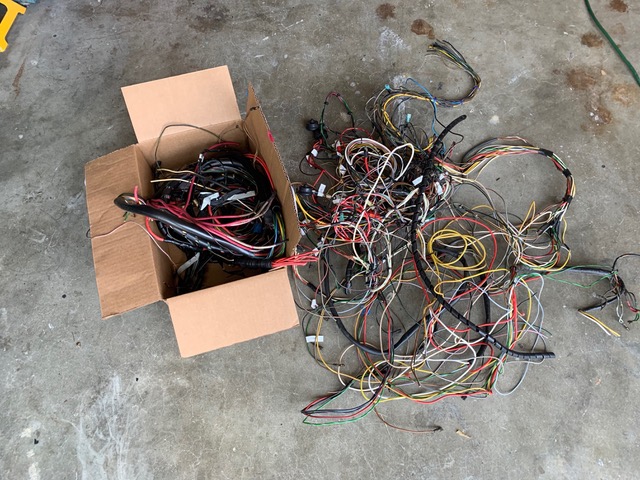 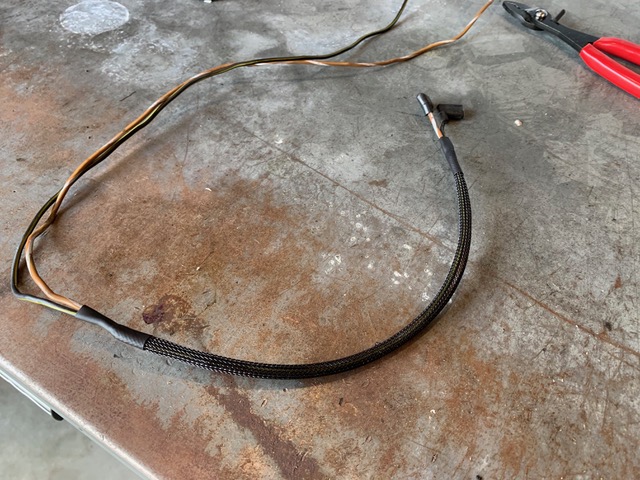 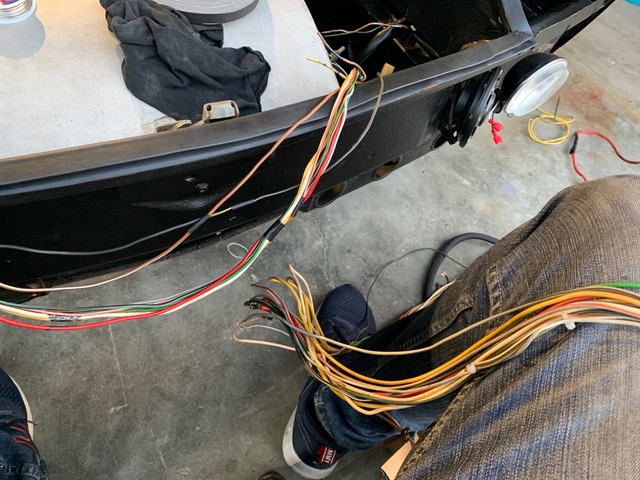 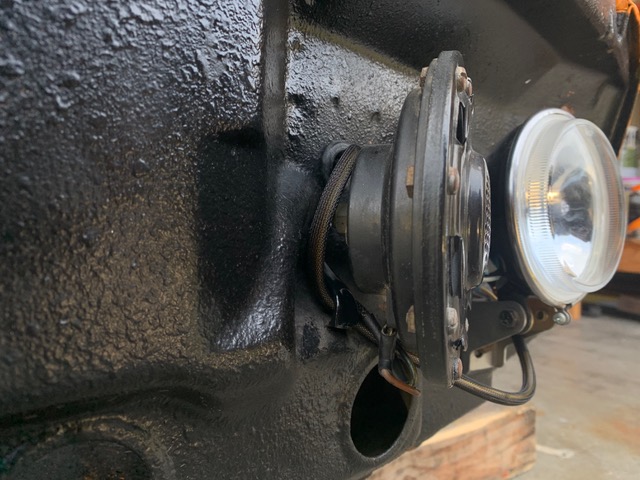 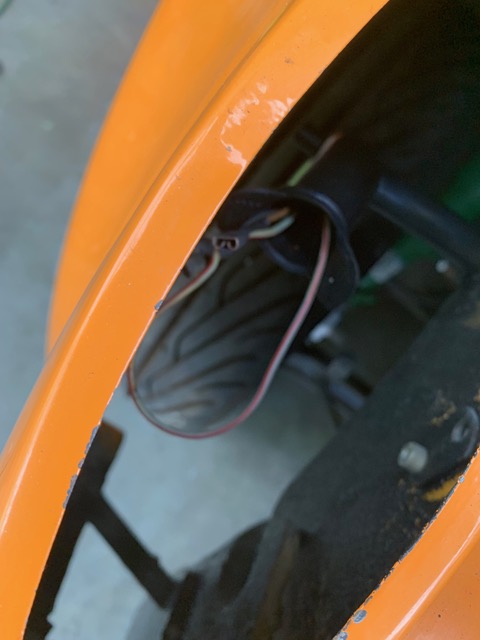 |
| eric9144 |
 May 19 2020, 09:01 AM May 19 2020, 09:01 AM
Post
#848
|
|
Advanced Member     Group: Members Posts: 2,769 Joined: 30-March 11 From: San Diego, CA Member No.: 12,876 Region Association: Southern California 
|
@SirAndy - This is my setup as it currently sits, but I think I will (need to) eventually relocate them. IIRC, the free-floating bracket isn't good for the components long term, eager to heard the 'experts' thoughts on the matter. If i remember correctly, my mounting bracket came from PMS. It's been on there for 10+ years without any issues. (IMG:style_emoticons/default/beerchug.gif) https://patrickmotorsports.com/products/eng-993-602-cam-pmp (IMG:style_emoticons/default/smile.gif) My build uses that bracket also |
| ClayPerrine |
 May 19 2020, 02:25 PM May 19 2020, 02:25 PM
Post
#849
|
|
Life's been good to me so far.....                Group: Admin Posts: 16,269 Joined: 11-September 03 From: Hurst, TX. Member No.: 1,143 Region Association: NineFourteenerVille 
|
@SirAndy - This is my setup as it currently sits, but I think I will (need to) eventually relocate them. IIRC, the free-floating bracket isn't good for the components long term, eager to heard the 'experts' thoughts on the matter. If i remember correctly, my mounting bracket came from PMS. It's been on there for 10+ years without any issues. (IMG:style_emoticons/default/beerchug.gif) https://patrickmotorsports.com/products/eng-993-602-cam-pmp (IMG:style_emoticons/default/smile.gif) My build uses that bracket also I still have 964 coils, but when I upgrade, I will put them where they are now, on a 914-6 CD box bracket bolted to the battery tray. All the wiring is already located there. |
| RiqueMar |
 May 20 2020, 11:29 AM May 20 2020, 11:29 AM
Post
#850
|
|
Enrique Allen Mar     Group: Members Posts: 2,220 Joined: 28-August 08 From: San Diego, CA Member No.: 9,478 Region Association: Southern California 
|
Continuing on the wiring at the gauges, and its a bit of a mess (more on that later). For now, I've focused on installing the small items, and have been looking for the 'easy wins' throughout the car. While these are simple things, its nice to see the car getting new and reconditioned parts, and touched up wherever needed.
One thing I will mention though, the small parts add up; New rubber, seals, reconditioned locks, odds-and-ends, and its not nearly as 'fun' as buying a new suspension or motor or interior parts. It's tedious. My advice for anyone imparting on a project like this, invest in zip-log bags, boxes and totes. It is so easy to take off bolts, and just throw them in a box and label interior.... and then that box gets lost. Use the bags, throw the part or bolt or screw in a bag or box, and write on it with a sharpie. 'Future you' will thank 'past you'.  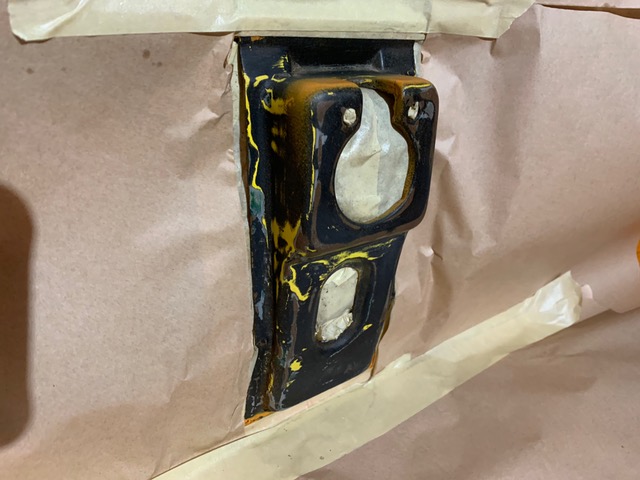 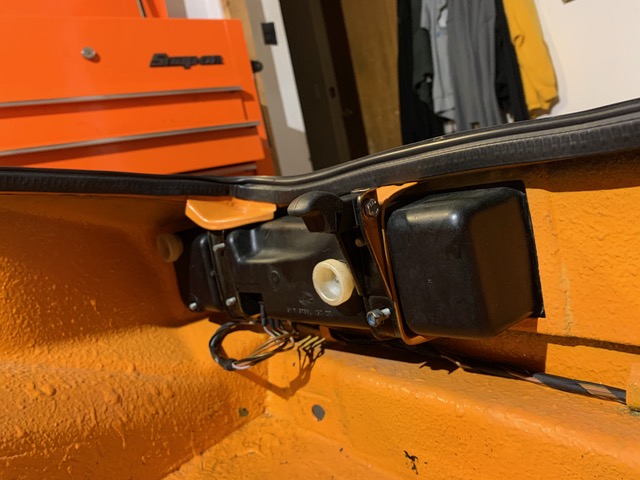 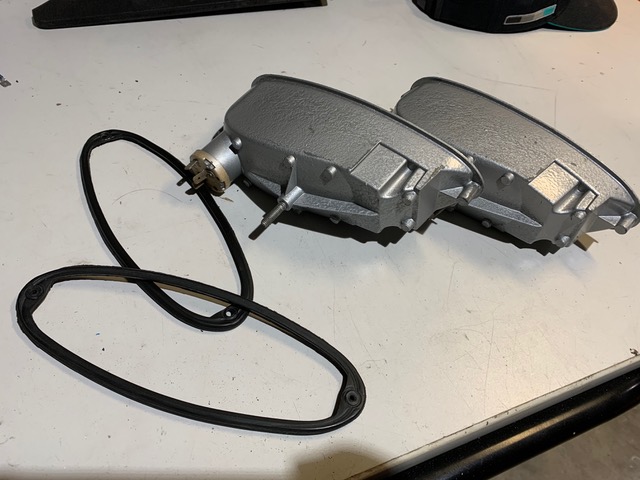 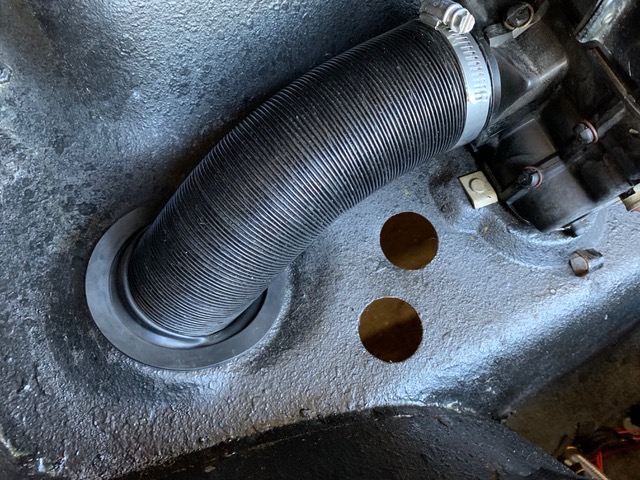 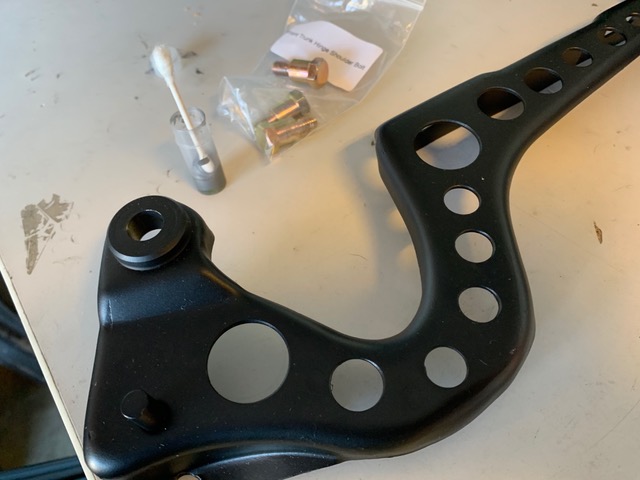 |
| RiqueMar |
 May 21 2020, 01:04 AM May 21 2020, 01:04 AM
Post
#851
|
|
Enrique Allen Mar     Group: Members Posts: 2,220 Joined: 28-August 08 From: San Diego, CA Member No.: 9,478 Region Association: Southern California 
|
I was very hesitant about putting on the Large Main Seal, as I understood it is a pain in the ass. I'm happy to say that after a brief search on here, and finding this thread: http://www.914world.com/bbs2/index.php?showtopic=337114 and this video by 914rubber https://www.youtube.com/watch?v=ui-GSfUS7ak its very easy. Seriously, the whole process only took me about 1hr 30 min, including setup, install, and probably a few distractions along the way.
Before I go over the process, a few items... - The first assumption people make regarding this seal install is that it slides in from the top. I don't know why I thought this at first, it's gotta be close to impossible especially with a new / reproduction seal. Instead of sliding the seal in from the top, you'll place it in with one side (interior), then work in the outer (exterior facing) side. - Use standard hand soap as a lubricant, as directed in the video. Its both slippery enough, and not so much that you lose control of the part that you're trying to handle. - For the tool to pry and work in the seal, I used a standard size flat-head screwdriver. For those of us, like me, that have blacked out the chrome on the trim, I didn't want to lose control and knock the trim. - The hardest part is the beginning, placing the seal to insert the screw and the 'curve' at the top of the windshield structure. I first placed the seal as it's directed in the video. I did find that, as Matt directed, you will have to clip or trim the bracket that attaches to the windshield. Big shears did it for me, and it was almost 'level' with the body piece. 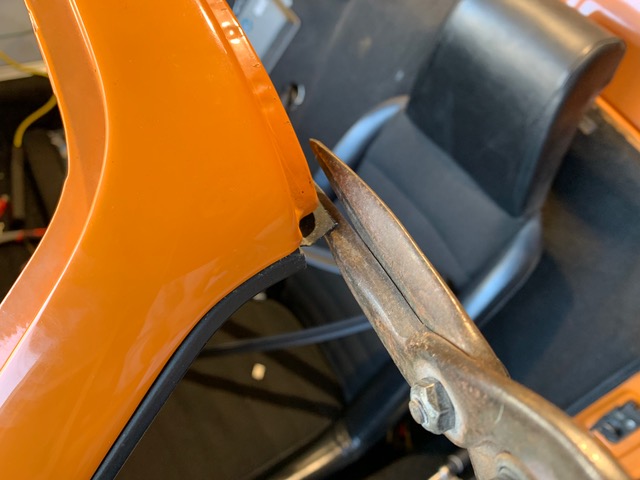 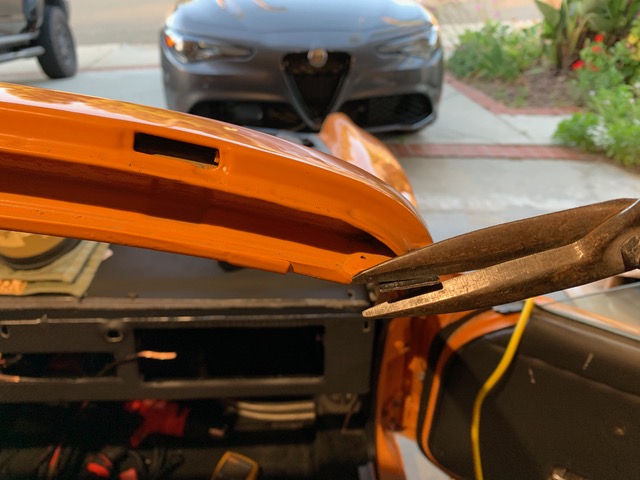 On this next step, I found it easier to divert a bit from the video instructions; Once you're able to correctly place the piece and the set-screw, I left the set screw off for the time being, and didn't place it until both sides were done. Starting with the Drivers side, I lined up the seal and placed the side that is closest to the interior of the car in the 'slot'. From there, I used the flathead screwdriver and 'worked in' the outer side. Each time I pushed in with the tool, about 1/2 an inch would slowly work itself into the channel. As I said before, the top is the hardest. Once you get a rhythm going, its pretty easy. You do not have to necessarily alternate between front and back, as the back slides in about 4-6 inches at a time. 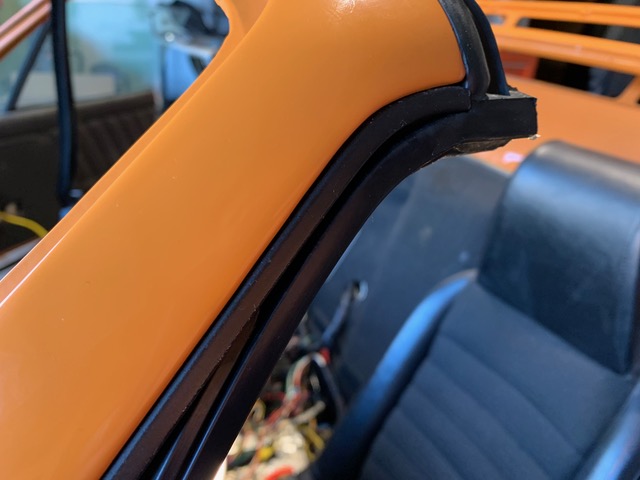 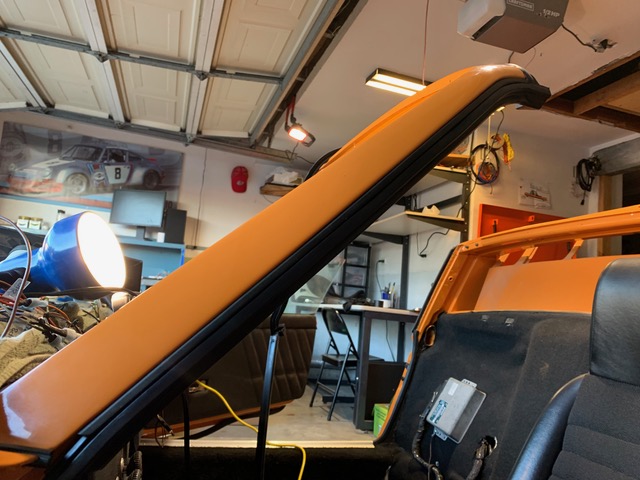 With the Drivers side complete (it should be a bit long, recommend letting it rest before trimming), I repeated the process on the passenger side. Same thing, place the rubber, omit the set screw for now, and start working it in. Same on this side, it will be a bit long, wait to trim it. With the seal in and secure on both sides, I used my rubber mallet to very lightly tap in the piece that runs along the length of the windshield connecting the two sides. This pieces is very easy to get on, and at some points, I didn't use the hammer and just tapped it in with the palm of my hand. Its at this point, I put in the set screws on either side. 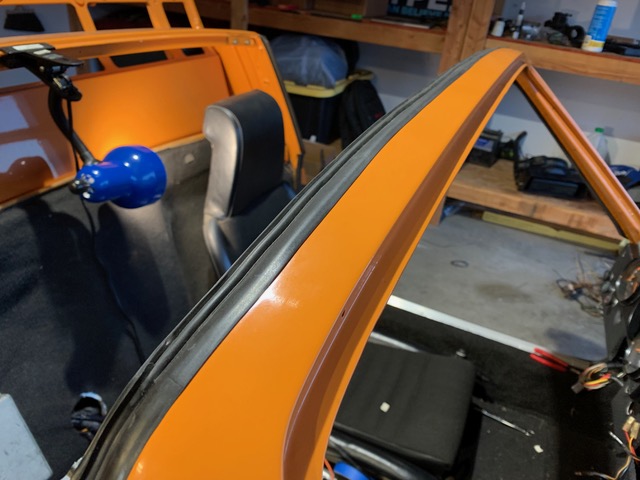 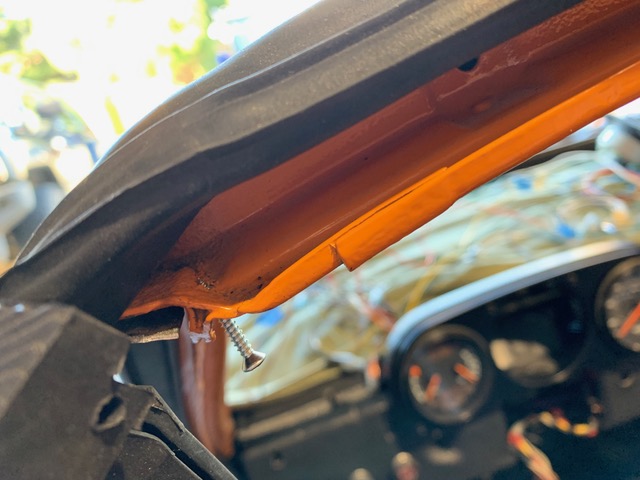 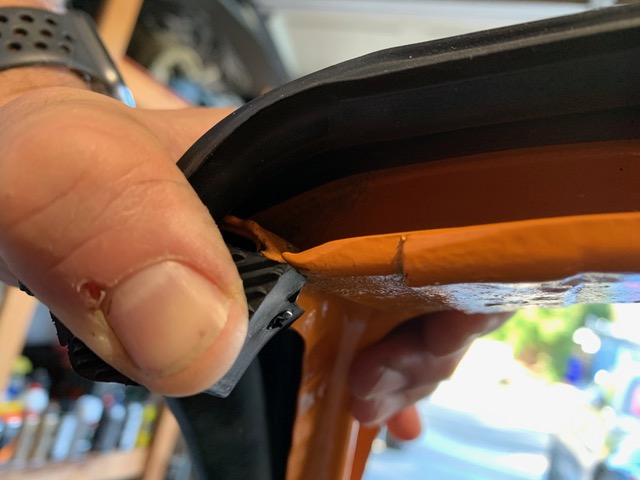 With all that complete, the final trick is to install the 'Lower Targa Mainseal', which is a joke compared to the process of the Main seal. Simply place it int he correct orientation and begin pushing it in. Once it's all the way in, spanning the length of the windshield, you can push or pull it to center it as you like. NOTE: Looking through the site, reference photos and diagrams, it was confusing to me which side was top, bottom, in, and out, so I included a photo. After thats in, start putting in your interior! 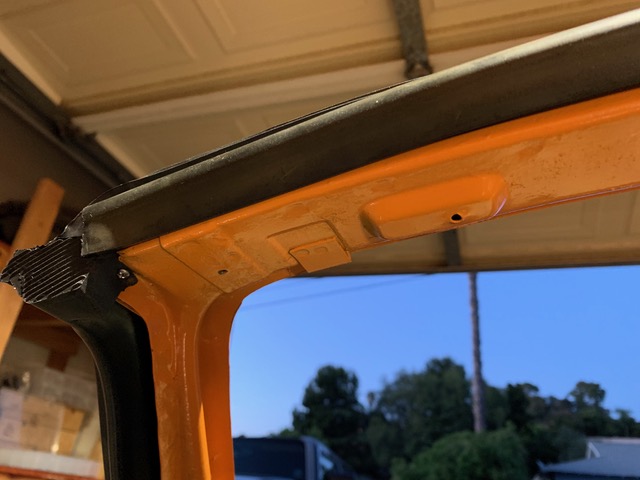 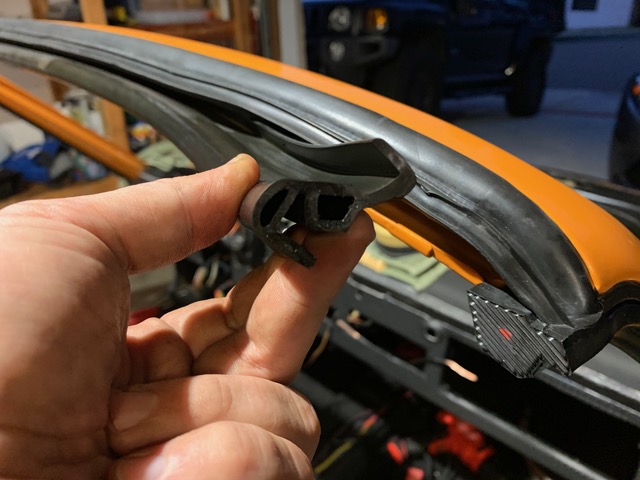 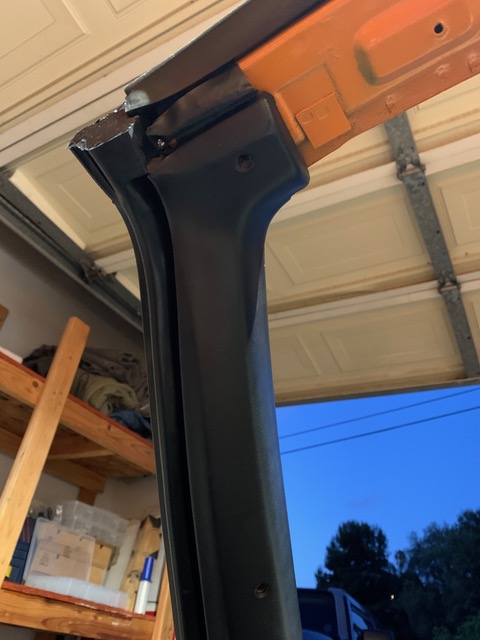 |
| racerx9146 |
 May 21 2020, 10:34 PM May 21 2020, 10:34 PM
Post
#852
|
|
good design never goes out of date..   Group: Members Posts: 174 Joined: 1-January 04 From: Sacramento, CA Member No.: 1,483 Region Association: Northern California |
Nope the Partrick thing is just a jumper harness and creates a much mess as it fixes. I got the 964 wiring diagram and just started labelling wires and removing stuff I did not need. It somewhat depends where you are going to mount the ECU. Based on what you have done with the rest of the car this will be cake for you.
regards Daron @racerx9146 question for you.... On your conversion, did you by any chance use the Patrick Motorsport conv. harnesses? |
| FourBlades |
 May 22 2020, 06:23 AM May 22 2020, 06:23 AM
Post
#853
|
|
From Wreck to Rockin     Group: Members Posts: 2,056 Joined: 3-December 07 From: Brevard, FL Member No.: 8,414 Region Association: South East States 
|
Great build, you are making great progress. (IMG:style_emoticons/default/beer3.gif) I like all the details you post, really tells the story. You are not kidding on all the little nick knacks and pieces you have to buy, they really add up, along with paints, hardware, clamps, etc. John |
| RiqueMar |
 May 22 2020, 01:46 PM May 22 2020, 01:46 PM
Post
#854
|
|
Enrique Allen Mar     Group: Members Posts: 2,220 Joined: 28-August 08 From: San Diego, CA Member No.: 9,478 Region Association: Southern California 
|
Great build, you are making great progress. (IMG:style_emoticons/default/beer3.gif) I like all the details you post, really tells the story. You are not kidding on all the little nick knacks and pieces you have to buy, they really add up, along with paints, hardware, clamps, etc. John Thank you! I'm not sure what's worse, the 'nickel and dime'-ing aspect of missing parts, or getting into a rhythm, and then having to stop because you need another metric bolt, screw or nut. |
| RiqueMar |
 May 22 2020, 02:17 PM May 22 2020, 02:17 PM
Post
#855
|
|
Enrique Allen Mar     Group: Members Posts: 2,220 Joined: 28-August 08 From: San Diego, CA Member No.: 9,478 Region Association: Southern California 
|
As of yesterday, we are turning stuff on!
Using the /6 ignition switch, now able to 'crank' and activate the starter as well as activate the Headlight motors, Hazards and running lights. Compared to the initial setup and testing we did with the original harness, everything is going very smoothly. Fuses in, battery in, and starting to turn stuff on. Listed below, very helpful resource from @JeffBowlsby and his site listed below for the front turn signal lights. Later today, I'm going to be taking the column off the black car to test the wipers, turn signals and high beams. Once that is tested and everything is working, we will then tie-in the 914/6 ignition switch and steering column. After that, on to the matter of setting up the gauges. This will be a bit more complicated, as the previous owner didn't use a specific wiring color / pattern, and its a mess. Any 3.6 guys reading, your help is appreciated in regards to gauge wiring and coloring! Not there yet, but this is certainly a big step! 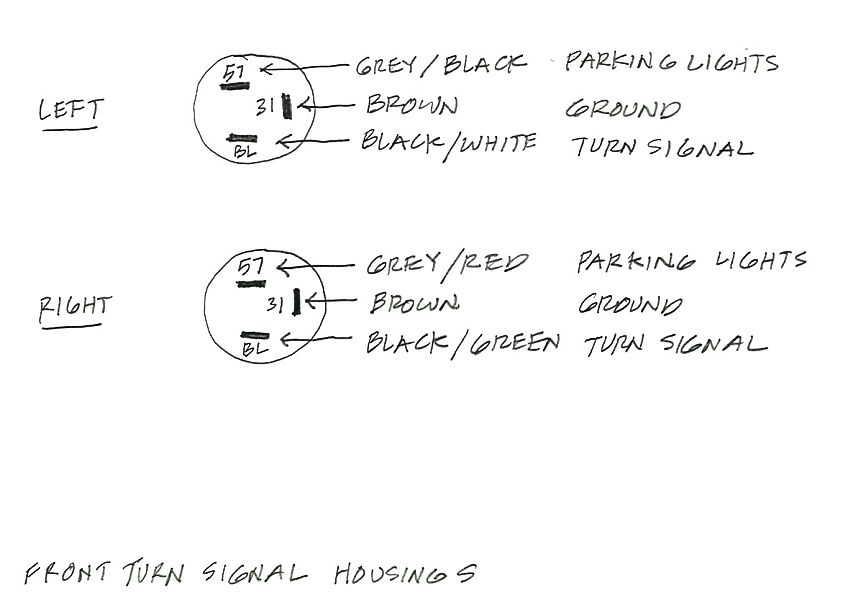 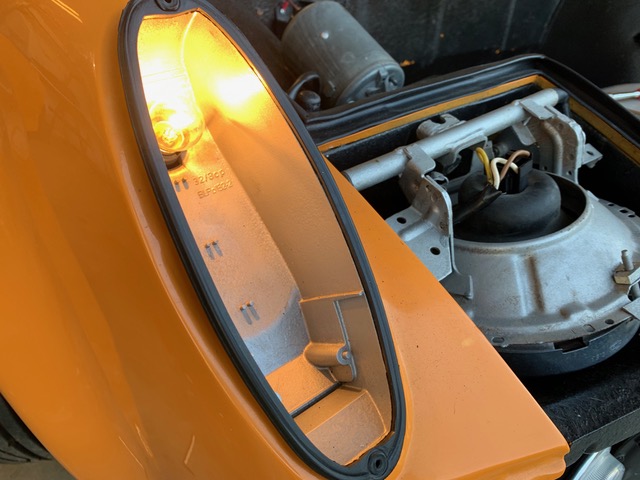 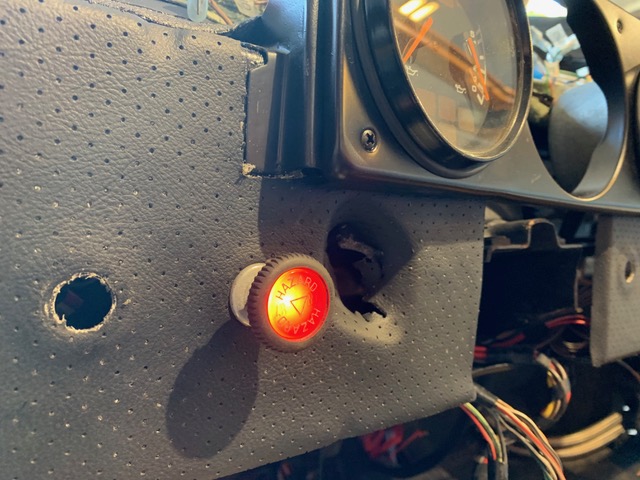 |
| RiqueMar |
 May 24 2020, 11:27 AM May 24 2020, 11:27 AM
Post
#856
|
|
Enrique Allen Mar     Group: Members Posts: 2,220 Joined: 28-August 08 From: San Diego, CA Member No.: 9,478 Region Association: Southern California 
|
This post is all about salvaging and reconditioning parts....
More equipment going on! Friday, I was able to head over to my Fathers garage and grab a few donor pieces off of the car the 3.6 was originally in; Interior pieces, heater control and cables, etc. Additionally, with a small trip up north to Riverside I was able to purchase a few new shiny and missing bits, thanks to @bdstone914 . At this point all I need is the Targa roll-bar pad for the interior, as the one of the donor car had a crack in it. After cleaning each of the parts (I was happy to find all were in really good condition) I decided to start with the gas tank, expansion tank, and charcoal canister. As the expansion tank got a new coat of paint, I set off on the charcoal canister. For some reason, maybe the awkward shape of the Gas tank, it was pretty difficult to fit the charcoal canister with the stock bracket. I don't know why it gave me such difficulty, and I didn't necessarily find a 'trick' to getting it on there. I suppose its one of those things thats just easy with 3 hands. Frustrated after the charcoal canister, 'That took way too long' I took a break and moved on to easier items, new door sensors and rubber seals from 914rubber, and beginning to put on the engine grill. Originally, I thought I would paint the supports that are below the engine grille mesh, but test fitting the pieces, I actually like the look of the body-color below the satin black pieces. I'll leave it body-color for now, I can always paint it later. 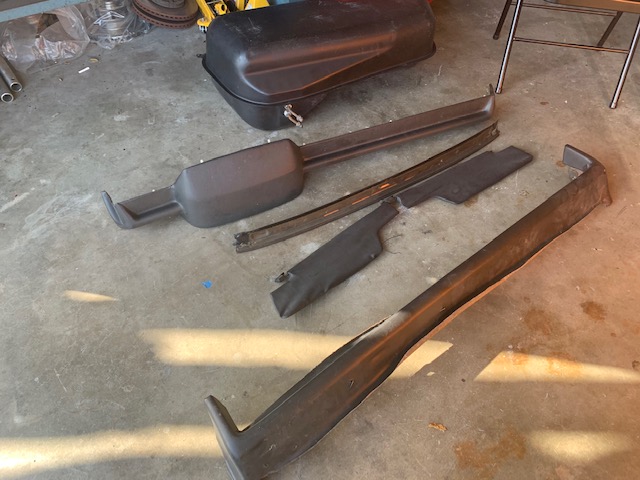 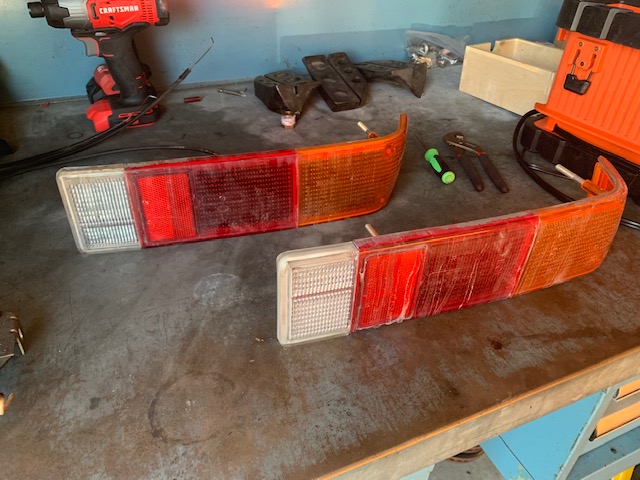 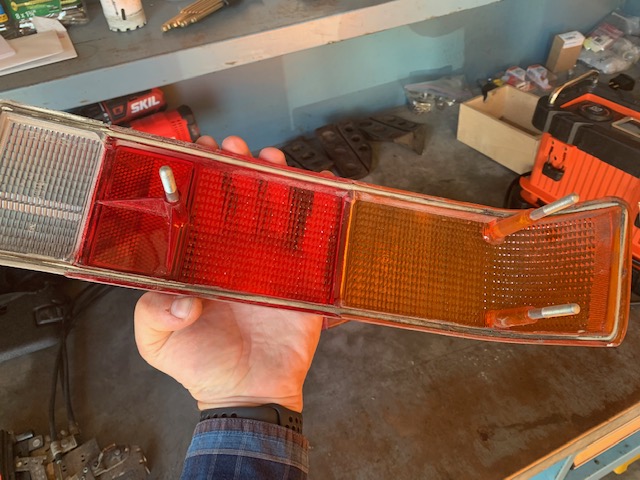 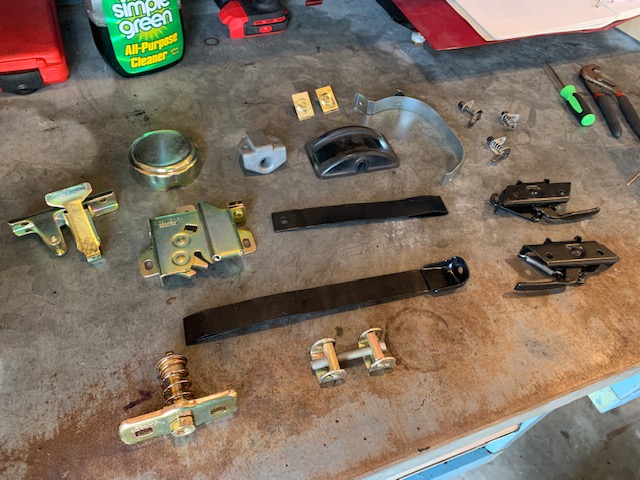 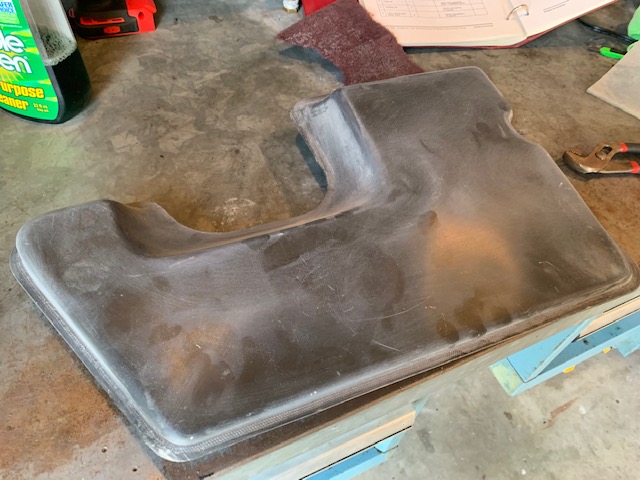 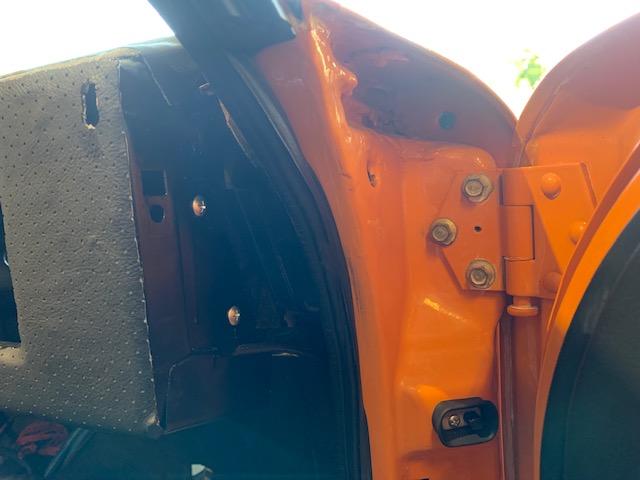 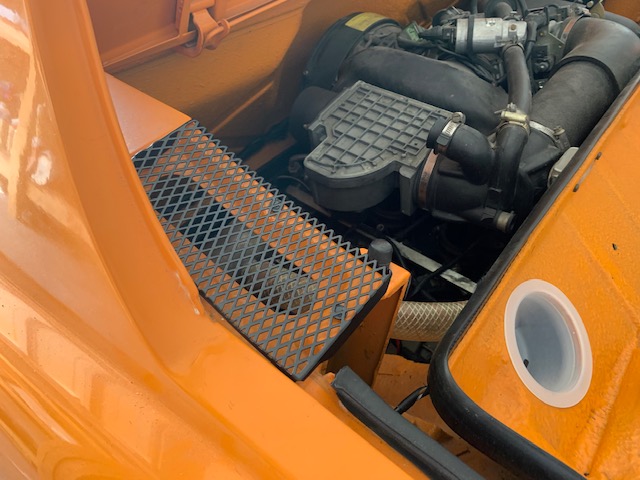 |
| eric9144 |
 May 24 2020, 05:48 PM May 24 2020, 05:48 PM
Post
#857
|
|
Advanced Member     Group: Members Posts: 2,769 Joined: 30-March 11 From: San Diego, CA Member No.: 12,876 Region Association: Southern California 
|
Going to be ready to drive in 2 weeks for the Corona run? (IMG:style_emoticons/default/poke.gif)
Seriously though, awesome progress! |
| RiqueMar |
 May 24 2020, 06:27 PM May 24 2020, 06:27 PM
Post
#858
|
|
Enrique Allen Mar     Group: Members Posts: 2,220 Joined: 28-August 08 From: San Diego, CA Member No.: 9,478 Region Association: Southern California 
|
Going to be ready to drive in 2 weeks for the Corona run? (IMG:style_emoticons/default/poke.gif) Seriously though, awesome progress! @eric9144 not a chance, but I'll still be there in something. Question for guys with later cars / harnesses; Is there any reason I need to keep the interlock system located before the passenger seat? I know I can engage the starter by linking the Yellow and Yellow and Red wires, but I'm concerned that some items won't activate, as I see some leads are the same colors. Is it possible for me to solder leads together and completely remove the equipment? 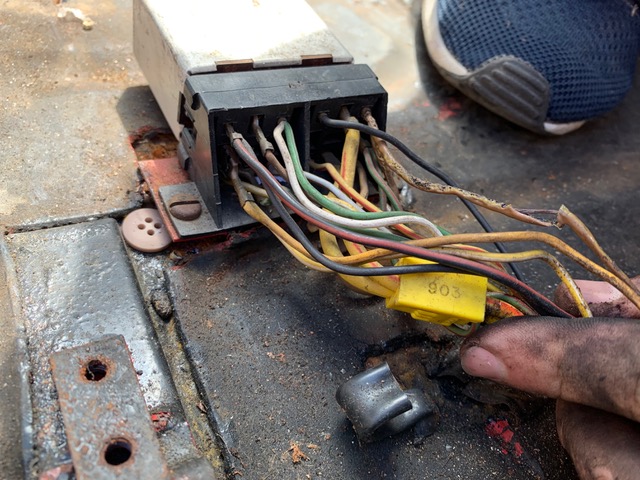 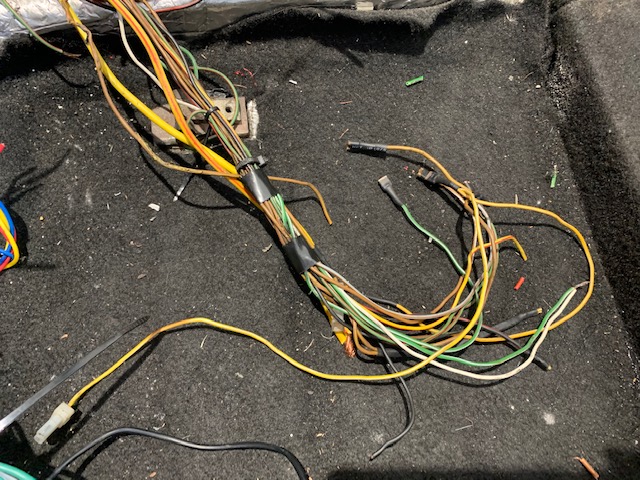 |
| Cairo94507 |
 May 25 2020, 07:19 AM May 25 2020, 07:19 AM
Post
#859
|
|
Michael           Group: Members Posts: 10,295 Joined: 1-November 08 From: Auburn, CA Member No.: 9,712 Region Association: Northern California 
|
Great progress. Can't wait to see it running. (IMG:style_emoticons/default/beerchug.gif)
|
| RiqueMar |
 May 25 2020, 06:31 PM May 25 2020, 06:31 PM
Post
#860
|
|
Enrique Allen Mar     Group: Members Posts: 2,220 Joined: 28-August 08 From: San Diego, CA Member No.: 9,478 Region Association: Southern California 
|
Gracias @Cairo94507 hope to be driving by you soon! (IMG:style_emoticons/default/beerchug.gif) With much help from the site by @JeffBowlsby and the reference photos I took before removing the harness from the donor car, I was able to reconnect and refurbish everything the corresponds and connects to the seat belt interlock / interrupt. The setup was different from the schematic drawn on the site, so I had to rely heavily on the photos taken before removal, with my theory being 'It worked before'. The only wire I couldn't find is a small Yellow w/ White-stripe that goes in the bottom left corner of the system, however as I'm wagering that these are for the seat belt sensors themselves, it should be easy to 'T-off' the existing yellow with white if I need to. Parallel to this, I'm also wrapping up the wiring in this area for the ECU and am beginning to shorten and lengthen wires to make it clean. I'm not exactly sure where I will put this module, but I've extended the ground to reach either a ground-point I created for the ECU (behind the passenger seat) or the center console.... I'm leaning more toward the center console. Once complete, I'll wrap this with the 'factory look' tape. 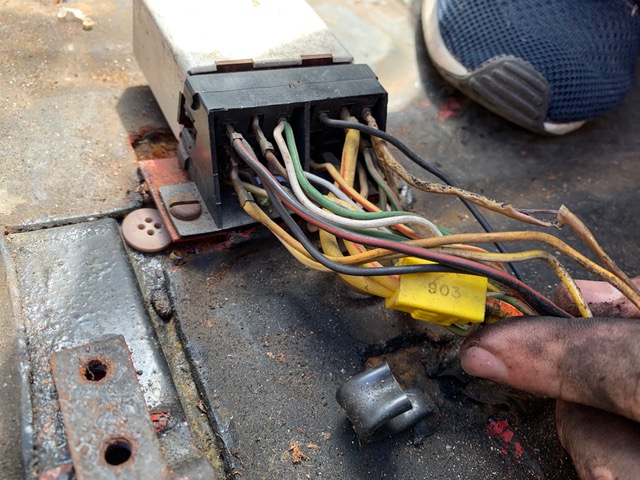 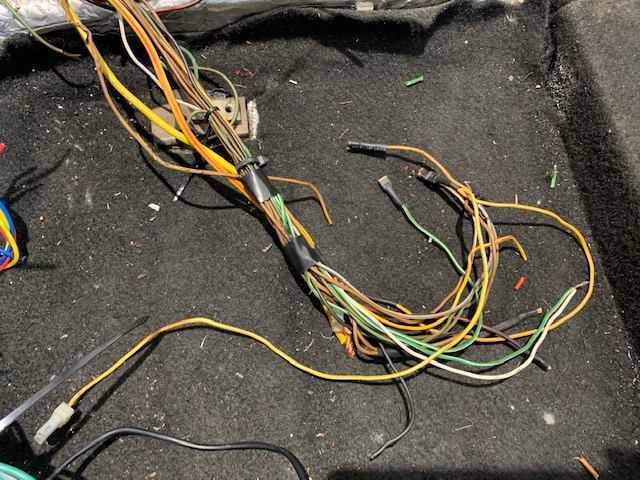 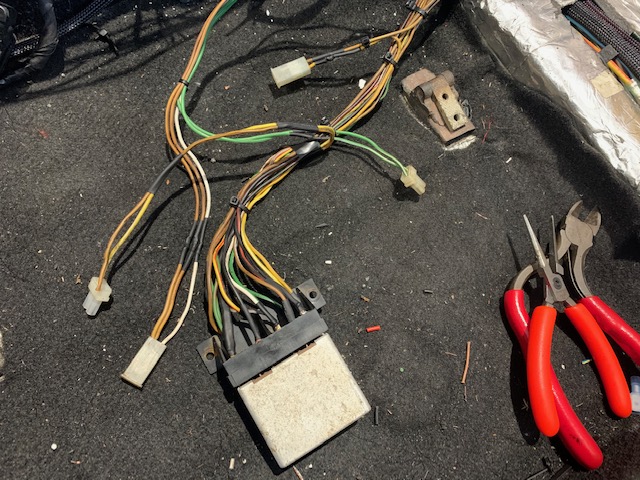 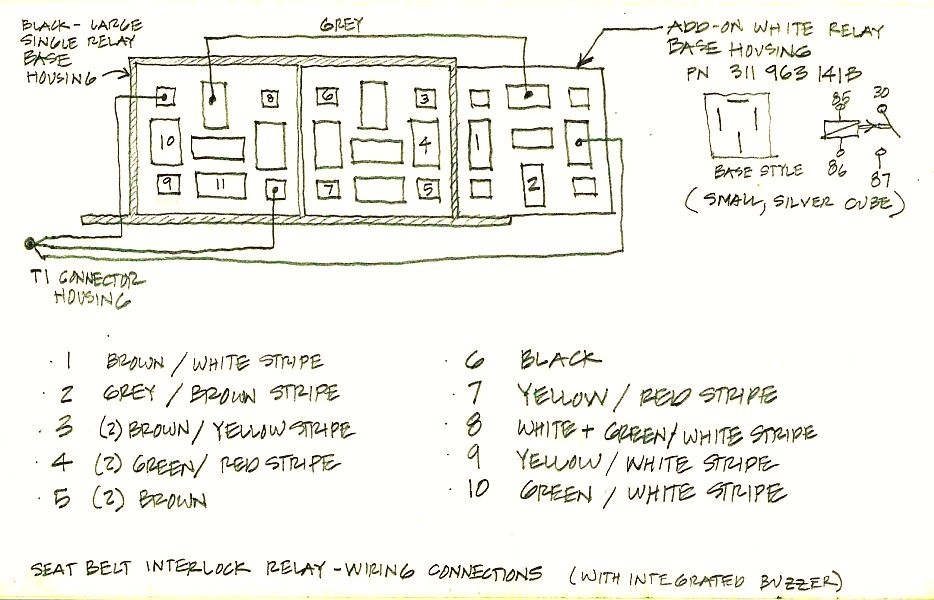 |
  |
2 User(s) are reading this topic (2 Guests and 0 Anonymous Users)
0 Members:

|
Lo-Fi Version | Time is now: 19th April 2025 - 02:53 AM |
Invision Power Board
v9.1.4 © 2025 IPS, Inc.


