|
|

|
Porsche, and the Porsche crest are registered trademarks of Dr. Ing. h.c. F. Porsche AG.
This site is not affiliated with Porsche in any way. Its only purpose is to provide an online forum for car enthusiasts. All other trademarks are property of their respective owners. |
|
|
  |
| RiqueMar |
 Aug 18 2020, 02:13 PM Aug 18 2020, 02:13 PM
Post
#901
|
|
Enrique Allen Mar     Group: Members Posts: 2,220 Joined: 28-August 08 From: San Diego, CA Member No.: 9,478 Region Association: Southern California 
|
Another station break that I wanted to share on my thread...
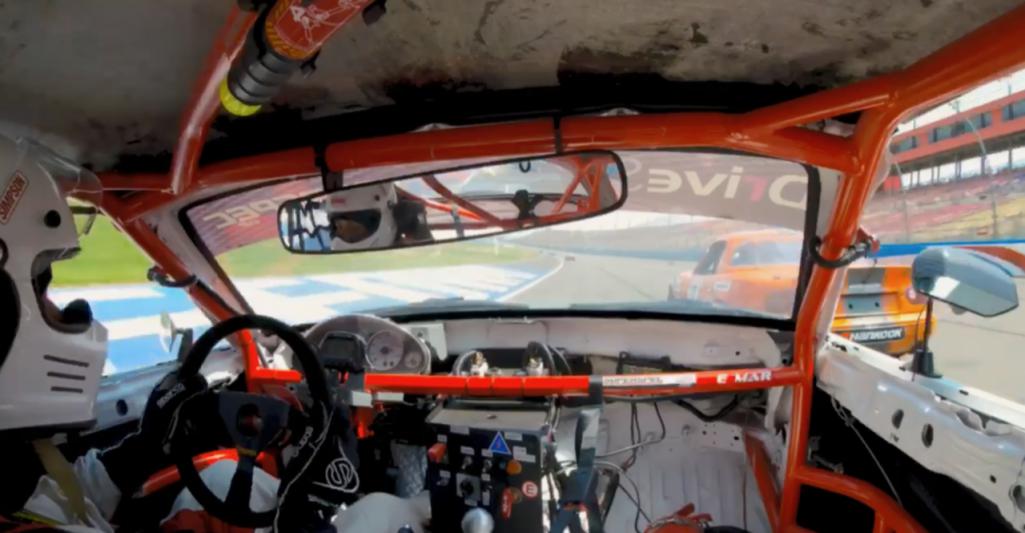
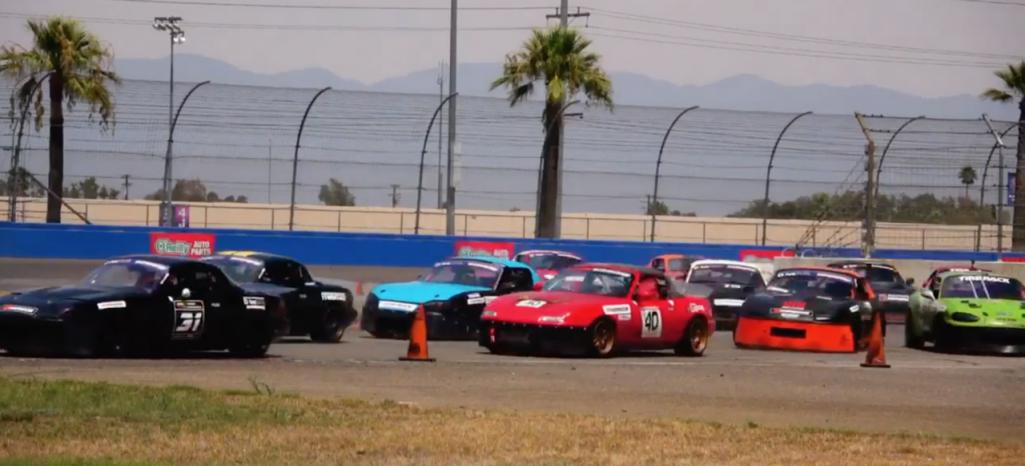
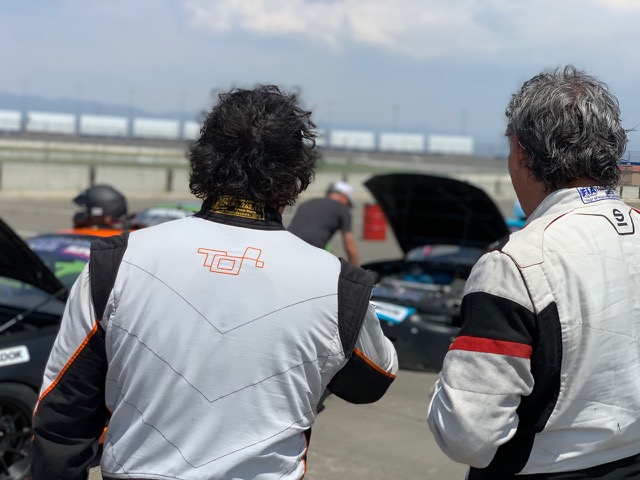
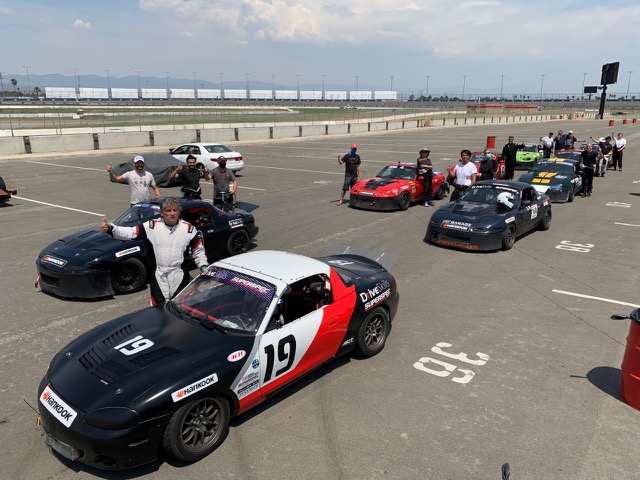
Took this weekend to spend some time with my Dad on his newest adventure with Miata Superspec racing via SpeedVentures. A lot of fun visiting and hanging out with the group at Autoclub Speedway in Fontana, CA. If you ever get the chance to do a track day or Speed Ventures event at this location (or any for that matter) I cannot recommend it enough. Hope everyone enjoys the photos! 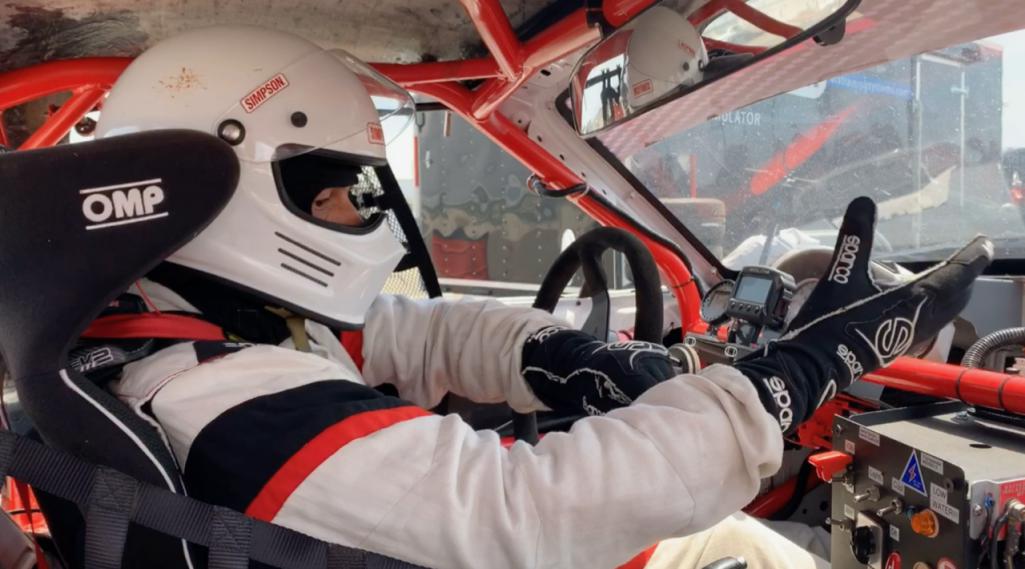 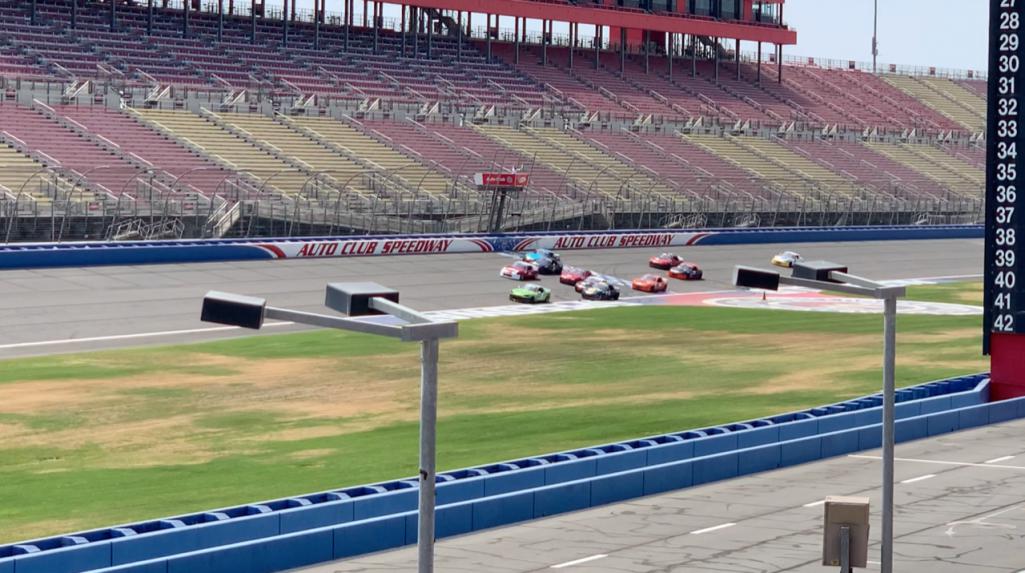 |
| RiqueMar |
 Aug 18 2020, 02:15 PM Aug 18 2020, 02:15 PM
Post
#902
|
|
Enrique Allen Mar     Group: Members Posts: 2,220 Joined: 28-August 08 From: San Diego, CA Member No.: 9,478 Region Association: Southern California 
|
|
| RiqueMar |
 Aug 18 2020, 02:41 PM Aug 18 2020, 02:41 PM
Post
#903
|
|
Enrique Allen Mar     Group: Members Posts: 2,220 Joined: 28-August 08 From: San Diego, CA Member No.: 9,478 Region Association: Southern California 
|
Back to our standard-914 content...
Work continues on the oil-system, and I'm happy to finally get the lines (mostly) wrapped up. The connection from the oil-tank / engine-out to the bulkhead fittings on the passenger-side longs is complete, as is the connection from the bulkhead fitting to the thermostat (routed through the inside of the cabin, under the gas-tank and into the front trunk). Also, I'de like to take this moment to mention how much I DO NOT love working with braided steel lines. For those of you moving in a similar direction, I highly suggest watching the various techniques on YouTube, investing in gloves, and learning how to curse in 4-languages... You'll need all of those! (IMG:style_emoticons/default/headbang.gif) For future reference, I can see the benefit when running them outside a shielded area, but will be moving to nylon whenever possible. NOTE: For those creating a similar solution, the connection from the thermostat to the oil-cooler is where it gets tricky, depending on where you mount the thermostat. Whereas originally I was going to run a 45º and then about 6" of braided hose, I find that I will have to install a 2"-3" 'extender' on the oil-cooler, then a 90º bend to be able to route this correctly (with the 45º, it would rub or 'kink' against the support below the headlight), see the last picture of where things don't line up like I was expecting, and the extender(s) I found on JEGS, not sure which one will end up being the solution.... 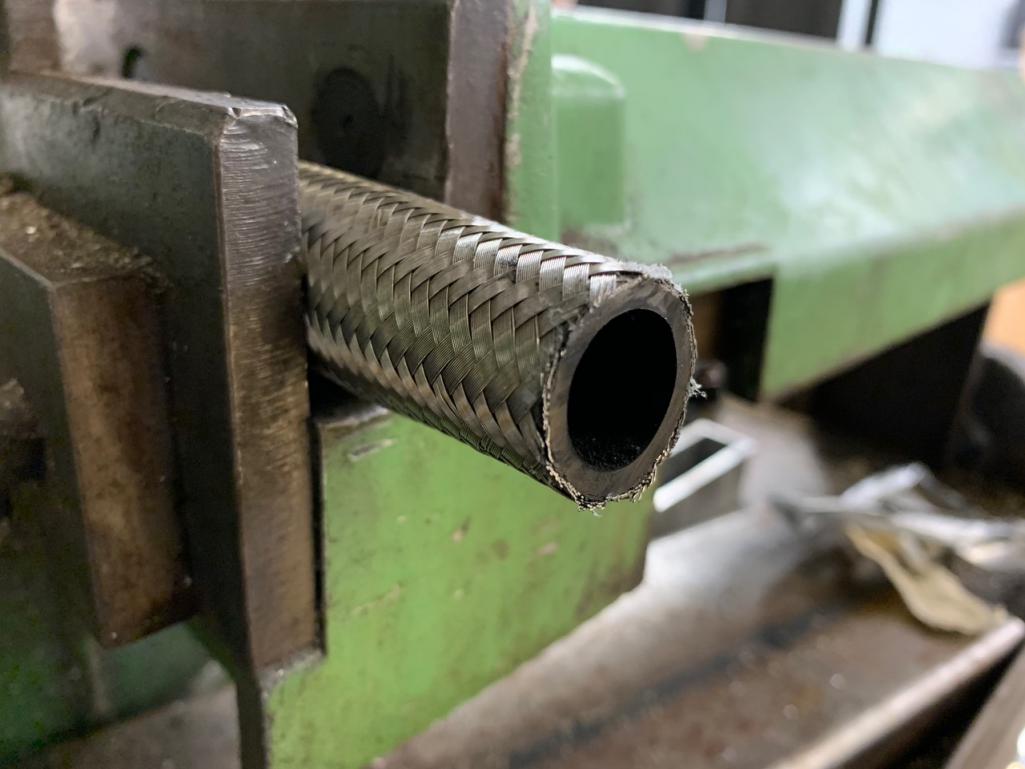 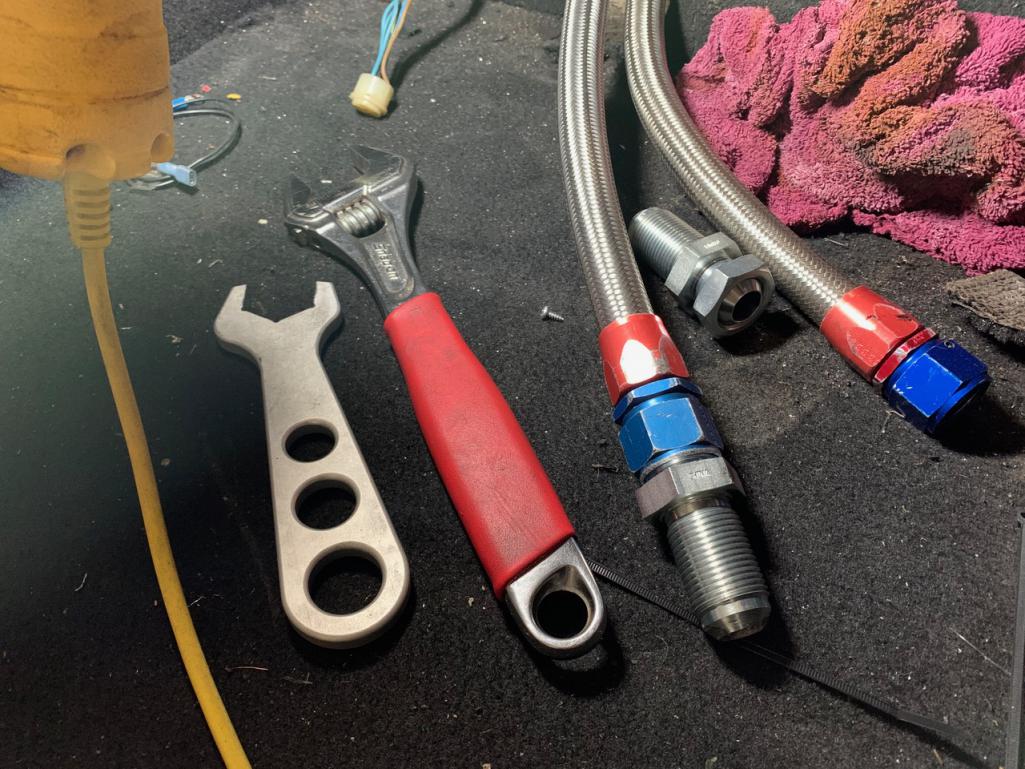 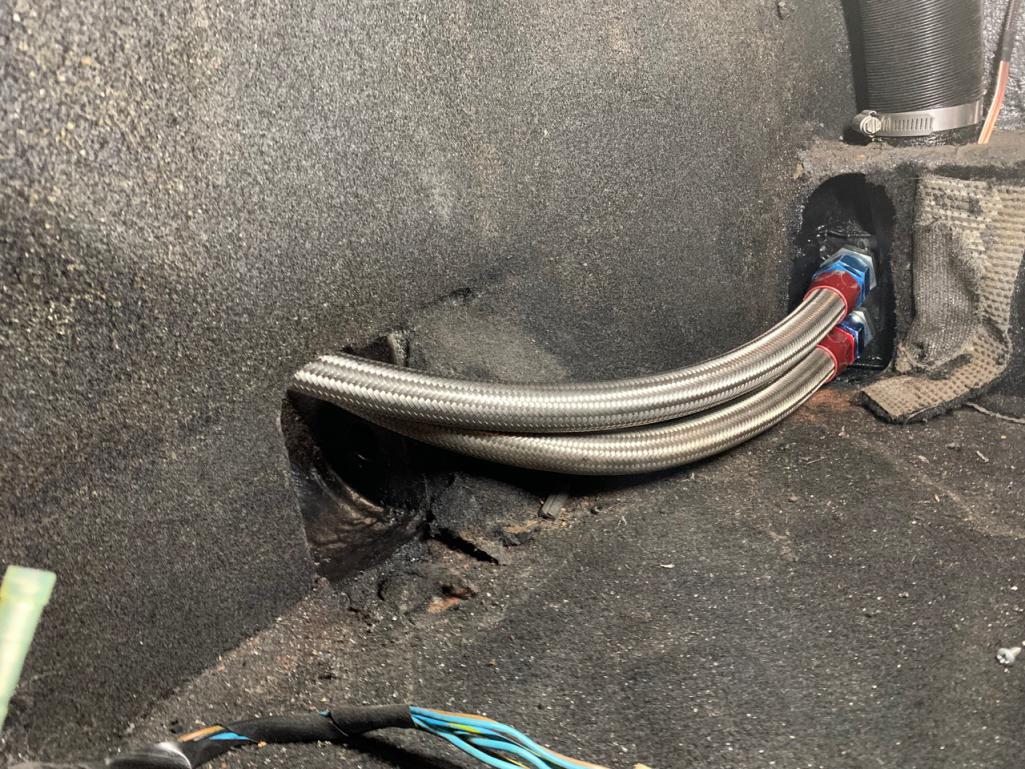 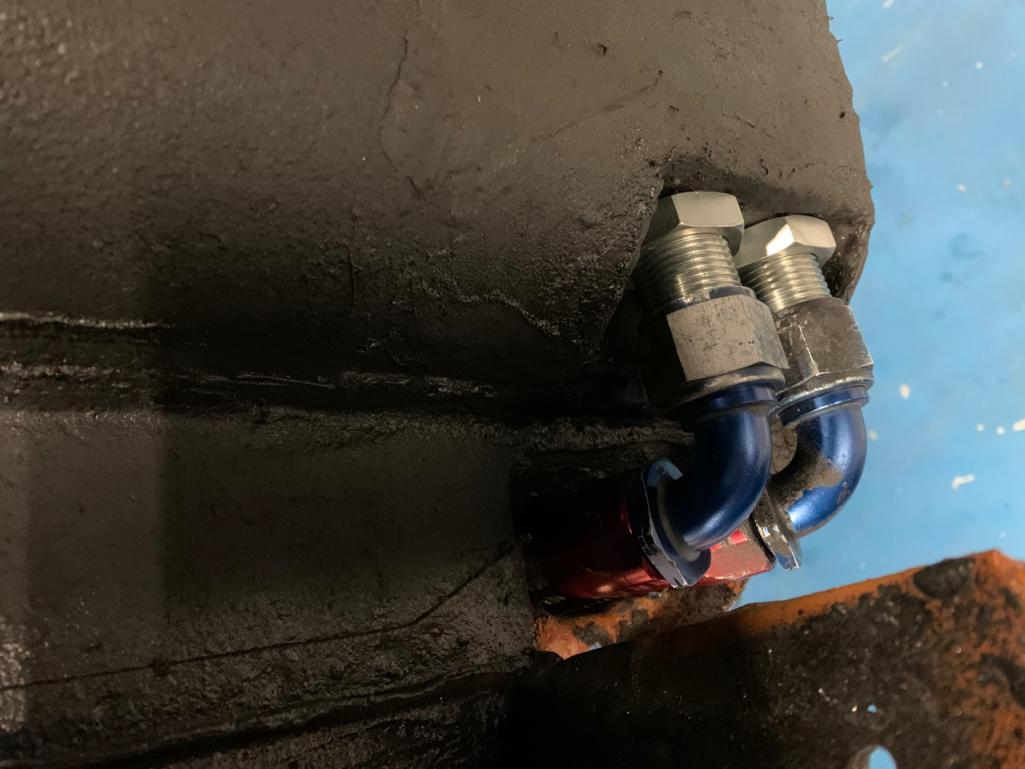 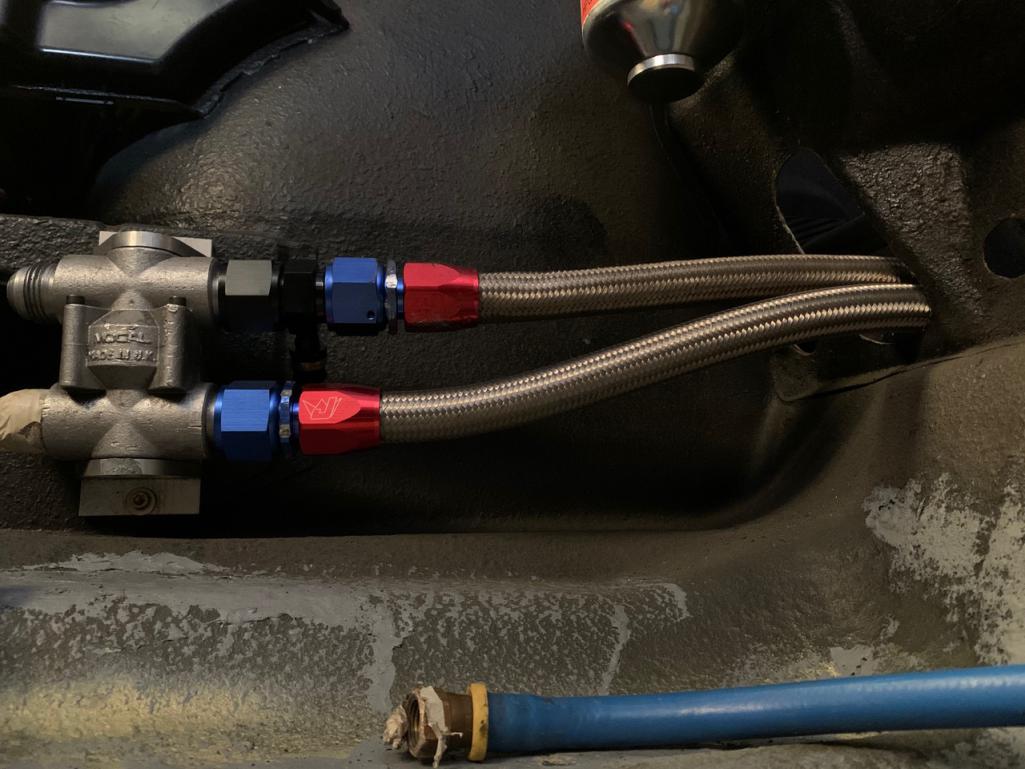 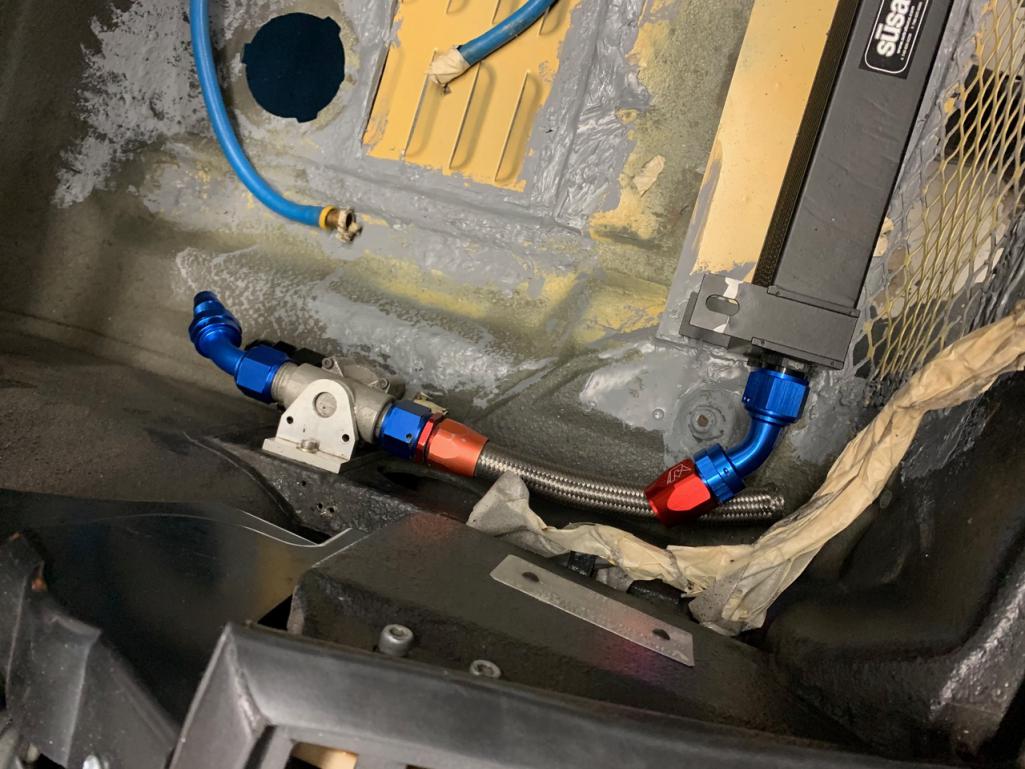 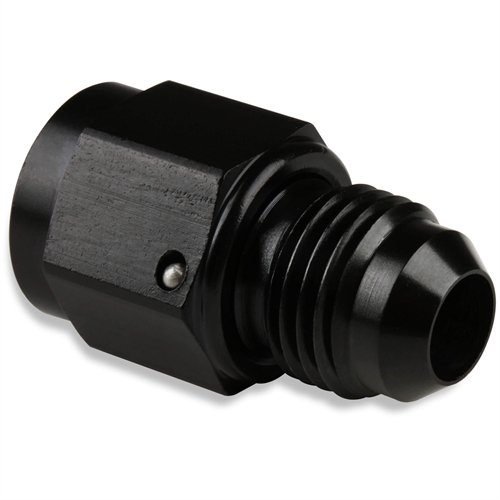 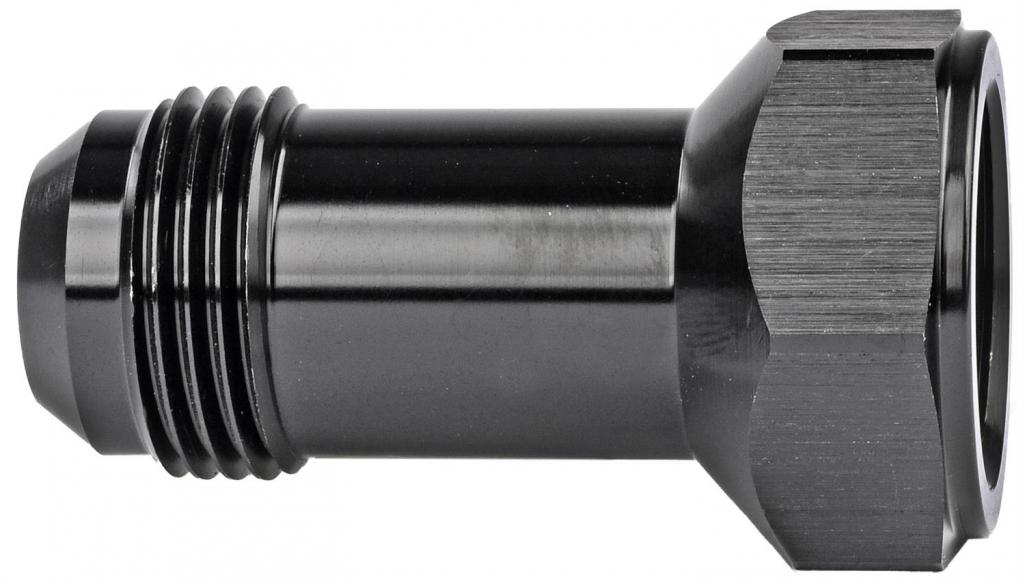 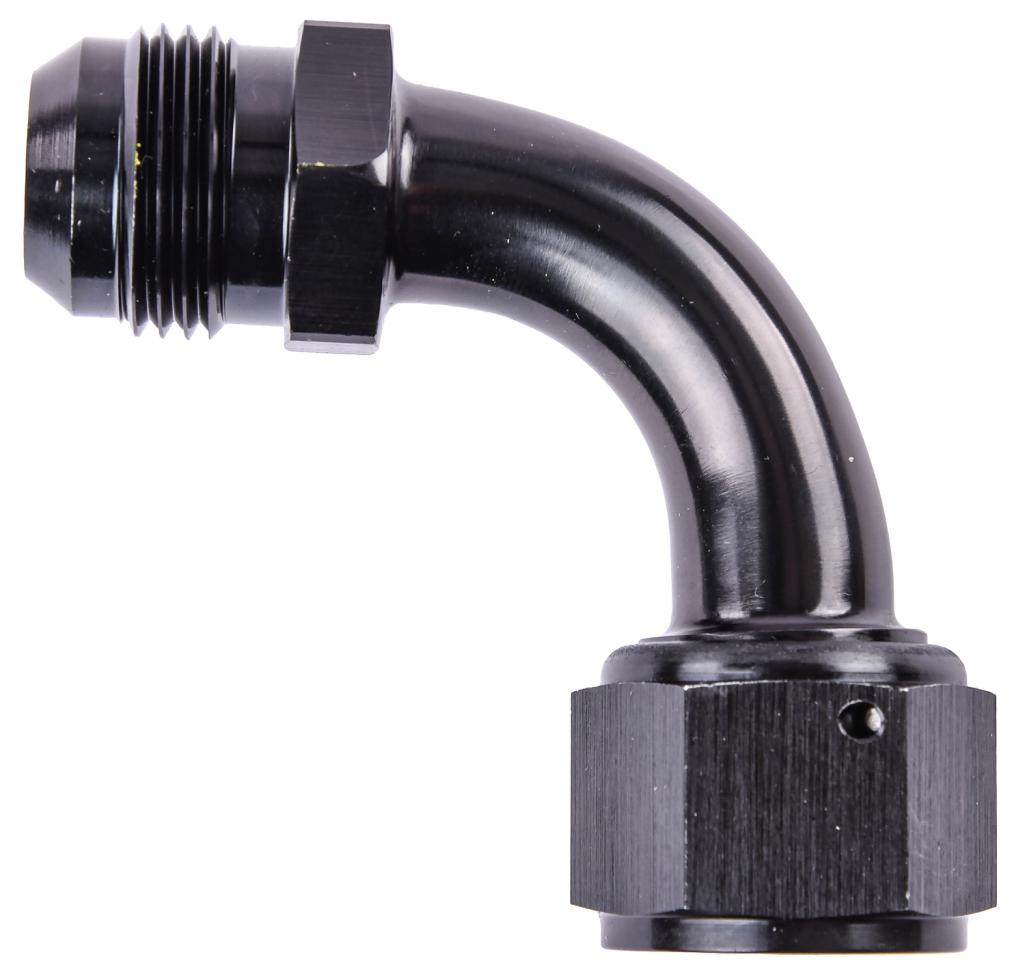 |
| RiqueMar |
 Aug 19 2020, 08:46 AM Aug 19 2020, 08:46 AM
Post
#904
|
|
Enrique Allen Mar     Group: Members Posts: 2,220 Joined: 28-August 08 From: San Diego, CA Member No.: 9,478 Region Association: Southern California 
|
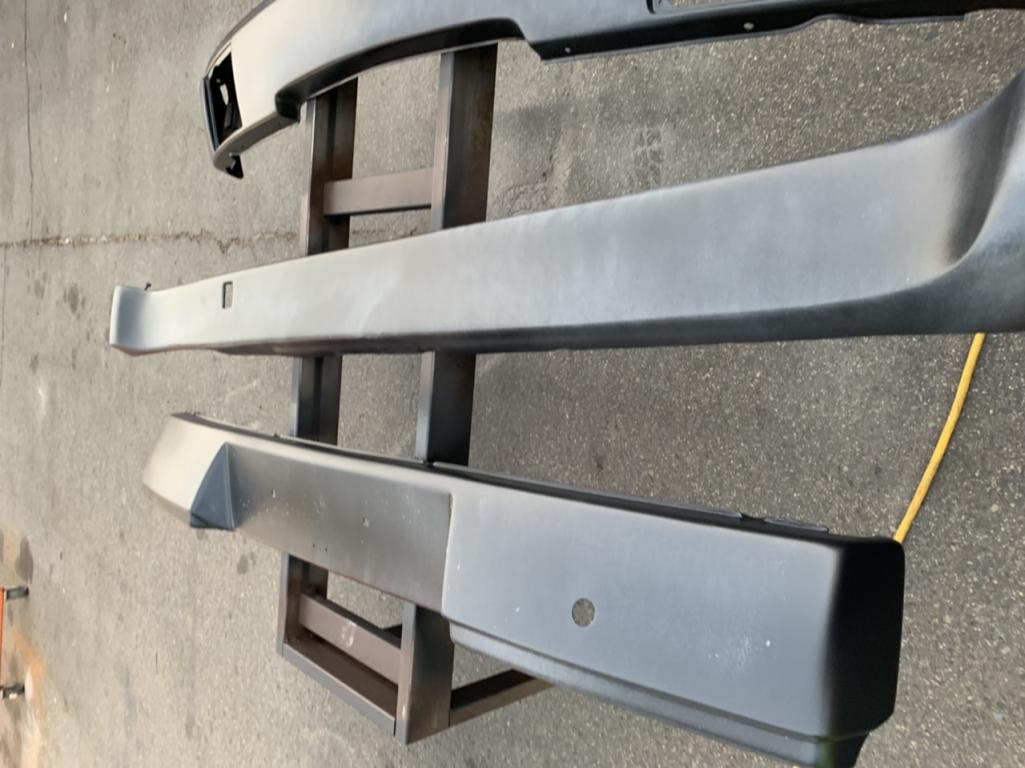
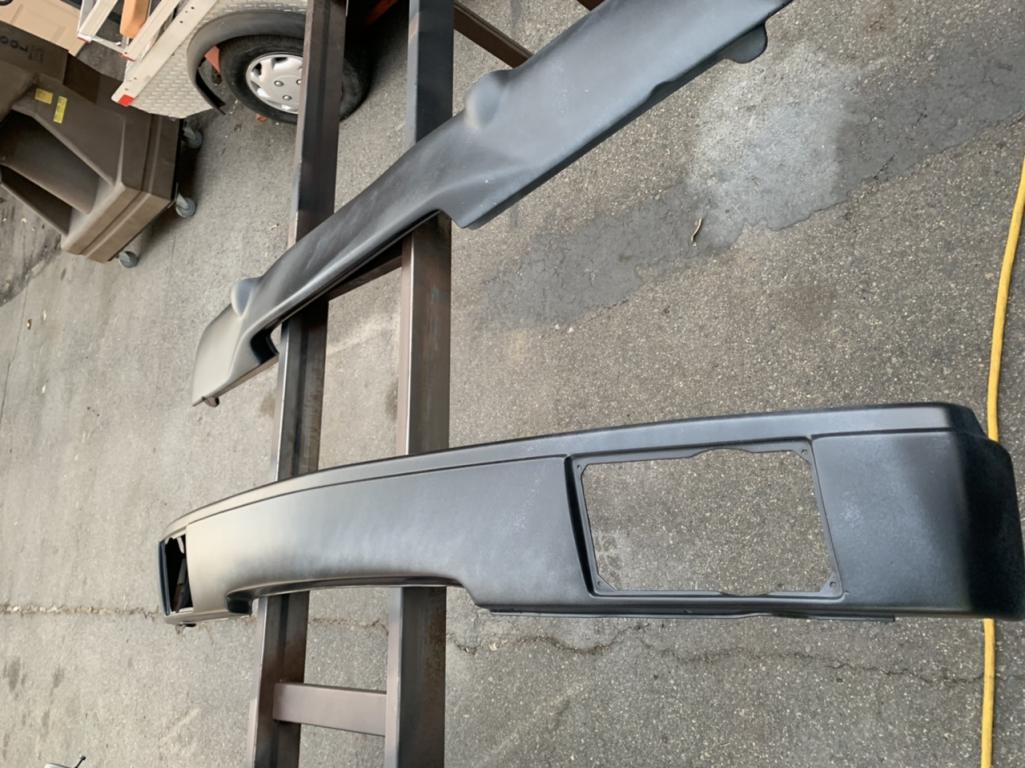
Small update... swung by the ranch (Garage) yesterday evening and was pleasantly surprised to see these beauties in primer! (IMG:style_emoticons/default/biggrin.gif)
  |
| RiqueMar |
 Sep 2 2020, 02:14 PM Sep 2 2020, 02:14 PM
Post
#905
|
|
Enrique Allen Mar     Group: Members Posts: 2,220 Joined: 28-August 08 From: San Diego, CA Member No.: 9,478 Region Association: Southern California 
|
Continuing work on project 3.6, following photo show the front trunk equipment placement and mock-up before repaint. As there has been a lot going on here, I've tried to summarizer everything in this entry for anyone following along, or who wants to do something similar. (IMG:style_emoticons/default/bye1.gif)
- Top Right Corner on front bulkhead - Amplifier bracket template (actual is 1/4" ABS) - Designed this myself, laser-cut. Used metric 8mm x 35 bolts back-drilled from the 'gas tank side' of the trunk. To isolate and stand off for wires and speaker cables, I added plastic spacers (approx 1.5"). Note: For the top-left bolt, it is necessary to drill through top-support of the bulkhead/firewall to have access to the tubing. - Top Left Corner on front bulkhead - 3.6 Fram Fuel-filter - As with the amplifier, back-drilled from the 'gas-tank side' of the trunk for easy access / studs. - Bottom-center on front bulkhead - 3.6 Fuel pump with isolators and bracket - Careful here, as it's close to the sway bar. Mounted the fuel pump on a bracket with 1" rubber isolators to reduce vibration. This location was chosen as it's (nearly) the lowest point of the front trunk, and doesn't interfere with the oil-cooler shroud. - Driver Side, below headlight - Aux Relay / Fuse Box - Found this on Amazon (Link here - Relay/Fusebox). Great model and very tidy. This will hold all fuses / relays for equipment in the front trunk; Fuel Pump, Amplifier, Oil-Cooler Fans, Work-light. As I had to slightly re-route the stock-harness for the Driver-Side headlights and turn-signal, I added an isolated wire-clamp. - Center-bottom of front trunk - Louvered sheet metal - Available on Patrick Motorsports (PMS Link here). Pretty straight-forward. - Front trunk Left - Oil Cooler thermostat - For those unfamiliar; When cool, the device returns oil to the engine. When up to operating temp., it will allow oil to flow to the front-mounted oil cooler. Additionally, I've mounted a Setrab inline thermal switch, also from Patrick Motorsports (PMS Website and link here). This is a 'set it and forget it measure'. When the oil temp gets to 190º, this will kick-on the 3x Spal fans (Link here). - Front trunk - Oil Cooler connections - I found it easiest to use a 90º bend and a small adapter to make everything fit and flow into the front-mounted oil-cooler. Cooler is a Setrab unit and, shocker-shocker, found on Patrick Motorsports (Oil Cooler - Link here) In case I haven't mentioned it, all lines and connections are AN12, and generally available on JEGS.com, Offroadwarehouse.com, etc. - Shroud - Used the GT replica shroud, this is available most anywhere. Cut the side out for the oil in/out to exit, and a small notch on the Drivers side for the fan electrical connections to pass under, making removing and installing easy. Additionally, I added 4x tabs to the top and bottom, drilled through the shroud and body, then welded 6mm nuts for the bolts to hold onto. No need to climb under the car or take off the bumper to remove, and no ugly sheet-metal screws (IMG:style_emoticons/default/shades.gif) 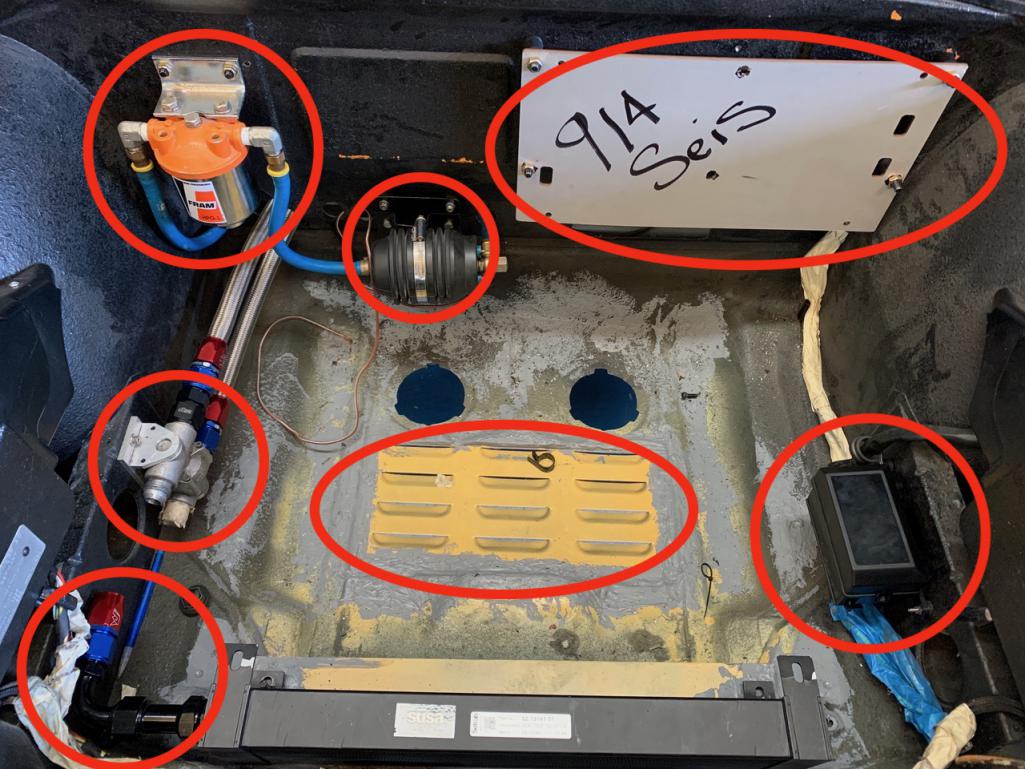 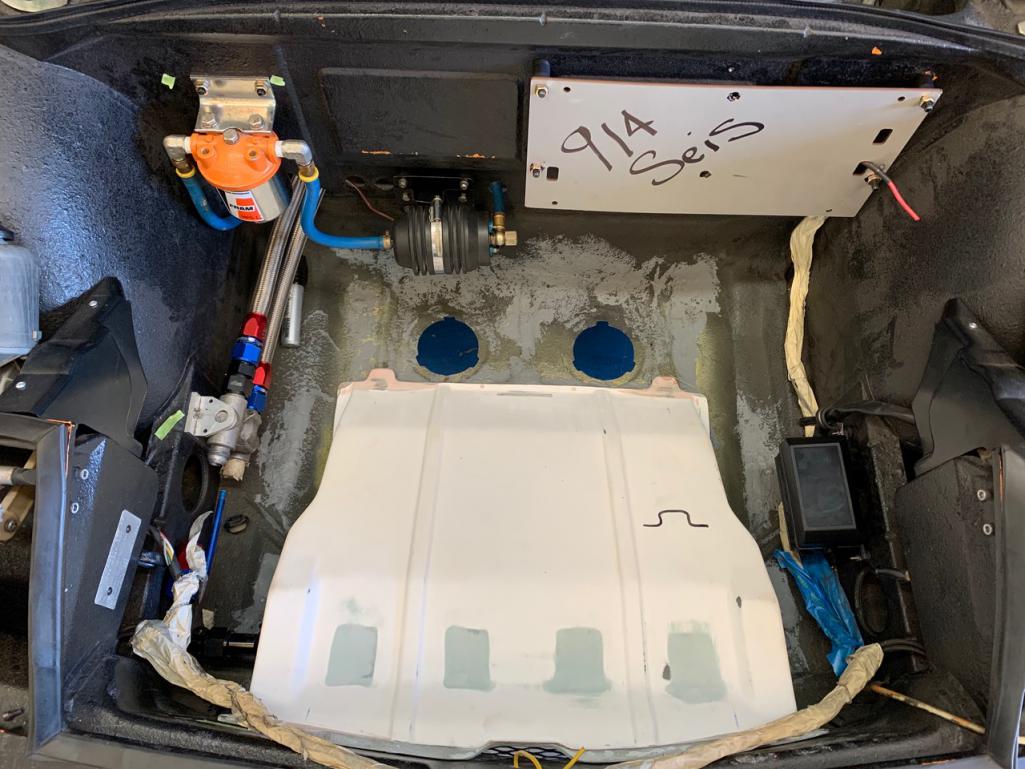 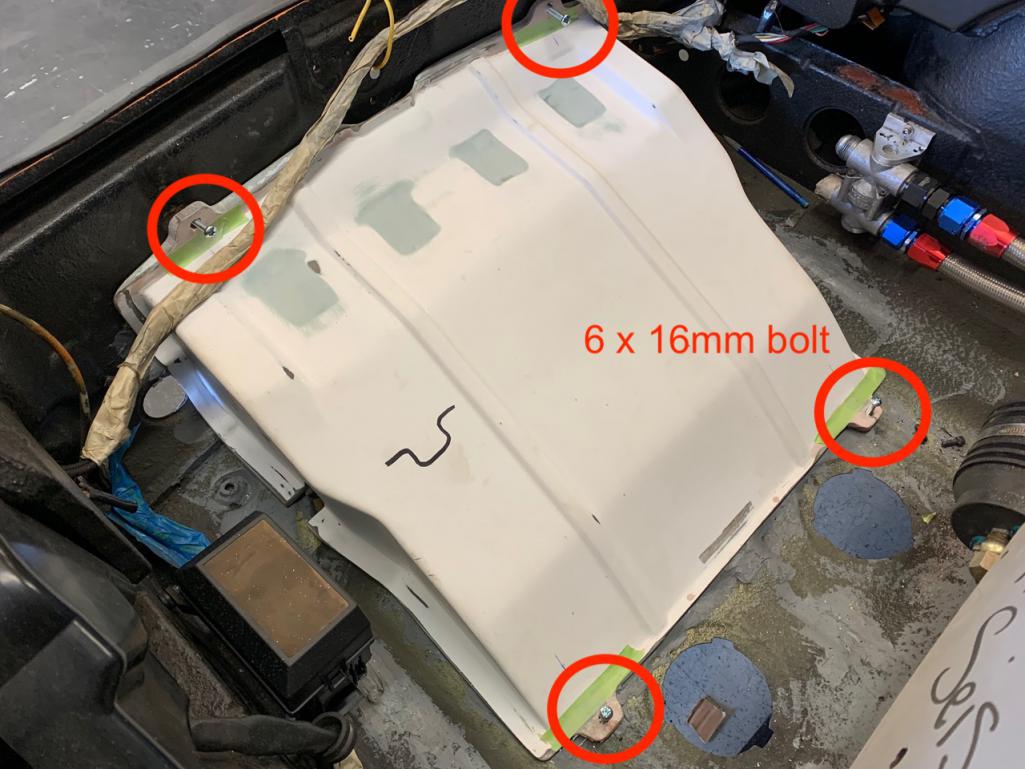 |
| RiqueMar |
 Sep 2 2020, 02:22 PM Sep 2 2020, 02:22 PM
Post
#906
|
|
Enrique Allen Mar     Group: Members Posts: 2,220 Joined: 28-August 08 From: San Diego, CA Member No.: 9,478 Region Association: Southern California 
|
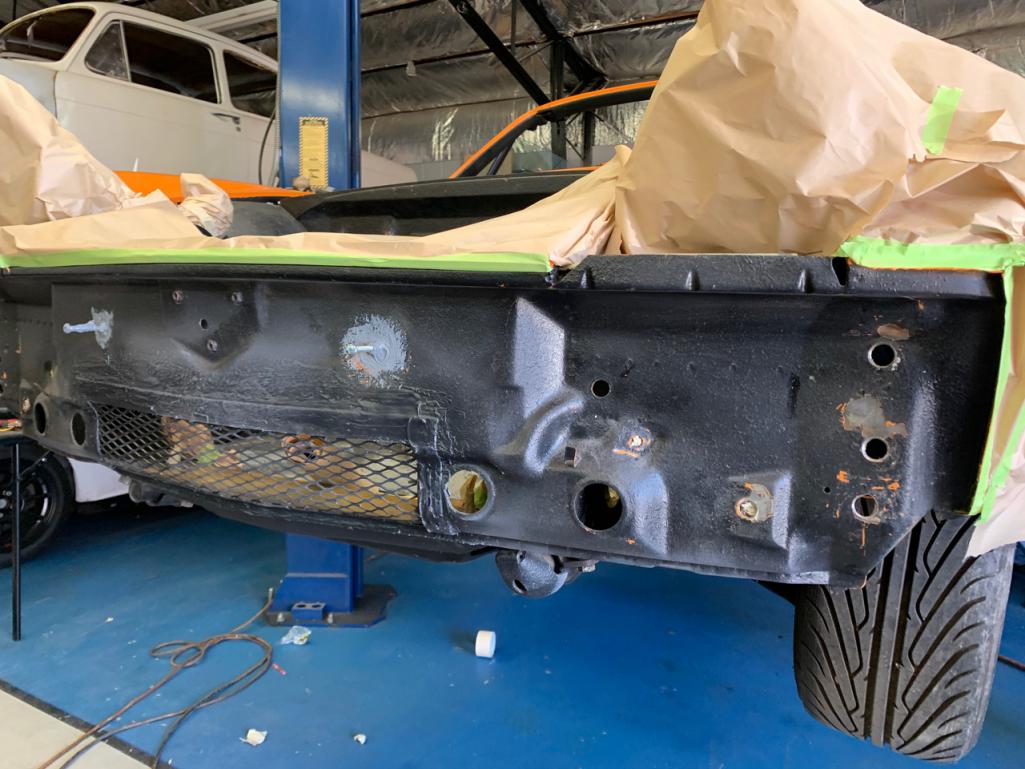
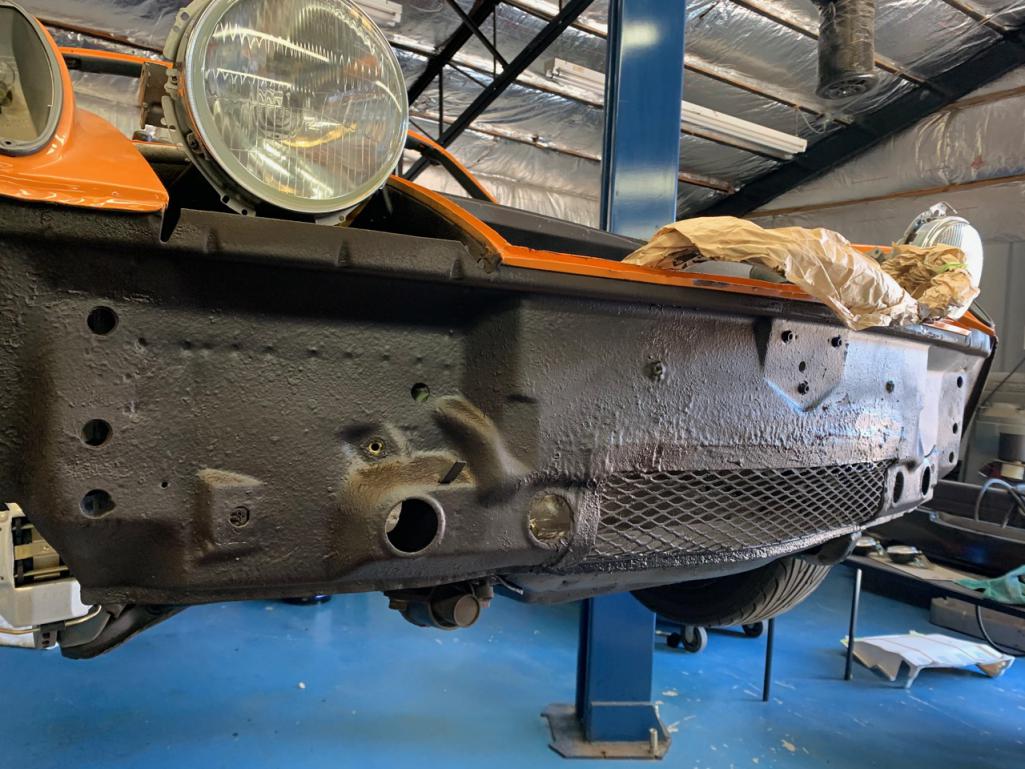
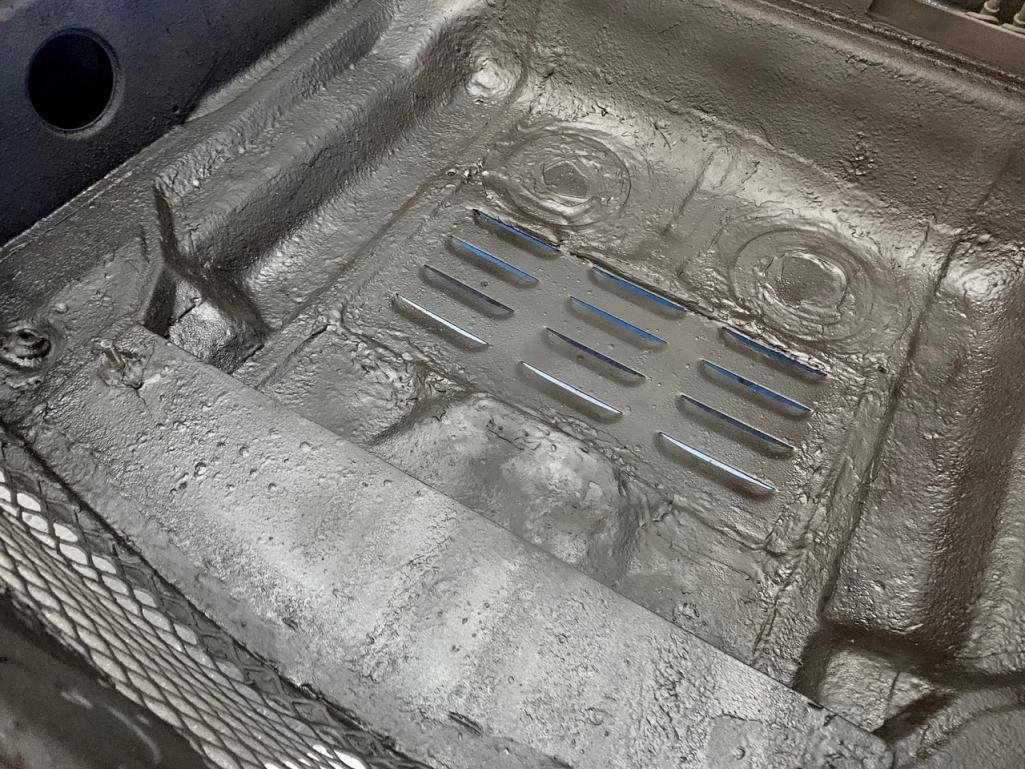
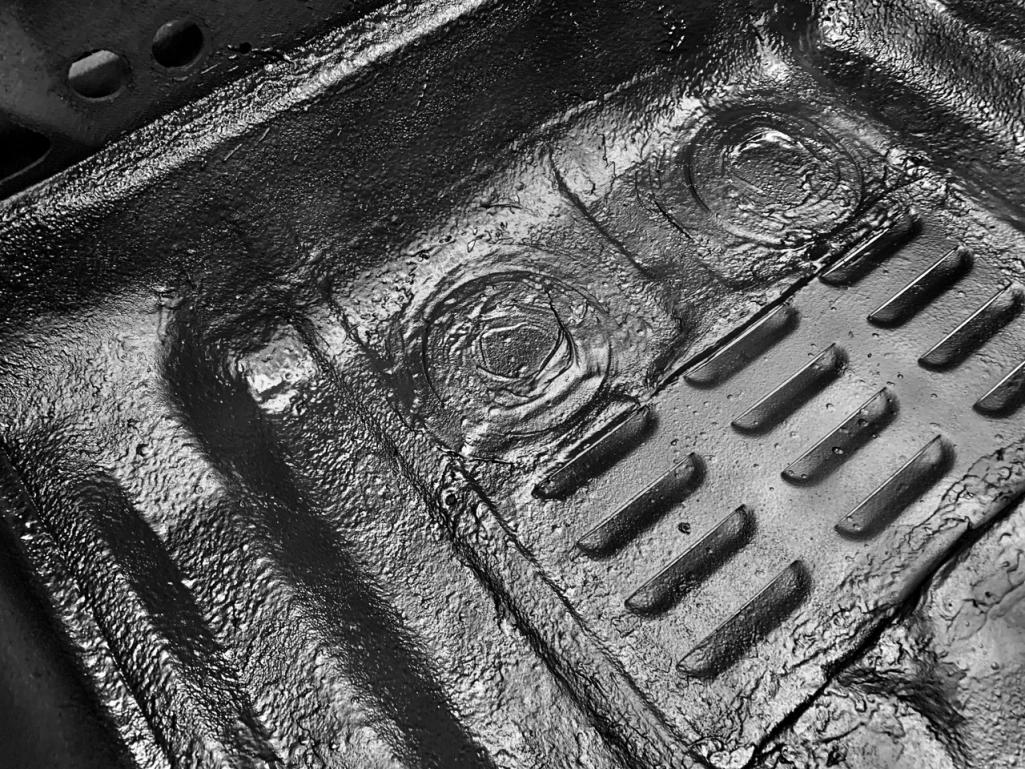
Once complete with the mockup, it's time to undo all the work seal up the new bolts and old-bolt holes, sand-down and re-shoot the front trunk, front bumper area, and trunk undercarriage. Luckily, with the original build, I used high-grade rubberized undercoating and it's still available. Not shown; Below the fuel tank and in the hard-to get to areas, I went a little-tougher and added more POR15, Wurth seam-sealer and truck bed-liner as some of this is exposed to moisture coming in from the suspension access plate.
    |
| RiqueMar |
 Sep 4 2020, 11:34 AM Sep 4 2020, 11:34 AM
Post
#907
|
|
Enrique Allen Mar     Group: Members Posts: 2,220 Joined: 28-August 08 From: San Diego, CA Member No.: 9,478 Region Association: Southern California 
|
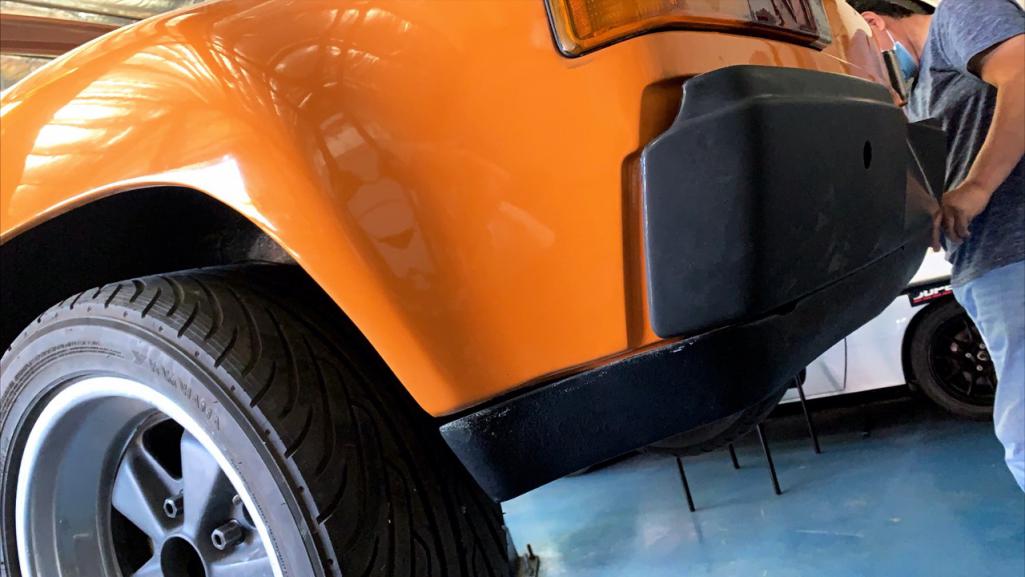
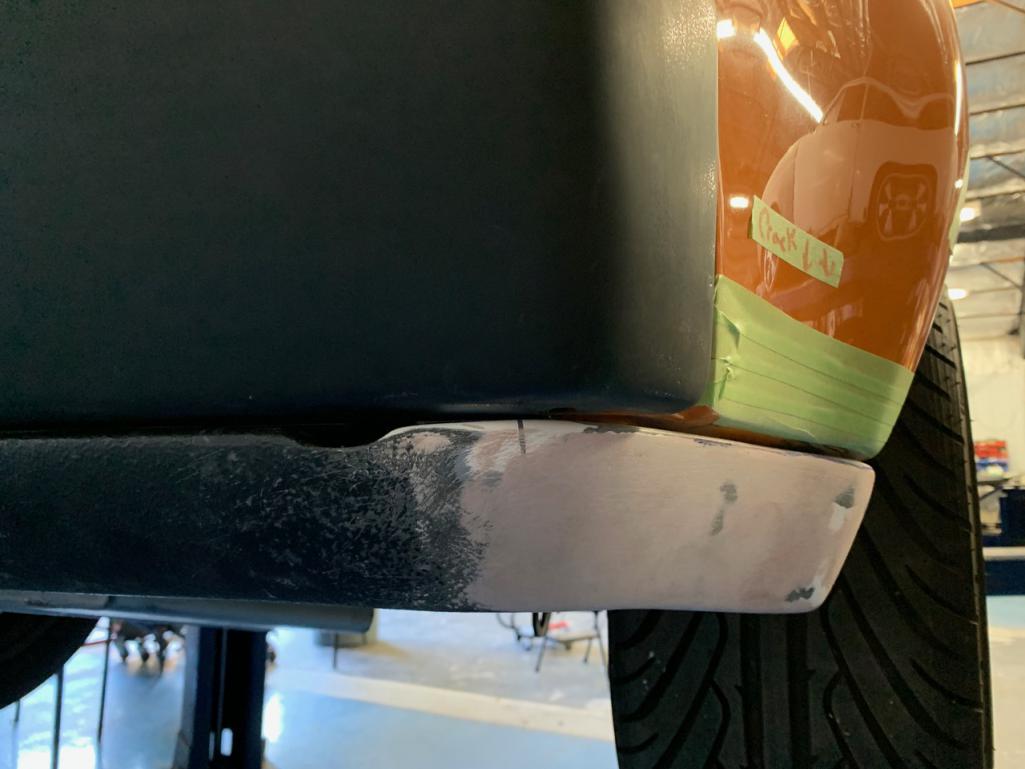
No entry needed, just a few progress photos showing the rear-fitment of the 'shorty valence'. I've said it several times on this thread, but I'll say it again.... Be very wary buying the fiberglass reproductions; These pieces need significant work to fit. (IMG:style_emoticons/default/smash.gif)
  |
| mepstein |
 Sep 4 2020, 11:55 AM Sep 4 2020, 11:55 AM
Post
#908
|
|
914-6 GT in waiting                Group: Members Posts: 19,841 Joined: 19-September 09 From: Landenberg, PA/Wilmington, DE Member No.: 10,825 Region Association: MidAtlantic Region 
|
No entry needed, just a few progress photos showing the rear-fitment of the 'shorty valence'. I've said it several times on this thread, but I'll say it again.... Be very wary buying the fiberglass reproductions; These pieces need significant work to fit. (IMG:style_emoticons/default/smash.gif) Enrique - the same held true for all the glass we used on 911 project cars. No matter who we purchased from and how much it cost, the actual fit was more of a suggestion than a rule. When a customer asked why it cost 2 grand to fit the IROC bumper, I would show them pics of how the body guy had to section it into pieces and piece it back together to make it fit the lines of the car. Glass is really meant for the track. Light and easily replaceable. Making it fit a road car is a lot of time and effort. |
| RiqueMar |
 Sep 4 2020, 12:06 PM Sep 4 2020, 12:06 PM
Post
#909
|
|
Enrique Allen Mar     Group: Members Posts: 2,220 Joined: 28-August 08 From: San Diego, CA Member No.: 9,478 Region Association: Southern California 
|
@mepstein - Hey Mark! Completely agree.
Luckily, we have a FRP modeler on-staff and this is easily enough resolved for me. If we didn't, this would get VERY expensive, VERY fast. For those that are unfamiliar with FRP products, this is the long and the short of it according to our modeler... In order to produce 'volume' or runs of a product, often times the producer will add more catalyst/hardener to the material to speed up the process. Further, the producer will usually 'pull' the piece from the mold before letting it 'set' in the mold a sufficient amount of time. Both of these techniques lead to a bad product that has the tendency to warp, shrink, etc. In my case, the Driver-side fit very well and needed only minimal work. The passenger side on the other hand had to come out several inches. In my experience, typical shop rate is approx. $90/hr, and the total time for this entire procedure was approximately 8hrs, and it's not even in final-prep /paint-work yet.... thats a potential $720 for body-work on 1 piece, scary! (IMG:style_emoticons/default/WTF.gif) |
| mepstein |
 Sep 4 2020, 12:16 PM Sep 4 2020, 12:16 PM
Post
#910
|
|
914-6 GT in waiting                Group: Members Posts: 19,841 Joined: 19-September 09 From: Landenberg, PA/Wilmington, DE Member No.: 10,825 Region Association: MidAtlantic Region 
|
@mepstein - Hey Mark! Completely agree. Luckily, we have a FRP modeler on-staff and this is easily enough resolved for me. If we didn't, this would get VERY expensive, VERY fast. For those that are unfamiliar with FRP products, this is the long and the short of it according to our modeler... In order to produce 'volume' or runs of a product, often times the producer will add more catalyst/hardener to the material to speed up the process. Further, the producer will usually 'pull' the piece from the mold before letting it 'set' in the mold a sufficient amount of time. Both of these techniques lead to a bad product that has the tendency to warp, shrink, etc. In my case, the Driver-side fit very well and needed only minimal work. The passenger side on the other hand had to come out several inches. In my experience, typical shop rate is approx. $90/hr, and the total time for this entire procedure was approximately 8hrs, and it's not even in final-prep /paint-work yet.... thats a potential $720 for body-work on 1 piece, scary! (IMG:style_emoticons/default/WTF.gif) Your numbers are cheap. When you take it into a Porsche shop to get it worked, your looking at $125-250/hour. |
| RiqueMar |
 Sep 4 2020, 12:59 PM Sep 4 2020, 12:59 PM
Post
#911
|
|
Enrique Allen Mar     Group: Members Posts: 2,220 Joined: 28-August 08 From: San Diego, CA Member No.: 9,478 Region Association: Southern California 
|
Your numbers are cheap. When you take it into a Porsche shop to get it worked, your looking at $125-250/hour. @mepstein - Uff, that makes me nauseous! (IMG:style_emoticons/default/icon8.gif) (IMG:style_emoticons/default/screwy.gif) |
| RiqueMar |
 Sep 8 2020, 11:11 AM Sep 8 2020, 11:11 AM
Post
#912
|
|
Enrique Allen Mar     Group: Members Posts: 2,220 Joined: 28-August 08 From: San Diego, CA Member No.: 9,478 Region Association: Southern California 
|
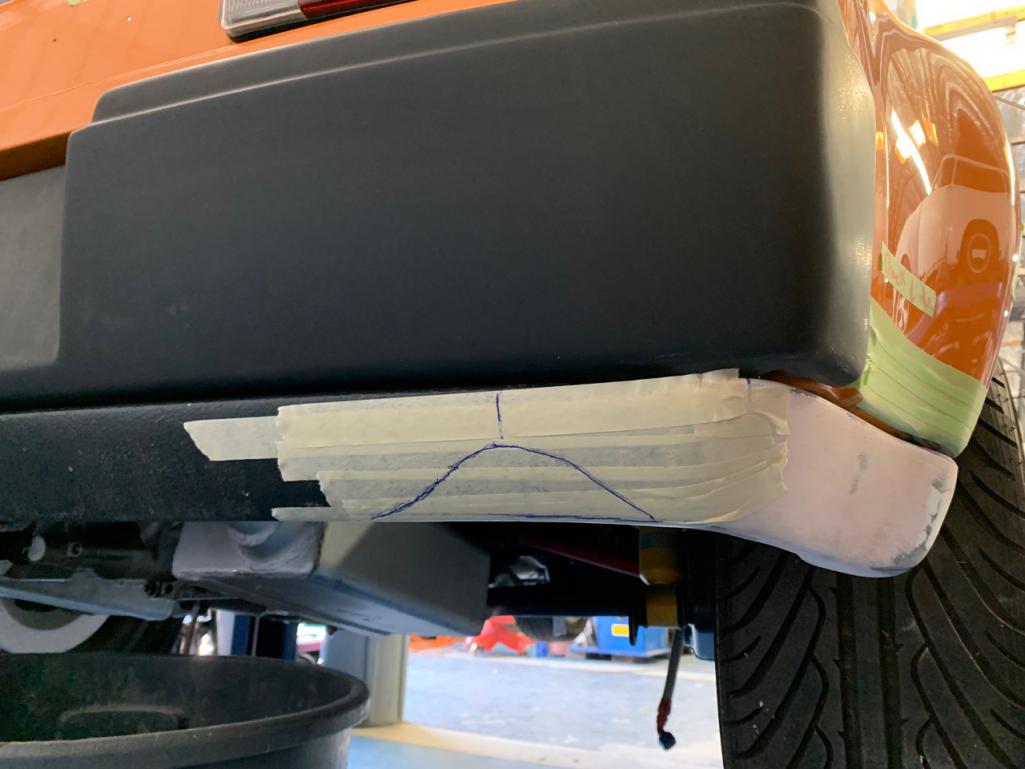
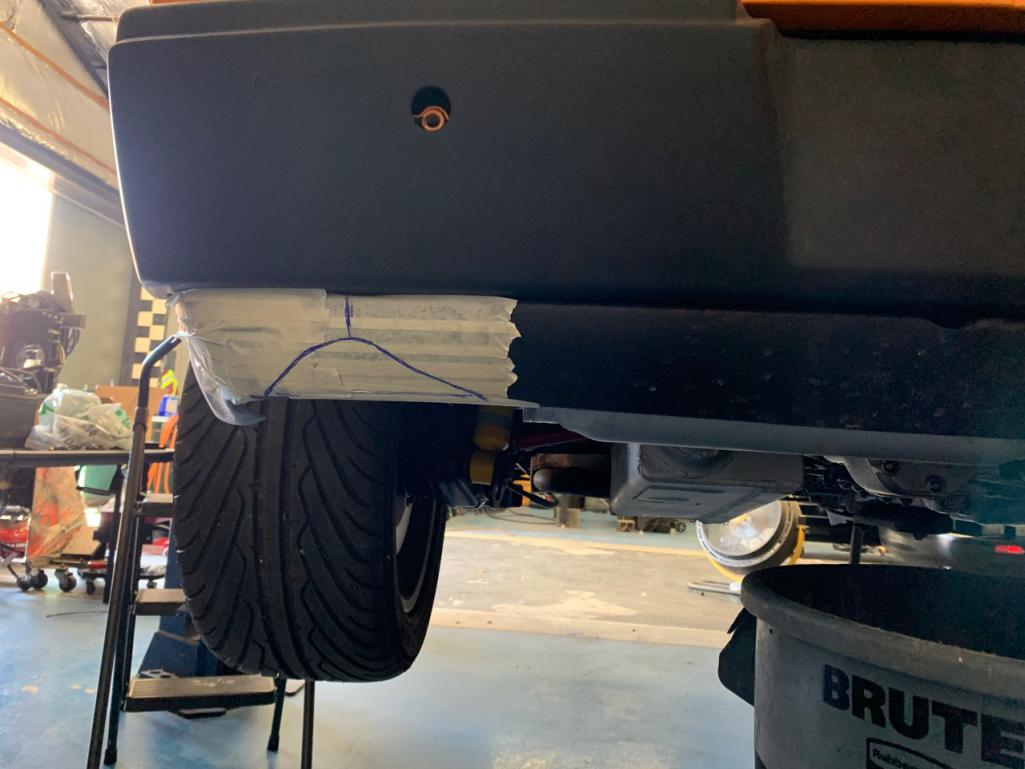
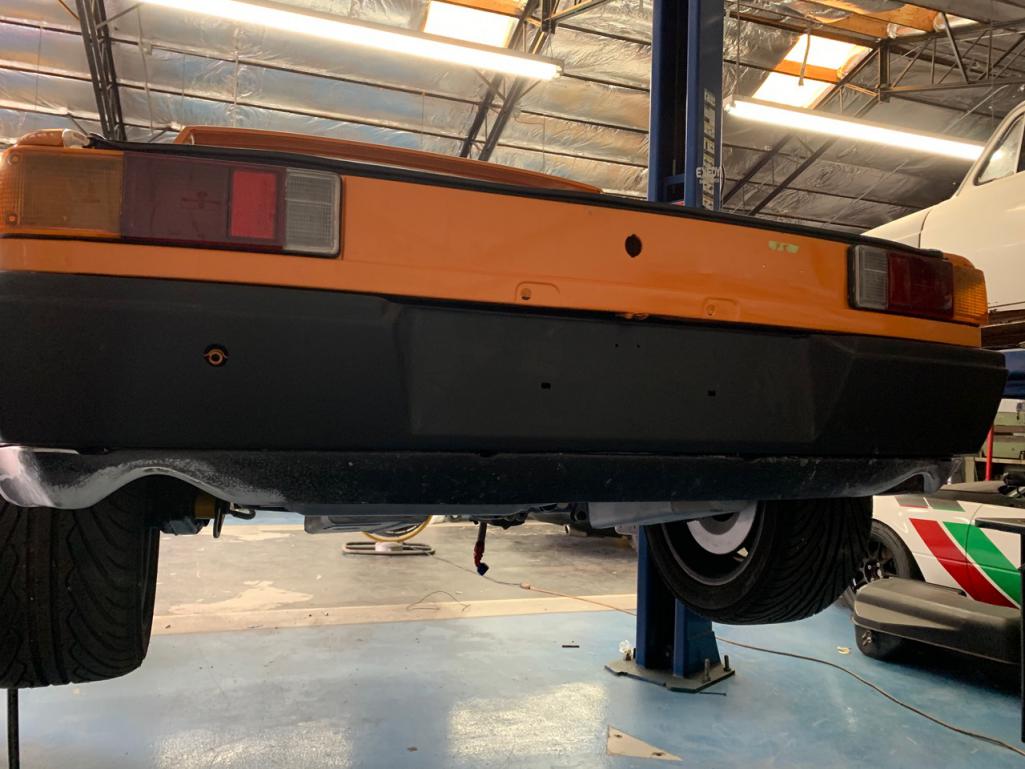
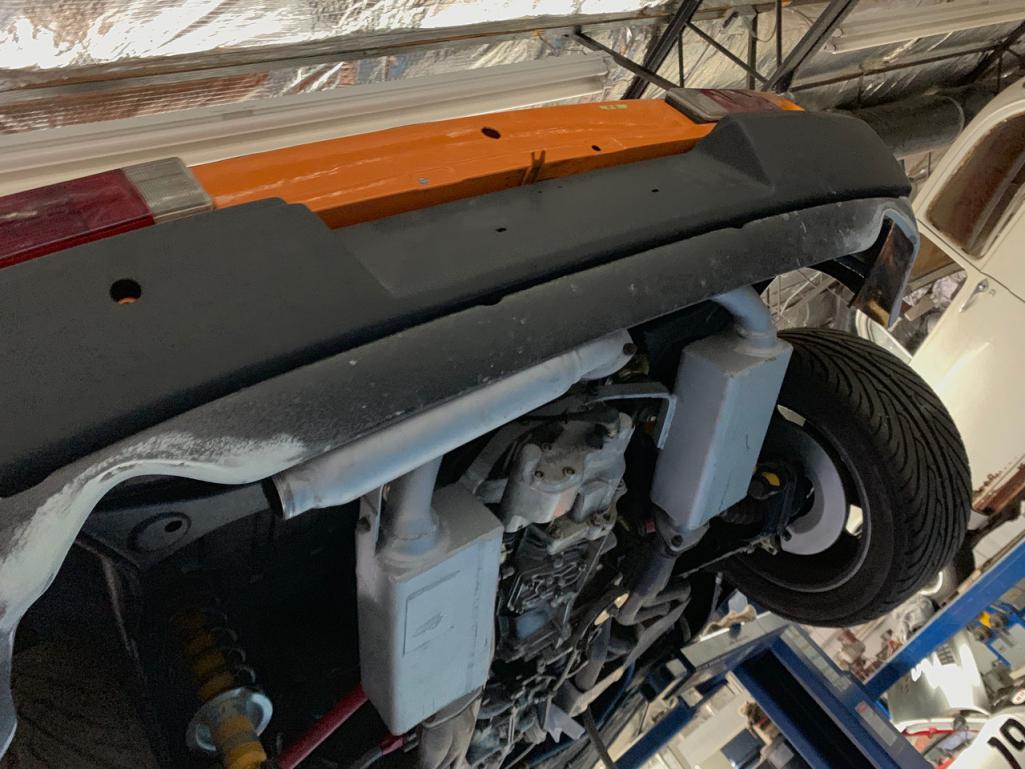
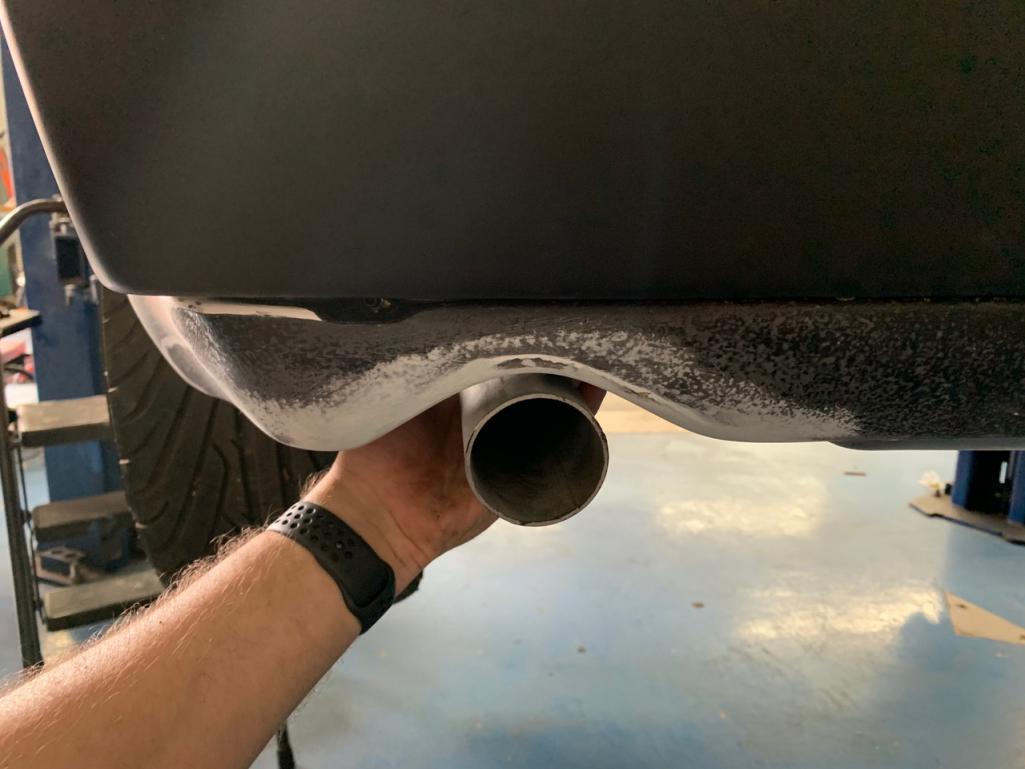
As mentioned in my previous entry, fitment of the rear-valence complete. Last weekend was dedicated to to modifying it to accommodate dual exhaust, and I'm very happy with the result. Once again our modeler has knocked it out of the park, duplicating the cutout to both-sides and adding the proper 'lip' around the cutout. As opposed to the previous setup, where the exhaust was exiting out of the drivers side at an angle, the dual setup will have a more subtle 'straight out' exit. (IMG:style_emoticons/default/piratenanner.gif)
     |
| RiqueMar |
 Sep 8 2020, 11:23 AM Sep 8 2020, 11:23 AM
Post
#913
|
|
Enrique Allen Mar     Group: Members Posts: 2,220 Joined: 28-August 08 From: San Diego, CA Member No.: 9,478 Region Association: Southern California 
|
Front trunk reassembly now that all is repainted after the equipment add-ons and changes...
"We put it together, just to take it apart again..." (IMG:style_emoticons/default/welder.gif) (IMG:style_emoticons/default/smash.gif) (IMG:style_emoticons/default/type.gif) (IMG:style_emoticons/default/screwy.gif) 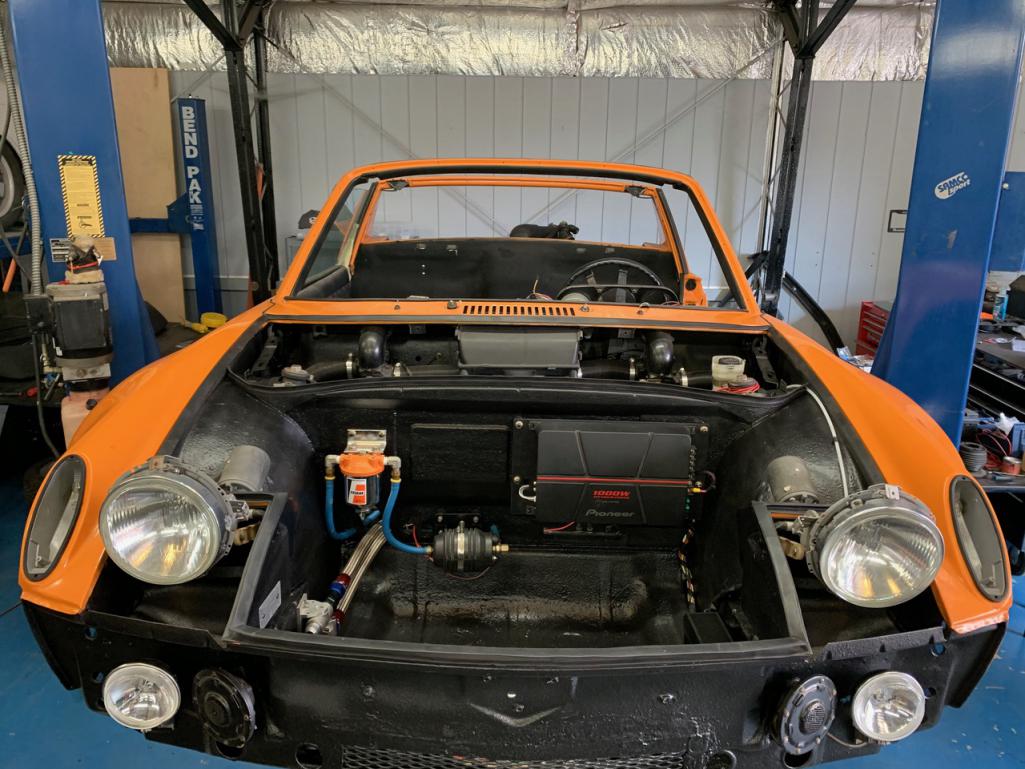 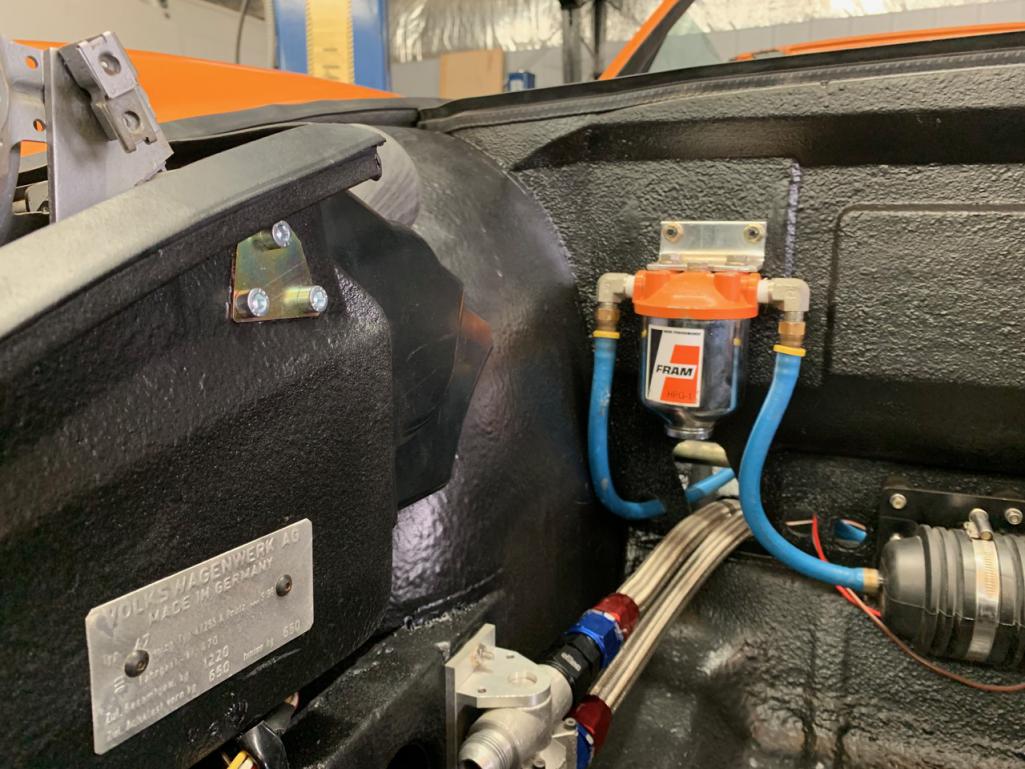 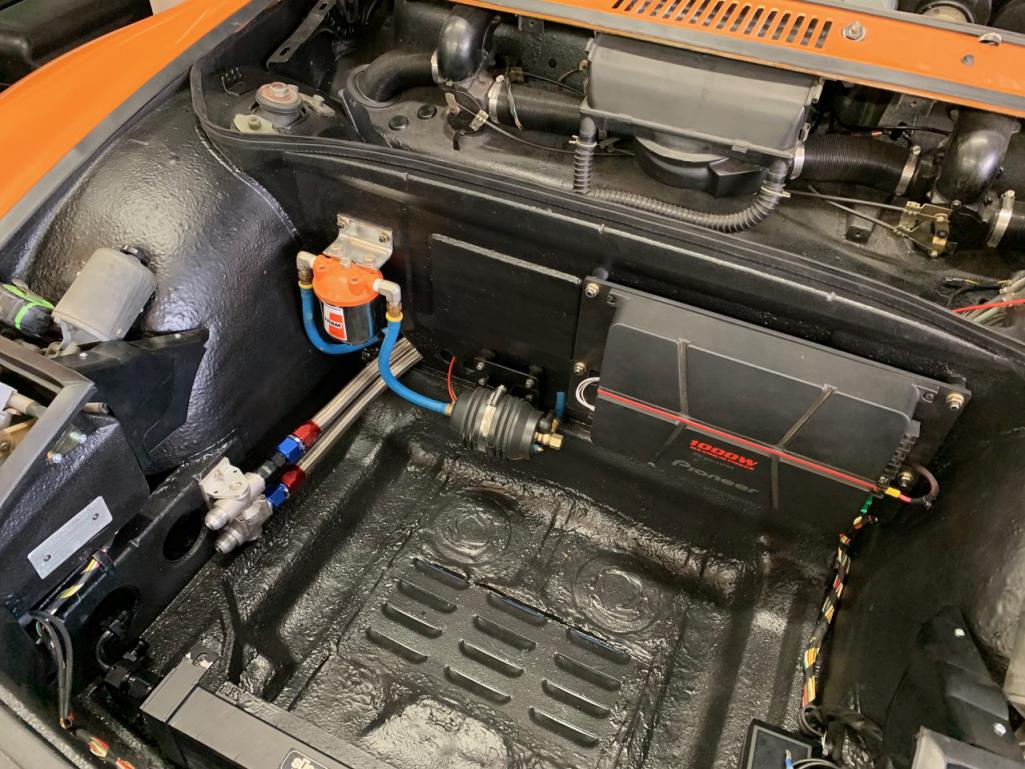 |
| RiqueMar |
 Oct 3 2020, 08:39 PM Oct 3 2020, 08:39 PM
Post
#914
|
|
Enrique Allen Mar     Group: Members Posts: 2,220 Joined: 28-August 08 From: San Diego, CA Member No.: 9,478 Region Association: Southern California 
|
As travel restrictions are slowly being lifted, I've found myself 'on the road' more, flying a bunch so progress has been a bit slow due to getting caught up with customers orders. Before leaving, I did have a chance to install my Camp914 (Camp914 Website hood shocks. Overall, I'm very happy with how they turned out, however I think there are a few items that I didn't understand before that other members may care to know:
- Newest version requires you to drill into the rear trunk-lid, whereas previously, I though it was only required to drill into the hood-hinge. I can see how this would be unappealling to some. Luckily, with the help of McMaster-Carr, I'm able to modify my hood-hinges to not drill into my hood. - It is required to 'grind away' a portion of the lip that separates the rear trunk from the engine bay. I don't believe this to be advertised, and it's not in the instructions. - The instructions could be better. They get a little wordy, and pictures or reference diagrams would help especially when giving directions on drill locations. - Use an excessive amount of tape to prevent a drill slipping and causing a knick. Very easy to do. - Front kit is very easy, and basically a 'bolt-on' setup. One end connects to the original mount of the spring, the other fits between the hood hinge and hood hinge bolt. - Note to others: When applying hood hinges, use a small(er) ratchet. Very easy to schear the shoulder bolt inside the hinge mount. See photos. Overall, I do like the kit, only wish there would be more information about it. I wish I would have purchased and assembled it BEFORE painting my car, to avoid any potential damage to the paint and make cutting away a bit of the trunk easier. Other than that, all good! (IMG:style_emoticons/default/bye1.gif) 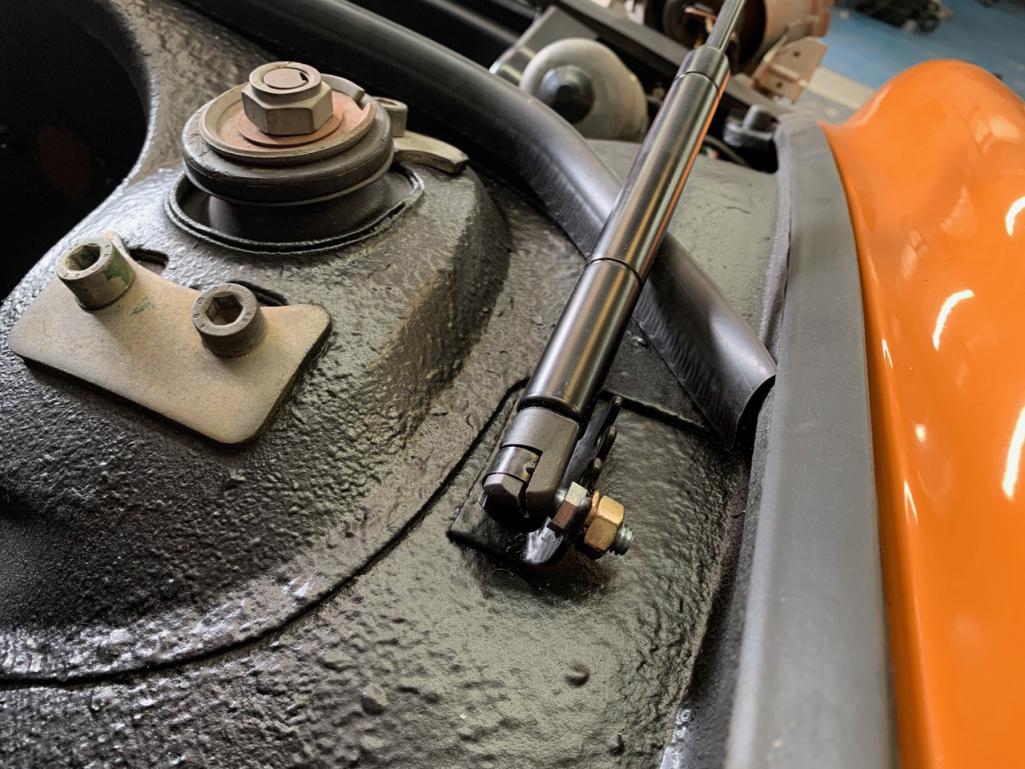 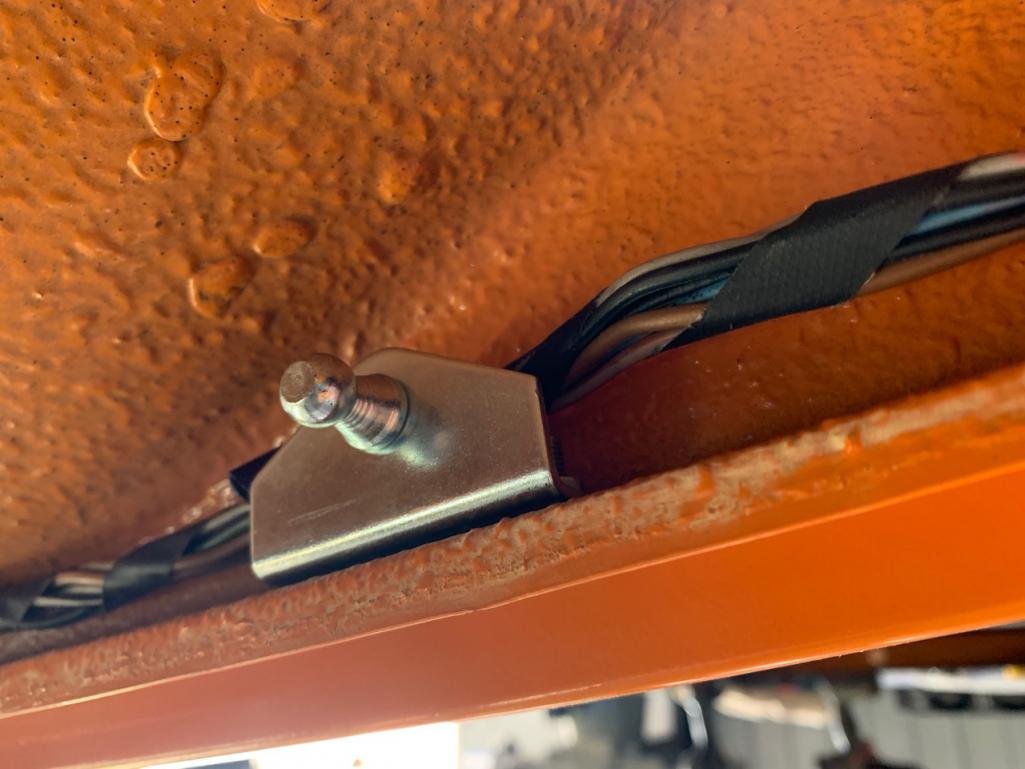 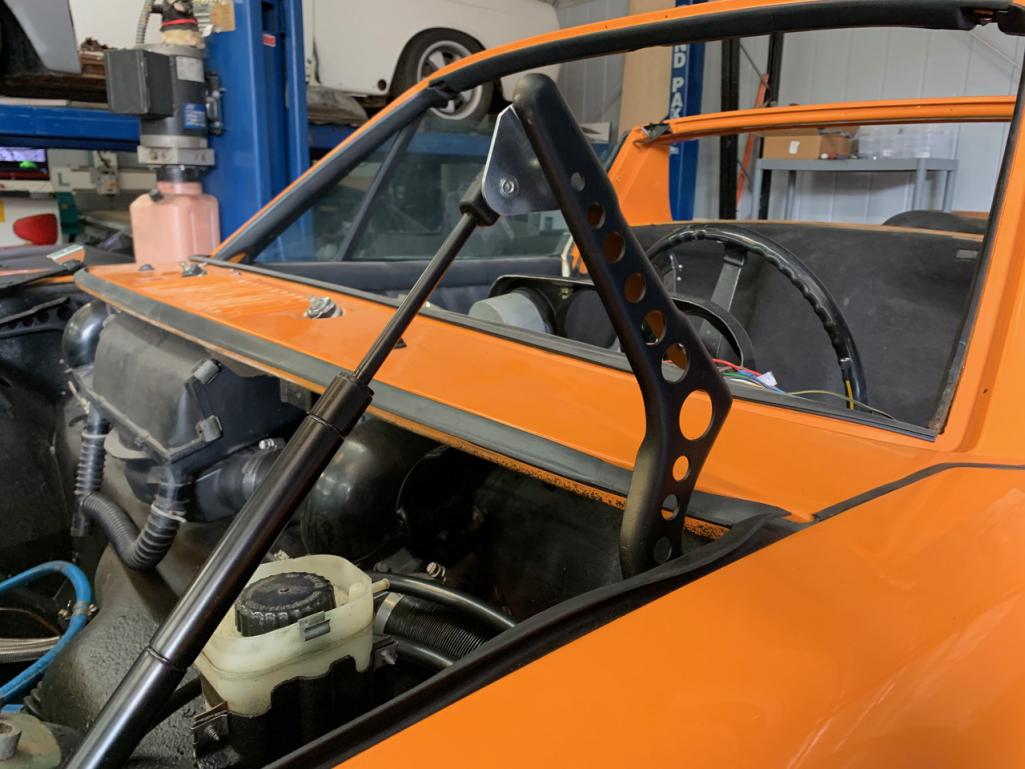 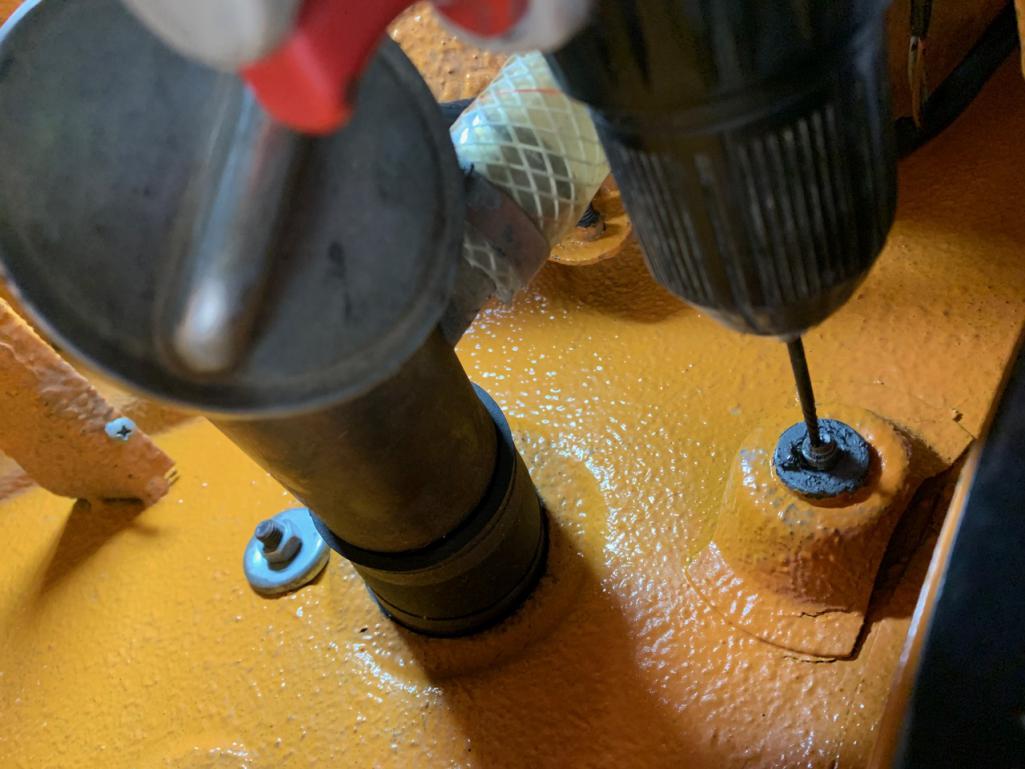 |
| RiqueMar |
 Oct 3 2020, 09:09 PM Oct 3 2020, 09:09 PM
Post
#915
|
|
Enrique Allen Mar     Group: Members Posts: 2,220 Joined: 28-August 08 From: San Diego, CA Member No.: 9,478 Region Association: Southern California 
|
Non-914 update, but I thought it would be cool to 'share' with the world; My newest vehicle and designated 'Tow Vehicle' and its maiden voyage. (IMG:style_emoticons/default/smilie_pokal.gif)
Purchased this Black 2020 GMC Sierra-Elevation. All Black, Black rims, modest list, Duramax engine, and optional leather and sunroof. It's been a couple of weeks now, and I'm very happy with it (and the 30MPG) I'm getting. Photos are from purchase day, you can see my wife in the background, and a few from a recent trip we took up the coast to see my Father race at Sonoma. Along the way, we were lucky enough to stop at Pismo Beach, Morro Bay, Big Sur, San Jose, Sonoma and Wine Country. Also, used this opportunity to visit @PCA7GGR (Sergio) and other 'Teeners' to pick-up one a very nice GT-style decklid. If you have the opportunity to purchase, I highly recommend. Very nice pieces, with stock fasteners holding the removable mesh, and rivets holding the new piece. Very excited to get this on, and keep my stock-looking lid if I want to mix-and-match. Thats all I have for now, stay safe everyone! (IMG:style_emoticons/default/bye1.gif) 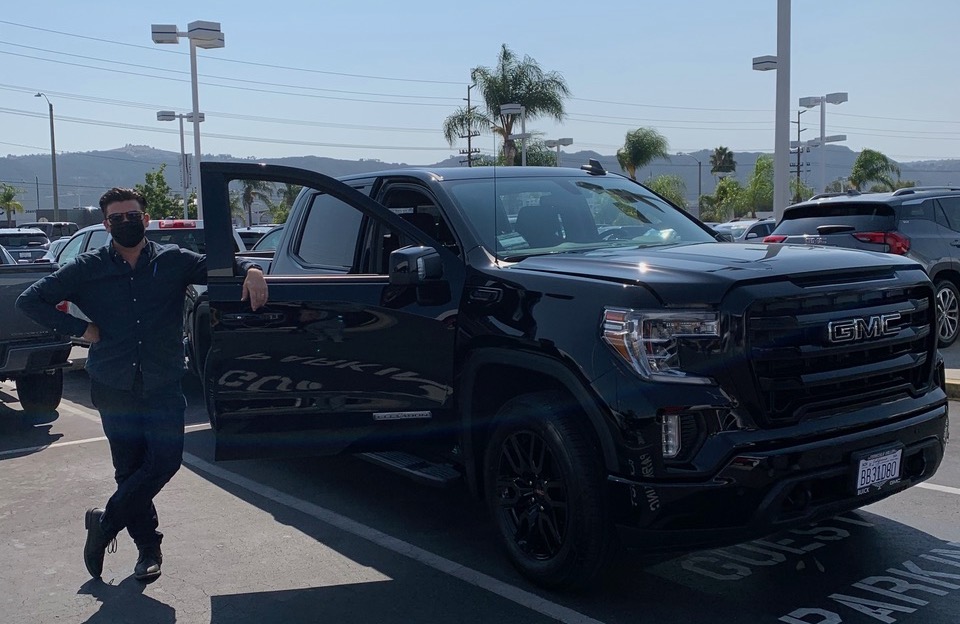 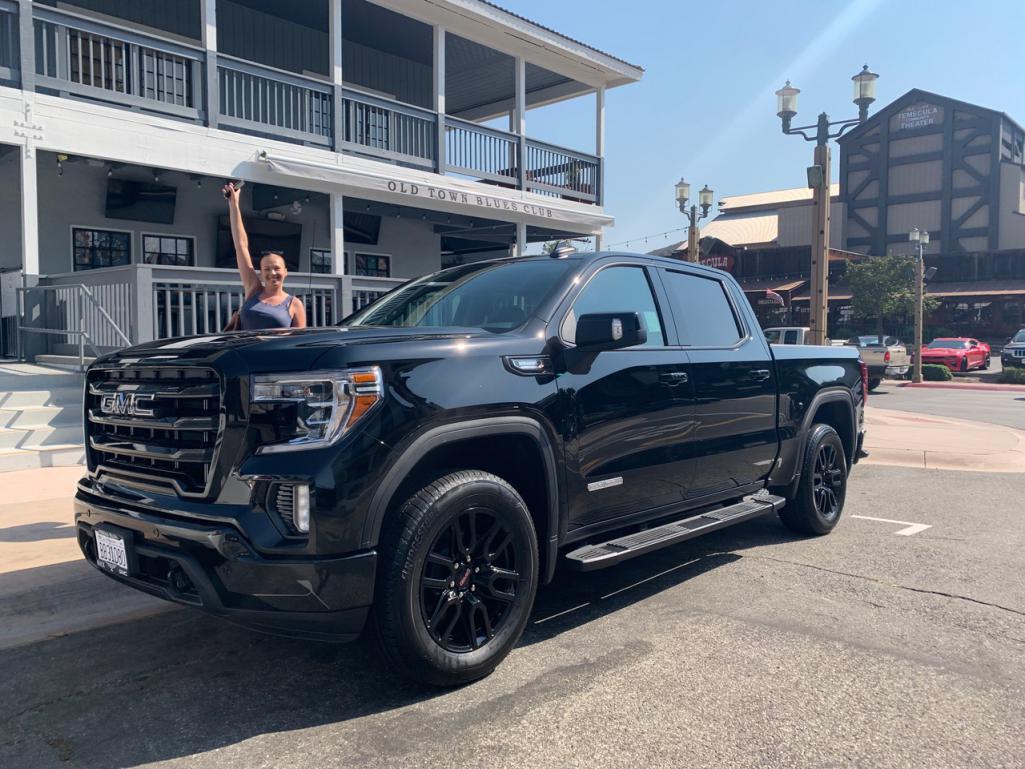 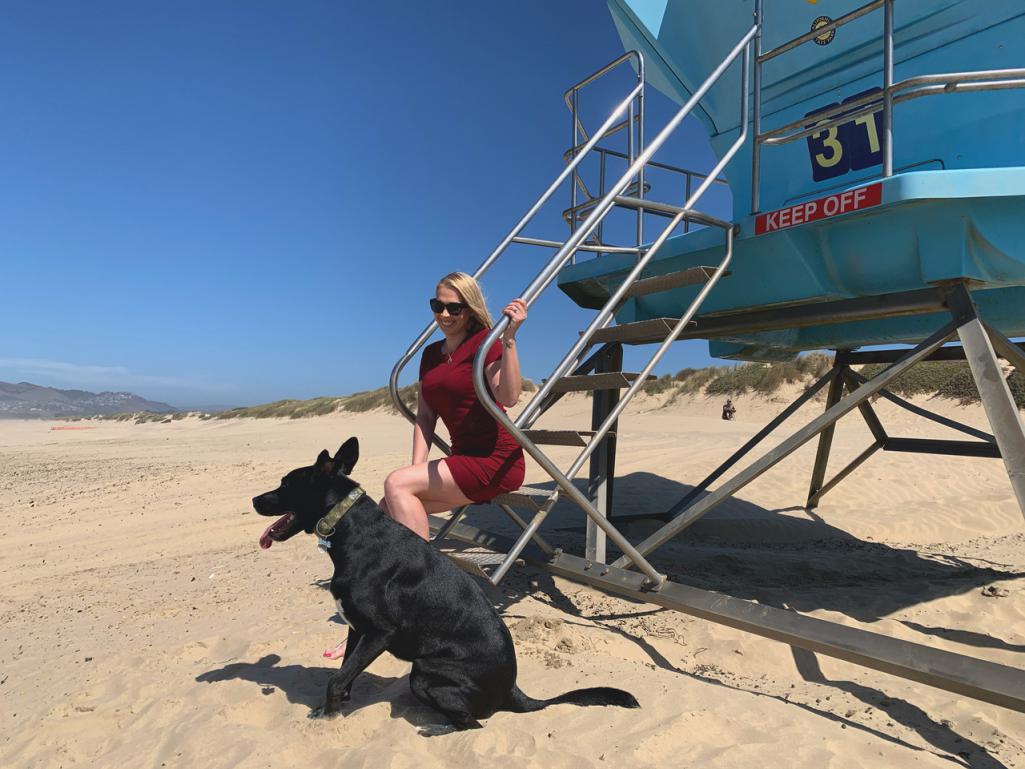 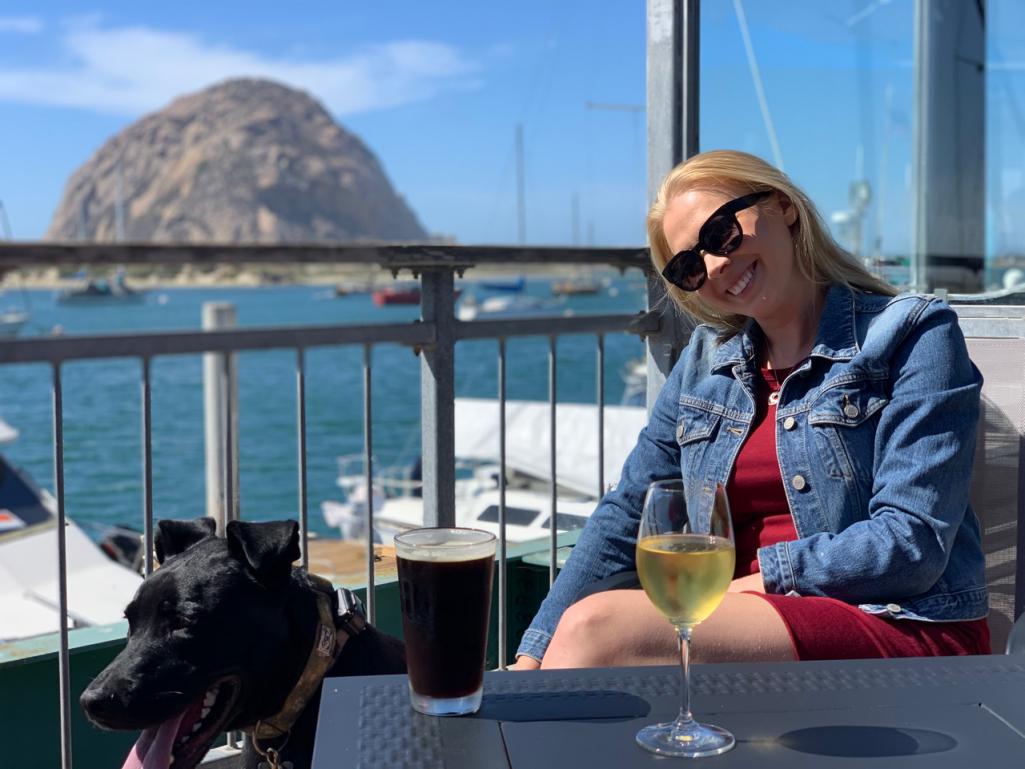 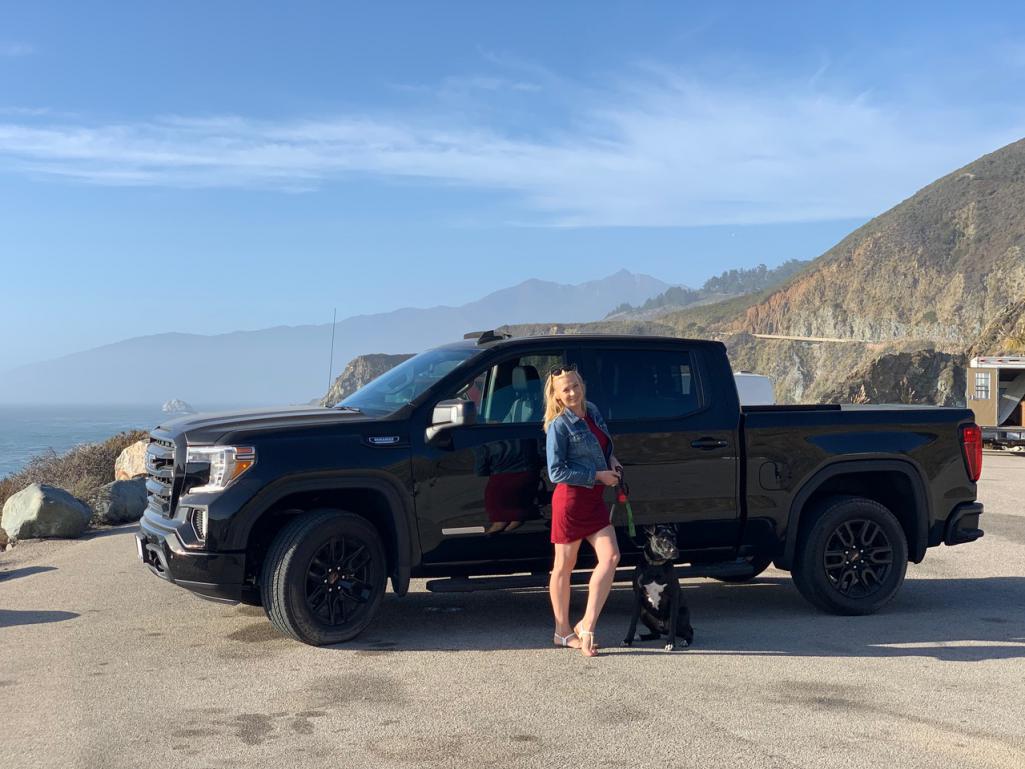 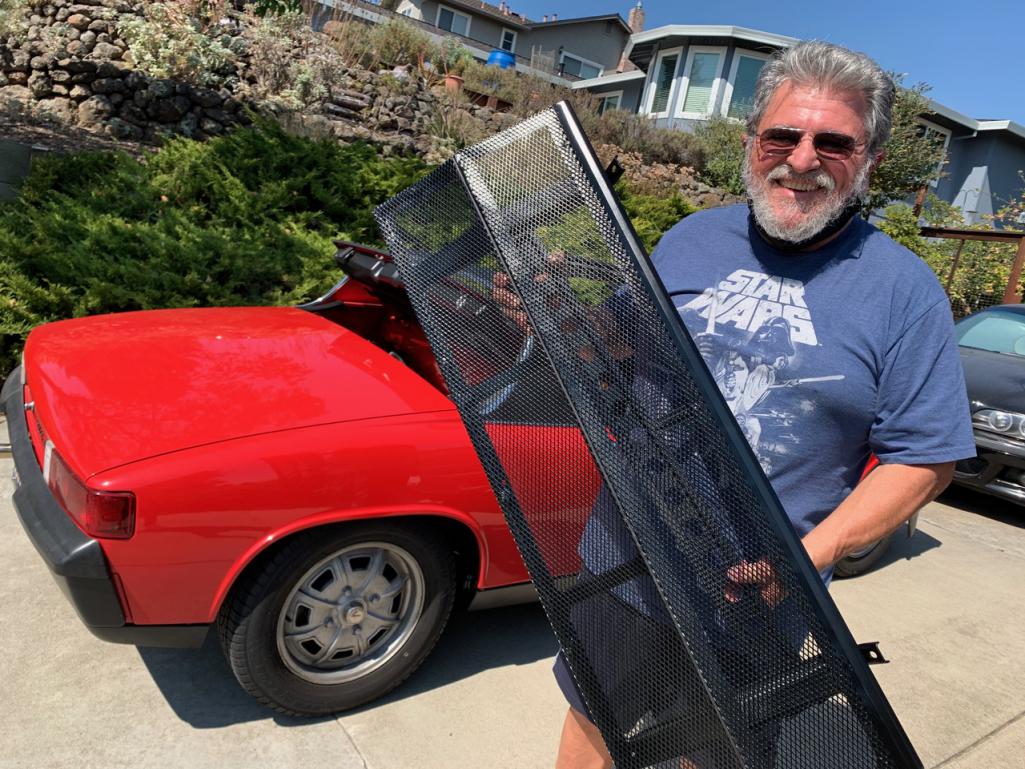 Attached thumbnail(s) 
|
| PCA7GGR |
 Oct 3 2020, 09:24 PM Oct 3 2020, 09:24 PM
Post
#916
|
|
Member   Group: Members Posts: 254 Joined: 3-October 03 From: Dublin, CA Member No.: 1,219 |
It was great to finally meet you.
|
| RiqueMar |
 Nov 30 2020, 02:18 PM Nov 30 2020, 02:18 PM
Post
#917
|
|
Enrique Allen Mar     Group: Members Posts: 2,220 Joined: 28-August 08 From: San Diego, CA Member No.: 9,478 Region Association: Southern California 
|
It was great to finally meet you. @PCA7GGR great to meet you too, and thanks for the limoncello (IMG:style_emoticons/default/drunk.gif) |
| RiqueMar |
 Nov 30 2020, 02:30 PM Nov 30 2020, 02:30 PM
Post
#918
|
|
Enrique Allen Mar     Group: Members Posts: 2,220 Joined: 28-August 08 From: San Diego, CA Member No.: 9,478 Region Association: Southern California 
|
Hey world!
Long-time-no-post, but I'm still on it! With the (temporary) ease of travel restrictions we saw in the Fall, I've been traveling a lot, but have still found time to carve-out a few weekends here and there as well as visit a few new-places. More on that later. Work continues on the car, and I've been focused on the new equipment added to the front trunk, and sorting out the system of powering the new parts, relays and systems. First up, I mentioned that I purchased an aftermarket relay-kit / project box. I've since wired this with 2x configurations.... - The three top relays are 'always' on. I've left 2 'open' for now, for whatever I want to install in the future (air horn, things like that) and the first is for the oil-cooler fans, with the thermo-switch (located on the passenger side) located on the GND leg. - The bottom two relays come on with ignition, specifically for items like the fuel-pump. I've left 1 extra 'open' for now, and am not sure what I'll use it for, but nice to know it's there. Once I bench-tested everything, I set the box into the trunk and soldered all connections. After I test, this will get wrapped to look like the stock harness. (IMG:style_emoticons/default/bye1.gif) 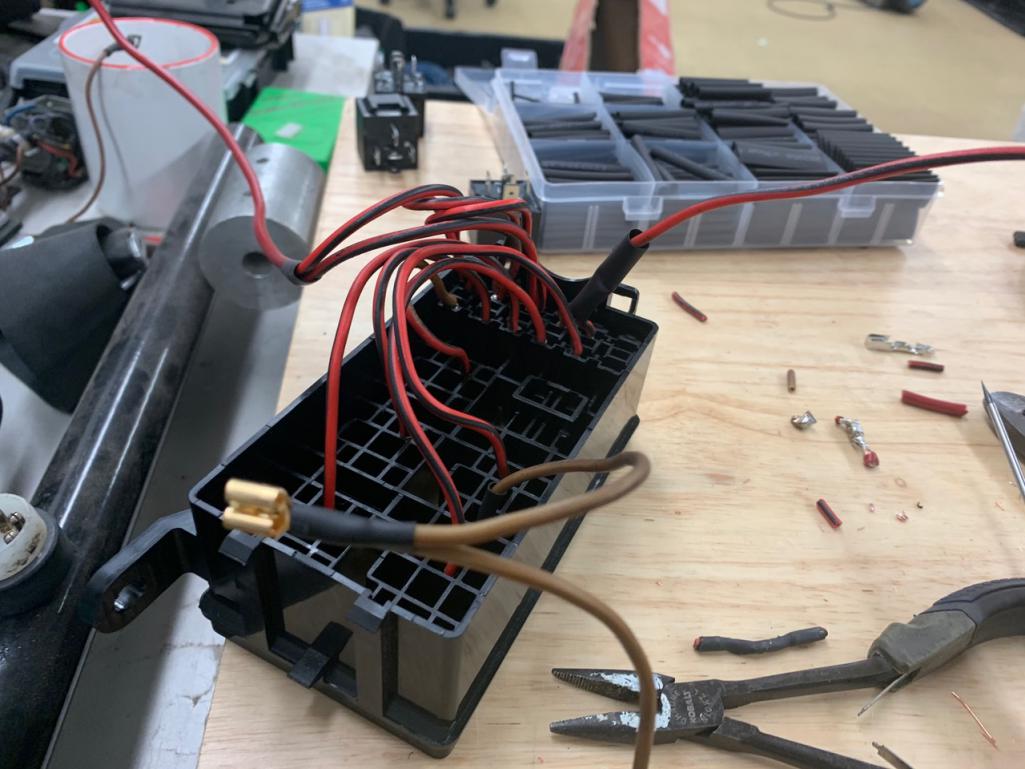 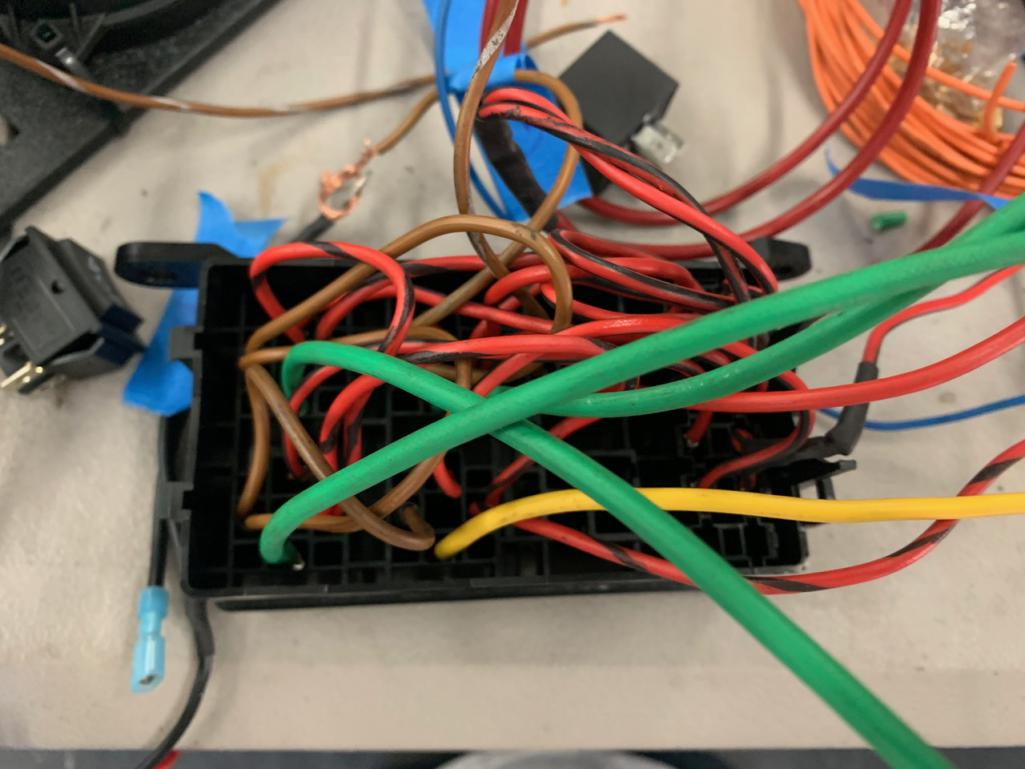 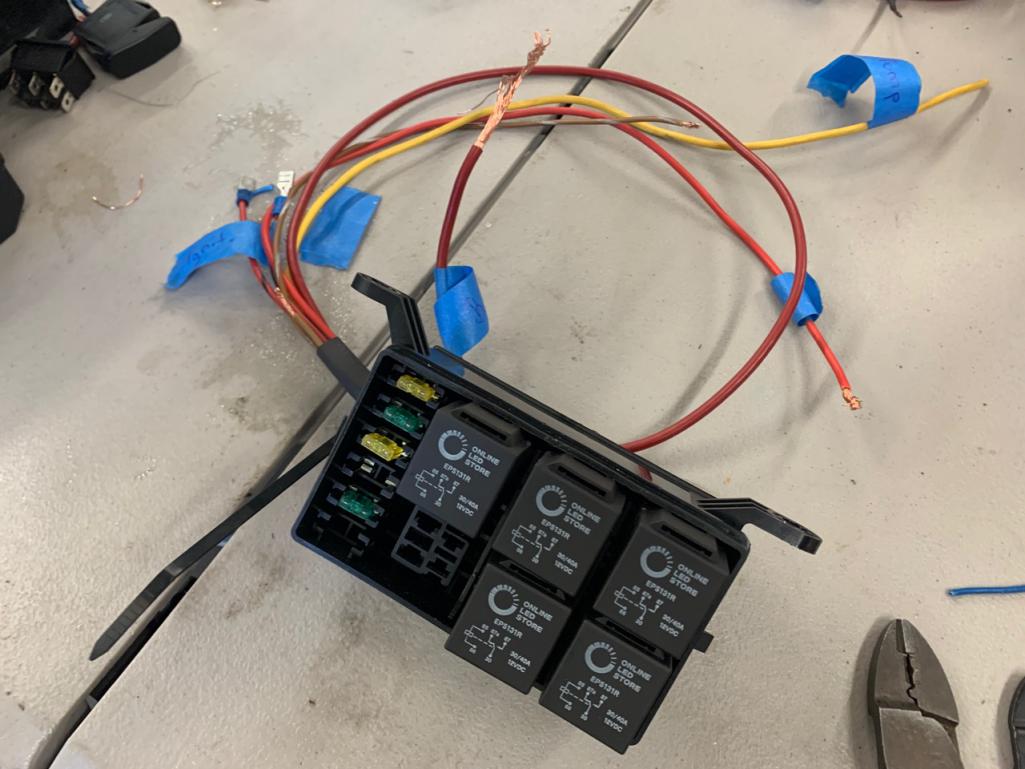 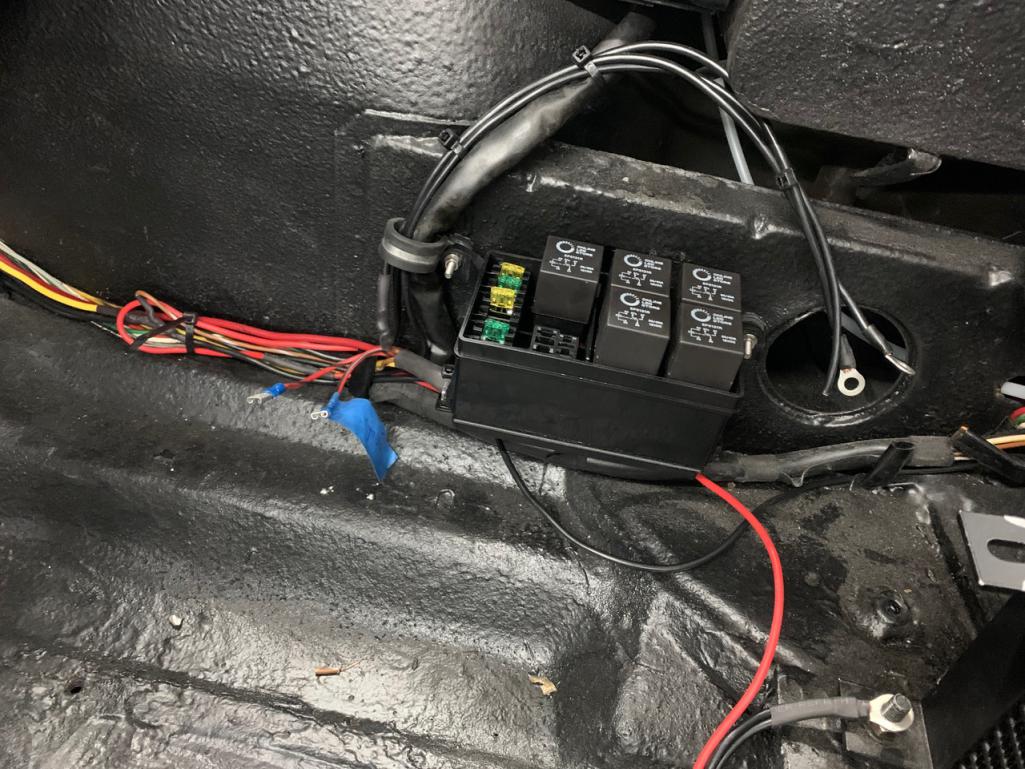 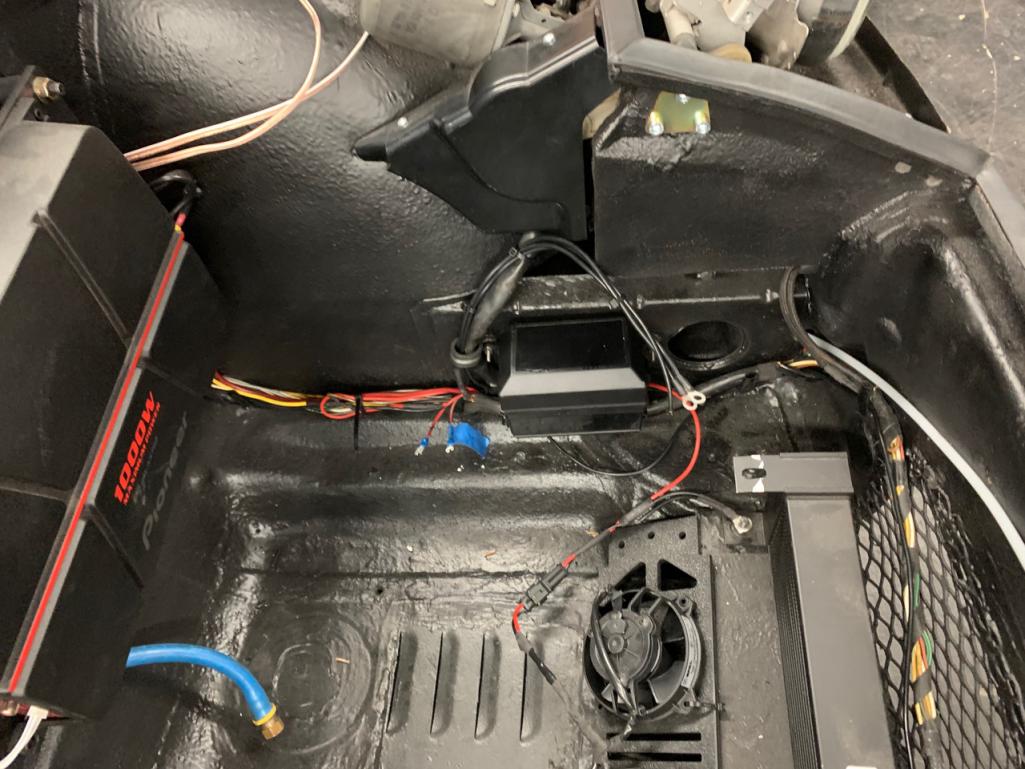 |
| RiqueMar |
 Nov 30 2020, 02:33 PM Nov 30 2020, 02:33 PM
Post
#919
|
|
Enrique Allen Mar     Group: Members Posts: 2,220 Joined: 28-August 08 From: San Diego, CA Member No.: 9,478 Region Association: Southern California 
|
Hey world! Long-time-no-post, but I'm still on it! With the (temporary) ease of travel restrictions we saw in the Fall, I've been traveling a lot, but have still found time to carve-out a few weekends here and there as well as visit a few new-places. More on that later. Work continues on the car, and I've been focused on the new equipment added to the front trunk, and sorting out the system of powering the new parts, relays and systems. First up, I mentioned that I purchased an aftermarket relay-kit / project box. I've since wired this with 2x configurations.... - The three top relays are 'always' on. I've left 2 'open' for now, for whatever I want to install in the future (air horn, things like that) and the first is for the oil-cooler fans, with the thermo-switch (located on the passenger side) located on the GND leg. - The bottom two relays come on with ignition, specifically for items like the fuel-pump. I've left 1 extra 'open' for now, and am not sure what I'll use it for, but nice to know it's there. Once I bench-tested everything, I set the box into the trunk and soldered all connections. After I test, this will get wrapped to look like the stock harness. (IMG:style_emoticons/default/bye1.gif)      |
| RiqueMar |
 Dec 26 2020, 01:17 PM Dec 26 2020, 01:17 PM
Post
#920
|
|
Enrique Allen Mar     Group: Members Posts: 2,220 Joined: 28-August 08 From: San Diego, CA Member No.: 9,478 Region Association: Southern California 
|
Taking the Holiday season to try to make headway on the project. With the help of various sites and members here, this is where I'm at so far.
I've begun decoding the setup the previous owner had. While I originally thought I could simply copy the setup from @racerx9146 - this was not the case as the original relay board has already been bypassed. No matter, his diagram is still an incredible help when it comes to the pin callouts on the DME relay. If anyone can help identify wires, especially when it comes to the OEM 14-pin connector, that would be very appreciated. I'm hoping to be able to figure this out myself over the course of time-off during the next week, or at the least, make a big-enough dent to be able to have a shop take it over and get it running. 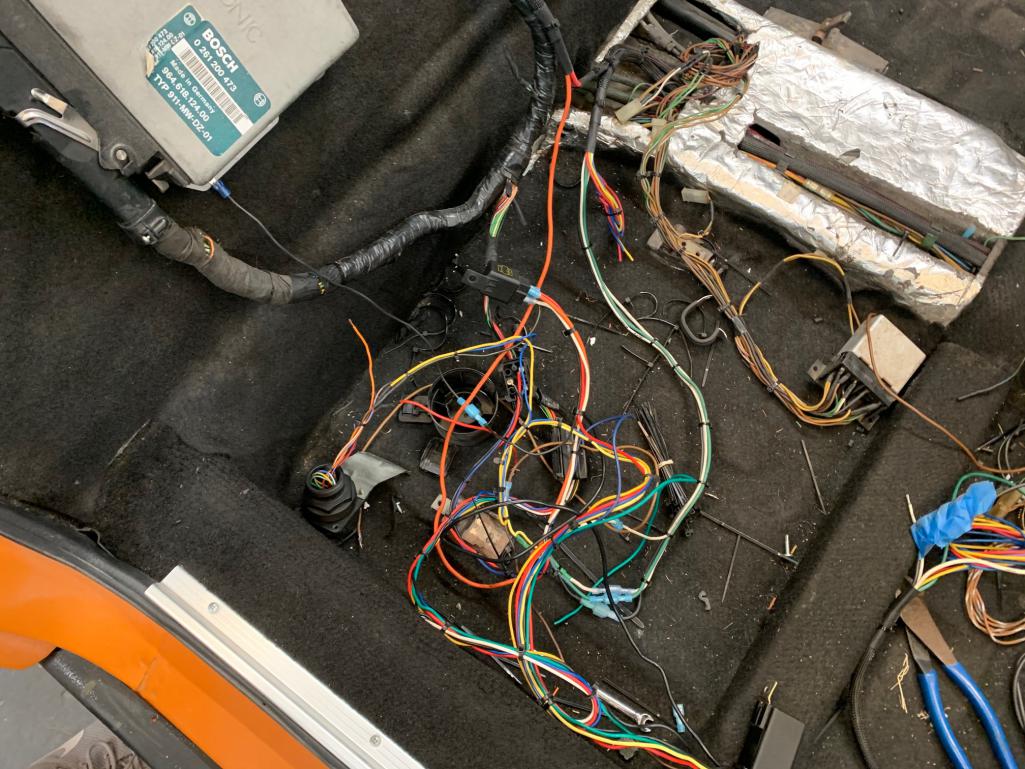 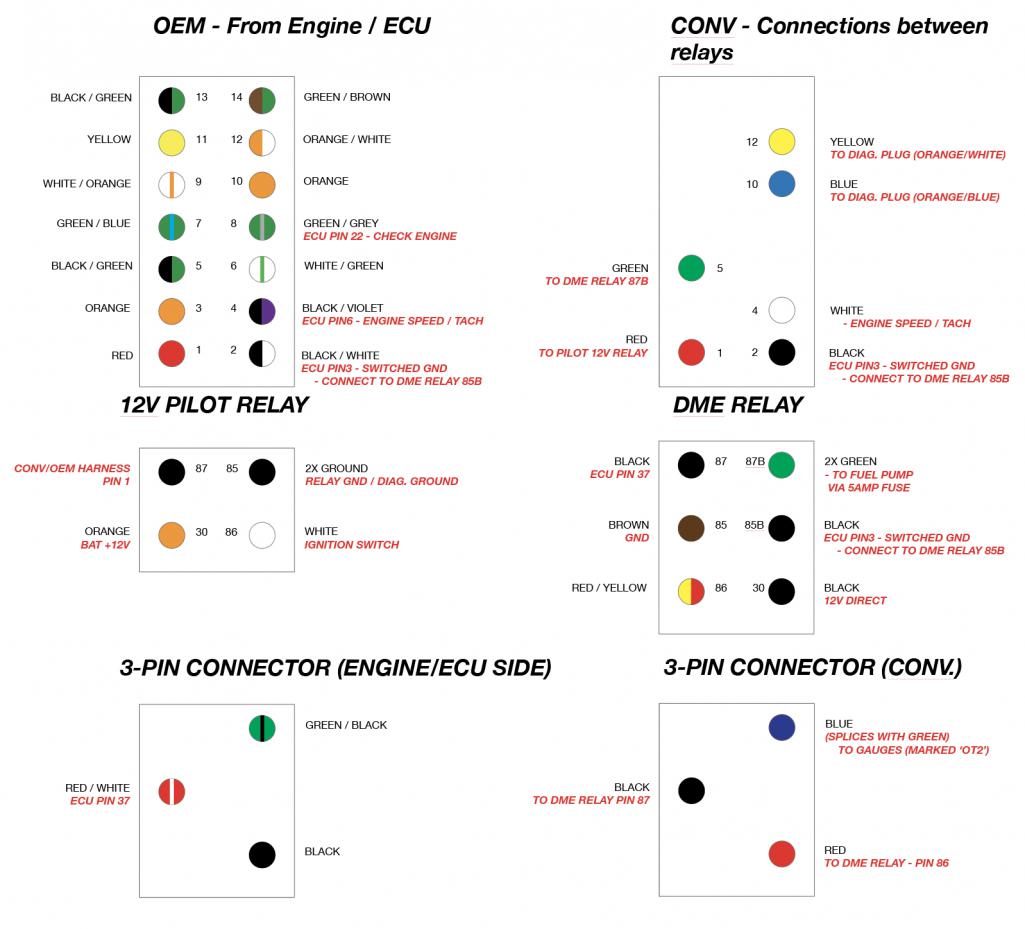 |
  |
1 User(s) are reading this topic (1 Guests and 0 Anonymous Users)
0 Members:

|
Lo-Fi Version | Time is now: 18th April 2025 - 04:42 AM |
Invision Power Board
v9.1.4 © 2025 IPS, Inc.


