|
|

|
Porsche, and the Porsche crest are registered trademarks of Dr. Ing. h.c. F. Porsche AG.
This site is not affiliated with Porsche in any way. Its only purpose is to provide an online forum for car enthusiasts. All other trademarks are property of their respective owners. |
|
|
  |
| RiqueMar |
 Mar 22 2021, 08:19 PM Mar 22 2021, 08:19 PM
Post
#941
|
|
Enrique Allen Mar     Group: Members Posts: 2,210 Joined: 28-August 08 From: San Diego, CA Member No.: 9,478 Region Association: Southern California 
|
Well, the car is back at my house. Though I don't have the same resources as the shop / ranch, having it at home will hopefully help me work easier. I find that, when it's here, it's easy to carve our 1-2 hours a day.
First order of business was getting it in. After, I was finally able to wrap-up the oil system with lines I had made at Parker. Though they were a bit on the expensive side ($128) for the set, it was much easier than making and fitting the braided lines, as these last pieces are only 7', and it's extremely difficult when they are that short with a fitting on each end. To make it all match, thinking to do a small connector for the other-side, and get rid of the ugly Blue and Red fittings, but thats not super important. (IMG:style_emoticons/default/bye1.gif) 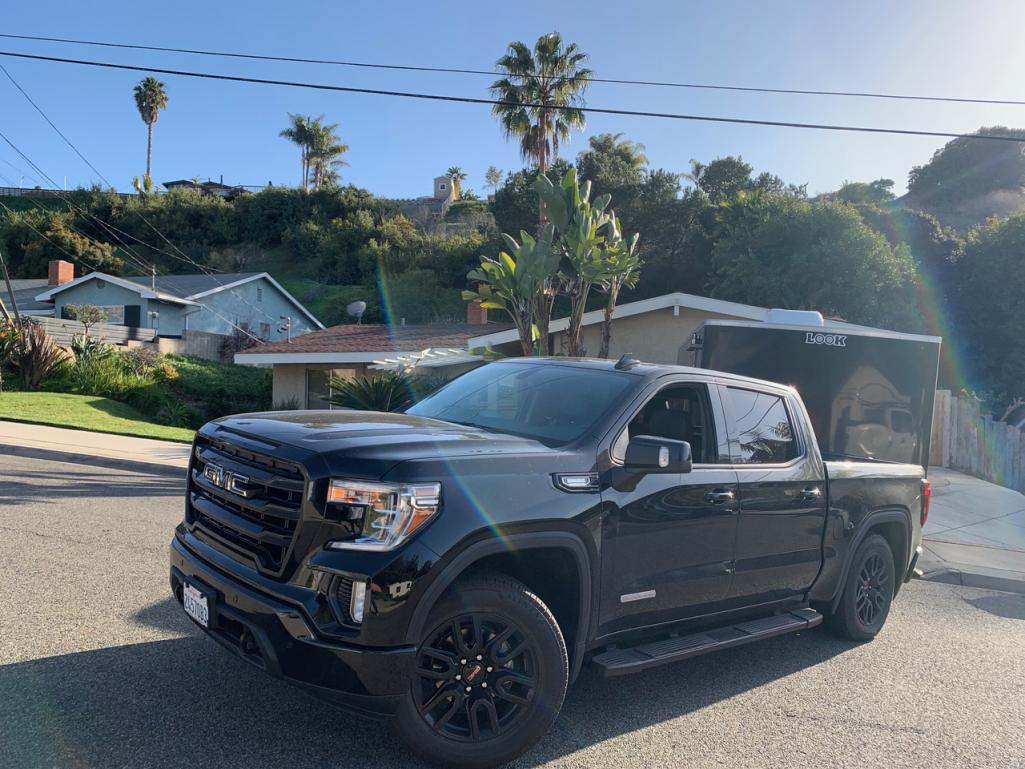 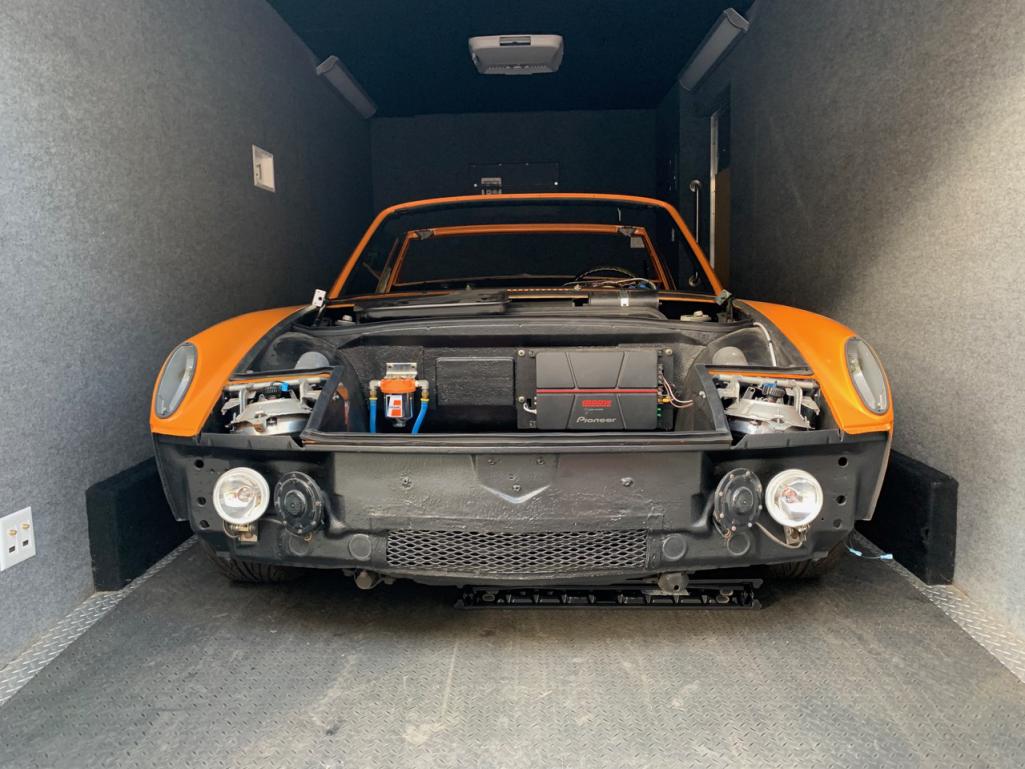 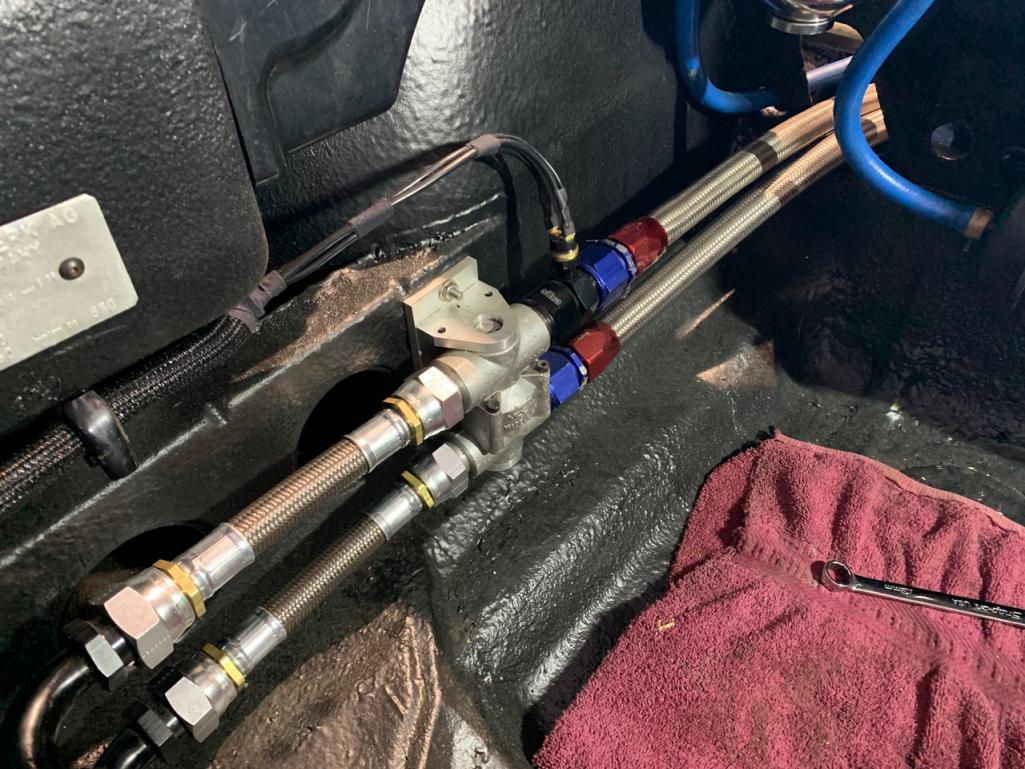 |
| RiqueMar |
 Mar 22 2021, 08:24 PM Mar 22 2021, 08:24 PM
Post
#942
|
|
Enrique Allen Mar     Group: Members Posts: 2,210 Joined: 28-August 08 From: San Diego, CA Member No.: 9,478 Region Association: Southern California 
|
Wondering if anyone can help me with, or point me in the right direction, on what I hope is one of my last wiring questions. Re-engaging on my project and last step of wiring, save for the ECU, is the /6 wiper control. I've confirmed the the connections on the motor are correct (photo of a similar thread attached for anyone troubleshooting this), and just don't know where to start with the connection between the dash-harness and the column lever.
On the wiper switch side (Stock 914/6 Column switch), I have the following wires... - Solid Red - Black with Yellow - Black with Purple - Light-Blue - Black On the other side, my 76' harness has the following wires... - Green with White - Black with Red - Black with Blue - Blue - Brown and White Any and all help is appreciated, thanks all in advance! (IMG:style_emoticons/default/bye1.gif) 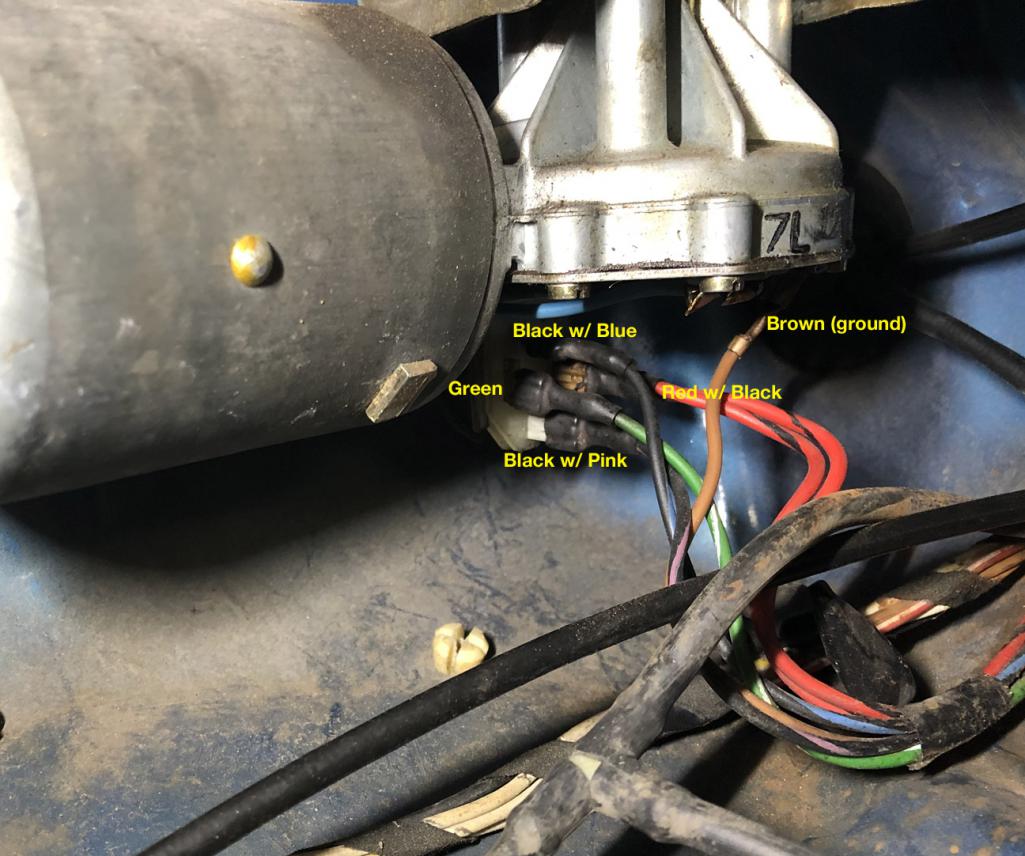 |
| RiqueMar |
 Mar 24 2021, 10:24 AM Mar 24 2021, 10:24 AM
Post
#943
|
|
Enrique Allen Mar     Group: Members Posts: 2,210 Joined: 28-August 08 From: San Diego, CA Member No.: 9,478 Region Association: Southern California 
|
Re-engaging on this subject, does anyone know the the wiper function for each of the colored wires? As I'm trying to make the 914-6 controls work with my 914-4 harness, I don't know which color wire corresponds to the different wiper functions. I would assume theres various speeds, and a lead to activate the Washer / Sprayer.
On the Stock 914/6 Column switch, I have the following wires... - Solid Red - Black with Yellow - Black with Purple - Light-Blue - Black On the other side, my 76' harness has the following wires... - Green with White - Black with Red - Black with Blue - Blue - Brown and White |
| RiqueMar |
 Mar 30 2021, 10:19 PM Mar 30 2021, 10:19 PM
Post
#944
|
|
Enrique Allen Mar     Group: Members Posts: 2,210 Joined: 28-August 08 From: San Diego, CA Member No.: 9,478 Region Association: Southern California 
|
Digging into this further, I've narrowed down the following. It's difficult to complete, because I'm not all to familiar with this part of the car, and whether or not the motor had different speeds. Seems like the below is correct and I'm think I'm getting different speeds so I'm going to move on, but any input is welcome...
Switch side > Chassis Harness Solid Red > Red and Black Black > (Washer Pump) Black / Purple > Black / Blue Green / White > Black / Yellow I've ordered a bunch of new parts, and they are slowly trickling in - more on that later. Finding something to do over the weekend, I decided to first complete orders for my 6-conversion GT Cooler, thread here. Very happy with how these turned out and a special 'thank you' to all the members who purchased the first-product, more to come! 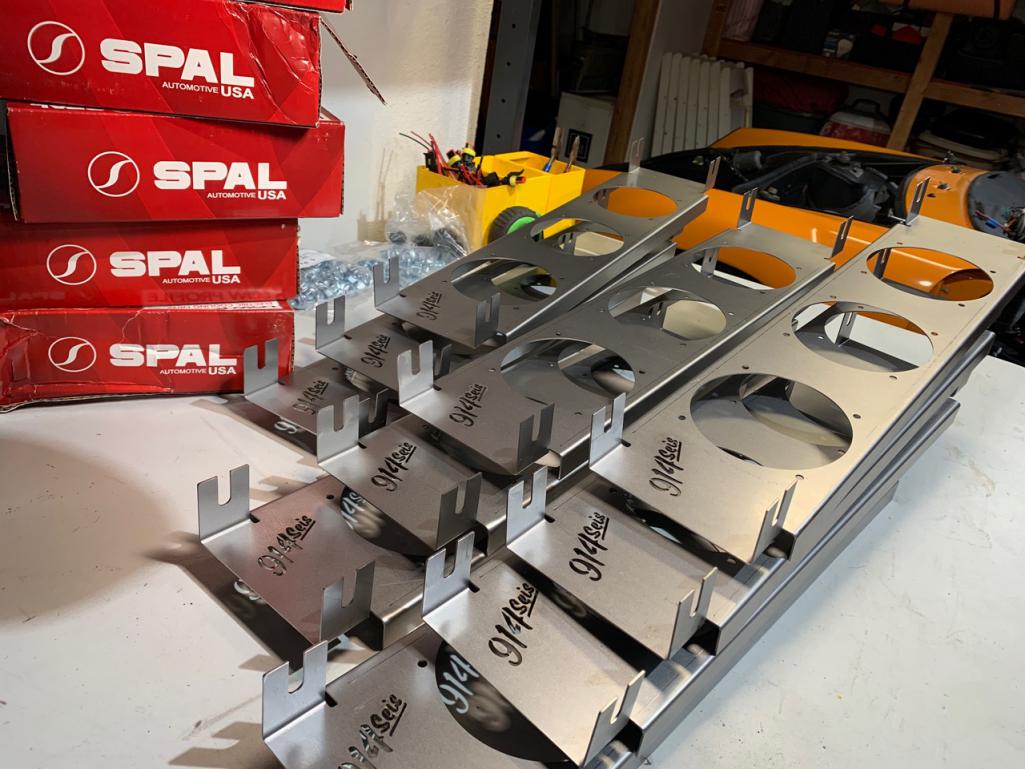 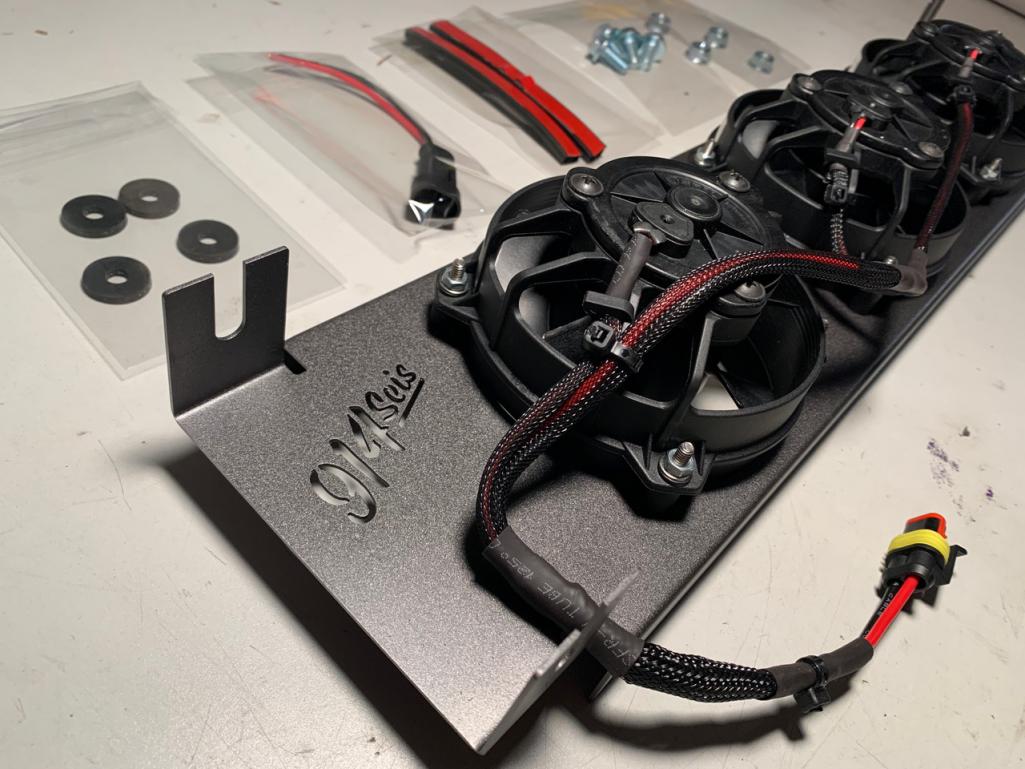 |
| RiqueMar |
 Mar 30 2021, 10:46 PM Mar 30 2021, 10:46 PM
Post
#945
|
|
Enrique Allen Mar     Group: Members Posts: 2,210 Joined: 28-August 08 From: San Diego, CA Member No.: 9,478 Region Association: Southern California 
|
After completing the orders for the cooler, dug into my parts stash. Idea is to start 'chipping' away on the weekend and finishing small jobs, while leaving the larger items (such as finishing the ECU wiring and touching-up the paint) for the weekend when there are larger blocks of time and concentration. (IMG:style_emoticons/default/screwy.gif)
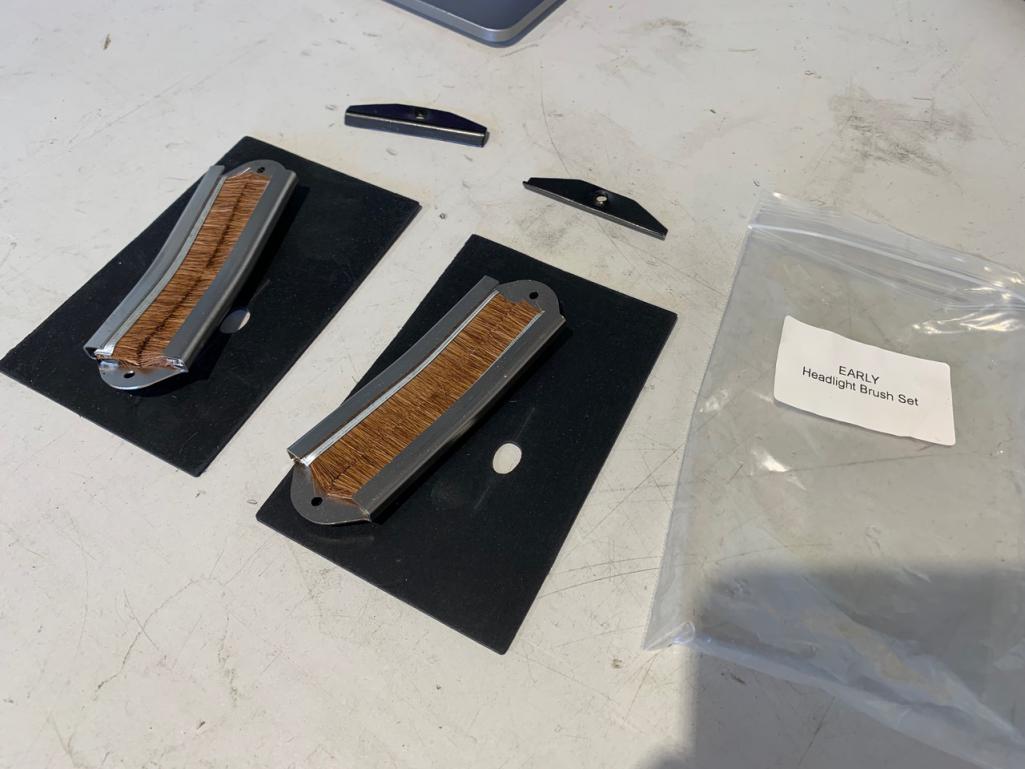 First up, I thought I would attach the parts-stash I have from 914Rubber. Though I originally installed the headlights, on my last order I received a set of early headlight brushes. While I thought I could install the brushes and rubber flap while just removing the arm.... I was fooling myself. For anyone trying to also do this, make it easy on yourself, Man... Just take-out the headlight and arm. It will take you 10-15 min, and will be alot easier. NOTE: Whenever working on, adjusting the headlights - DISCONNECT THE BATTERY / POWER. Those headlight motors will easily bite your hand, no joke! Remove the headlight 'eye-brows' and covers, then the 3-bolts on the inside of the trunk (first photo), the 2-bolts on the inside of the fender, and finally the arm thats connected to the motor. Voilá! You can now work much easier. Though my car is a restoration, this is also a great opportunity to check your headlight-buckets. It's not at all uncommon that the drain at the bottom gets clogged with dirt and leaves. 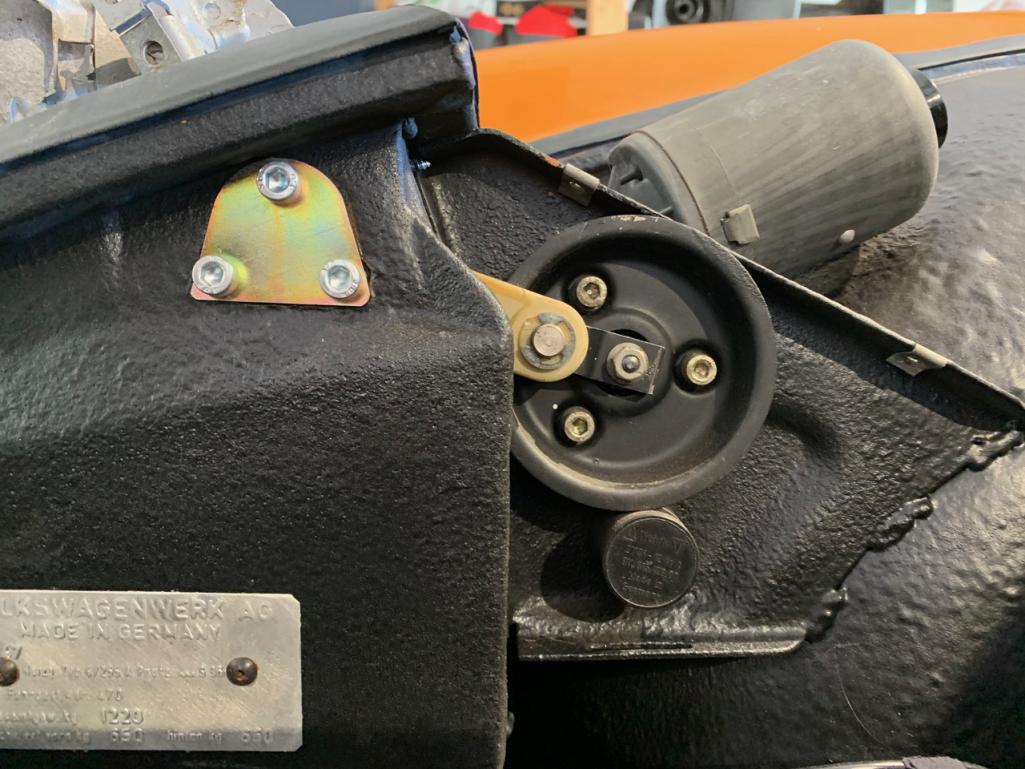 Once everything is open to the world, the installation of the brushes is pretty-straight forward. Make sure to use the rubber piece included and line up the slit in the rubber with the center of the brush. When you're done, it while lay like a flap over the brush and minimize water splashing into the front-trunk area. Will it fail eventually? Yes - it's designed to, and cheap to replace. 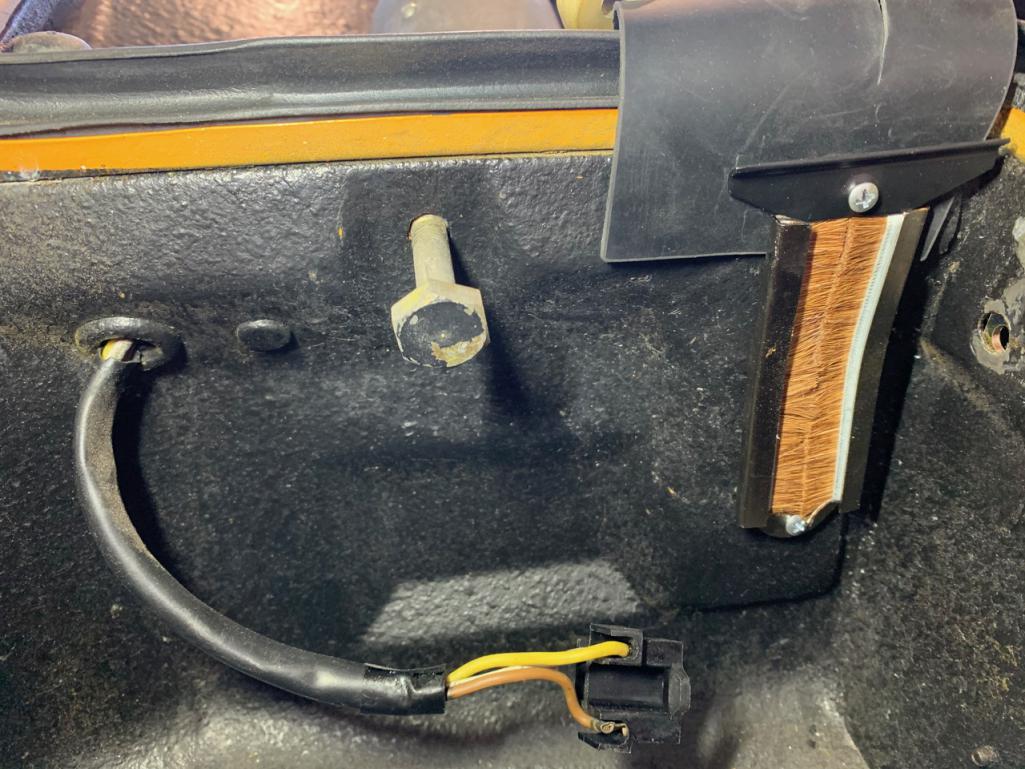 With that through, follow the same procedure in reverse to assemble the headlight system. When you get to the end, and you feel that your headlights aren't even, you can check by turning the black nobs on-top of the headlight motors. If that small adjustment doesn't work, you can also disconnect the 'arm' that connects the motor to the headlight assembly, make sure it's completely 'straight' when the headlight should be in the 'up' position. First picture shows the wrong position, second shows the correct. 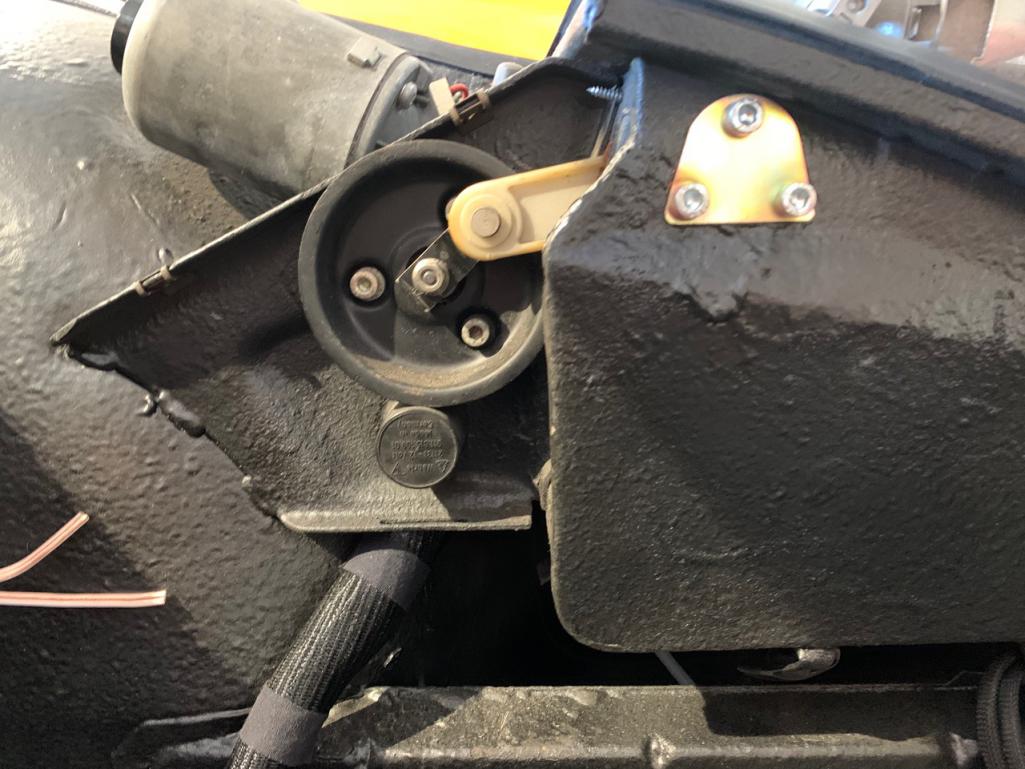 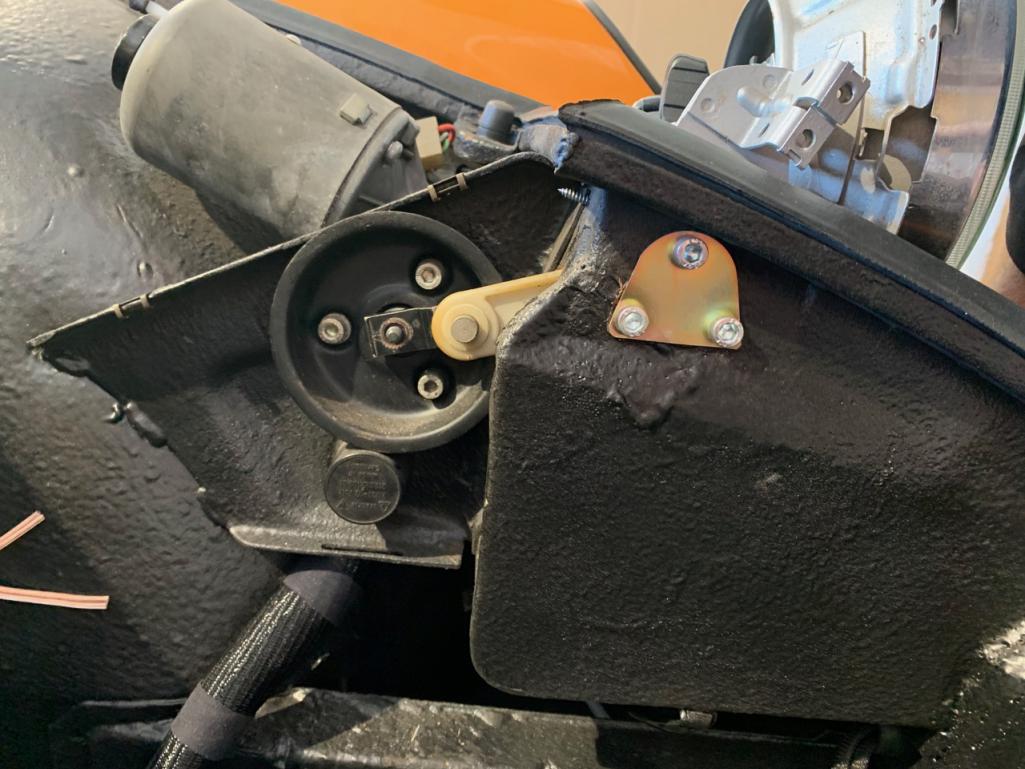 Final Note: If you're doing this job, it's also a great time to replace or check the following... - LED Headlights - Headlight Enclosures / Lenses - Turn-signal Grommet / boot - Headlight Relays - Your ground points - Located on the back of each headlight. (IMG:style_emoticons/default/bye1.gif) |
| CptTripps |
 Mar 31 2021, 05:45 AM Mar 31 2021, 05:45 AM
Post
#946
|
|
:: Punch and Pie ::     Group: Members Posts: 3,585 Joined: 26-December 04 From: Tuscaloosa, AL and Akron, OH Member No.: 3,342 Region Association: Upper MidWest |
I can offer no help with your wiring issue, but think you're doing a hell of a job on this car. Really great work. Love that you're going to the 10th degree on everything.
Also, as a fellow sim racer, it's fun to work on real cars now and then. But way more greasy! I did a thread in the Sandbox about my rig. Check it out: http://www.914world.com/bbs2/index.php?showtopic=351983 |
| RiqueMar |
 Mar 31 2021, 07:05 PM Mar 31 2021, 07:05 PM
Post
#947
|
|
Enrique Allen Mar     Group: Members Posts: 2,210 Joined: 28-August 08 From: San Diego, CA Member No.: 9,478 Region Association: Southern California 
|
I can offer no help with your wiring issue, but think you're doing a hell of a job on this car. Really great work. Love that you're going to the 10th degree on everything. Also, as a fellow sim racer, it's fun to work on real cars now and then. But way more greasy! I did a thread in the Sandbox about my rig. Check it out: http://www.914world.com/bbs2/index.php?showtopic=351983 @CptTripps - Gracias, trying my best to keep the quality up, sometimes after looking at my work it's hit or miss. Good looking rig, don't be afraid to ask should you have any questions (IMG:style_emoticons/default/aktion035.gif) |
| RiqueMar |
 Mar 31 2021, 07:21 PM Mar 31 2021, 07:21 PM
Post
#948
|
|
Enrique Allen Mar     Group: Members Posts: 2,210 Joined: 28-August 08 From: San Diego, CA Member No.: 9,478 Region Association: Southern California 
|
This last couple of days, it's been all about SOUND (IMG:style_emoticons/default/aktion035.gif)
Though I do require having a radio in the car, I'll admit I'm not much of an audiophile. While not really concerned with bass or loudness, I do enjoy clarity and want to have something for long-trips that sounds good, and has all the modern amenities such as hands-free capability and Bluetooth. Doing the research, settled on this Pioneer AMP I had originally bought for another project, I understand it is a very good solution. Coupled with that, I decided to go with 'Pioneer everything', and ordered the speakers and receive as well. In the cab, I'm just mounting 2x speakers in the stock-location, albeit with the 914Rubber speaker pods. As great as these (speaker pods) are, I do with they were less pliable and a bit more sturdy, I feel like there is a better-solution than the formed plastic that they come in, but more on that later. Currently, have run my own cabling lead for Amp controller, Speaker Wire to speakers, and speaker wire from the Receiver to AMP. As usual, to make this all the more cleaner and easier to understand in the future, this is it's own harness with safety-sheathing running in parallel to the the equipment harnesses to there front trunk and through the firewall. Just got an alert that the Speakers and receiver are delivered to the house, so hopefully I can update more this weekend! (IMG:style_emoticons/default/bye1.gif) 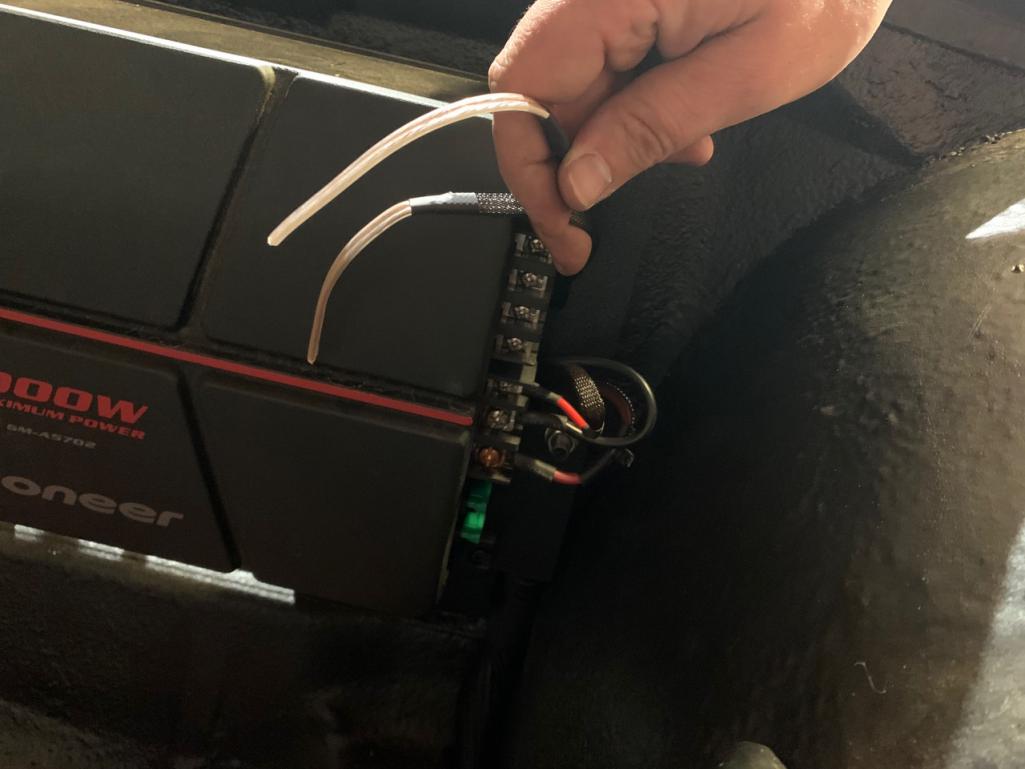 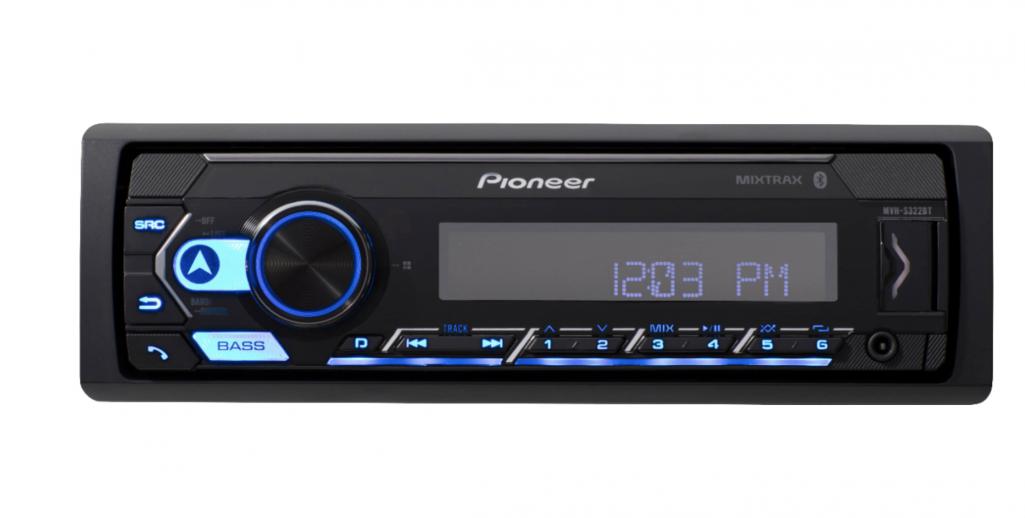 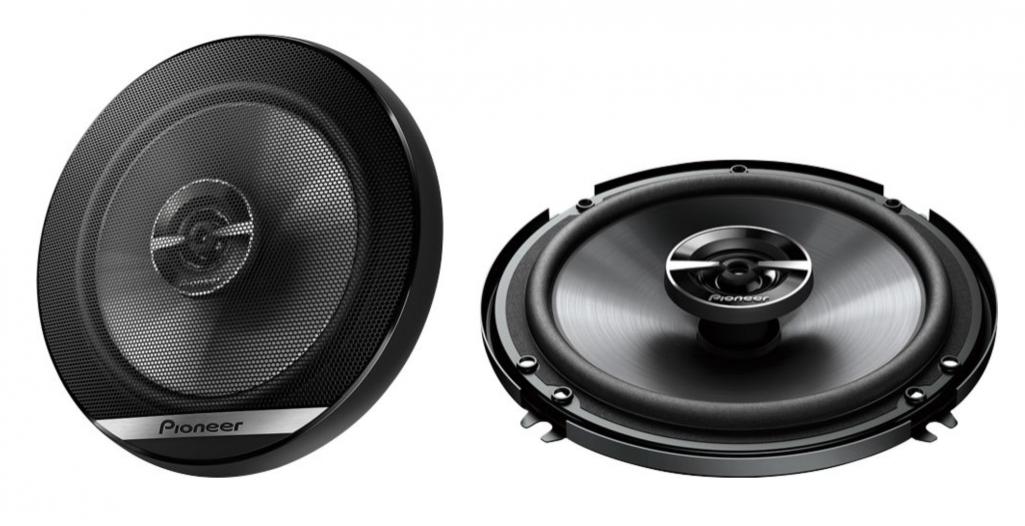 |
| saladin |
 Apr 1 2021, 12:57 AM Apr 1 2021, 12:57 AM
Post
#949
|
|
Member   Group: Members Posts: 53 Joined: 18-September 07 From: Mountain View, CA Member No.: 8,125 Region Association: Northern California 
|
Hope this helps with your wiring work. The drawings are draft as they are incomplete, need to be double checked, and I have yet performed the wiring work to verify operation.
For my 914-6 ignition switch conversion, I am using the stock 1974 dash with Restoration Design's PP360 "Dash section for Ignition." 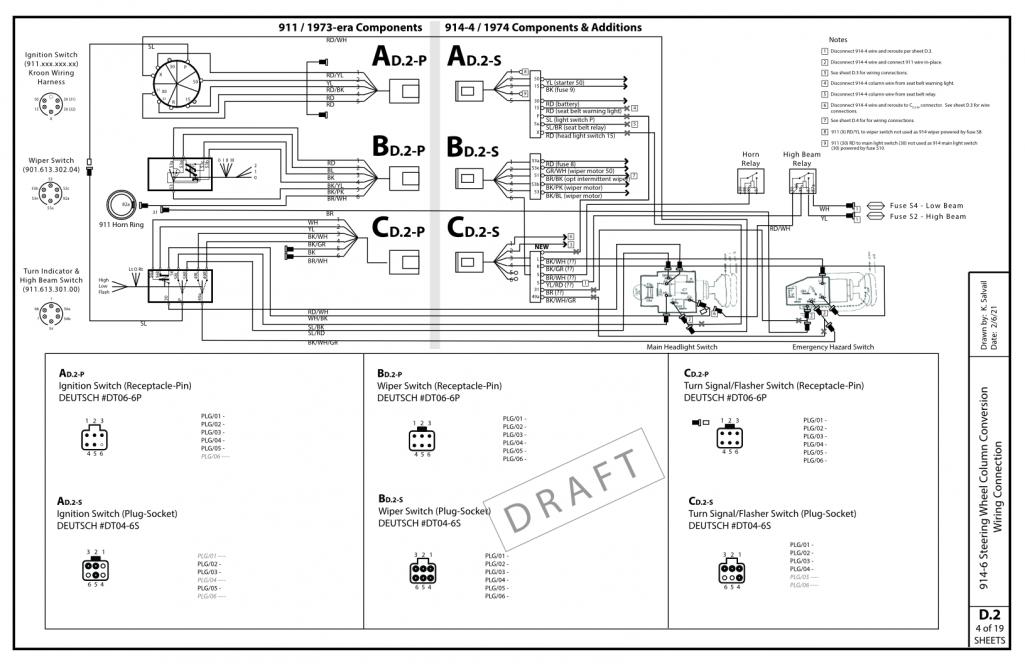 Since I am using the 1974 dash, I lost a dash switch opening and decided to eliminate the fog light switch and run driving lights like a 914-6 with the 914-6 flash operation as well. In order to protect the column switch, I looking to add power relays to provide full power to the lights, like @JWest JWest Engineering "911 Headlight Relay Kit." I am also adding a DLR module to use the driving lights as daylight running lights. 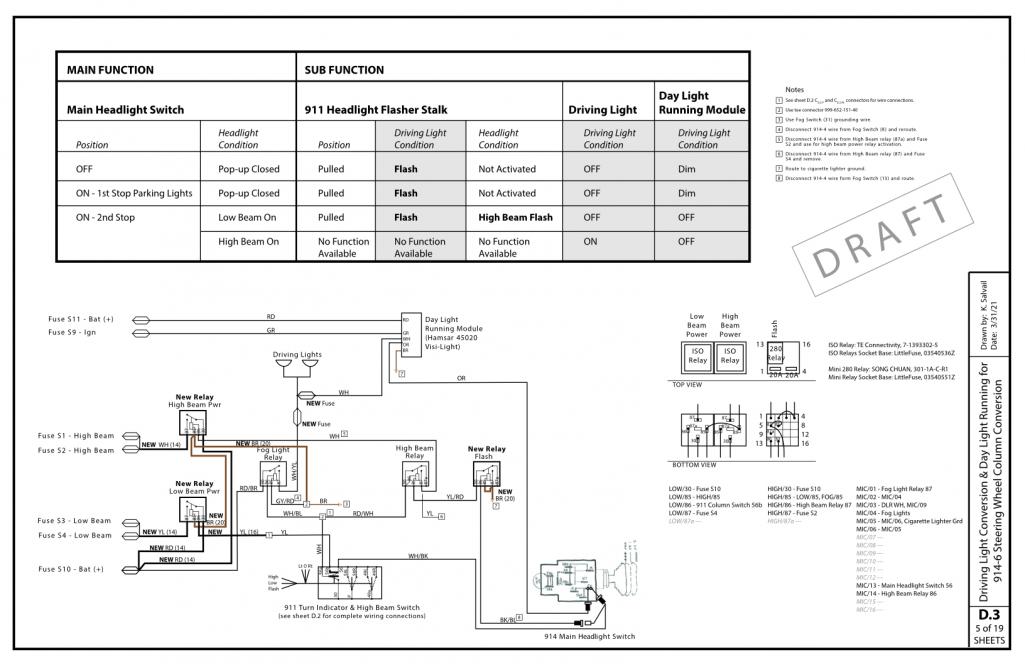 |
| RiqueMar |
 Apr 1 2021, 09:25 AM Apr 1 2021, 09:25 AM
Post
#950
|
|
Enrique Allen Mar     Group: Members Posts: 2,210 Joined: 28-August 08 From: San Diego, CA Member No.: 9,478 Region Association: Southern California 
|
@saladin - I think this is the ‘silver bullet’ I need. While I don’t have a 911 wiper switch on the steering column (mine is stock 914-6) believe i can trace these functions to match the functionality of the motor...
Not sure if this is the total solution, but thanks for your input! 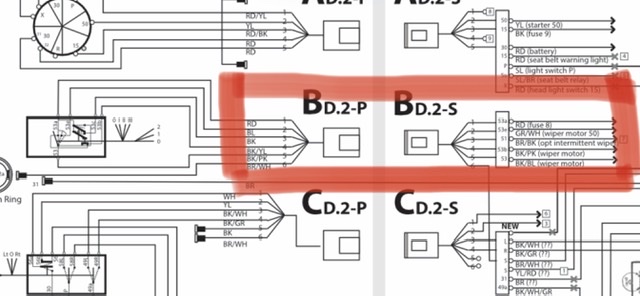 |
| saladin |
 Apr 1 2021, 01:41 PM Apr 1 2021, 01:41 PM
Post
#951
|
|
Member   Group: Members Posts: 53 Joined: 18-September 07 From: Mountain View, CA Member No.: 8,125 Region Association: Northern California 
|
Forgot to mention that the black wire from the 911 wiper switch is for the washer pump and I am using the 914-4 brown/black wire that is already routed from the dash to the washer bottle area. The 914-4 brown/black wire is for an optional intermittent wiper function (in combination with an optional relay installed in the washer bottle area) that is not supported by the 1973 and older 911 wiper switch.
|
| RiqueMar |
 Apr 1 2021, 03:59 PM Apr 1 2021, 03:59 PM
Post
#952
|
|
Enrique Allen Mar     Group: Members Posts: 2,210 Joined: 28-August 08 From: San Diego, CA Member No.: 9,478 Region Association: Southern California 
|
Forgot to mention that the black wire from the 911 wiper switch is for the washer pump and I am using the 914-4 brown/black wire that is already routed from the dash to the washer bottle area. The 914-4 brown/black wire is for an optional intermittent wiper function (in combination with an optional relay installed in the washer bottle area) that is not supported by the 1973 and older 911 wiper switch. @saladin - I'm not near my car right now, and I'm using a stock 914/6 switch, but I think I follow what you're saying. - Agree that the Black-wire from the switch controls pump function, have already run that to the pump. - Current obstacle is seeing which wiper switch corresponds to which-speed on the motor, believe your diagram will help me with that - Final, need to see which wire on the 914 harness gets connected to the washer-pump function so that when I spay the washers, the wipers automatically come on. My car is a 70' and the harness is a 75', so no relay in the cowl area, though that wouldn't be difficult to add. In case I don't mention it enough, thanks for your correspondence. |
| saladin |
 Apr 1 2021, 10:17 PM Apr 1 2021, 10:17 PM
Post
#953
|
|
Member   Group: Members Posts: 53 Joined: 18-September 07 From: Mountain View, CA Member No.: 8,125 Region Association: Northern California 
|
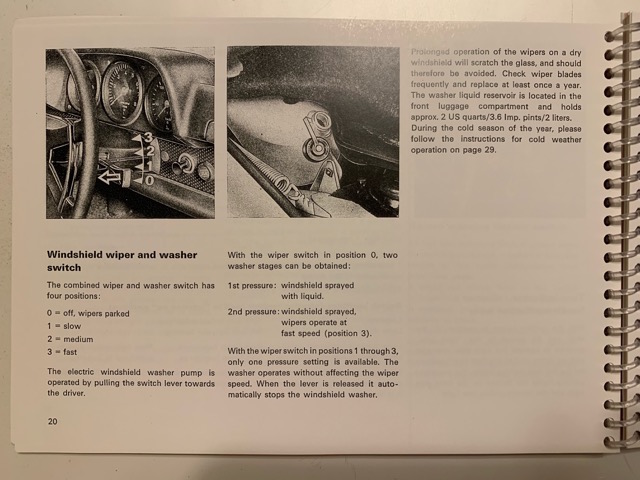
The 914-6 / 911 wiper switch activates the washer pump in two different stages according to the 914-6 owners manual shown below: 1st stage liquid only and 2nd stage activates the wipers as the wiper switch is designed to route power to the motor through the already wired motor wires.
 |
| RiqueMar |
 Apr 6 2021, 10:25 AM Apr 6 2021, 10:25 AM
Post
#954
|
|
Enrique Allen Mar     Group: Members Posts: 2,210 Joined: 28-August 08 From: San Diego, CA Member No.: 9,478 Region Association: Southern California 
|
Well unfortunately, stock-piling my parts and components during the week didn't exactly pan-out as I had to work over the weekend. I was, however, able to carve out time to connect and wire the amp, speakers, and receiver. As I mentioned previously, I went with an 'all Pioneer' system. After doing the initial sounds test, very impressed with the speakers and the smart 'app' to control the receiver unit.
Aside from the sound system, I finally connected the oil-tank to the engine. The previous setup had tons of breathers (2 in-front, 1 in rear). Though I don't think I need that many, wondering if I need to add one somewhere. If anyone has any input, please let me know! (IMG:style_emoticons/default/bye1.gif) 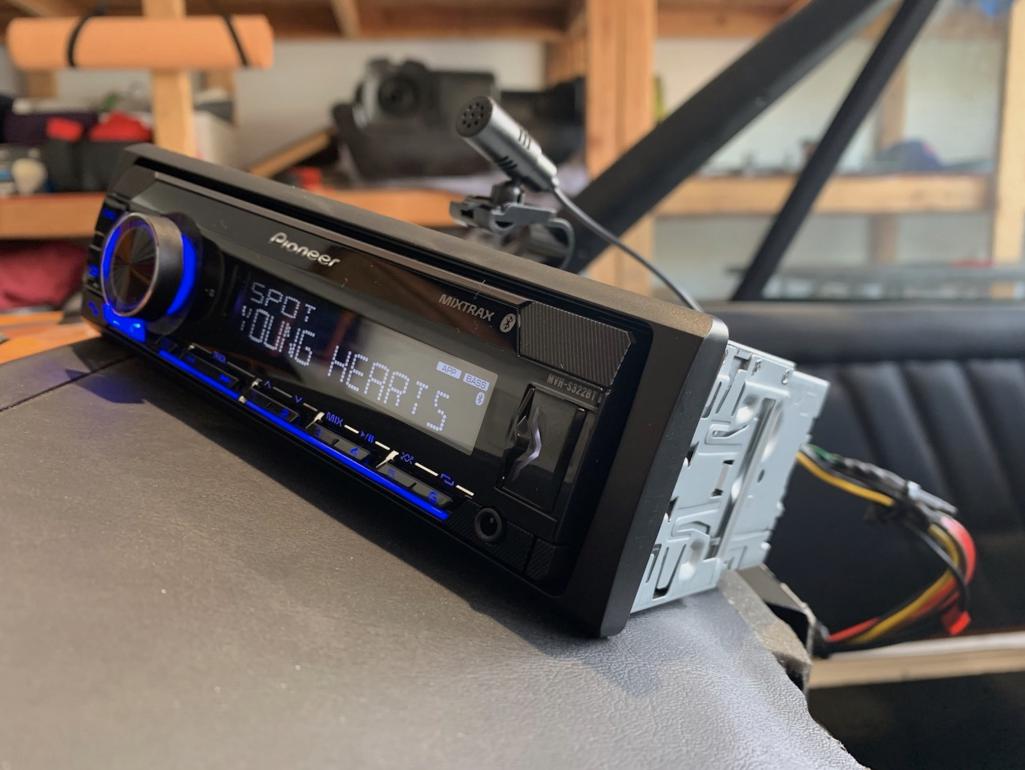 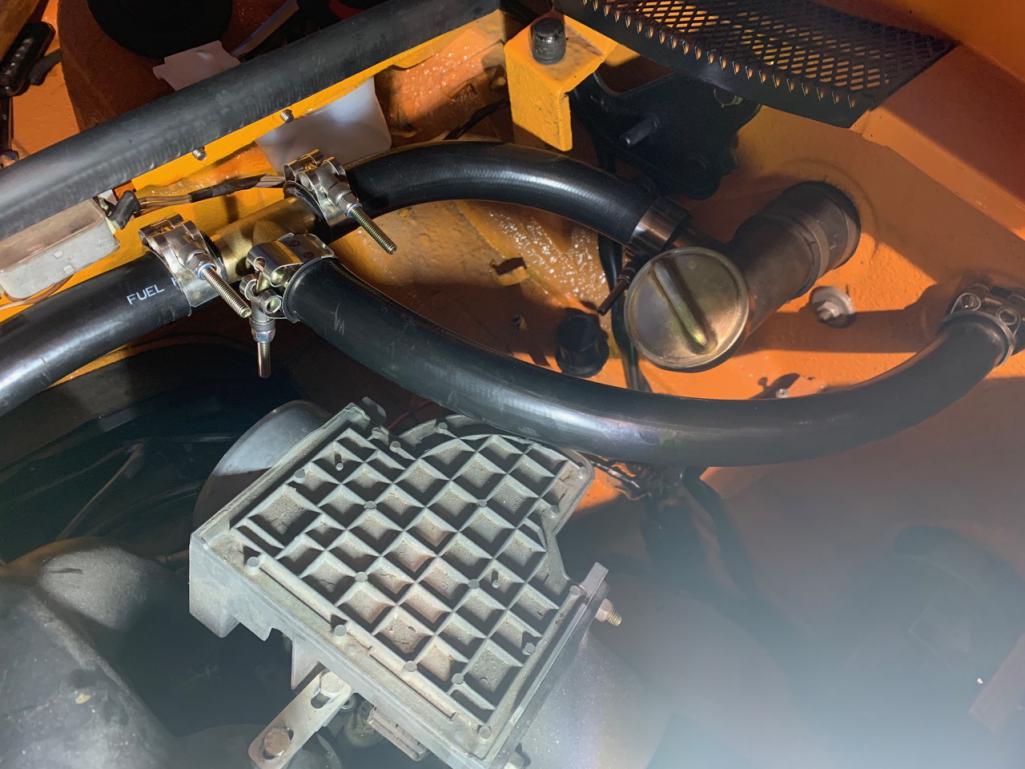 |
| RiqueMar |
 May 5 2021, 05:55 PM May 5 2021, 05:55 PM
Post
#955
|
|
Enrique Allen Mar     Group: Members Posts: 2,210 Joined: 28-August 08 From: San Diego, CA Member No.: 9,478 Region Association: Southern California 
|
Hi All - Hope everyone is staying busy and healthy!
I was finally able to start to overcome a pretty-big hurdle and found a shop (one that is familiar with this and the previous black-car) to finish-off the wiring and get everything running! (IMG:style_emoticons/default/smilie_pokal.gif) Meanwhile, while the car is getting the professional treatment I'm using this time to try and catch up on the miscellaneous items. First up, finishing up the sound-system peripherals. Luckily, 914Rubber makes this easy with their thermally formed speaker-pods. Unboxing these, they work pretty well, and allow you to use a modern 5-inch to 6 1/2-inch speaker. (Link to 914Rubber speaker pods here) The ONLY downside to these units is that they are made out of thermal-formed plastic, rather than something more sturdy like fiberglass. While a great jumping-off point, this makes the end product a bit flimsy and hard to work with, and doesn't leave the best finish around the edges. To fix this, I asked our fiberglass modeler to apply a reinforcement layer before cutting out the holes for the Pioneer speakers. Regarding the speakers, believe I went to the 'maximum size' of 6-1/2", and it's pushing it a bit. I'll work on the general fitment later, but for now, believe I'll have to add a 1" ABS 'ring' to accomodate the mounting holes. In any case, believe these look MUCH better than the originals and love the fact they allow for a bigger and more modern speaker. (IMG:style_emoticons/default/bye1.gif) 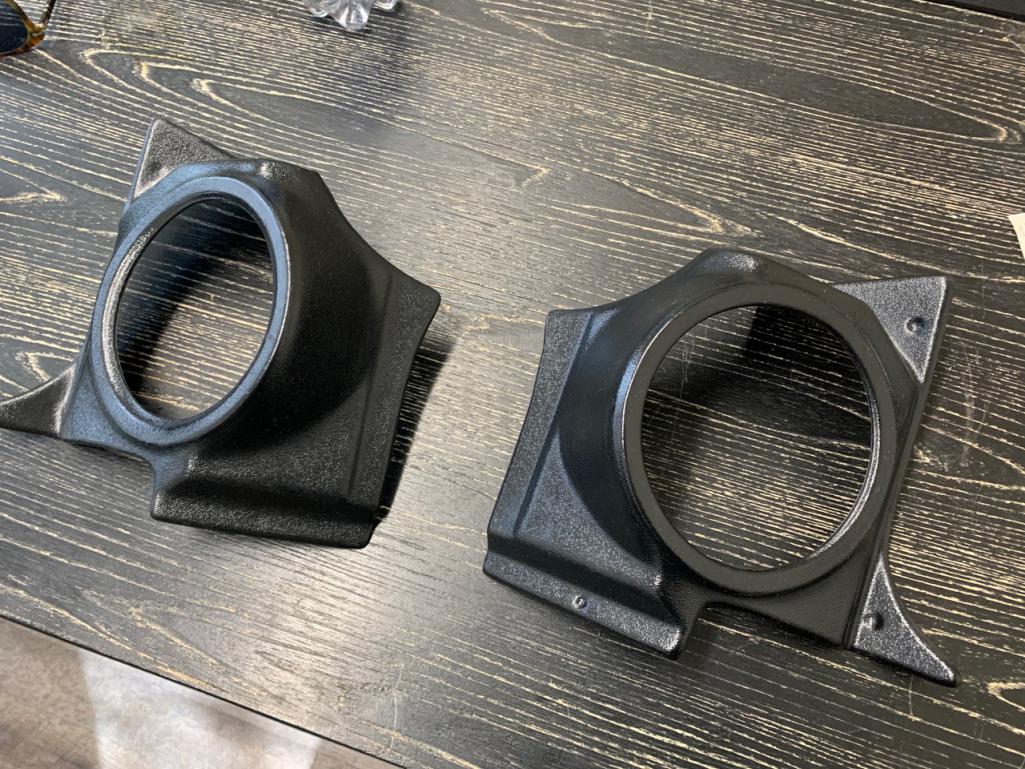 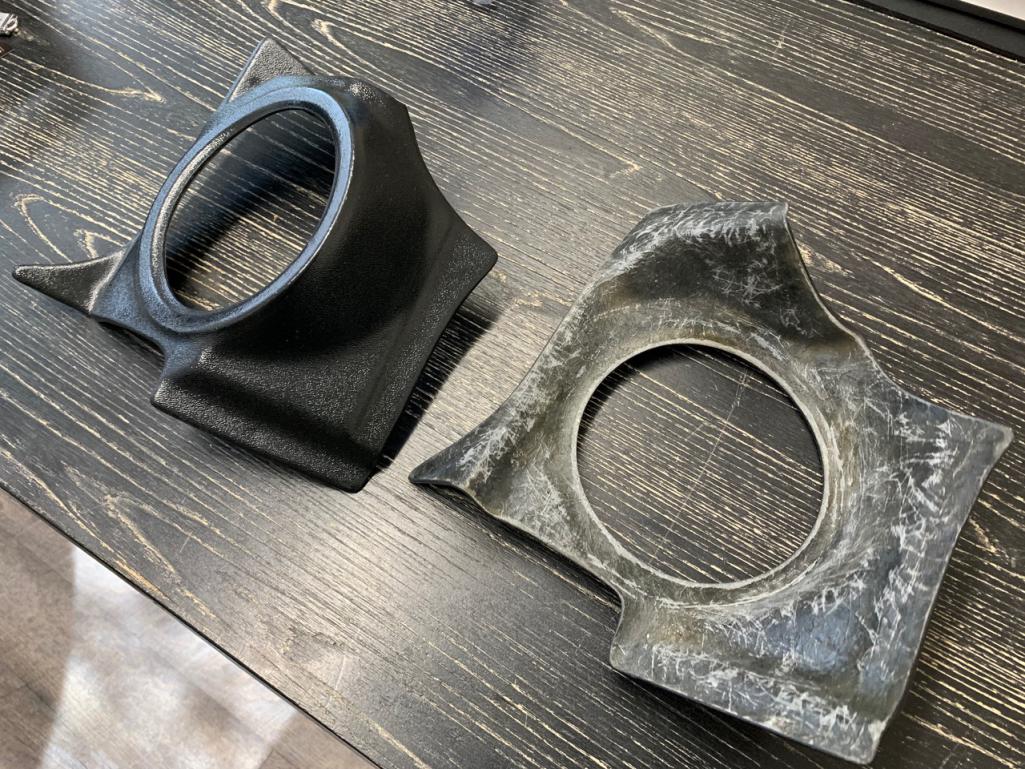 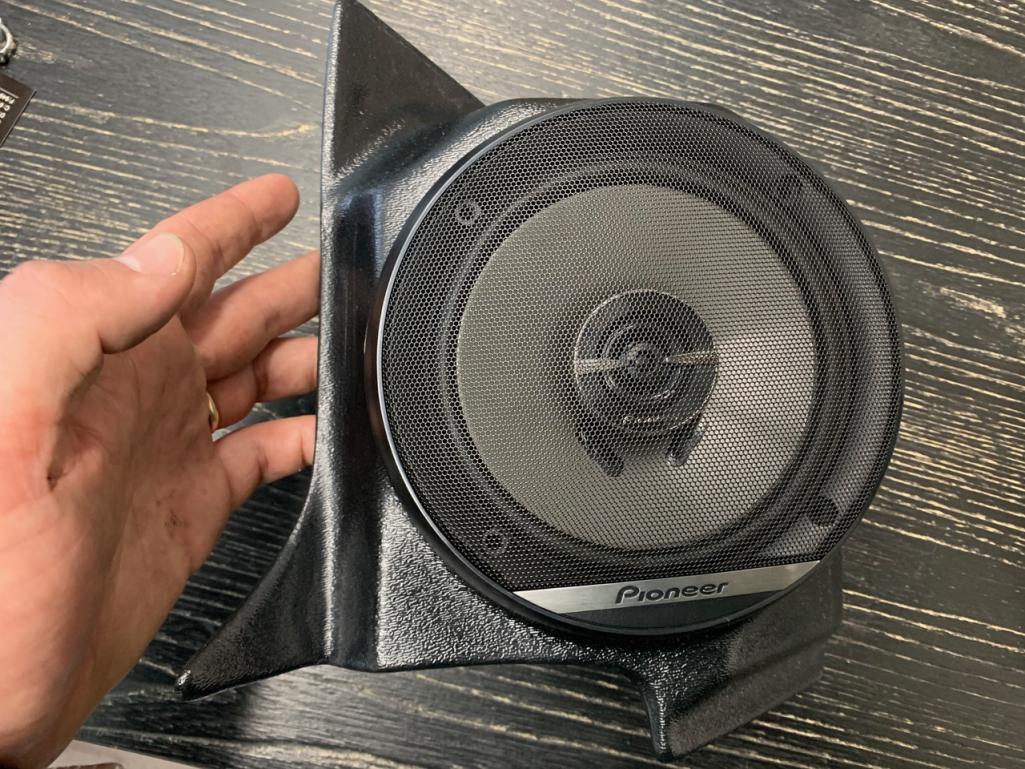 |
| Steve |
 May 5 2021, 06:01 PM May 5 2021, 06:01 PM
Post
#956
|
|
914 Guru      Group: Members Posts: 5,837 Joined: 14-June 03 From: Laguna Niguel, CA Member No.: 822 Region Association: Southern California 
|
Are you going to run a subwoofer? Those speakers in those plastic enclosures sound really tinny compared to mounting them in the doors.
|
| RiqueMar |
 May 5 2021, 07:17 PM May 5 2021, 07:17 PM
Post
#957
|
|
Enrique Allen Mar     Group: Members Posts: 2,210 Joined: 28-August 08 From: San Diego, CA Member No.: 9,478 Region Association: Southern California 
|
Are you going to run a subwoofer? Those speakers in those plastic enclosures sound really tinny compared to mounting them in the doors. Hey @Steve - Definitely thinking to run a subwoofer - possibly an 8" in my center-console, though it's not high on my to-do after my initial test with these speakers. Hooked them up and ran music for about 2-hours and was pretty pleased with the sound and clarity. Completely agree that doors are usually the best option, but went with this compromise for the tidiness and the ability to run my Getty doors (unless I move to something more GT inspired). If I remember correctly, you had a setup in your car, mind sharing? |
| Steve |
 May 5 2021, 11:23 PM May 5 2021, 11:23 PM
Post
#958
|
|
914 Guru      Group: Members Posts: 5,837 Joined: 14-June 03 From: Laguna Niguel, CA Member No.: 822 Region Association: Southern California 
|
I’m running the same enclosures with infinity speakers. My daughters boy friend Brandon has a v8 914 with the speakers in the doors. Huge difference, but I also don’t want to cut holes in my doors. His were already cut. I thought a subwoofer would help. I also have not installed one yet.
It’s on my list of things to do. |
| RiqueMar |
 Jun 8 2021, 09:52 AM Jun 8 2021, 09:52 AM
Post
#959
|
|
Enrique Allen Mar     Group: Members Posts: 2,210 Joined: 28-August 08 From: San Diego, CA Member No.: 9,478 Region Association: Southern California 
|
Long time no update, but incredible progress!
I was finally able to 'round-off' the vehicle enough to take it to a local shop, European Motorsports (www.emsautorepair.com) and get the ECU and DME functioning properly. While there, I also asked the staff to 'double-check' the wiring work I had done previously. While the wiring was pretty straight forward, I'm glad the car was in their hands as it seems that the previous owner used hydraulic-lines instead of fuel-line for the fuel system. While the hydraulic lines where originally fine - over time the fuel degraded the inner lining, potentially sending bits into the injection system, and made the lines very hard and in-flexible, making them crack easy. Long story short, I'm glad professionals had eyes on this because as soon as the engine was fired up, we had multiple fuel-leaks that would have almost certainly resulted in a engine fire. Now, the car has all-new fuel lines and fittings, and is functioning well! Crisis averted! 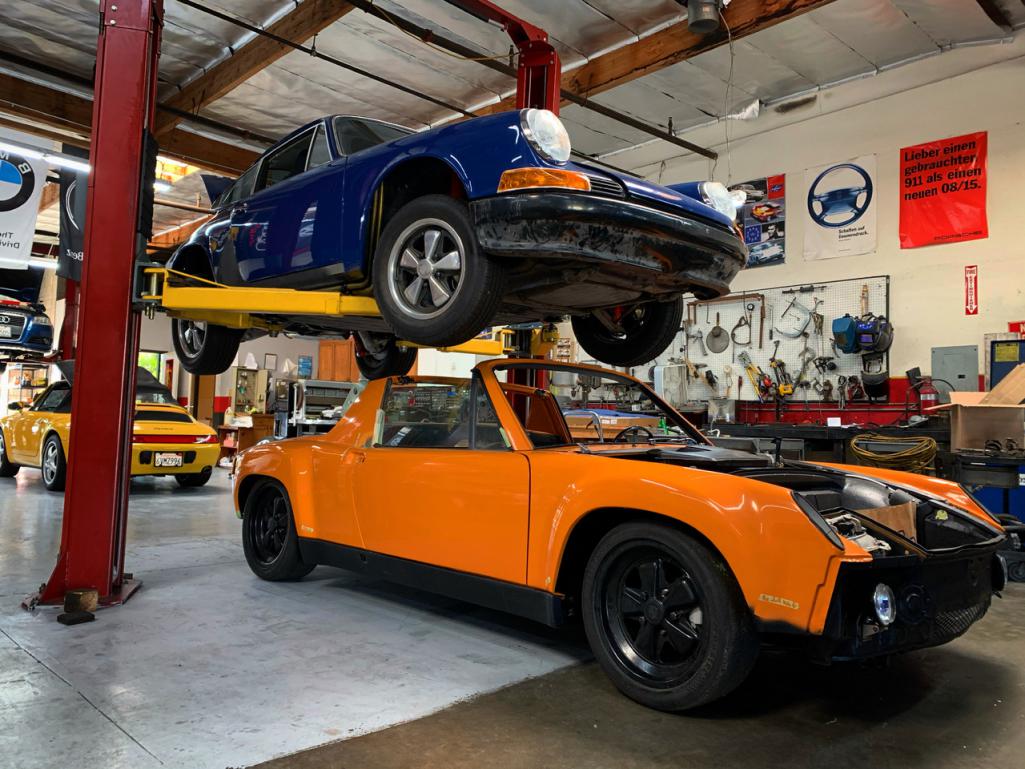 |
| RiqueMar |
 Jun 8 2021, 10:18 AM Jun 8 2021, 10:18 AM
Post
#960
|
|
Enrique Allen Mar     Group: Members Posts: 2,210 Joined: 28-August 08 From: San Diego, CA Member No.: 9,478 Region Association: Southern California 
|
Now that the car is back at the house and running, taking this opportunity to do the 'fun stuff' and begin assembling the odds and ends and hopefully get this thing on the road soon! First up, finishing off the oil-system fans and fan-shroud. Unfortunately, during the run of oil-coolers earlier this year, I depleted my stash of fans, so my unit took a back-seat to fill orders. Happy to get this painted, assembled, wired and covered!
Also, seeing as the fuel-system is done and the tank is ready to go in permanently (I hope), also spent the weekend focusing on this area. Fuel-tank pads, fuel-lever sender, lines to the charcoal canister, etc. (IMG:style_emoticons/default/bye1.gif) 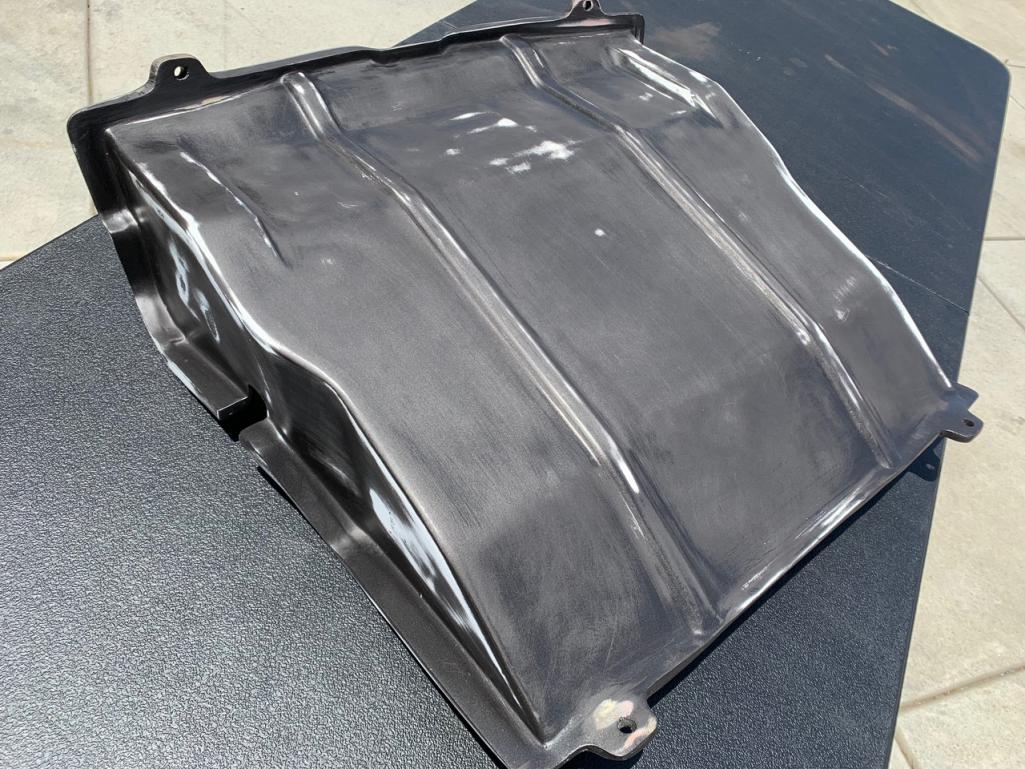 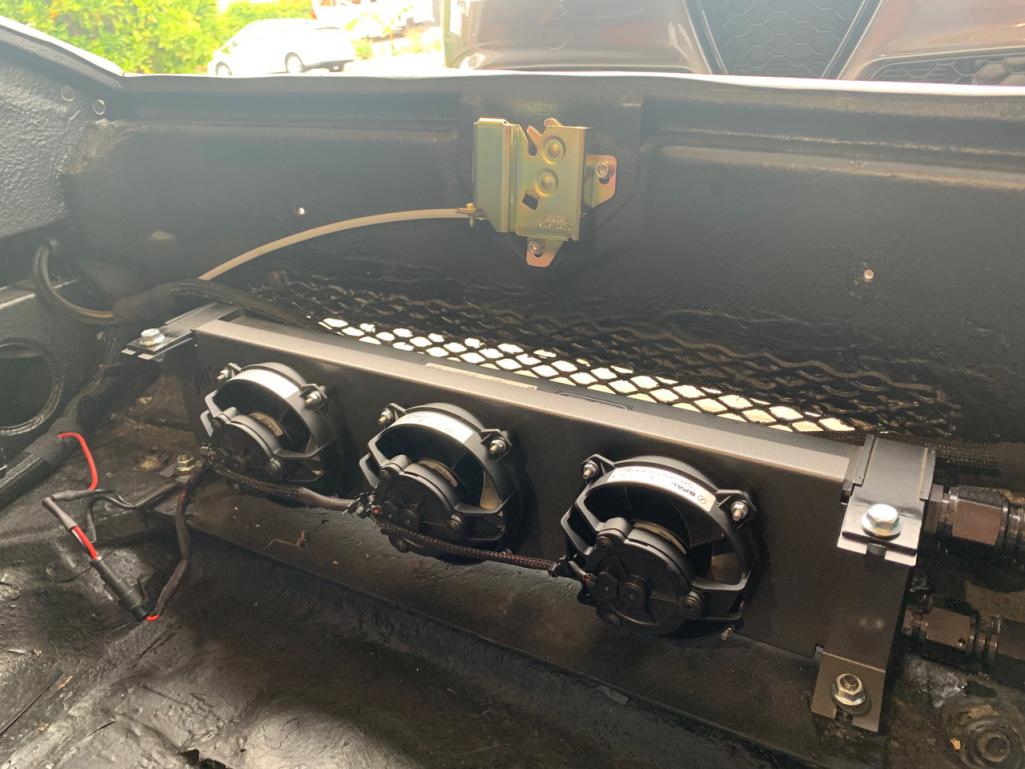 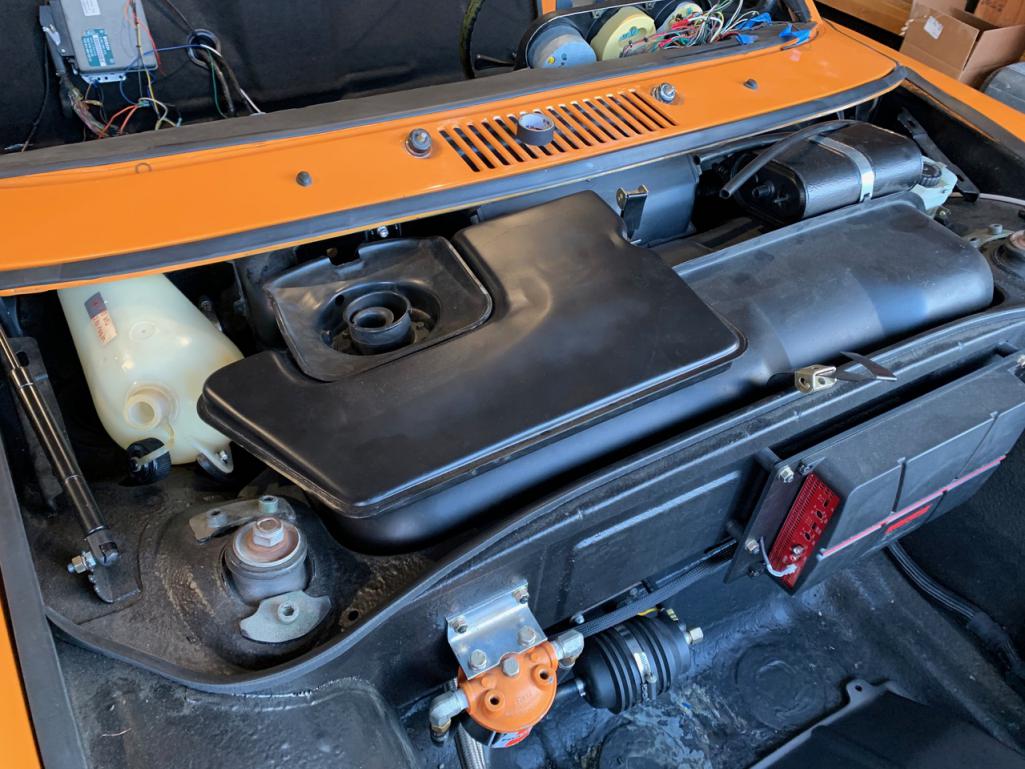 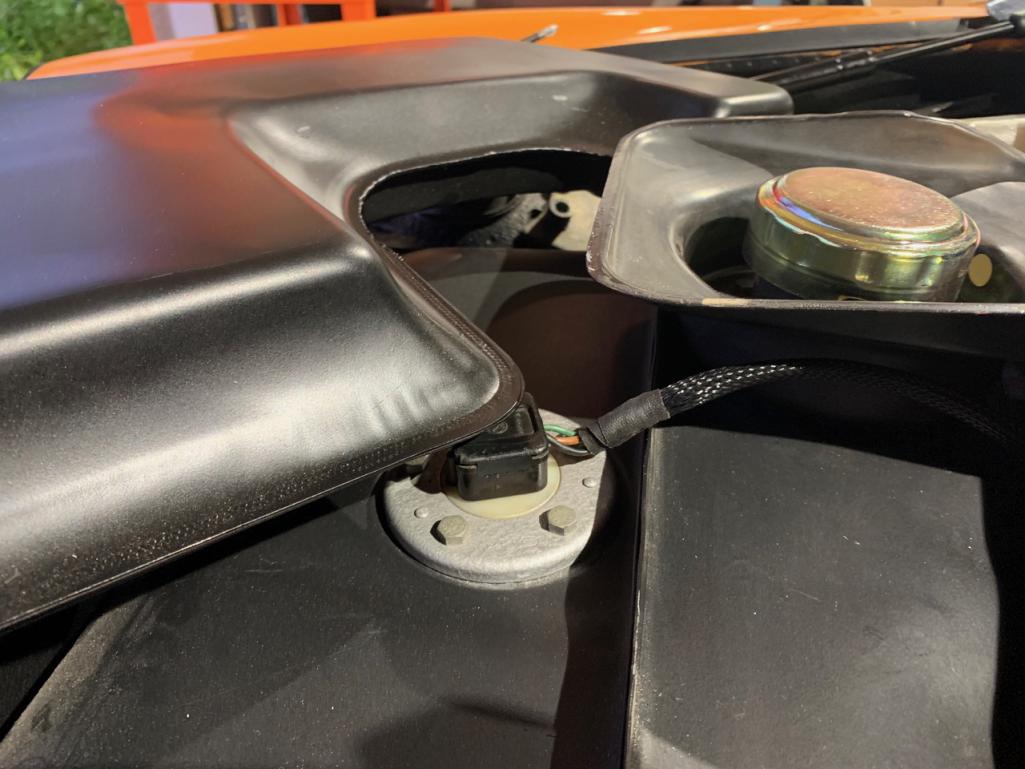 |
  |
2 User(s) are reading this topic (2 Guests and 0 Anonymous Users)
0 Members:

|
Lo-Fi Version | Time is now: 10th April 2025 - 04:23 PM |
Invision Power Board
v9.1.4 © 2025 IPS, Inc.


