|
|
|
Porsche, and the Porsche crest are registered trademarks of Dr. Ing. h.c. F. Porsche AG.
This site is not affiliated with Porsche in any way. Its only purpose is to provide an online forum for car enthusiasts. All other trademarks are property of their respective owners. |
|
|

  |

| kafermeister |
 Feb 12 2004, 05:14 PM Feb 12 2004, 05:14 PM
Post
#21
|
|
Senior Member  Group: Members Posts: 778 Joined: 20-January 03 From: Cincinnati/Northern KY Member No.: 174 |
Pic #13 of 15
Attached thumbnail(s) 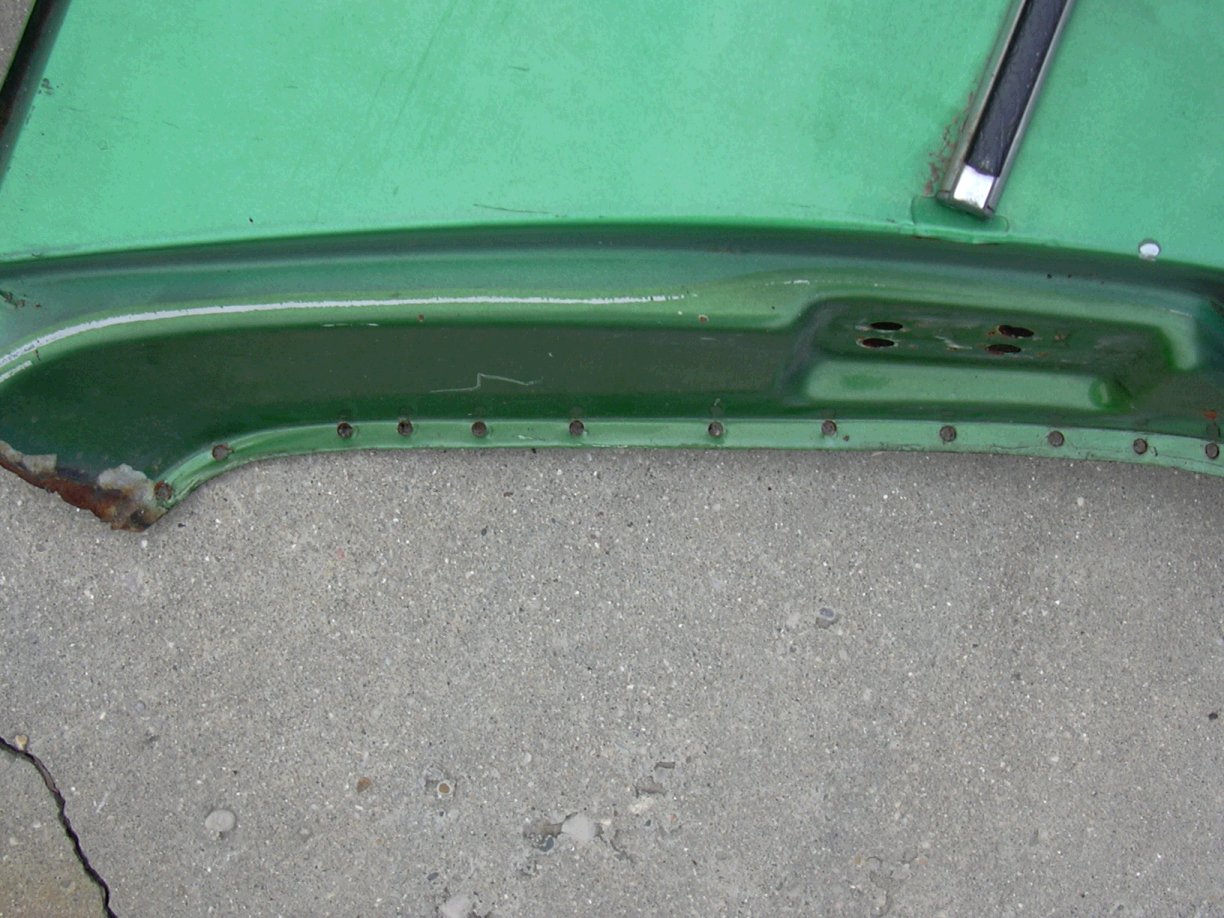
|
   |

 
|
| kafermeister |
Feb 12 2004, 05:14 PM
Post
#22
|
|
Senior Member Group: Members Posts: 778 Joined: 20-January 03 From: Cincinnati/Northern KY Member No.: 174 |
Pic #14 of 15
Attached thumbnail(s) 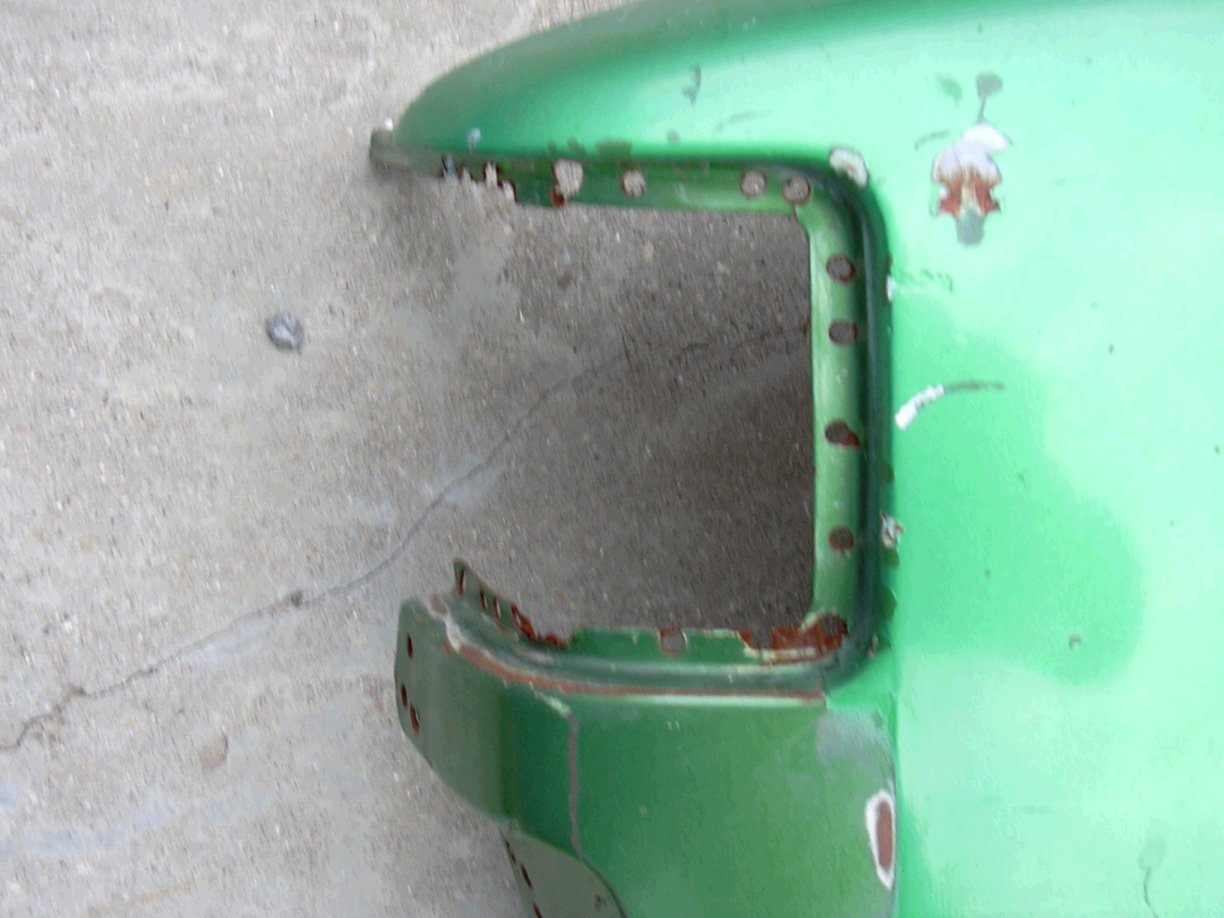
|
|
|
|
| kafermeister |
Feb 12 2004, 05:15 PM
Post
#23
|
|
Senior Member Group: Members Posts: 778 Joined: 20-January 03 From: Cincinnati/Northern KY Member No.: 174 |
Pic #15 of 15
Attached thumbnail(s) 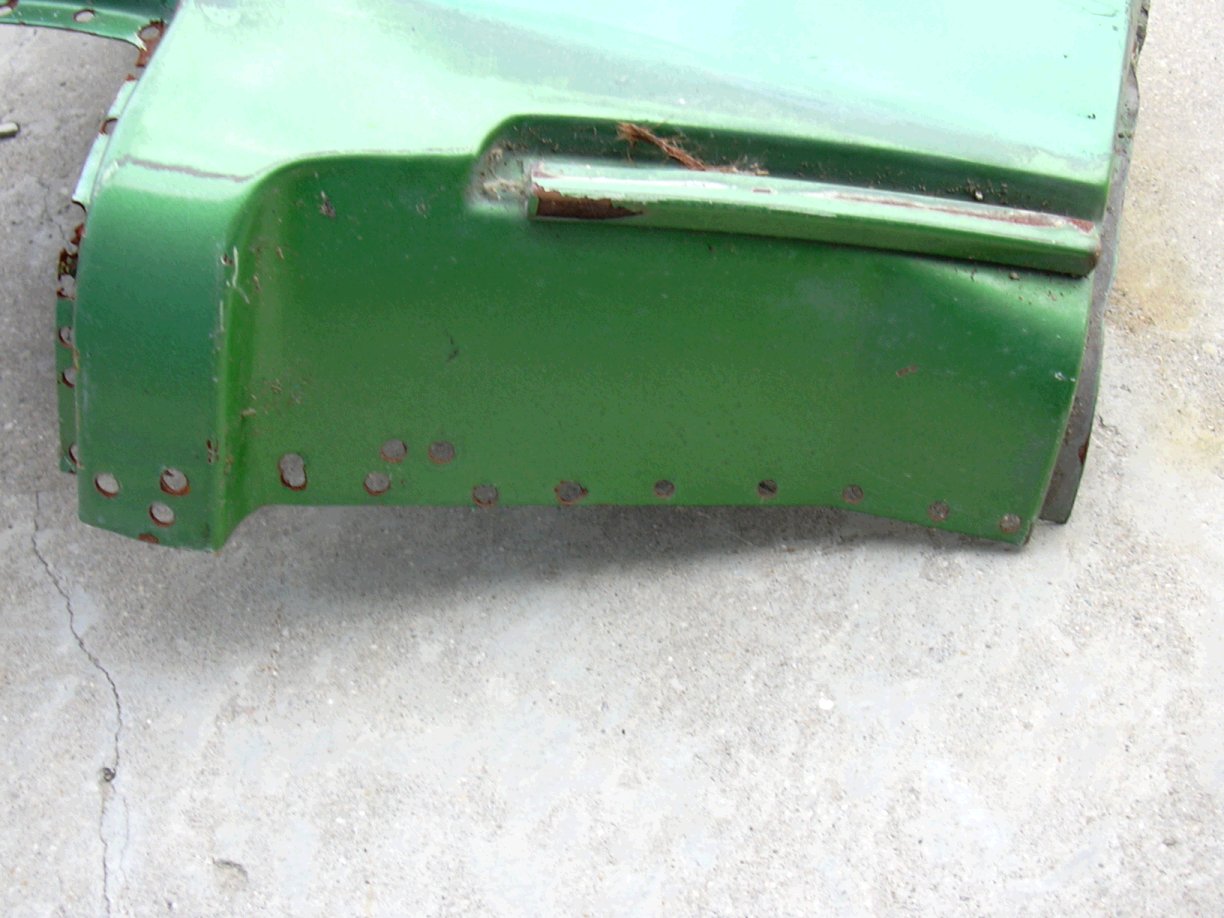
|
|
|
|
| watsonrx13 |
Feb 12 2004, 05:19 PM
Post
#24
|
|
Advanced Member Group: Members Posts: 2,735 Joined: 18-February 03 From: Plant City, FL Member No.: 312 Region Association: South East States |
Rick, thanks for the pics, it will definately help me this weekend. I'll take plenty of pics myself and post to this when I'm finished. I noticed that the panel where the door striker is, is part of the rear fender, I wasn't aware of that piece. Thanks again.
|
|
|
|
| kafermeister |
Feb 12 2004, 05:28 PM
Post
#25
|
|
Senior Member Group: Members Posts: 778 Joined: 20-January 03 From: Cincinnati/Northern KY Member No.: 174 |
QUOTE(watsonrx13 @ Feb 12 2004, 07:19 PM) I noticed that the panel where the door striker is, is part of the rear fender, I wasn't aware of that piece. Thanks again. Your welcome. I will send you a PM with links to the original images. The part where the striker sits was originally a seperate piece. It's just simpler to keep it with the quarter. Saves you from having to guess how deep to set the quarter over it. BTW, depending on which year car you have, there may be a brace that binds the striker/nut-plate thingie to the tub itself. |
|
|
|
| Gint |
Feb 12 2004, 06:53 PM
Post
#26
|
|
Mike Ginter Group: Admin Posts: 16,095 Joined: 26-December 02 From: Denver CO. Member No.: 20 Region Association: Rocky Mountains |
Thanks for posting those pics! I might try to remove the fender on the parts car (tub). These will come in handy.
|
|
|
|
| watsonrx13 |
Feb 12 2004, 08:06 PM
Post
#27
|
|
Advanced Member Group: Members Posts: 2,735 Joined: 18-February 03 From: Plant City, FL Member No.: 312 Region Association: South East States |
Hey Gint, between your 'rustoration' and my 'resurrection' and the complete support of this web site, we're going to prove that anyone, with the time and the drive, can restore these cars.
|
|
|
|
| ThinAir |
Feb 12 2004, 08:46 PM
Post
#28
|
|
Best friends Group: Members Posts: 2,555 Joined: 4-February 03 From: Flagstaff, AZ Member No.: 231 Region Association: Southwest Region |
Exactly what is it that is circled in picture #8?
|
|
|
|
| Joe Ricard |
Feb 12 2004, 08:51 PM
Post
#29
|
|
CUMONIWANNARACEU Group: Members Posts: 6,811 Joined: 5-January 03 From: Gautier, MS Member No.: 92 |
wow
|
|
|
|
| Joe Ricard |
Feb 12 2004, 08:53 PM
Post
#30
|
|
CUMONIWANNARACEU Group: Members Posts: 6,811 Joined: 5-January 03 From: Gautier, MS Member No.: 92 |
Well that didn't work.
|
|
|
|
| seanery |
Feb 12 2004, 08:58 PM
Post
#31
|
|
waiting to rebuild whitey! Group: Retired Admin Posts: 15,854 Joined: 7-January 03 From: Indy Member No.: 100 Region Association: None |
now it does! (IMG:style_emoticons/default/w00t.gif)
|
|
|
|
| kafermeister |
Feb 12 2004, 09:17 PM
Post
#32
|
|
Senior Member Group: Members Posts: 778 Joined: 20-January 03 From: Cincinnati/Northern KY Member No.: 174 |
QUOTE(ErnieDV @ Feb 12 2004, 10:46 PM) Exactly what is it that is circled in picture #8? Picture #8 is showing an area where you may choose to leave more metal. There is a natural seam in that general area. You may want to find it and determine how to split it based on your particular needs. Rick |
|
|
|
| watsonrx13 |
Feb 16 2004, 04:01 PM
Post
#33
|
|
Advanced Member Group: Members Posts: 2,735 Joined: 18-February 03 From: Plant City, FL Member No.: 312 Region Association: South East States |
Well, the intent this long 3 day weekend was to remove the left rear fender. Unfortunately I wasn't able to find the Black and Decker Bullet drill bit. I've checked NAPA, Sears, Tool Wholesale (local company) and the locak auto paint store. Any recommendations to where I can check next? I don't want to purchase the 'hole-saw' type, evidently they break easily. Once I get the bullet bit, I'll show the removal of the fender.
BTW, it wasn't a lost Porsche weekend. I worked on the V8 conversion project. I removed the dealer installed A/C system. This included removing the condesor, in the front trunk, the dryer, in the right fender well, the under dash fan control unit, in the passenger compartment, and all of the A/C hoses, that run from the front to the engine compartment. Here's a shot of the hoses hidden beheath the right side valance. Attached image(s) 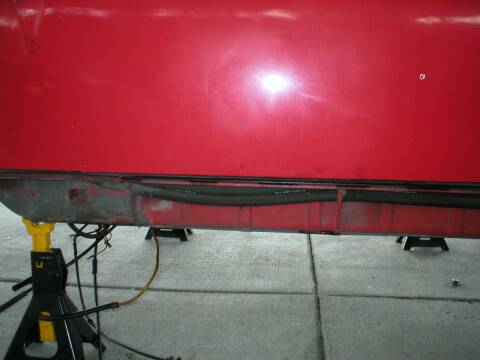
|
|
|
|
| sj914 |
Feb 17 2004, 03:32 AM
Post
#34
|
|
Senior Member Group: Members Posts: 805 Joined: 20-August 03 From: San Jose, CA Member No.: 1,053 |
Looks like you got some 30 year old cheese in pic #4. (IMG:style_emoticons/default/wacko.gif)
|
|
|
|
| sj914 |
Feb 17 2004, 03:33 AM
Post
#35
|
|
Senior Member Group: Members Posts: 805 Joined: 20-August 03 From: San Jose, CA Member No.: 1,053 |
What does the B&D bullet drill bit look like?
|
|
|
|
| watsonrx13 |
Feb 24 2004, 03:25 PM
Post
#36
|
|
Advanced Member Group: Members Posts: 2,735 Joined: 18-February 03 From: Plant City, FL Member No.: 312 Region Association: South East States |
Well, the removal of the left rear fender continues. I've drilled out all of the spot welds, using the 3/8" spot weld drill bit
(bought at Eastwood Co for $19.99 + shipping) and a 1/4" regular drill bit (for the spot welds where the 3/8" wouldn't fit, see pics). Here's a pic with 95% of the fender apart. It also shows where I used the 3/8" and the 1/4" drill bits. There are 2 places that are still connected, the air tube and where the fender meets the rear tail light housing. Attached image(s) 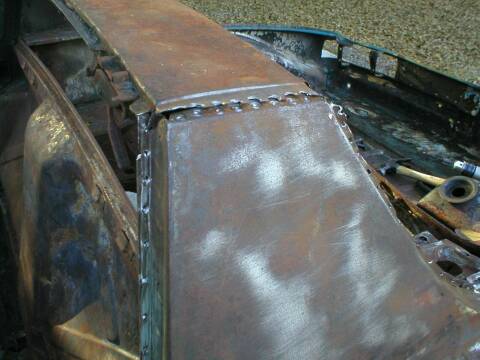
|
|
|
|
| watsonrx13 |
Feb 24 2004, 03:26 PM
Post
#37
|
|
Advanced Member Group: Members Posts: 2,735 Joined: 18-February 03 From: Plant City, FL Member No.: 312 Region Association: South East States |
Chris (Racer Chris) you mentioned that the air tube is brazed, how can I un-braze it?
Close up of the air-tube. Attached image(s) 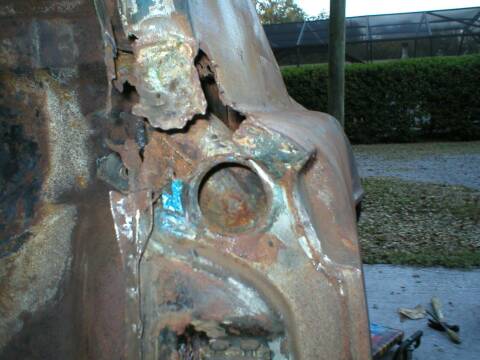
|
|
|
|
| watsonrx13 |
Feb 24 2004, 03:26 PM
Post
#38
|
|
Advanced Member Group: Members Posts: 2,735 Joined: 18-February 03 From: Plant City, FL Member No.: 312 Region Association: South East States |
The rear tail light housing has some previous repairs and the spot welds are hidden underneath the PO welding job.
Any recommendations for removal? Attached image(s) 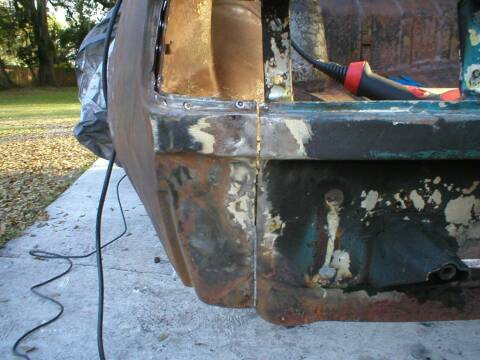
|
|
|
|
| waterboy |
Feb 24 2004, 03:54 PM
Post
#39
|
|
Newbie Group: Members Posts: 16 Joined: 2-September 03 From: PDX Member No.: 1,104 |
classic thread!! (IMG:style_emoticons/default/aktion035.gif)
|
|
|
|
| kafermeister |
Feb 24 2004, 07:16 PM
Post
#40
|
|
Senior Member Group: Members Posts: 778 Joined: 20-January 03 From: Cincinnati/Northern KY Member No.: 174 |
Rob, are you removing the fender from this car for use on another tub?
Rick |
|
|
|
|
3 User(s) are reading this topic (3 Guests and 0 Anonymous Users)
0 Members:

|
Lo-Fi Version | Time is now: 5th February 2025 - 08:45 AM |
Invision Power Board
v9.1.4 © 2025 IPS, Inc.