|
|
|
Porsche, and the Porsche crest are registered trademarks of Dr. Ing. h.c. F. Porsche AG.
This site is not affiliated with Porsche in any way. Its only purpose is to provide an online forum for car enthusiasts. All other trademarks are property of their respective owners. |
|
|

  |

| FourBlades |
 Dec 2 2010, 08:16 AM Dec 2 2010, 08:16 AM
Post
#161
|
|
From Wreck to Rockin  Group: Members Posts: 2,056 Joined: 3-December 07 From: Brevard, FL Member No.: 8,414 Region Association: South East States |
Rob, I used a 5/16 because I found a 50% off deal on amazon on them. I always search Amazon before buying anything because they are often the cheapest even on stuff like tools and welding helmets. They had Mallory optical ignition modules when all the race suppliers were out of stock for weeks. I think 3/8 would be better because it allows you to be off center from the spot weld a little more and still get it all. I peeled the other half of the donor last night in 90 minutes. John |
   |

 
|
| FourBlades |
Dec 2 2010, 08:18 AM
Post
#162
|
|
From Wreck to Rockin Group: Members Posts: 2,056 Joined: 3-December 07 From: Brevard, FL Member No.: 8,414 Region Association: South East States |
QUOTE(Racer Chris @ Dec 1 2010, 08:23 PM)  You'll have a fuel cell and oil cooler to install as soon as you get the trunk reconstructed and the chassis flipped upright again John. Here's what it looks like mocked up. The tubular braces will be ready shortly. Everything appears to fit together just fine. I have most of your fuel plumbing together now and the cooler/shroud shipped today. We plumbed a similar oil cooler installation over the last couple days for a 3.2L conversion, so I have many details already worked out. Chris, That is looking great. Thanks for all your help with this project. Chris is making the front tubes for me like he did for Jeff Hail, plus the fuel and oil systems. John |
|
|
|
| FourBlades |
Dec 5 2010, 07:13 PM
Post
#163
|
|
From Wreck to Rockin Group: Members Posts: 2,056 Joined: 3-December 07 From: Brevard, FL Member No.: 8,414 Region Association: South East States |
Test fitting the donor chunk.
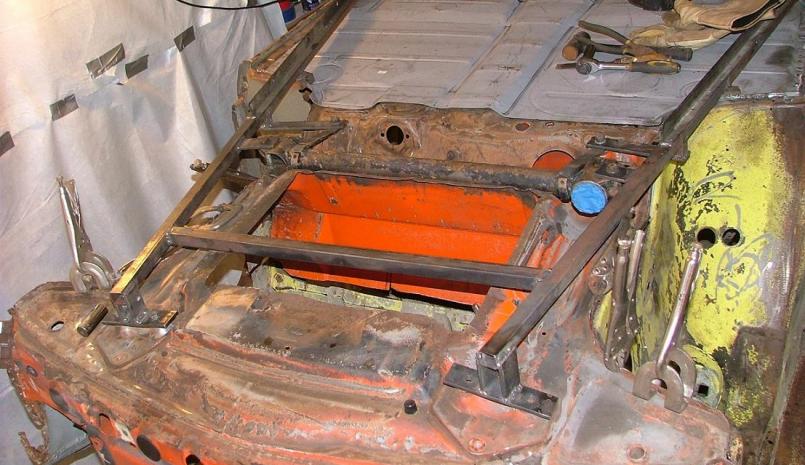 It fits pretty well. My goal is to have it fit without any forcing. I want the suspension mounting points to line up without any stress on the jig or the chunk. I have trimmed it little by little and now the fit is pretty good. I wonder if the original unit body parts would just fall together perfectly or if they had to be clamped against their will to take they shape Karmann wanted? Does it help to pre-tension the body panels or would that stress just be released over time as the car went over bumps? I got the oil cooler and shrouds from Chris yesterday, thanks! John |
|
|
|
| gms |
Dec 13 2010, 12:42 PM
Post
#164
|
|
Advanced Member Group: Members Posts: 2,718 Joined: 12-March 04 From: Chicagoland Member No.: 1,785 Region Association: Upper MidWest |
John,
I bought the fenders for my project car from QRS Fiberglass (cheap plug) and am very happy with the quality and the weight of them. I will take some pix for you |
|
|
|
| sixnotfour |
Dec 20 2010, 11:06 PM
Post
#165
|
|
914 Wizard Group: Members Posts: 10,807 Joined: 12-September 04 From: Life Elevated..planet UT. Member No.: 2,744 Region Association: Rocky Mountains |
uh just was reading TC's project thread , You better get to work (IMG:style_emoticons/default/sawzall-smiley.gif) (IMG:style_emoticons/default/welder.gif)
|
|
|
|
| carr914 |
Dec 21 2010, 05:13 AM
Post
#166
|
|
Racer from Birth Group: Members Posts: 124,687 Joined: 2-February 04 From: Tampa,FL Member No.: 1,623 Region Association: South East States |
|
|
|
|
| tscrihfield |
Dec 28 2010, 04:51 PM
Post
#167
|
|
Drive Fast and Take Chances Group: Members Posts: 643 Joined: 8-September 10 From: Amelia Ohio Member No.: 12,156 Region Association: None |
John,
Car is comming along great! Can't wait to see the nose on it, and all of that fine fab work in fitting it. Hope to see whats next soon! Thomas |
|
|
|
| FourBlades |
Jan 1 2011, 07:59 PM
Post
#168
|
|
From Wreck to Rockin Group: Members Posts: 2,056 Joined: 3-December 07 From: Brevard, FL Member No.: 8,414 Region Association: South East States |
I have been very busy on the car, just not posting much. Here is what has been
done. I spent several days fiddling with the donor chunk, with levels and a tram gauge to try to get it as perfect as possible. Then I tack welded it in about 10 places on each side. These pictures are from after welding it in more when I was re-checking it all. 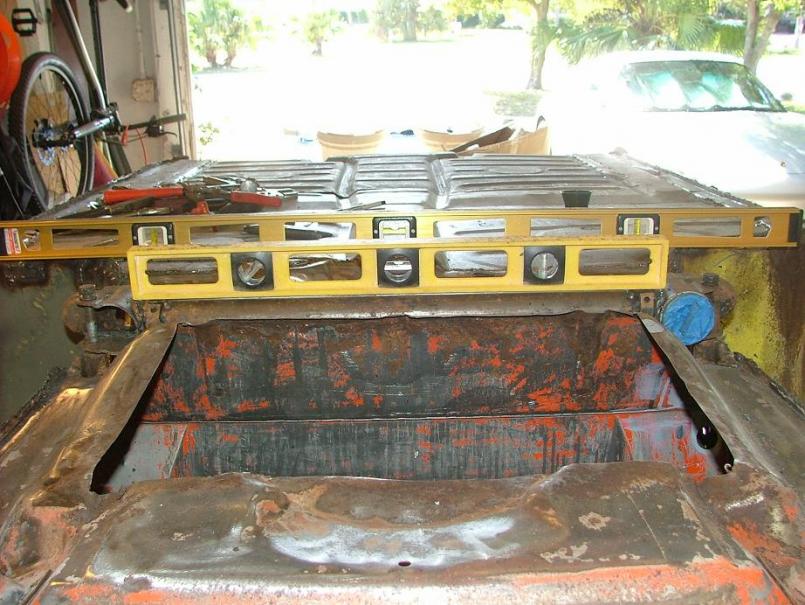 I checked measurements from the suspension points diagonally and lengthwise against each other. They are all within 0.5 mm of each other. My tram gauge is only accurate to 2mm so I was happy with that result. 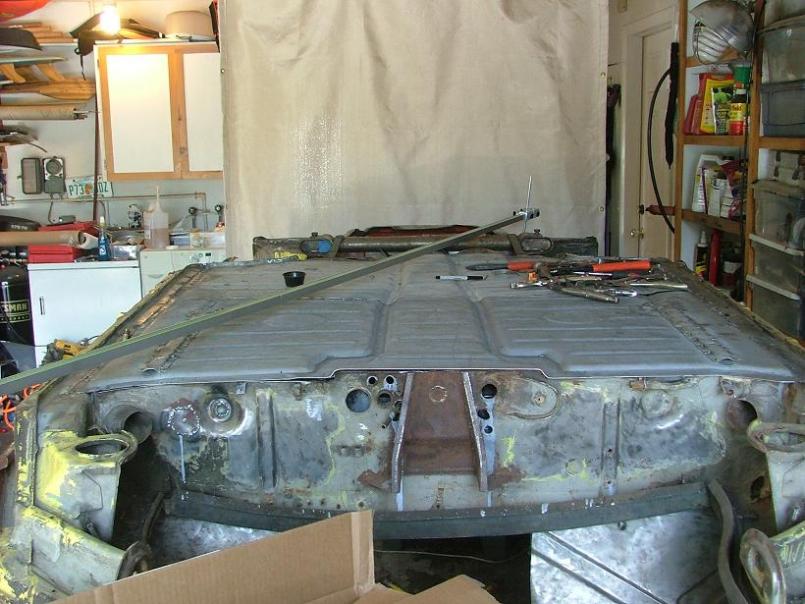 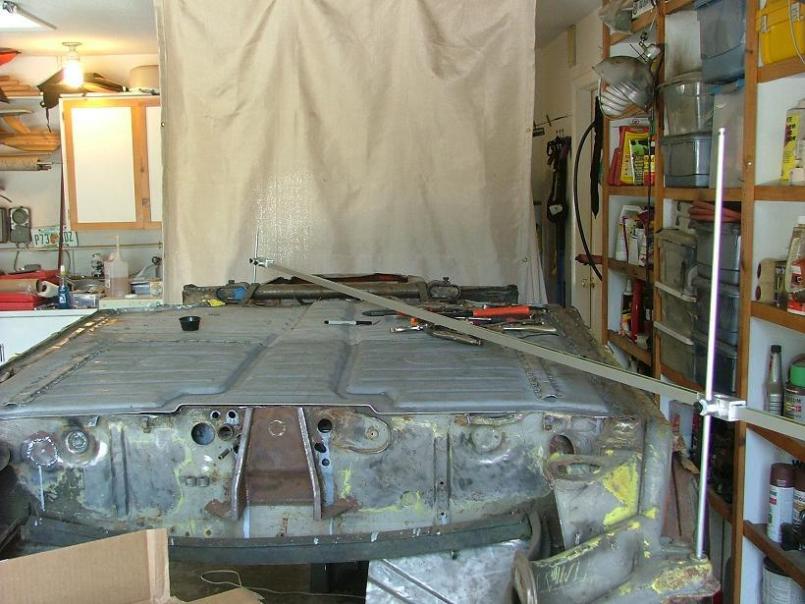 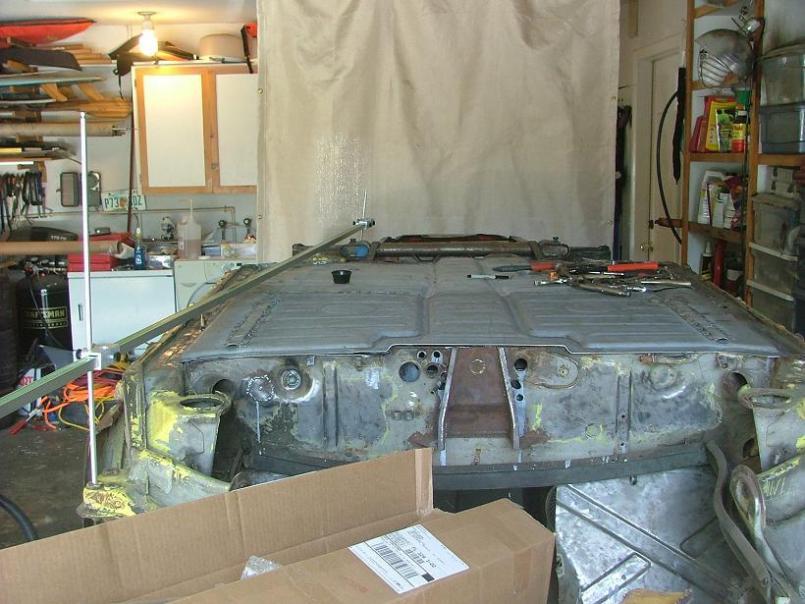 |
|
|
|
| FourBlades |
Jan 1 2011, 08:09 PM
Post
#169
|
|
From Wreck to Rockin Group: Members Posts: 2,056 Joined: 3-December 07 From: Brevard, FL Member No.: 8,414 Region Association: South East States |
The tram gauge makes it easy to measure between two points on the car no
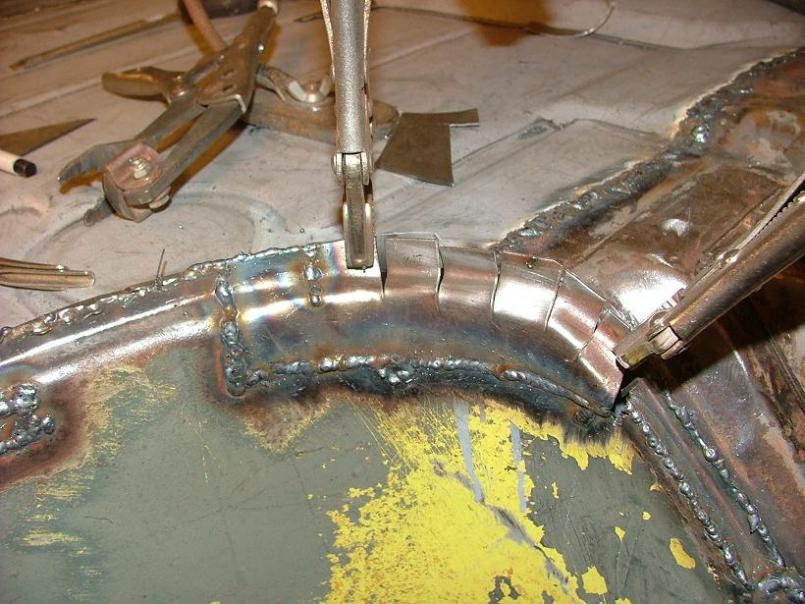
matter how uneven the body is between them. 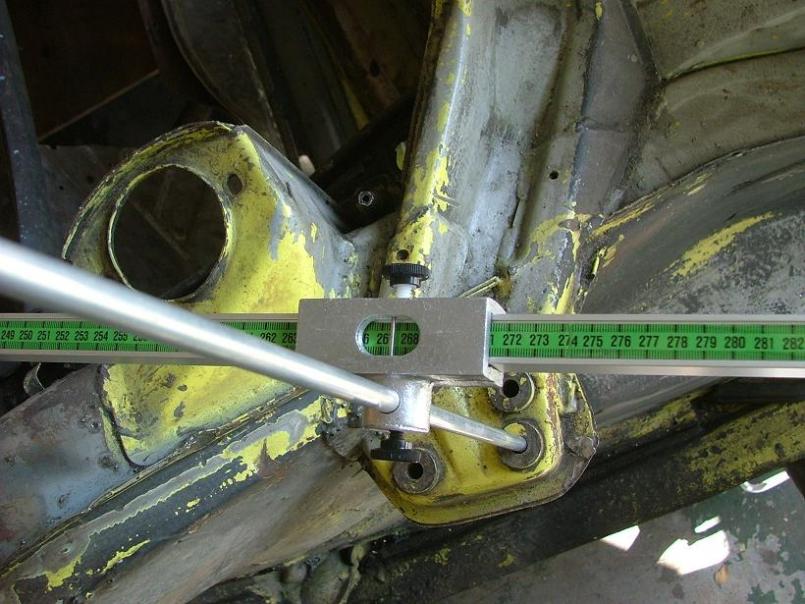 I bought this gauge from http://www.autobodytoolmart.com/ just for this project. It is too hard to measure between holes accurately with a tape measure and this way I got to buy another cool tool. It should be good for checking front and rear toe measurements as well. When I was satisfied all was ok I plug welded all the drilled out spot weld holes. The existing fender wells are very thin metal with lots of rusted through pin holes and a load of holes the owners drilled everywhere. For added strength, I seam welded a lot of the pinch weld between the donor chunk and the original car. I don't plan on grinding all the welds totally flat. I think that will weaken it too much and the original owners would never have bothered with that. 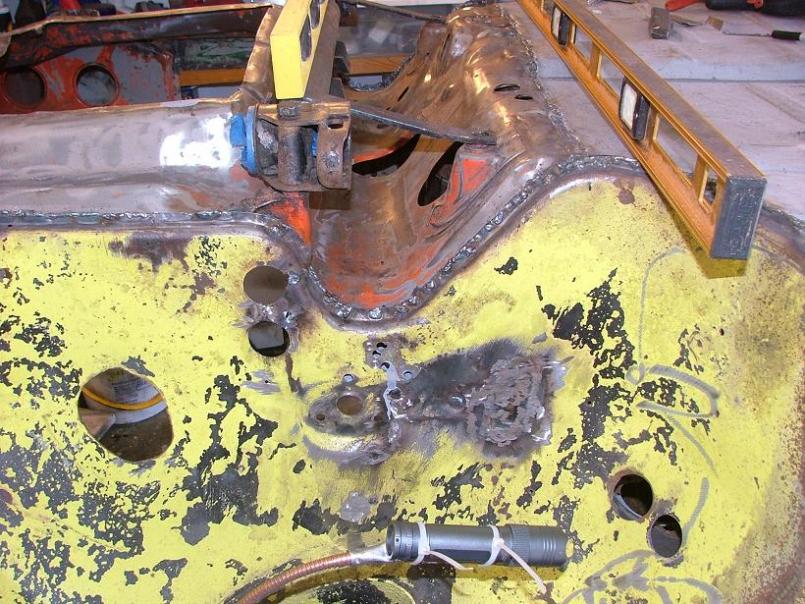 Notice all the holes in the fenders. After welding the chunk in, I spent days and days filling in all the rust holes and drilled holes I don't plan to use anymore. John |
|
|
|
| URY914 |
Jan 1 2011, 08:14 PM
Post
#170
|
|
I built the lightest 914 in the history of mankind. Group: Members Posts: 126,214 Joined: 3-February 03 From: Jacksonville, FL Member No.: 222 Region Association: None |
|
|
|
|
| FourBlades |
Jan 1 2011, 08:23 PM
Post
#171
|
|
From Wreck to Rockin Group: Members Posts: 2,056 Joined: 3-December 07 From: Brevard, FL Member No.: 8,414 Region Association: South East States |
Fixing some choice holes in the fender wells.
 This was a tricky shape to fix. I used 18 gauge metal which is a pain to bend. All the bends were done using one pair of pliers to hold the piece close to where I wanted to bend it, then using another pair to grab it and bend. Once you start having it welded on, you can shape it by hammering on it or hammering on a screw driver to force the metal where you want to go. 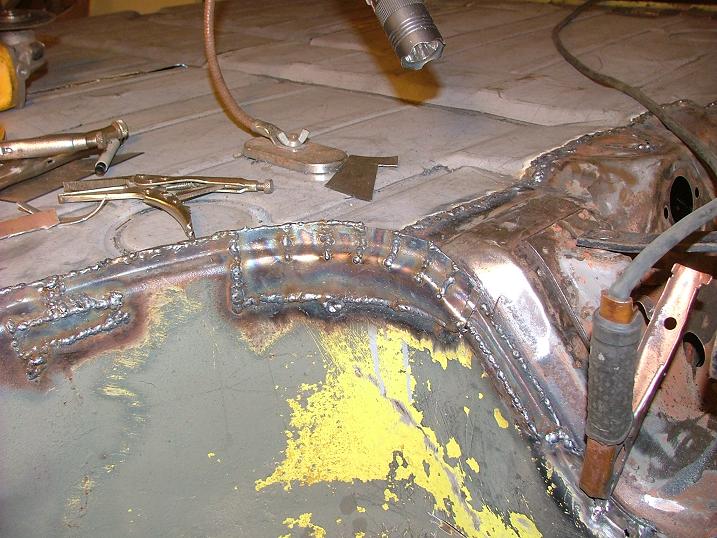 Another similar hole. 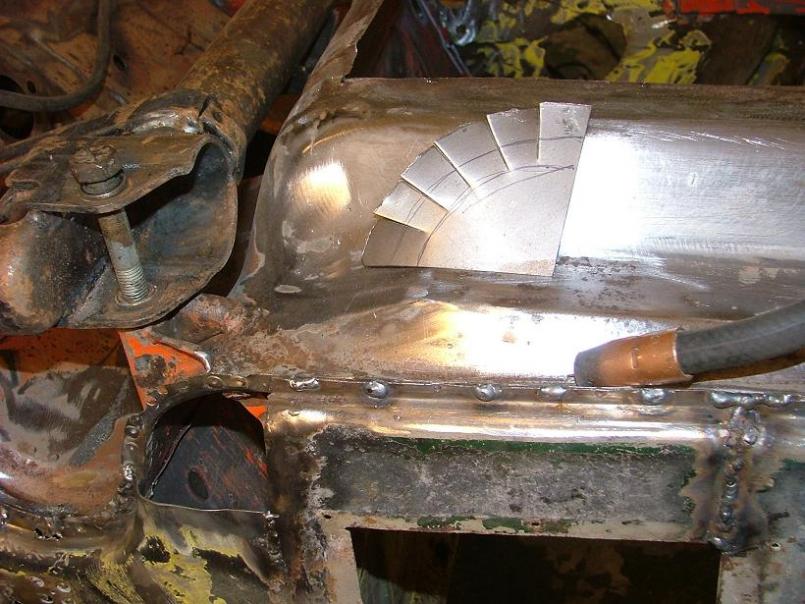 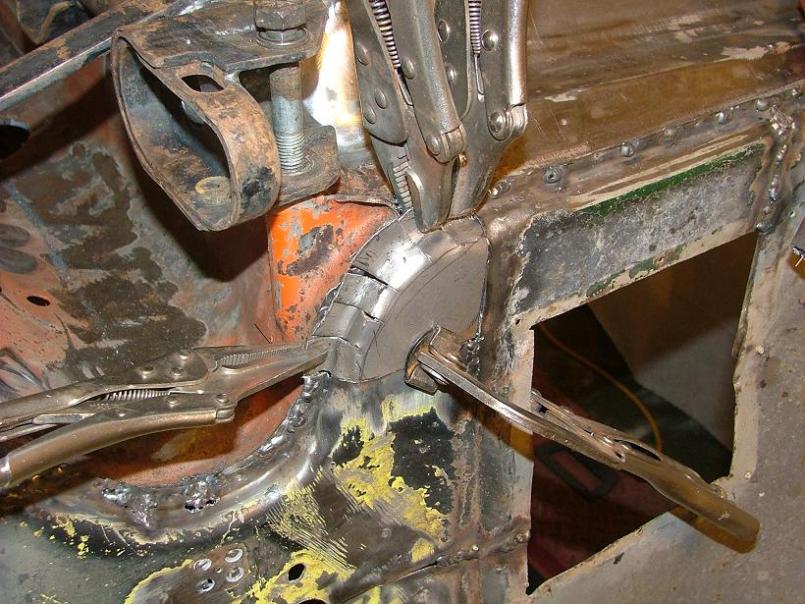 |
|
|
|
| FourBlades |
Jan 1 2011, 08:26 PM
Post
#172
|
|
From Wreck to Rockin Group: Members Posts: 2,056 Joined: 3-December 07 From: Brevard, FL Member No.: 8,414 Region Association: South East States |
Welded up.
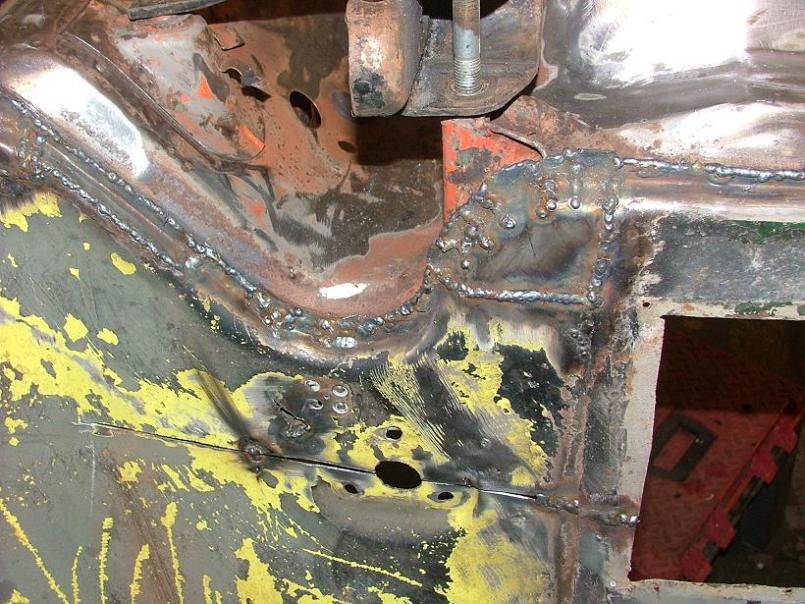 Lots of holes welded up. This area I did grind almost flush. 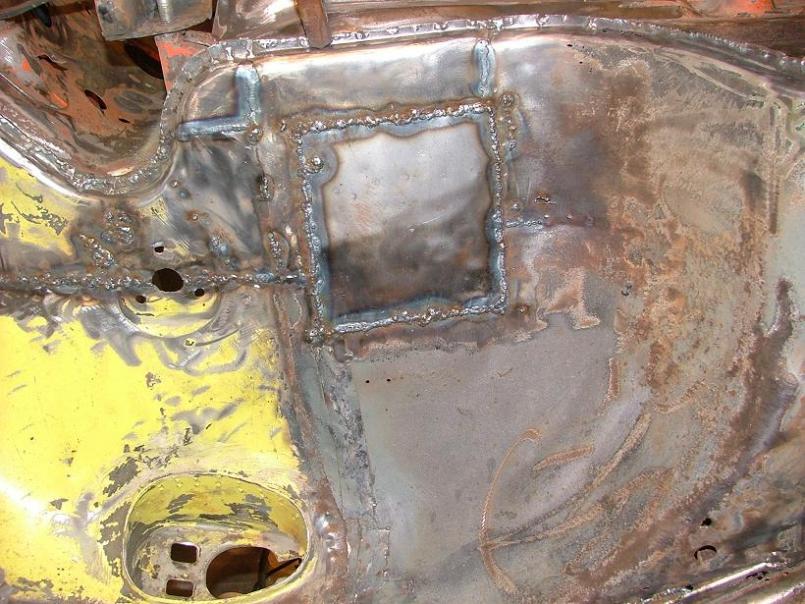 Lot of the same kind of holes on the other side. John |
|
|
|
| J P Stein |
Jan 1 2011, 09:38 PM
Post
#173
|
|
Irrelevant old fart Group: Members Posts: 8,797 Joined: 30-December 02 From: Vancouver, WA Member No.: 45 Region Association: None |
Just my .02.
While you have it up side over, weld all the pinch seams. Grind the 2 pieces flush with each other then weld the knife edge......that makes the metal as clean as possible and gives a good target to weld (dirty wetal gives blow backs). Dress up with a grinder to make the welds smooth.....no kerfs. All lap seams should be at least (2 inchers) skip welded tho I prefer full welds. .023 wire works best for this. |
|
|
|
| FourBlades |
Jan 1 2011, 11:47 PM
Post
#174
|
|
From Wreck to Rockin Group: Members Posts: 2,056 Joined: 3-December 07 From: Brevard, FL Member No.: 8,414 Region Association: South East States |
JP, I have been thinking of doing more seam welding as you describe.
I especially want to shore up the rear shock towers where they tend to crack. John |
|
|
|
| pete-stevers |
Jan 2 2011, 12:06 AM
Post
#175
|
|
saved from fire! Group: Members Posts: 2,648 Joined: 10-October 04 From: Abbotsford,BC, Canada Member No.: 2,914 Region Association: Pacific Northwest |
this thread keeps me checking back!
|
|
|
|
| carr914 |
Jan 2 2011, 04:16 AM
Post
#176
|
|
Racer from Birth Group: Members Posts: 124,687 Joined: 2-February 04 From: Tampa,FL Member No.: 1,623 Region Association: South East States |
John, Did you end up getting an engine?
Give me a call this week. T.C. |
|
|
|
| J P Stein |
Jan 2 2011, 09:08 AM
Post
#177
|
|
Irrelevant old fart Group: Members Posts: 8,797 Joined: 30-December 02 From: Vancouver, WA Member No.: 45 Region Association: None |
I did find some cracking on my car around the bottom of the rear towers......see pic. (not my car). This was before I put in the down tubes from the cage to towers.
The sheet metal in that area is really thin. Also pictured is the srea over the axles & inner ear. The pinch seams marked are highly susceptable to cracking. The.023 wire I used was called "Easy Grind". It is not nearly as hard to grind (go figure) a normal 6 or 7000 serise wire. It also requires less amperage to run...less heat is gud for sheet metal.....don't weld up your cage with it tho. (IMG:style_emoticons/default/biggrin.gif) Attached image(s) 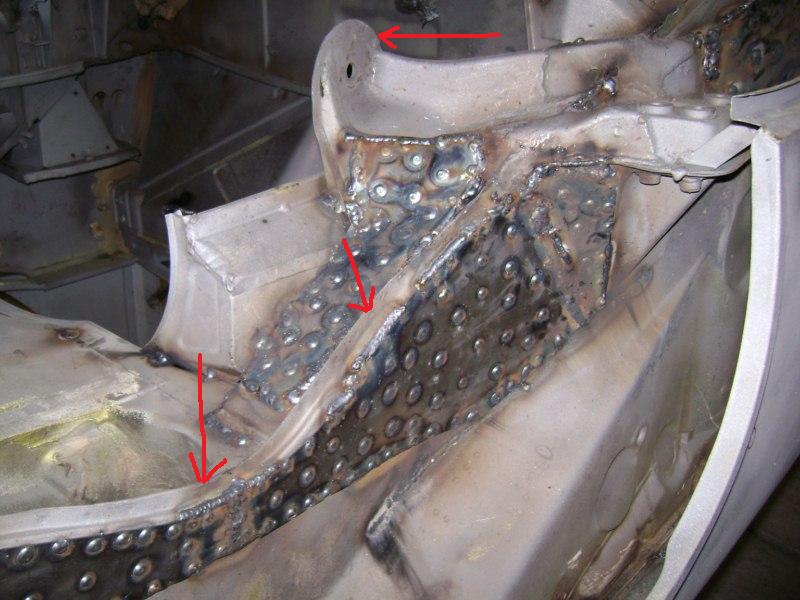 
|
|
|
|
| Lou W |
Jan 2 2011, 11:50 AM
Post
#178
|
|
"Here Kitty Kitty" my ass...... Group: Members Posts: 4,109 Joined: 9-May 04 From: Roseburg, OR. Member No.: 2,039 Region Association: Spain |
Wow, this is amazing (IMG:style_emoticons/default/popcorn[1].gif)
|
|
|
|
| FourBlades |
Jan 2 2011, 03:31 PM
Post
#179
|
|
From Wreck to Rockin Group: Members Posts: 2,056 Joined: 3-December 07 From: Brevard, FL Member No.: 8,414 Region Association: South East States |
QUOTE(carr914 @ Jan 2 2011, 03:16 AM) John, Did you end up getting an engine? Give me a call this week. T.C. TC, I'll call you at work tomorrow. Blake is working on a 2.5 for me (with nickies!) that should be done soon. John |
|
|
|
| FourBlades |
Jan 2 2011, 03:32 PM
Post
#180
|
|
From Wreck to Rockin Group: Members Posts: 2,056 Joined: 3-December 07 From: Brevard, FL Member No.: 8,414 Region Association: South East States |
Oops, duplicate post deleted. |
|
|
|
|
1 User(s) are reading this topic (1 Guests and 0 Anonymous Users)
0 Members:

|
Lo-Fi Version | Time is now: 27th April 2025 - 03:25 PM |
Invision Power Board
v9.1.4 © 2025 IPS, Inc.