|
|
|
Porsche, and the Porsche crest are registered trademarks of Dr. Ing. h.c. F. Porsche AG.
This site is not affiliated with Porsche in any way. Its only purpose is to provide an online forum for car enthusiasts. All other trademarks are property of their respective owners. |
|
|

  |

| FourBlades |
 Jun 23 2011, 08:52 PM Jun 23 2011, 08:52 PM
Post
#241
|
|
From Wreck to Rockin  Group: Members Posts: 2,056 Joined: 3-December 07 From: Brevard, FL Member No.: 8,414 Region Association: South East States |
Cleaning up the a-arms I noticed something new to me, maybe you all can tell
me if this is a common thing. 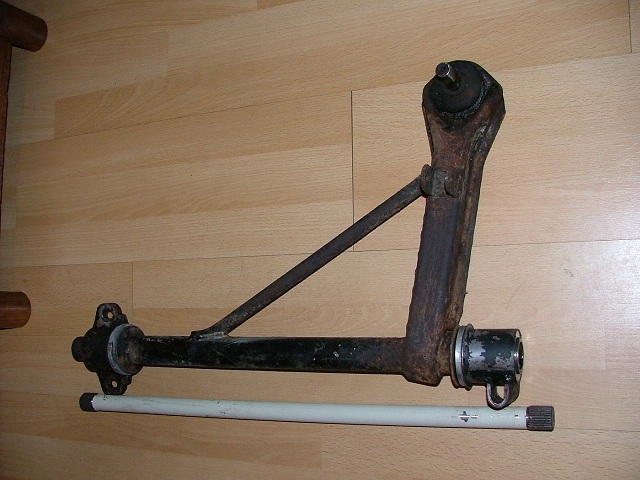 The rubber bushings on the a-arms were replaced with solid aluminum bushings. They fit very precisely and once cleaned and oiled they spin freely on the a-arm with no play in them. There are no grease fittings, which seems like a problem. Those are 22 mm torsion bars. 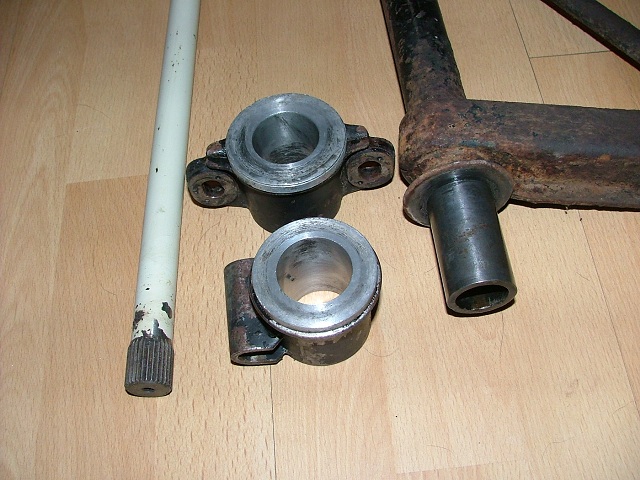 Did someone make these and sell them back in the day or were these made just for this car? Anyone know? John |
   |

 
|
| FourBlades |
Jun 25 2011, 08:38 AM
Post
#242
|
|
From Wreck to Rockin Group: Members Posts: 2,056 Joined: 3-December 07 From: Brevard, FL Member No.: 8,414 Region Association: South East States |
No one has seen solid bushings like I found on the car? There are no part numbers on them so someone could have just made these on a lathe. John |
|
|
|
| dion9146 |
Jun 26 2011, 06:29 AM
Post
#243
|
|
Member Group: Members Posts: 469 Joined: 16-May 04 From: Buckner, KY Member No.: 2,071 Region Association: MidAtlantic Region |
Great build John. Can't comment on the solid bushings, but you can be sure they are just about as stiff as you are going to get for front bushings! Are the rears the same?
I might be tempted to keep them and add grease fittings as you noted. Dion |
|
|
|
| gms |
Jun 26 2011, 07:40 AM
Post
#244
|
|
Advanced Member Group: Members Posts: 2,718 Joined: 12-March 04 From: Chicagoland Member No.: 1,785 Region Association: Upper MidWest |
QUOTE(FourBlades @ Jun 25 2011, 09:38 AM)  No one has seen solid bushings like I found on the car? There are no part numbers on them so someone could have just made these on a lathe. John looks interesting, I have never seen it before. it is not a whole lot different than the Elephant Racing PolyBronze Control Arm Bearings. I would put Zerk fittings and have them grooved for grease penetration. |
|
|
|
| FourBlades |
Jun 26 2011, 07:57 AM
Post
#245
|
|
From Wreck to Rockin Group: Members Posts: 2,056 Joined: 3-December 07 From: Brevard, FL Member No.: 8,414 Region Association: South East States |
Are the Elephant Bushings actually solid? I thought there was a polyurethane lining inside the bronze? These things are solid aluminum. I plan to reuse them if they don't bind. I guess I could drill some holes and add zerks. Not sure how I would groove the inside of the bushings. Like cutting an inside thread, maybe it could be done on a lathe. I went on a sand blasting and painting frenzy yesterday and restored most of the front suspension parts. I have not looked closely at the rear control arms yet. I did notice they had the driver's side rear spring one notch higher than the passenger side. I am guessing this is an attempt at corner balancing? John |
|
|
|
| ChrisFoley |
Jun 26 2011, 08:20 AM
Post
#246
|
|
I am Tangerine Racing Group: Members Posts: 7,981 Joined: 29-January 03 From: Bolton, CT Member No.: 209 Region Association: None |
QUOTE(FourBlades @ Jun 26 2011, 09:57 AM) Are the Elephant Bushings actually solid? I thought there was a polyurethane lining inside the bronze? Elephant Bushings are bronze bearing sleeves surrounded by a urethane layer in between the sleeve and the support housing. QUOTE These things are solid aluminum. I plan to reuse them if they don't bind. Thats the key. As long as they don't bind and you use bearing grease they should work great. QUOTE I guess I could drill some holes and add zerks. Not sure how I would groove the inside of the bushings. Like cutting an inside thread, maybe it could be done on a lathe. Easiest would be with a carbide burr in an end grinder. After you locate the zerk hole, create a spiral groove with a small ball shaped burr made for aluminum. |
|
|
|
| carr914 |
Jun 26 2011, 08:50 AM
Post
#247
|
|
Racer from Birth Group: Members Posts: 124,689 Joined: 2-February 04 From: Tampa,FL Member No.: 1,623 Region Association: South East States |
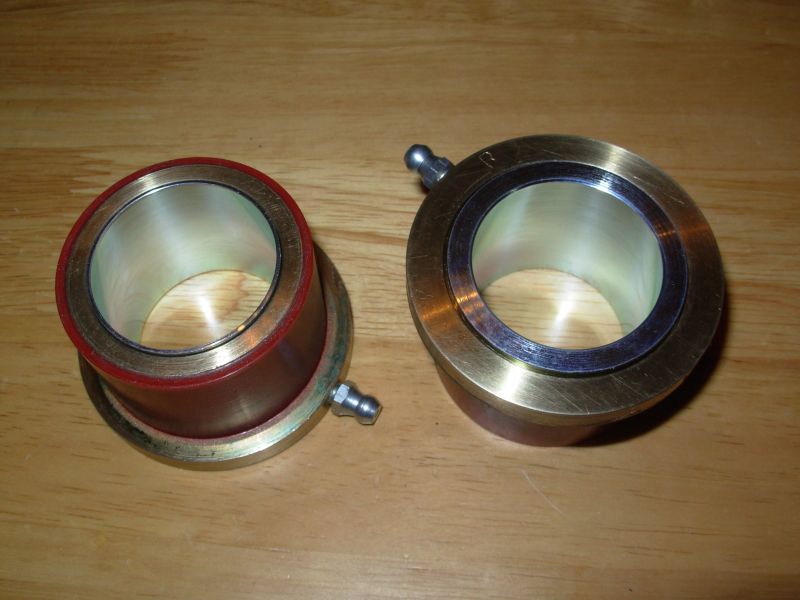
Here are the Elephants
 |
|
|
|
| FourBlades |
Jun 27 2011, 02:32 PM
Post
#248
|
|
From Wreck to Rockin Group: Members Posts: 2,056 Joined: 3-December 07 From: Brevard, FL Member No.: 8,414 Region Association: South East States |
Rear control arms appear to have the same solid bushings. I did not extract them yet, I was busy blasting and painting the rear suspension yesterday. John |
|
|
|
| tscrihfield |
Jun 27 2011, 07:39 PM
Post
#249
|
|
Drive Fast and Take Chances Group: Members Posts: 643 Joined: 8-September 10 From: Amelia Ohio Member No.: 12,156 Region Association: None |
Love this build! Cant wait to see it moving!
It was good to see that front end come together. Looks like a lot of what I sent was used! Great job fab'n it all in. (IMG:style_emoticons/default/sawzall-smiley.gif) (IMG:style_emoticons/default/welder.gif) |
|
|
|
| trojanhorsepower |
Sep 18 2011, 06:52 PM
Post
#250
|
|
Senior Member Group: Members Posts: 867 Joined: 21-September 03 From: Marion, NC Member No.: 1,179 Region Association: None |
|
|
|
|
| FourBlades |
Nov 21 2011, 01:26 PM
Post
#251
|
|
From Wreck to Rockin Group: Members Posts: 2,056 Joined: 3-December 07 From: Brevard, FL Member No.: 8,414 Region Association: South East States |
Been busy on fine tuning my blue 914, insulating and adding AC to my garage, and going to DEs at Palm Beach, Roebling, and Sebring all in the last couple months. I am working on getting my SCCA racing license.
Byron (racerbvd) helped me get into the Dark Side DE at Roebling at the last minute, which was a really fun and well run event. Great party with live music and a lot of cool people and cars. Byron is a really friendly and helpful guy in person who has been in the 914 scene since the beginning. 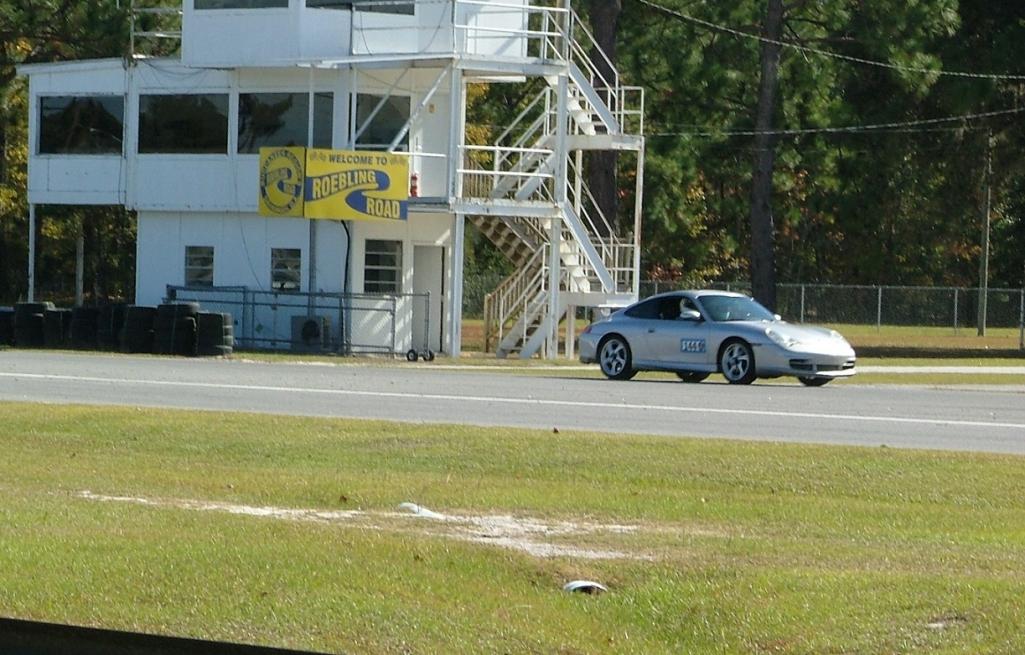 Now I am back to getting this IMSA car done. I did a lot of boring sheet metal work to the front of the car that I won't bother detailing. Cut out the late model front end reinforcement and started fitting the oil cooler and shroud. 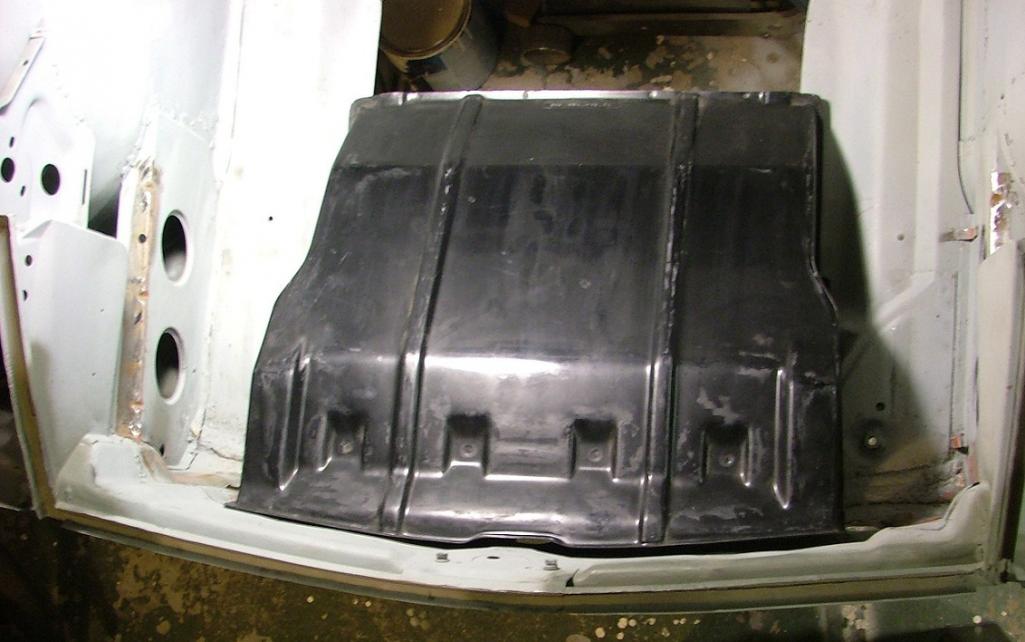 Packaging all the stuff that has to go in the front trunk is going to be interesting. John |
|
|
|
| FourBlades |
Nov 21 2011, 02:05 PM
Post
#252
|
|
From Wreck to Rockin Group: Members Posts: 2,056 Joined: 3-December 07 From: Brevard, FL Member No.: 8,414 Region Association: South East States |
Here are the front trunk tubes, fuel cell, and oil cooler plumbing. This will all work but it makes running the -12 oil lines tight.
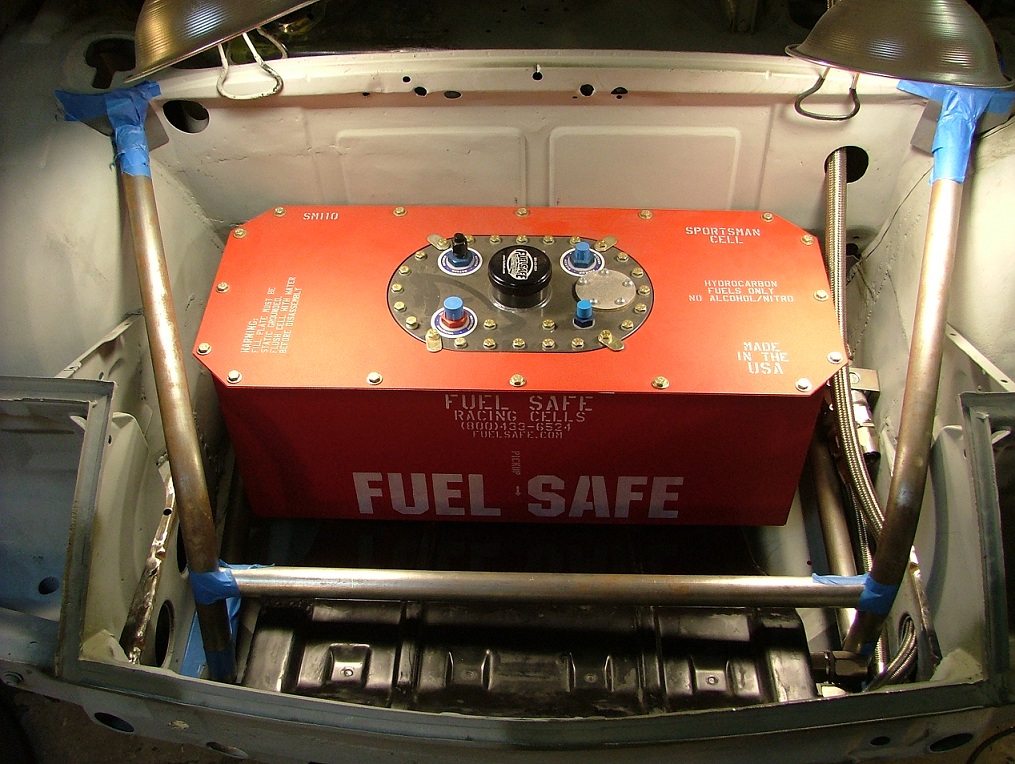 Here is the oil cooler and thermostat plumbing concept. The thermostat will be mounted a little higher than shown. The oil return line was originally run through the driver long and then through the boxed section under the gas tank. I'll do it the same way. The line from the thermostat will go to the oil tank. I'll have to cut out part of the reinforcing plate under the head light bucket to make room for the oil lines to the cooler. It will be tight but it should work ok. 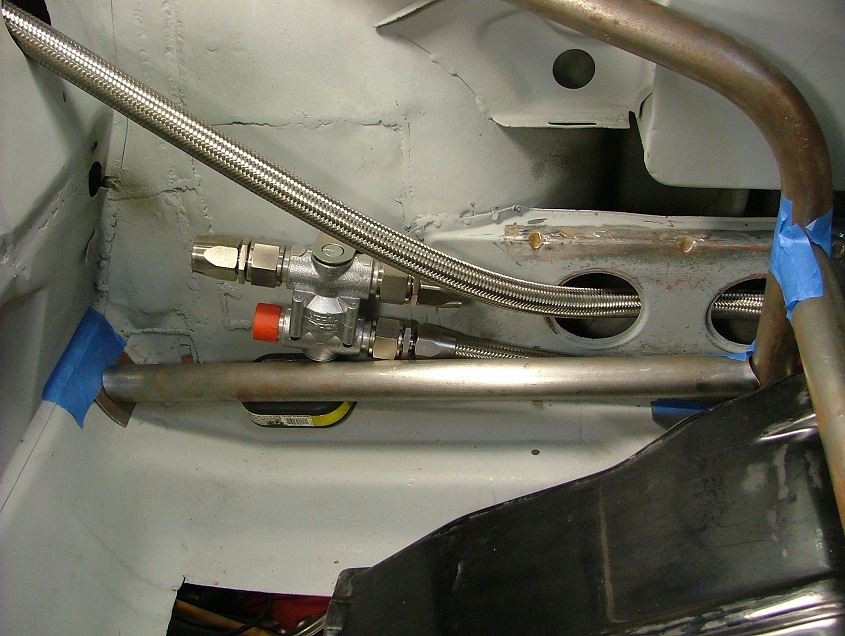 I will close up the excess hole in the floor of the trunk. I will probably use stainless wire mesh over the radiator outlet hole. The oil cooler is the Setrab unit many people use. It will be rubber mounted and shrouded using two fiberglass pieces. I read about 25 threads on oil coolers before putting this plan together. (IMG:style_emoticons/default/beerchug.gif) Any comments would be great before I JB weld it all together. (IMG:style_emoticons/default/biggrin.gif) John |
|
|
|
| Series9 |
Nov 21 2011, 05:20 PM
Post
#253
|
|
Lesbians taste like chicken. Group: Members Posts: 5,446 Joined: 22-August 04 From: DeLand, FL Member No.: 2,602 Region Association: South East States |
This is a great build. Please let me know if you need anything.
|
|
|
|
| FourBlades |
Nov 21 2011, 06:24 PM
Post
#254
|
|
From Wreck to Rockin Group: Members Posts: 2,056 Joined: 3-December 07 From: Brevard, FL Member No.: 8,414 Region Association: South East States |
Thanks Joe. I think about dropping all my cars off at your shop and just saying, call me when they are done. (IMG:style_emoticons/default/biggrin.gif) It may come to that... John |
|
|
|
| carr914 |
Nov 21 2011, 06:27 PM
Post
#255
|
|
Racer from Birth Group: Members Posts: 124,689 Joined: 2-February 04 From: Tampa,FL Member No.: 1,623 Region Association: South East States |
I wpuld put the T-Stat in the rear.
Also check with HSR, SVRA, PCA about the Legality of the curved front bars Good seeing you at Sebring, sorry I didn't get much time - mega busy |
|
|
|
| Series9 |
Nov 21 2011, 06:37 PM
Post
#256
|
|
Lesbians taste like chicken. Group: Members Posts: 5,446 Joined: 22-August 04 From: DeLand, FL Member No.: 2,602 Region Association: South East States |
QUOTE(FourBlades @ Nov 21 2011, 07:24 PM) Thanks Joe. I think about dropping all my cars off at your shop and just saying, call me when they are done. (IMG:style_emoticons/default/biggrin.gif) It may come to that... John That would be cool, but you're doing just fine. |
|
|
|
| bam914 |
Nov 21 2011, 08:29 PM
Post
#257
|
|
Member Group: Members Posts: 342 Joined: 23-November 03 From: Atlanta, Ga Member No.: 1,378 Region Association: None |
Are you going to do the double school at Roebling to get your SCCA license? I might be down there if my friend goes to get his.
|
|
|
|
| TurbOH Brad |
Nov 21 2011, 08:54 PM
Post
#258
|
|
Brad. Just Brad. Group: Members Posts: 207 Joined: 2-February 11 From: Sparks, NV Member No.: 12,654 Region Association: Northern California |
This is, by far, my favorite build thread on this forum.
|
|
|
|
| FourBlades |
Nov 21 2011, 09:29 PM
Post
#259
|
|
From Wreck to Rockin Group: Members Posts: 2,056 Joined: 3-December 07 From: Brevard, FL Member No.: 8,414 Region Association: South East States |
Hey TC:
It was great seeing you at Sebring. I had a fantastic time and was told I am about ready to solo. I am done with the stock brakes on my 996 and am thinking of using pagid orange pads next time. Remember that the original oil tank on this car is in the front where the fuel tank normally is. Doesn't that kind of necessitate putting the thermostat in the front? Why would curved bars in the front trunk not be legal? I was looking at a 914 at Roebling that is used in VCDA racing that has no bars in the front trunk at all. VCDA is the series I am thinking of doing. There are several central florida people running 914s and 911s in that series. I admit to ignorance of the various series rules and need to study them. Blake: That is what I am hoping to do. My wife is also going to do it. We want to do as many track days as we can before that. Thanks for all the comments. John |
|
|
|
| FourBlades |
Nov 23 2011, 10:08 AM
Post
#260
|
|
From Wreck to Rockin Group: Members Posts: 2,056 Joined: 3-December 07 From: Brevard, FL Member No.: 8,414 Region Association: South East States |
Working on finishing the outlet hole for the radiator. Did some relief cuts so I could flatten the trunk floor and attach it to a stiffening strip.
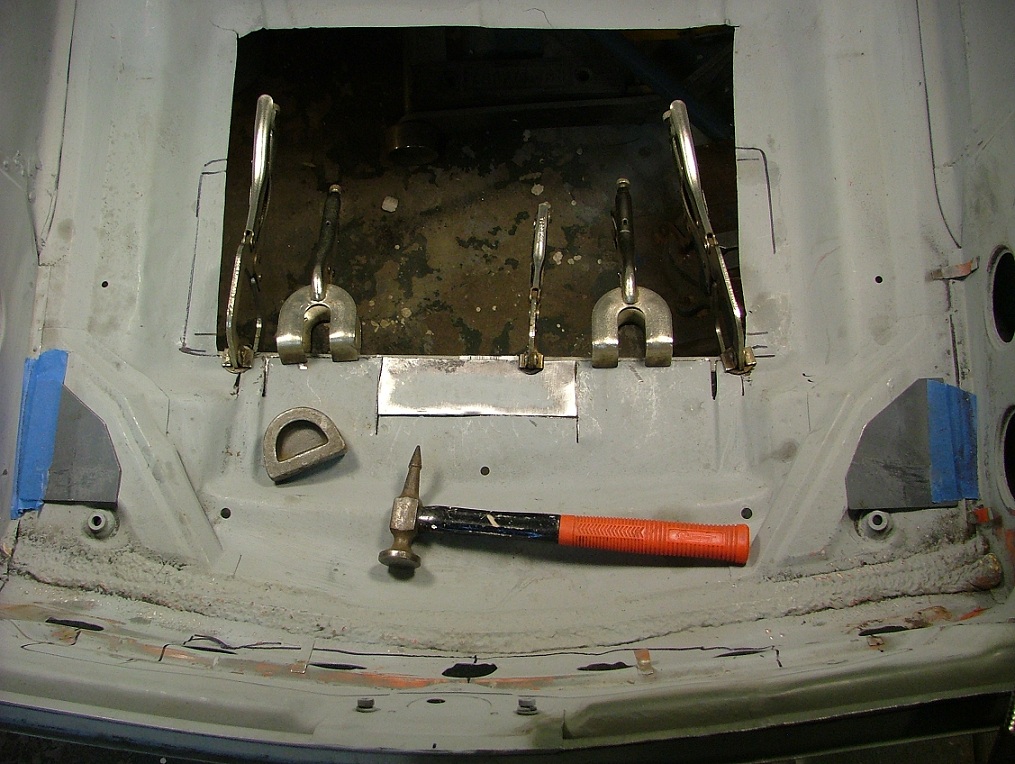 Reinforcing the edges with 1/8 by 1 inch strips. This will give me something to bolt the shroud to and will strengthen the edges of the hole. Closed up the back half of the old air conditioning hole. 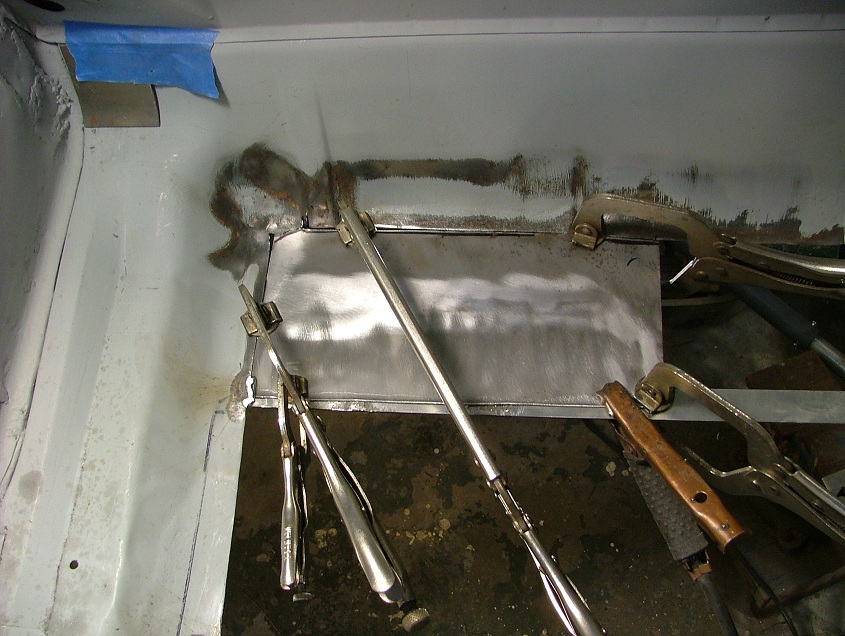 Also welded in the pads for the front trunk tubes.  The outlet opening is 7x20 inches which is 140 square inches. The radiator is 4x18 inches or 72 square inches, which is close to the 2 to 1 ratio recommended for radiator air flow. This only took all day yesterday. (IMG:style_emoticons/default/smile.gif) John |
|
|
|
|
1 User(s) are reading this topic (1 Guests and 0 Anonymous Users)
0 Members:

|
Lo-Fi Version | Time is now: 28th April 2025 - 05:15 PM |
Invision Power Board
v9.1.4 © 2025 IPS, Inc.