|
|

|
Porsche, and the Porsche crest are registered trademarks of Dr. Ing. h.c. F. Porsche AG.
This site is not affiliated with Porsche in any way. Its only purpose is to provide an online forum for car enthusiasts. All other trademarks are property of their respective owners. |
|
|
  |
| dlee6204 |
 Jun 11 2009, 08:28 PM Jun 11 2009, 08:28 PM
Post
#21
|
|
Howdy     Group: Members Posts: 2,162 Joined: 30-April 06 From: Burnsville, NC Member No.: 5,956 |
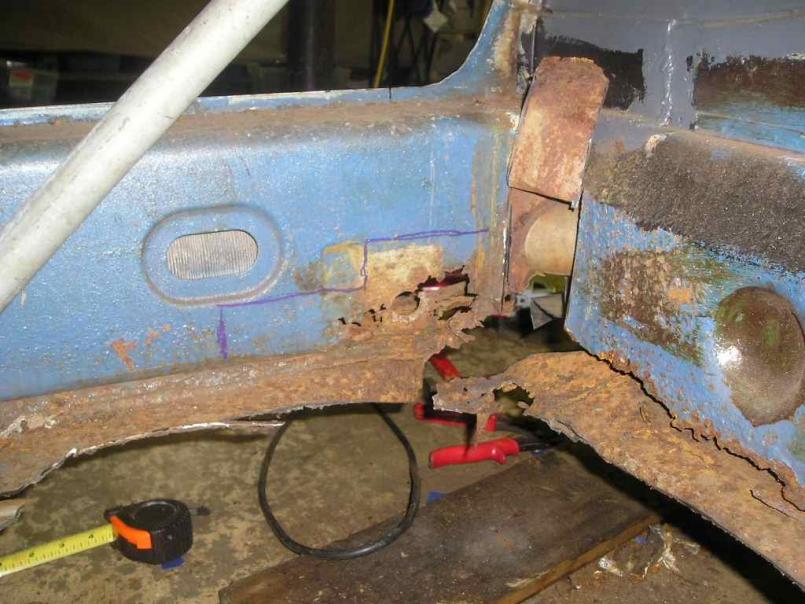
Here are a few pictures of some of the work I got done today.
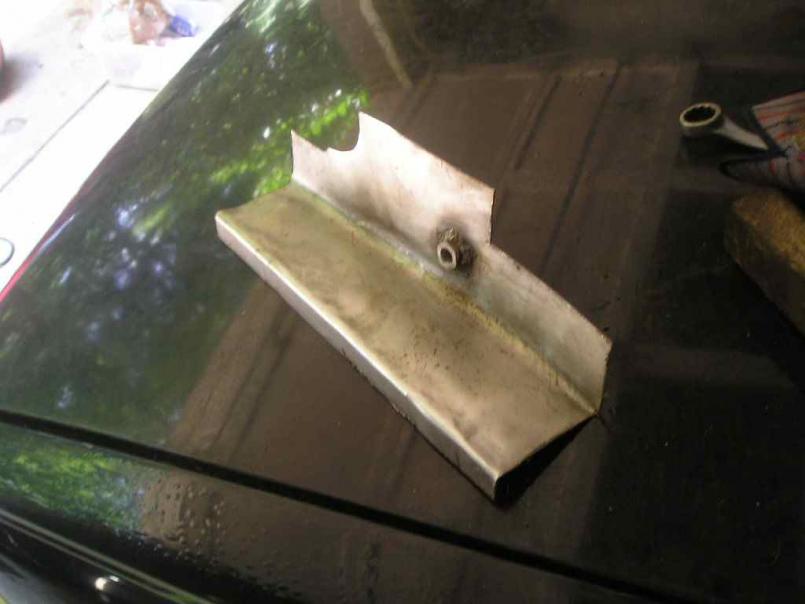
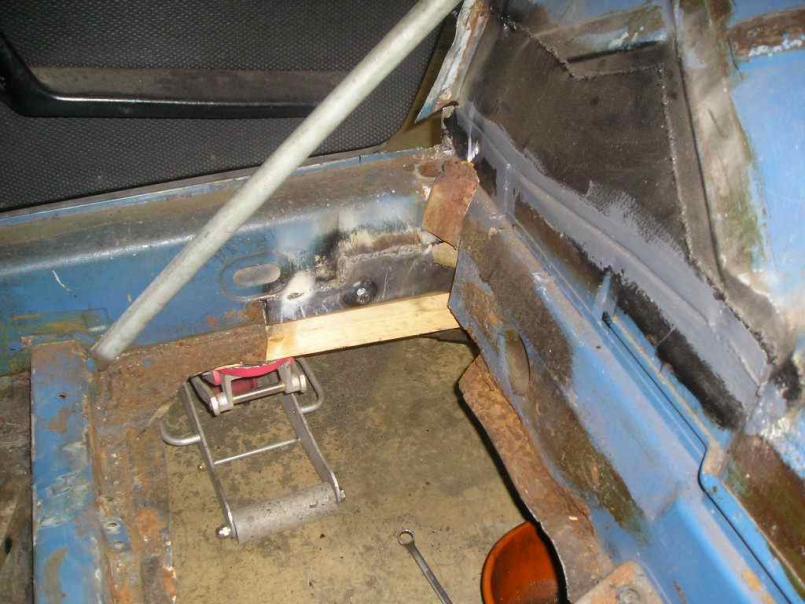
I started by cutting out some more of the bad stuff. 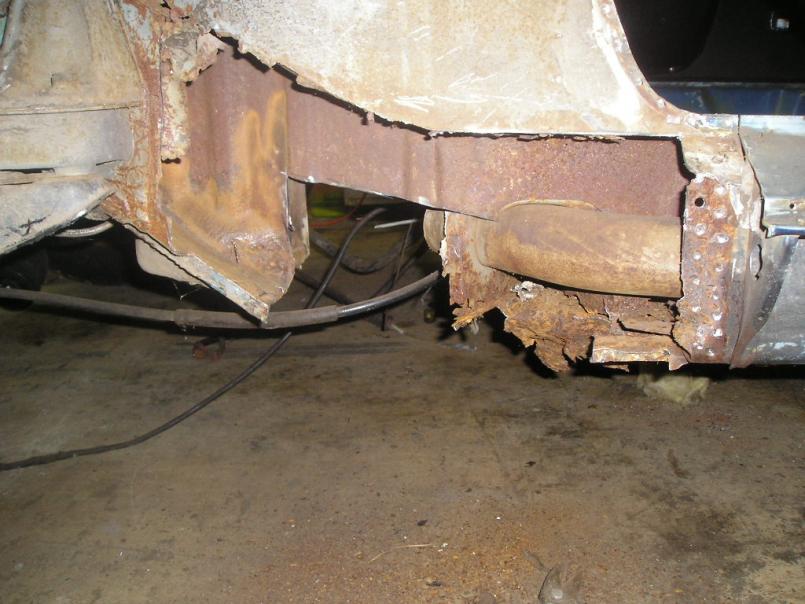 And then I made and tacked in one of the two pieces that will repair the "inner" longitudinal. 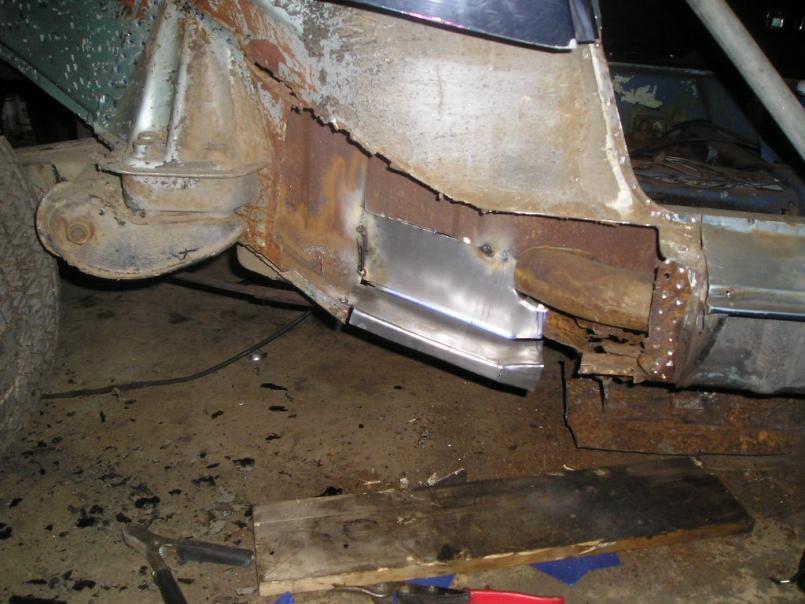 After I get done fixing the inner portion of the longitudinal I will weld in the lower wheelhouse panel and then the jackpoint and finish with the fender. After I get that side completely done, I will have to focus on replacing the floorpan and on the lower edge of the firewall where it meets the floor. So much work and so little time. (IMG:style_emoticons/default/smash.gif) (IMG:style_emoticons/default/smash.gif) (IMG:style_emoticons/default/smash.gif) |
| dlee6204 |
 Jun 13 2009, 05:52 PM Jun 13 2009, 05:52 PM
Post
#22
|
|
Howdy     Group: Members Posts: 2,162 Joined: 30-April 06 From: Burnsville, NC Member No.: 5,956 |
|
| dlee6204 |
 Jun 13 2009, 06:01 PM Jun 13 2009, 06:01 PM
Post
#23
|
|
Howdy     Group: Members Posts: 2,162 Joined: 30-April 06 From: Burnsville, NC Member No.: 5,956 |
My next job was to work on installing the wheelhouse piece.
Here is after I cut out the suspension mount. 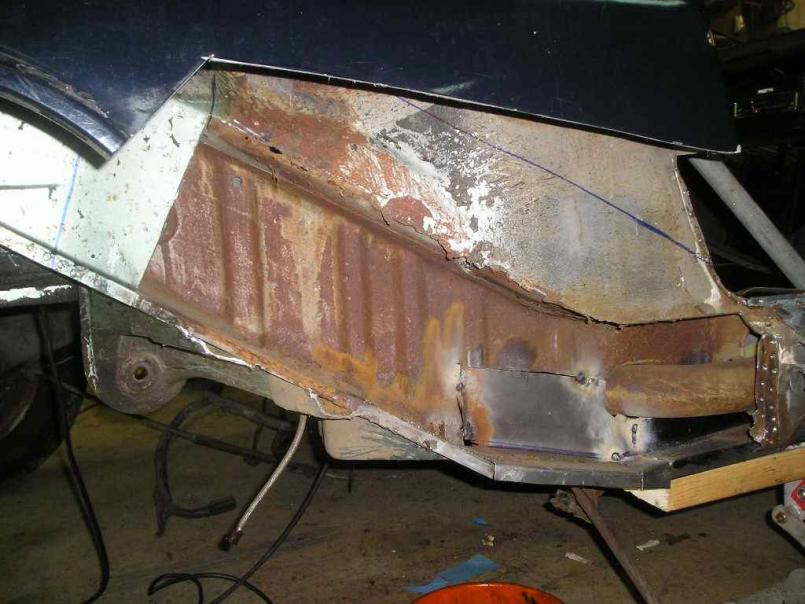 More 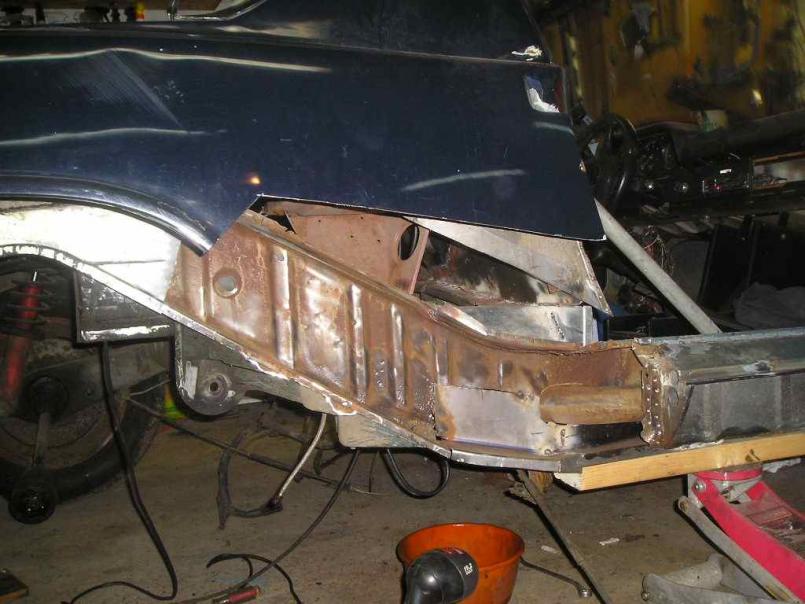 Different angle 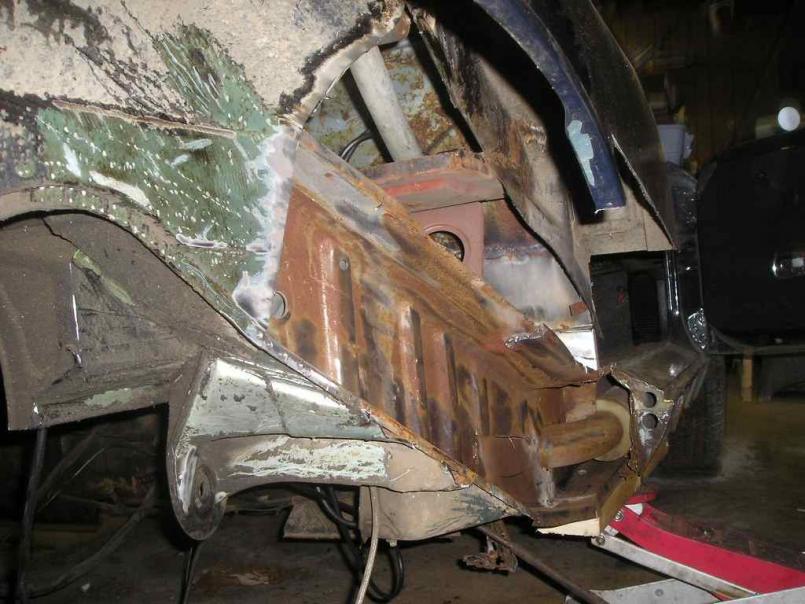 And then after I got as much of the surface rust off with the wire wheel, I coated everything with rust encapsulator. 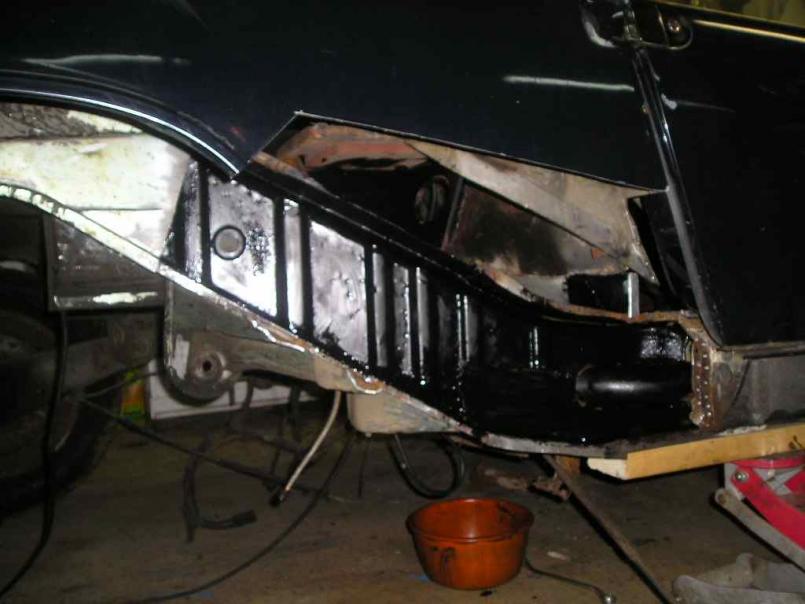 Here is everything just begging to be welded in. 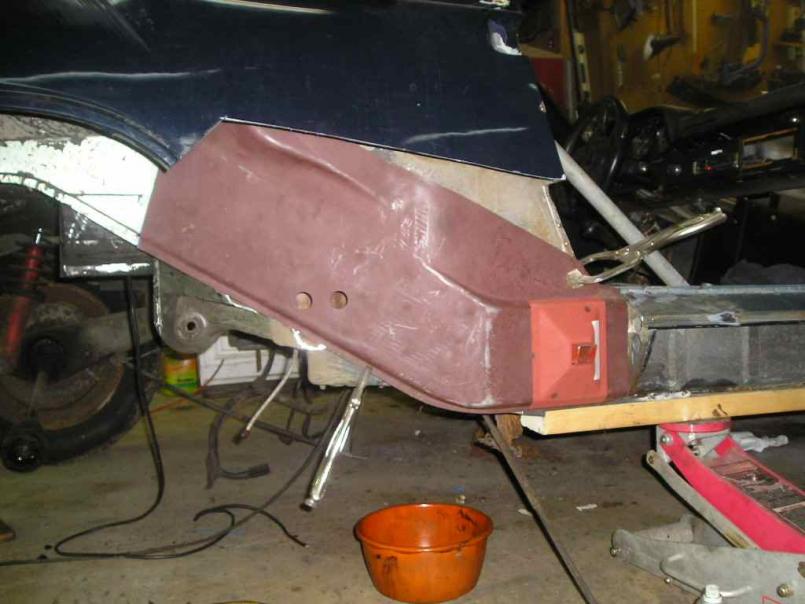 And this is all I got done today. Tomorrow my goal is to finish the wheelhouse and jackpoint pieces. |
| dlee6204 |
 Jun 14 2009, 09:54 PM Jun 14 2009, 09:54 PM
Post
#24
|
|
Howdy     Group: Members Posts: 2,162 Joined: 30-April 06 From: Burnsville, NC Member No.: 5,956 |
(IMG:style_emoticons/default/welder.gif) Well I got it welded in. The car no longer sags! All the door gaps and measurements are what they should be! (IMG:style_emoticons/default/smilie_pokal.gif) I still need to clean up the old suspension mount and then install it but at least progress is being made!
I start a new job this week so progress will slow a bit but I will still keep at it! Here is a list of stuff that still needs to be fixed: Suspension mount, Rear firewall "lip", floor pan, clutch tube, and then a little rust near the front suspension mount. I will probably end up installing an Engman stiffening kit later this summer but right now that is not priority. 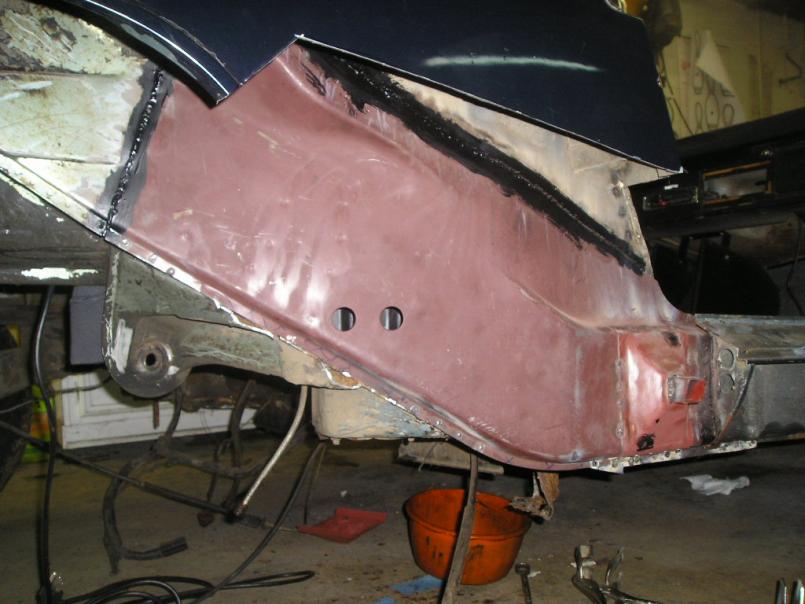 |
| type11969 |
 Jun 14 2009, 10:04 PM Jun 14 2009, 10:04 PM
Post
#25
|
|
Senior Member    Group: Members Posts: 1,231 Joined: 2-December 03 From: Collingswood, NJ Member No.: 1,410 Region Association: North East States |
Doug-
Your updates are an inspiration for me to get working on my teener again. Nice work! -Chris |
| jc914 |
 Jun 16 2009, 07:37 PM Jun 16 2009, 07:37 PM
Post
#26
|
|
Member   Group: Members Posts: 289 Joined: 15-September 08 From: Miami, Florida Member No.: 9,548 Region Association: South East States |
NICE JOB keep us posted (IMG:style_emoticons/default/smilie_pokal.gif) (IMG:style_emoticons/default/pray.gif) (IMG:style_emoticons/default/popcorn[1].gif)
|
| dlee6204 |
 Jun 28 2009, 05:29 PM Jun 28 2009, 05:29 PM
Post
#27
|
|
Howdy     Group: Members Posts: 2,162 Joined: 30-April 06 From: Burnsville, NC Member No.: 5,956 |
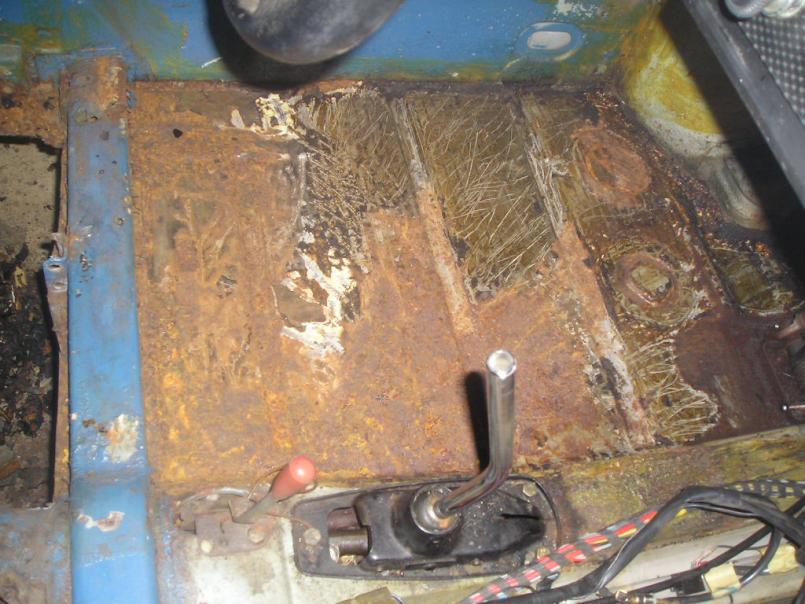
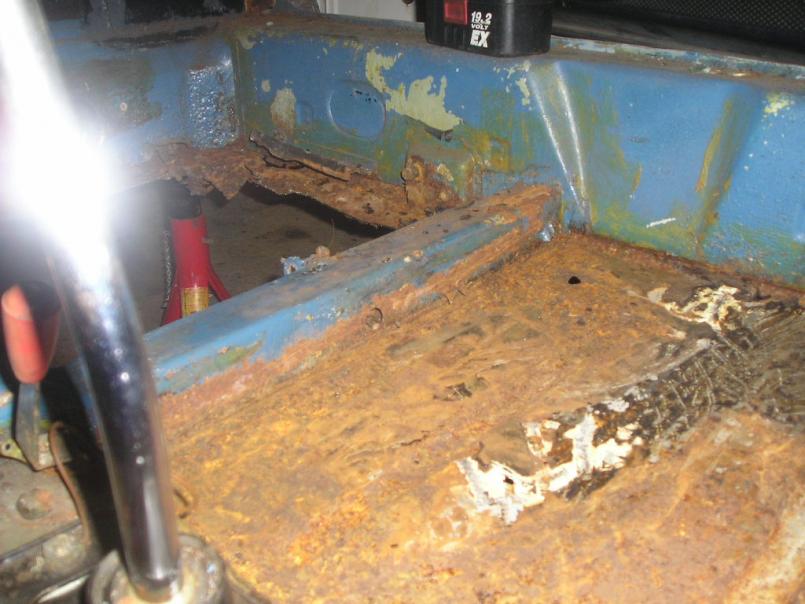
Well I have been pretty busy the past week or two so only a little progress has been made. The suspension mount I had was beyond worth repairing so I am waiting for that part to arrive. Meanwhile I started working on the floor area.
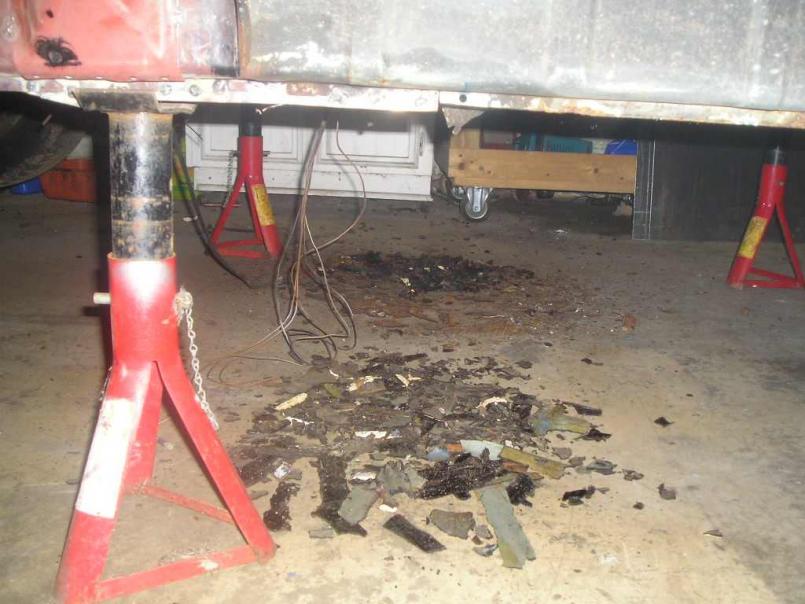
I cut most of the old floor out 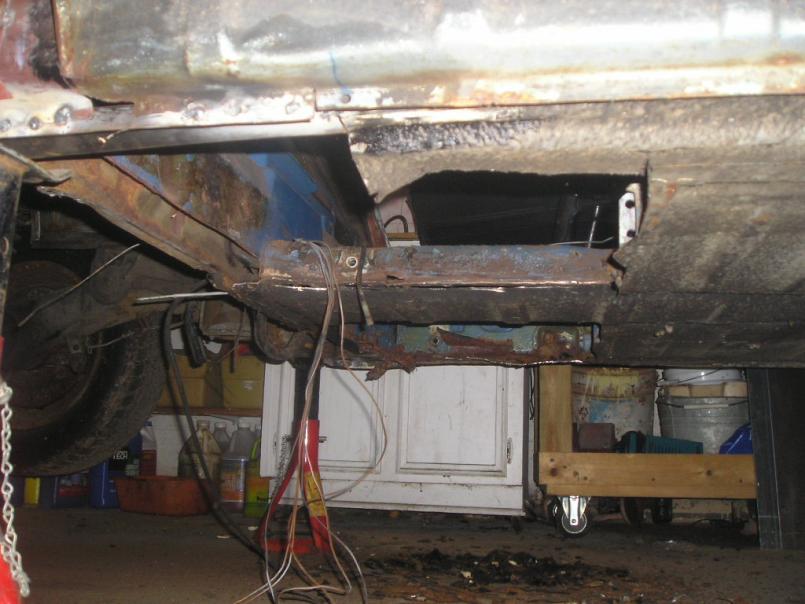 I also removed all the floor tar and found some more areas of rust. 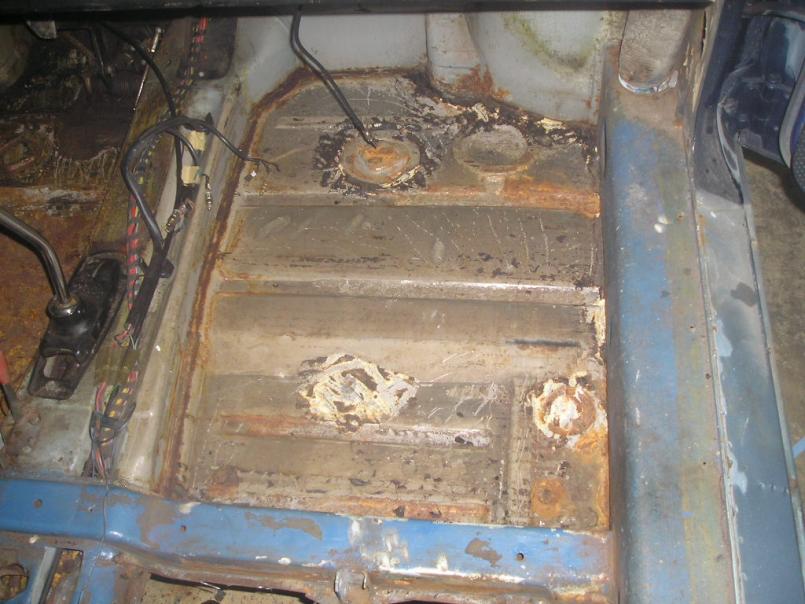 Here is a spot I will need to repair 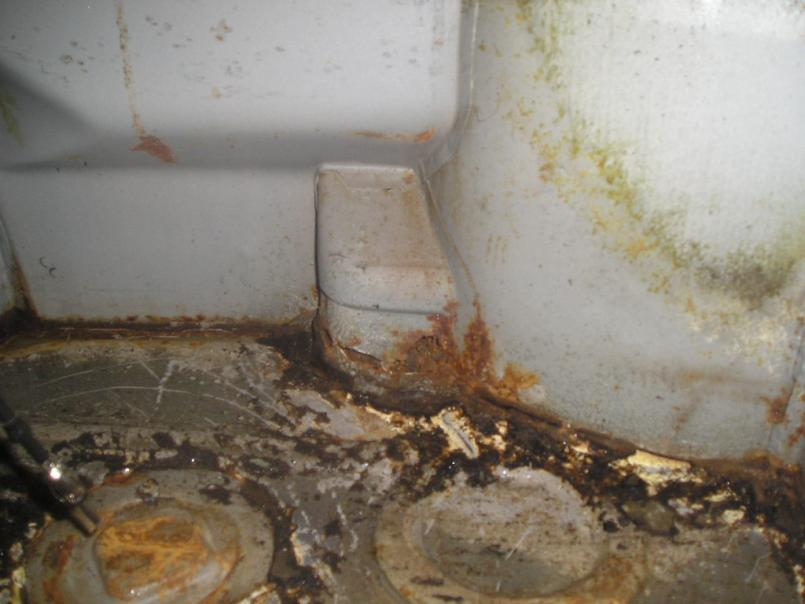 |
| dlee6204 |
 Jun 28 2009, 05:34 PM Jun 28 2009, 05:34 PM
Post
#28
|
|
Howdy     Group: Members Posts: 2,162 Joined: 30-April 06 From: Burnsville, NC Member No.: 5,956 |
|
| dlee6204 |
 Jun 30 2009, 09:15 PM Jun 30 2009, 09:15 PM
Post
#29
|
|
Howdy     Group: Members Posts: 2,162 Joined: 30-April 06 From: Burnsville, NC Member No.: 5,956 |
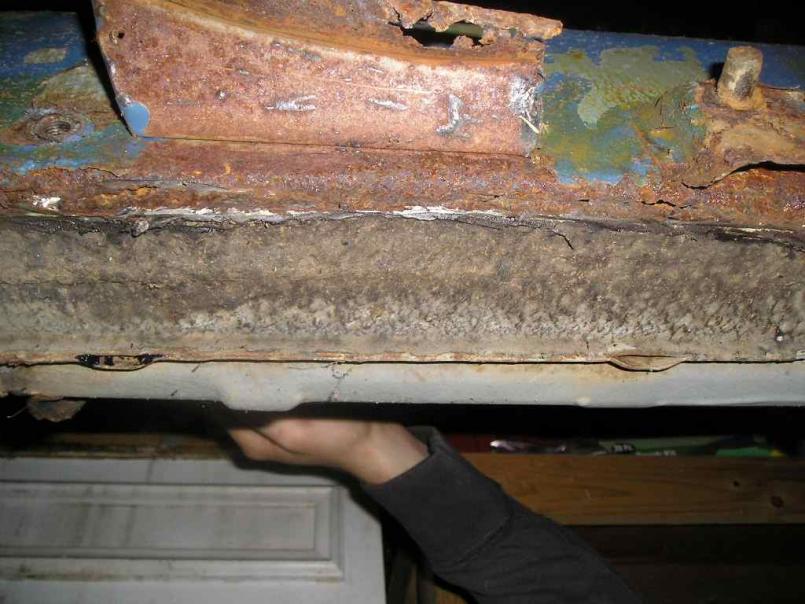
Well I was trimming for the floor and I found some more rust in the driver's side long. I wasn't sure how bad the rust was and now I know. I will have to replace this area as well before the floor goes in. Luckily I have a four day weekend coming up so I will have plenty of time to work on the car!
 Here is the new floor held up in place 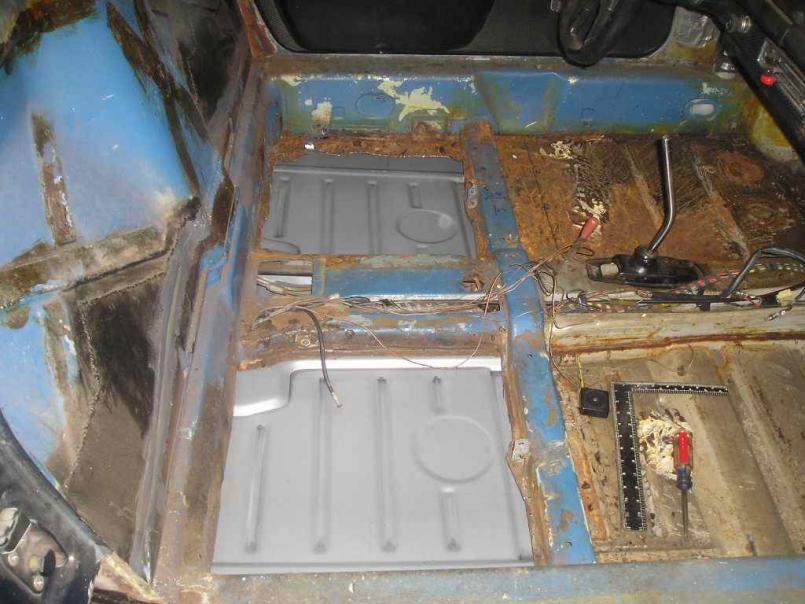 The center tunnel lines are luckily all solid. The clutch tube broke at some point and the PO did some handy work which I will correct before the new floor goes in. 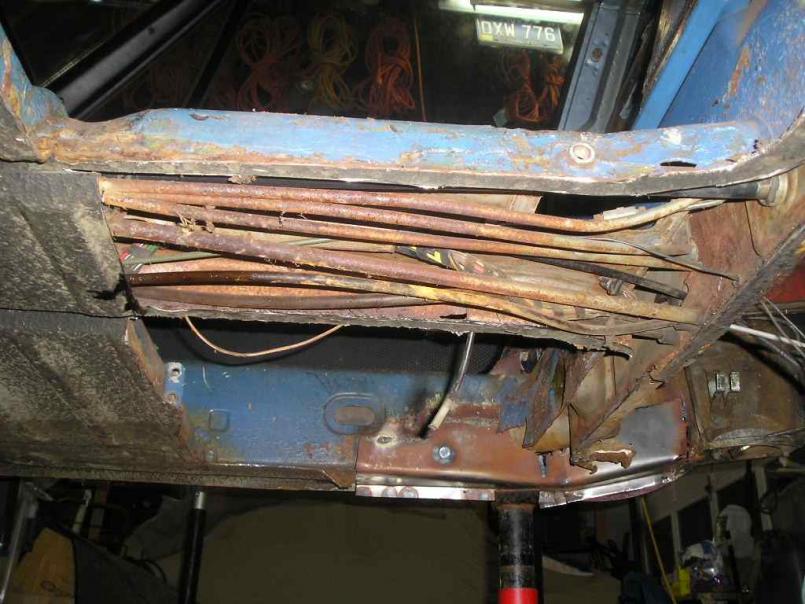 |
| Cupomeat |
 Jun 30 2009, 10:36 PM Jun 30 2009, 10:36 PM
Post
#30
|
|
missing my NY 914 in VA    Group: Members Posts: 1,338 Joined: 26-November 07 From: Oakton VA Member No.: 8,376 Region Association: MidAtlantic Region |
Wow, great job, and you handle all this with such little drama! (IMG:style_emoticons/default/smilie_pokal.gif)
Great work, thanks and you are inspiring me to finally get a welder of my own and work up to a project like this. |
| dlee6204 |
 Jul 1 2009, 09:46 PM Jul 1 2009, 09:46 PM
Post
#31
|
|
Howdy     Group: Members Posts: 2,162 Joined: 30-April 06 From: Burnsville, NC Member No.: 5,956 |
Thanks for commenting! It keeps me motivated!
I took the gas tank out tonight. The rust that was in the passenger foot area extends under the gas tank and into the front wheel-well. The gas tank was also repaired on the bottom at some point and you can hear some rust rattling on the inside. I will most likely just replace it with another tank I have lying around. 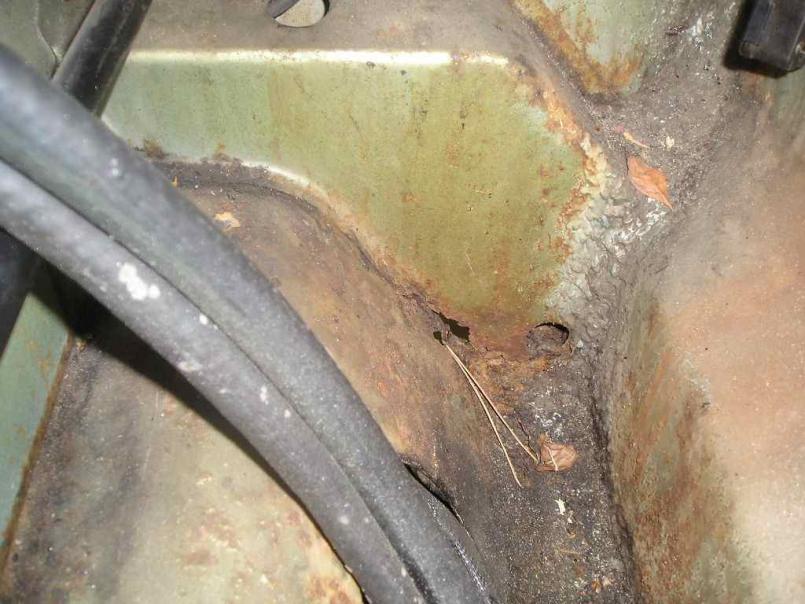 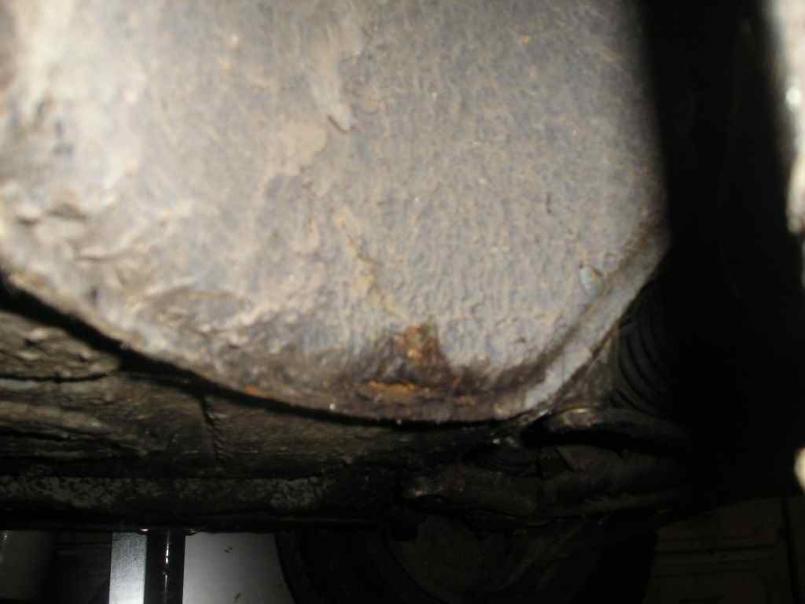 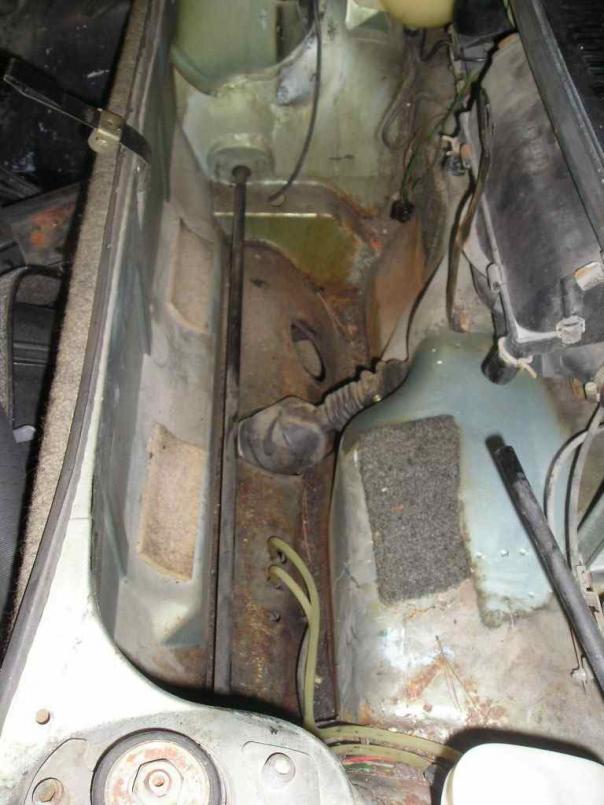 |
| FourBlades |
 Jul 2 2009, 07:33 PM Jul 2 2009, 07:33 PM
Post
#32
|
|
From Wreck to Rockin     Group: Members Posts: 2,056 Joined: 3-December 07 From: Brevard, FL Member No.: 8,414 Region Association: South East States 
|
Doug, You are moving along really well, fast work. (IMG:style_emoticons/default/smilie_pokal.gif) It is really satisfying when you weld in your new floor. Keep up the pictures. John |
| dlee6204 |
 Jul 2 2009, 09:44 PM Jul 2 2009, 09:44 PM
Post
#33
|
|
Howdy     Group: Members Posts: 2,162 Joined: 30-April 06 From: Burnsville, NC Member No.: 5,956 |
Thanks John! (IMG:style_emoticons/default/beerchug.gif)
I did a little more tonight. I got tired of cutting more and more out of the car so I repaired a piece on the tunnel. 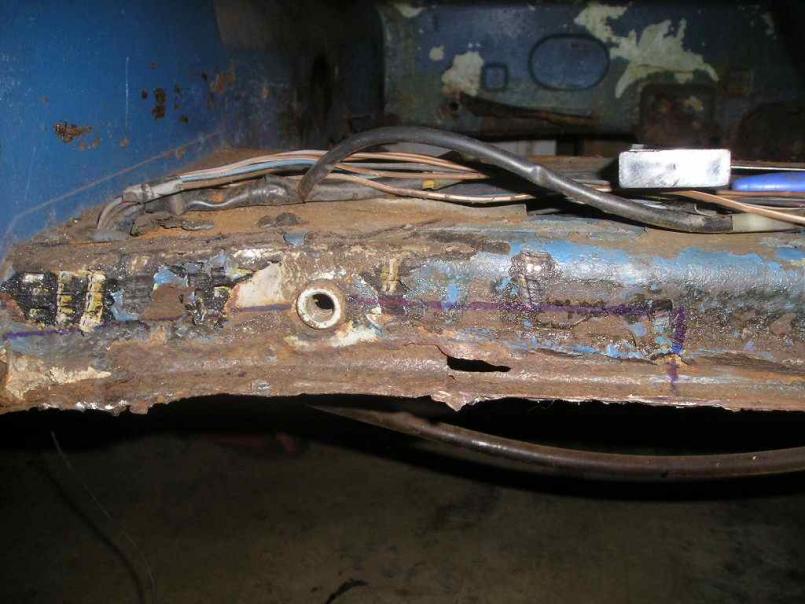 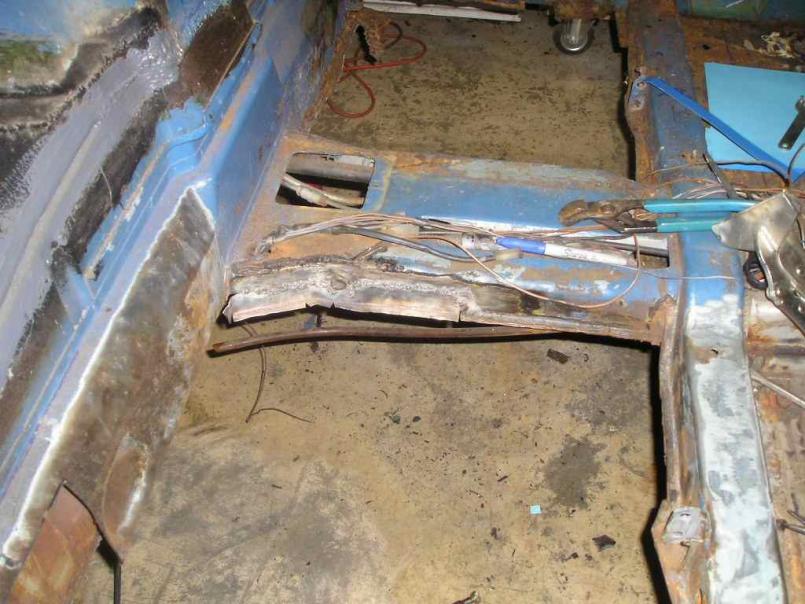 I also cut some more rust out in the passenger corner 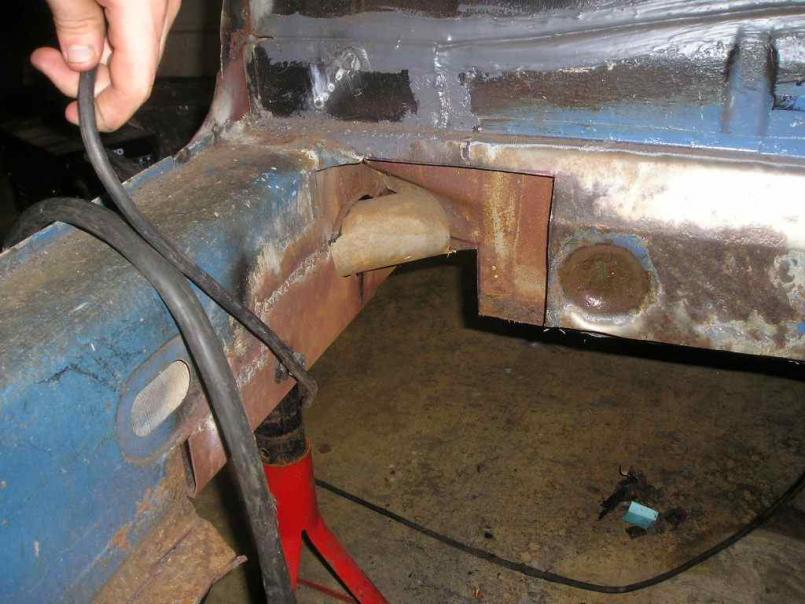 And I also cut the seat mounts from the old floor pan and got them ready to use. 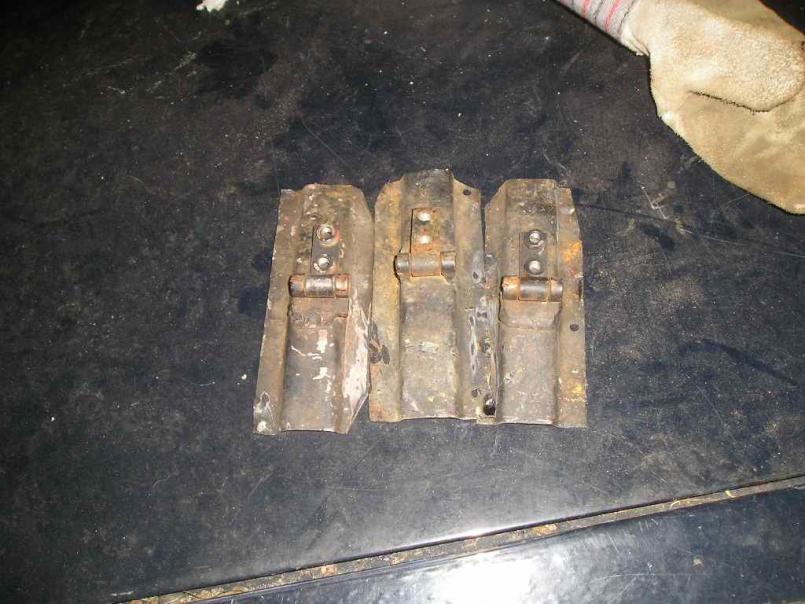 |
| dlee6204 |
 Jul 6 2009, 09:39 PM Jul 6 2009, 09:39 PM
Post
#34
|
|
Howdy     Group: Members Posts: 2,162 Joined: 30-April 06 From: Burnsville, NC Member No.: 5,956 |
Well I made some big progress this weekend. I first repaired the driver's side long
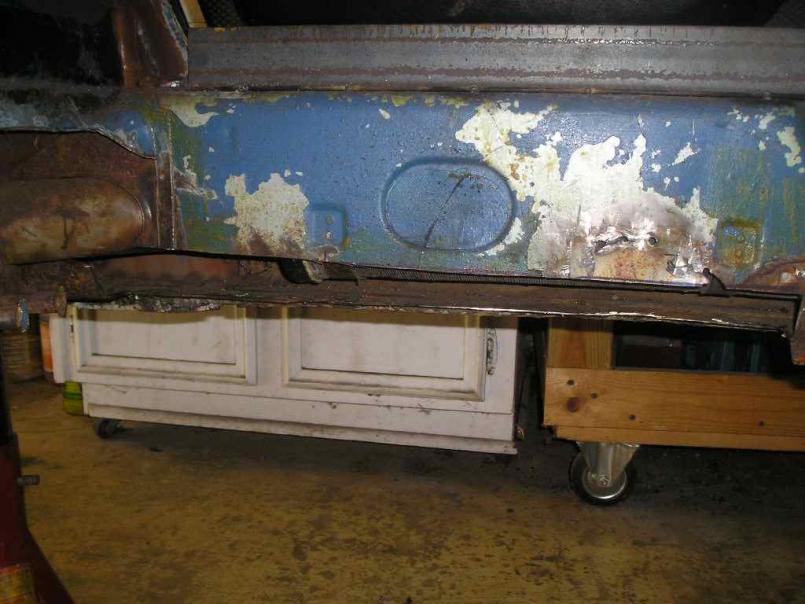 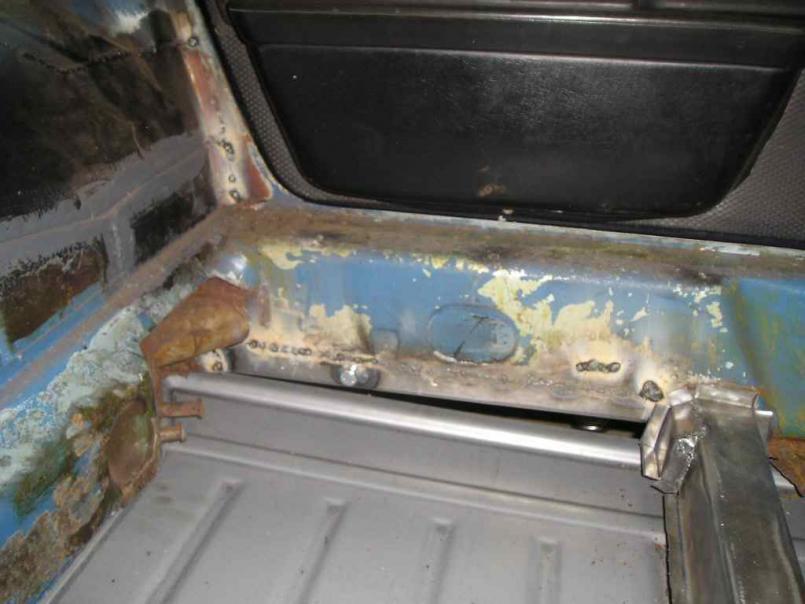 I then fabricated a crossmember for the driver's side 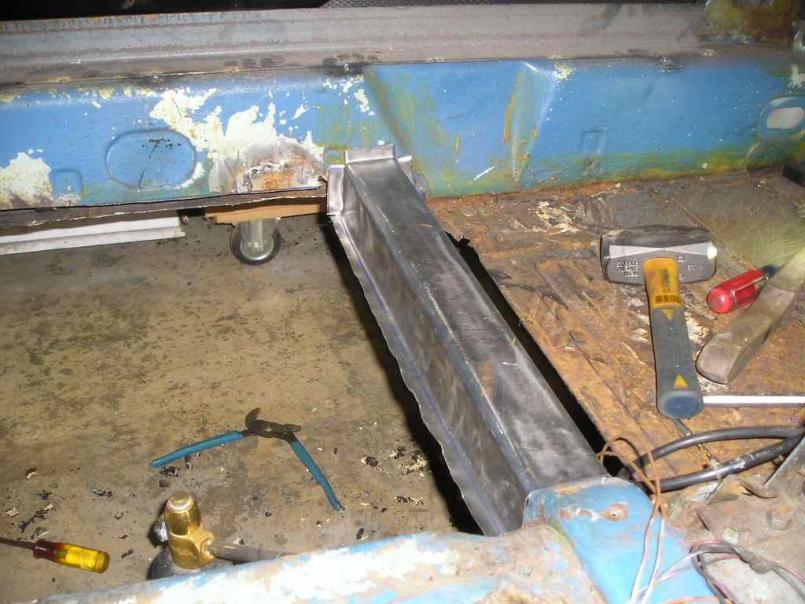 And I added a piece for the e-brake switch 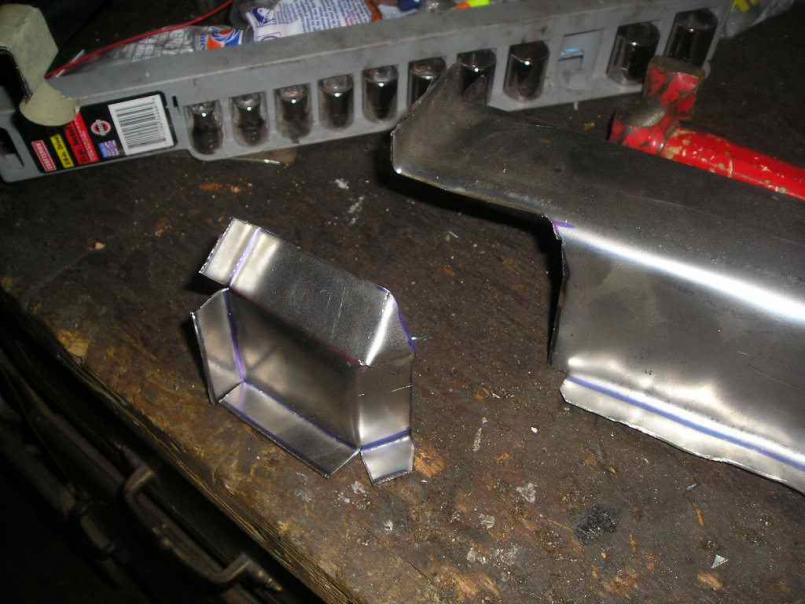 sitting in place 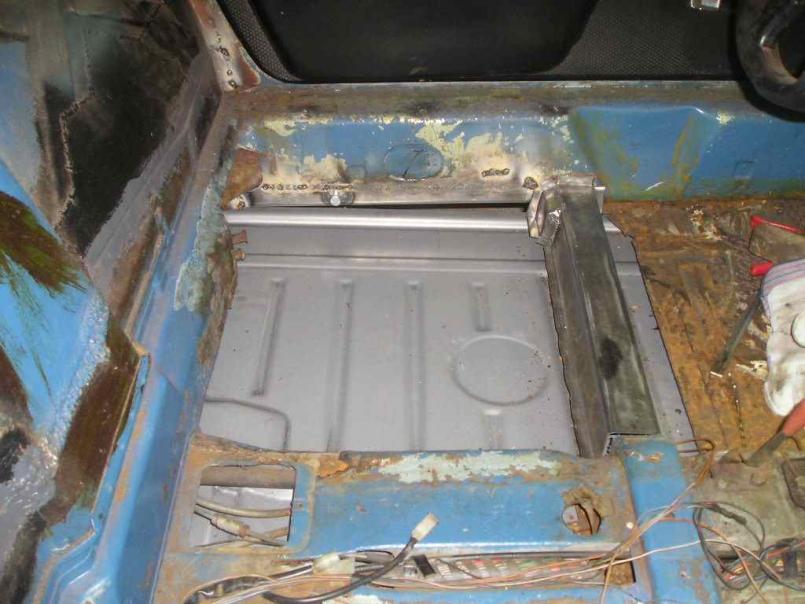 And last but not least... I got the floor put in! (IMG:style_emoticons/default/piratenanner.gif) It is just tacked in place but I have to say I was pleased at how nicely it went in and how everything lined up. I had to do a lot of little things before putting it in like cleaning all the mating surfaces and fixing the clutch tube so that took some time. 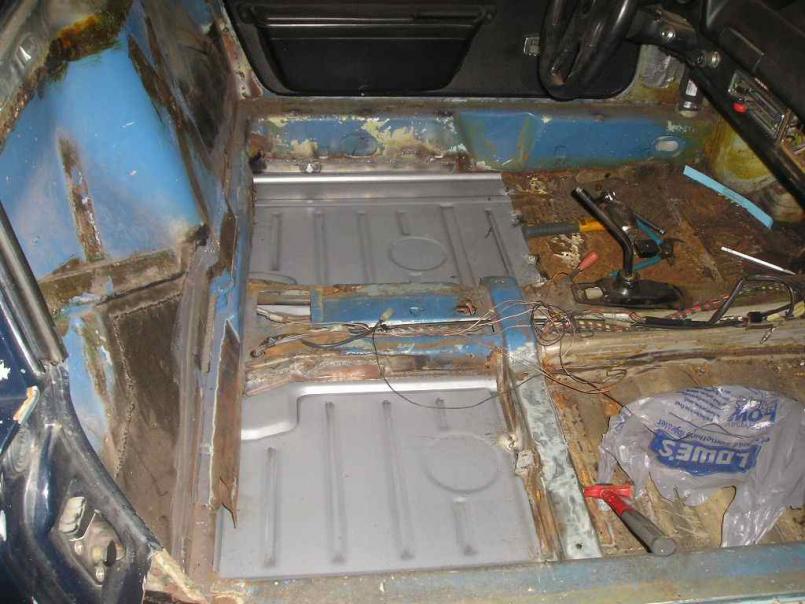 This week I will work on finishing the firewall, rust spots around the center tunnel, adding the crossmember and the seat hinges. I am also waiting on some parts to get here so more progress to come. Enjoy! |
| saigon71 |
 Jul 7 2009, 06:28 AM Jul 7 2009, 06:28 AM
Post
#35
|
|
Advanced Member     Group: Members Posts: 2,011 Joined: 1-June 09 From: Dillsburg, PA Member No.: 10,428 Region Association: MidAtlantic Region 

|
Well I made some big progress this weekend. I first repaired the driver's side long   I then fabricated a crossmember for the driver's side  And I added a piece for the e-brake switch  sitting in place  And last but not least... I got the floor put in! (IMG:style_emoticons/default/piratenanner.gif) It is just tacked in place but I have to say I was pleased at how nicely it went in and how everything lined up. I had to do a lot of little things before putting it in like cleaning all the mating surfaces and fixing the clutch tube so that took some time.  This week I will work on finishing the firewall, rust spots around the center tunnel, adding the crossmember and the seat hinges. I am also waiting on some parts to get here so more progress to come. Enjoy! |
| saigon71 |
 Jul 7 2009, 06:30 AM Jul 7 2009, 06:30 AM
Post
#36
|
|
Advanced Member     Group: Members Posts: 2,011 Joined: 1-June 09 From: Dillsburg, PA Member No.: 10,428 Region Association: MidAtlantic Region 

|
Looks good Doug - great work! I will be tearing into mine in a few weeks. Question, is rust encapsulator the same as POR-15? I am trying to figure out the best stuff to paint with after welding in new panels.
|
| dlee6204 |
 Jul 14 2009, 09:30 PM Jul 14 2009, 09:30 PM
Post
#37
|
|
Howdy     Group: Members Posts: 2,162 Joined: 30-April 06 From: Burnsville, NC Member No.: 5,956 |
I got some more work done. (IMG:style_emoticons/default/biggrin.gif) I received a box today with the suspension console, e-brake mount and cover in it. I went ahead and cleaned up the suspension mount and welded that on. (IMG:style_emoticons/default/welder.gif) Finally my car is able to roll again!
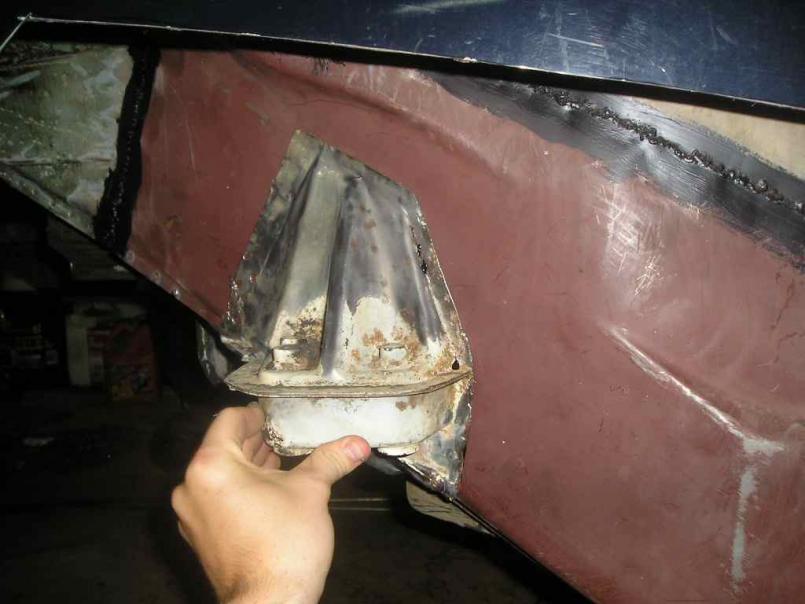 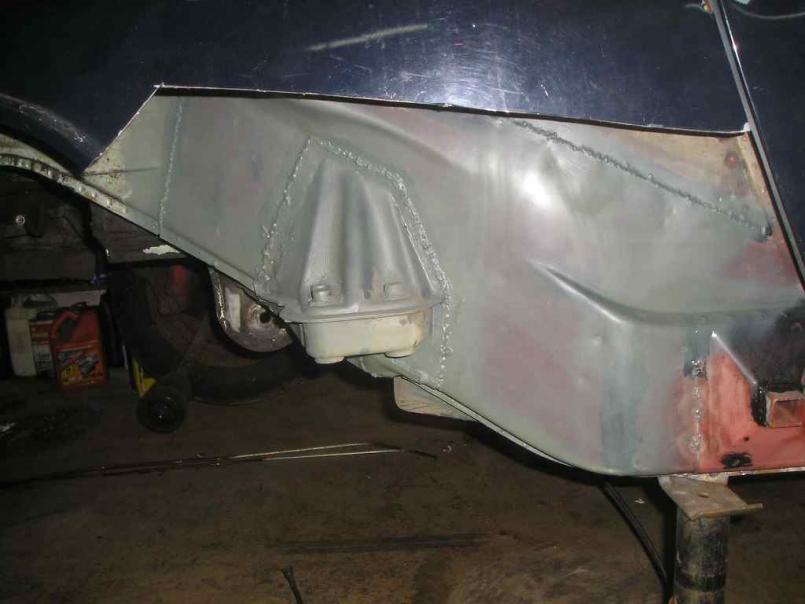 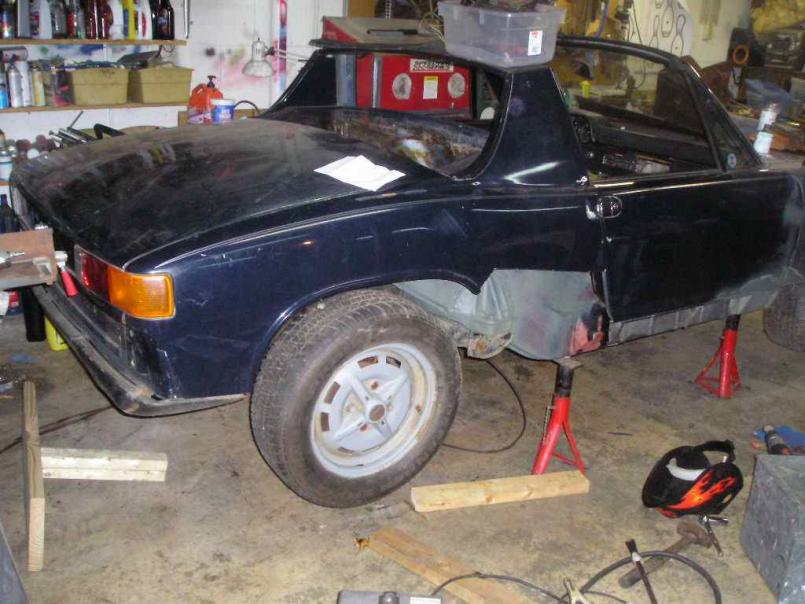 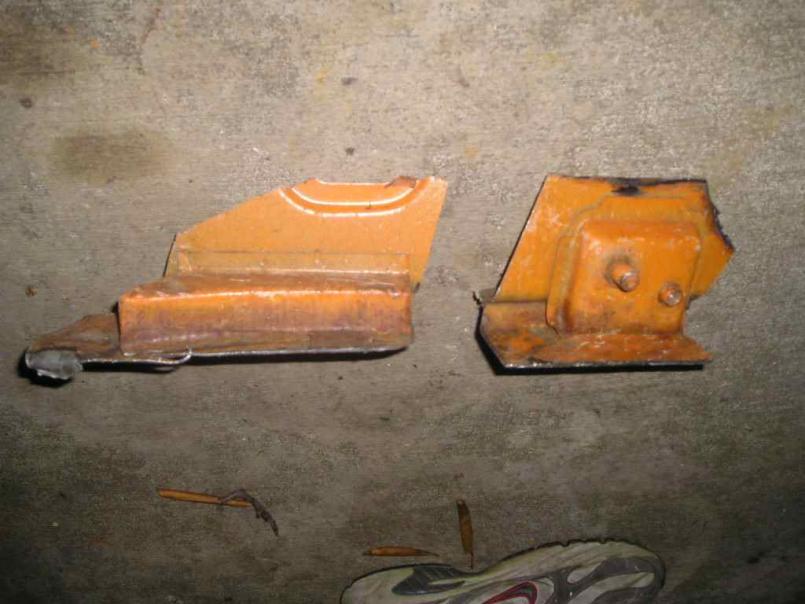 A lot of stuff on the to-do list is just welding and cleanup. I have to finish welding in the floor, crossmember, firewall, e-brake stuff, and both rear fenders not to mention the small rust in the passenger footwell and the front weather strip channel that needs to be repaired. I have also been trying to find a local powder coating place for all the engine tins so hopefully I will have something lined up within the next week. So much to do and so little time. |
| dlee6204 |
 Aug 10 2009, 09:38 PM Aug 10 2009, 09:38 PM
Post
#38
|
|
Howdy     Group: Members Posts: 2,162 Joined: 30-April 06 From: Burnsville, NC Member No.: 5,956 |
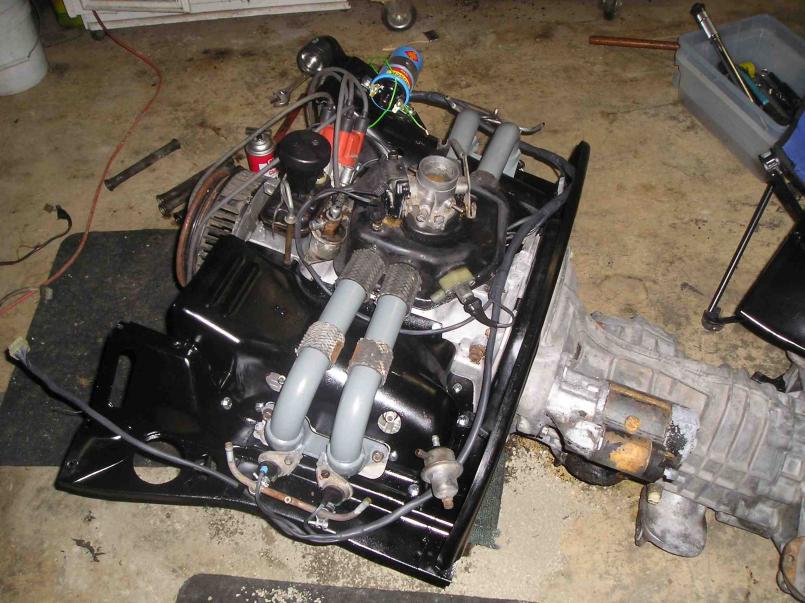
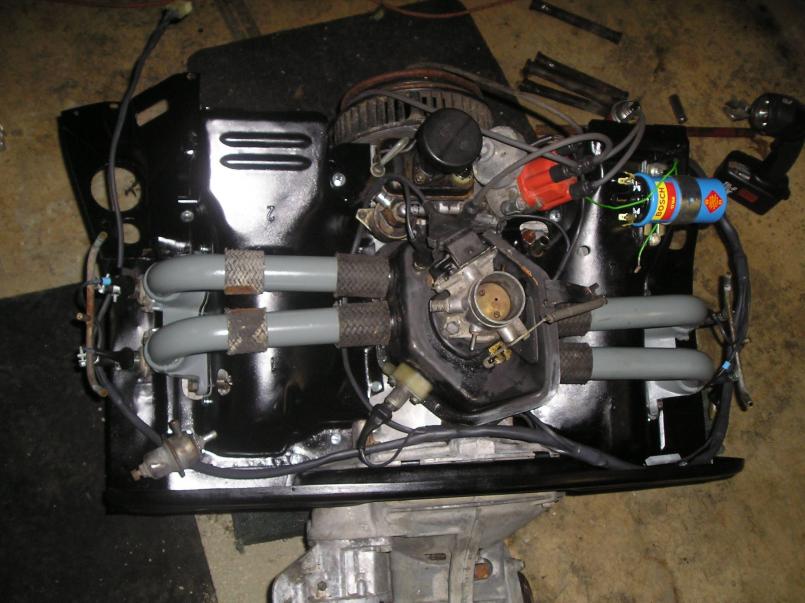
Wow so its been a while since I have last updated this. I have been extremely busy so I haven't made too much progress on the car. I did tack the seat mounts in place and clean up the ebrake cover and mount so those are ready to be welded in. I also have been making some more progress on the engine. I stripped down the engine and replaced the pushrod tubes and seals and have painted the tin instead of getting them powder coated. I of course adjusted the valves and all that good stuff and now I am just working on reassembling everything! I also forked out the cash to get a new engine harness from Jeff Bowlsby (IMG:style_emoticons/default/biggrin.gif) so hopefully I will have a nice looking and running engine after all is done.
To boost your memory, here is a picture of the engine the day I removed it. 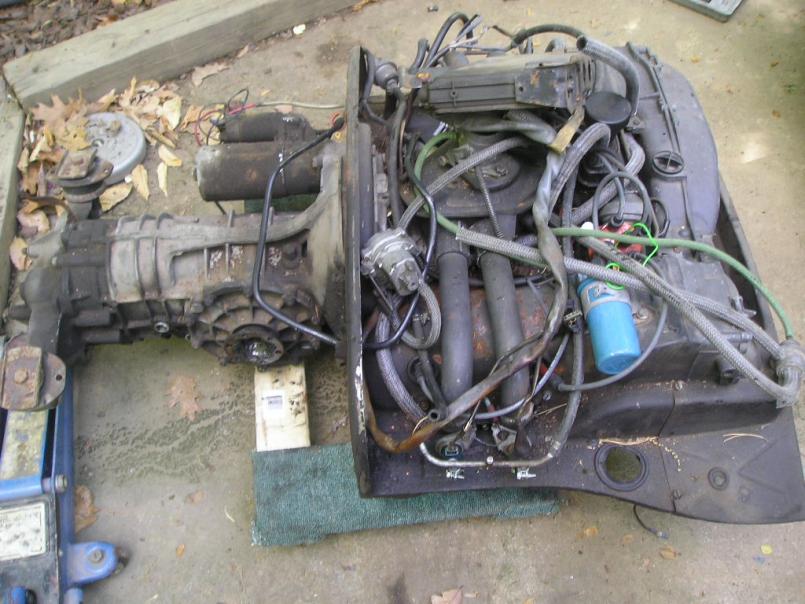 Here are some of the tin after they were painted. 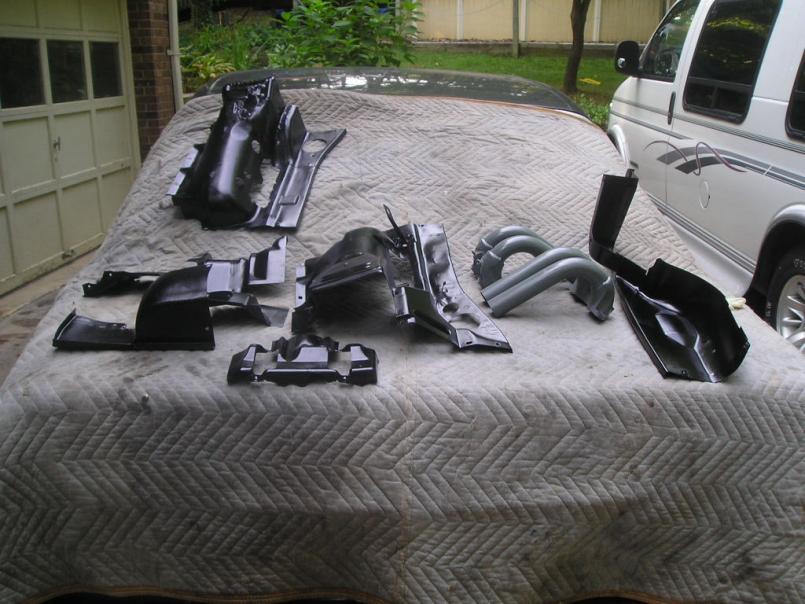 |
| dlee6204 |
 Aug 10 2009, 09:45 PM Aug 10 2009, 09:45 PM
Post
#39
|
|
Howdy     Group: Members Posts: 2,162 Joined: 30-April 06 From: Burnsville, NC Member No.: 5,956 |
|
| dlee6204 |
 Aug 10 2009, 09:47 PM Aug 10 2009, 09:47 PM
Post
#40
|
|
Howdy     Group: Members Posts: 2,162 Joined: 30-April 06 From: Burnsville, NC Member No.: 5,956 |
|
  |
1 User(s) are reading this topic (1 Guests and 0 Anonymous Users)
0 Members:

|
Lo-Fi Version | Time is now: 2nd April 2025 - 02:06 AM |
Invision Power Board
v9.1.4 © 2025 IPS, Inc.


