|
Firewall shift bushing
replacement
Are you having
difficulty getting the gear into first or reverse? Have you adjusted
the clutch and you’re still having difficulty shifting? If you
jack the car up and the shift rod moves freely at the firewall? Well,
it’s probably time to replace the firewall shift bushing. This
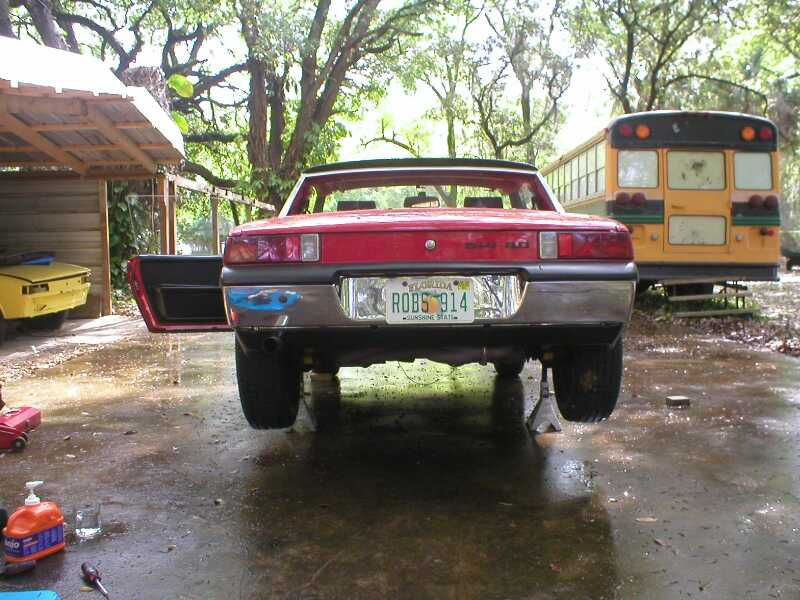
procedure is fairly easy but you will need to jack up the car, so
make certain you have a concrete pad that you can work on the car
safely.
Tools and supplies
Step 1:
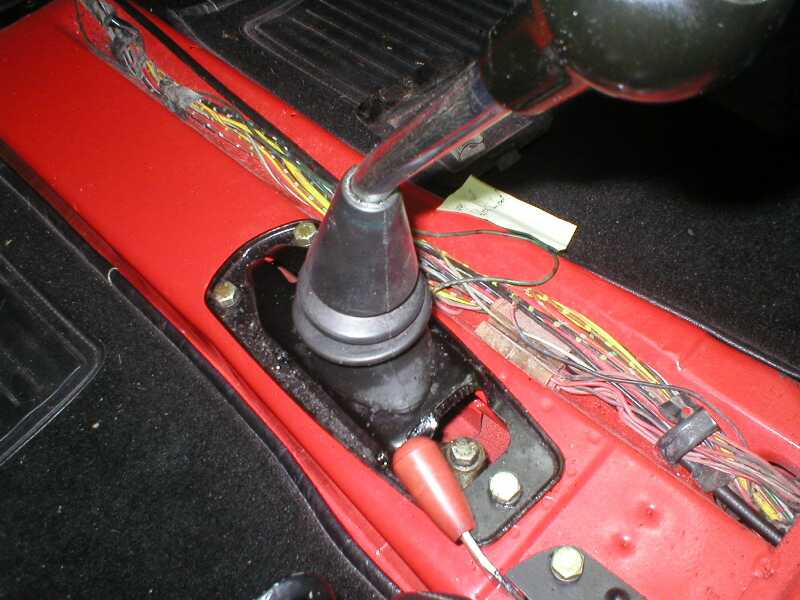
Remove the center console and/or the center arm rest.
Remove the tunnel carpet and the rear access panel on the center tunnel.
Jack up the car and put it on the jack stands. Put the gear shift into
2nd gear.
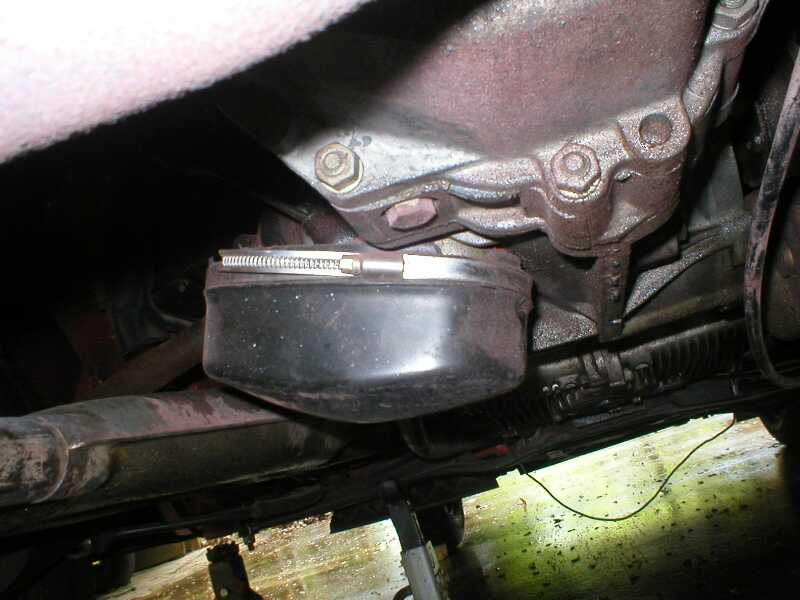
Step 2:
Remove the band on the rear shifter housing cover
and drop the shifter housing cover out of the way. The rod goes through the
housing, so it will just pivot out of the way.
Step 3:
Remove the cone screw with the appropriate allen wrench.
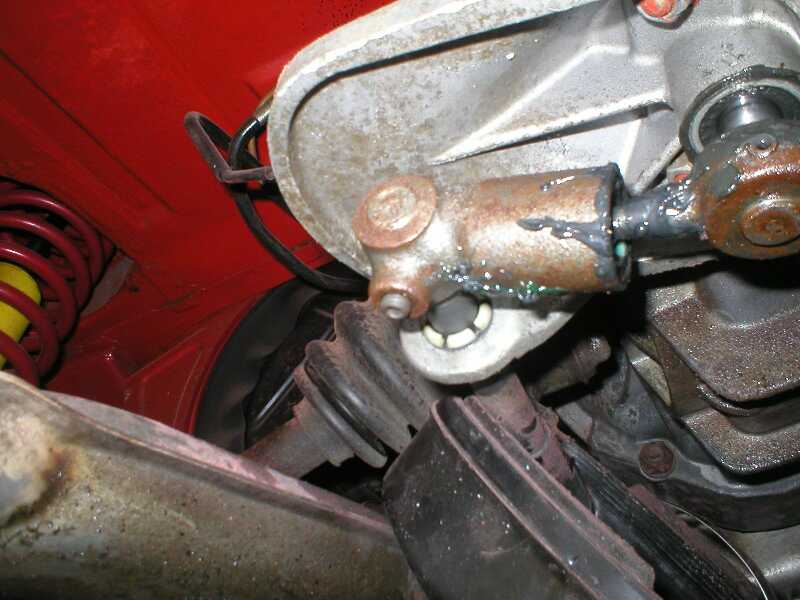
Step 4:
Place several open-end wrenches between the rear shift
coupling and the rear crown bushing. While you hold these wrenches,
have someone get in the car and quickly pull the gear shifter into
3rd. You might have to do this several times. What you’re
trying to do is pull the shifter rod out of the rear shift coupling.
This shows the rod out of the coupling.
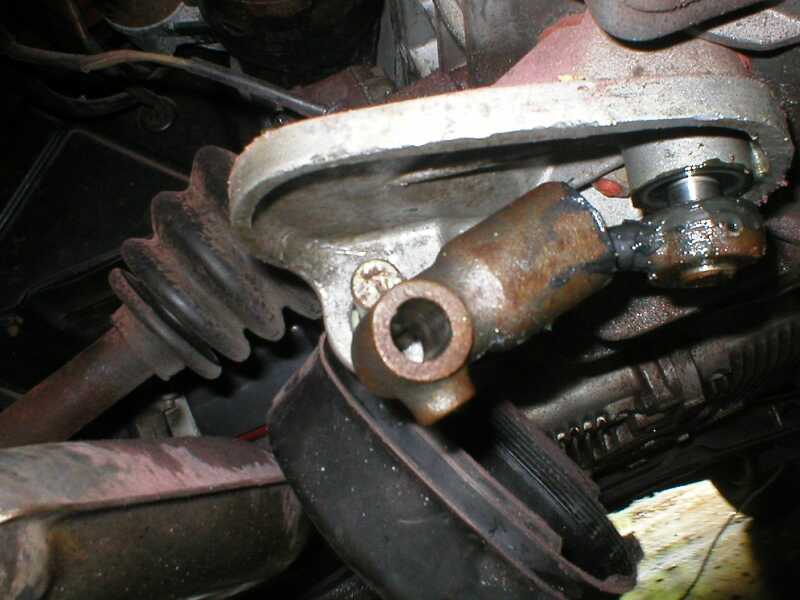
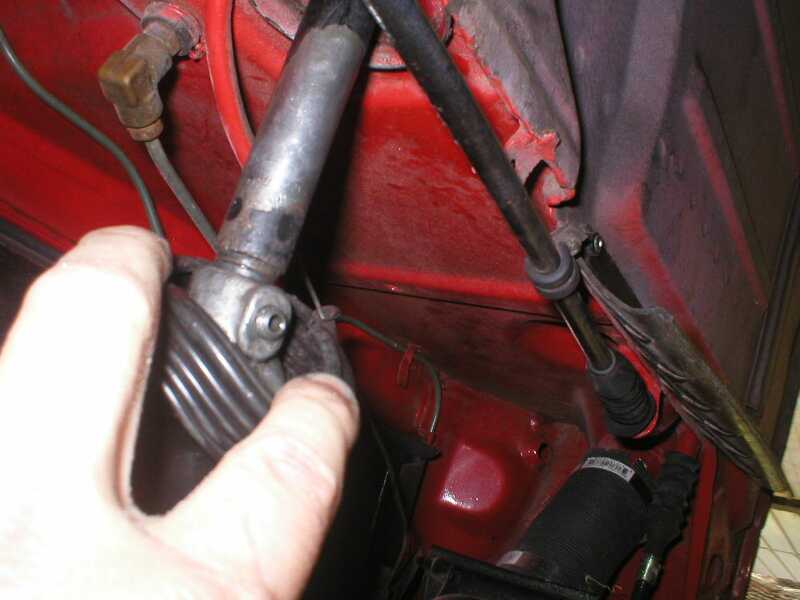
Step 5:
Move to the firewall and pull the front shift boot from the
firewall attachment. Next, pull the boot back and remove the cone
screw.
Step 6:
Hold the rear section of the shifter rod and have someone
pull the gear shifter into 3rd, to separate the two
sections of the rod.
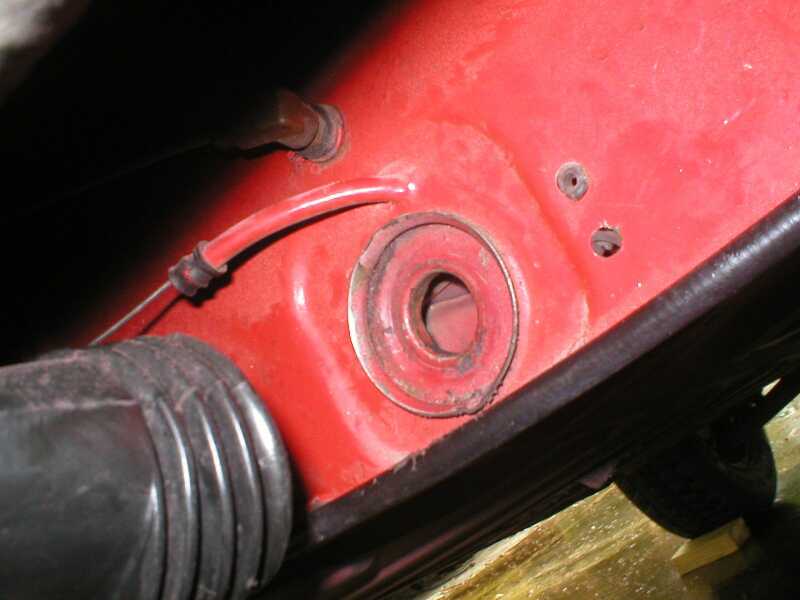
Step 7:
This should pull the front section out of the firewall and
into the center tunnel.
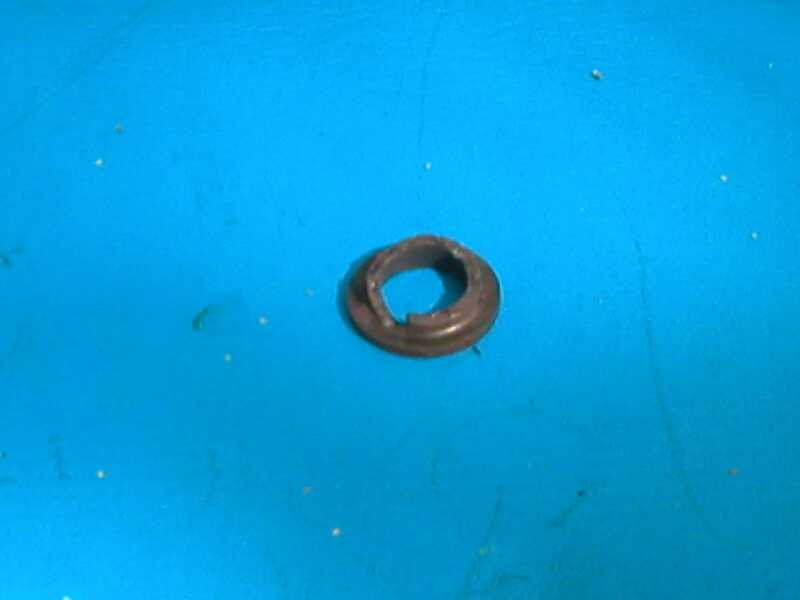
Here’s what the broken bushing looks like.
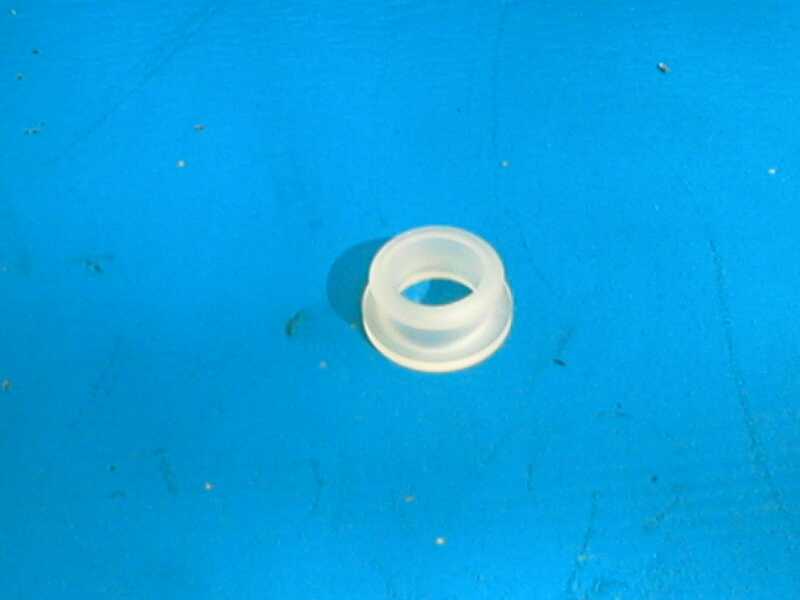
Here’s what a new bushing looks like.
Step 8:
At this point you could replace the rear shifter cup bushing
and the rear crown bushing. Apply a liberal amount of grease in the
cup bushing. I had already replaced these, so I didn’t need to.
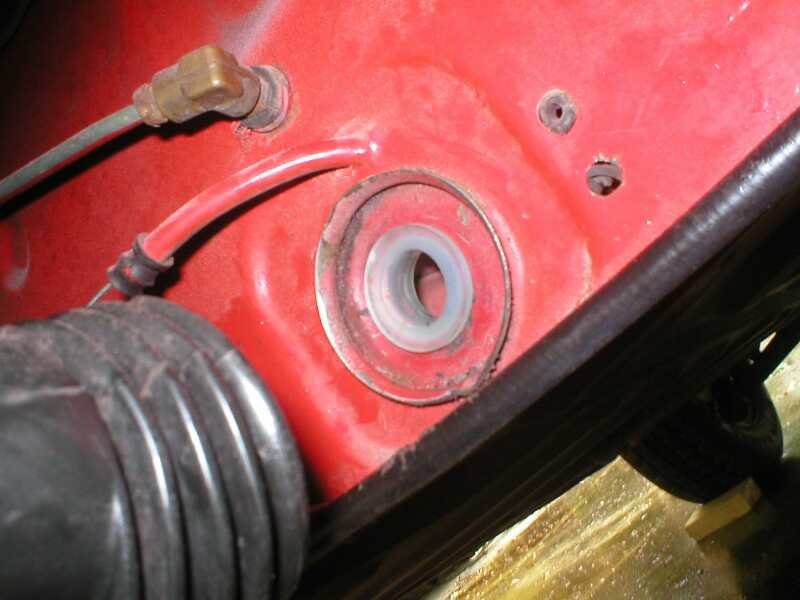
Now, go inside and put the firewall bushing in a coffee cup full of
water and microwave for 3 minutes. When the water has started to
boil, return to the car. Quickly remove the bushing from the boiling
water and pop it into the hole in the firewall. I wore gloves and
used a screwdriver to get the bushing out of the water.
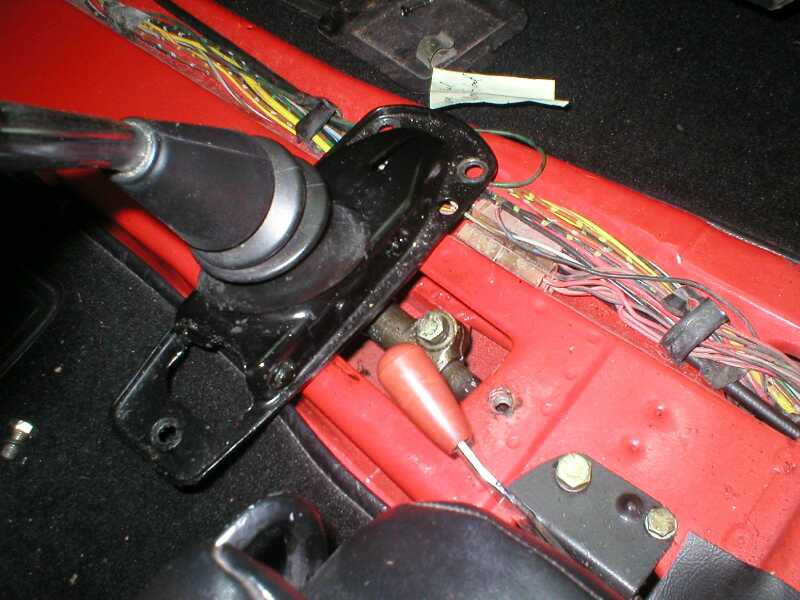
Step 9:
Get in the car and remove the 3 bolts holding the gear
shifter to the center tunnel. Carefully push the rear section of
shifter rod through the new bushing. I used the rear access opening
to guide the rod.
Step 10:
Get back underneath the car and put the two sections of the
shifter rod back together. You’ll need to make certain that the
depression in the small rod fits over the hole where the cone screw
will go. Install the new cone screw. You can twist the rods until the
screw goes into place.
Step 11:
Go to the back of the car and install the rear shifter rod
into the rear shift bushing. Again, align the depression in the
smaller rod with the hole for the cone screw. Install a new cone
screw.
Step 12:
Install the rear shift cover. Go to the firewall and
liberally grease the shifter rod, then reinstall the boot cover.
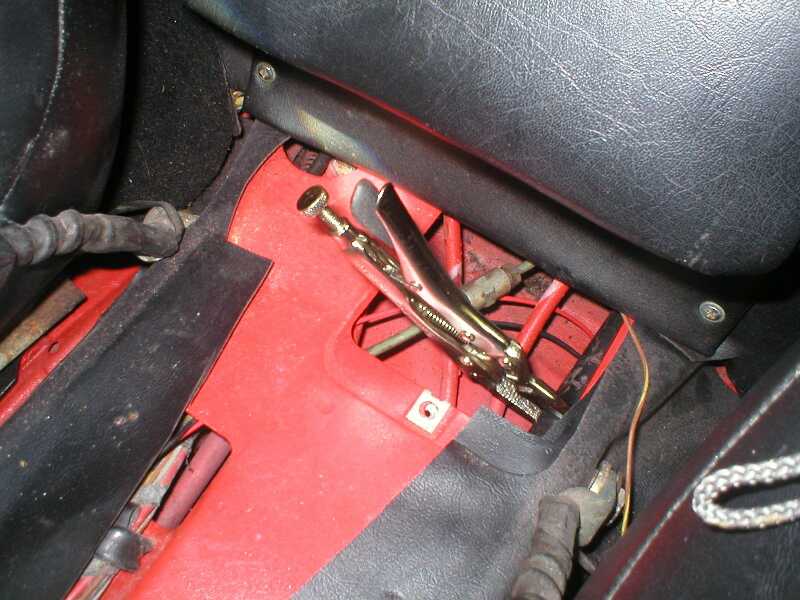
Step 13:
Finally, adjust the shifter. Loosen the bolt that secures
the gear shifter to the shifter bar and pull the bar out. Since I put
the car in 2nd gear, I estimated where the gear shifter should be and
connected the gear shifter back on the bar and tightened the shifter
rod adjustment bolt, don't forget to install the 3 bolts on the gear
shifter to the tunnel. Next, test the shifter, making certain it
would go into each gear. Finally, drive the car and make final
adjustments to the gear shifter. Remember, there are 2 dimensions
you'll need to check. The fore and aft, which will allow ease of
movement from 2->3 and 4->5. To make this adjustment, you'll
need to just loosen the bolt on the gear shifter/rod, make the
adjustment, then drive the car and test again. The other adjustment
is for the shift from 1->2 and 3->4. To make this adjustment,
you'll have to unbolt the gear shifter from the tunnel and the bolt
holding the rod to the gear shifter, turn the gear shifter 90, hold
the rear bolt with needle-nose pliers and carefully pull the gear
shifter away from the rod. Again, carefully twist the shifter rod,
with the pliers and put it all back together and drive it again.
Continue to adjust it until you feel comfortable with the new
shifting pattern.
|