|
|
Headlight Adjustment
Do your headlamps move but when they "park" in the down position they are not fully down? When you switch them on do they go further down before they
raise to the up position? Do they not move together? This will help you align and adjust them back to regular working operation.
Tools and Supplies
- 10mm open ended wrench
- 13mm wrench or socket
Just so you know, the motors always turn in the same direction the same amount, there is no way of changing that.
The procedure:
- Turn off your lights and have the headlights close.
- Remove the headlight relays (just so you don't get your fingers crushed).
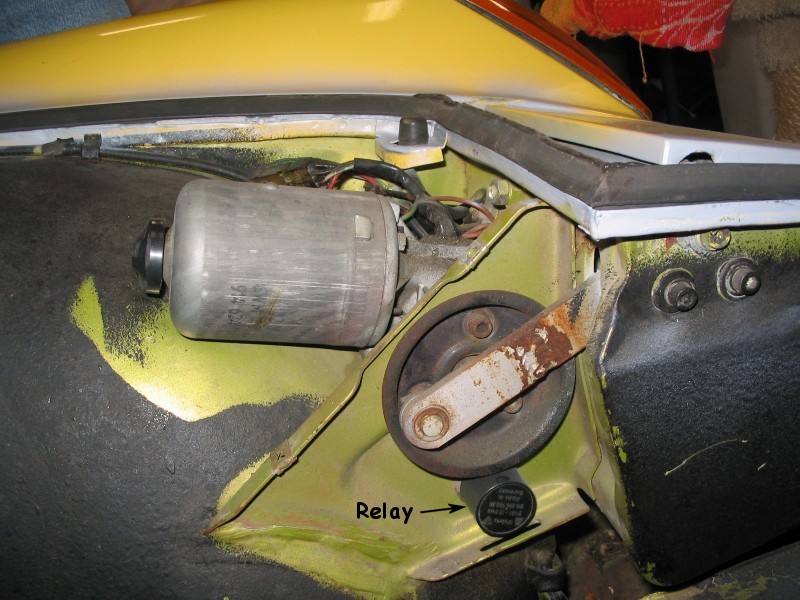
Figure 1
- Take a 13mm socket and brake lose the retaining nut on the headlight stop screw and turn the screw all the way out.
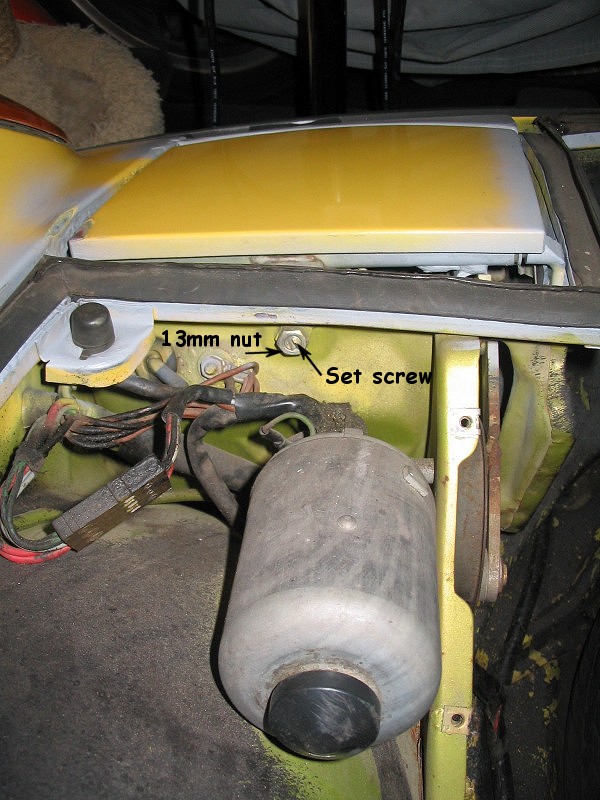
Figure 2
- Take a 10mm socket and remove the "arm" from the headlight motor. Follow these steps:
- Put the relays back in.
- Put the headlights in the UP position.
- Remove the relays (just so you don't get your fingers crushed).
- Remove the 10mm nut.
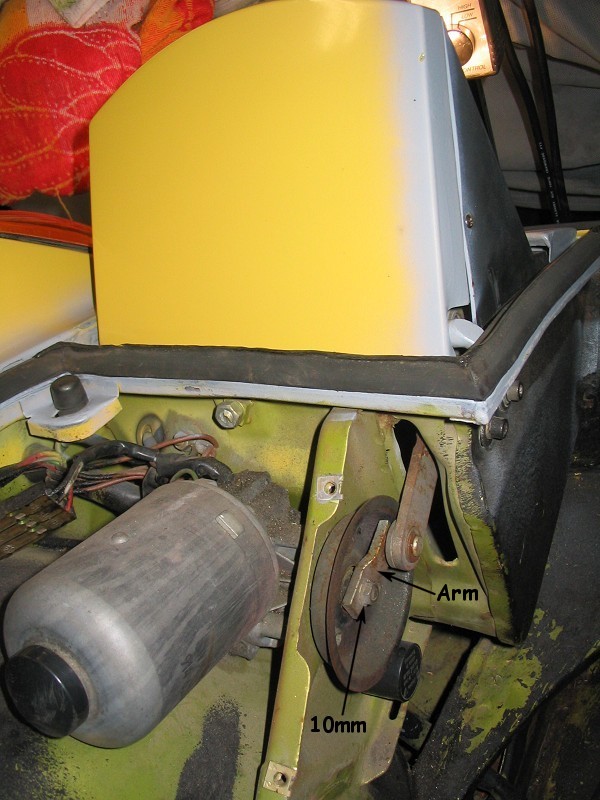
Figure 3
- Pry off the arm from the motor spindle then put it back on VERY loosely.
- Put the nut back on, but only enough to get it on the spindle. You need to do this because with the headlight in the down position, you can't get the nut back
on the spindle.
- Put the headlight in the DOWN position.
- The headlight assembly should now be free to be moved by hand:
- Put the relays back in and turn on/off the lights a couple times to make sure the motors are in the correct position.
- Turn off the lights and take out the relays again (just so you don't get your fingers crushed).
- Move your headlight assembly until the headlight top lines up flush with the hood etc., hold it there and put the arm back on the motor and tighten the 10mm nut with an open ended wrench. The splines on the shaft are fine so it's easy to get everything lined up.
- Another "fine" adjustment is the outside pivot, the one that has the two 10mm bolts in the wheel well. If the doors are not closing just right, loosen the two 10mm bolts and move the pivot until ithe headlight doors are correct and flush.
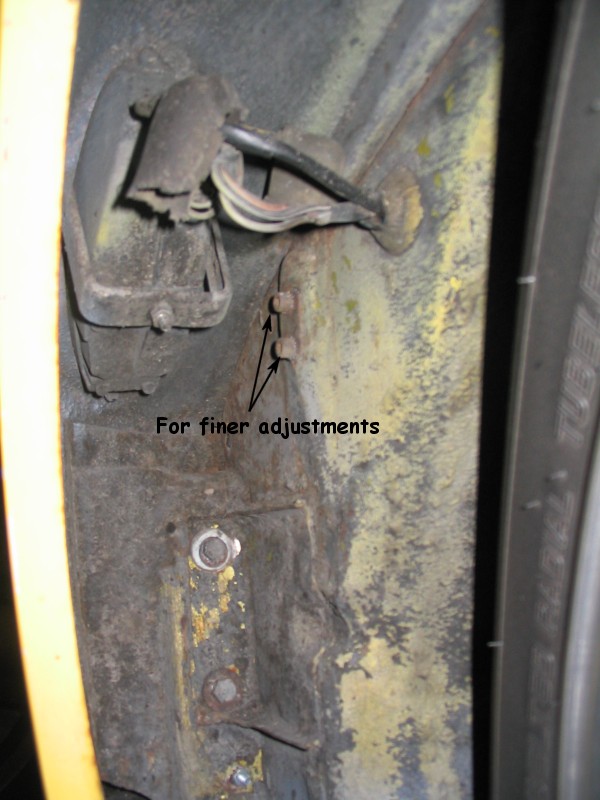
Figure 4
- There are 3 bolts on the other side of the bucket that can be used for
fine-tuning the position of the headlight cover left/right and back/forth as
well.

Figure 5
- Put the relays back in.
- Turn on the lights. If you adjusted both lights, they now should move up at the same time and come to rest at the same point.
- With the lights UP, remove the relays (just so you don't get your fingers crushed) and screw in the stop screw until it just barely touches the stop at the headlight (see Figure 2). Tighten the 13mm retaining nut.
- Put the relays back in. You're done!
Additional notes:
You may need to re-align your headlight beam pattern. This procedure is explained in the Haynes manual and is easily done using the two adjusting screws at the front of the headlight.
|
|